

Page 1
Installation Instructions
For the KingShield Air Curtain
Model No: AC3000N
IMPORTANT
This product should be installed by a competent
person and in accordance with the current IEE
Wiring Regulations. If in doubt, consult a qualified
electrician.
This product is not intended to be used by
•
children and persons with sensory, physical
and/or mental impairments that would prevent
them from using it safely.
Extreme caution is necessary where children or
•
persons with reduced physical, sensory or mental
capabilities may come into contact with the
heater when in use.
1. Remove the four screws from the front
panel and remove it see diagram (2).
2. Loosen, but do not remove the retaining
bolt using a spanner as shown in diagram
(3) and remove the bracket - see
iagram (6).
d
WARNING
• In order to avoid overheating do not cover or
obstruct grilles or air intake openings when
in use.
• The heater must not be located immediately
adjacent to or under/against an electrical
socket outlet.
• Do not operate the heater with a damaged
cord/plug or if heater malfunctions. If the
supply cord is damaged it must be replaced
by a qualified electrician
• Before making any fixing holes make sure
there are no pipes or cables below the
surface.
• Make sure the heater is anchored to a solid
surface which can take the weight of the
heater.
• This heater is for indoor use only.
• This heater must be connected to earth.
• Position the heater ensuring that hot air
cannot blow directly onto flammable surfaces.
• This heater is not equipped with a device to
control the room temperature. Do not use
this heater in small rooms when they are
occupied by persons not capable of leaving
the room on their own, unless constant
supervision is provided.
• If the unit overheats, thermal switches will cut
the power and will restore the power when the
unit has cooled down. However, if the unit
overheats severly, thermal fuses will isolate
the power, these fuses will not reset and
cannot be replaced by the user.
3. Make fixing holes in wall or ceiling using
the wall bracket as a template and secure
bracket using the fixings supplied. If the
fixings supplied are not suitable for your
installation, use appropriate alternative
fixings - see diagram (4). Note: the bracket
must be fixed to a solid point e.g. brick,
concrete, stud or joist.
4. Hang the heater on the bracket, ensure
that the bracket is located between the bolt
and the serrated washer and that the bolts
are at the end of the slots in the bracket see
diagram (3).
5. Adjust the heater to the required angle and
tighten the bolts using a spanner.
Take care not to overtighten.
INTRODUCTION
The Air Curtain unit is designed for easy
installation and can be wall or ceiling mounted.
The unit has a fan and two heat settings and its
angle can be adjusted. This unit is ideal for
providing a heated air curtain if mounted over
doorways and reduces draughts and the discomfort
of cold air when doors are opened.
It is also an ideal choice for heating general areas.
INSTALLATION
Switch off mains supply and remove the appropriate
circuit fuse or MCB before commencing installation
or maintenance.
6. Re-fit the front panel.
7. Connect heater to mains supply using a
switched 13A fused spur to the
corresponding symbols.
Live - Brown or Red
Neutral - Blue or Black
Earth - Green and Yellow
Page 2
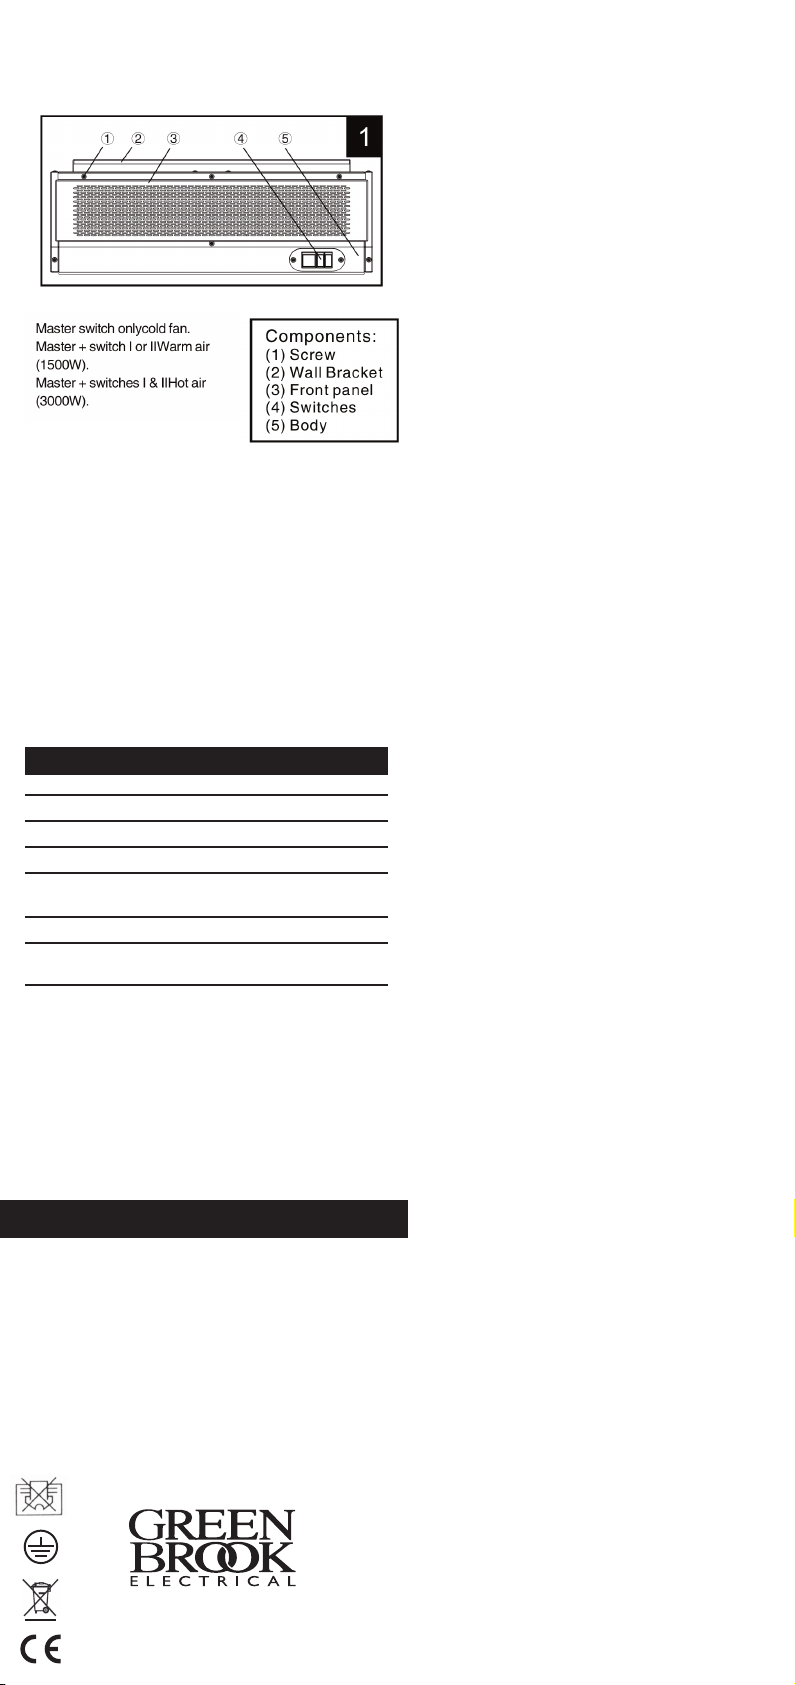
8. Restore power and switch on the main switch
(red illuminated). Heating levels are controlled
by two switches (4) for half and full load.
Operation:
• The large switch is a master switch, turning this
witch on and off will start and stop the fan and
s
heaters if selected
• The degree of heat is controlled by switches I &
II see diagram (5).
TECHNICAL DATA
Rating: 230-240V 50Hz
Power: 1.5 - 3kw (two heat settings)
Class: I (requires earth)
Colour: White
Dimensions: L580 x W205.5 x H104.5mm
(Including bracket)
Prewired: 1.3M cable
Conforms To: EN60335-2-30, EN 60335-1
& EN62233
GUARANTEE
Your KingShield Air Curtain is guaranteed
for 12 months from the date of purchase.
This does not affect your statutory rights.
Please keep these instructions for future reference.
INSTALLER - Please pass instruction manual
onto the owner of the unit
WEST ROAD . HARLOW
ESSEX . CM20 2BG . UK
in f o @gree n b rook. c o .uk
W WW. G RE E NB RO OK .C O .U K
Issue no: 704385
 Loading...