

Gree GWH09TB-D3DNA1A, GWH24TD-D3DNA1A, GWH18TC-D3DNA1A, GWH12TB-D3DNA1A Owner's Manual
Split Air Conditioner Wall
Mounted Model
OWNER’S MANUAL
MODELS
GWH09TB-D3DNA1A
GWH12TB-D3DNA1A
GWH18TC-D3DNA1A
GWH24TD-D3DNA1A
00621_09/03/12
Please read this owner's manual carefully before operating,
and keep it for reference.
© Copyright, GREE Canada, 2012
WWW.GREE.CA
St-Mathieu-de-Beloeil (Québec) Canada
1-866-680-GREE
Hansol
®
-
CONTENTS
The actual product may differ from the drawing in this manual. In case of discrepancy,
please refer to the actual product as the standard.
This appliance is not intended for use by persons (including children) with reduced
physical, sensory or mental capabilities or lack of experience and knowledge, unless
they are supervised or have been instructed on how to use the appliance by a person
responsible for their safety. Children should be supervised to ensure they do not play
with the appliance.
Never attempt.
Be sure to follow this instruction.
Do not dispose of this product as unsorted municipal waste.
Such waste is collected separately for special treatment.
Operation and Maintenance
• Safety Precautions ....................................................................................................1
• Parts ........................................................................................................................4
• How to Use the Wireless Remote Control ................................................................5
• Emergency Operation..............................................................................................13
• Care and Cleaning ..................................................................................................14
• Troubleshooting ......................................................................................................16
Installation Service
• Operation Tips ........................................................................................................19
• Installing and Cleaning the He
althy Filter ..............................................................21
• Warranty ................................................................................................................22
1
Safety Precautions
Please read the following notices before operating the appliance.
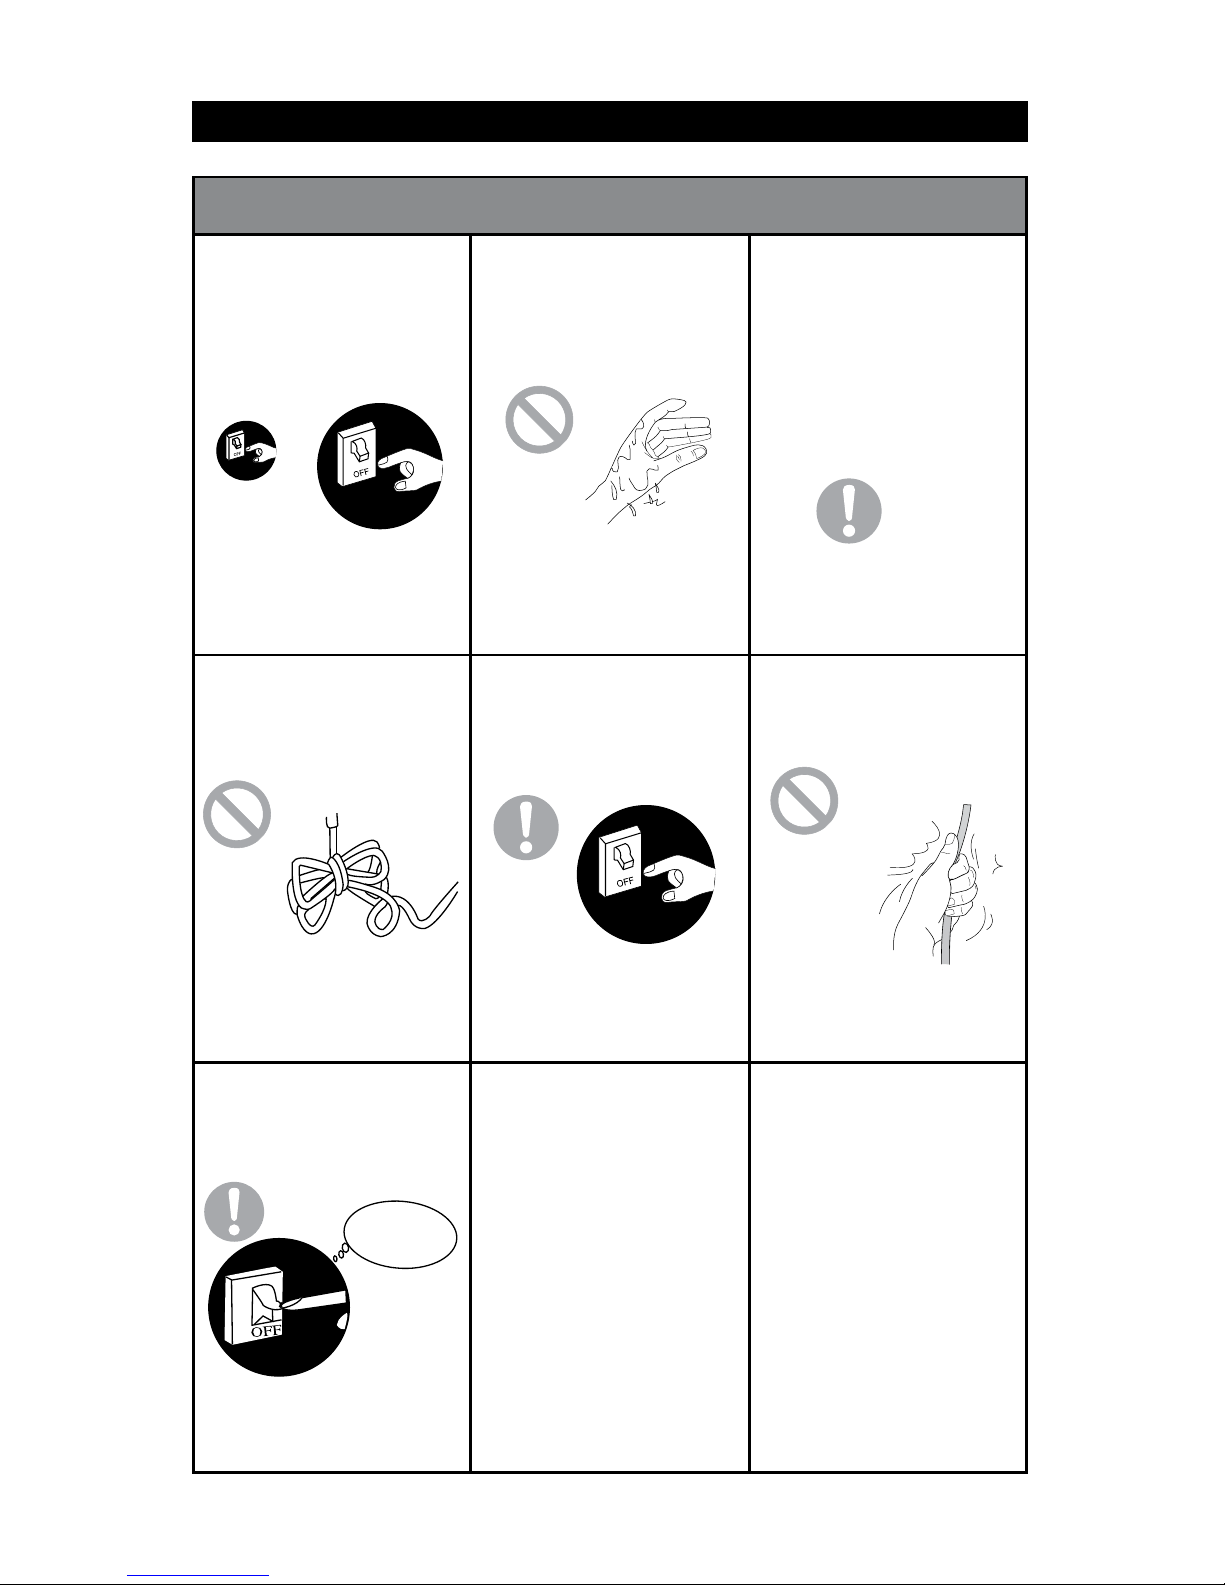
★ If there is an abnormal
occurence (like a burning
smell), immediately turn off
the power. Contact an
authorized Gree service
centre.
★ Do not cut or damage the
power cord or signal control
wire. If the air conditioner’s
power cord or signal control
wire is damaged, have a
professional technician
replace it with the appropriate
power cord.
If the abnormal condition
persists, the air conditioner
may be
damaged or may
cause electric shock or fire.
★ To avoid fire hazards, a
special circuit must be used
for the power supply.
Do not use octopus outlets
or a mobile wiring board for
wire connections.
★ Turn off the power supply
when the air conditioner will
not be used for an extended
period of time.
Dust accumulation may cause
overheating, fire and other
accidents.
★ Do not operate the air
conditioner with
wet hands.
It may cause electric shock.
★ Turn off the power before
cleaning the air conditioner.
★ When the voltage is too high,
electric elements can be
damaged easily. If the voltage
is too low, the compressor
will vibrate violently, which
may damage the cooling
system or compressor,
causing the electric elements
to fail.
★ The power supply should use
a circuit breaker of adequate
capacity, with a creepage
protection switch. Do not turn
the a
ir conditioner on and off
frequently.
This air conditioner’s power
supply uses a Y-type
connection. If the power cord
is damaged, it must be
replaced by the manufacturer,
service centre or a similarly
qualified professional to
avoid hazards.
There is a risk of electric
shock or injury.
it may
★ Do not damage the power
cord or use an incorrect
power cord.
This may cause the power
cord to overheat, leading to a
risk of fire.
Turn
power off
WARNING
e.
2
Safety Precautions
★ Ensure the power supply
is properly grounded.
An ungrounded power supply
may cause electric shock.
Accumulated dust may cause
fire or electric shock.
★ For safety, turn off the circuit
breaker before performing
any maintenance or
cleaning, or when the
product will not be used for
an extended period of time.
e.
The unit will not perform
efficiently.
★ Do not keep windows and
doors open for long periods
of time while the unit is on.
The unit will not perform
efficiently and may
malfunction.
★ Do not block the air inlet or
outlet.
It may cause fire or explosion.
★ Keep combustible materials
at least 1 m away from the
unit.
It can save electric energy.
★ Select the most appropriate
temperature.
Keep room
about 9°F
cooler than
outside.
3
Safety Precautions
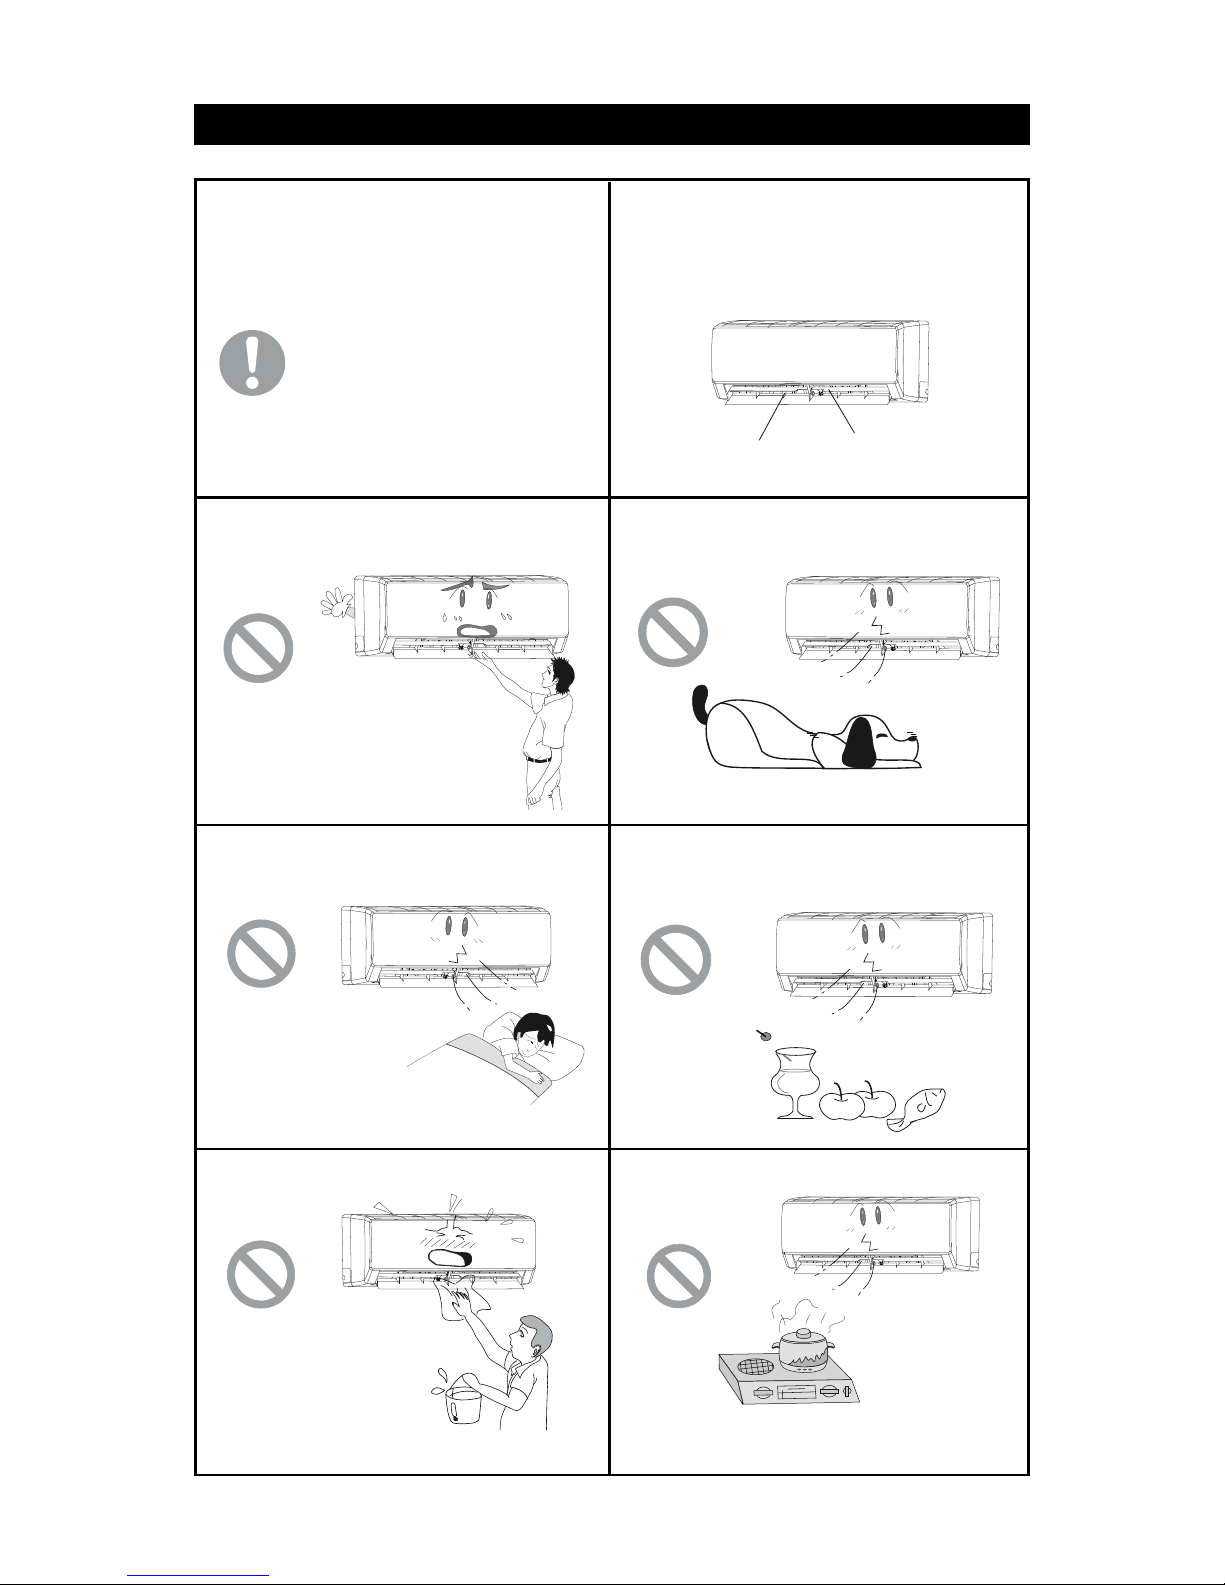
Please read the following carefully before operating
★ Do not cut or damage the power cord or
control cords. If they are damaged, please
contact the dealer or a qualified service
technician.
★ To change the airflow direction, adjust the
vertical and horizontal air flow direction
using the remote control.
Vertical Louver
Horizontal Louver
★ Do not insert your hands or objects into
the air inlet or outlet.
Accidents are likely.
★ Do not stay in the direct cold air flow for
a long period of time.
It may be detrimental to your health.
★ Do not splash water on the air conditioner.
It may cause electric shock or malfunction.
★ Do not place the air conditioner near a stove
or burner.
It may cause CO toxicity due to improper
combustion.
★ Do not expose animals or plants to the
direct air flow.
It may have a detrimental effect on them.
★ Do not use the unit for any other purpose,
such as preserving food or drying clothes.
ň
ʼn
ł
ņ
⑺
Ń
Ł
ń
Ņ
4
Parts
ň
ʼn
ł
ņ
⑺
Ń
Ł
ń
Ņ
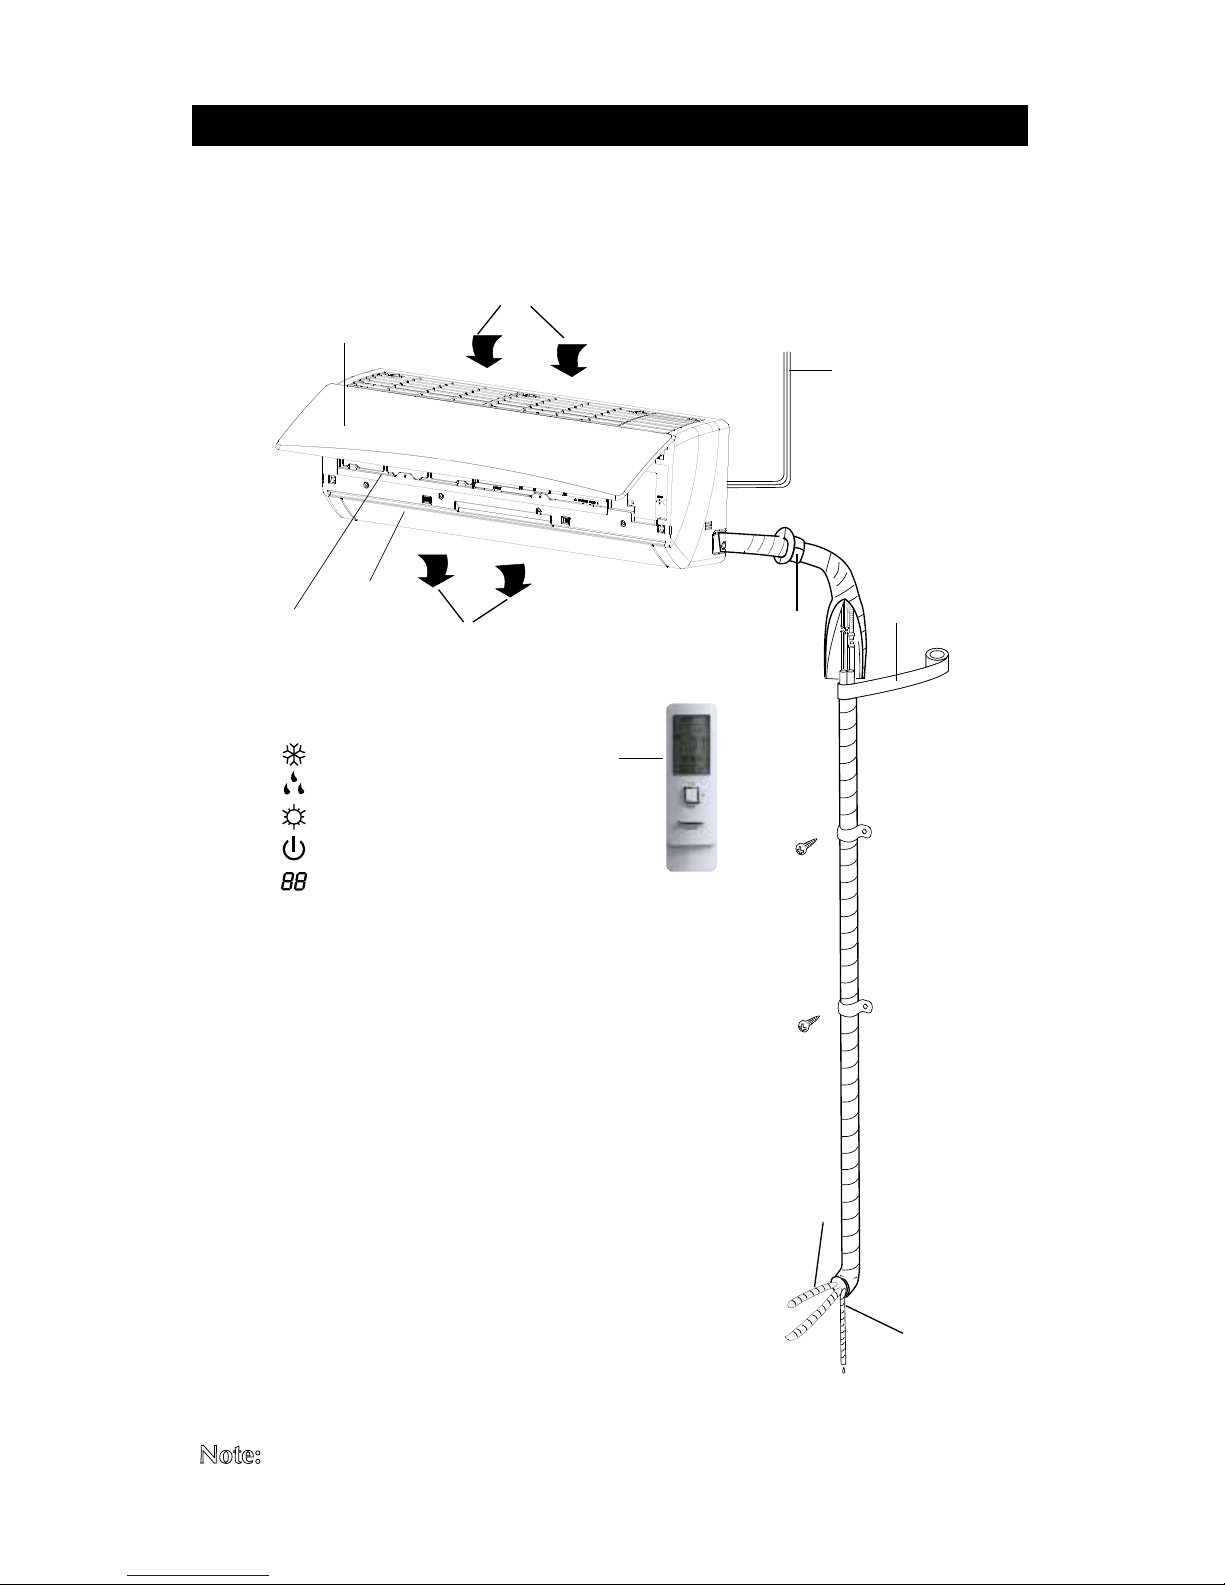
Indoor unit
N
ote:
This is just the schematic plan, please refer to the actual product
(1) Power cord
(2) Remote control
(3) Front panel
(4) Filter
(5) Horizontal louver
(6) Wall pipe
(7) Sealing tape
(8) Connection pipe
(9) Drain hose
Air in
Air out
The icons displayed:
: Cool
: Dry
: Heat
: Power
: Set temp.
Note: Be sure that there is no obstruction between the receiver and the remote control. Do not
drop or throw the remote control. Do not get any liquid on the remote control and avoid placing
it in direct sunlight or where it is very hot.
Press to start the unit. Press again to
turn the unit off. When the unit is
off, the sleep function is canceled.
Press to select Auto, Low, Mediumlow, Medium, Medium-
high or
High speed. AUTO is the default
setting when the unit is first turned
on. When the unit is in DRY mode,
the only FAN setting available is
LOW.
Press this button to select from the setting temperature, indoor ambient temperature and outdoor ambient temperature. When the indoor unit is firstly
turned on, it will display the setting
temperature ” ”. When the display
status shows ” ”, it is
the indoor
ambient temperature that is displayed.
” ” displays the outdoor ambient
temperature. After five seconds, if no
other signal has been sent, the display
will show the setting temperature.
Attention: the outdoor ambient
temperature range is
0-99°Fand 0-60°C. When
it goes beyond the range, it
keeps the threshold data
(the smallest—0 and the
largest 99°For 60°C).
Tip: When using the buttons on the
cover, make sure the cover is
completely closed.
Press to select from the AUTO, COOL,
DRY, FAN or HEAT modes. AUTO is
the default setting when the unit is first
turned on. In AUTO mode, the temperature will not be displayed. In
HEAT mode, the initial value is 28°C
(82°F). In other modes, the initial value
is 25°C (77°F).
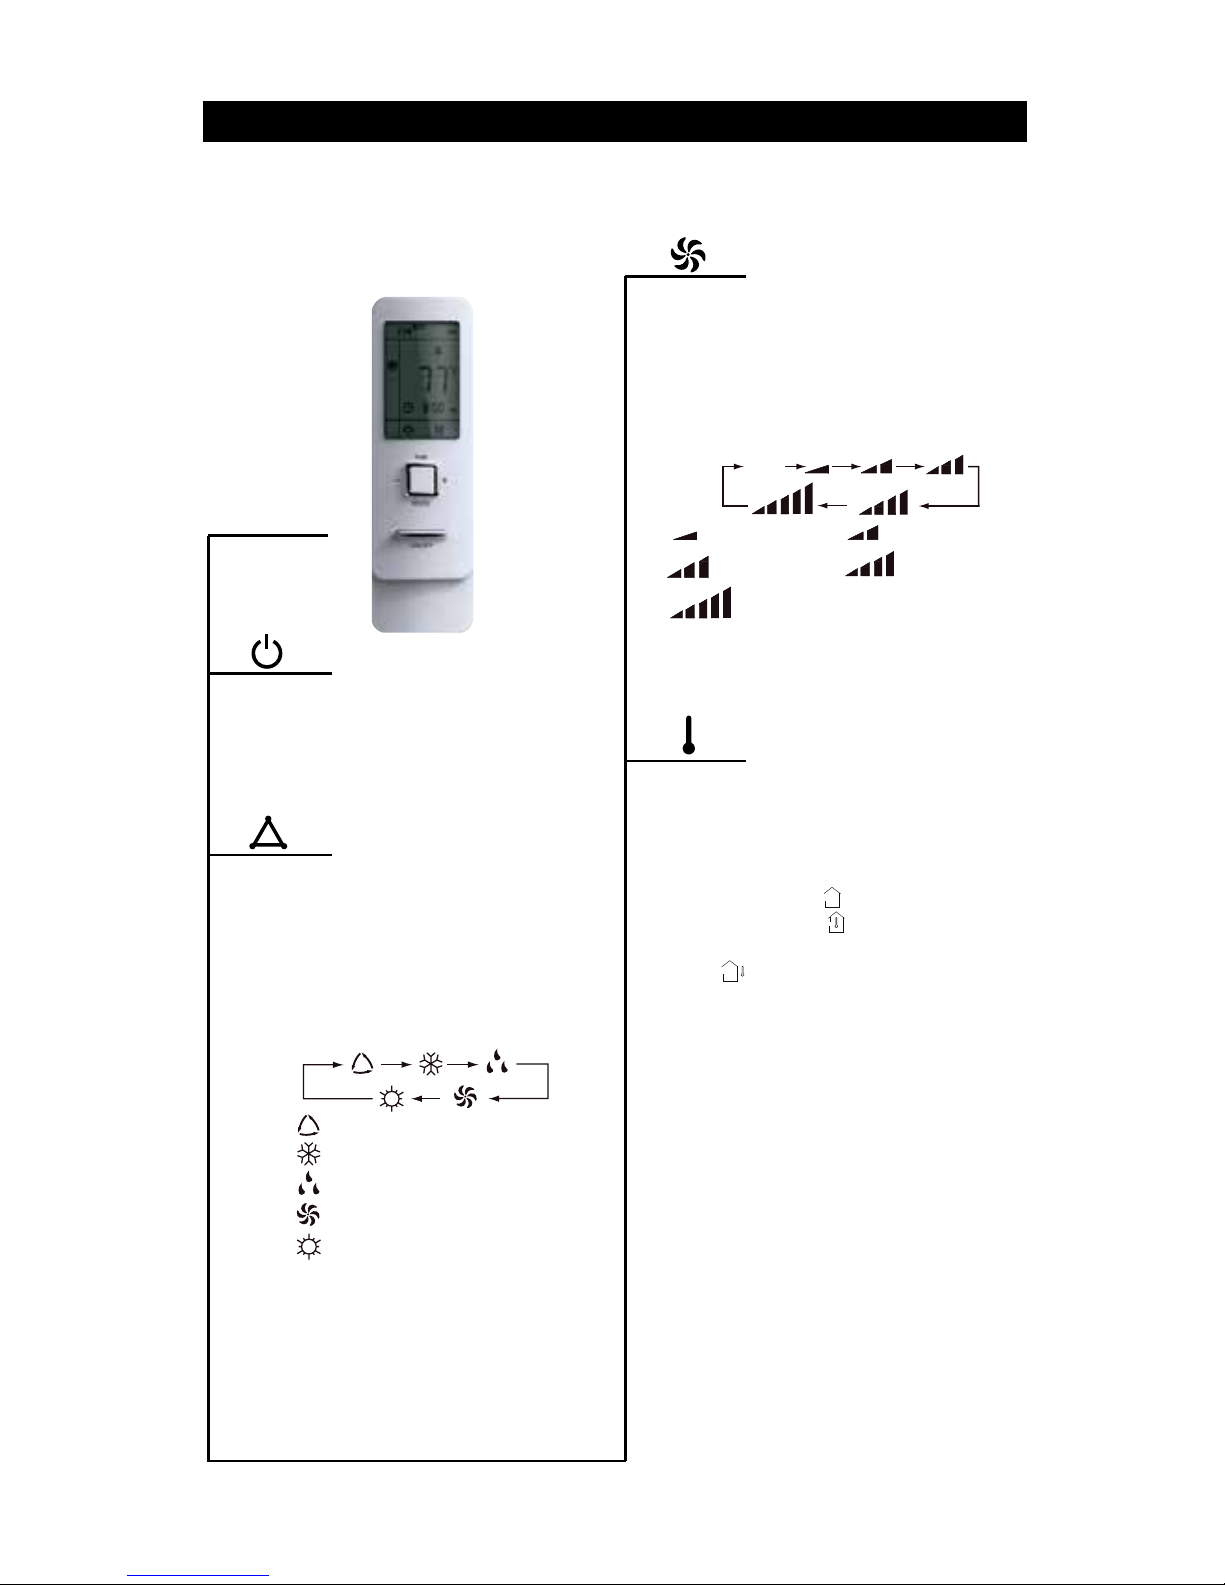
Signal transmitter
Remote control
ON/OFF button
FAN button
TEMP button
MODE button
5
How to Use the Wireless Remote Control
Parts and functions of the wireless remote control
AUTO
Low fan
Medium fan
High fan
Note: Only Low is available when the fan is on.
Medium-low fan
Medium-high fan
: AUTO
: COOL
: DRY
: FAN
: HEAT
*(only for a cooling
and heating unit. In
units that only cool
the air, this function
won’t do anything if
pressed.)

6
Note: Be sure that there is no obstruction between the receiver and the remote control. Do not
drop or throw the remote control. Do not get any liquid on the remote control and avoid placing
it in direct sunlight or where it is very hot.
While running in Cool or Heat
mode, press to turn the Turbo
function on or off. When the Turbo
function is on, the Turbo symbol
will be displayed. The symbol will
automa
tically disappear if the
mode or fan speed is changed.
The preset temperature can be increased.
Press this button to increase the temperature. If the button is held down for two
seconds, the temperature will change
more quickly. When the button is
released, the temperature will be set and
the (°F) symbol will be displayed. The
temperature cannot be changed in Auto
mode, but the signal can still be sent b
y
pressing this button. The temperature in
Celsius can be set between 16 and 30;
the temperature in Fahrenheit Celsius can
be set between 61 and 86.
The preset temperature can be decreased.
Press this button to lower the temperature. If the button is held down for two
seconds, the temperature will change
more quickly. When the button is
released, the temperature will be set and
the (°F) symbol will be disp
layed. The
temperature cannot be changed in Auto
mode, but the signal can still be sent by
pressing this button.
Press when the unit is on or off to
set the light on or off. When the
unit is first turned on, Light On is
the default.
Remote control
( + ) button
( ) button
TURBO button
LIGHT button
TURBO
LIGHT
How to Use the Wireless Remote Control
Parts and functions of the wireless remote control
Press to set the ” ”; the display
will flash. After 5 seconds, the
value can be adjusted by pressing
the + or – button. If the button is
held for 2 seconds longer, the minutes will increase by 1 every 0.5
seconds. When the display is flashing, press the ” ” (clock button)
again to accept the setting. When
the unit is first turned on, 12:00 is
the default time display, and the
clock symbol will be shown. When
the clock symbol is shown with a
time, it is the current time. If the
clock symbol is not displayed, it is
the timer time.
CLOCK button
Press to set the Quiet status to Auto Quiet
mode (” ” and ” ” symbols are
displayed), Quiet mode (” ” symbol) or
Quiet OFF (no display). When first turned
on, Quiet OFF is the default setting.
Note: The Quiet function cannot be used
when running in the Fan or Dry mode.
The fan speed is not available in Quiet
mode (” ”).
QUIET button
+
When the X-FAN button is pressed while
the unit is in the COOL or DRY mode,
the symbol ” ” is displayed and the
indoor fan will continue to run for 10
minutes in order to dry the indoor unit,
even after the unit is turned off. When
turned on for the first time, X-FAN OFF is
the default. X-FAN does not work in the
AUTO, FAN or HEAT modes.
X-FAN button
X-FAN
 Loading...