

Gree GWH12UB-K3DNXXB, GWC09UB-K3DNXXA, GWH18UC-K3DNXXB, GWH09UB-K3DNXXA, GWH12UB-K3DNXXA Owner's Manual
...
Change for Life
Split Air Conditioner
Owner's Manual
Residential Air Conditioners
Thank you for choosing Residential Air Conditioners,please read this owner’s
manual carefully before operation and retain it for future reference.
MODELS:
GWH12UB-K3DNXXA
GWH18UC-K3DNXXA
GWH09UB-K3DNXXB
GWC09UB-K3DNXXA
GWC12UB-K3DNXXA
GWC18UC-K3DNXXA
GWH09UB-K3DNXXA
GWH09UB-K3DNXXC
GWH12UB-K3DNXXB GWH12UB-K3DNXXC
GWH18UC-K3DNXXB GWH18UC-K3DNXXC
Note:“XX” stand for different front panels “A1~A9”
or “B1~B9” or “C1~C9” or “D1~D9” or “E1~E9”
CONTENTS
Operation and Maintenance
■
................................................................1
Safety Precautions
■
....................................................................17
■
Name of Parts
.......................................................................4
■
Operation of Remote Controller
................................................5
■
...............................................................11
■
..................................................................14
Installation Service
■
..........................................................19
■
.............................................................22
■
......................................................23
■
...................................................26
■
..............................27
■
...........................................................10
Do not dispose this product as unsorted municipal waste.
Collection of such waste separately for special treatment
is necessary.
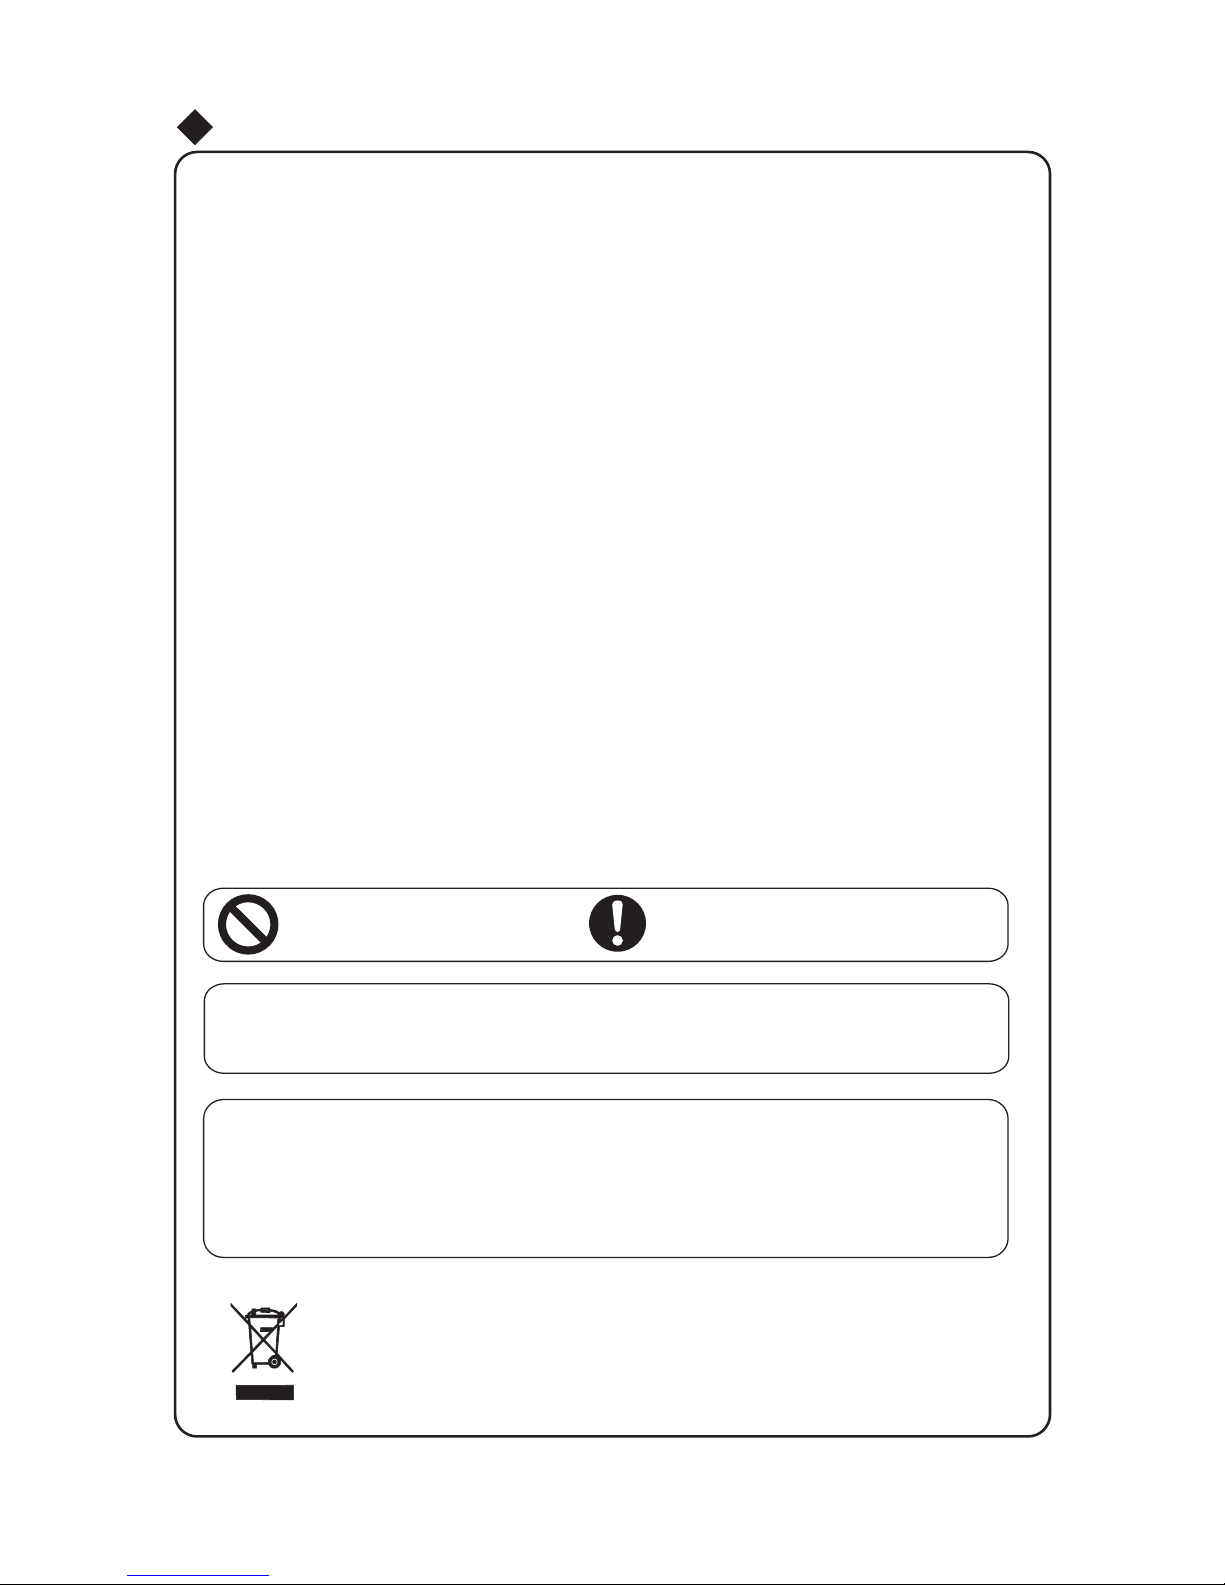
Never attempt.
Be sure to follow this instruction
The physical product may differ from the drawing in this manual for different display.
If there are some differences between them, please refer to the physical product as
the standard
.
This appliance is not intended for use by persons (including children) with reduced
physical, sensory or mental capabilities or lack of experience and knowledge,
unless they have been given supervision or instruction concerning use of the appliance
by a person responsible for their safety.
Children should be supervised to ensure they are away from the appliance.
■
..............28
Operation Tips
Care and Cleaning
Troubleshooting
Notices for Installation
Installation Drawing
Installation of Indoor Unit
Installation of Outdoor Unit
Check after Installation and Operation Test
Emergency Operation
Installation and Maintenance of Healthy Filter(Optional)
Configuration of connection pipe and additional volume of refrigerant
........29
■
WARNING
Please read the following notices before operation.
★
cut off power
If there's abnormal pheno-
If this abnormal status is kept
★★
★
Safety Precautions
it may
on, air conditioner may be
damaged or
even cause
electric shock or fire.
menon
(like smell of burning),
please cut off the power immediately and then contact with
Gree authorized maintenance
center.
Do not operate the air cond-
itioner with wet hands.
Otherwise, it may cause electric
shock.
Do not cut off or damage the
power cord or signal control
wire. If the power cord or signal
control wire of air conditioner
is damaged,
please replace it by
the professional with specified
power cord.
The special circuit must be
adopted for power supply to
avoid fire.
Do not use octopus multipurpose
socket or mobile wiring board for
wire connection.
Please cut off the power supply
when the air conditioner won't be
used for an extended period of
★
time.
Otherwise, accumulated dust
may cause overheating, fire
and other accidents.
★
Do not damage the power
cord or use unspecified
power cord.
★
Otherwise, it may cause fire due to
overheating of power cord.
★
Before cleaning the air con-
ditioner,
please cut off the power.
★
Otherwise, it will cause electric
shock or injury.
★
Power supply should adopt
the special circuit with the protection of air switch and the capacity
must be sufficient. Pease do not
turn on or turn off the air conditioner
frequently .
Y-type connection is adopted for the
power supply of this air conditioner.
If the power cord is damaged, it
must be replaced by the
manuf-
acture
r, maintenance center or a
similarly qualified person to avoid
a hazard.
★
When the voltage is too high,
electric elements can be damaged
easily;
if the voltage is too low, the
compressor will vibrate fiercely,
which may damage the cooling
system or compressor, and electric
components can't operate.
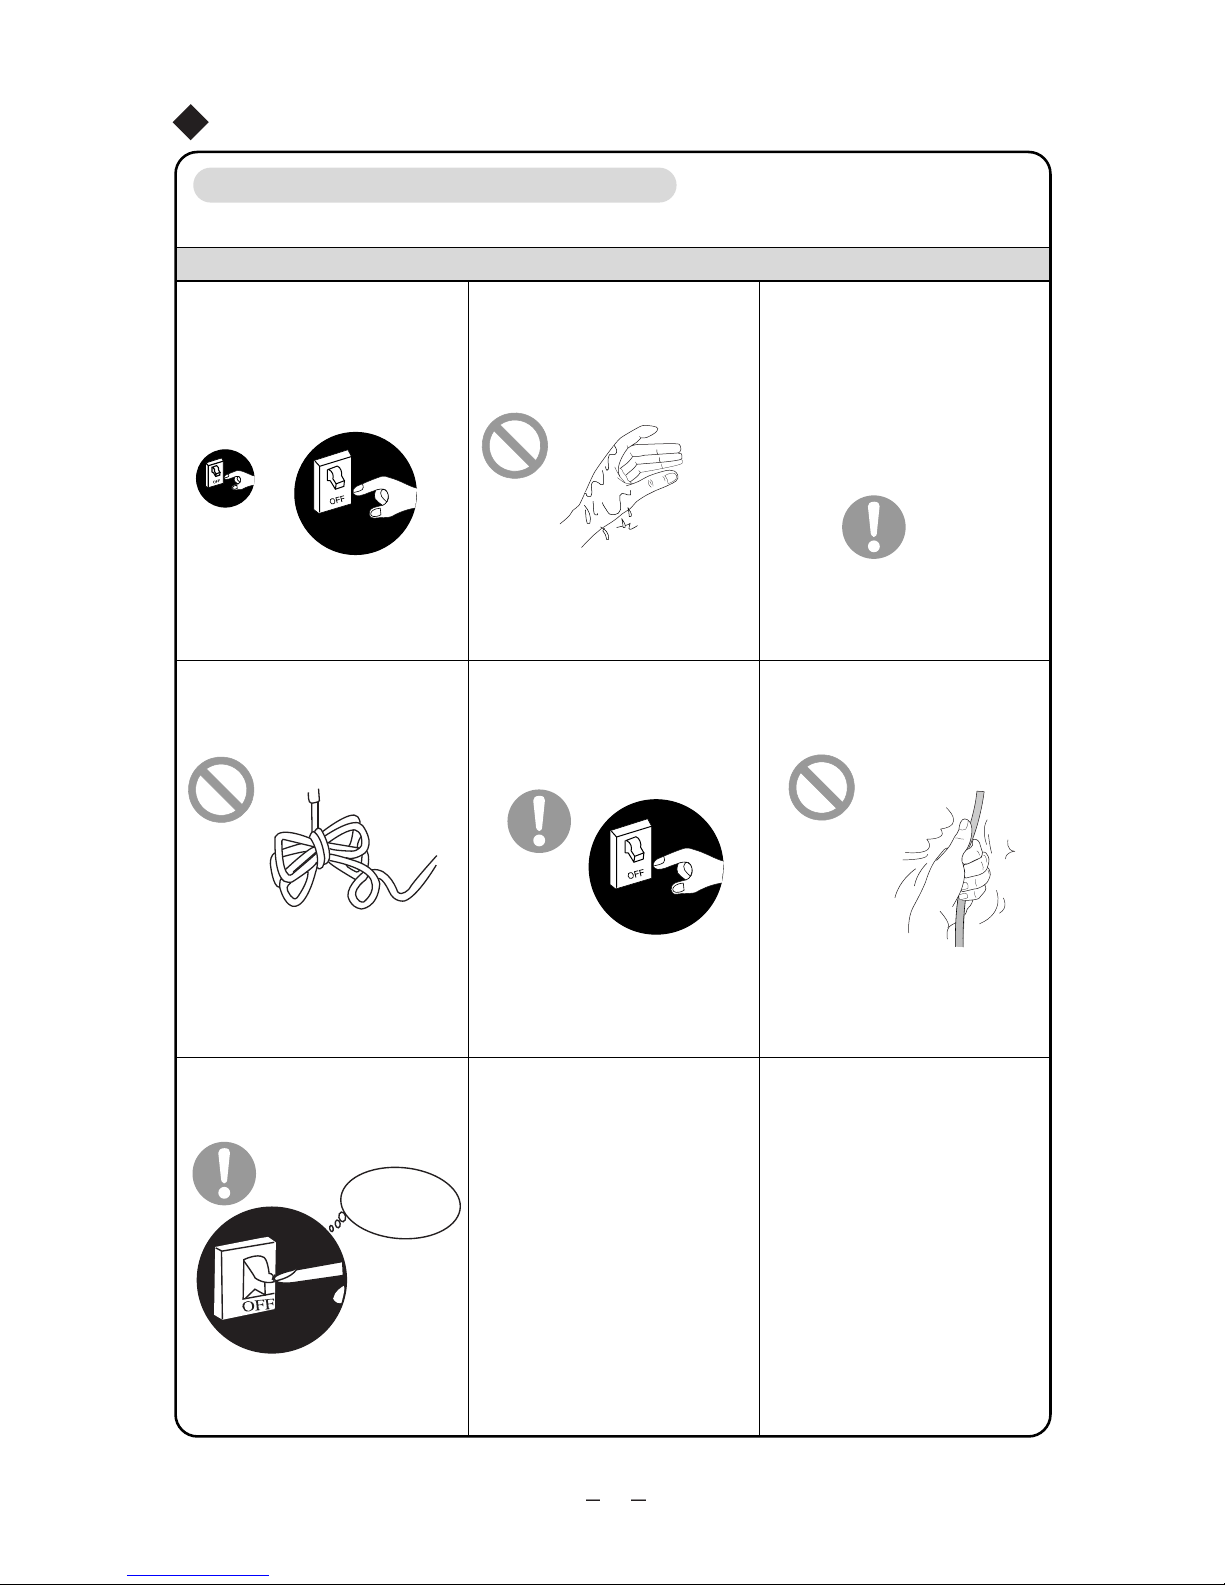
1
★
★
★
2
★
★
For safety, be sure to turn
off the circuit beaker before
★
★
★
★
No earthing may cause electric
shock.
performing any maintenance
Accumulated dust may cause fire
or electric shock.
Select the most appropriate
temperature.
Keep room about
5 cooler than
outside.
It can save electric energy.
Do not keep windows and
doors open for a long time
during operation.
It will result in insufficient performance.
Do not block the air inlet or
outlet.
and cause
malfunctions.
Keep combustible
materials
at least 1m away
from the
units .
.noisolpxe ro erif esuac yam tI
It may cause falling of the unit
and
injury to the person.
Install the outdoor
unit firmly
enough.
Do not step on the top of the
outdoor unit or place heavy
things on it.
It may cause damage or injury
.
eht riaper ot tpmetta ton oD
air conditioner by yourself.
Incorrect repairs may cause electric
shock or fire.
Please contact the
local a
uthorised s
ervice center.
Always ensure effective
earthing.
or cleaning or when the
product is not used for an
extended period of time.
Safety Precautions
℃
It will result in insufficient performance
3
★
★
★
★
★
★
★
★
Safety Precautions
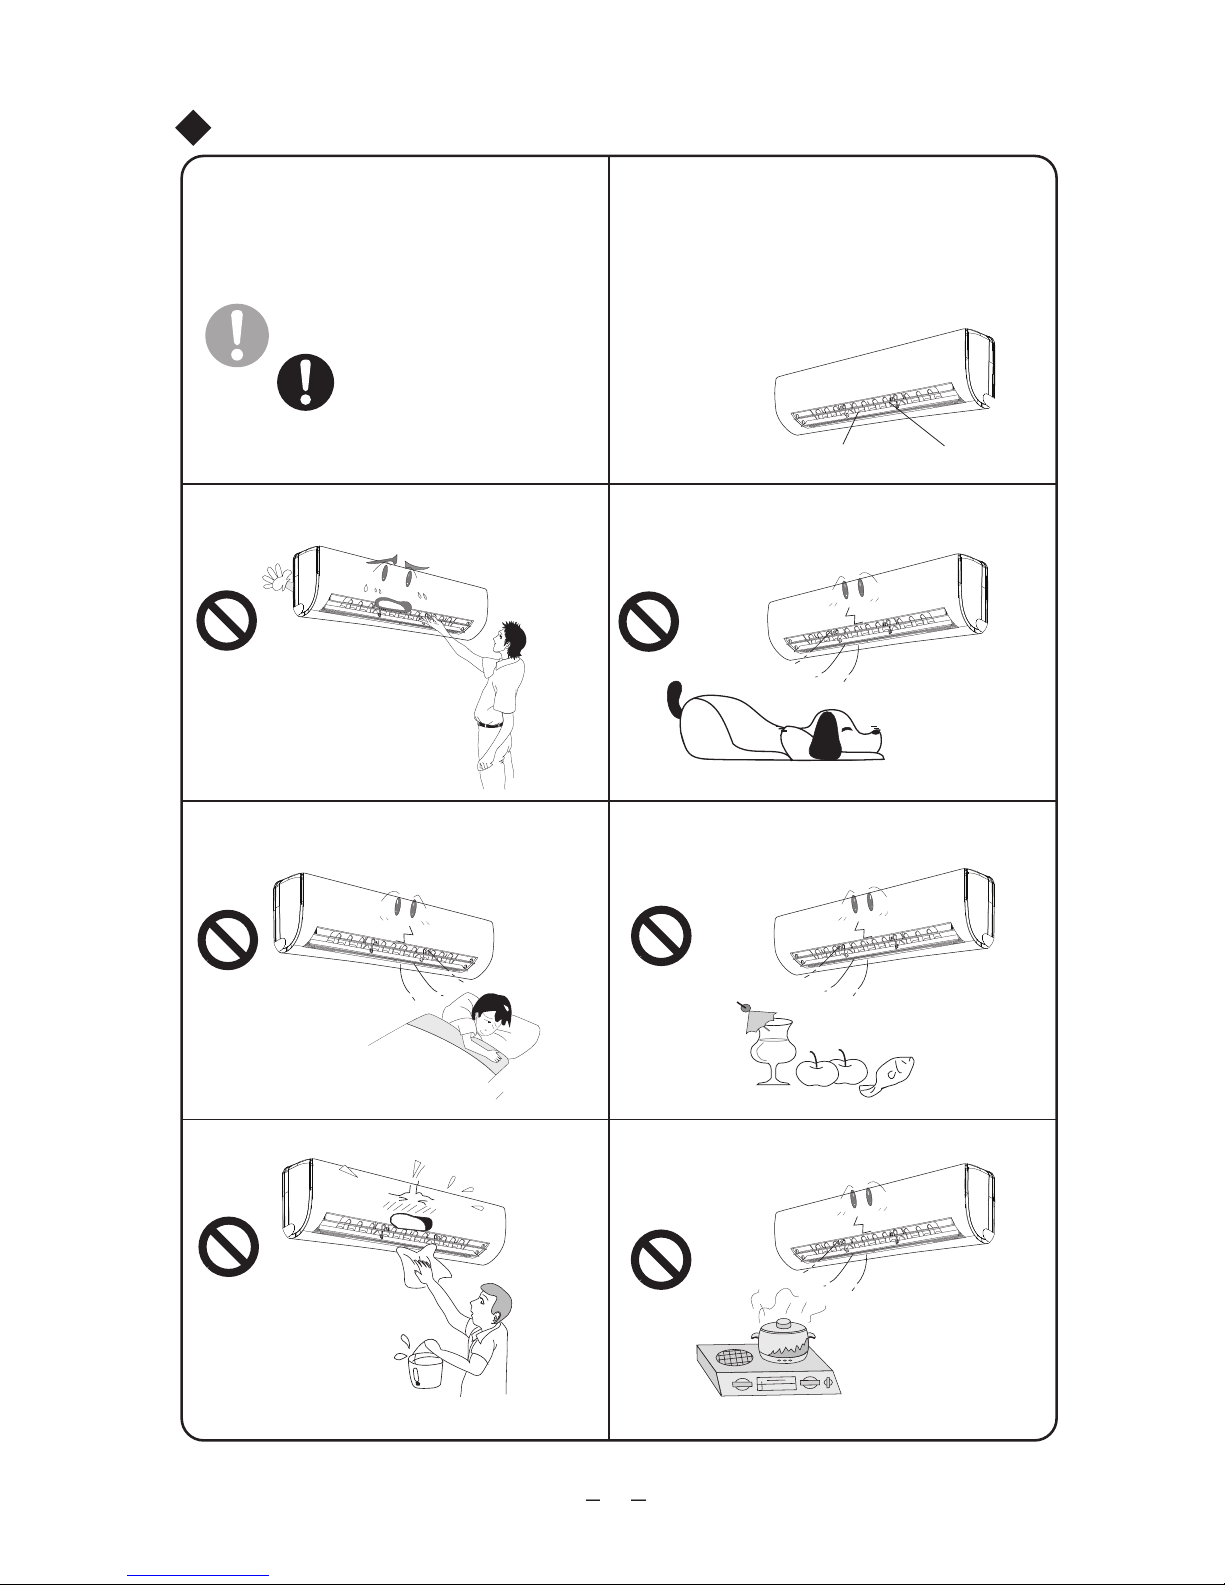
Do not cut off or damage the power cords or
control cords. If they are damaged, please
contact the dealer or qualified service
personnel
To change the airflow direction, adjust the vertical
and horizontal air flow direction by using the
remote controller.
Vertical
Louver
Horizontal
Louver
Do not insert your hands or objects into
the air in let or outlet.
It may cause an accident.
Do not expose animals or plants directly to
the air flow .
Do not expose yourself to cold air directly
for a long time.
Do not use the unit for any other purpose , such
as preserving food
or drying clothes.
Do not splash water on the air conditioner . Do not place a burner near the air
conditioner .
It will cause CO toxicosis due to incomplete burning.
It may have a detrimental effect on them.
It's not good for your health.
It may cause electric shock or malfunction.

⑹
⑸
⑵
⑻
⑼
⑽
⑷
⑺
⑶
⑴
Power cord
Remote controller
Front panel
Filter
Horizontal louver
Wall pipe
Binding tape
Connection wires
Drain hose
Drain connector
Name of Parts
⑸
⑻
⑶
⑼
⑽
⑴
⑵
Indoor unit
Air in
Air out
Outdoor unit
Air in
Air out
⑷
⑹
⑺
:Cool
:Dry
:Heat
:Set temp.
:
Power
The icons displayed:
4
5
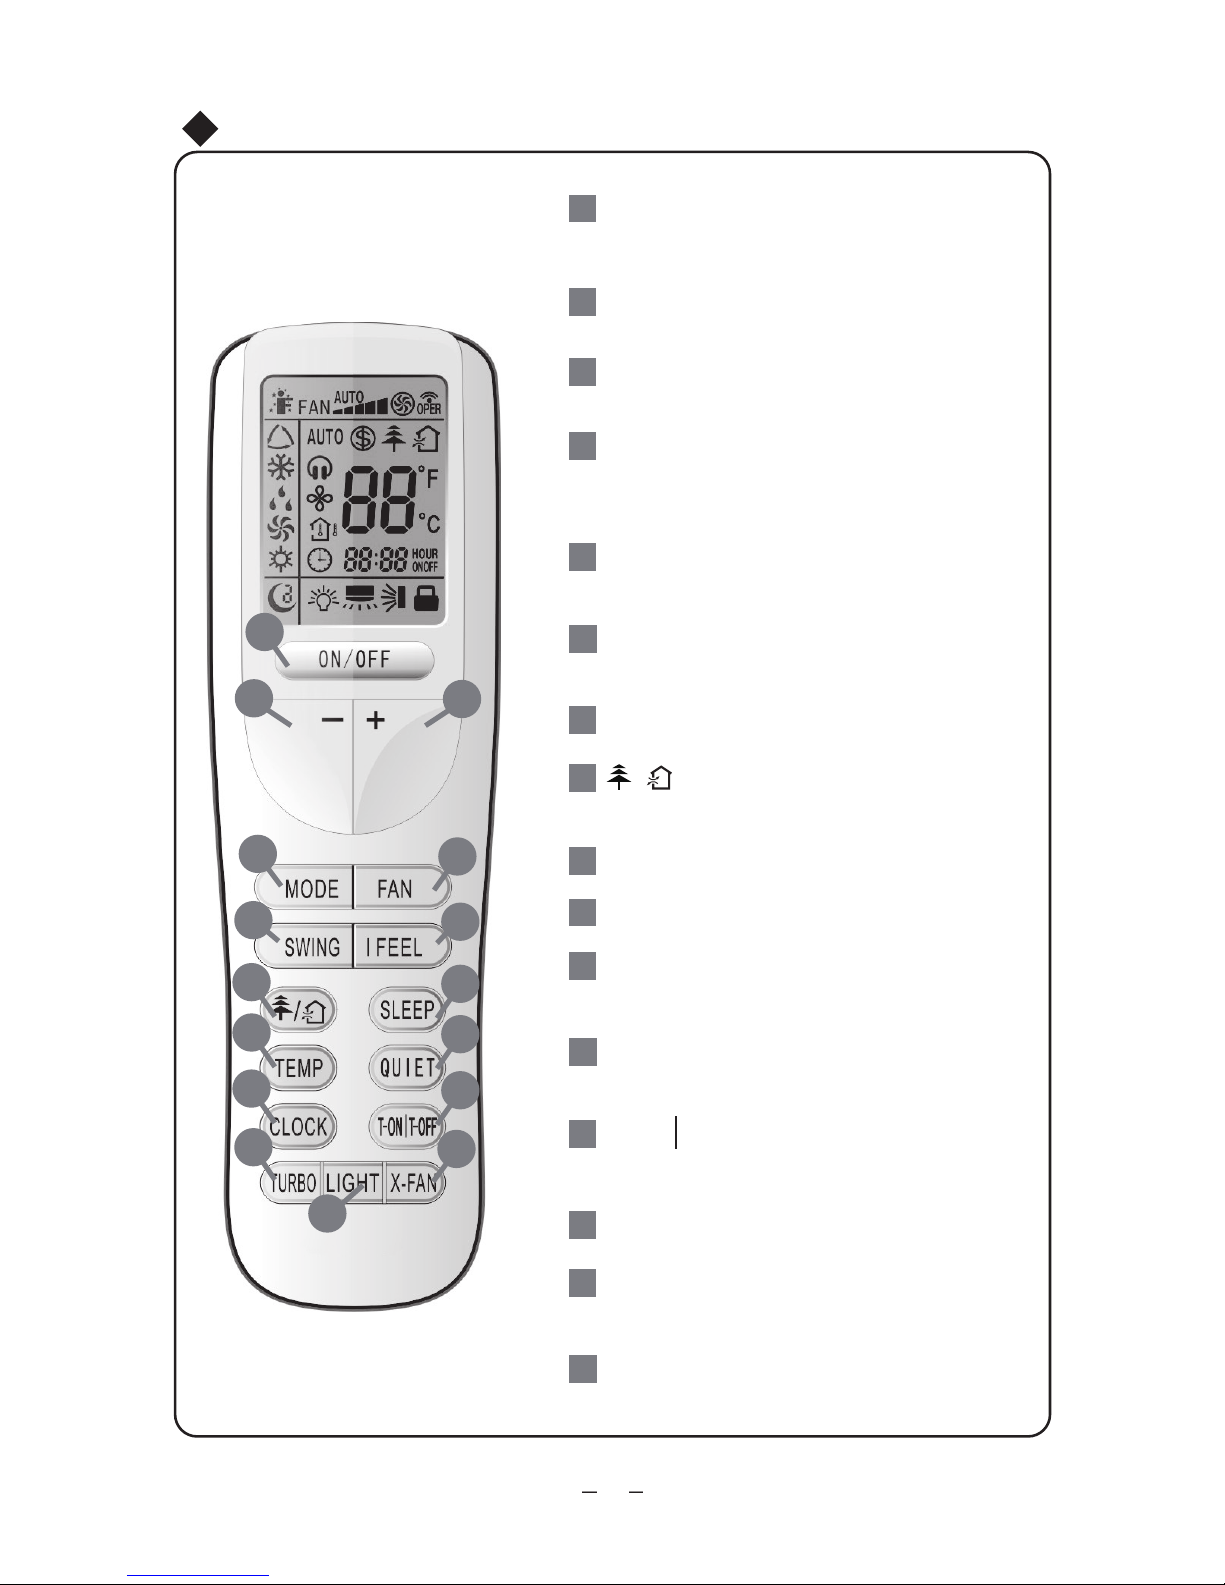
Operation of Remote Controller
T-ON T-OFF
1
7
Press it to set HEALTH or AIR function.
8
I FEEL
/
4
3
2
5
6
11
13
12
16
10
14
9
15
Press it to start or stop operation.
ON/OFF
MODE
+
-
Press it to select operation mode
(AUTO/COOL/DRY/FAN/HEAT).
: Press it to increase temperature
setting.
: Press it todecreasetemperature
setting.
FAN
Press it set swing angle.
QUIET
SWING
CLOCK
X-FAN
TEMP
TURBO
SLEEP
LIGHT
Press it to set fan speed.
Press it to set
Press it to set auto-off/auto-on timer.
Press it set clock.
3
15
5
4
14
7
16
13
12
9
8
11
10
2
1
6
Press it to turn on/off the light.
QUIET function.
6
Operation of Remote Controller
6
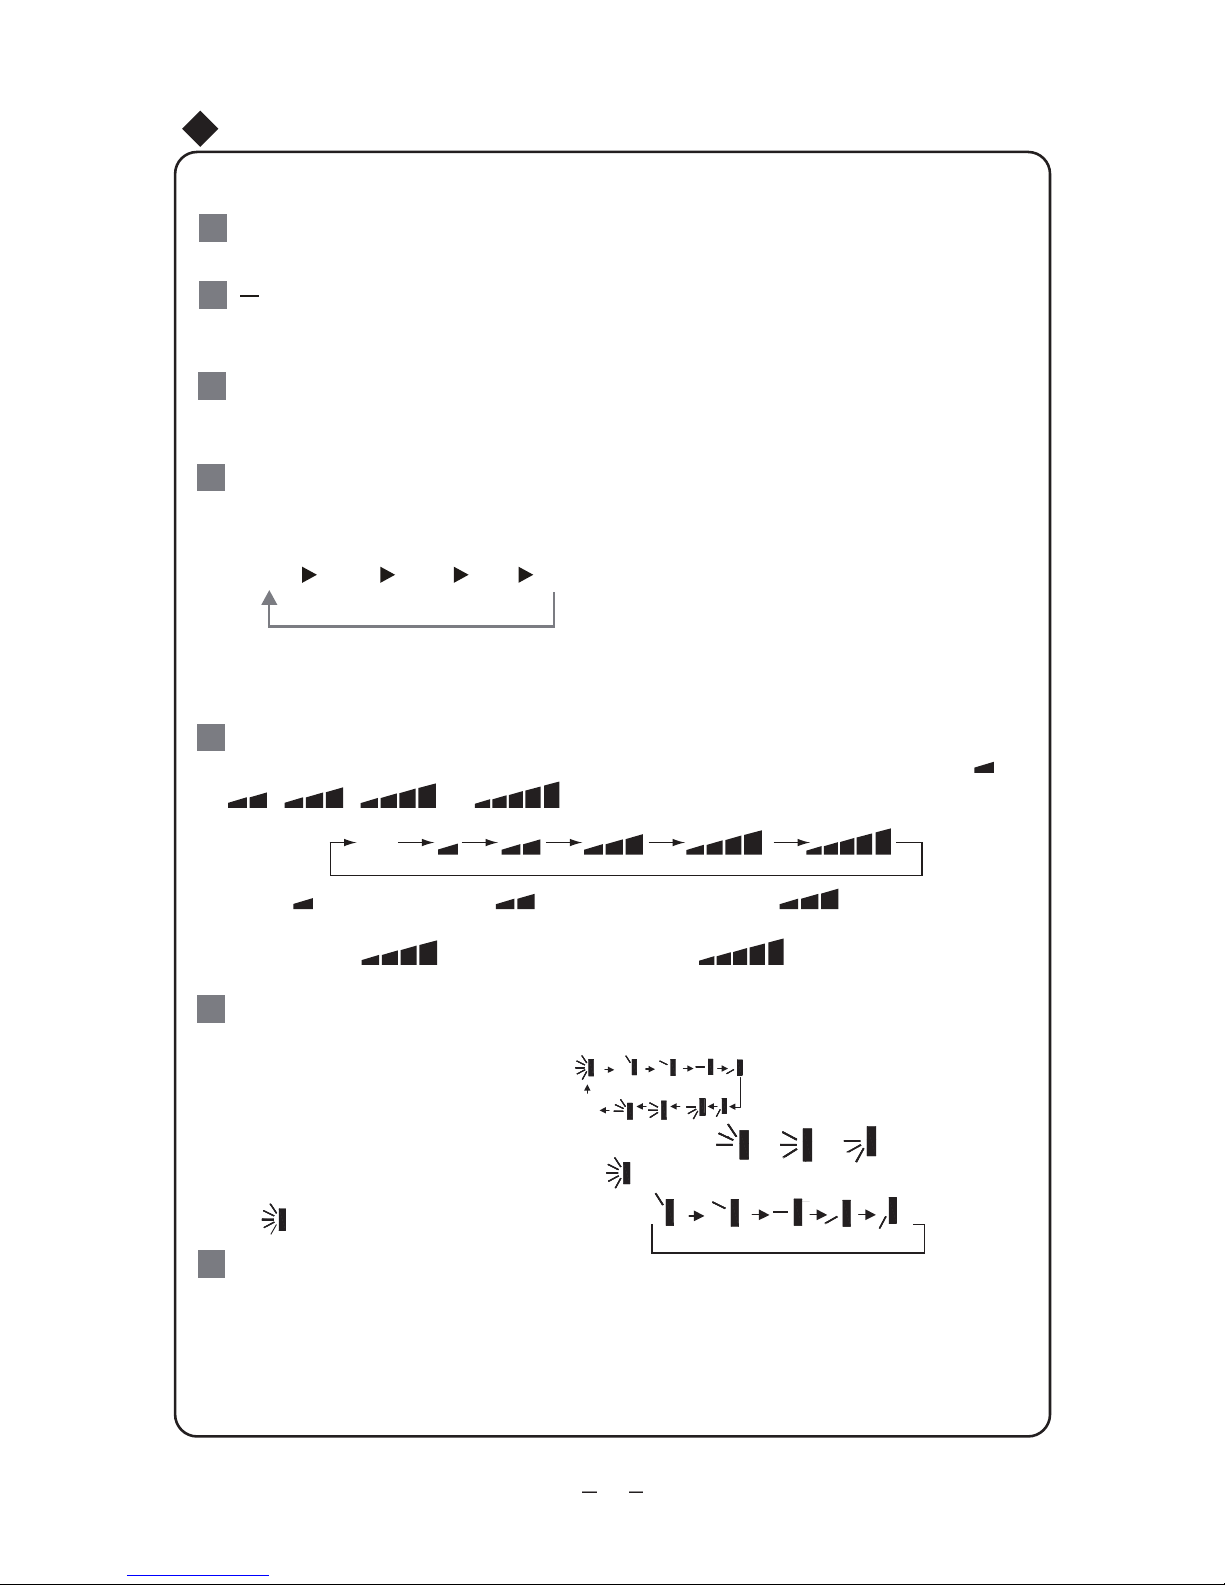
Press this button to set up &down swing angle, which circularly changes as below
:
OFF
This remote controller is universal . If any command , or is sent out,
the unit will carry out the command as
indicates the guide louver swings as:
Press this button to turn on I FEEL function. The unit automatically adjust temperature
according to the sensed temperature. Press this button again to cancel I FEEL function.
I FEEL:
SWING:
7
Remote Controller Description
ON/OFF :
MODE :
+ :
AUTO
COOL
DRY
FAN HEAT
*
*Note:Only for models with heating function.
After energization, AUTO mode is defaulted. In AUTO mode, the set temperature will not
be displayed on the LCD, and the unit will automatically select the suitable operation
mode in accordance with the room temperature to make indoor room comfortable.
This button is used for setting Fan Speed in the sequence that goes from AUTO,
to
then back to Auto.
,
, ,
,
FAN
:
1
4
3
2
5
Press this button to turn on the unit .Press this button again to turn off the unit.
Press this button to decrease set temperature. Holding it down above 2 seconds rapidly
decreases set temperature. In AUTO mode, set temperature is not adjustable.
Press this button to increase set temperature.Holding it down above 2 seconds rapidly
increases set temperature. In AUTO mode, set temperature is not adjustable.
Auto
Medium speedLow-Medium speedLow speed
High speedMedium-High speed
Each time you press this button,a mode is selected in a sequence that goes from AUTO,
COOL,DRY, FAN,and HEAT
*
,as the following:
7
Operation of Remote Controller
Remote Controller Description
P
ress this button to achieve the on and off of healthy and scavenging functions in
operation status.Press this button for the first time to start scavenging function;
LCD displays“ ”. Press the button for the
second time to start healthy and scavenging
functions simultaneously; LCD displays“ ” and “ ” .
Press this button for the third
time to
quit healthy and scavenging functions simultaneously. Press the button for the
fourth
time to start healthy function; LCD display “ ”
. Press this button again to repeat
the operation above.
/
8
SLEEP:
9
Press this button, can select Sleep 1 ( ), Sleep 2 ( ),Sleep 3 ( ) and cancel
the Sleep,circulate between these, after electrified, Sleep Cancel is defaulted.
Sleep 1 is Sleep mode 1, in Cool, Dehumidify modes: sleep status after run for one hour, the
main unit setting temperature will increase 1
Sleep 3- the sleep curve setting under Sleep mode by DIY:
(1) Under Sleep 3 mode, press "Turbo" button for a long time, remote control enters into user
individuation sleep setting status, at this time, the time of remote control will dis
play "1hour ",
(2) Adjust "+" and "-" button, could change the corresponding setting temperature, after
adjusted, press "Trubo "button for confirmation;
(3) At this time, 1hour will be automatically increased at the timer postion on the remote
(4) Repeat the above step (2)
~ (3) operation, until 8hours
temperature setting finished,
sleep,curve setting finished, at this time, the remote control will resume the original timer
the setting temperature "88" will display the corresponding temperature of last setting sleep
curve and blink (The first entering will display according to the initial curve setting value of
original factory);
control, (that are "2hours " or "3hours " or "8hours "), the place of setting temperature "88"
will display the corresponding temperature of last setting sleep curve and blink;
display;temperature display will resume to original setting temperature.
●
●
Sleep3- the sleep curve setting under Sleep mode by DIY could be inquired:
The user could accord to sleep curve setting
method to inquire the presetting sleep curve,
enter into user
individuation sleep setting status, but do not change the temperature, press
"Turbo" button directly for confirmation.
Note: In the above presetting or enquir
y procedure,
if continuously within10s, there is no button pressed, the sleep curve setting within
10s, there is no button pressed, the sleep curve setting status will be automatically
quit and resume to display the original displaying. In the presetting or enquiry procedure, press
●
●
℃,setting temperature increased 2℃, the unit will
run at this setting temperature; In Heat mode: sleep status after run for one hour, the setting
temperature will decrease 1
℃, 2 hours, setting temperature will decrease 2
℃, then the unit
will run at this setting temperature.
●
Sleep 2 is sleep mode 2, that is air conditioner will run according to the presetting a group of
sleep temperature curve.
"ON/OFF" button, "Mode" button, "Timer"button or "Sleep" button, the sleep curve setting
or enquiry status will quit similarly.
8
Operation of Remote Controller
LIGHT:
15
Press LIGHT button to turn on the display's light and press this button again to turn off
the display's light. If the light is turned on , is displayed. If the light is turned off,
disappears.
TURBO:
14
Press this button to activate / deactivate the Turbo function which enables the unit to
reach the preset temperature in the shortest time. In COOL mode, the unit will blow strong
cooling air at super high fan speed. In HEAT mode, the unit will blow strong heating air
at super high fan speed.
Press this button, could select displaying the indoor setting temperature or indoor ambient
temperature.When the indoor unit firstly power on it will display the setting temperature,
if the temperature's displaying status is changed from other status to" ",displays the
ambient temperature, 5s later or within 5s, it receives other remote control signal that will
return to display the setting temperature. if the users haven't set up the temperature
displaying status,that will display the setting temperature.
T-ON T-OFF:
present time.Holding down either button above 2 seconds increases or decreases the
CLOCK :
time by 1 minute every 0.5 second and then by 10 minutes every 0.5 second. During
blinking after setting, press CLOCK button again to confirm the setting,and then
10
TEMP:
Press T-ON button to initiate the auto-ON timer. To cancel the auto-timer program, simply
press this button again.
After press of this button, disappears and "ON "blinks .0
0:00 is displayed for ON time
setting. Within 5 seconds, press + or - button to adjust the time value. Every press of either
button
changes the time setting by 1 minute. Holding down either button rapidly changes the
time setting by1 minuteand then10 minutes. Within 5Seconds aftersetting, pressTIMER
ON button to confirm.
12
will
be constantly displayed.
QUIET:
11
13
Press T-OFF button to initiate the auto-off timer. To cancel the auto-timer program, simply
press the button again.TIMER OFF setting is the same as TIMER ON.
Press this button, the Quiet status is under the Auto Quiet mode (display "
Auto
"signal )
and Quiet mode (display " " singal) and Quiet OFF (there is no signal of " "
displayed),after powered on, the Quiet OFF is defaulted.
Press CLOCK button, blinking . Within 5 seconds,pressing +or - button adjusts the
X-FAN:
16
Pressing X-FAN button in COOL or DRY mode, the icon is displayed and the indoor
fan will continue operation for 10 minutes in order to dry the indoor unit even though you
have turned off the unit.
After energization, X-FAN OFF is defaulted. X-FAN is not available in AUTO, FAN or
HEAT mode.
 Loading...