

Gree GJC12BL-A3RNC5G, GJC12BL-A3MNC6A, GJC12BL-A3RNC5B, GJC12BL-A3RNC5H, GJC12BL-A3RNC9B Owner's Manual
...
Change for Life
Window Type
Air Conditioner
Owner's Manual
Residential Air Conditioners
MODEL:
Thank you for choosing Residential
GJC10BL-A3RNC5A
GJC10BL-A3RNC5B
GJC10BL-A3RNC5G
GJC10BL-A3RNC5H
GJC10BL-A3MNC6A
GJC10BL-A3RNC9B
GJC10BL-A3RND2G
GJC12BL-A3RND2H GJC10BL-A3RND2H
GJC12BL-A3RNC5A
GJC12BL-A3RNC5B
GJC12BL-A3RNC5G
GJC12BL-A3RNC5H
GJC12BL-A3MNC6A
GJC12BL-A3RNC9B
GJC12BL-A3RND2G
Air Conditioners, please read this owner’s
manual carefully before operation and retain it for future reference.

TABLE OF CONTENTS
AIR CONDITIONER SAFETY ........................................................................................................................................................ 1
INSTALLATION INSTRUCTIONS ........................................................................................................................................................ 1
AIR CONDITIONER USE ..................................................................................................................................................................... 4
Starting Your Air Conditioner - Digital Control .............................................................................................................................. 5
Starting Your Air Conditioner - Mechanical Control ................................................................................................................ 7
Normal Sounds .............................................................................................................................................................................. 8
AIR CONDITIONER CARE ............................................................................................................................................................ 8
Cleaning the Air Filter ..................................................................................................................................................................... 8
Cleaning the Front Panel ............................................................................................................................................................... 8
Repairing Paint Damage ......................................................................................................................................................... 8
Annual Maintenance ....................................................................................................................................................................... 8
TROUBLESHOOTING .......................................................................................................................................................................... 9
AIR CONDITIONER SAFETY
Your safety and the safety of others are very important.
We have provided many important safety messages in this manual and on your appliance. Always read and obey all
safety messages.
This is the safety alert symbol.
This symbol alerts you to potential hazards that can kill or hurt you and others.
All safety messages will follow the safety alert symbol and either the word “DANGER” or
“WARNING.” These words mean:
You can be killed or seriously injured if you don't
immediately follow instructions.
You can be killed or seriously injured if you don't
follow instructions.
All safety messages will tell you what the potential hazard is, tell you how to reduce the chance of injury, and tell you
what can happen if the instructions are not followed.
IMPORTANT SAFETY INSTRUCTIONS
WARNING:
Plug into a grounded 3 prong outlet.
To reduce the risk of fire, electrical shock or injury when using your air conditioner, follow these basic precautions:
Do not use an extension cord.
Do not remove ground prong.
Do not use an adapter.
SAVE THESE INSTRUCTIONS
INSTALLATION INSTRUCTIONS
Your air conditioner is designed to install in standard
double hung windows with opening widths of 22 to 36
inches (550 mm to 914 mm) (FIG. 1)
Lower sash must open sufficiently to allow a clear vertical
opening of 15-2/5 inches (392 mm). Side louvers and the
rear of the AC must have clear air space to allow
enough airflow through the condenser, for heat removal.
The rear of the unit must be outdoors, not inside a
building or garage.
EXTERIOR
INTERIOR
WALL
STOOL
SILL
OFFSET
WALL
550mm to 914mm
〃
15 2/5 min
(392 mm)
。
22 to 36
。
Unplug air conditioner before servicing.
Use two or more people to move and install air conditioner.
NOTE: SAVE CARTON and these INSTALLATION
INSTRUCTIONS for future reference. The carton is the
best way to store unit during winter, or when not in use.
Some assembly is required. Please read these instructions
carefully.
1
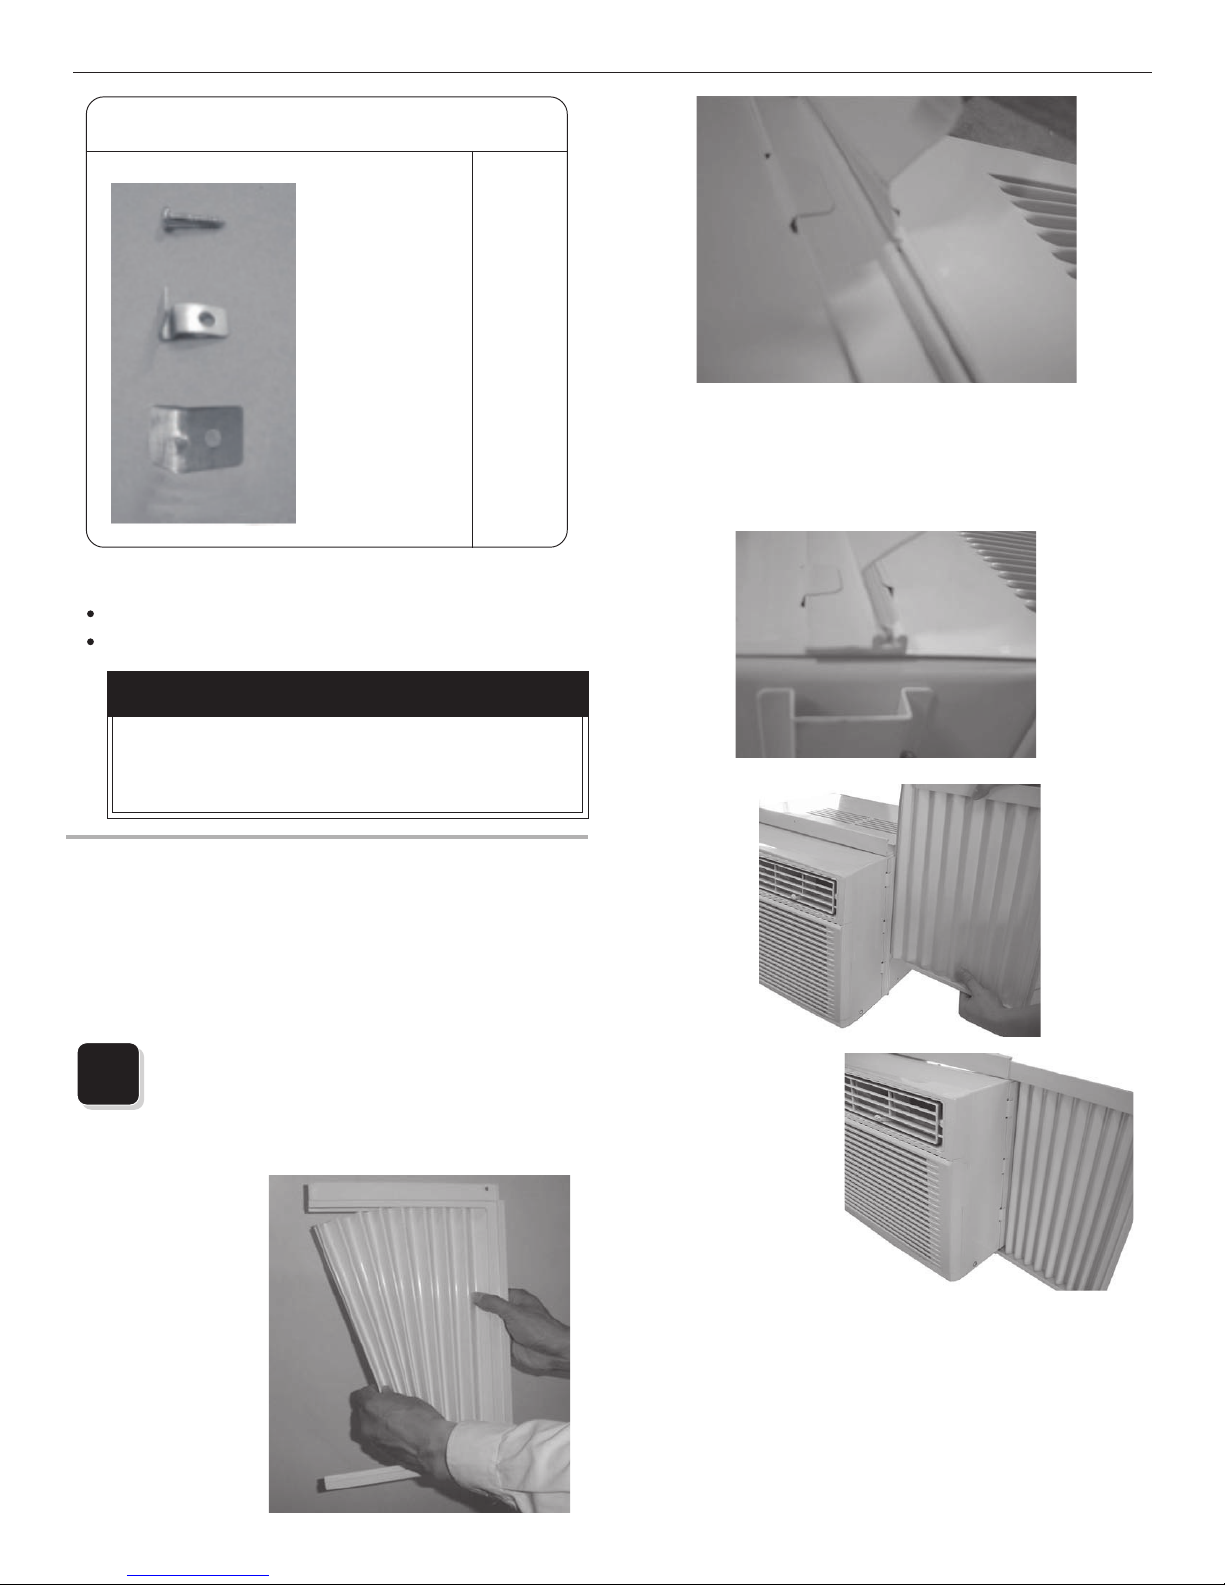
Mounting Hardware
TOOLS NEEDED:
Phillips Screw Driver
Drill (If pilot holes are needed)
CAUTION
Qty.
3/4" screws 6
lock frame 2
sash lock 1
FIG. 3A
B. Slide the free end (“I”section) of the panel into the
cabinet as shown in Figures 3A, 3B & 4. Slide the
panel down. Be sure to leave enough space to slip the
top and bottom of the frame into the rails on the cabinet.
FIG. 3B
When handling unit, be careful to avoid cuts
from sharp metal edges and aluminum fins on
front and rear coils.
How to Install
NOTE: Top Rail and Sliding Panels at each side are
offset to provide the proper pitch to the rear of (5/16").
This is necessary for proper condensed water utilization
and drainage. If you are not using the Side Panels for
any reason, this pitch to the rear must be maintained!
Place unit on floor, a bench or a table. There is a
Left and Right Window Filler Panel - be sure to
1
use the proper panel for each side.When installed
the flange for securing the panel in place to the window sill
will be facing into the room.
A. Hold the
Accordion
Panel in one
hand and
gently pull
back the
center to free
the open end.
See Figure 2.
FIG. 2
FIG. 4
C. Once the panel
has been
installed on the
side of the
cabinet, make
sure it sits
securely inside
the frame
channel by
making slight
adjustments. Slide the top and bottom ends of the frame
into the top and bottom rails of the cabinet. Figure 5.
D. Slide the panel all the way in and repeat on the other
side.
FIG. 5
2
 Loading...