

Page 1
Installation Instructions
Planter Hopper Lid Latch Kit
Used with Planter models:
• YP425A, YP425A3P
• YP625A, YP625A3P
• YP825A, YP825A3P
General Information
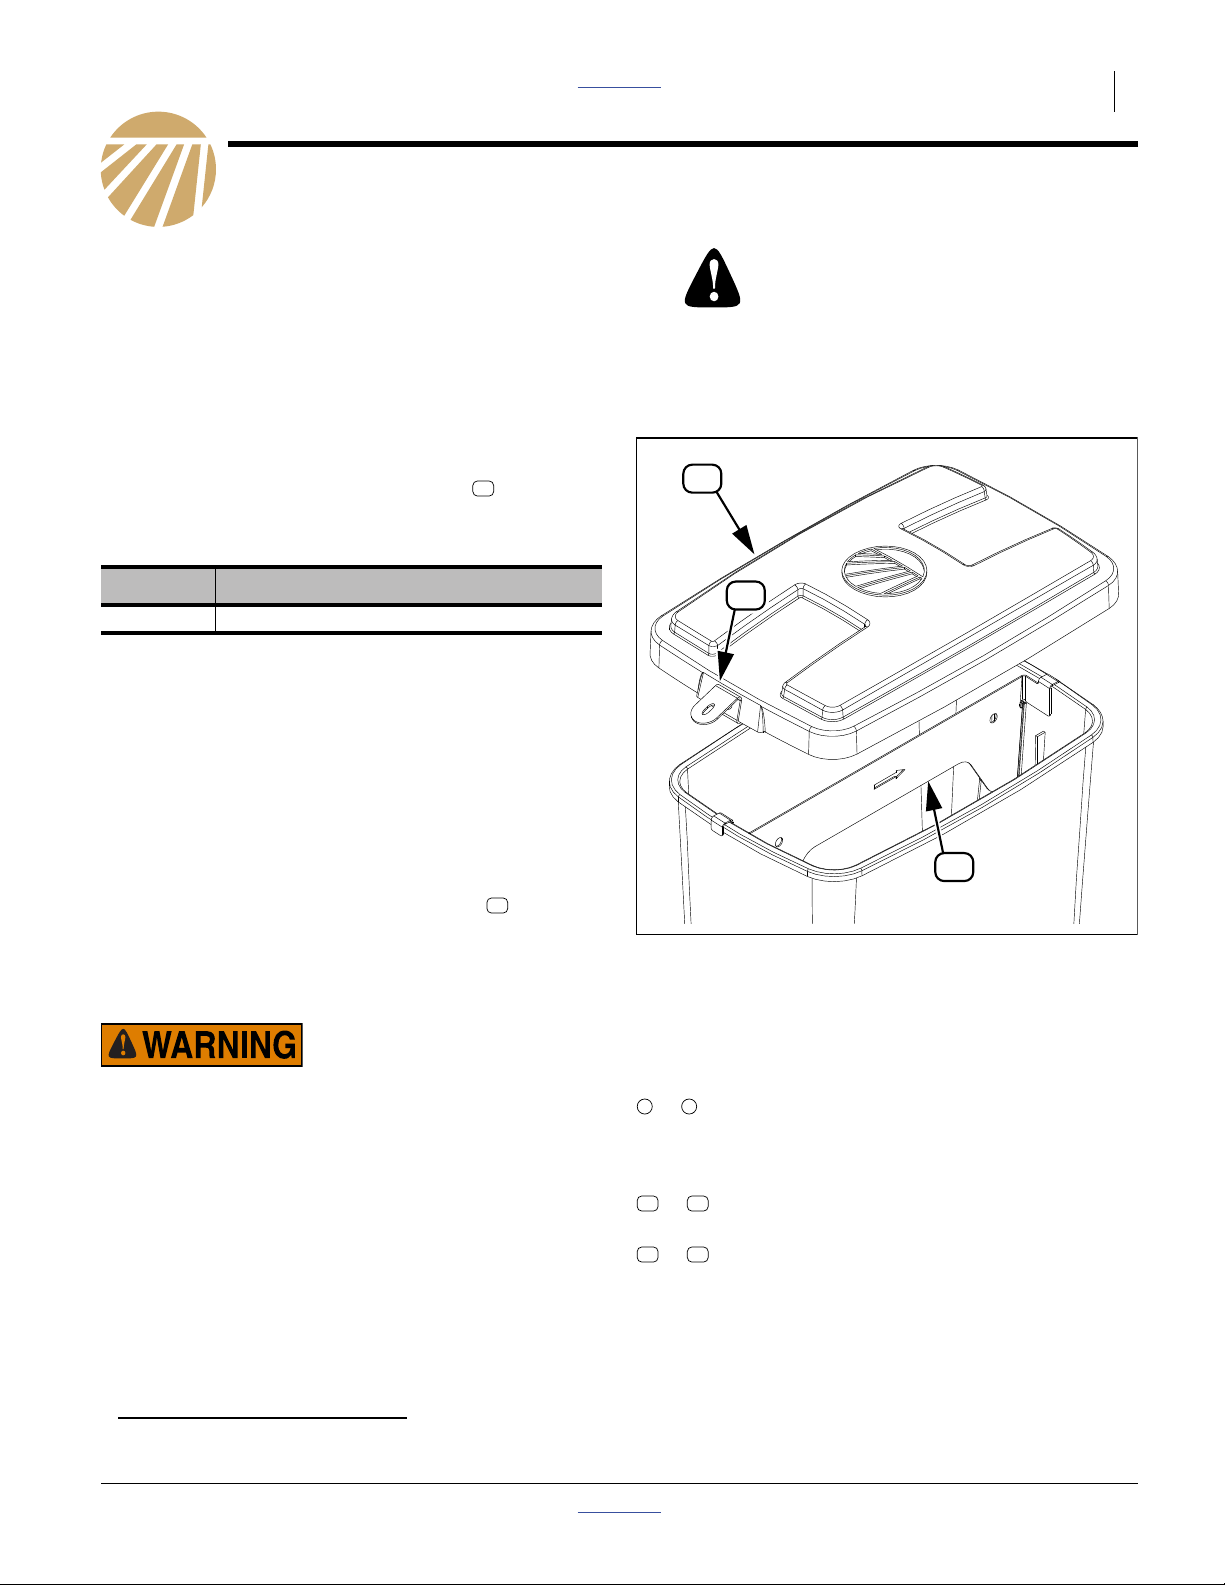
Refer to Figure 1
These instructions explain how to install a Planter
Hopper Lid Latch Kit. The kit adds a latch to the rear
of the hopper lid.
One kit updates one row unit:
12
Part Lists Great Plains Manufacturing, Inc. 1
When you see this symbol, the subsequent
instructions and warnings are serious - follow
without exception. Your life and the lives of
others depend on it!
21
Kit Kit Description
403-620A PLANTER HOPPER LID LATCH KIT
Tools Required
• basic hand tools
• drill and9⁄32inch (7.1 mm, letter size K) drill bit
• die grinder or cutoff wheel
• safety glasses and gloves
• personal protective equipment (chemical dust)
Compatibility Check
Open one lid and inspect the hopper. This kit requires
that the hopper be equipped with a stiffener . This part
is standard on new planters, and is available as an
Update for older modelsa. If your planter lacks stiffeners,
have your dealer consult Service Information Bulletin
SIB-10-XX19-P.
Possible Chemical Hazard:
Wear a dust mask and other personal protective equipment
suitable for working with seed treatments and seed lubricants
used with the hoppers. Wash the lids if a suitable location is
available. The lids are likely to be coated with chemical or
lubricant dust, which will become airborne during hole
drilling. This dust could cause medical problems ranging from
throat and lung irritation to severe illness or death.
23
12
23
Figure 1
Latch on Compatible Hopper
Notations and Conventions
Call-Outs
1 9
to Single-digit callouts identify components in
the currently referenced Figure. These
numbers may be reused for different items
from page to page.
14
11
to Two-digit callouts in the range 11 to 14
reference new parts from the list on page 3.
21 25
to Two-digit callouts in the range 21 to 25
reference existing parts.
34139
a. Implements not listed under “Used with Planter models:” may not be compatible with this kit.
© Copyright 2012 Printed 2012-04-03 Part Lists 403-621M
Page 2
2 Great Plains Manufacturing, Inc. Front Page Part Lists PLANTER HOPPER LID LATCH KIT
Remove Old Latch Tab
Refer to Figure 2
1. Remove a lid . Locate the latch end, which has a
single molded center tab . The hinge end has two
molded tabs.
Equipment Damage Risk:
Do not remove the hinge tabs, or the lid will become useless.
2. Using a cut-off wheel or die grinder, remove the
molded latch tab , leaving a flush smooth surface
on the inside of the lid rim.
21
1
21
1
1
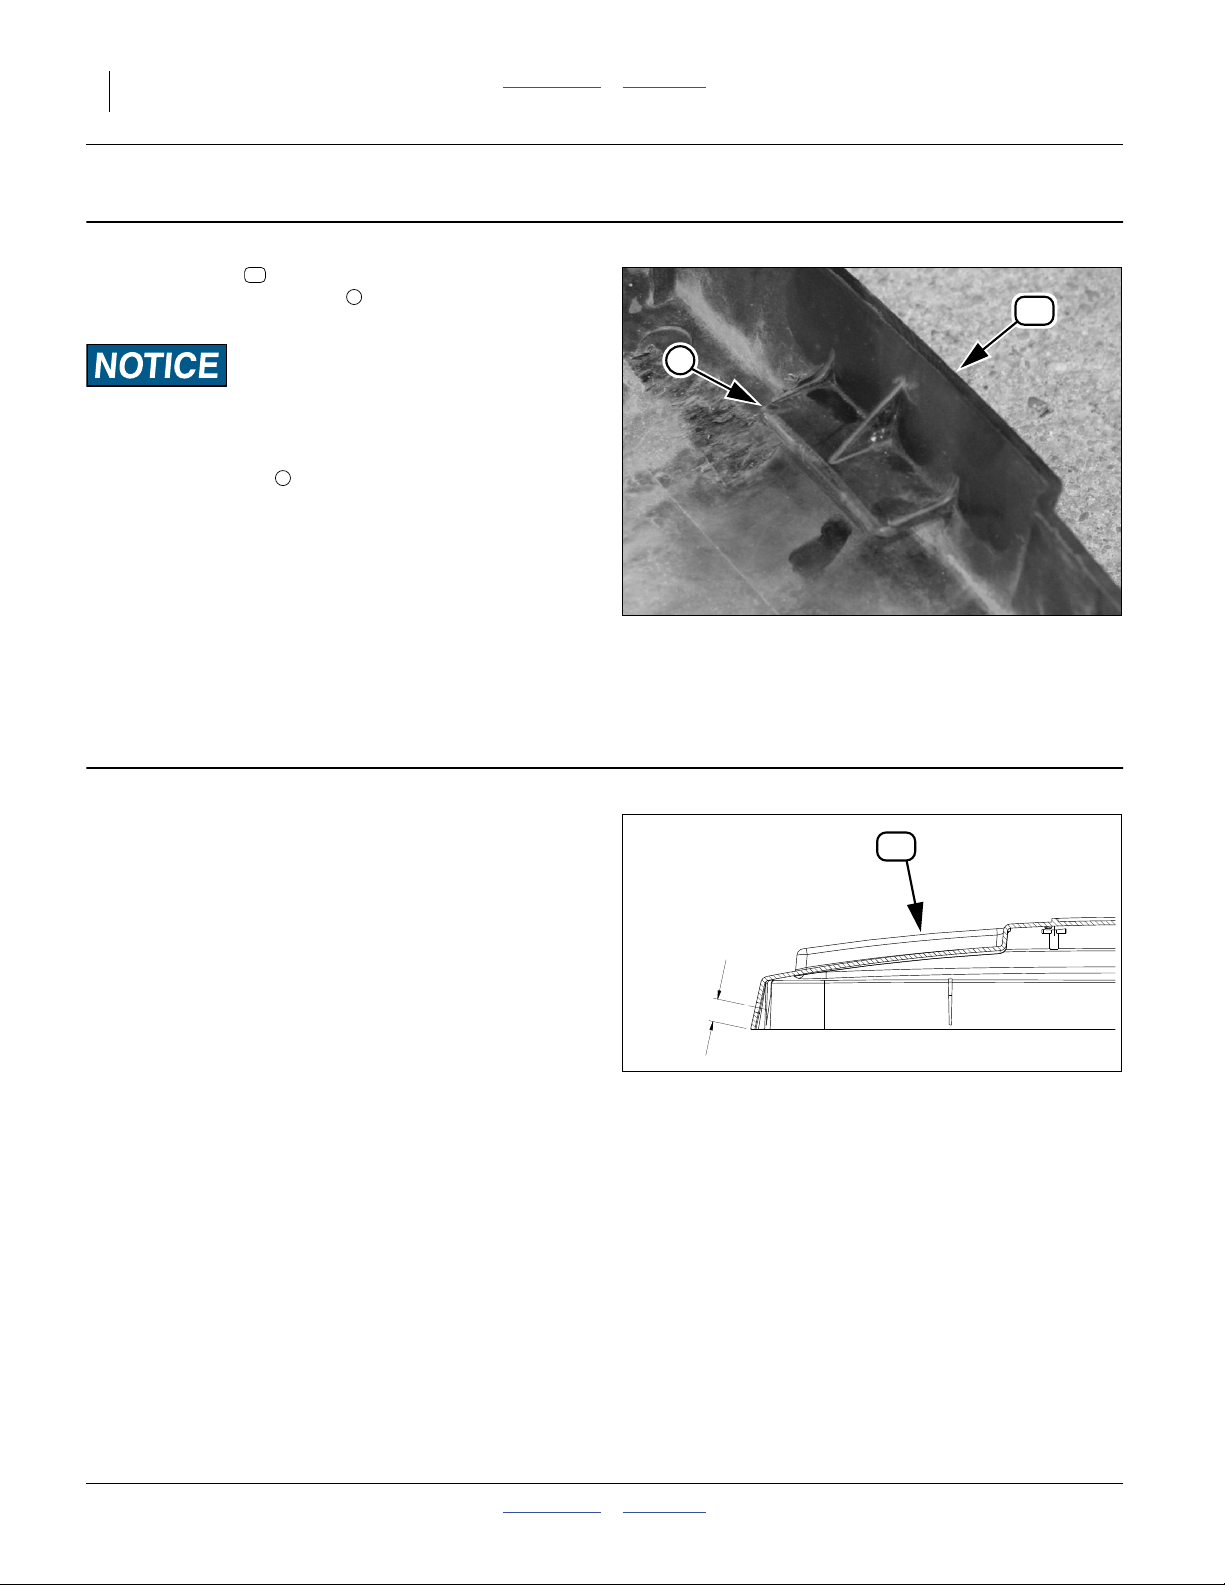
Drill Mounting Hole
Refer to Figure 3
3. At the lid end where the latch tab was removed, mark
a hole location on lid center-line, and 16.8 mm from
the bottom edge of the lid rim.
4. Drill a 7.1 mm (9⁄32inch, letter size K) hole at this
location.
16.8 mm
.661 in
21
⁄32in.
Figure 2
Remove Latch Tab
21
Figure 3
Latch Hole Location
34142
34143
403-621M Front Page Part Lists 2012-04-03
Page 3

Install New Latch Front Page Part Lists Great Plains Manufacturing, Inc. 3
Install New Latch
Refer to Figure 4
5. Select one set new:
12
403-791D LID LATCH
13
802-633C RHSNB 1/4-20X5/8 PLT
14
803-088C NUT HEX LOCK 1/4-20 FLG
Align the square hole in the latch with the new
213
hole in the lid. Insert the square neck bolt from
the outside of the lid. Secure with flanged lock
14
nut , tightened to 5.6 foot-pounds (7.4 N-m).
6. Re-install the lid on the hopper.
12
14
2
12
13
Figure 4
Install New Latch
Appendix
Part Lists
New Parts
The part call-out numbers in this list match all Figures in
these installation instructions. Part descriptions match
those in your updated Parts Manual.
Kit Contents
403-620A PLANTER HOPPER LID LATCH KIT
Callout Quantity Part Number Part Description
11 1 403-621M MANUAL LID LATCH KIT
12 1 403-791D LID LATCH
13 1 802-633C RHSNB 1/4-20X5/8 PLT
14 1 803-088C NUT HEX LOCK 1/4-20 FLG
Quantities are units (“ea”).
34141
2012-04-03 Front Page Part Lists 403-621M
Page 4

4 Great Plains Manufacturing, Inc. Front Page Part Lists PLANTER HOPPER LID LATCH KIT
Great Plains Manufacturing, Inc.
Corporate Office P.O. Box 5060
Salina, Kansas 67402-5060 USA
403-621M Front Page Part Lists 2012-04-03
 Loading...