

Page 1
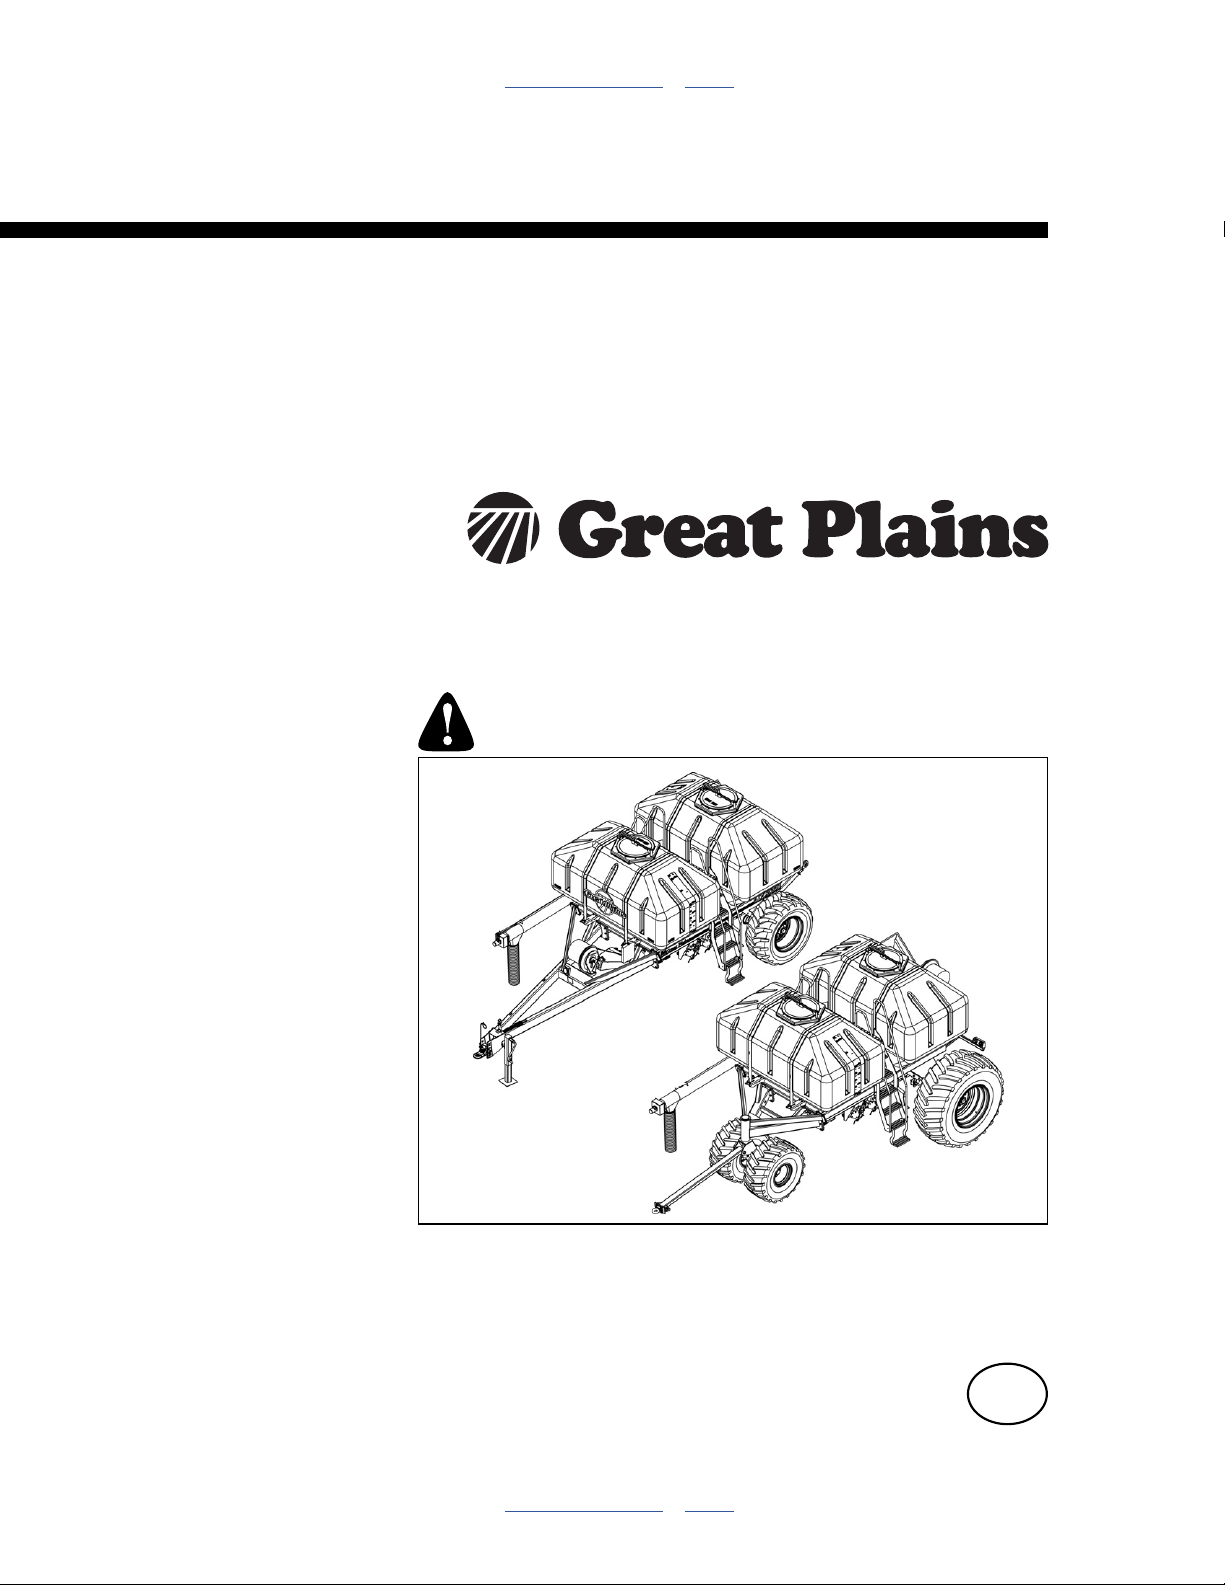
Table of Contents Index
Operator Manual
ADC2350, ADC2350E,
ADC2350B and ADC2350BE
Air Drill Carts
Manufacturing, Inc.
www.greatplainsmfg.com
Read the operator manual entirely. When you see this symbol, the
subsequent instructions and warnings are serious - follow without
exception. Your life and the lives of others depend on it!
27116
Illustrations may show implement and optional equipment not supplied with standard
unit or may depict similar ADC2220 carts where a topic is identical.
ORIGINAL INSTRUCTIONS
© Copyright 2012 Printed 2012-08-01 167-085M
Table of Contents Index
EN
Page 2

Table of Contents Index
Table of Contents Index
Page 3

Great Plains Manufacturing, Inc. Cover Index iii
Table of Contents
Important Safety Information ......................................1
Safety Decals .................................................................6
Introduction ................................................................15
Air Cart Document Family ............................................15
Description of Unit ........................................................ 15
Intended Usage ........................................................16
Using This Manual........................................................16
Definitions................................................................. 16
Owner Assistance ........................................................17
Preparation and Setup ............................................... 18
Pre-Setup Checklist......................................................18
Installing Seed Monitor Terminal..................................18
Cart Drive System ........................................................19
Cart Sprocket Setup .................................................19
Hitching ........................................................................20
ADC2350/E Hitching.................................................20
ADC2350B/BE Hitching............................................ 20
ADC2350/E “Pull Between” Hitching ........................21
Hitching ADC2350/E to Tractor ............................21
Make ADC2350/E Seed Hose Connections .........22
Make ADC2350/E Electrical Connections ............23
Make ADC2350/E Hydraulic Connections............24
Fan Priority ...........................................................24
ADC2350/E Hydraulic Hookup .............................24
Fan Priority ...........................................................25
Sump First and Last .............................................25
ADC2350/E Hydraulic Hookup .............................25
Hitching ADC2350B/BE to Leading Drill................... 26
Make ADC2350B/BE Seed Hose Connections ....26
Make ADC2350B/BE Electrical Connections .......27
Make ADC2350B/BE Hydraulic Connections .......27
Fan Priority ...........................................................27
Set Up the Implement............................................... 28
ADC2350B/BE Older Style Hoses With Color Ties ..
28
Fan Priority ...........................................................28
Setup Seed Monitor for Air Drill....................................29
Row Setup Data .......................................................29
Row Spacing and Swath ......................................29
CTA4000 Air Drill Implement ................................29
CTA4000HD Air Drill Implement...........................29
NTA3010 Air Drill Implement ................................30
NTA3510 Air Drill Implement................................ 30
3N-4010HDA Air Drill Implement ......................... 30
Operating Instructions .............................................. 31
General Description ..................................................... 31
Pre-Start Checklist ....................................................... 31
Walkboard Ladders...................................................... 32
Ladder Operation ..................................................... 32
Removing the Right Ladder ..................................... 32
Hopper Lids.................................................................. 33
Lid Opening.............................................................. 33
Lid Closing ............................................................... 33
Strainer..................................................................... 34
Meter Doors ................................................................. 35
Meter Door Opening................................................. 35
Meter Door Closing .................................................. 35
Meter Hand Crank........................................................ 36
Installing Crank ........................................................ 36
Operating the Hand Crank ....................................... 36
Drive Chain Lockout..................................................... 37
Locking Out for Transport ........................................ 37
Disengaging Lockout................................................ 37
Auger Operations......................................................... 38
Deploying Auger....................................................... 38
Auger Hydraulic Controls ......................................... 39
Diverter Valve....................................................... 39
Auger Direction Valve .......................................... 39
Storing Auger ........................................................... 40
Auger Swing Arm ..................................................... 40
Transport...................................................................... 41
Minimum Towing Vehicle ......................................... 41
Pre-Transport Checklist ........................................... 43
Monitor Material Configuration..................................... 43
Loading Material .......................................................... 44
Cart Diverter Valve................................................... 45
Unloading the Cart ....................................................... 47
Unloading Front Hopper........................................... 49
Unloading Rear Hopper ........................................... 50
Unloading Closeout.................................................. 52
Field Operations........................................................... 53
Single Hopper Operation.......................................... 53
Fan Speed................................................................ 53
Final Field Checklist ................................................. 54
© Copyright 2006, 2007, 2008, 2009, 2012 All rights Reserved
Great Plains Manufacturing, Inc. provides this publication “as is” without warranty of any kind, either expressed or implied. While every precaution has been
taken in the preparation of this manual, Great Plains Manufacturing, Inc. assumes no responsibility for errors or omissions. Neither is any liability assumed for
damages resulting from the use of the information contained herein. Great Plains Manufacturing, Inc. reserves the right to revise and improve its products as
it sees fit. This publication describes the state of this product at the time of its publication, and may not reflect the product in the future.
2012-08-01 Cover Index 167-085M
Trademarks of Great Plains Manufacturing, Inc. include: Singulator Plus, Swath Command, Terra-Tine.
Registered Trademarks of Great Plains Manufacturing, Inc. include:
Air-Pro, Clear-Shot, Discovator, Great Plains, Land Pride, MeterCone, Nutri-Pro, Seed-Lok, Solid Stand,
Terra-Guard, Turbo-Chisel, Turbo-Chopper, Turbo Max, Turbo-Till, Ultra-Till, Ver ti-Till, Whirlfilter, Yield-Pro.
Brand and Product Names that appear and are owned by others are trademarks of their respective owners.
Printed in the United States of America
Page 4

iv ADC2350/E and ADC2350B/BE Table of Contents Index Great Plains Manufacturing, Inc.
Planting Sequence................................................... 54
Planting .................................................................... 54
Parking......................................................................... 54
Storage ........................................................................ 55
Adjustments ............................................................... 56
Setting Material Rates.................................................. 56
Check Drive System ................................................ 56
Check Flute Shaft Type ........................................... 57
Find Your Chart and Rate ........................................ 58
Target Rate Adjustments ..................................... 58
Monitor Material Configuration................................. 58
Meter Rate Adjustment ............................................ 60
Seed Meter Final Drive Range............................. 61
Setting Variable Rate Gearbox ............................ 61
Meter Calibration.................................................. 62
Calibration Procedure .......................................... 62
Changing Meter Flutes................................................. 66
Fan Speed Adjustment ................................................ 68
Hydraulic Fan Start-Up ............................................ 68
Recommended Fan Speeds ................................ 68
Implement Lift Switch Adjustment................................ 69
CTA4000 and CTA4000HD Lift Switch .................... 69
NTA3010 and NTA3510 Lift Switch ......................... 69
3N-4010HDA Lift Switch .......................................... 69
Clutch Lock-Up ............................................................ 70
Troubleshooting......................................................... 71
Maintenance and Lubrication....................................74
Chain Slack ..................................................................75
Hub Chain.................................................................75
Clutch Input Chain ....................................................75
Gearbox Input Chains...............................................76
Chain Maintenance...................................................76
Problem Clean-Outs .....................................................77
Removing Meter Box ................................................77
Hopper Entry ................................................................78
Lubrication and Scheduled Maintenance .....................80
Options ........................................................................84
Appendix .....................................................................87
Specifications and Capacities.......................................87
Tire Inflation Chart ........................................................87
Torque Values Chart ....................................................88
Chain Routing...............................................................89
Hydraulic Diagrams ......................................................90
ADC2350/E Hydraulic Diagram (S/N A1157T-) ........90
ADC2350/E Hydraulic Circuits..................................90
ADC2350/E Hydraulic Circuits..................................91
ADC2350/E Hydraulic Fan (S/N A1157T-) ...............92
ADC2350B/BE Hydraulic Diagram (S/N A1157T-) ...94
ADC2350B/BE Hydraulic Fan (S/N A1157T-)...........96
Warranty .......................................................................98
Index ............................................................................99
167-085M Table of Contents Index 2012-08-01
Page 5

Great Plains Manufacturing, Inc. Table of Contents Index Important Safety Information 1
Important Safety Information
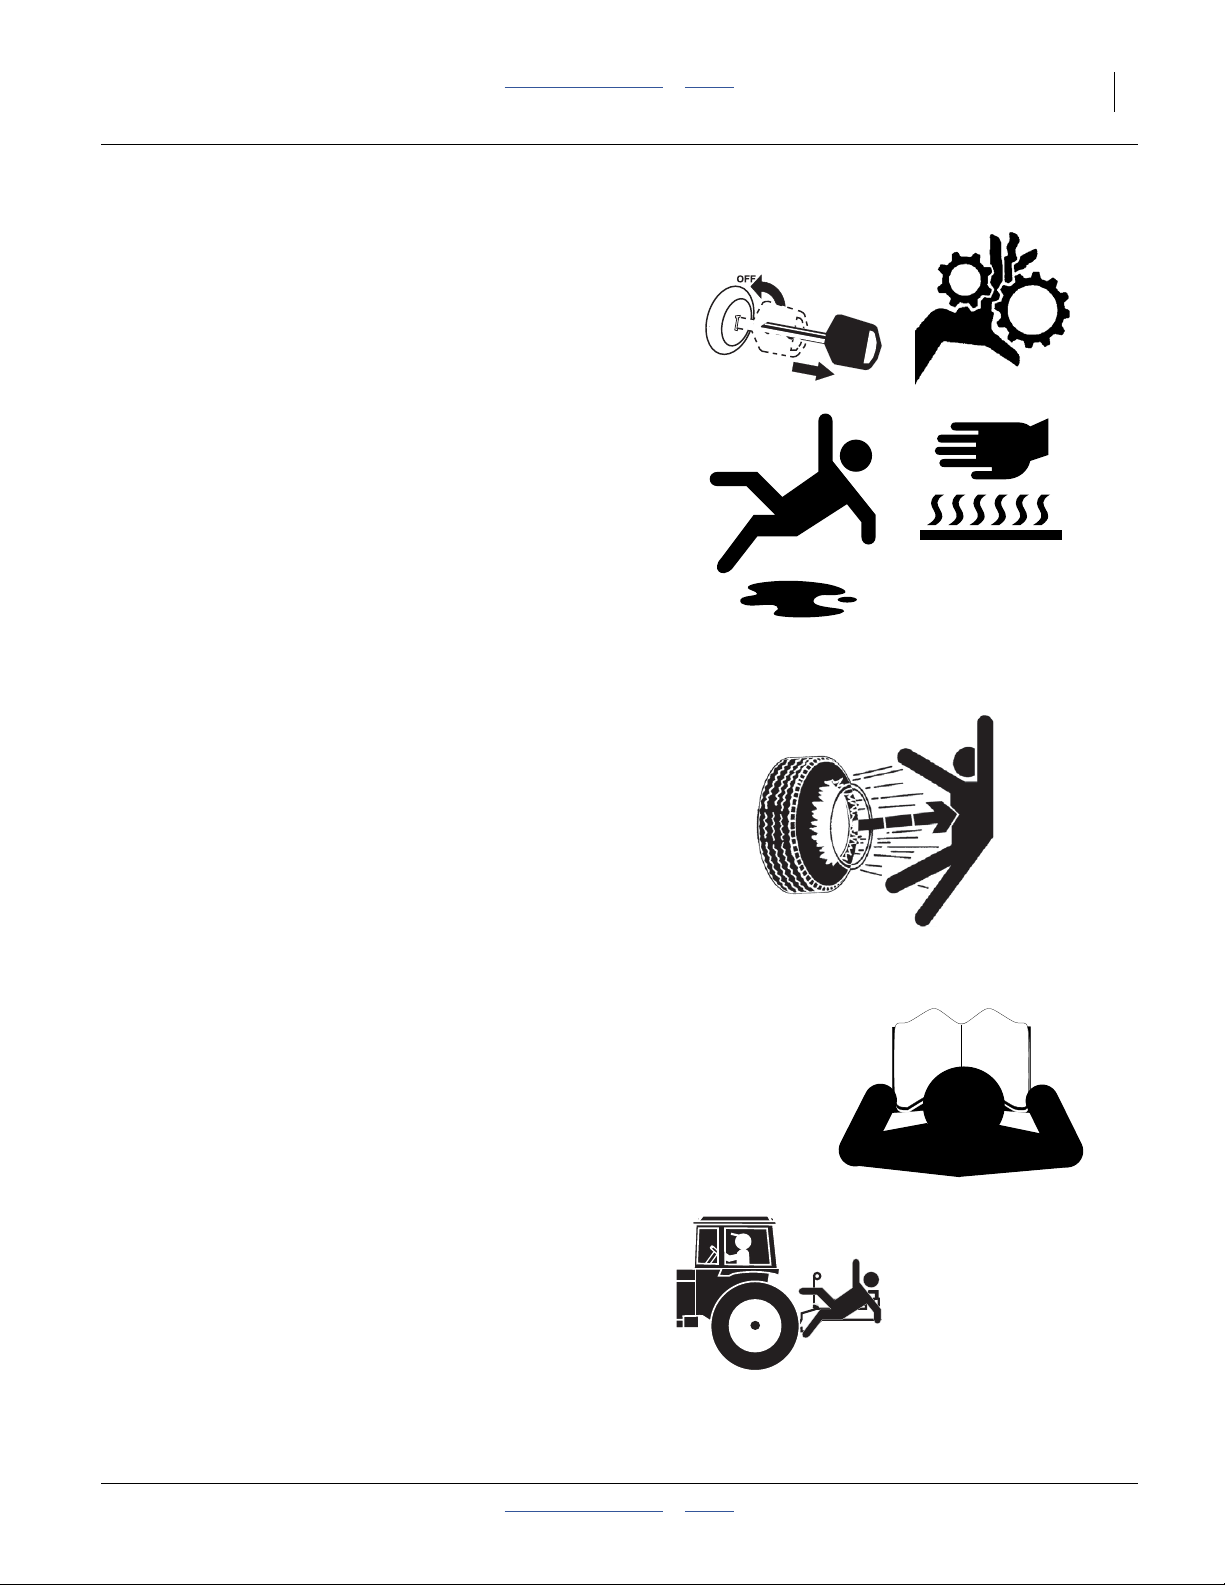
Look for Safety Symbol
The SAFETY ALERT SYMBOL indicates there is a
potential hazard to personal safety involved and extra
safety precaution must be taken. When you see this
symbol, be alert and carefully read the message that
follows it. In addition to design and configuration of
equipment, hazard control and accident prevention are
dependent upon the awareness, concern, prudence and
proper training of personnel involved in the operation,
transport, maintenance and storage of equipment.
Be Aware of Signal Words
Signal words designate a degree or level of hazard
seriousness.
DANGER indicates an imminently hazardous situation
which, if not avoided, will result in death or serious injury.
This signal word is limited to the most extreme situations,
typically for machine components that, for functional
purposes, cannot be guarded.
WARNING indicates a potentially hazardous situation
which, if not avoided, could result in death or serious
injury, and includes hazards that are exposed when
guards are removed. It may also be used to alert against
unsafe practices.
CAUTION indicates a potentially hazardous situation
which, if not avoided, may result in minor or moderate
injury. It may also be used to alert against unsafe
practices.
Prepare for Emergencies
▲ Be prepared if a fire starts
▲ Keep a first aid kit and fire extinguisher handy.
▲ Keep emergency numbers for doctor, ambulance, hospital
and fire department near phone.
Be Familiar with Safety Decals
▲ Read and understand “Safety Decals” on page 6,
thoroughly.
▲ Read all instructions noted on the decals.
▲ Keep decals clean. Replace damaged, faded and illegible
decals.
2012-08-01 Table of Contents Index 167-085M
Page 6
2 ADC2350/E and ADC2350B/BE Table of Contents Index Great Plains Manufacturing, Inc.
Avoid High Pressure Fluids
Escaping fluid under pressure can penetrate the skin,
causing serious injury.
▲ Avoid the hazard by relieving pressure before disconnecting
hydraulic lines.
▲ Use a piece of paper or cardboard, NOT BODY PARTS, to
check for suspected leaks.
▲ Wear protective gloves and safety glasses or goggles when
working with hydraulic systems.
▲ If an accident occurs, seek immediate medical attention
from a health care provider familiar with this type of injury.
Use A Safety Chain
▲ Use a safety chain to help control drawn machinery should
it separate from tractor drawbar.
▲ Use a chain with a strength rating equal to or greater than
the gross weight of towed machinery.
▲ Attach chain to tractor drawbar support or other specified
anchor location. Allow only enough slack in chain to permit
turning.
▲ Replace chain if any links or end fittings are broken,
stretched or damaged.
▲ Do not use safety chain for towing.
Keep Riders Off Machinery
Riders obstruct the operator’s view. Riders could be
struck by foreign objects or thrown from the machine.
▲ Never allow children to operate equipment.
▲ Keep all bystanders away from machine during operation.
Use Safety Lights and Devices
Slow-moving tractors and towed implements can create
a hazard when driven on public roads. They are difficult
to see, especially at night.
▲ Use flashing warning lights and turn signals whenever
driving on public roads.
▲ Use lights and devices provided with air cart and drill.
167-085M Table of Contents Index 2012-08-01
Page 7
Great Plains Manufacturing, Inc. Table of Contents Index Important Safety Information 3
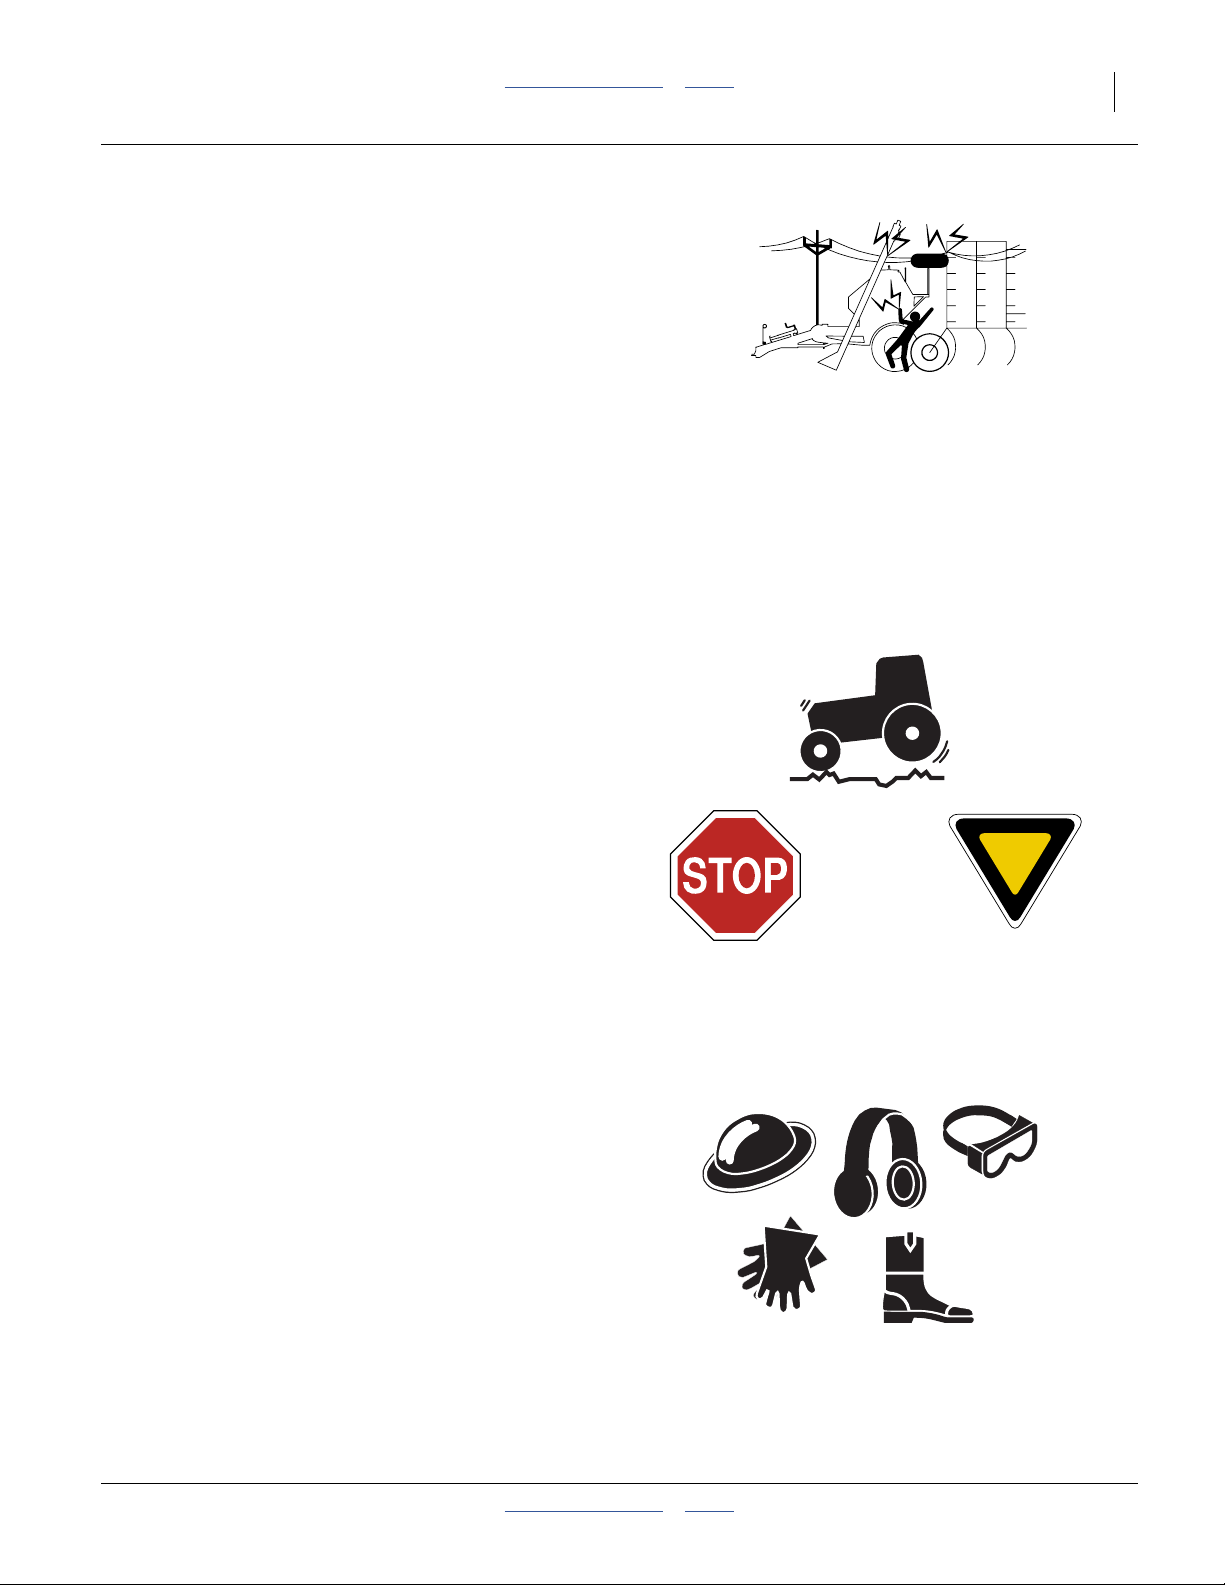
Check for Overhead Lines
Seed auger or drill markers contacting overhead
electrical lines can introduce lethal voltage levels on air
cart, drill and tractor frames. A person touching almost
any metal part can complete the circuit to ground,
resulting in serious injury or death. At higher voltages,
electrocution can occur without direct contact.
▲ Avoid overhead lines during seed loading, unloading and
marker operations.
Transport Machinery Safely
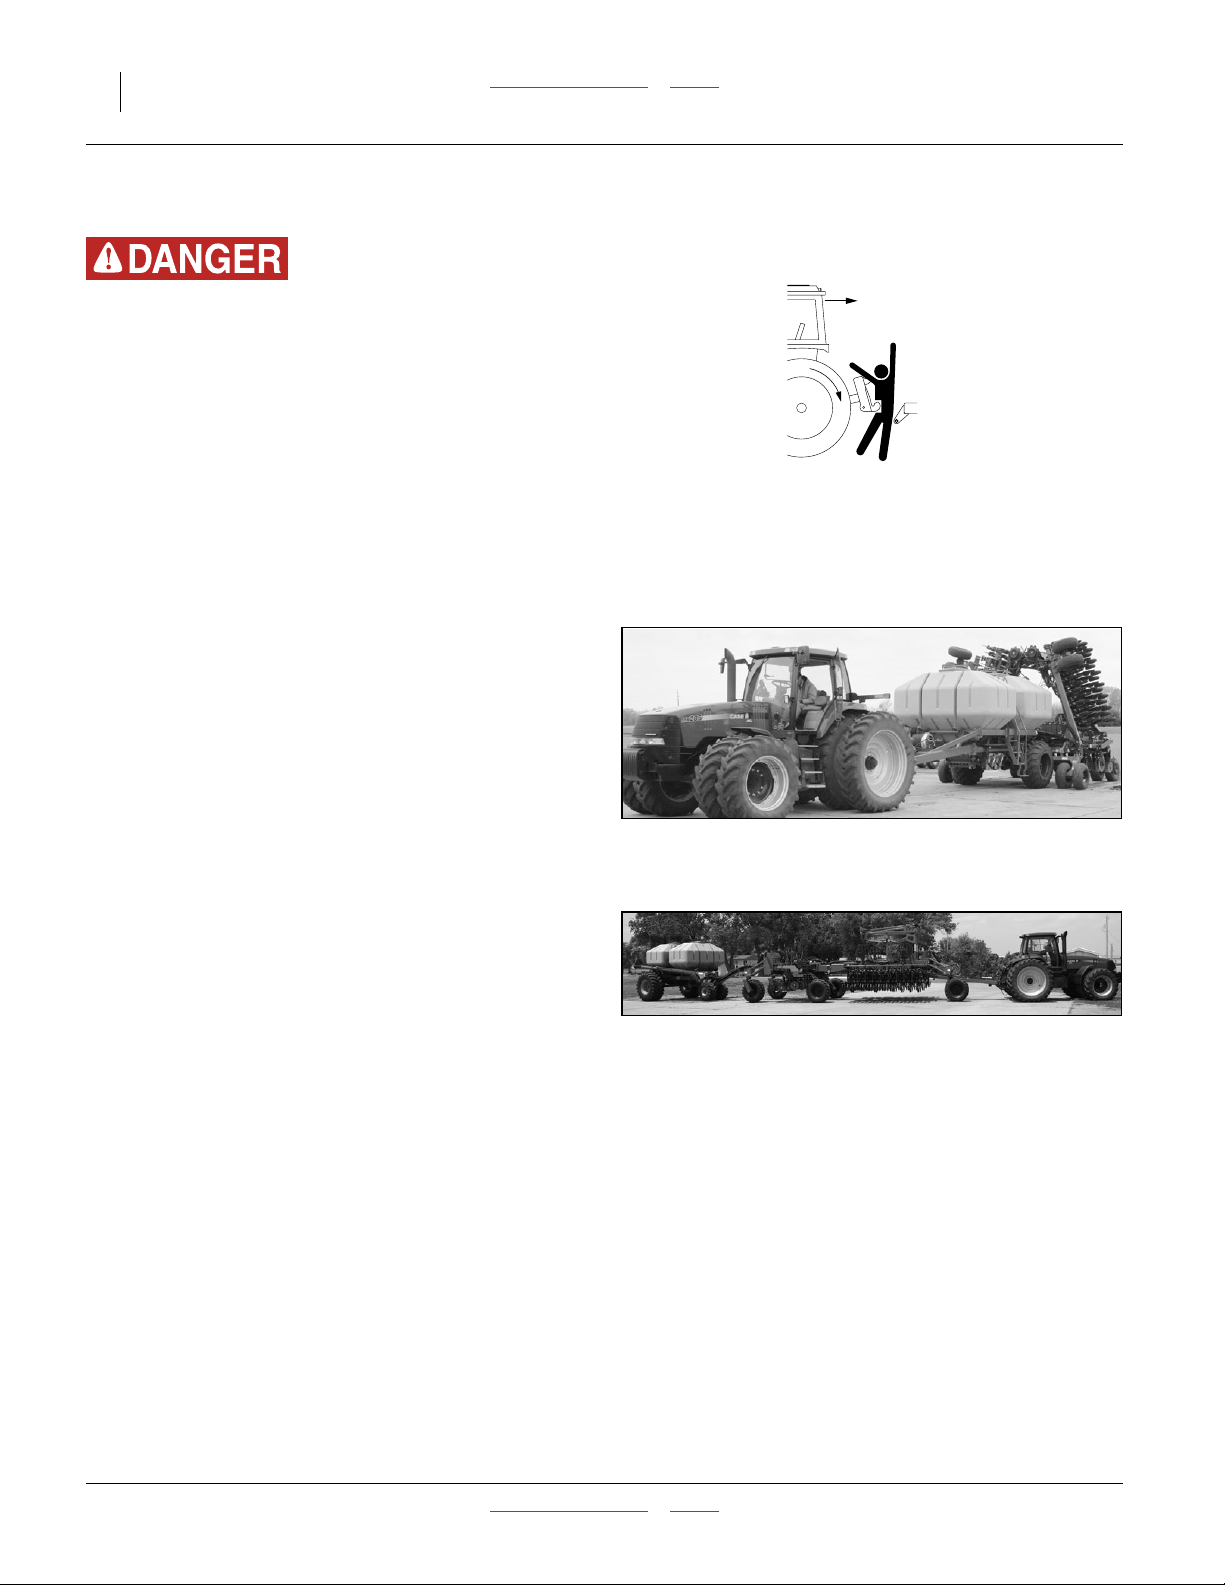
Maximum transport speed for air cart is 20 mph
(32 km/h). Some rough terrains require a slower speed.
Sudden braking can cause a towed load to swerve and
upset.
▲ Latch auger.
▲ Do not tow a load that weighs more than 1.5 times the
weight of the tractor.
▲ Do not exceed 20 mph (32 km/h). Never travel at a speed
which does not allow adequate control of steering and
stopping. Reduce speed if towed load is not equipped with
brakes.
▲ Comply with national, regional and local laws.
▲ Follow your tractor manual recommendations for maximum
hitch loads. Insufficient weight on tractor steering wheels
will result in loss of control.
▲ Carry reflectors or flags to mark air cart and drill in case of
breakdown on the road.
▲ Keep clear of overhead power lines and other obstructions
when transporting. Refer to transport dimensions under
“Specifications and Capacities” on page 87.
Wear Protective Equipment
▲ Wear protective clothing and equipment.
▲ Wear clothing and equipment appropriate for the job. Avoid
loose-fitting clothing.
▲ Because prolonged exposure to loud noise can cause
hearing impairment or hearing loss, wear suitable hearing
protection such as earmuffs or earplugs.
▲ Because operating equipment safely requires your full
attention, avoid wearing entertainment headphones while
operating machinery.
2012-08-01 Table of Contents Index 167-085M
Page 8
4 ADC2350/E and ADC2350B/BE Table of Contents Index Great Plains Manufacturing, Inc.
Handle Chemicals Properly
Agricultural chemicals can be dangerous. Improper use
can seriously injure persons, animals, plants, soil and
property.
▲ Do not use liquid treatments with air cart.
▲ Read and follow chemical manufacturer’s instructions.
▲ Wear protective clothing.
▲ Handle all chemicals with care.
▲ Avoid inhaling smoke from any type of chemical fire.
▲ Never drain, rinse or wash dispensers within 100 feet of a
freshwater source, nor at a car wash.
▲ Store or dispose of unused chemicals as specified by
chemical manufacturer.
▲ Dispose of empty chemical containers properly. Laws
generally require power rinsing or rinsing three times,
followed by perforation of the container to prevent re-use.
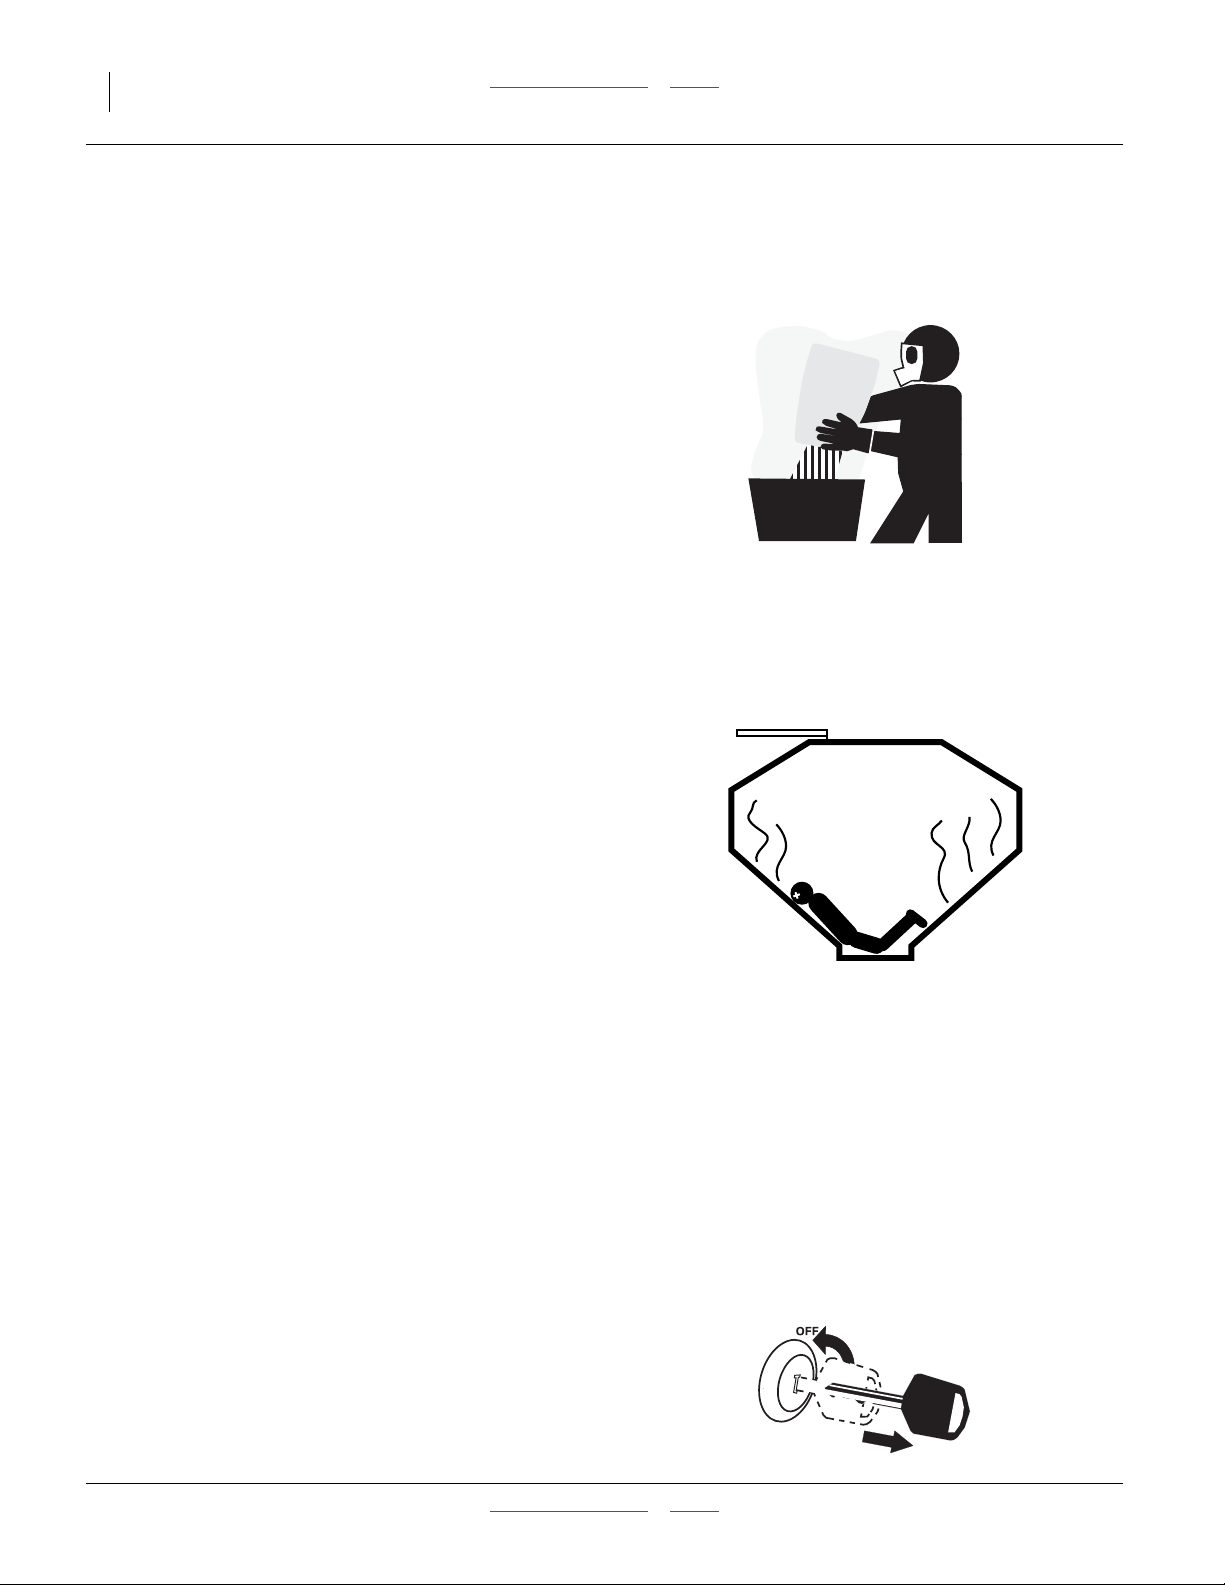
Confined Space
Once used for hazardous fertilizers, or seeds with
hazardous treatments, your hoppers may become
“permit-required confined spaces”
under applicable statutes, regulations, insurance rules or
business policy. The ladder provided in the hoppers is for
escape, not routine entry.
▲ A hopper that is full or merely appears full can be an
entrapment hazard. You can sink entirely into the grain, or
into a void, and suffocate in a matter of seconds. Grain
bridges and crusts are especially dangerous.
▲ When hazardous fumes are present, you can be quickly
overcome even with the hopper lid open.
▲ Do not enter a hopper for material loading, material
unloading, hopper cleaning or meter maintenance.
▲ Clean hopper by power washing from outside hopper top.
▲ Perform meter maintenance by removing meters from
bottom of empty hopper.
▲ If obstruction removal or repair requires hopper entry, have
the work performed by a team trained in confined space
procedures. See “Hopper Entry” on page 78.
Shutdown and Storage
▲ Clean out and safely store or dispose of residual chemicals.
▲ Secure air cart using blocks and the stand provided.
▲ Store in an area where children normally do not play.
167-085M Table of Contents Index 2012-08-01
Page 9
Great Plains Manufacturing, Inc. Table of Contents Index Important Safety Information 5
Practice Safe Maintenance
▲ Understand procedure before doing work. Use proper tools
and equipment. Refer to this manual for additional
information.
▲ Work in a clean, dry area.
▲ Put tractor in park, turn off engine, and remove key before
performing maintenance.
▲ Make sure all moving parts have stopped and all system
pressure is relieved.
▲ Disconnect battery ground cable (-) before servicing or
adjusting electrical systems or before welding on cart.
▲ Inspect all parts. Make sure parts are in good condition and
installed properly.
▲ Remove buildup of grease, oil or debris.
▲ Remove all tools and unused parts from drill before
operation.
Tire Safety
Tire changing can be dangerous and should be
performed by trained personnel using correct tools and
equipment.
▲ When inflating tires, use a clip-on chuck and extension hose
long enough for you to stand to one side–not in front of or
over tire assembly. Use a safety cage if available.
▲ When removing and installing wheels, use wheel-handling
equipment adequate for weight involved.
Safety At All Times
Thoroughly read and understand the instructions in this
manual before operation. Read all instructions noted on
the safety decals.
▲ Be familiar with all air cart and drill functions.
▲ Operate machinery from the driver’s seat only.
▲ Do not leave air cart unattended with tractor engine
running.
▲ Do not dismount a moving tractor. Dismounting a moving
tractor could cause serious injury or death.
▲ Do not stand between the tractor and air cart during
hitching.
▲ Keep hands, feet and clothing away from power-driven
parts.
▲ Wear snug-fitting clothing to avoid entanglement with
moving parts.
2012-08-01 Table of Contents Index 167-085M
Page 10
6 ADC2350/E and ADC2350B/BE Table of Contents Index Great Plains Manufacturing, Inc.
Safety Decals
Safety Reflectors and Decals
Your air cart comes equipped with all lights, safety
reflectors and decals in place. They were designed to
help you safely operate your air cart.
▲ Read and follow decal directions.
▲ Keep lights in operating condition.
▲ Keep all safety decals clean and legible.
▲ Replace all damaged or missing decals. Order new decals
from your Great Plains dealer. Refer to this section for
proper decal placement.
▲ When ordering new parts or components, also request
corresponding safety decals.
To install new decals:
1. Clean the area on which the decal is to be placed.
2. Peel backing from decal. Press firmly on surface,
being careful not to cause air bubbles under decal.
818-055C
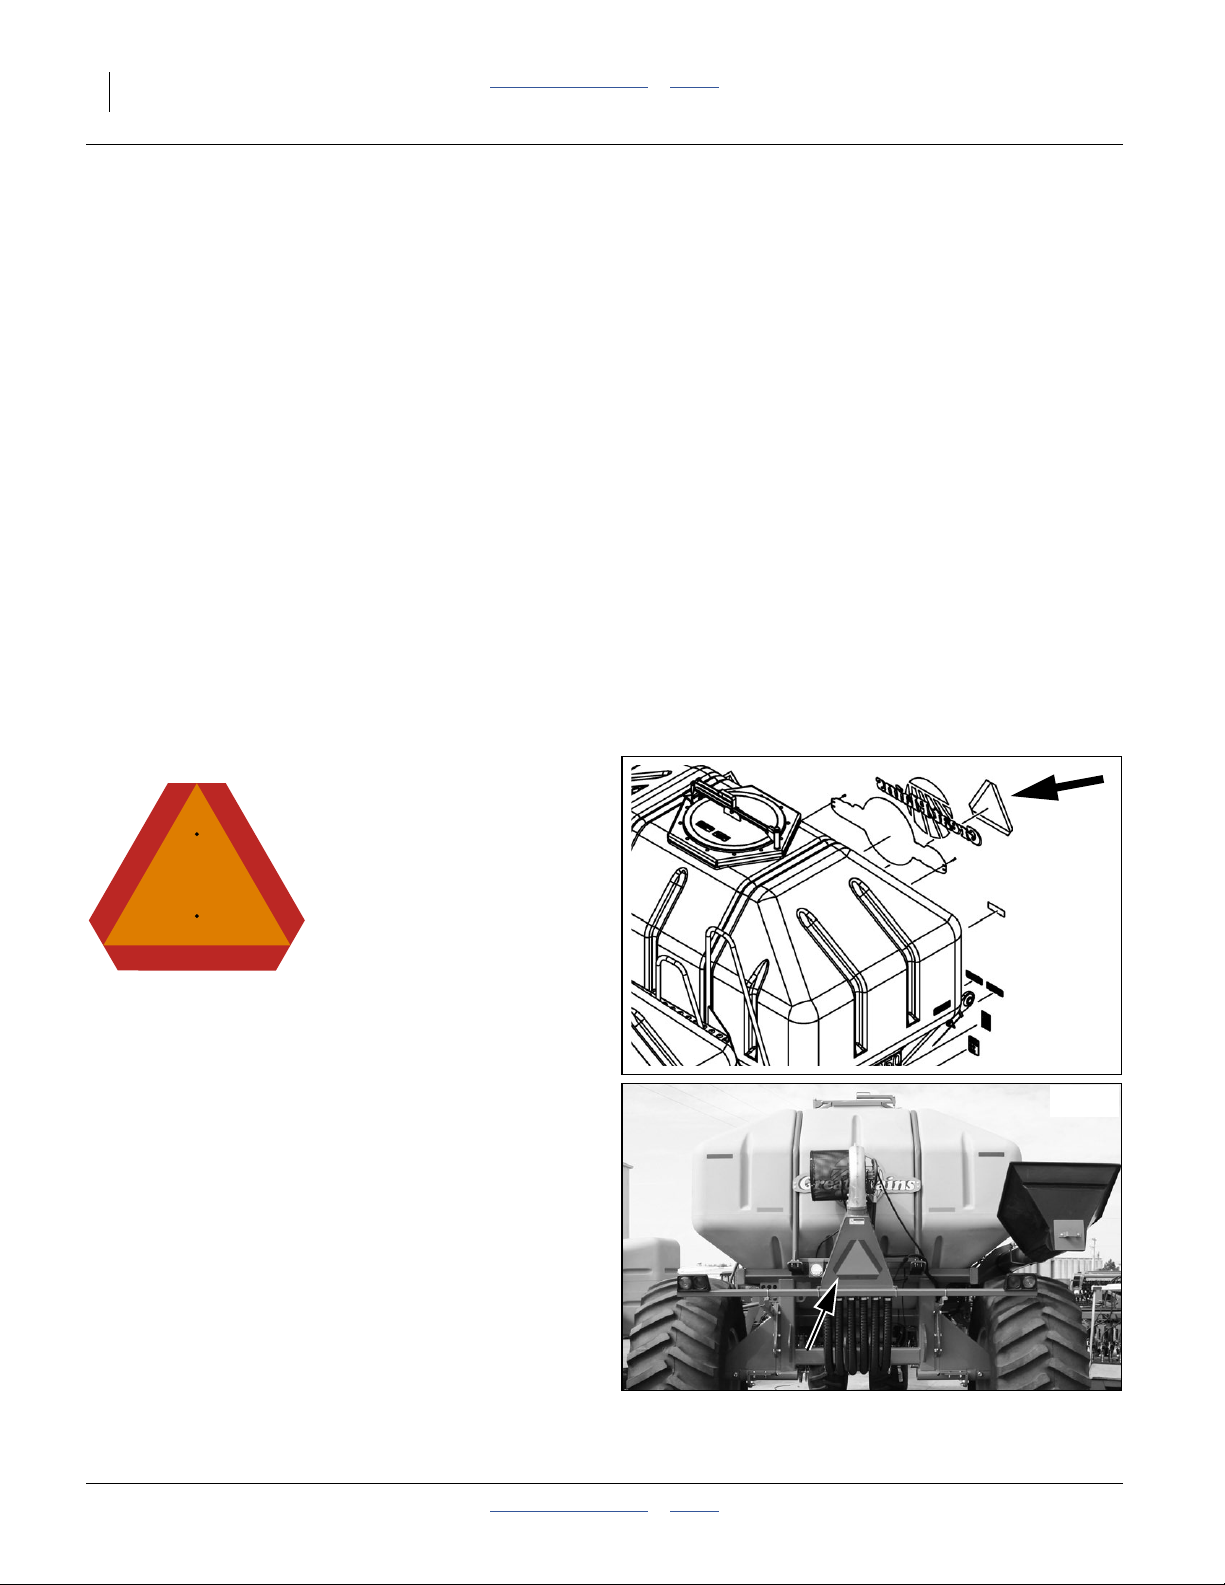
Slow Moving Vehicle Reflector
ADC2350/E: On the back of the aft hopper, frame center;
1 total
ADC2350B/BE: On the back face of the fan air manifold;
1 total
26255
29194
167-085M Table of Contents Index 2012-08-01
Page 11
Great Plains Manufacturing, Inc. Table of Contents Index Important Safety Information 7
838-266C
Red Reflectors
ADC2350/E: On the outside corners of aft hopper frame;
2 total
26255
27194
ADC2350B/BE: On rear face of rear hopper, top outside
corners;
2 total
838-265C
Amber Reflectors
Front and outside leading corner of front hopper,
outside rear corner of rear hopper;
6 total
26455
2012-08-01 Table of Contents Index 167-085M
Page 12
8 ADC2350/E and ADC2350B/BE Table of Contents Index Great Plains Manufacturing, Inc.
838-267C
Daytime Reflectors
ADC2350/E: On the outside corners of aft hopper
frame,
just inside red reflectors;
2 total
25255
27194
ADC2350B/BE: On the rear face of the rear hopper,
lower edge just outside hold-down straps;
2 total
818-557C
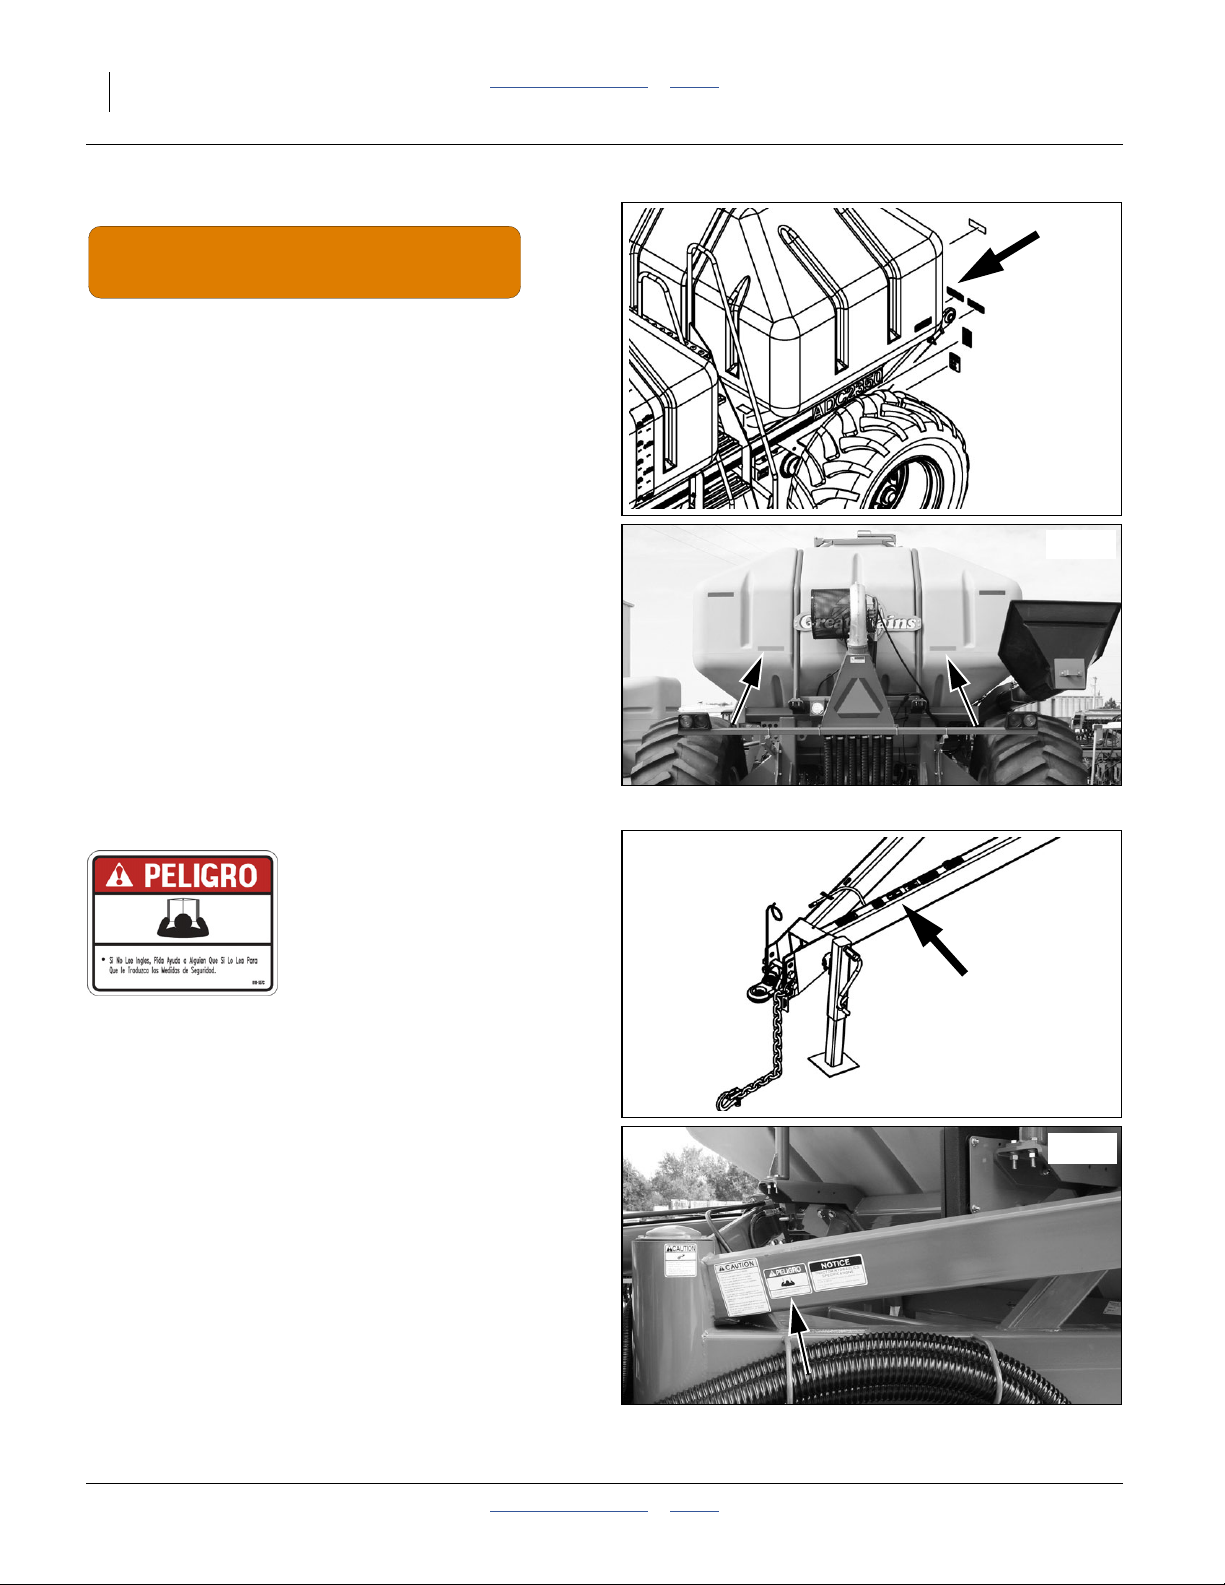
Danger: Cannot Read English
ADC2350/E: On top of left draw bar near hitch,
1 total
26255
27195
ADC2350B/BE: On side of left frame near caster pivot,
1 total
167-085M Table of Contents Index 2012-08-01
Page 13
Great Plains Manufacturing, Inc. Table of Contents Index Important Safety Information 9
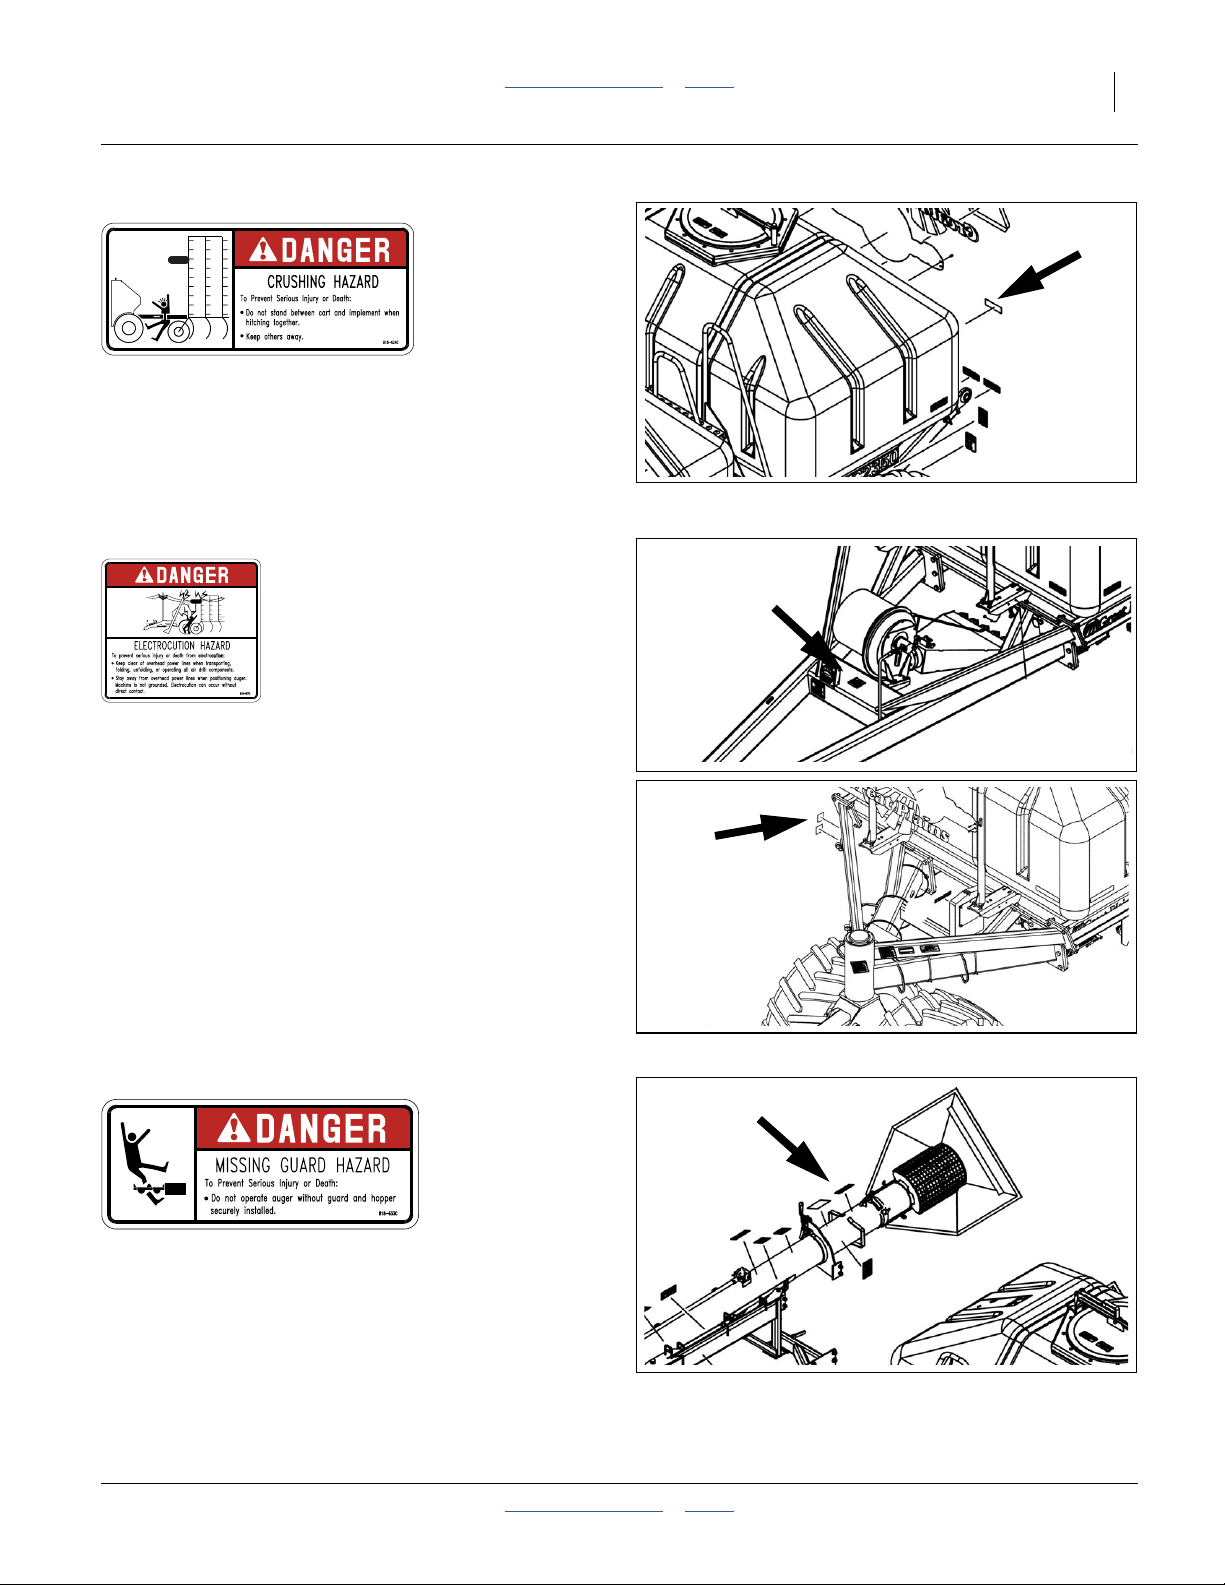
818-624C
Danger: Hitch Crushing Hazard
ADC2350/E: On the left vertical beam at rear hitch,
ADC2350/E: On the tongue at front hitch,
(not present on ADC2350B/BE);
2 total
26255
818-627C
Danger: Electrocution Hazard
ADC2350/E: On the crossbar aft of hitch,
1 total
ADC2350B/BE: On the right side, outside face of front
frame;
2 total
818-633C
Danger: Missing Guard Hazard
On the auger tube near inlet,
1 total
26255
27076
26255
2012-08-01 Table of Contents Index 167-085M
Page 14
10 ADC2350/E and ADC2350B/BE Table of Contents Index Great Plains Manufacturing, Inc.
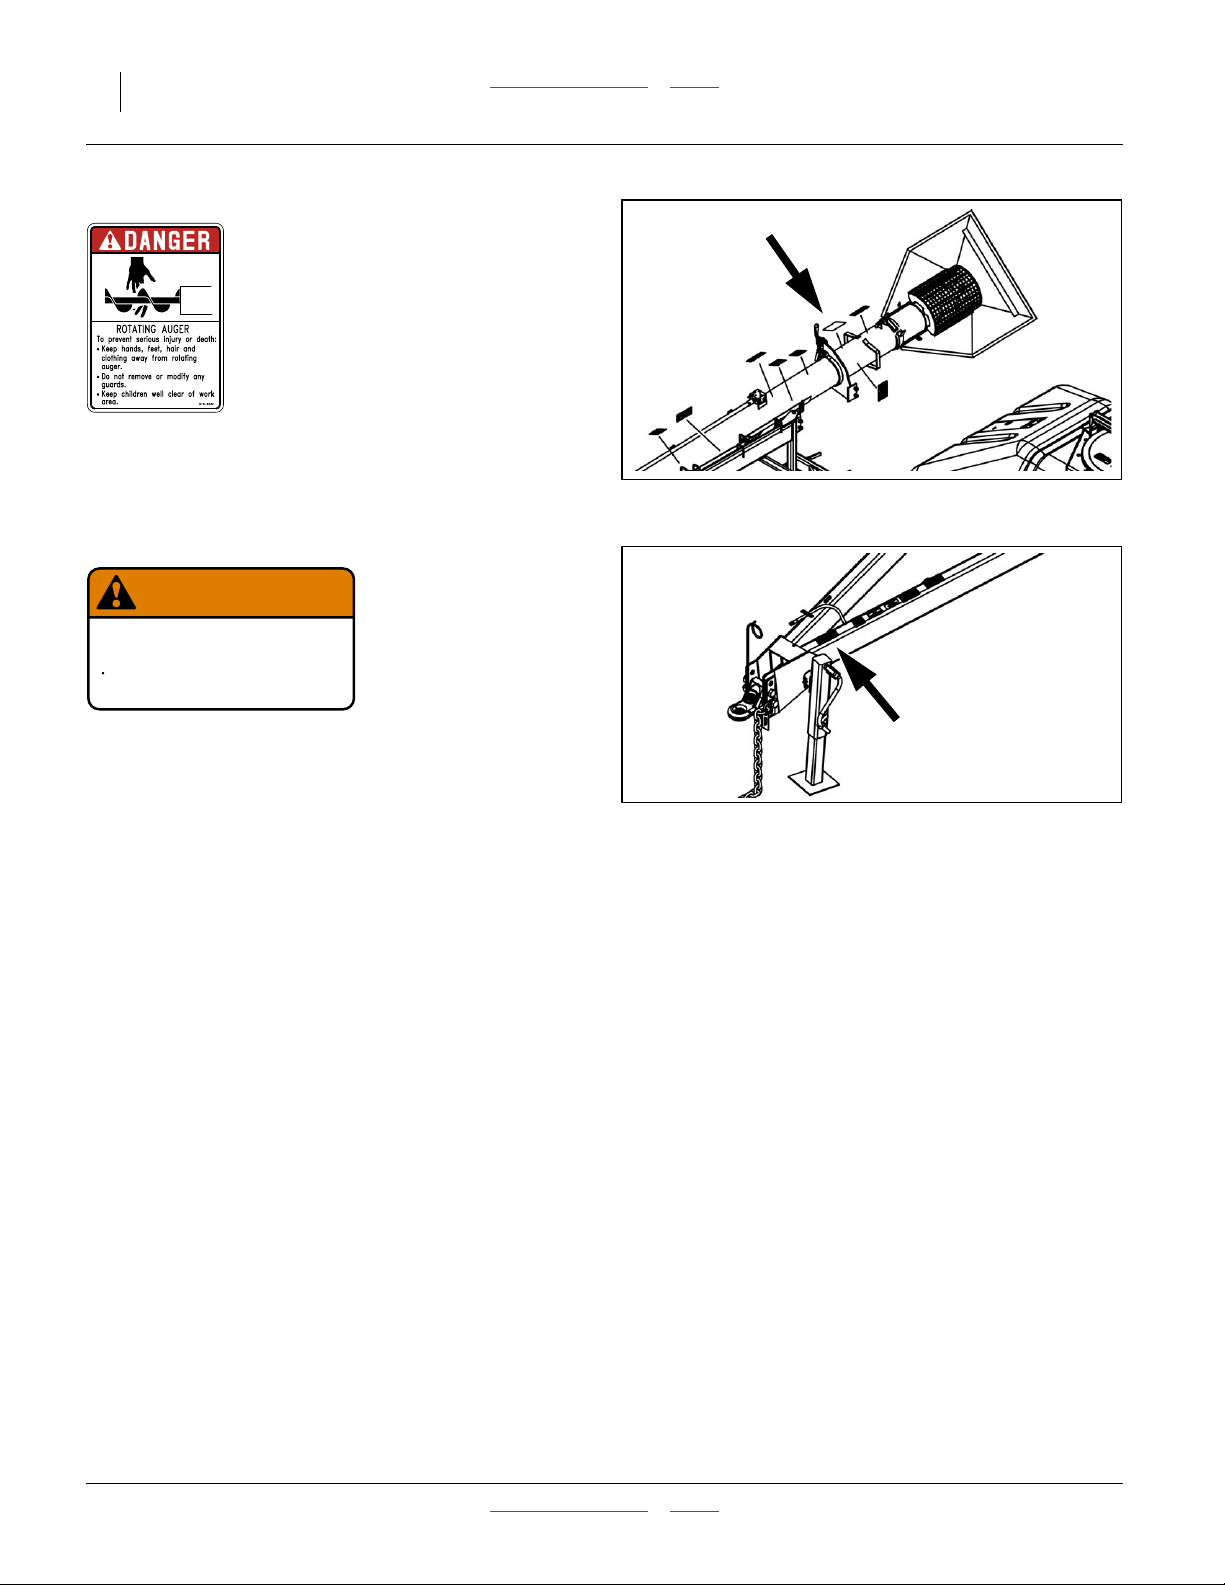
818-634C
26255
Danger: Rotating Auger
On the auger tube near inlet,
1 total
818-188C
WARNING
EXCESSIVE SPEED HAZARD
To Prevent Serious Injury or Death:
Do Not exceed 20 mph maximum transport
speed. Loss of vehicle control and/or machine
can result.
Warning: Excessive Speed
Both Models: On top of tongue at hitch;
1 total
818 188C Rev C
167-085M Table of Contents Index 2012-08-01
Page 15

Great Plains Manufacturing, Inc. Table of Contents Index Important Safety Information 11
818-339C
Warning: High Pressure Fluid Hazard
At hydraulic connection panel (ADC2350/E only),
on hitch right drawbar (ADC2350/E only),
on frame below selector valve (ADC2350B/BE only),
on seed auger near hand-hold;
3 total
26455
26455
26255
818-622C
Warning: Overhead Auger Hazard
On auger near each end,
1 total
27076
26255
2012-08-01 Table of Contents Index 167-085M
Page 16
12 ADC2350/E and ADC2350B/BE Table of Contents Index Great Plains Manufacturing, Inc.
818-623C
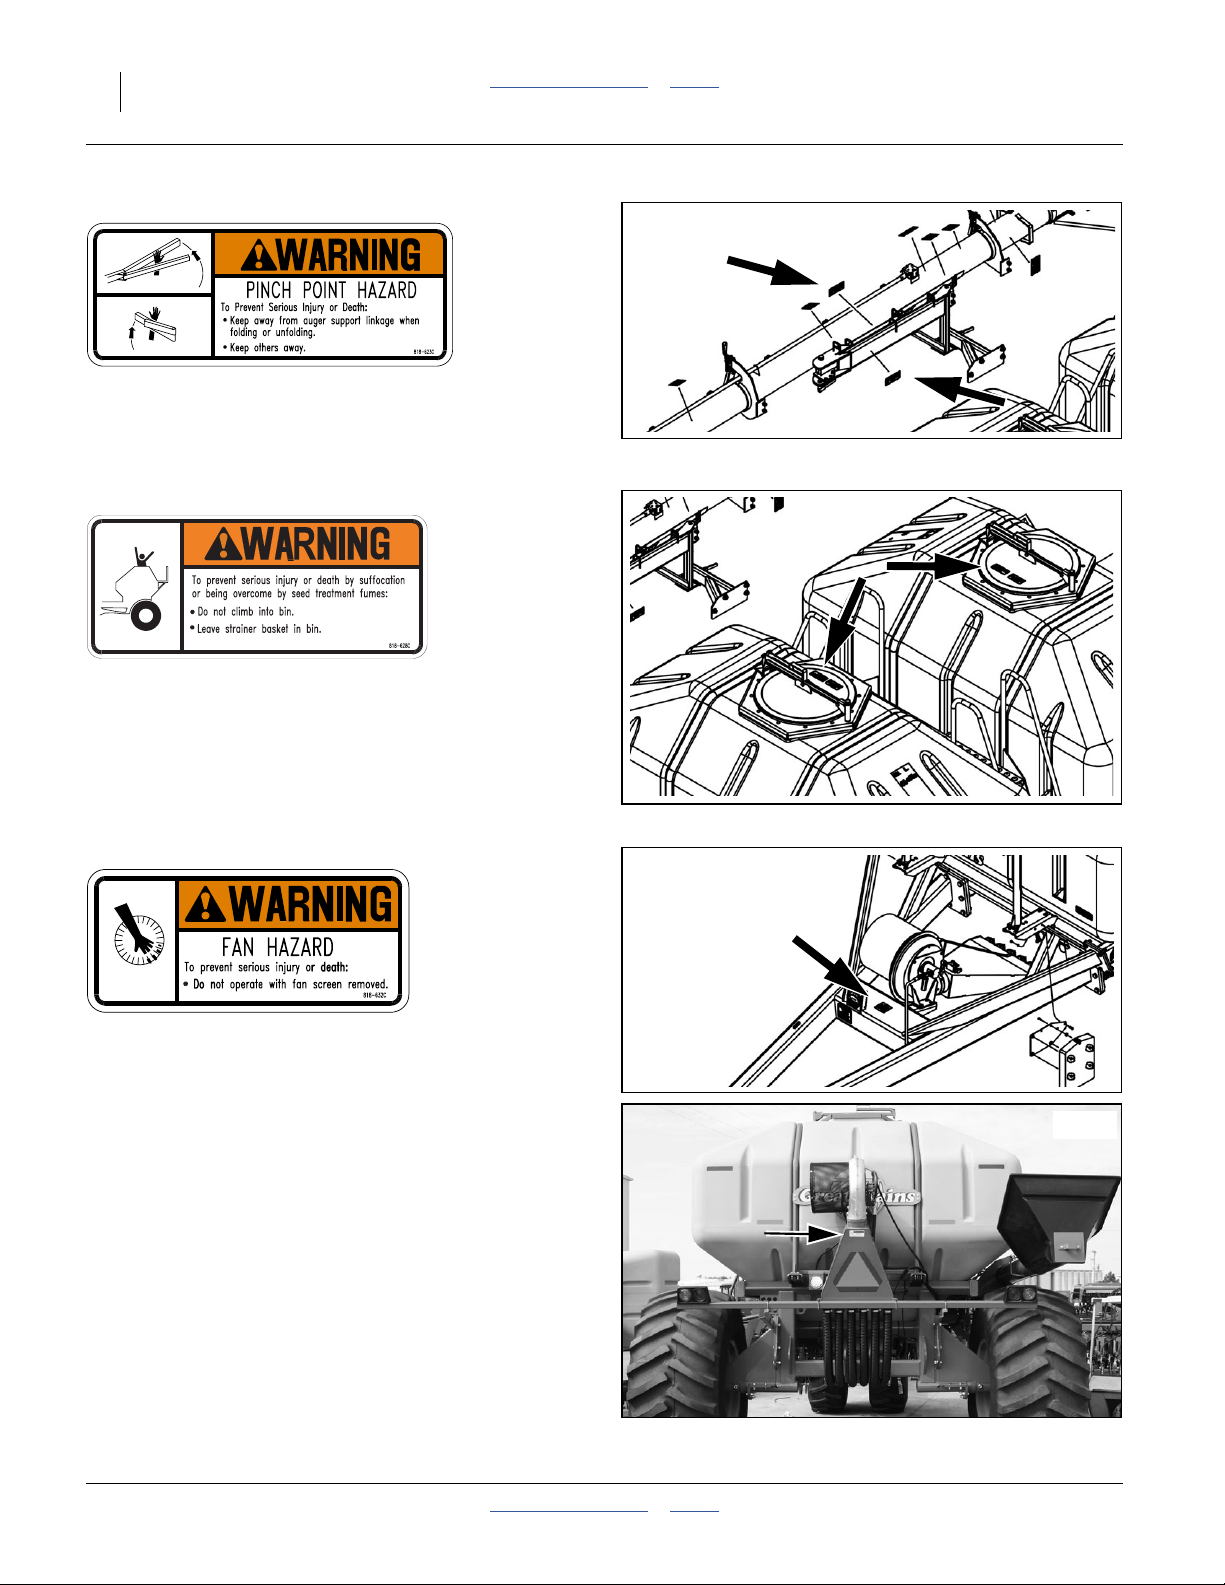
Warning: Pinch Point Hazard
On both sides of auger swing arm;
2 total
818-628C
Warning: Confined Space
On lid, walkboard side, each hopper;
2 total
818-632C
26255
26255
Warning: Fan Hazard
ADC2350/E: On the cross brace at fan,
1 total
ADC2350B/BE: On the back face of the fan air
manifold;
1 total
167-085M Table of Contents Index 2012-08-01
26255
27194
Page 17
Great Plains Manufacturing, Inc. Table of Contents Index Important Safety Information 13
818-398C
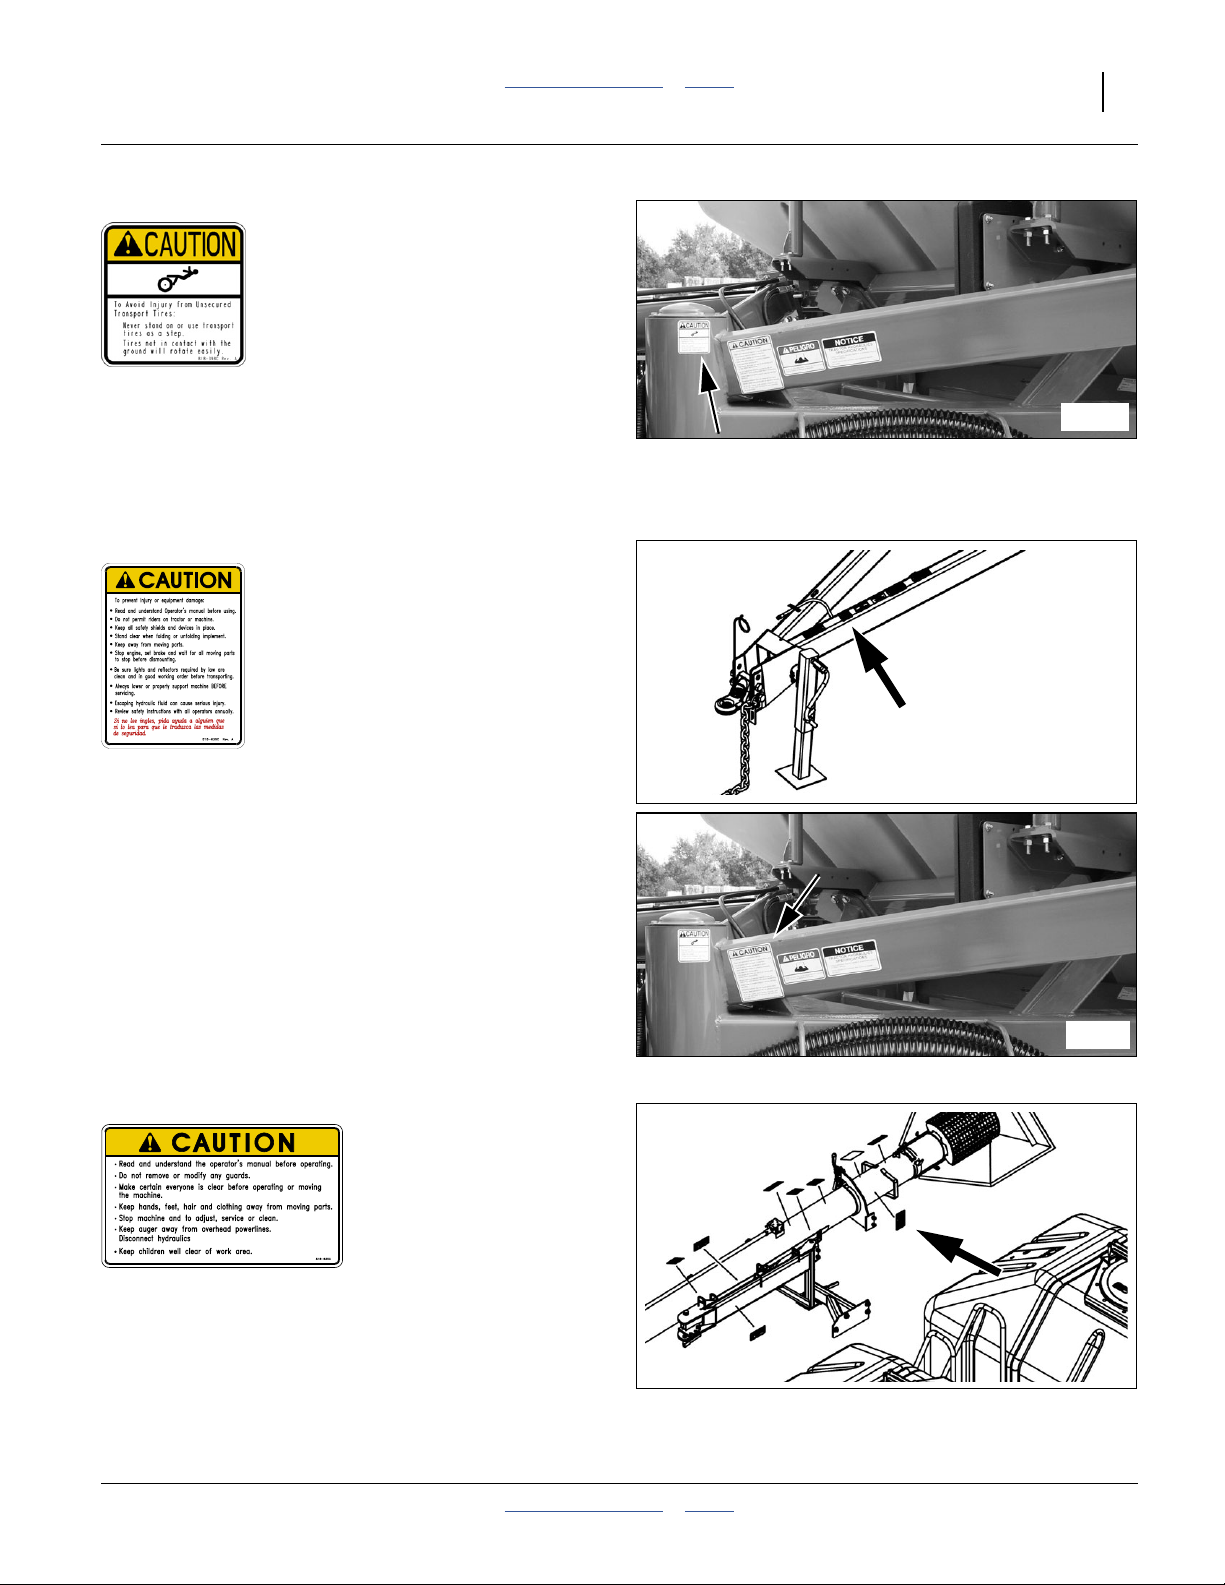
Caution: Tires Not A Step
ADC2350B/BE:On top left face of caster pivot,
(not present on ADC2350B/BE)
1 total
818-630C
Caution: General
ADC2350/E: On the main tool bar at hitch;
1 total
ADC2350B/BE: On outside face, front right frame;
1 total
27195
26255
27195
818-635C
26255
Caution: Auger General
On discharge end of auger:
1 total
2012-08-01 Table of Contents Index 167-085M
Page 18
14 ADC2350/E and ADC2350B/BE Table of Contents Index Great Plains Manufacturing, Inc.
848-102C
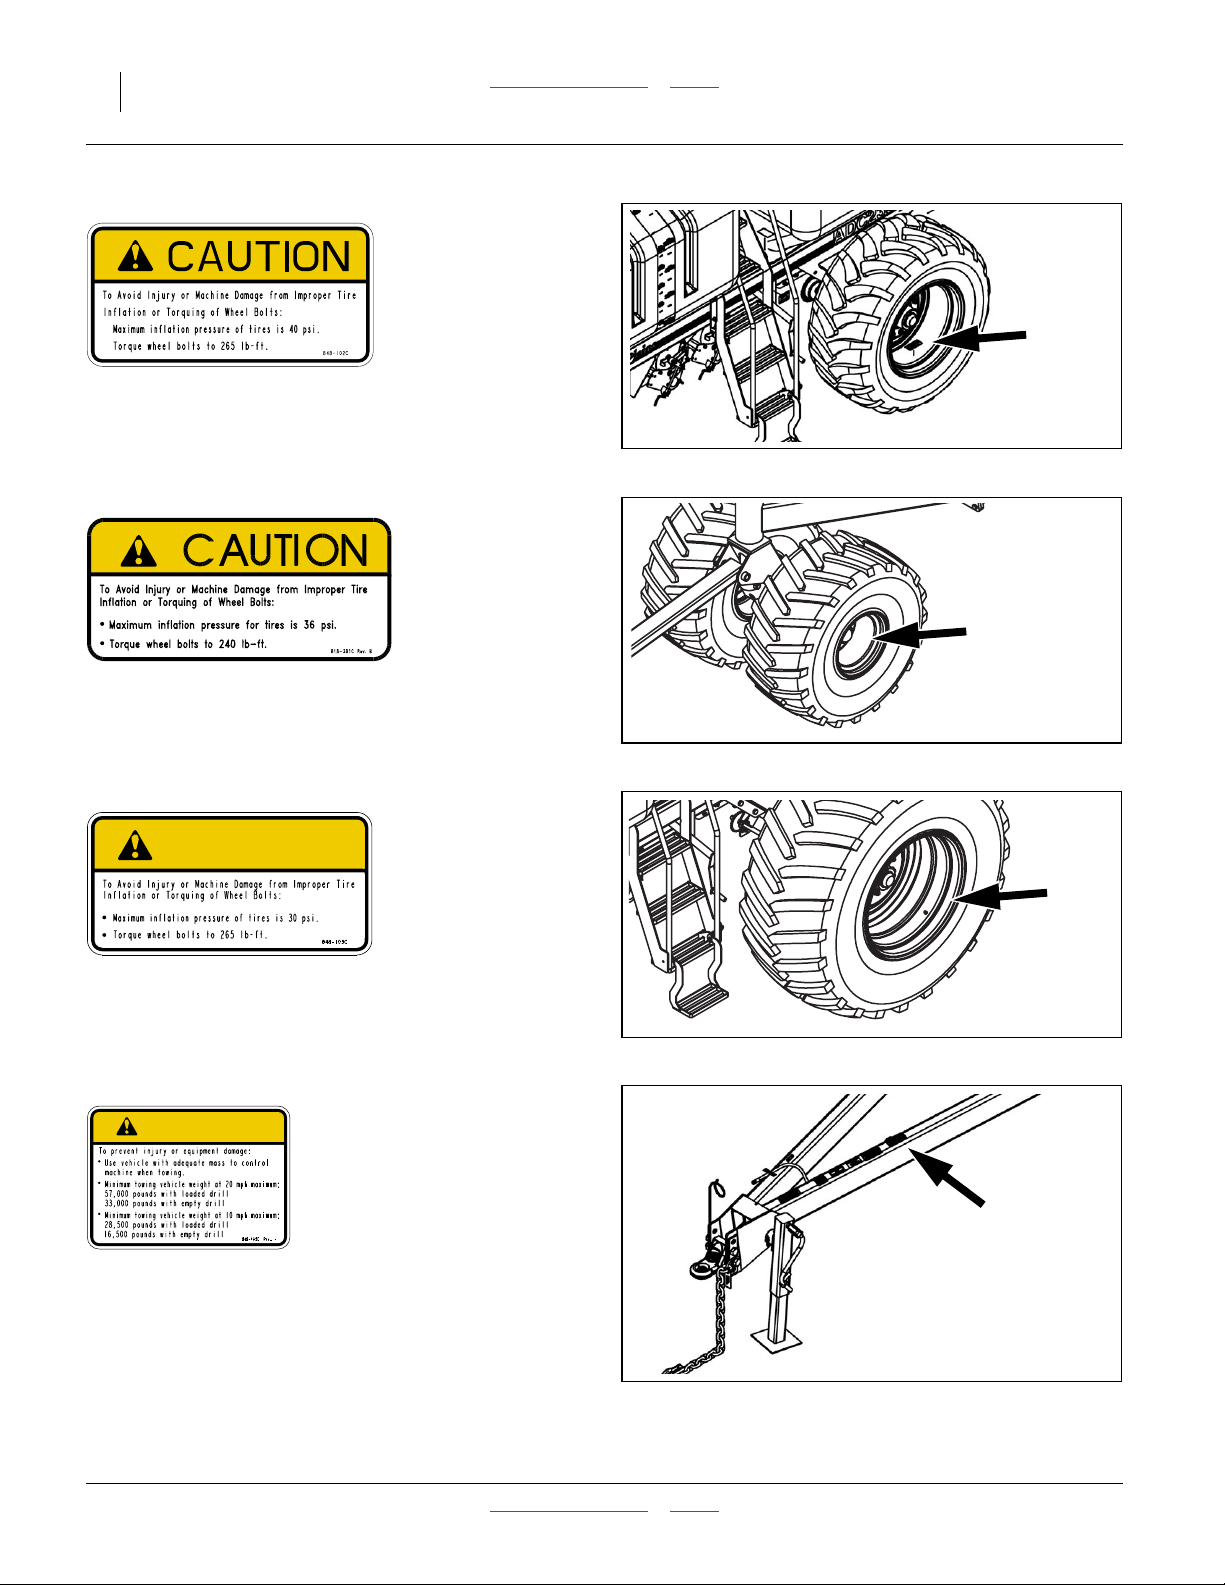
Caution: Tire Pressure
ADC2350/E: On each wheel rim:
2 total
26255
818-381C
Caution: Tire Pressure
ADC2350B/BE: On each caster wheel rim:
2 total
848-103C
CAUTION
Caution: Tire Pressure
ADC2350B/BE: On each main wheel rim:
2 total
848-105C
CAUTION
27077
27077
Caution: Towing
ADC2350/E: On the right draw bar at hitch
(not present on ADC2350B/BE);
1 total
167-085M Table of Contents Index 2012-08-01
26255
Page 19
Great Plains Manufacturing, Inc. Table of Contents Index Introduction 15
Introduction
Great Plains welcomes you to its growing family of new
product owners. Your Air Drill Cart has been designed
with care and built by skilled workers using quality
materials. Proper setup, maintenance, and safe
operating practices will help you get years of satisfactory
use from the machine.
Air Cart Document Family
167-085M Owner’s Manual (this document)
167-085B Seed Rate Charts
167-085P Parts Manual
110011439 IntelliAg® 5in Terminal
110011440 IntelliAg
110011445 IntelliAg® User Manual
110011459 IntelliAg® CTA Quick Start Guide
110011460 IntelliAg® NTA Quick Start Guide
110011461 IntelliAg® 3N40 Quick Start Guide
®
10in Terminal
Description of Unit
The (ADC2350/E and ADC2350B/BE are pull-type
implements for volumetric seeding. A hydraulic fan
creates an airflow to supply seed and dry treatments to a
compatible leading or trailing Great Plains drill.
The ADC2350 or ADC2350E (ADC2350/E) Air Drill Cart
is compatible with the following Great Plains air drills:
• CTA4000 40-foot Conventional Tillage Air Drill,
Model Year 2007 or later (see notea),
ADC2350/E air cart leading
• CTA4000HD Heavy Duty tillage Air Drill,
ADC2350/E air cart leading
• NTA3010 30-foot No-Till Air Drill,
Model Year 2007 or later (see notea),
ADC2350/E air cart leading
• NTA3510 35-foot No-Till Air Drill,
Model Year 2007 or later (see notea),
ADC2350/E air cart leading
The ADC2350B or ADC2350BE (ADC2350B/BE) Air Drill
Cart is compatible with the following Great Plains air drill:
• 3N-4010HDA 3-Section 40-foot Heavy Duty Air Drill
ADC2350B/BE air cart trailing
The ADC2350E and ADC2350BE are export models,
and are otherwise identical to the ADC2350 and
ADC2350B, respectively.
Drills introduced after the release of this manual may
also be compatible. Consult your Great Plains dealer.
Figure 1
ADC2350/E Air Cart Leading Drill
Figure 2
Drill Leading ADC2350B/BE Air Cart
26360
27078
a. Earlier model drills require upgrades for compatibility with the ADC2350/E and ADC2350B/BE Air Drill Cart.
2012-08-01 Table of Contents Index 167-085M
Page 20

16 ADC2350/E and ADC2350B/BE Table of Contents Index Great Plains Manufacturing, Inc.
Intended Usage
Use the air cart and drill to seed production-agriculture
crops only. Do not modify the air cart for use with
attachments other than Great Plains options and
accessories specified for use with the air cart.
R
Using This Manual
This manual will familiarize you with safety, assembly,
operation, adjustments, troubleshooting, and
maintenance. Read this manual and follow the
recommendations to help ensure safe and efficient
operation.
The information in this manual is current at printing.
Some parts may change to assure top performance.
L
Definitions
The following terms are used throughout this manual.
Right-hand and left-hand as used in this manual are
determined by facing the direction the machine will travel
while in use unless otherwise stated.
Paragraphs in this format present a crucial point of information
related to the current topic.
Read and follow the directions to:
- remain safe,
- avoid serious damage to equipment and
- ensure desired field results.
Note: Paragraphs in this format provide useful
information related to the current topic.
R
Figure 3
ADC2350/E: Left/Right Notation
Figure 4
ADC2350B/BE: Left/Right Notation
26254
L
27077
167-085M Table of Contents Index 2012-08-01
Page 21
Great Plains Manufacturing, Inc. Table of Contents Index Introduction 17
Owner Assistance
If you need customer service or repair parts, contact a
Great Plains dealer. They have trained personnel, repair
parts and equipment specially designed for Great Plains
products.
Refer to Figure 5
Your machine’s parts were specially designed and
should only be replaced with Great Plains parts. Always
use the serial and model number when ordering parts
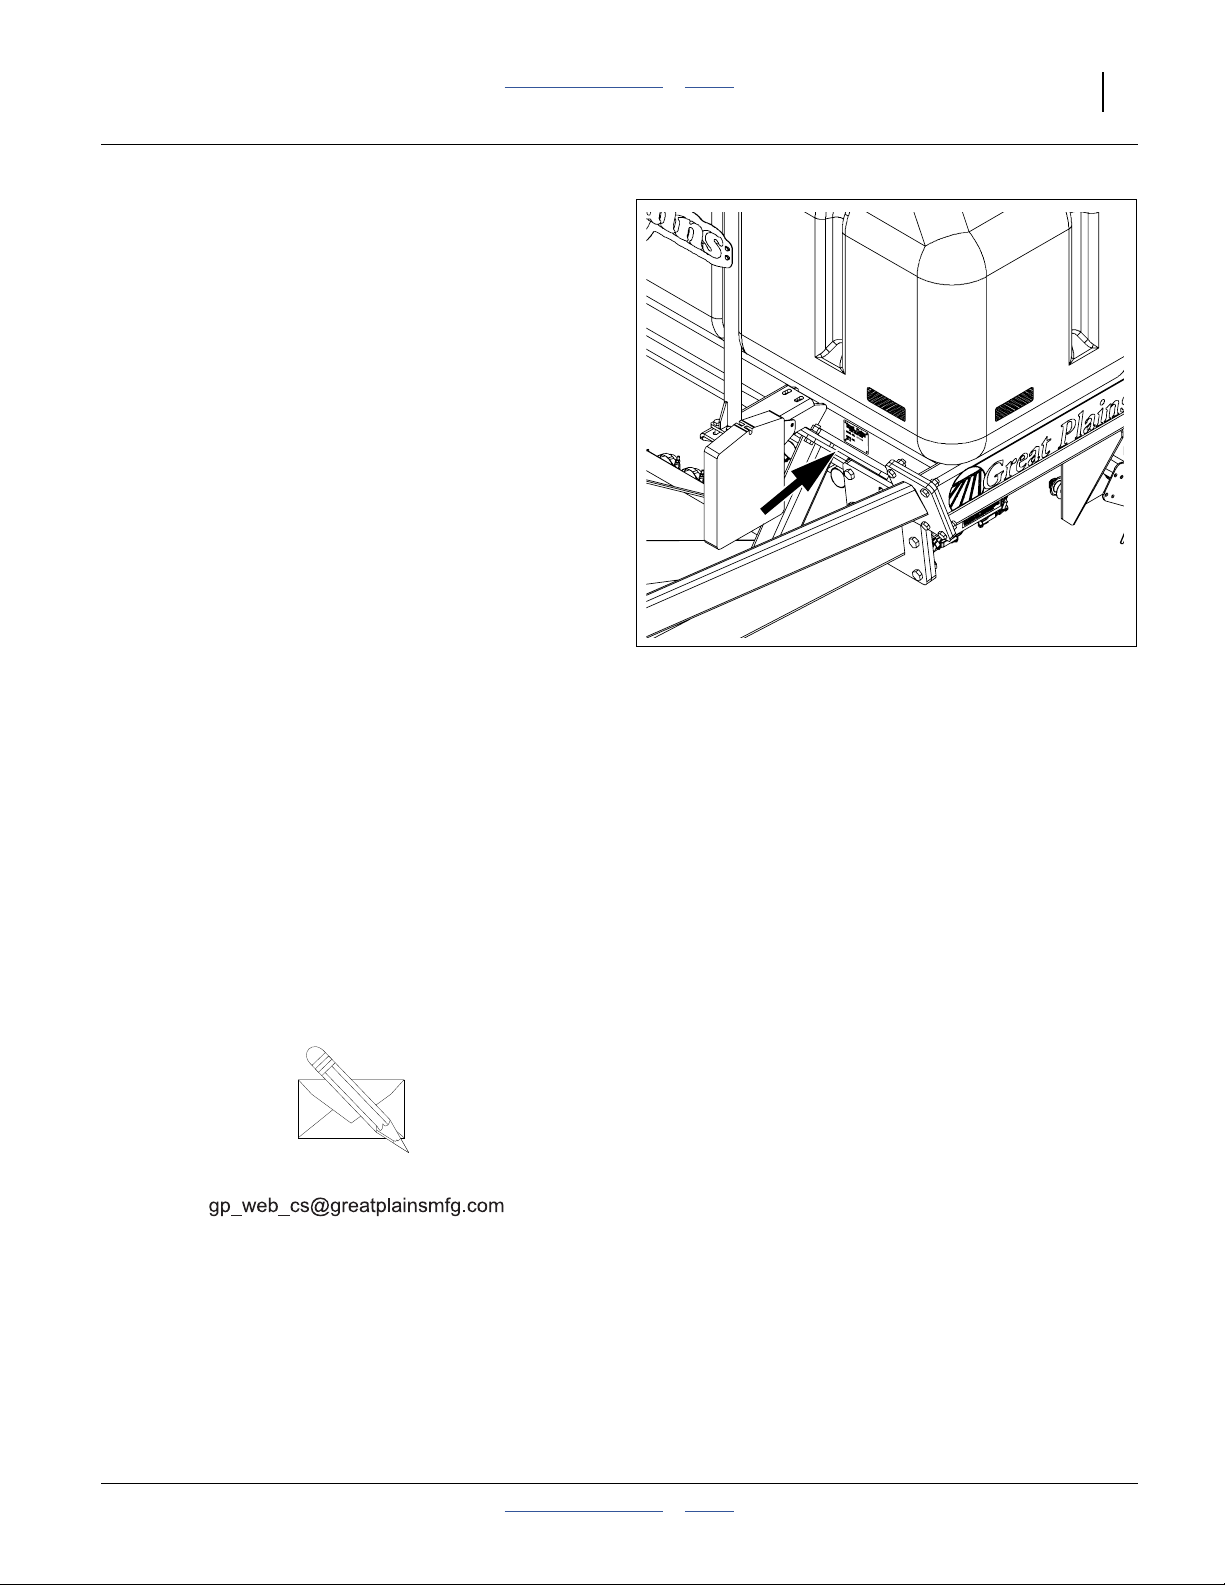
from your Great Plains dealer. The serial-number plate is
located on the left side of the cart frame below the front
hopper.
Record your air cart model and serial number here for
quick reference:
Model Number:__________________________
Serial Number: __________________________
Your Great Plains dealer wants you to be satisfied with
your new machine. If you do not understand any part of
this manual or are not satisfied with the service received,
please take the following actions.
1. Discuss the matter with your dealership service
manager. Make sure they are aware of any problems
so they can assist you.
2. If you are still unsatisfied, seek out the owner or
general manager of the dealership.
For further assistance write to:
Figure 5
Serial Number Plate
26428
Product Support
Great Plains Mfg. Inc., Service Department
Salina, KS 67402-5060
PO Box 5060
785-823-3276
2012-08-01 Table of Contents Index 167-085M
Page 22

18 ADC2350/E and ADC2350B/BE Table of Contents Index Great Plains Manufacturing, Inc.
Preparation and Setup
This section helps you prepare your tractor, air cart and
drill for use. Before using the air cart in the field, you
must hitch the air cart to a suitable tractor, compatible
drill, and also setup the drill.
Pre-Setup Checklist
1. Read and understand “Important Safety
Information” on page 1.
2. Check that all working parts are moving freely, bolts
are tight, and cotter pins are spread.
3. Check that all grease fittings are in place and
lubricated. See “Lubrication and Scheduled
Maintenance” on page 80.
4. Check that all safety decals and reflectors are
correctly located and legible. Replace if damaged.
See “Safety Decals” on page 6.
5. Inflate tires to pressure recommended and tighten
wheel bolts as specified. “Appendix” on page 87.
Installing Seed Monitor Terminal
The ADC2350/E and ADC2350B/BE cart standard seed
monitor system includes a virtual terminal that must be
mounted in the tractor cab. The kit includes an “H”
bracket for any modules, and a ball swivel for mounting
the bracket in the tractor.
Mount the modules so that they are easy to observe during
planting, but do not interfere with safe operation of the tractor
in the field or on public roads.
The ball swivel includes four 10-32 screws. You or your
dealer must provide the mounting holes for the screws.
Your dealer may have alternate suction cup or clamping
brackets available if you prefer to avoid drilling holes.
See the DICKEY-john®manual for harness connections.
The monitor needs to be configured with information
about your air drill, after hitching and electrical
connections. See “Setup Seed Monitor for Air Drill”on
page 29.
Once configured for your drill and your material, the seed
monitor performs the following functions:
On the Implement:
• Implement lift switch monitoring
• Fold function control (on some drill models)
• Seed flow blockage detection (optional)
Figure 6
Terminal and Mount Hardware
On the Air Cart:
• Fan Speed monitoring
• Hopper material level monitoring
• Hopper air pressure monitoring
• Meter rate monitoring (seed rate control, optional)
• Ground speed monitoring
26429
167-085M Table of Contents Index 2012-08-01
Page 23
Great Plains Manufacturing, Inc. Table of Contents Index Preparation and Setup 19
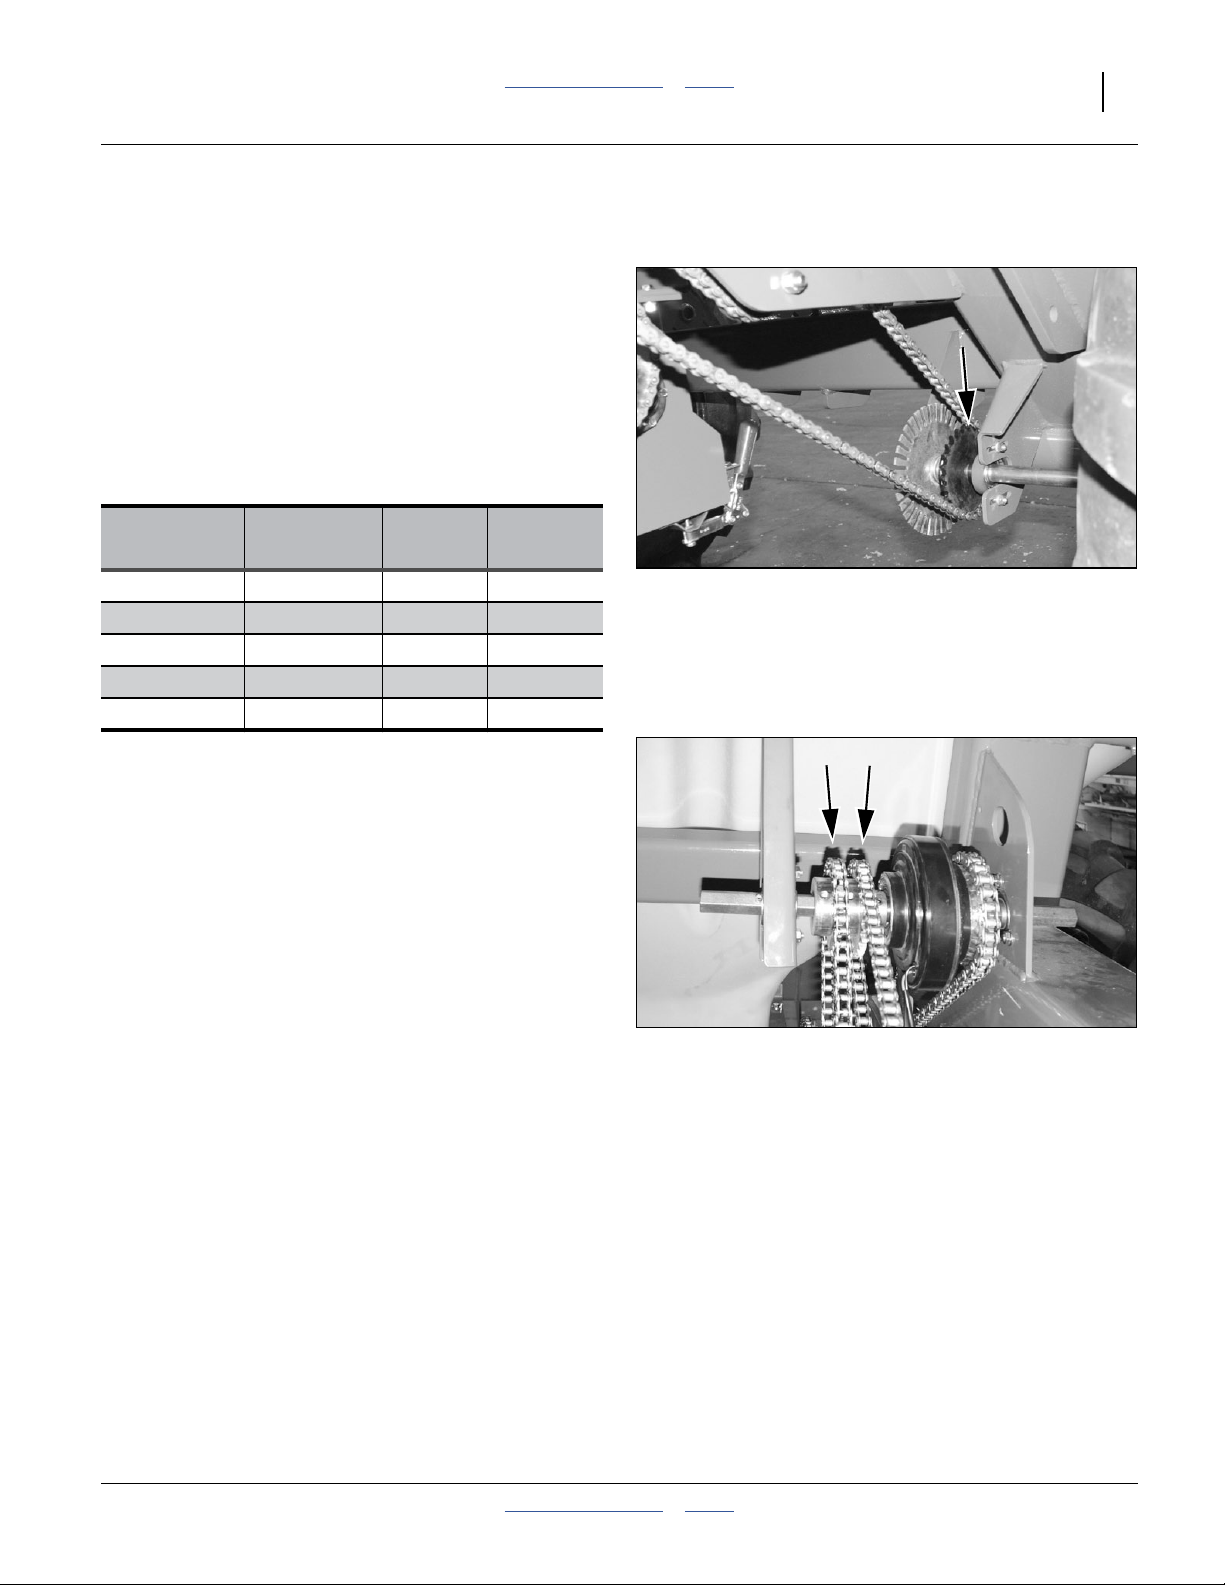
Cart Drive System
Refer to Figure 7, Figure 8 and table below
Sprockets on the cart need to be checked to ensure that
the seeding rates for your implement match those in the
Seed Rate manual.
The sprockets are factory-installed for a specific
implement, and may be incorrect if the cart is ultimately
delivered with a different implement. Once configured for
a particular implement, cart meter rate is determined by
the variable rate gearboxes and final drive range gears.
Cart Sprocket Setup
Implement
CTA4000 30T 24T 5 Towers
CTA4000HD 30T 24T 5 Towers
NTA3010 30T 23T 4 Towers
NTA3510 26T 24T 5 Towers
3N-4010HDA 39T 20T 6 Towers
Consult the table above. If any sprockets are found to not
match the table, contact your dealer for the correct
replacement sprockets.
Conversion requires one drive shaft output sprocket and
two (2) clutch output sprockets.
Inner Main
Driveshaft
Clutch
Output
Manifold
Outlets
Figure 7
Inner Main Driveshaft Sprocket
Figure 8
Clutch Output Sprockets
26238
26327
2012-08-01 Table of Contents Index 167-085M
Page 24
20 ADC2350/E and ADC2350B/BE Table of Contents Index Great Plains Manufacturing, Inc.
Hitching
Crushing Hazard:
You may be severely injured or killed by being crushed
between the tractor, air cart and drill. Do not stand or place
any part of your body between machines being hitched. Stop
tractor engine and set park brake before installing hitch pins.
When ready for planting, the air cart is part of an
assembly that includes the tractor, the air cart, and the
drill.
When hitching for the first time, hitch the leading
implement (cart or drill) first.
Once the air cart and drill are hitched together, they are
usually left connected, unless parking or storage
considerations require separation.
ADC2350/E Hitching
This manual includes full details only for the leading air
cart’s forward hitch. Consult the drill manual for trailing
drill hitching.
The air cart must be hitched to the tractor first. Continue
with ADC2350/E “Pull Between” Hitching on the next
page.
ADC2350B/BE Hitching
The drill must be hitched to the tractor first, and the air
cart is then hitched to the drill. Continue with to
“Hitching ADC2350B/BE to Leading Drill” on page 26.
Figure 9
Complete ADC2350/E Assembly
Figure 10
Complete ADC2350B/BE Assembly
26360
27079
167-085M Table of Contents Index 2012-08-01
Page 25
Great Plains Manufacturing, Inc. Table of Contents Index Preparation and Setup 21
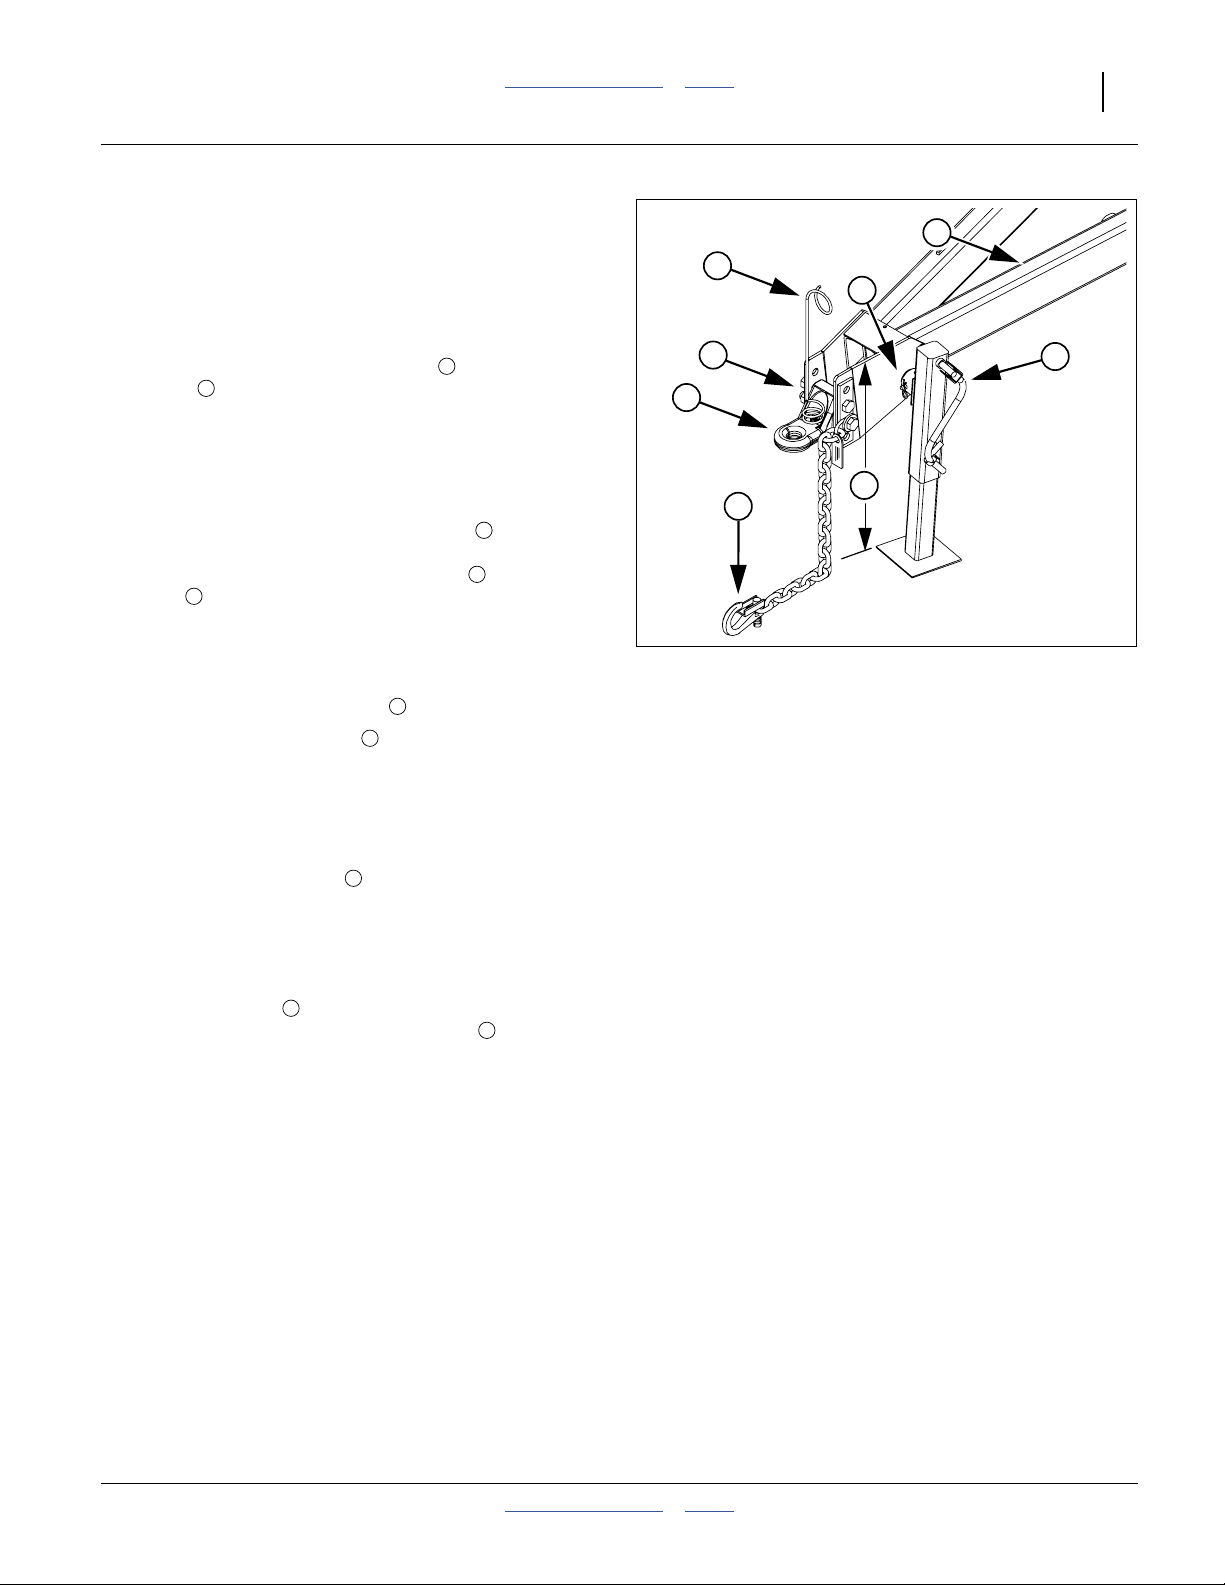
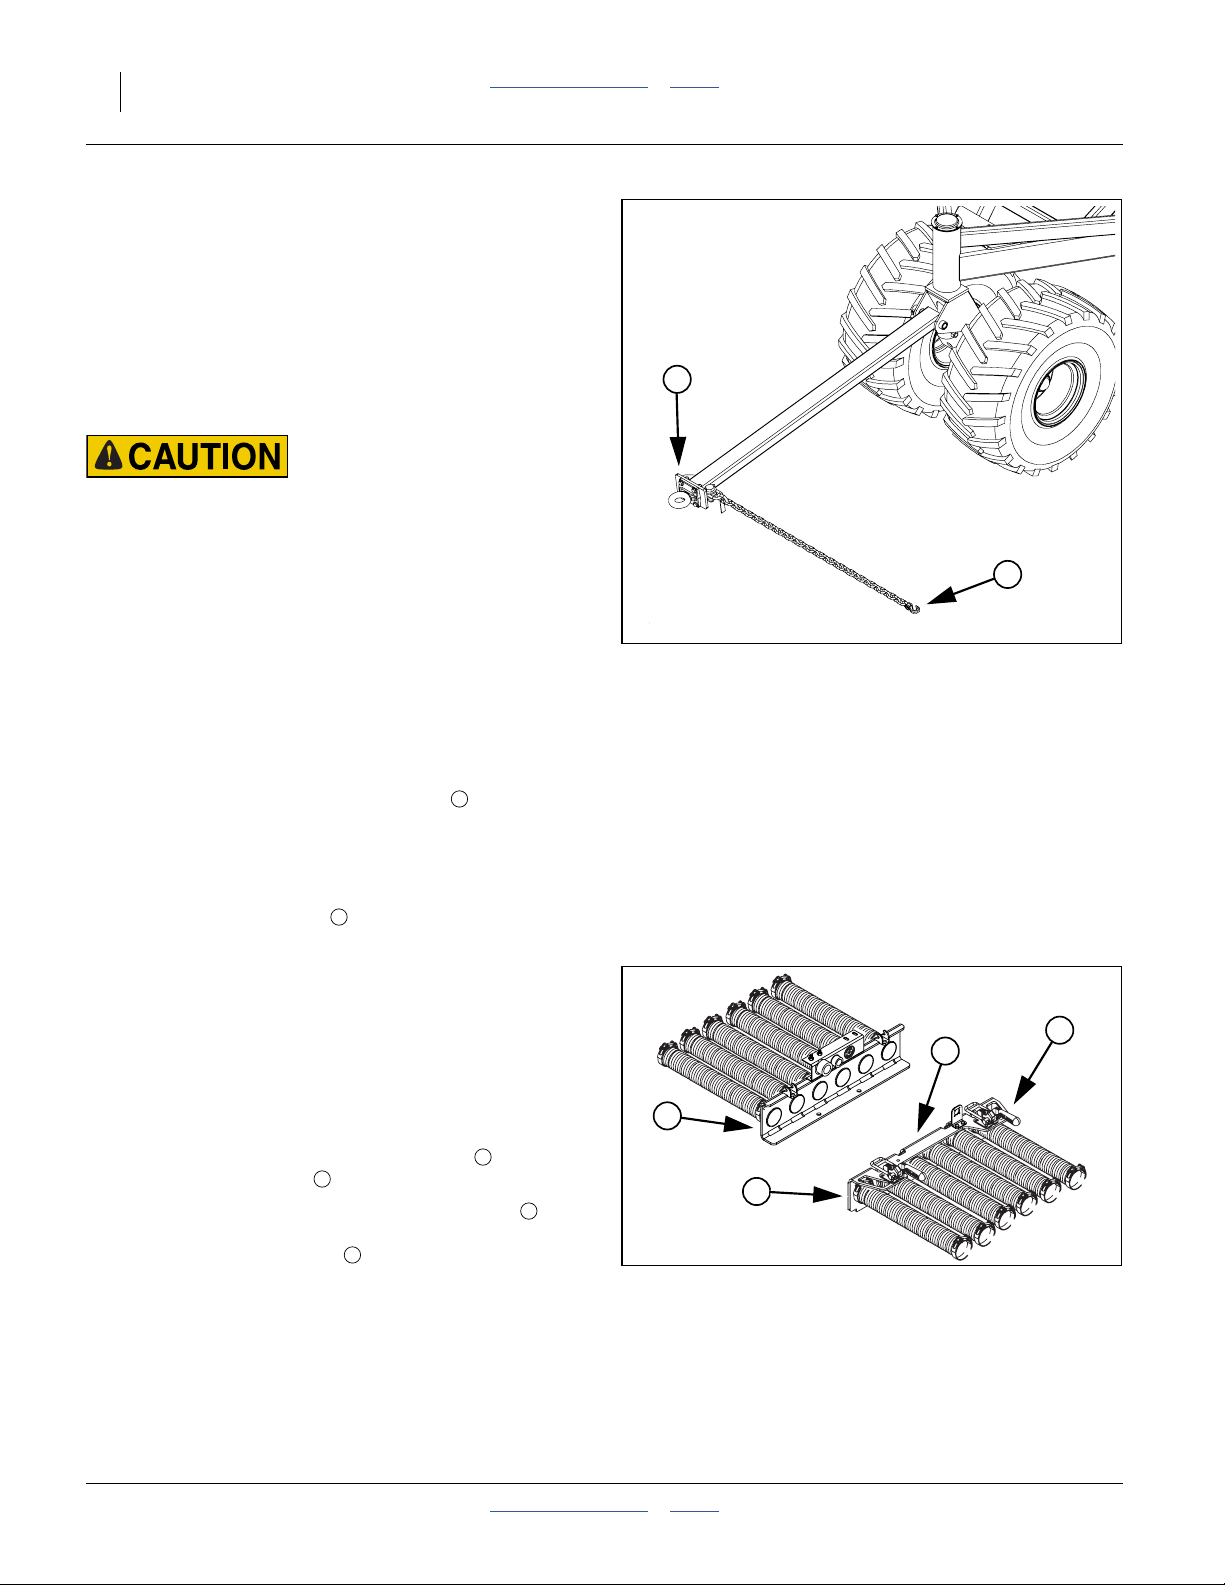
ADC2350/E “Pull Between” Hitching
Hitching ADC2350/E to Tractor
To ensure consistent planting at the drill, the main frame
of the ADC2350/E air cart needs to be level. Set the
tongue height before hitching for the first time.
3
7
8
Refer to Figure 11
1. Using the crank on the jack stand , adjust the
height of the tongue to:
The cart frame is level at this height.
2. Back the tractor up to the cart, and confirm that
when hitched, the cart tongue will remain at this
height. If not, adjust either the height of the tractor
hitch, or the location of the hitch strap .
To adjust the height of the hitch strap , remove the
bolts , and reset the strap up or down.
If the strap needs to be moved so far that only one
bolt would be holding it, the strap may be inverted.
Strap inversion requires removing the bolt that
retains the spring hose loop , and re-mounting it.
3. Use the jack stand crank to raise the hitch strap
slightly. Back the tractor so that its drawbar is aligned
with the strap hole.
4. Shut off the tractor and set the parking brake.
5. Insert and secure the hitch pin.
6. Attach the safety chain to an anchor on the
tractor.
7. Operate the jack stand crank to retract the inner leg
and base several inches. Secure the crank handle in
the spring clip on the stand.
8. Remove the pin at the stand swivel. Remove the
stand and re-pin it on the storage stob (not visible
in figure) inside the hitch beam.
2
31 inches (78.7 cm).
4
1
6
7
1
5
5
3
8
4
1
5
2
6
Figure 11
Hitch: Cart Leads Drill
26300
2012-08-01 Table of Contents Index 167-085M
Page 26

22 ADC2350/E and ADC2350B/BE Table of Contents Index Great Plains Manufacturing, Inc.
Make ADC2350/E Seed Hose Connections
ADC2350/E seed hose connections are made at the
back of the cart and are clamped. ADC2350B/BE seed
hose connections (page 26) are made at the front of the
cart, and are couplers.
Refer to Figure 12 and Figure 13
Connect primary seed hoses (tower feed hoses) from
drill to their respective outlets on the cart meter box, in
left to right order.
Figure 12
26302
ADC2350/E Seed Hose Outlets
Skip any capped outlets on the meter. Do not move
1
caps; the meter shaft at capped outlets has fillers, and no
flutes for metering seed.
At extreme outside outlets on cart model ADC2350/E,
orient jackscrew hose clamps so that screw hardware
does not interfere with operation of meter box door
handles.
Leave enough slack so that drill can be fully raised,
lowered, folded and unfolded.
1
Figure 13
ADC2350/E Seed Hoses Connected
26403
167-085M Table of Contents Index 2012-08-01
Page 27
Great Plains Manufacturing, Inc. Table of Contents Index Preparation and Setup 23
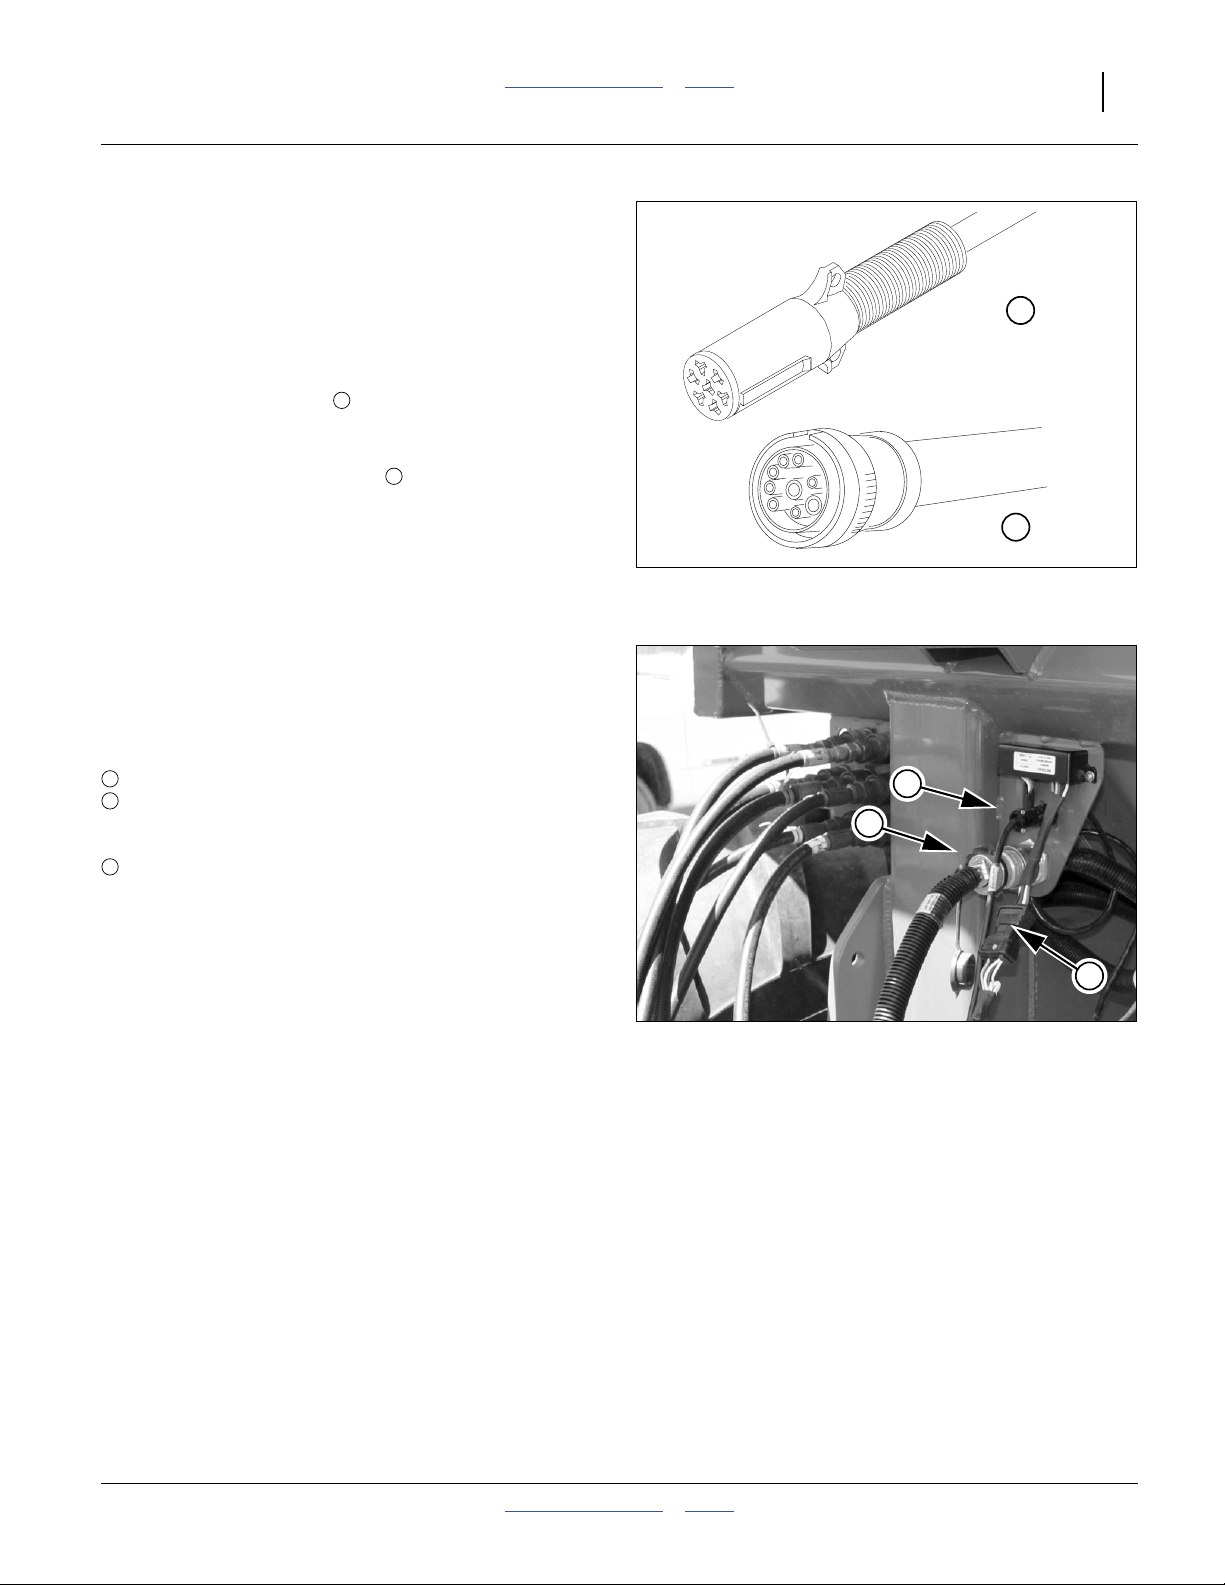
Make ADC2350/E Electrical Connections
The ADC2350/E cart has connections in front and back.
The ADC2350B/BE has connections only in front.
ADC2350/E Front Electrical Connections
Refer to Figure 14
1
Make sure tractor is shut down with accessory power off
before making connections.
1. Mate the lighting plug to the outlet connector on
1
the tractor. This connection is also passed through to
the back of the cart for the trailing drill.
2. Mate the seed monitor plug to the outlet
2
connector on the tractor. This connection is also
passed through to the back of the cart.
2
3. Secure cables so they are clear of moving parts at
the hitch.
Figure 14
Cart Lighting & Monitor
26467
27080
ADC2350/E Rear Electrical Connections
Before making electric or hose connections between cart
and trailing drill, first make the rear cart-drill mechanical
hitch connection. Refer to the drill manual.
For a trailing implement,
1
a lighting and
2
an implement lift switch connector
are always present.
2
3
3
A monitor connection may or may not also be present,
depending on implement options.
Consult the implement manual for drill-cart connections.
Figure 15
Implement Electrical Cables
1
26439
2012-08-01 Table of Contents Index 167-085M
Page 28
24 ADC2350/E and ADC2350B/BE Table of Contents Index Great Plains Manufacturing, Inc.
Make ADC2350/E Hydraulic Connections
High Pressure Fluid Hazard:
Only trained personnel should work on system hydraulics!
Relieve pressure before disconnecting hydraulic lines.
Escaping fluid under pressure can have sufficient pressure to
penetrate the skin causing serious injury. Use a piece of paper
or cardboard, NOT BODY PARTS, to check for leaks. Wear
protective gloves and safety glasses or goggles when working
with hydraulic systems. If an accident occurs, seek immediate
medical attention from a physician familiar with this type of
injury.
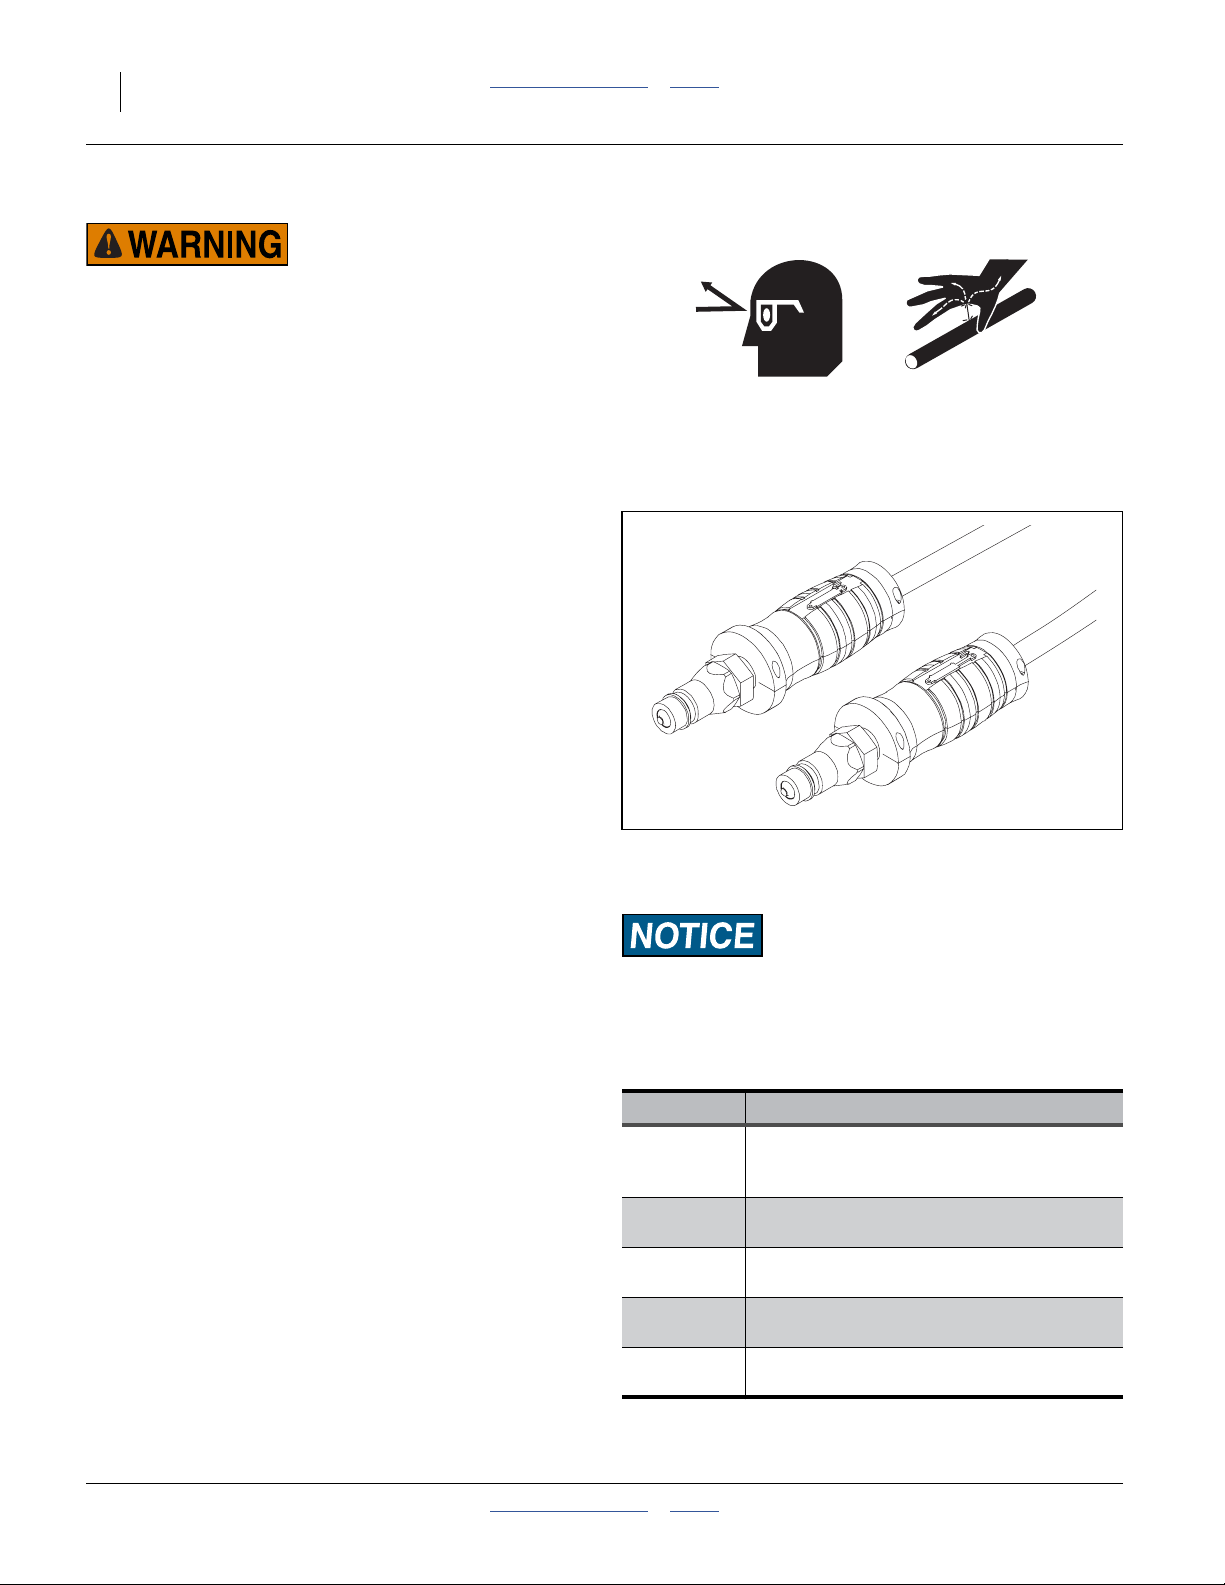
Current Style Color Coded Hose Handles
The air cart itself consumes hydraulic power for one or
two circuits, and has a low pressure sump return line.
When the cart leads the drill, the cart also passes
through three circuits necessary for drill operations.
Refer to Figure 16
Great Plains hydraulic hoses have color coded handle
grips to help you hookup hoses to your tractor outlets.
Hoses that go to the same remote valve are marked with
the same color.
To distinguish hoses on the same hydraulic circuit, refer
to the symbol molded into the handle grip. Hoses with an
extended-cylinder symbol feed cylinder base ends.
Hoses with a retracted-cylinder symbol feed cylinder rod
ends.
Figure 16
Color Coded Hose Grips
31733
For hydraulic fan and drive motors, connect the hose
under the retracted cylinder symbol to the pressure side
of the motor. Connect the hose under the extended
cylinder symbol to the return side of the motor.
The fan motor further requires hookup of a third line,
which returns hydraulic fluid from the fan motor case.
Make sure all tractor levers are in neutral or float, or
For CTA implements, some tractors require an auxiliary flow
kit to prevent damage to the hydraulic pump. Contact a factory
trained service technician before hooking to cart and CTA
implement.
tractor hydraulics are off, before making connections.
Fan Priority
If your tractor has a priority circuit for hydraulic motors,
connect the fan (Black) to this circuit.
ADC2350/E Hydraulic Hookup
The cart fan uses only the Extend/Base side of the Black
circuit, but both sides (plus sump) are passed through to
the trailing drill.
Color Hydraulic Function
<none>
(decal)
Black Cart: Hydraulic Fan (Extend side only)
SUMP return:
Cart: Hydraulic Fan
Drills: Down pressure or weight transfer
Drill (NTA only): Fold Cylinders
Blue Cart: <no function>
Drills: Lift Cylinders
Green Cart: Auger
Drills: Marker Cylinders
<none> Cart: Case Drain
Drills: <no function>
167-085M Table of Contents Index 2012-08-01
Page 29

Great Plains Manufacturing, Inc. Table of Contents Index Preparation and Setup 25
ADC2350/E Older Style Hoses with Color Ties
Only trained personnel should work on system hydraulics!
Great Plains hydraulic hoses are color coded to help you
hookup hoses to your tractor or drill outlets. Hose
connections are also passed through to a rear panel
when the air cart leads the drill. Hoses that go to the
same remote valve are marked with the same color tie.
Refer to Figure 17
To distinguish hoses on the same hydraulic circuit, refer
to plastic hose label. The hose under an
extended-cylinder symbol feeds a cylinder base end. The
hose under a retracted-cylinder symbol feeds a cylinder
rod end.
Make sure all tractor levers are in neutral or float, or
Figure 17
Plastic Hose Label
817-348c
17641
tractor hydraulics are off, before making connections.
Fan Priority
If your tractor has a priority circuit for hydraulic motors,
connect the fan (Yellow) to this circuit.
Sump First and Last
Seals in the hydraulic fan motor can be damaged if the
return line is pressurized. Always connect the SUMP
hose first and disconnect it last. The sump hose has a
larger (1.06 inch) quick-connect coupling.
The hose & large connector labeled sump refers to high
volume hydraulic motor return and should always be
connected to the port on the tractor capable of handling high
volume low pressure return oil. DO NOT connect this line to
low volume case drain lines or low volume sump lines on the
tractor. See tractor manufacturer’s recommendations for high
volume hydraulic motor return.
ADC2350/E Hydraulic Hookup
The cart fan uses only the Extend/Base side of the
Yellow circuit, but both sides (plus sump) are passed
through to the trailing drill.
Color ADC2350/E Hydraulic Function
<none>
(decal)
SUMP return:
Cart: Hydraulic Fan
Drills: Down pressure or weight transfer
Yellow Cart: Hydraulic Fan (Extend side only)
Drill (NTA only): Fold Cylinders
Blue Cart: <no function>
Drills: Lift Cylinders
Orange Cart: Auger
Drills: Marker Cylinders
<none> Cart: Case Drain
Drills: <no function>
2012-08-01 Table of Contents Index 167-085M
Page 30
26 ADC2350/E and ADC2350B/BE Table of Contents Index Great Plains Manufacturing, Inc.
Hitching ADC2350B/BE to Leading Drill
Hitching the ADC2350B/BE air cart to the drill is easiest
if the cart hoppers are empty of all seed and treatments.
Shifting the tongue side to side is difficult if material is
loaded, particularly in the forward hopper.
The ADC2350B/BE requires no leveling.
Once the cart is hitched to the drill, it may be left hitched
indefinitely, although disconnection may be necessary for
extensive backing operations.
Crush and Run-Away Hazards:
On completely level ground, it is possible to manually move an
empty cart for hitching. This is unsafe if the ground is not level,
or the cart is not empty. Leave any wheel chocks in place on
uneven/unlevel ground, or if cart is not empty.
Refer to Figure 18
Position the cart so that after hitching, only forward
movements are needed. Once connected to a drill and
tractor, reverse steering is extremely difficult.
1. Hitch the drill to the tractor before hitching the cart to
the drill.
2. Back the tractor and drill up to the cart, so that the
drill drawbar is over the tongue strap .
3. Shut off the tractor and set the parking brake.
4. Raise the cart tongue, and position the pintle ring on
the drill pintle hook and close clasp.
5. Attach the safety chain to an anchor loop on the
drill hitch.
Make ADC2350B/BE Seed Hose Connections
ADC2350B/BE seed hose connections are made at the
front of the cart, and are couplers. ADC2350/E see hose
connections are made at the back of the cart and are
clamped.
ADC2350B/BE Seed Hose Connections
Refer to Figure 19
Connect the cart seed hose outlet bulkhead to the drill
seed hose inlet bulkhead .
While making the connection, inspect the gasket (on
the cart side) between the two bulkheads and replace as
needed. Secure with latches .
Note: On the ADC2350B/BE, the center primary hoses at
the meter feed the outside towers, and the outside
primary hoses at the meter feed the center towers.
2
2
4
1
1
3
1
Figure 18
Hitch: Drill Leads Cart
2
3
Figure 19
ADC2350B/BE Seed Hose Manifold
2
27077
4
1
27082
167-085M Table of Contents Index 2012-08-01
Page 31

Great Plains Manufacturing, Inc. Table of Contents Index Preparation and Setup 27
Make ADC2350B/BE Electrical Connections
The ADC2350B/BE has connections only in front. The
ADC2350/E cart has connections in front and back.
Refer to Figure 20
1
2
Make sure tractor is shut down with accessory power off
before making connections. All connections are made at
or above the seed hose bulkhead.
1. Mate the lighting plug to the leading implement
1
outlet connector, which is tied to the seed hose
bulkhead.
2. Mate the implement lift connector at the bulkhead.
3. Mate the seed monitor plug to the receptacle at
2
3
the bulkhead.
4. Secure cables so they are clear of moving parts at
3
the hitch.
Figure 20 - ADC2350B/BE: Cart
Lighting, Lift Switch & Monitor
26144
27192
27193
Make ADC2350B/BE Hydraulic Connections
Only trained personnel should work on system hydraulics!
Current Style Color Coded Hose Handles
The air cart itself consumes hydraulic power for one or
two circuits, and has a low pressure sump return line.
When the cart trails the drill (ADC2350B/BE), only a
single shared auger/fan connection is necessary.
Great Plains hydraulic hoses have color coded handle
grips to help you hookup hoses to your tractor or drill
outlets. Hose connections are also passed through to a
rear panel when the air cart leads the drill. Hoses that go
to the same remote valve are marked with the same
color.
Refer to Figure 21
To distinguish hoses on the same hydraulic circuit, refer
to the symbol molded into the handle grip. Hoses with an
extended-cylinder symbol feed cylinder base ends.
Hoses with a retracted-cylinder symbol feed cylinder rod
ends.
Make sure all tractor levers are in neutral or float, or
tractor hydraulics are off, before making connections.
Fan Priority
If your tractor has a priority circuit for hydraulic motors,
connect the fan (Black) to this circuit.
Figure 21
Color Coded Hose Grips
31733
2012-08-01 Table of Contents Index 167-085M
Page 32

28 ADC2350/E and ADC2350B/BE Table of Contents Index Great Plains Manufacturing, Inc.
Sump First and Last
Seals in the hydraulic fan motor can be damaged if the
return line is pressurized. Always connect the SUMP
hose first and disconnect it last. The sump hose has a
larger (1.06 inch) quick-connect coupling.
The hose & large connector labeled sump refers to high
volume hydraulic motor return and should always be
connected to the port on the tractor capable of handling high
volume low pressure return oil. DO NOT connect this line to
low volume case drain lines or low volume sump lines on the
tractor. See tractor manufacturer’s recommendations for high
volume hydraulic motor return.
ADC2350B/BE Hydraulic Hookup
The fan uses only the Extend side of this circuit, and the
Sump line. Both connections are made at or above the
seed hose bulkhead.
Size ADC2350B/BE Hydraulic Function
large SUMP return:
Cart: Hydraulic Fan and Auger
Drill: <no function>
small Cart: Hydraulic Fan and Auger
(Extend side only)
Drill: <no function>
1
⁄4inch Cart: Case Drain
Drill: <no function>
Set Up the Implement
This manual only covers air cart setup. Consult the
Operator’s Manual for the implement for additional
setup steps required prior to operation.
ADC2350B/BE Older Style Hoses With Color Ties
Only trained personnel should work on system hydraulics!
Hoses that go to the same remote valve are marked with
the same color tie.
Refer to Figure 22
To distinguish hoses on the same hydraulic circuit, refer
to plastic hose label. The hose under an
extended-cylinder symbol feeds a cylinder base end. The
hose under a retracted-cylinder symbol feeds a cylinder
rod end.
Make sure all tractor levers are in neutral or float, or
tractor hydraulics are off, before making connections.
Fan Priority
If your tractor has a priority circuit for hydraulic motors,
connect the fan (Yellow) to this circuit.
Figure 22
Plastic Hose Label
817-348c
17641
167-085M Table of Contents Index 2012-08-01
Page 33

Great Plains Manufacturing, Inc. Table of Contents Index Preparation and Setup 29
Setup Seed Monitor for Air Drill
With the monitor terminal installed (see page 18), the
cart hitched and the implement hitched, the monitor can
be set up with information that rarely changes (as well as
with defaults for planting-specific information to be
changed later).
See the DICKEY-john® Quick Start guide for
more detailed instructions. This Operator’s
manual section provides only cross-references
to information required
Note: Monitor setup menus are not enabled
until all monitor harness connections are
made
If the monitor inputs are correctly entered, the monitor is
a handy tool to allow you to fine tune the variable rate
gearbox setting.
Row Setup Data
25421
Row Spacing and Swath
If “Auto Update Width” is set to “Disabled”, a
precise (swath averaged) row spacing is not
needed.
CTA4000 Air Drill Implement
Model CTA4000-8006 CTA4000-6575 CTA4000-5010
Row Count 80 65 50
Nominal Row Spacing 6 inches (15.2 cm) 7.5 inches (18.9 cm) 10 inches (24.8 cm)
Swath Averaged Row Spacing 6.08 inches (15.45 cm) 7.49 inches (19.0 cm) 9.75 inches (24.77 cm)
Swath [Width] 486.5 inches (1235.7 cm) 487.1 inches (1237.2 cm) 487.5 inches (1238.6 cm)
Number of Towers 5 (16 ports per tower) 5 (13 ports per tower) 5 (10 ports per tower)
CTA4000HD Air Drill Implement
Model CTA4000HD-8006 CTA4000HD-6575 CTA4000HD-5010
Row Count 80 65 50
Nominal Row Spacing 6 inches (15.2 cm) 7.5 inches (18.9 cm) 10 inches (24.8 cm)
Swath Averaged Row Spacing 6.08 inches (15.45 cm) 7.49 inches (19.0 cm) 9.75 inches (24.77 cm)
Swath [Width] 486.5 inches (1235.7 cm) 487.1 inches (1237.2 cm) 487.5 inches (1238.6 cm)
Number of Towers 5 (16 ports per tower) 5 (13 ports per tower) 5 (10 ports per tower)
2012-08-01 Table of Contents Index 167-085M
Page 34

30 ADC2350/E and ADC2350B/BE Table of Contents Index Great Plains Manufacturing, Inc.
NTA3010 Air Drill Implement
Model NTA3010-4875 NTA3010-3610
Row Count 48 36
Nominal Row Spacing 7.5 inches (19.1 cm) 10 inches (25.4 cm)
Swath Averaged Row Spacing 7.58 inches (19.3 cm) 10.1 inches (25.7 cm)
Swath [Width] 364.0 inches (924.6 cm) 364.0 inches (924.6 cm)
Number of Towers 4 (12 ports per tower) 4 (9 ports per tower)
NTA3510 Air Drill Implement
Model NTA3510-5575 NTA3510-4010
Row Count 55 40
Nominal Row Spacing 7.5 inches (19.1 cm) 10 inches (25.4 cm)
Swath Averaged Row Spacing 7.57 inches (19.2 cm) 10.1 inches (25.7 cm)
Swath [Width] 416.5 inches (1057.9 cm) 404.0 inches (1026.2 cm)
Number of Towers 5 (11 ports per tower) 5 (8 ports per tower)
3N-4010HDA Air Drill Implement
Model 3N-4010HDA-6675 3N-4010HDA-4810
Row Count 66 48
Nominal Row Spacing 7.5 inches (19.1 cm) 10 inches (25.4 cm)
Swath Averaged Row Spacing 7.58 inches (19.3 cm) 10.1 inches (25.7 cm)
Swath [Width] 499.0 inches (1267 cm) 490.0 inches (1245 cm)
Number of Towers 6 (11 ports per tower) 6 (8 ports per tower)
167-085M Table of Contents Index 2012-08-01
Page 35

Great Plains Manufacturing, Inc. Table of Contents Index Operating Instructions 31
Operating Instructions
This section covers general operating procedures. It
assumes that setup items have been completed for both
air cart and implement.
Experience, machine familiarity and the following
information will lead to efficient operation and good
working habits. Always operate farm machinery with
safety in mind.
General Description
Seed metering is powered by a cart tire and driven at a
rate proportional to distance traveled. Each seed bin is
self-contained and has its own metering device. The
seed bins are sealed and held at the same pressure as
the meter boxes so metering is controlled
mechanically–not by air-flow fluctuations. The metered
seed is carried by air through the hoses to the
distribution towers on the implement. These towers then
divide the air and seed into individual rows.
The metering devices are driven through an
electromagnetic clutch. The clutch only engages if the
implement is lowered, operating an adjustable lift switch.
Seed metering is shut off automatically when the drill is
lifted for headland turns.
Pre-Start Checklist
❑ Lubricate the cart as indicated under Lubrication,
“Maintenance and Lubrication” on page 74.
❑ Check the tires for proper inflation according to “Tire
Inflation Chart” on page 87.
❑ Check the chains for proper tension and alignment
as shown under Drive System Adjustments,
“Adjustments” on page 56.
❑ Check for worn or damaged parts and repair or
replace before going to the field.
❑ Check all nuts, bolts and screws. Tighten bolts as
specified on “Torque Values Chart” on page 88
❑ Check height switch on implement.
2012-08-01 Table of Contents Index 167-085M
Page 36

32 ADC2350/E and ADC2350B/BE Table of Contents Index Great Plains Manufacturing, Inc.
Walkboard Ladders
The walkboard between the hoppers is served by two
ladders, one on each side of the cart. When the auger is
latched in the storage position, it obstructs use of the
ladder on the right side.
The ladder on the right side is also removable, to allow
auger access under the rear meter box.
Ladder Operation
Refer to Figure 23
Both ladders have swing-down lower sections. These
need to be raised for transport and planting.
To stow a lower ladder section, swing it up until a
spring-loaded pin engages a cutout in the right side of
the step frame. Make sure the pin engages, or the ladder
may swing down during cart movement.
To lower the ladder section, pull the pin out and swing the
section down.
1
Figure 23
Lower Ladder Section
1
26342
Removing the Right Ladder
Refer to Figure 24
If unloading the rear hopper, the lower section of the
right side walkboard ladder must be removed for auger
access to the rear meter.
Note: This ladder section is easier to handle if the bottom
step is swung up and pinned first.
5. Latch open the pins that secure the lower ladder
section to the cart frame.
6. Swing the ladder out and lift the hooks off the
outer rung of the step at the cart frame. Set the
ladder down clear of the operating area.
To re-install the right ladder:
1. Release the pin lever arms.
2. Place the hooks over the outer rung of the step at the
cart frame.
3. Swing the ladder onto the cart until the pins re-seat.
2
3
3
2
2
Figure 24
Remove Lower Ladder
3
26330
167-085M Table of Contents Index 2012-08-01
Page 37

Great Plains Manufacturing, Inc. Table of Contents Index Operating Instructions 33
Hopper Lids
Keep lids closed. Keep tightly closed for operations.
Keep loosely closed for storage. Open only for material
loading, hopper clean-out and exceptional maintenance.
Lid Opening
Refer to Figure 25
1. Lift handle .
1
1
Refer to Figure 26 and Figure 27
2. Swing handle out until hook releases from
U-bolt.
3. Move hook clear of U-bolt and re-close handle.
Refer to Figure 27
4. Lift lid slightly at pivot end to clear strainer (shown on
next page).
5. Swing lid away from walkboard. Open only enough
to accomplish the present task.
1 2
2
Lid Closing
Refer to Figure 27, Figure 26 and Figure 25
1. Swing lid over opening until capture hook is
centered on U-bolt .
2. Open handle and engage hook on U-bolt .
3. Close handle for operations or short-term parking.
For long-term storage, do not engage hook or latch
handle, to avoid deforming the seal.
4. For storage, particularly unlatched, a padlock
through both U-bolts deters unauthorized entry by
persons unaware of possible confined space risks,
and prevents entry of pests, debris and precipitation.
3
1 2 3
1
2
Figure 25
Hopper Lid Latched
Figure 26
Hopper Lid Unlatched
3
Figure 27
Hopper Lid Opening
26344
2
1
26345
2
26343
2012-08-01 Table of Contents Index 167-085M
Page 38

34 ADC2350/E and ADC2350B/BE Table of Contents Index Great Plains Manufacturing, Inc.
Strainer
Each hopper is equipped with a strainer intended to:
• capture large foreign matter in seed and materials,
• prevent entry by animals if lid left open, and;
• discourage hopper entry by children.
Leave the strainer in place except during strainer and
hopper cleaning.
Check the strainer for residue prior to each loading
operation. Remove, empty and return it to the hopper.
For strainer or hopper cleaning, the strainer lifts out when
the lid is fully open.
Figure 28
Hopper Strainer
26405
167-085M Table of Contents Index 2012-08-01
Page 39

Great Plains Manufacturing, Inc. Table of Contents Index Operating Instructions 35
Meter Doors
Refer to Figure 29 and Figure 30
Each meter box has two distinct access doors on the
bottom:
1
• Front: Clean-Out
(for emptying hopper)
2
• Rear: Calibration
(for meter sampling and meter clean-out)
The doors are closed during transport, loading and
planting. They may be open slightly in storage if the
hopper was not completely dry at clean-out.
The doors need to close and seal tightly during planting.
Periodically inspect the lever clamps for proper
tension, and inspect the elastomer seals for integrity and
resiliency.
3
Meter Door Opening
2
3
3
Figure 29
Meter Doors Closed
1
3
3
26346
Material Loss Risk:
Do not open the (forward) clean-out door until preparations
have been made to capture any material to be re-used. Any
material present will flow immediately, possibly in large
volume, as soon as the door is open.
1. Pull out on a clamp handle just until it is loose.
2. Pull out on the other clamp handle. The door
normally will swing down on its own. If not, pull it
open by hand.
3
Meter Door Closing
Make sure the clamp handles are out or down (not up),
or it will not be possible to close the door.
1. Use a clean rag to wipe any residual material from
the face of the elastomer seals on the door, and from
the bottom face of the meter box.
2. Swing the door up into closed position.
3. While holding the door closed, swing one clamp
handle up, past vertical.
4. Swing the other clamp handle up past vertical.
5. Inspect the door closure for possible air leaks.
Replace any deformed elastomer seal or damaged
latch clamp.
2
Figure 30
Meter Doors Open
1
3
26341
2012-08-01 Table of Contents Index 167-085M
Page 40

36 ADC2350/E and ADC2350B/BE Table of Contents Index Great Plains Manufacturing, Inc.
Meter Hand Crank
A hand crank is provided on the left side of the cart for
manual operation of the meters (the meters otherwise
turn only when the cart is in motion with the clutch
engaged).
Equipment Damage Risk:
Rotate the hand crank only in the counter-clockwise direction,
as shown in Figure 32. Operating in reverse (clockwise) can
cause meter gear box damage.
The crank is used for two common tasks:
• calibration of the meter setting for planting, and
• clean-out of the meter flute chamber.
3
Installing Crank
Refer to Figure 31 and Figure 32
6. Remove the pin from the crank shaft behind the
outer crank bracket.
7. Pull the crank out of the inside bracket (only)
and slide the end of the crank shaft onto the outside
end of the meter jackshaft . Re-insert the pin in the
crank shaft so it doesn’t get lost.
1
2 3
4
Operating the Hand Crank
Refer to Figure 32
Turn the hand crank counter-clockwise to simulate meter
operation during planting.
Specific recommendations may be made in applicable
manual sections. See:
see “Meter Calibration” in the Seed Rate manual,
see “Unloading the Cart” on page 47, and
see “Storage” on page 55.
In general, you may operate the crank as fast as is
comfortable. For reference, at a field speed of 6 mph, the
jackshaft rotates at 150 rpm (2.5 turns per second).
For clean-out, make sure the variable rate gearboxes
are set:
• above “10” if the final drive range gears are in
High Range mode, or
• above “80” if the final drive range gears are in
Low Range mode.
To change variable rate gearbox and final drive range
gearing see “Setting Material Rates” on page 56.
Note: If variable rate gearbox is set to “0”, operating the
hand crank may fail to clear the meters of seed.
5
4
1
2
Figure 31
Hand Crank Storage
26333
5
Figure 32
Hand Cranking Direction
26333
167-085M Table of Contents Index 2012-08-01
Page 41

Great Plains Manufacturing, Inc. Table of Contents Index Operating Instructions 37
Drive Chain Lockout
Refer to Figure 33,
which depicts the primary drive sprocket locked out.
To minimize wear during transport, the chain drive
system up to the clutch can be locked out at the driving
wheel hub.
Locking Out for Transport
1. Locate the lockout pin receiver on the primary 60T
sprocket weldment at the wheel hub. Depending
on where rotation stopped at the last cart movement,
the receiver may be hidden behind the axle bolt
3
plate . Lockout tasks may be performed with the
receiver exposed or hidden.
2
1
2
3
1
4
When engaged for chain drive operations, a
spring-loaded pin plunger in the receiver occupies a
hole in the lockout hub plate (not visible) behind the
sprocket, so that both turn together. The cross-pin
in the plunger is in the deeper of the two detent
positions in the receiver.
2. Pull the cross-pin toward machine center,
rotate it 90 degrees (one quarter turn), and
position it in the shallow receiver detents, as shown
in Figure 33.
4
Disengaging Lockout
Refer to Figure 33,
which depicts the primary drive sprocket locked out.
Pull the cross-pin toward machine center,
rotate it 90 degrees (one quarter turn), and
position it in the deeper receiver detents.
Unless the mating hole in the lockout hub plate just
happens to be under the pin receiver (not likely), the pin
will not move all the way into the detent; however, the pin
will engage the hole automatically at next cart
movement.
4
Figure 33
Drive Chain Lockout
4
263xx
2012-08-01 Table of Contents Index 167-085M
Page 42

38 ADC2350/E and ADC2350B/BE Table of Contents Index Great Plains Manufacturing, Inc.
Auger Operations
Electrocution Hazard:
Keep clear of overhead power lines when positioning auger.
The auger can reach 15 feet (4.6m) above ground level during
positioning operations. If it contacts a power line, nearly all
metal parts of the cart, tractor and drill will have lethal
voltage present, and anyone touching them can complete the
circuit to ground, resulting in serious injury or death. With
very high voltages, electrocution can occur without direct
contact.
This section covers only basic auger operations. For
specific tasks, see:
“Unloading the Cart” on page 47, and
“Loading Material” on page 44.
Latch the auger into its cradles and pin the arm pivots,
whenever the auger is not in use.
5
1
4
3
Auger Latched for Movement
2
Figure 34
26329
To avoid auger damage during cart movement,
do not rely solely on the arm pins to secure the auger in the
stored configuration. Use the latches.
Deploying Auger
The back (inlet) end of the auger has grasp handles.
When empty of material this end of the auger also tends
to be heavier. Start unlatching at the front end.
Refer to Figure 35
1. Squeeze the lock lever . Pull out on the front clamp
1
latch and free the strap from the U-bolt. Raise the
U-bolt , then the latch handle, so the auger tube
will clear it.
Refer to Figure 34 and Figure 36
2. Use the pin levers to withdraw both arm pins ,
and hold them in the withdrawn configuration.
Refer to Figure 34
3. Hold a grasp handle near the auger inlet hopper.
4. Release and clear rear clamp latch and strap.
5. Pull the auger away from the cart and set the inlet
end on the ground.
8
7
2 3
4
7
8
Figure 35
Auger Closed, Unlocked, Clear
3
Figure 36
Auger Swing Arm Pins
2
1
26350
26348
167-085M Table of Contents Index 2012-08-01
Page 43

Great Plains Manufacturing, Inc. Table of Contents Index Operating Instructions 39
Auger Hydraulic Controls
Operating the auger involves one or two valves on the
cart, and the tractor lever for the hydraulic circuit.
32393
Rotating auger.
To prevent serious injury or death:
B
F
▲ Read instructions and safety information before operation.
▲ Keep hands, feet, hair and clothing away from rotating
auger.
▲ Do not remove or modify any guards.
▲ Keep children well clear of work area.
Diverter Valve
Refer to Figure 37
This valve is located at the front right corner of the front
bulk hopper. It selects between
auger and markers (ADC2350/E cart) or
auger and fan (ADC2350B/BE cart).
Do not operate the diverter valve with the hydraulic circuit
energized. Unexpected auger, fan or drill movements can
result.
Do not use this valve as the Start-Stop control for the auger.
Operate the valve with the tractor hydraulic circuit off, or
set to neutral or float. The handle has two positions.
Auger Diverter Valve Positions
F
Handle Forward: Auger (make sure Auger control is
in center-off position before moving handle to ).
B
Handle Back: Marker-enable or fan-enable (make
sure circuit is off before moving handle to ).
F
B
Figure 37
ADC2350/E Auger Diverter Valve
1
Figure 38
ADC2350B/BE Diverter Valve
2
1
26332
29127
Auger Direction Valve
Refer to Figure 39
A valve toward the inlet end of the auger tube controls
1
the direction of auger helicoid screw rotation.This valve is
“center off”.
To allow flow control by an operator at the outlet end, the
Figure 39
Auger Direction Valve
26404
control handle for the valve has an extension and second
handle .
2
Use this valve as the Start-Stop and Forward-Reverse
control for the auger. Set the valve to center-Off when not
moving material at the moment.
2012-08-01 Table of Contents Index 167-085M
Page 44

40 ADC2350/E and ADC2350B/BE Table of Contents Index Great Plains Manufacturing, Inc.
Storing Auger
Refer to Figure 40 and Figure 41
The auger will not fully seat in the rear cradle unless the
auger inlet hopper is in one of two positions , . Each
position is shown in the figures.
1. Orient hopper.
1 2
1
5
6
If storing for transport, orient the inlet hopper up and
toward cart center , as shown in Figure 40. This
protects the auger from damage from movement of
the trailing implement on uneven terrain, and
minimizes collection of debris thrown by the tire.
If securing the auger for cart storage, orient the inlet
hopper out and down , as shown in Figure 41. This
minimizes collection of airborne debris and
precipitation. See also “Storage” on page 55.
2. Set arm levers , to lock arm pins open.
3. Fold arm with center pivot forward.
4. Push auger to cradles.
Refer to Figure 42
which depicts pin configurations with arm in storage position.
Arm lengths have been foreshortened for clarity.
5. Release arm pins, so that they will seat automatically
when arm is in final storage position.
6. Seat auger in cradles, and secure straps , .
1
2
3 4
5 6
Auger Swing Arm
The auger arm may be completely unfolded to straight
out, or folded, with the middle pivot pointing to cart front
or back, as needed, to meet your loading or unloading
requirements.
The arms pins may be used during unfolding and
positioning to hold one arm in place while the other is
being moved. This is useful for single-person operations.
In specific working configurations, you can engage the
pins in slots or holes, to constrain the range of movement
of the arm, or prevent movement altogether.
3
Auger Latched for Movement
4
Figure 40
26329
2
5
3
4
Figure 41
Auger Latched for Storage
Figure 42
Pins when Arm is Stored
6
26349
26358
Equipment Damage Risk:
Be aware of the location of the outlet end of the auger during
positioning. In addition to overhead line hazards, if a trailing
implement is folded, the auger can strike it during positioning,
with possible damage to the auger or implement.
See arm positioning illustrations at specific task topics:
“Unloading the Cart” on page 47, and
“Loading Material” on page 44.
167-085M Table of Contents Index 2012-08-01
Figure 43
Auger Swing Arm
26359
Page 45

Great Plains Manufacturing, Inc. Table of Contents Index Operating Instructions 41
Transport
Electrocution Hazard:
To prevent serious injury or death from electric shock, keep
clear of overhead power lines when transporting, folding,
unfolding or operating all air drill components. Machine is not
grounded. At higher voltages, electrocution can occur without
direct contact.
Great Plains recommends transporting the air cart
without seed loaded. Although designed for highway
movement with full hoppers, the additional weight of
seed may cause the implement assembly to exceed the
rated ability of the tractor, makes the assembly more
difficult to control and stop, and increases wear on cart
tires and wheel bearings.
Towing the drill at high speeds or with a vehicle that is not
heavy enough can lead to loss of vehicle control. Loss of
vehicle control can lead to serious road accidents, injury and
death. To reduce the hazard:
• Do not exceed 20 mph (32 km/h).
• Do not tow an assembly that, when fully loaded,
weighs more than 1.5 times the weight of the towing
vehicle.
In the following tables, the tractor must weight at least
2
⁄3(67%) of the weights shown.
The tractor must also be rated for towing and braking
the total load shown.
Review Transport Checklist
Figure 44
Minimum Towing Vehicle
Refer to the tables below, or compute the weight of your
configuration from the “Specifications and Capacities”
information in each manual, plus any material data.
Assembly Weight for ADC2350/E Air Cart Plus CTA4000
CTA4000 No Extra Weights One Weight Kit Two Weight Kits
Model -8006 -6575 -5010 -8006 -6575 -5010 -8006 -6575 -5010
ADC2350/E
Empty
ADC2350/E
Full
a. Data does not include markers.
21773 lbs
9876 kg
44173 lbs
20037 kg
20700 lbs
9389 kg
43100 lbs
19550 kg
19748 lbs
8958 kg
42148 lbs
19118 kg
23173 lbs
10511 kg
45573 lbs
20672 kg
Note: A loaded seed cart can easily cause the total
assembly weight to exceed 1.5 times the weight of
a fully ballasted tractor. Great Plains recommends
transport with the cart empty.
a
22100 lbs
10024 kg
44500 lbs
20185 kg
21148 lbs
9593 kg
43548 lbs
19753 kg
24573 lbs
11146 kg
46973 lbs
21307 kg
23500 lbs
10659 kg
45900 lbs
20820 kg
26360
22548 lbs
10228 kg
44948 lbs
20388 kg
2012-08-01 Table of Contents Index 167-085M
Page 46

42 ADC2350/E and ADC2350B/BE Table of Contents Index Great Plains Manufacturing, Inc.
Assembly Weight for ADC2350/E Air Cart Plus CTA4000HD
a
CTA4000HD Model -8006 (6in) -6576 (7.5in) -5010 (10in)
ADC2350/E Empty 28653 lbs (12997 kg) 27340 lbs (12401 kg) 26148 lbs (11861 kg)
ADC2350/E Full 51053 lbs (23157 kg) 49740 lbs (22562 kg) 48548 lbs (22021 kg)
a. Data includes standard (four) weight kits, but does not include markers.
Assembly Weight for ADC2350/E Air Cart Plus NTA3010
a
CTA3010 -3610 (10in) -4875 (7.5in)
Rows ADC2350B/BE Empty ADC2350B/BE Full ADC2350B/BE Empty ADC2350B/BE Full
No Weight Kits 23800 lbs (10795 kg) 46200 lbs (20956 kg) 25750 lbs (11680 kg) 48150 lbs (21840 kg)
1 Weight Kit
2 Weight Kits
3 Weight Kits
4 Weight Kits
a. Data does not include markers.
25200 lbs (11431 kg) 47600 lbs (21591 kg) 27150 lbs (12315 kg) 49550 lbs (22476 kg)
26600 lbs (12066 kg) 49000 lbs (22226 kg) 28550 lbs (12950 kg) 50950 lbs (23111 kg)
28000 lbs (12701 kg) 50400 lbs (22861 kg) 29950 lbs (13585 kg) 52350 lbs (23746 kg)
29400 lbs (13336 kg) 51800 lbs (23496 kg) 31350 lbs (14220 kg) 53750 lbs (24381 kg)
Assembly Weight for ADC2350/E Air Cart Plus NTA3510
a
CTA3510 -4010 (10in) -5575 (7.5in)
Rows ADC2350B/BE Empty ADC2350B/BE Full ADC2350B/BE Empty ADC2350B/BE Full
No Weight Kits 24600 lbs (11158 kg) 47000 lbs (21319 kg) 26900 lbs (12202 kg) 49300 lbs (22362 kg)
1 Weight Kit
2 Weight Kits
3 Weight Kits
4 Weight Kits
a. Data does not include markers.
26000 lbs (11793 kg) 48400 lbs (21954 kg) 28300 lbs (12837 kg) 50700 lbs (22997 kg)
27400 lbs (12428 kg) 49800 lbs (22589 kg) 29700 lbs (13472 kg) 52100 lbs (23632 kg)
28800 lbs (13063 kg) 51200 lbs (23224 kg) 31100 lbs (14107 kg) 53500 lbs (24267 kg)
30200 lbs (13698 kg) 52600 lbs (23859 kg) 32500 lbs (14742 kg) 54900 lbs (24902 kg)
Assembly Weight for ADC2350B/BE Air Cart Plus 3N-4010HDA
3N-4010HDA -4810 (10in) -6675 (7.5in)
Cart
Standard Drill & Cart 30984 lbs (14054 kg) 53384 lbs (24215 kg) 31098 lbs (14106 kg) 53498 lbs (24266 kg)
1 Weight Kita & Cart
Dual Markers & Cart
2 Weight Kits & Cart
Markers, 1 Kit & Cart
3 Weight Kits & Cart
Markers, 2 Kits & Cart
Markers, 3 Kits & Cart
a. Each weight kit assumed to be populated with ten 100-pound weights (5 weights each bracket).
ADC2350B/BE Empty ADC2350B/BE Full ADC2350B/BE Empty ADC2350B/BE Full
32105 lbs (14563 kg) 54505 lbs (24723 kg) 32219 lbs (14614 kg) 54619 lbs (24775 kg)
32844 lbs (14898 kg) 55244 lbs (25058 kg) 32958 lbs (14949 kg) 55358 lbs (25110 kg)
33227 lbs (15071 kg) 55627 lbs (25232 kg) 33341 lbs (15123 kg) 55741 lbs (25284 kg)
33965 lbs (15406 kg) 56365 lbs (25567 kg) 34079 lbs (15458 kg) 56479 lbs (25618 kg)
34348 lbs (15580 kg) 56748 lbs (25741 kg) 34462 lbs (15632 kg) 56862 lbs (25792 kg)
35086 lbs (15915 kg) 57486 lbs (26075 kg) 35200 lbs (15967 kg) 57600 lbs (26127 kg)
36208 lbs (16424 kg) 58608 lbs (26584 kg) 36322 lbs (16475 kg) 58722 lbs (26636 kg)
167-085M Table of Contents Index 2012-08-01
Page 47

Great Plains Manufacturing, Inc. Table of Contents Index Operating Instructions 43
Pre-Transport Checklist
Before transporting the cart, check and observe the
following items.
❑ Make sure the weight of the tractor equals or exceeds
the value specified for your air drill assembly in the
tables above or calculated from specifications. Be
sure to include hopper contents if materials are
pre-loaded, and markers. If weights are added to the
tractor or drill, or to reach the tractor-weight figure,
make sure the total assembly weight is still within the
rated capacity of the tractor.
❑ Lockout Drive Chain.
If the cart will be transported more than 15 miles, lock
out drive chain to avoid wear.
See “Drive Chain Lockout” on page 37.
❑ Auger Latches
Properly latch auger to cart and rear storage arm
before transporting.
See “Storing Auger” on page 40.
❑ Hopper Lids
Closed and secured.
See “Lid Closing” on page 33.
❑ Walkboard Ladder
Right side ladder mounted and pinned. Both ladder
lower sections raised and pinned.
See “Walkboard Ladders” on page 32.
❑ Transport Locks
Check that all implement transport locks are securely
in place.
❑ Tires
Check that all tires are properly inflated as listed on
“Tire Inflation Chart” on page 87.
❑ Bystanders
Check that no one is in the way before moving. Do not
allow any one to ride on the cart or implement.
❑ Warning Lights
Always use tractor, cart and implement warning lights
when transporting the air drill.
❑ Clearance
Know the maximum dimensions of the cart and
implement in transport position and follow a route that
provides adequate clearance from all obstructions,
including overhead lines.
See “Specifications and Capacities” on page 87.
❑ Stopping Distance
Allow sufficient stopping distance and reduce speed
prior to any turns or maneuvers. If the cart is
transported full, allow extra stopping distance.
❑ Road Rules
Comply with all national, regional and local laws when
transporting on public roads.
❑ Watch Traffic
The bins obstruct a portion of your rear view. Be
prepared for sudden maneuvers from following
vehicles.
Monitor Material Configuration
The DICKEY-john®IntelliAg® monitor reads meter shaft
speeds and can report pounds-per-acre (or kg/ha)
planted. With the optional Variable Rate Kit, the monitor
can control material rates.
In order to report accurately, the monitor requires several
inputs. Inputs that rarely change were entered during
cart setup (see “Setup Seed Monitor for Air Drill” on
page 29). Inputs specific to particular materials (seed or
fertilizer) need to be entered when those materials are
first used, and when changed.
See the DICKEY-john® Quick Start guide for
detailed instructions. Consult the DICKEY-john
®
Operator’s Manual for how to configure
reporting and alerts.
2012-08-01 Table of Contents Index 167-085M
25421
Page 48

44 ADC2350/E and ADC2350B/BE Table of Contents Index Great Plains Manufacturing, Inc.
Loading Material
Entrapment and suffocation hazard:
Never enter a hopper for loading or unloading.
Once used for hazardous fertilizer or treated seed, dangerous
concentrations of fumes may be present even in an empty
hopper with the lid open.
Even with small amounts of otherwise harmless material
loaded, the atmosphere inside the hopper may have insufficient
oxygen or high levels of choking dust.
1. Securely hitch cart or drill+cart to a tractor with
adequate weight and power. Park cart on solid, level
ground. See Tractor Requirements, “Specifications
and Capacities” on page 87.
Note: Static tongue weight of a loaded cart is about
9,500 pounds on level ground and more when
facing downhill.
Refer to Figure 45
2. At each hopper to be loaded, if meter box clean-out
door was completely closed, open it. See “Meter
Doors” on page 35. If the cart has been parked for
more than a day, condensation may have caused
moisture to accumulate.
3. Wipe seals and meter bottom flanges clean. Close
and latch clean-out doors.
Population Risk:
Before filling the cart for the first time, and at the beginning of
each season, check the entire bin for leaks. A small air leak
can cause large variations in seeding rates.
4. With the cart fan running, check hopper-lid and
meter-box seals carefully for air leaks. Adjust bin
latch or replace seals to prevent leakage.
5. Shut off all hydraulic power to the cart.
Refer to Figure 46
6. Set the Auger Direction Valve control handle to
center, off position.
Figure 45
Hopper Unloading Door
26340
Figure 46
26404
Auger Direction Valve Off
167-085M Table of Contents Index 2012-08-01
Page 49

Great Plains Manufacturing, Inc. Table of Contents Index Operating Instructions 45
Cart Diverter Valve
Refer to Figure 47 or Figure 48
7. Set the cart diverter valve to the forward (Auger)
1
position, as indicated by a decal near the valve. See
“Diverter Valve” on page 39.
8. Climb the ladder to the cart walkboard. Unlatch the
lid and pivot it fully open. See “Lid Opening” on
page 33.
Note: If you do not want to fully open lid until just before
moving material, at least unlatch the lid. The auger
nozzle may be in the way of unlatching if you wait
until after auger positioning.
9. Check that the strainer basket is in place in the top of
the bin. Remove any foreign material from the
basket.
Electrocution Hazard:
Keep clear of overhead power lines when positioning auger.
1
Figure 47
ADC2350/E Diverter Valve (to Auger)
1
26417
10. Un-pin and un-clamp the auger, and swing the inlet
end to the ground. See “Deploying Auger” on
page 38.
Refer to Figure 50
11. Extend the auger swing arms until the mount pin
and the arm joint pin align with the curved slots in
2
1
the locking plates.
Equipment Damage Risk:
If the trailing implement is folded, mind the outlet end of the
auger, as the auger can strike components of a folded trailing
implement.
12. Release the arm pins , into the plate slots.
1 2
Figure 48
29127
ADC2350B/BE Diverter Valve (to
2
1
Figure 49
Arm for Material Loading
26352
2012-08-01 Table of Contents Index 167-085M
Page 50

46 ADC2350/E and ADC2350B/BE Table of Contents Index Great Plains Manufacturing, Inc.
Refer to Figure 50
13. Pull up on the hopper snap pin and pivot the
auger hopper until its opening is facing up, and
2
1
1
the snap pin is captured in a locking hole.
2
Refer to Figure 51
With the pins latched in the arm pivot slots, both front
and rear hopper can be loaded from a single distribution
point (inlet hopper location) at 100 inches (2.54 m) out
from the hoppers and centered between the hoppers.
The outlet end can be swung from hopper to hopper by a
single operator on the walkboard.
Refer to Figure 52
14. Swing the auger so the spout is centered over the
hopper opening. Position your grain container for
unloading into the auger hopper.
Figure 50
Auger Hopper Loading
100 inches
Figure 51
Single-Point Loading
26331
26438
Rotating auger. To prevent serious injury or death:
▲ Read instructions and safety information before operation.
▲ Keep hands, feet, hair and clothing away from rotating
auger.
▲ Do not remove or modify any guards.
▲ Keep children well clear of work area.
15. Energize tractor hydraulics for auger. You may need
to tie the control lever in place or adjust the detent
Figure 52
Loading Rear Hopper
26355
pressure on your tractor.
167-085M Table of Contents Index 2012-08-01
Page 51

Great Plains Manufacturing, Inc. Table of Contents Index Operating Instructions 47
16. Start the auger by turning the auger direction valve
off center to the left or right. Visually check auger for
correct rotation direction. Reverse handle if needed.
See “Auger Hydraulic Controls” on page 39.
12713
17. Slowly turn on material flow and fill hopper.
Note: Hopper fill level indications are molded into the side
of the hopper.
18. When hopper is full, turn off the auger by moving the
auger direction control to the center position.
19. Briefly run auger in reverse to return any residual
material to the inlet hopper for recovery or disposal.
20. Return auger to storage position. See “Storing
Auger” on page 40.
21. Turn off the tractor hydraulics.
Do not turn the auger hydraulic diverter handle until the
hydraulics have been shut off. If the diverter is moved with
hydraulics on, other equipment may suddenly begin moving.
22. When circuit is off, set diverter to up (pass-through to
markers or fan). See “Auger Hydraulic Controls”
on page 39
23. Remove any foreign matter from the strainer basket.
24. Wipe any grain or foreign matter from lid-seal area
on top of cart bin. Close lids and latch securely.
Unloading the Cart
The cart auger can be swung under the cart to unload
material in hoppers. The material must be in a
free-flowing state. If the material will not flow out the
clean-out door, see “Problem Clean-Outs” on page 77.
For normal unloading:
1. Securely hitch cart or drill+cart to a tractor with
adequate weight and power. Park cart on solid, level
ground. See Tractor Requirements, “Minimum
Towing Vehicle” on page 41.
2. Shut off all hydraulic power to the cart.
12713
2012-08-01 Table of Contents Index 167-085M
Page 52

48 ADC2350/E and ADC2350B/BE Table of Contents Index Great Plains Manufacturing, Inc.
Keep clear of overhead power lines when positioning auger.
3. Deploy the auger. See “Deploying Auger” on
page 38.
4. Check that the auger directional control on the auger
tube is in the center, neutral/off position. See “Auger
Hydraulic Controls” on page 39.
Refer to Figure 53
5. As needed, pull up on the auger hopper snap pin
and rotate the auger hopper so that the opening
2
1
faces up.
6. Install the calibration crank. It will be used to empty
the flute chamber of the meters. See “Meter Hand
Crank” on page 36.
7. For clean-out, make sure the variable rate
gearboxes are set:
5
• above “10” if the final drive range gears are in
High range mode, or
• above “80” if the final drive range gears are in
Low range mode.
To change variable rate gearbox and final drive
range see “Setting Material Rates” on page 56. If
set to “0”, operating the hand crank may fail to
clear the meters of seed.
1
2
Figure 53
Orient Auger Hopper
26331
1
Refer to Figure 54 or Figure 55
8. Check that the diverter valve is set to Auger .
1
9. Start the tractor’s hydraulic system and engage the
circuit for the Auger/Marker (model ADC2350/E) or
Auger/Fan (model ADC2350B/BE). You may need to
tie the tractor control lever in place.
Note: The function of the valve’s forward position
depends on the cart and implement model.
10. If unloading the front hopper, continue at step 11.
If unloading the rear hopper, skip to step 15.
Figure 54
ADC2350/E Selector Valve (to
1
Figure 55
ADC2350B/BE Diverter Valve (to
26416
29127
167-085M Table of Contents Index 2012-08-01
Page 53

Great Plains Manufacturing, Inc. Table of Contents Index Operating Instructions 49
Unloading Front Hopper
Refer to Figure 56 and Figure 57
11. Swing auger assembly out from cart and engage
mount lock pin . This prevents undesired
movement of the inner arm while positioning the
outer arm and auger tube.
12. Swing auger under the meter box clean-out door of
the front hopper. The clean-out door is the forward
door.
1
Refer to Figure 57 (which depicts the arm orientation when
the auger is positioned as shown in Figure 56)
13. Engage auger swing arm lock pin .
2
14. Skip to step 19.
Figure 56
Auger Under Front Hopper
1
Figure 57
Arm for Forward Unload
26356
2
26353
2012-08-01 Table of Contents Index 167-085M
Page 54

50 ADC2350/E and ADC2350B/BE Table of Contents Index Great Plains Manufacturing, Inc.
Unloading Rear Hopper
15. Remove the right ladder. See “Removing the Right
Ladder” on page 32.
Refer to Figure 58 and Figure 59
16. Swing auger assembly out from cart and engage
mount lock pin . This prevents undesired
movement of the inner arm while positioning the
outer arm and auger tube
17. Swing auger under the meter box clean-out door of
the rear hopper. The clean-out door is the forward
door.
1
Refer to Figure 59 (which depicts the arm orientation when
the auger is positioned as shown in Figure 58)
18. Engage auger swing arm mount lock pin and
swing arm joint pin .
2
1
Figure 58
26357
Auger Under Rear Hopper
1
2
Figure 59
Arm for Rear Unload
26354
167-085M Table of Contents Index 2012-08-01
Page 55

Great Plains Manufacturing, Inc. Table of Contents Index Operating Instructions 51
Unloading Either Hopper, cont...
19. Position your grain container under the auger spout.
20. Before restarting the tractor hydraulics, check the
configuration of the tractor and cart hydraulics. The
cart diverter valve is located at the front right corner
of the forward bulk hopper. See “Auger Hydraulic
Controls” on page 39.
21. Engage tractor lever for auger circuit.
Rotating auger. To prevent serious injury or death:
▲ Read instructions and safety information prior to operation.
▲ Keep hands, feet, hair and clothing away from rotating
auger.
▲ Do not remove or modify any guards.
▲ Keep children well clear of work area.
Refer to Figure 60
22. Start the auger by turning the auger motor control
left or right. Visually check auger for correct direction
of rotation. Reverse handle if needed.
Follow manufacturer recommendations for protective
equipment when working with treated seeds.
Refer to Figure 61
23. Slowly open the clean-out door on the bottom of
1
the meter.
This is the forward of the two doors on the meter.
24. When material flow from the clean-out stops, open
the calibration door to ensure complete clean-out.
The calibration door is the rear door.
25. Turn the hand crank counter-clockwise to empty
meter. Turn until material flow is nil.
26. Set the auger directional control to neutral/off.
27. Latch-out pins on auger swing arm joint and mount.
Move auger inlet out from under cart.
28. To empty the other hopper, return to:
step 15 on page 50 for the rear hopper, or
step 11 on page 49 for the front hopper.
Otherwise continue at step 29.
Figure 60
Auger Directional Control
12713
14884
1
Figure 61
Hopper Unloading Door
Equipment Damage Risk:
Rotate the hand crank only in the counter-clockwise direction,
as shown in Figure 32, page 36. Operating in reverse can
cause meter gear box damage.
26340
2012-08-01 Table of Contents Index 167-085M
Page 56

52 ADC2350/E and ADC2350B/BE Table of Contents Index Great Plains Manufacturing, Inc.
Unloading Closeout
29. Remove pin from hand crank shaft, return hand
crank to storage position, and re-pin.
30. If storing at end of season, or having residual
material in the auger tube is a concern, reverse the
directional control on the auger until no seed
remains in the auger tube.
31. Set the tractor circuit for the auger to neutral, or shut
down tractor hydraulics completely.
Refer to Figure 37 on page 39
32. With auger circuit off, set diverter handle back
(pass-through to markers or fan).
Do not move the auger hydraulic diverter valve to the forward
position until the hydraulic circuit has been shut off at the
tractor. If the diverter is moved with hydraulics on, the drill
markers will suddenly begin moving.
Refer to Figure 62
33. Clean out auger hopper by pulling up the hopper
snap pin and swiveling the hopper to the side.
34. When empty, fold the auger swing arm (middle pivot
forward), and move it nearly into the cradles.
35. Swivel the auger hopper for transport or storage.
See “Storing Auger” on page 40.
36. Return auger to storage cradle. See “Storing
Auger” on page 40.
37. If removed, re-attach lower ladder. See “Removing
the Right Ladder” on page 32.
1 2
2
Empty Auger Hopper
1
Figure 62
26331
38. Wipe top and bottom of meter-box seal flanges,
making sure all material is removed. Look for
material caught between seal and flange.
39. Close clean-out and calibration doors. Close and
latch bulk hopper lids if they were open for
unloading.
Figure 63
Checking Meter Box Seals
167-085M Table of Contents Index 2012-08-01
26341
Page 57

Great Plains Manufacturing, Inc. Table of Contents Index Operating Instructions 53
Field Operations
This section presumes that all pre-operation check
have been made on both air cart and drill, and cart is
loaded with seed and any treatments.
Single Hopper Operation
There are two ways to disable a meter if only one
hopper is being used.
1. For short planting sessions, simply set the variable
rate gearbox control arm to zero (0). The input shaft
to the gearbox still rotates, but the output shaft
does not, and no material is metered.
2. For extended planting sessions, loosen the idler
and remove the gearbox input drive chain. This
minimizes wear on the gearbox.
Fan Speed
Fan speed is monitored and reported by the seed
monitor, but is manually controlled. The optimum rate
depends on the seed type, any treatments. “Fan Speed
Adjustment” on page 68 for further information.
Refer to Figure 64
ADC2350/E only: Fan shut-off valve must be open for fan
to operate. This valve is not present on ADC2350B/BE.
Equipment Damage Risk:
Always engage the fan with the tractor at a low engine speed.
Engaging the fan when the tractor is at high speed may cause
fan damage.
Do not reverse hydraulic flow with the fan running.
Figure 64
Fan Shutoff Valve Open
29582
2012-08-01 Table of Contents Index 167-085M
Page 58

54 ADC2350/E and ADC2350B/BE Table of Contents Index Great Plains Manufacturing, Inc.
Refer to Figure 65
The proper reading for the magnehelic air pressure gauge is
12 to 25 inches of water. A sudden drop in pressure is a sign of
a possible leak which can negatively affect seeding.
Final Field Checklist
❑ Set seed meters per chart and calibration.
❑ Check diverter valve set to marker or fan.
Check fan shut-off valve open (fan enabled)
❑ Set fan to speed suitable for seed. Watch fan at
start-up to ensure correct direction of rotation.
❑ Run fan for at least 15 minutes before planting.
❑ Check air pressure gauge for 12 to 25 inches of
water pressure.
❑ Check all seed hoses secure.
❑ Check for air leaks at lids and meter box seals.
❑ Complete drill checklist.
Planting Sequence
1. Lower drill 5 to 10 feet before initial seeding point.
2. Pull forward and begin planting.
3. Raise drill for turns (meters stop automatically).
Planting
Be aware of the 5 to 10 feet of drill-lowered operating
distance required for seed to reach the row units.
If you stop in the middle of a pass, raise the drill and back
up 10 feet before resumption of seeding.
Figure 65
Fan Air Pressure
26425
Parking
Follow these steps when parking the drill for periods of
less than 36 hours. For longer periods, see Storage, the
next topic.
1. Place the cart on firm, level ground.
2. Check that hopper lids are latched, and secure the
hopper lids with security cable or padlock and chain
to prevent entry by children. See “Lid Closing” on
page 33.
3. ADC2350/E only: Remove jack from storage position
and pin securely to lifting stob on outside of cart
tongue. See “Hitching” on page 20.
4. ADC2350/E only: If ground is soft place a wide block
or plate under the jack to increase contact area.
5. Securely block cart tires to prevent rolling.
6. ADC2350/E only: Extend jack until weight is off of
the tractor drawbar.
7. Unhook electrical lines and install plugs as provided.
8. Release pressure on hydraulic system, then
disconnect hydraulic lines and pull all lines back onto
cart tongue. Be sure hose ends do not rest on the
ground.
9. Disconnect the safety chain.
10. Unhitch from tractor or leading implement.
167-085M Table of Contents Index 2012-08-01
Page 59

Great Plains Manufacturing, Inc. Table of Contents Index Operating Instructions 55
Storage
If possible, leave the air cart and drill connected for
extended storage.
Store the air cart and drill where children do not play. If
possible, store them inside for longer life.
1. Unload all material in hoppers. See “Unloading the
Cart” on page 47.
2. Unlatch the hopper lids so that the seals are not in
compression during storage. Route a chain or
security cable through the hold-down U-bolt and the
latch handle to prevent unauthorized entry, and
prevent high winds from opening the lid.
3. Empty the hoppers completely. Hand crank the
meters several turns to empty completely. See
“Meter Hand Crank” on page 36. Blow out the
meters with air to remove all material.
4. Unless cleaned out at last loading or during unload
above, deploy the auger, and run the motor in
reverse until auger is completely empty. See “Auger
Operations” on page 38
5. Return the auger to its cradle with the hopper in the
extended storage orientation. See “Storing Auger”
on page 40.
6. Remove the drive chains and store in oil.
7. Lubricate the cart at all points listed under
“Lubrication and Scheduled Maintenance” on
page 80.
8. Check all bolts, pins, fittings and hoses. Tighten,
repair or replace parts as needed.
9. Check all moving parts for wear or damage. Make
notes of any parts needing repair before the next
season.
10. Open the meter-box doors completely to release
seal pressure and allow rinse water to exit.
11. Thoroughly wash the hoppers with water inside and
out to prevent corrosion from fertilizer or seed
treatments.
12. Set doors to slightly open, but not wide enough for
animals to enter the meters. Wire doors in place if
needed.
Do not store the cart with seals compressed.
13. If the cart is disconnected from the implement for
storage, plug all 2
1
⁄2inch openings to prevent pests
from nesting.
14. Raise and stow the walkboard ladder extensions, to
discourage climbers.
15. Use touch-up paint to cover scratches, chips and
worn areas to prevent rust.
2012-08-01 Table of Contents Index 167-085M
Page 60

56 ADC2350/E and ADC2350B/BE Table of Contents Index Great Plains Manufacturing, Inc.
EN
© Copyig
t 2
012
P nt d 012 01 3 167
085B
Manufacturing Inc
wwwg ea pla nsmfg com
ORG NAL NSTRUCT
IONS
Seed and Fertilizer Rate Charts for Air
Drills withVariable Rate Gearbox(VRG)
Metering, models:
NTA607 or NTA607HD,
NTA907 or NTA907HD,
NTA2007 or NTA2007HD,
NTA3007 or NTA3007HD, and
ADC2350 or ADC2350B Air Drill Carts
with all compatible air drill implements
The folowing pages a e to assist in the proper se ting of seeding and
fer iizer rates for he air dri l
Toa s ur
ethe most accu
ateappl cat on ra es it s recommended that heaird i l be ca i ra ed or t e
esired
maer a s
at he t me of p an ing
G
e
a Pl i s M g nc
n ta la ion Ins ruc ions 1
6/ 3 2010 ©Co
py gh 2010 166 26 M
Air D il Variab e Rate K t
Air Drill Carts and 6 & 9m Air Dri ls
General Information
These
in
t
r ct ons
expai
n how to in ta l a varab e a e
conro er
on a compatb e ir ca t or nteg ated a r dr l
hat pre ent y has nly manual crank ope ated) rate
co t
ol Wi h Var able Rate ns al ed he eed mon tor
d ect
y cont
os
maer al r te ndepende t y at ea h
upda
ted meter
These
in t
uctons
appy
o an ns al a ion of
These
kts app y o
One ual it nc udes tw
o actu
tos and upda es one
ar art or one nteg a ed a r dr l One sgl sing e) k t
ncl des
o e
acua or and pdat
es one
met
er
The166 1
93Ak t nc udes newWSM
Tsotware or ol er
ADC
2350B a r car s that ave a So tware
Ve si n
hat
lac s qual fied
varab e a e sup ort
Used
wth
•ADC
23 0 ADC2350B
•NTA907H
D
NT
A3007HD
•NTA607H
D NTA2007HD
Kt
Kit Descripion
166193A ADC2350 VARABL
E RATE
KT dua )
16 -
328A
ARAB
E
RATE
ACTR
K
T SGL BN
66-
339A VAR RATE
ACTR
KT DUAL
BN
Cart or D i l
Kt Compatib l ty
ADC
2350
a
aDrls
w
h
so ware er on pror to 421 eq i e t e so tw re
up a e n l ded n t is it S e page 4
166
193A
ADC
2350B
a
166193A
NTA60
HD 1 6-328A or 166-339A
bA s ng e ho per r l u es t e 166 32 A t A d al opp r d i l
may se ether 1 6 28A or 66 33 A de en i g on whe her
ara le a e is esr d f r j st ne or b th me e s
N A
07HD
166-
193A
NTA200
7HD 166- 28A or 66-339A
NTA3007HD
166193A
Related Documents
Have he Ope ator Manua at hand for d i l movements
Have he urrent Par s Manual t hand or parts ID
Fgure 1
166-193A Kt nst l at on
294 8
110011512 ACC
Use
r Manual Leve s 2 nd 3
110011513 ACC
Us r Manual Le el 1
110011507 Verson 4 So twa e Upda e Gu de
167085B Seed Rae Manua (ADC & NTA model )
167-085M Opeator ADC 350/2350B
166207M Opeator NTA907 3007HD
166283M Opra or NTA6072007HD
167-08 P Parts ADC23502350B
166- 07P Parts N A 07/300HD
166283P Pars NTA607/ 007HD
U
D
F
B
L
R
Adjustments
To get full performance from your air cart, you need an
understanding of all component operations, and many
provide adjustments for optimal field results. Some of
Even if your planting conditions rarely change, some of
these items need periodic adjustment due to normal
wear.
these have already been covered earlier in this manual.
Adjustment Page The Adjustment Affects
Cart Sprocket Setup 19 Matching published seed rates
Leveling Cart 21 Planting consistency
Seed Monitor Configuration 43 Correct application rate reporting, without false alarms.
Seed Meter Final Drive Range 61 Seed population or fertilizer rate (coarse control)
Setting Variable Rate Gearbox 61 Seed population or fertilizer rate (fine control)
Meter Calibration 62 Achieving desired application rate
Changing Meter Flutes 66 Using high rate charts in the Appendix of the Seed Rate manual
Fan Speed Adjustment 68 Consistent seed population and minimum seed damage
Implement Lift Switch Adjustment 69 Avoiding wasted and unplanted seed
Chain Slack 75 Reliable operation and minimum wear
Setting Material Rates
Rate setting details are covered in the Seed Rate Manual
167-085B, which also contains seed and fertilizer rate
charts. The topic is covered only in summary form in the
present manual.
For an air drill cart with the optional Variable Rate Kit
(servo actuators at variable rate gearboxes), see the
detailed instructions in the 166-263M Installation and
Operation manual.
The ADC2350/E or ADC2350B/BE and attached drill is a
volumetric implement. For a given metering
configuration, rates will vary for materials with different
density and granularity. The rate charts provide starting
point, but calibration is essential for accurate application
(even if using both meters for the same material at the
same rate). Material rates are set independently for each
hopper and meter.
Check Drive System
Reliable material rates are only achieved if the ground
drive system is working properly. The transport tires must
be the correct size, and must be inflated to factory
specifications. Drive sprockets must be correct for the
implement.
167-085M Table of Contents Index 2012-08-01
Page 61

Great Plains Manufacturing, Inc. Table of Contents Index Adjustments 57
Check Flute Shaft Type
For some unusual very high rate applications and some
small seeds, Great Plains offers alternate meter flute
shafts (page 85) that change rates to 150%, 200% or
approximately 25% vs. the factory standard shaft.
Refer to Figure 66
(which depicts a single flute “star” with its halves, a single star
mated, two stars staggered, and a filler)
Know your “stars” setup. If your air drill cart has never
been changed from factory standard, you have standard
meter flute shafts with 2 “stars” (4 halves) per outlet.
How many and what type of “stars” you have determines
which rate chart to use.
Refer to Figure 67
(depicting an inspection from below meter)
If the configuration is not known, inspect the flute shaft
from the hopper lid (if hopper empty), or from below the
meter, with the calibration door fully open. It is not
necessary to remove the shaft. Inspect the flutes
1 2 3
( or ), and filler rings at active outlets.
On a standard “2 star” shaft, each seed drop outlet
contains two standard flute sets (4 halves ), each pair
staggered slightly from the next. Unused outlets are fully
blocked by filler rings .
On a “3 star” shaft, each outlet contains 3 flute sets.
On a “4 star” shaft, each outlet contains 4 flute sets,
with no fillers between adjacent drops.
On a small seed shaft, each outlet contains one set of
shallow flutes .
See also “Changing Meter Flutes” on page 66.
2
4
1
1
1
3
Figure 66
Standard / Small Stars and Filler
3
Figure 67
Checking Flute Shafts
1
2
32400
41
26426
2012-08-01 Table of Contents Index 167-085M
Page 62

58 ADC2350/E and ADC2350B/BE Table of Contents Index Great Plains Manufacturing, Inc.
Grea P a ns M
a
nuac ur ng nc
Seed Rates 27
201201 03 167 85B
Whea
t(Tri icum)
Sandard Stars High Range H gher ate Wheat char s requi ing opt onal flutes a e on page 45 and page 46
N tes
Sa ed seed densty is m asu ed and not c st m r ycommod y al
weght If our s ed has a igni can y ifere t dens y
see Dens ty Ad ustment on pa e 38
Tale r tes ae f app icat on from a si gle h pper a a me
wheher or ot bo h are loaded w th he same m teri l) For
app ca ion o the same ma eral r m boh hopp rs simul an ous y
do not use t e a get ate da a irst dvde t e ta get rate by wo
and use t e et ng for ha ha f ra e U e ha target ate or
ca br t ng each me er
Fnal D ive Range Gears Stars Per Outet Seed Densty Remarks
ei/gk 9702egnaR hgH
See tabe No es
54T Drving 17T D iven (standard) 61 5 pounds per bushel
Seed Rate
taR deeStaR deeS
a/gkca/sla/gkca/sla/gkca/sl
0 0 0 - 100 2 112 3 46 77955 238 5 2673 73 81929
164 184 20 75699 104 7 117 3 47 77990 243 7 2731 74 82307
184 206 21 75902 109 2 122 4 48 78027 248 8 2789 75 82712
205 230 22 76092 113 9 127 6 49 78067 253 8 2845 76 83146
227 254 23 76268 118 5 132 9 50 78110 258 8 2901 77 83610
250 280 24 76431 123 3 138 2 51 78159 263 6 2955 78 84106
274 307 25 76582 128 2 143 7 52 78212 268 4 3008 79 84636
299 335 26 76722 133 1 149 2 53 78272 273 0 3061 80 85202
325 364 27 76850 138 0 154 7 54 78338 277 6 3111 81 85806
352 395 28 76967 143 1 160 4 55 78411 281 9 3160 82 86451
380 426 29 77074 148 2 166 1 56 78493 286 2 3208 83 87138
409 459 30 77172 153 3 171 8 57 78583 290 2 3253 84 87871
439 492 31 77260 158 5 177 6 58 78684 294 1 3297 85 88653
470 527 32 77341 163 7 183 5 59 78794 297 8 3339 86 89486
502 563 33 77413 169 0 189 4 60 78916 301 4 3378 87 90374
535 600 34 77479 174 3 195 4 61 79050 304 6 3415 88 91322
569 637 35 77538 179 6 201 3 62 79197 307 7 3449 89 92332
604 676 36 77591 185 0 207 4 63 79357 310 5 3481 90 93410
639 717 37 77640 190 4 213 4 64 79532 313 1 3509 91 94560
676 758 38 77683 195 8 219 4 65 79723 315 4 3535 92 95789
714 800 39 77723 201 2 225 5 66 79930 317 4 3558 93 97102
752 843 40 77760 206 5 231 5 67 80155 319 1 3577 94 98506
792 887 41 77795 211 9 237 6 68 80398 320 5 3592 95 100008
832 933 42 77828 217 3 243 6 69 80660 321 5 3604 96 101617
873 979 43 77859 222 7 249 6 70 80943 322 2 3611 97 103342
915 102 6 44 77891 228 0 2555 71 81248 322 5 361 5 98 105194
958 107 4 45 77923 233 3 2615 72 81576 322 4 361 4 99 107184
Wheat 2 S ar ) P lses p r ub c oot
31308
Gearbox
Seting
Cal
Const
Gearbox
Seting
Cal
Const
Gearbox
Set ng
Cal
Const
Find Your Chart and Rate
Standard “2 star” rates are in the main section of the
Seed Rate manual. “3 star” and “4 star” and Small Seeds
rates are in the Appendix of the Seed Rate manual.
If you are planning to apply two different materials (such
as seed and fertilizer) in each hopper, perform the setup
steps separately for each hopper, as the configurations
(including stars) may be completely different.
1. Confirm that the chart is for the material and star
configuration you have.
2. Find your target population or application rate.
Note: If you have a choice of charts, for most consistent
results, pick one that results in a variable rate
gearbox value between 30 and 70.
“High Rate” charts are provided for some seeds, but the
charts do not cover all possible combinations of
dual-hopper and/or high-rate flutes. You can use any
standard-rate single-hopper chart.
To find the initial chart rate
AdjustedRate FieldRate LookupFactor×=
In the example, the desired field rate was 200 lbs/ac.
100 = 200 × 0.5
Lookup settings for 100 lbs/ac. in the charts. Initially set
each meter for a 100 lbs/ac rate, and calibrate.
Adjustment for Small Seeds
Small Seeds rates are provided for somea, but not all
seeds that might be compatible with the optional
smaller/shallow flute shaft. If the seed has a chart for the
standard shaft, choose a chart rate that is about 500%
(5x) the desired field rate. The Small Seeds shaft meters
at between 20% and 50% of the standard shaft.
Target Rate Adjustments
Hoppers for This Material
Single Dual
2 Stars (std) Rate is 1× Chart
Use chart rate
3 Stars Rate is 1.5× Chart
Lookup 0.67×
4 Stars Rate is 2× Chart
Lookup 0.5×
31374
Rate is 2× Chart
Lookup 0.5x
Rate is 3× Chart
Lookup 0.33x
Rate is 4× Chart
Lookup 0.25×
Monitor Material Configuration
The DICKEY-john®IntelliAg® monitor reads meter shaft
speeds and can report pounds/acre (or kg/ha) planted.
In order to report accurately, the monitor requires several
inputs. Inputs that rarely change were entered during
cart setup. Inputs specific to particular materials (seed or
fertilizer) need to be entered when those materials are
first used, and when changed.
167-085M Table of Contents Index 2012-08-01
See the DICKEY-john® Quick Start guide more
detailed instructions.
a. See “Tested Small Seeds” on page 85.
25421
Page 63

Great Plains Manufacturing, Inc. Table of Contents Index Adjustments 59
1. Material Configuration Setup Screen
for Seeds
“Type” - This must be set to “Gran Seed Monitor” to
configure for seeds.
Density Units” - If configured for “U.S.” mode (U.S.
customary units), this is pounds-per-bushel or
Note: Always enter Density Units before entering the
Density value. Changing the value of Density
Units will alter the value of Density.
pounds-per-cubic-foot. In metric mode this is always
kg/liter.
“Density” - This is the density of seed being planted.
Obtain this information from the material
container/supplier. If unknown, use the value specified in
the rate chart.
“Total Number of Towers” - This is the number of
primary hoses coming off the rear meter box
(typically 4, 5 or 6).
“Calibration Constant” - This is the number listed in the
seed rate charts for the rate you are planting or the
number obtained from running the calibration routine for
your specific seed.
2. Material Configuration Setup Screen
for Fertilizer
“Type” - This must be set to “Gran Fert Monitor” to
configure for fertilizer.
“Density” - Enter the density of Fertilizer being applied,
in pounds-per-cubic-foot (kilograms-per-liter). Obtain this
information from the material container/supplier. If
unknown, use the value specified in the rate chart.
“Total Number of Towers” - This is the number of
primary hoses coming off the rear meter box.
“Calibration Constant” - This is the number listed in the
seed rate charts for the rate you are planting or the
number obtained from running the calibration routine for
your specific fertilizer.
2012-08-01 Table of Contents Index 167-085M
Page 64

60 ADC2350/E and ADC2350B/BE Table of Contents Index Great Plains Manufacturing, Inc.
3. Channel Setup Screen
Channel 1 setups are for the front hopper.
Channel 2 setups are for the rear hopper.
“Type” - Set this to either “Gran Seed Monitor” or “Gran
Fert Monitor” based on the type of material in each
hopper.
“Material Name” - Choose the name of the material
configured for each channel in steps 1 and 2 above.
“Sensor Constant” - [ 360 ]
“Gear Ratio” - [ 1 ]
“Channel Width” - is your Implement Width (swath) in
inches (cm). Precise row/swath data is found in the air
cart or implement Operator’s Manuals.
If the monitor inputs are correctly entered, the monitor is
a handy tool for fine tuning the variable rate gearbox
setting. If the rate reported by the monitor does not
match the desired planting rate, rotate the crank to adjust
the variable rate gearbox control arm slightly so as to
achieve the desired planting rate.
Meter Rate Adjustment
Seed rate is determined by:
• Flute shafts (covered on page 57):
standard 2-star/1x rate, or
optional 3-star/1.5x or 4-star/2x rates
• Single/twin hopper metering
• Seed meter Final Drive Range gearing
• Variable Rate Gearbox setting
The Seed Rate Manual charts are based on cleaned
untreated seed of average size and test weight. Many
factors affect meter rates including foreign material, seed
treatment, seed size, field conditions, and test weight.
Minor adjustments will be needed to compensate for
these factors. Initially set the rates according to the
charts, then calibrate for your material and conditions.
Calibration is also required to set up the monitor
Calibration Constant. With the correct Calibration
Constant and material density the monitor can be used
to help fine tune the variable rate gearbox setting.
167-085M Table of Contents Index 2012-08-01
Page 65

Great Plains Manufacturing, Inc. Table of Contents Index Adjustments 61
Seed Meter Final Drive Range
Refer to Figure 68 and Figure 69
The meter flute shaft is driven by the agitator shaft
through a pair of interchangeable gears , . The
positioning of these gears creates two final drive ranges.
Each seed rate chart is based on a specific Final Drive
Range. The Ranges are:
• “High” range, which is used for larger seeds and
higher seeding rates
• “Low” range, which is used for smaller seeds and
lower seeding rates
The two seed meter shafts are labeled “DRIVING” and
“DRIVEN”.
The “DRIVING” shaft is the upper forward shaft.
The “DRIVEN” shaft is the lower rear shaft.
Refer to the Seed Rate chart (or Fertilizer Rate chart),
the table below, and Figure 68 and Figure 69 for setting
the seed meter final drive range.
FINAL DRIVE
RANGE
LOW RANGE 17 Tooth Small 54 Tooth Large
HIGH RANGE 54 Tooth Large 17 Tooth Small
1. Remove the lynch pins from the ends of both
shafts.
2. Remove and position the gears as shown in the table
above.
3. Secure with lynch pins.
Setting Variable Rate Gearbox
The variable rate gearbox allows you to infinitely vary the
meter drive speed to attain a wide range of seeding
rates. The ratio of gearbox input speed to output speed is
controlled by the position of a gearbox control arm. The
control arm has an indicator that points to a scale
marked in degrees. The Seed Rate and Fertilizer Rate
charts show the rate for each degree of the control arm
rotation.
Refer to the seed rate charts and set each variable rate
gearbox control arm to its scale setting for the desired
seeding rate. With the optional servo-controlled meters,
the rate is set via the seed monitor terminal.
To adjust the Variable Rate Gearbox for each hopper:
Refer to Figure 70
1. Remove the hairpin cotter securing the gearbox
adjustment crank.
2. Rotate crank until the control arm indicator points to
the scale setting that matches the rate from the Seed
Rate chart or determined by calibration.
1 2
3 4
DRIVING DRIVEN
5
3
DRIVEN
1
1
DRIVEN
Figure 68
Low Final Drive Range
5
Figure 69
High Final Drive Range
3
2
Figure 70
Variable Rate Gearboxes
4
DRIVING
2
26368
DRIVING
5
26369
26306
2012-08-01 Table of Contents Index 167-085M
Page 66

62 ADC2350/E and ADC2350B/BE Table of Contents Index Great Plains Manufacturing, Inc.
3. Reinsert the hairpin cotter.
Note: The variable rate gearbox operates optimally
between 30 and 70. If a seed has charts for both
HIGH Range and LOW Range, the mostconsistent
results are obtained when the gearbox control arm
is set between 30 and 70. Settings below
20 degrees are not recommended. When the
control arm is set above 70 degrees, large
movements of the arm result in small changes in
seeding rate.
Note: If you will be metering the same material from both
bins at the same time, use the Seed Rate chart
entry for half the desired application rate. Do not
use a half scale setting - the effect of the variable
rate gearbox control arm is not linear.
Meter Calibration
Push then and then to get to
meter calibration.
The Seed Rate charts are based on cleaned untreated
seed of average size and test weight. Many factors affect
meter rates including foreign material, seed treatment,
seed size, field conditions, and test weight. The Fertilizer
Rate chart is based on a representative granular
fertilizer.
Great Plains recommends calibrating for the exact
materials you intend to apply. Calibration determines two
very important settings for achieving accurate rates:
• The pounds per acre (or kg/ha) of the meter at the
current variable rate gearbox setting for your particular
seed or fertilizer.
• The Calibration Constant for the monitor to accurately
report the planting rate of your particular seed or fertilizer.
Calibration Procedure
The seed monitor must be correctly set up for both the air
drill and the material(s), or the calibration will not result in
useful monitor displays.
1. Set the Final Drive Range gears and Variable Rate
Gearbox setting to the values suggested in the Seed
Rate Chart (or Fertilizer Rate Chart).
2. Make sure there is enough material in the hopper(s)
for at least1⁄10 acre (or1⁄10 hectare) plus an extra
75 to 100 lbs. (35-45 kg).
167-085M Table of Contents Index 2012-08-01
Page 67

Great Plains Manufacturing, Inc. Table of Contents Index Adjustments 63
Refer to Figure 72
3. Since only one calibration bag is provided, remove
one of the final range gears from the meter that is
NOT being tested, to disable it.
4. Open the calibration door of the meter being
calibrated. The calibration door is the rear of the two
bottom doors.
1
R
2
2
1
Material Loss Risk: Do not open the front door. This is the
clean-out door. Opening the front bottom door will drain the
hopper. Once the front clean-out door is open it is difficult to
stop seed flow until the hopper is empty.
Refer to Figure 72
5. Insert calibration crank onto clutch shaft. See “Meter
Hand Crank” on page 36.
Rotate the calibration crank only in the
COUNTERCLOCKWISE direction. Operating in reverse can
cause gearbox damage.
6. Turn the calibration crank enough turns to be sure
the meter flutes are full and the system is metering.
Obey manufacturer or grower recommendations for safety
equipment and protective gear when using treated seeds.
7. Wipe all material off the flanges around the meter
door.
8. Accurately weigh an empty container large enough
to catch material coming out of the meter. The
calibration bag supplied with your cart weighs
3.36 lbs (1.53 kg).
Figure 71
Calibration Door Open
Figure 72
Calibration Crank
F
26339
26333
Refer to Figure 73
9. Place container under open calibration door. If using
the calibration bag, loop bag handles over the door
handles and hook the bag to the front of the meter.
10. On the seed monitor terminal,
set the monitor to Calibration mode .
enter [ 5 ] for the “# Meter Revs”, and
press the Start softkey .
This “# Meter Revs” parameter does not affect the
monitor calibration because the monitor counts
actual meter shaft revolutions and uses that count to
compute the Calibration Constant.
The “# Meter Revs” parameter is used for a progress
bar displayed during calibration.
2012-08-01 Table of Contents Index 167-085M
Figure 73
Calibration Bag
26402
Page 68

64 ADC2350/E and ADC2350B/BE Table of Contents Index Great Plains Manufacturing, Inc.
11. Turn the calibration crank counterclockwise for the
number of turns to simulate
Note: It is important to turn the calibration crank rapidly.
(About 2 to 2
1
⁄2revolutions per second is the
1
⁄10acre (or1⁄10hectare).
proper speed to simulate 5 to 6 mph planting
speed.)
See chart below for the correct number of turns for
your implement.
Clutch Shaft (Crank) Revs for…
Drill Model
1/10 Acre 1/10 Hectare
CTA4000
CTA4000HD
NTA3010
NTA3510
3N-4010HDA
301⁄
2
301⁄
2
411⁄
4
311⁄
4
31 761⁄
Note: A longer calibration is always more accurate,
especially for low rates and small seeds.1⁄10acre is
easy to calculate and is a minimum calibration run.
12. Wipe all the material off the flanges around the
meter doors and capture that material in the
calibration container.
The right column contains an example for the following
steps.
751⁄
751⁄
102
77
2
2
2
Example: Wheat, High Rate, 2 Stars
Target Seed Rate: 67.6 pounds per acre
Initial Variable Rate Gearbox setting: 38
13. Accurately weigh the container plus material.
Subtract the empty container weight to determine
the application rate for1⁄10 acre (or1⁄10 hectare).
Example:
MeasuredWeight is 10.92 pounds
SampleWeight = 10.92 - 3.36,
which is: 7.56 pounds
SampleWeight MeasuredWeight ContainerWeight–=
14. Press the Stop softkey on the monitor
and enter the sample net weight (SampleWeight).
The monitor responds with a Calibration Constant.
Push the Save softkey to accept this
value.
15. Multiply the sample size by 10 to determine
application rate per acre (hectare) at the current
variable rate gearbox setting.
CalibratedRate SampleWeight 10×=
Example:
CalibratedRate = 7.56 × 10,
which is: 75.6 lbs/ac
This is higher than our target rate of 67.6 lbs/ac.
If the calibrated rate matches the target rate, skip to
step 21. Otherwise…
167-085M Table of Contents Index 2012-08-01
Page 69

Great Plains Manufacturing, Inc. Table of Contents Index Adjustments 65
56.963.7 34 82719
16. Subtract the calibrated rate per acre (or hectare)
from the target rate to determine a correction
difference.
RateDifference T etRarg ate CalibratedRate–=
17. Refer to the seed rate chart for Seed Rate gearbox
setting values for the target rate.
18. Determine the amount of rate change for each
degree of control arm rotation from the target setting.
If the calibrated rate was
higher than target (as in our example),
examine lower gearbox setting values.
If the calibrated rate was
lower than target,
examine higher gearbox setting values.
19. Adjust the control arm by the number of degrees
needed to adjust for the calibration difference.
The rate of the arm adjusting crank is more than one
scale degree per turn, and the crank can only be
pinned at quarter turns. Pin it when the indicator is
closest to the corrected setting.
20. Run the calibration again, starting at step 9, using
the new Variable Rate Gearbox scale setting.
Example: TargetRate = 67.6
RateDifference = 67.6 - 75.6,
which is: -8 pounds
The calibration run metered 8 pounds too much.
You must lower the gearbox setting to compensate.
Example:
Initial Variable
Rate Gearbox
Setting: 38
60.5 67.8 35 82843
64.2 72.0 36 82969
68.1 76.3 37 83099
TargetRate
72.0 80.7 38 83232
76.0 85.2 39 83369
Example:
1 degree lower reduces rate by 67.6-63.9, or 3.7 lbs
2 degrees lower reduces by 67.6-60.4, or 7.2 lbs
3 degrees lower reduces by 67.6-56.9, or 10.7 lbs
Example:
The calibration difference was 8 pounds.
Adjusting down 2 degrees would correct by 7.2 pounds,
but adjusting by 3 would over-correct to 10.7 lbs.
So adjust the gearbox setting to just over 2 degrees
lower, to a final scale setting slightly below 36.
This validates the gearbox adjustment, and
establishes a new, more precise Calibration
Constant.
21. With the present meter satisfactorily calibrated,
re-mount the final drive gear removed from the other
hopper.
22. Repeat the calibration procedure for the other
hopper, starting at step 1.
If only planting from a single hopper, see “Single
Hopper Operation” in the air cart Operator’s manual
for methods of disabling the meter on the hopper not
in use.
23. Remove and store the calibration crank.
2012-08-01 Table of Contents Index 167-085M
Page 70

66 ADC2350/E and ADC2350B/BE Table of Contents Index Great Plains Manufacturing, Inc.
Changing Meter Flutes
To order high rate flute shafts, see “Alternate Flute
Sets” on page 85. To install a set of these shafts (or
re-install the standard shafts), start with the front meter,
as the task is a bit easier there. Save all parts for
immediate or future re-use.
Hopper must be empty for this procedure. see
“Unloading the Cart” on page 47.
2
2
Refer to Figure 74
1. On the right end of the meter box, remove and save
the lynch pins from the final range gears , and
then remove and save the gears.
Note which size gear was on the agitator output and
flute input shaft.
Refer to Figure 75
2. Remove and save the outer ring of six (6)
self-tapping hex head bolts , that secure the outer
flange to the meter box.
Note: Do not remove the six bolts that secure the
bearing flangette to the outer flange. The shaft to
be installed includes its own flange.
Refer to Figure 76
(Shown with meter box off and various components removed
for clarity. It is not necessary to dismount or further
disassemble meters to swap flute shafts).
3. From the right end of the meter box, carefully
withdraw the current flute shaft . It is likely that the
flange has a bead of silicone gasket. You may need
to carefully pry the flange loose from the box.
Note: For the rear meter box
It will not be possible to withdraw the shaft straight
out, as it would strike the tire. When the right end of
the shaft is close to the tire, angle the shaft forward
to clear the tire.
4. Store the old shaft in the carton in which the new
shaft was supplied. Mark the carton with the number
of active hoses (towers) and the number of stars
(factory standard is 2). This will reduce the risk of
mistaking the carton/contents in the future.
5. Apply a bead of silicone sealant to the inside face of
the outer flange, just inside the bolt hole pattern.
6. Carefully insert the new shaft in the meter box.
1 2
1
2
1
Figure 74
Remove Gears
1
2
Figure 75
Remove Flange Bolts
1
Figure 76
Exchange Flute Shafts
1
1
26337
26338
2
26335
167-085M Table of Contents Index 2012-08-01
Page 71

Great Plains Manufacturing, Inc. Table of Contents Index Adjustments 67
7. When the flange on the right end is fully seated
against the box, secure it with the 6 saved bolts.
Give the shaft a few turns.
8. Re-mount the gears. Refer to the Seed Rate manual
for the gear assignments for the agitator and flute
shafts. Note the pin hole orientation on the shaft and
on the gears. The gears can only be pinned in
2 of the 6 possible ways they can be placed on the
shafts.
2012-08-01 Table of Contents Index 167-085M
Page 72

68 ADC2350/E and ADC2350B/BE Table of Contents Index Great Plains Manufacturing, Inc.
Fan Speed Adjustment
Fan speed (rpm) is available on the seed monitor. Have
the seed monitor powered up for fan adjustments.
Refer to Figure 77
ADC2350/E only: Fan shut-off valve must be open for fan
to operate. Valve not present on model ADC2350B/BE.
Hydraulic Fan Start-Up
With the ADC2350/E fan shut-off valve open, and the
tractor at a low idle speed, energize tractor hydraulics for
fan. Lock hydraulic lever in place for continuous
operation. Refer to your tractor operator’s manual for
instructions on operating hydraulic motor.
Always engage the fan with the tractor at a low engine speed.
Engaging the fan when the tractor is at high speed may cause
fan damage.
Check that the bottom of the fan rotor rotates toward the
fan outlet port. If not, reverse the direction of the
hydraulic flow from the tractor.
Run fan for at least 15 minutes before seeding. Hydraulic
fluid must be warm before fan and wing down pressure
will operate properly.
1. Check bin-lid and meter-box seals for air leaks.
Adjust the latch or replace the seals to prevent
leakage.
Note: It only takes a very small air leak to cause large
variations in the seeding rate and pattern.
2. Watch the seed monitor and adjust fan speed by
increasing or decreasing hydraulic flow from the
tractor. Use the following guidelines and the fan
speed chart at right to properly adjust fan speed.
• Higher fan speeds improve seed distribution, but
high fan speeds also increase the chance of seed
damage and bounce.
• At first, adjust fan speed to the high end of the
range suggested in the chart at right. Watch for
excessive seed cracking and seed bounce from
the furrow, then reduce fan speed if necessary.
• Follow the chart at right as a guide. Actual fan
speeds will vary with implement width, row
spacing, seeding rates, seed weights and seed
size. Increase fan speed for heavier seeding rates
or seed. Reduce fan speed for lighter seeding
rates and seed more prone to cracking.
Figure 77
Fan Shutoff Valve (Open)
Figure 78
Fan Air Pressure
Recommended Fan Speeds
Seeds Fan RPM
Sunflowers 2,250 to 3,000
Wheat 3,250 to 4,000
Soybeans 2,750 to 3,500
Milo 3,250 to 4,000
29582
26425
167-085M Table of Contents Index 2012-08-01
Page 73

Great Plains Manufacturing, Inc. Table of Contents Index Adjustments 69
Implement Lift Switch Adjustment
Refer to Figure 79, which depicts a model NTA3510 drill.
An implement lift switch on the drill turns seed metering
off when the implement is raised. To adjust the height at
which seed metering is turned off, first locate the lift
switch on the implement. See table below.
Do not place any part of body under implement while making
adjustments.
Drill Model Lift Switch Location
CTA4000 Lift arm, mainframe front
CTA4000HD Lift arm, mainframe front
NTA3010 Right rear parallel lift arms
NTA3510 Right rear parallel lift arms
3N-4010HDA Right rear parallel lift arms
CTA4000 and CTA4000HD Lift Switch
Raise openers completely. Lock them up by moving the
FIELD/TRANS valve handle to TRANS. Loosen switch
mount bolts and slide switch up or down until the flexible
switch toggle makes contact with the top of the opener
sub-frame arm (toggle is bent up). Adjust the switch until
the toggle activates the switching.
NTA3010 and NTA3510 Lift Switch
Lower the implement until at a height where seeding
should start (usually just above ground). Turn off the
tractor and remove the key. Securely support implement
frame at this height with jack stands or blocks. Loosen
switch bracket bolts and slide switch up or down until the
flexible switch toggle is just past the point at which the
switch is activated (flexible switch toggle not contacting
anything).
Figure 79
NTA Height Switch
Note: The implement lift switch has three wires (black,
red and green). In order for the switch to work
properly, the correct two leads must be connected
to the lift switch extension cable.
The extension cable black lead always connects to
the switch black wire.
The extension cable red lead must connect to the
switch wire color indicated in the table below, for
your implement.
26366
Lift Switch
Drill
Model
CTA4000 Switch Wire: Red Closed
CTA4000HD Switch Wire: Red Closed
NTA3010 Switch Wire: Green Open
NTA3510 Switch Wire: Green Open
3N-4010HDA Switch Wire: Red Closed
Extension Cable
Red Wire to...
Switch State
Drill Raised
3N-4010HDA Lift Switch
Lower the implement until at a height where seeding
seeding should stop (usually just above ground). Turn off
the tractor and remove the key. Securely support
implement frame at this height with jack stands or blocks.
Loosen switch bracket bolts and slide switch up or down
until the flexible switch toggle makes contact with the
bottom of the implement rear parallel lift arm. Adjust the
switch until the toggle activates the switching.
2012-08-01 Table of Contents Index 167-085M
Page 74

70 ADC2350/E and ADC2350B/BE Table of Contents Index Great Plains Manufacturing, Inc.
Clutch Lock-Up
In the event of a mechanical or electrical failure of the
clutch of its controlling circuit, the clutch may be
mechanically locked in the engaged mode, using three
bolts stored near the hand crank.
This permits completion of a planting session when
repair or replacement is not an immediate option.
Note: When locked up, meters will continue supplying
seed even with the drill raised. For short moves
without seeding, set variable rate gearboxes to 0.
For longer moves, remove lock-up bolts or remove
chains.
Refer to Figure 80 and Figure 81
1. Remove the three M8-1.25×14mm metric bolts
from their storage locations near the clutch. Save the
nuts.
2. At the clutch, align the cutouts with the holes .
3. Insert the M8-1.25×14mm metric bolts .
If you observe half the hole obstructed by a metal
4
disc , you are not at a cutout.
If the entire hole is obstructed by a metal disc , you are
not at a cutout.
When at a cutout, the bolt will screw in with minimal
resistance until the bolt head reaches the clutch face.
Note: Use only the provided 14 mm length bolts. Longer
bolts will damage the clutch. Shorter bolts may not
effect a lock-up. Replacement bolts are Great
Plains part number 802-782C.
1 2
3
3
4
2
Figure 80
Electric Clutch Lockup
4
2
1
Figure 81
Clutch Plate Nearly at Cutout
2
3
22906
26168
167-085M Table of Contents Index 2012-08-01
Page 75

Great Plains Manufacturing, Inc. Table of Contents Index Troubleshooting 71
Troubleshooting
This chart primarily covers problems arising from air cart
issues, although it does include a few drill items.
Problem Cause Solution
Planting too little
Air leaks Check hopper lids, meter seals, manifold caps and
Fan speed too low See “Recommended Fan Speeds” on page 68.
Fan won’t run fast enough. Tractor must be able to supply 18 gallons/minute
Hydraulic fan running in reverse Check hydraulic circuit flow direction.
Height switch operating too low - clutch
is disengaging with openers in ground
Incorrect meter setting Re-check against Seed Rate Charts.
Incorrect cart setup sprockets for
implement
Excessive field speed: chart rates were
developed at 6.5 mph (10.5 km/h)
Incorrect tire size or air pressure Check tire size and air pressure, page 87.
Seed size and weight vary from chart Calibrate. Adjust rate to compensate.
Excessive gaps between drill passes Adjust implement markers.
Low seed level in seed box Fill seed box.
Actual field size is different Verify field size.
Plugged seed hose Clean out seed tube hose.
Plugged opener seed tube Lift up drill, expose bottom of seed tube and clean
Meter sprocket damaged Replace seed cup sprocket.
Obstruction in meter or seed tubes
(foreign material or uncleaned seed)
Clutch slippage due to oil in clutch Disassemble and de-grease clutch. On an
Removed, thrown or worn chains Check drive chains.
Also consult the Troubleshooting chart for the drill
implement.
seed hose connections. Adjust latch and/or
replace seals as needed.
at 200 psi.
Check that hydraulic fan check valve is not
installed backward.
See “Implement Lift Switch Adjustment” on
page 69.
Verify calibration.
Re-check against page 19.
Reduce speed
Remove excess slack in hoses.
Re-route hoses to avoid sharp bends.
Check that metering is actually stopping when drill
is raised. Adjust or replace height switch.
out.
Clean meter and seed tube.
emergency basis, use the clutch lock-up
procedure on page 70.
2012-08-01 Table of Contents Index 167-085M
Page 76

72 ADC2350/E and ADC2350B/BE Table of Contents Index Great Plains Manufacturing, Inc.
Problem Cause Solution
Planting too much
No Seed Flow
Uneven seed
spacing
Uneven seed
depth
Meter setting too high Re-check against chart & calibration.
Incorrect cart setup sprockets for
implement
Seed size and weight vary from chart Calibrate. Adjust rate to compensate.
Actual field size is different Verify field size.
Excessive overlap or irregular shaped
field
Incorrect tire size or air pressure Check tire size and air pressure, page 87.
Meter sprocket damaged Replace if damaged.
Seed monitor Master Switch off Engage seed monitor.
Height switch out of adjustment or
failed.
Chain broken or removed Inventory chains against routing diagrams.
Clutch failed Replace clutch. On an emergency basis, use the
Clutch circuit failed Replace failed component or cable. On an
Seed rate set to zero Check seed rate indicator at meter(s).
Sprocket loose on shaft Check all sprocket pins, keys and set screws.
Meter box completely plugged Have Parts Manual at hand for parts identification.
Excessive field speed Reduce speed.
Unclean seed Use clean seed.
Air leaks Check hopper lids, meter seals, manifold caps and
Erratic meter clutch Check for damaged cables and loose connections.
Build up of seed treatment in meter. Clean out meter (see above).
Tower blockage Check towers for obstructions and plugging.
Seed hose plugged Stop and raise drill with fan running. Hand-crank
Meter wheel damaged or worn Check meter sprocket and replace.
Excessive field speed Slow down. Check Seeding Rate Chart for correct
Air cart not level Check leveling instructions, page 21.
Planting conditions too wet Wait until drier weather.
Re-check against page 19.
Adjust implement marker.
Check, adjust or replace height switch.
clutch lock-up procedure on page 70.
emergency basis, use the clutch lock-up
procedure on page 70.
Remove chain drive to meter. Remove bolts
holding meter box to bottom of hopper. Remove
and clean out meter.
seed hose connections. Adjust latch and/or
replace seals as needed.
Blockages sometimes move from port to port in
towers.
meter and check for rows not delivering seed.
maximum field speed.
167-085M Table of Contents Index 2012-08-01
Page 77

Great Plains Manufacturing, Inc. Table of Contents Index Troubleshooting 73
Problem Cause Solution
Excessive seed
cracking
Chain
Excessive field speed Slow down. Check Seeding Rate Chart for correct
maximum field speed.
Fan speed too high Check fan speed against recommendations on
page 68.
Dividers missing or damaged in towers Check and replace as needed,
Unclean seed Use clean seed.
Damaged, old or dry seed Use clean, new seed.
Debris in retainer clip Be sure open end of retainer clips are facing
opposite direction of chain travel. Consult chain
routing diagrams in Appendix.
2012-08-01 Table of Contents Index 167-085M
Page 78

74 ADC2350/E and ADC2350B/BE Table of Contents Index Great Plains Manufacturing, Inc.
Maintenance and Lubrication
Proper servicing and maintenance is the key to long
implement life. With careful and systematic inspection,
you can avoid costly maintenance, downtime and repair.
Always turn off and remove the tractor key before making
any adjustments or performing any maintenance.
Crushing Hazard:
You may be severely injured or killed by being crushed under a
falling implement. Always have frame sufficiently blocked up
when working on, and particularly under implement.
High Pressure Fluid Hazard:
Escaping fluid under pressure can have sufficient pressure to
penetrate the skin. Check all hydraulic lines and fittings before
applying pressure. Fluid escaping from a very small hole can
be almost invisible. Use paper or cardboard, not body parts,
and wear heavy gloves to check for suspected leaks. If injured,
seek immediate medical attention from a health care provider
familiar with this type of injury.
After using drill for several hours, check all bolts to be
sure they are tight.
1. Securely block cart before working on it.
2. Lubricate areas listed under “Lubrication and
Scheduled Maintenance” on page 80.
3. Adjust idlers to remove excess slack from chains.
Clean and use chain lube on all roller chains as
needed.
4. Check for air leaks at lids, doors, seals, caps and
hose connections.
5. Inflate tires as specified on “Tire Inflation Chart”on
page 87.
6. Replace any worn, damaged or illegible safety
decals. Order new decals from your Great Plains
dealer. “Safety Decals” on page 6.
167-085M Table of Contents Index 2012-08-01
Page 79

Great Plains Manufacturing, Inc. Table of Contents Index Maintenance and Lubrication 75
Chain Slack
Initially check the drive chains after the first 10 hours of
drill use. Thereafter, check the chains every 100 hours.
2
Hub Chain
Refer to Figure 82
This chain connects the hub sprocket weldment to a
sprocket on the main drive shaft at the left rear cart
wheel.
Check chain tension. Chain should have1⁄8inch
(3 mm) slack. To adjust, loosen the bolts holding the
main-shaft bearings and slide the main shaft. Retighten
bolts.
Note: If you make any adjustments to the hub chain,
check tension on the chain from the main shaft to
clutch shaft (next item, not shown in Figure 82).
2
1
3
Clutch Input Chain
Refer to Figure 83 and Figure 84
This chain connects a driving sprocket on the main
drive shaft to a driven sprocket on the clutch
jackshaft above the meter gearboxes.
Check that both driving and driven sprockets are aligned
(in the same plane of rotation) and that the chain is not
skewed. If not, loosen the set screws holding one or both
drive sprockets in place and move them until they are
aligned. Re-tighten the set screws.
1 2
3 4
5
1
3
3
Figure 82
Hub Chain
26362
6
2
3
7
1
26363
Refer to Figure 84 and Figure 83
Check chain tension. Lower span should have1⁄2inch
(13 mm) slack at the midpoint. To tighten, loosen idler
6
bolts and adjust idlers. Do not adjust main shaft
7
bolts except to keep main shaft parallel to wheel
spindle if significant adjustment was necessary on hub
chain.
Figure 83
Clutch Input Chain, Lower
5
1
4
6
Figure 84
Clutch Input Chain, Upper
2012-08-01 Table of Contents Index 167-085M
26364
Page 80

76 ADC2350/E and ADC2350B/BE Table of Contents Index Great Plains Manufacturing, Inc.
Gearbox Input Chains
Refer to Figure 85
These chains connect the clutch output to each of the
two gearboxes.
Check chain tension. The rear spans should have
1
⁄2inch (13 mm) slack at the midpoint. To adjust, loosen
the bolts holding the upper idlers and move idler.
1
Retighten the bolts.
Note: The gearbox output chains are tensioned by spring
idlers and require no adjustment.
Chain Maintenance
Initially check the drive chains after the first 10 hours of
drill use. The slack of new chains tends to increase
during the first few hours of operation due to seating.
Thereafter, check the chains every 100 hours.
Lubricate chains any time there is a chance of moisture,
and when being stored at the end of the planting season.
Chain Slack
1
Figure 85
Gearbox Input Chains
1
2
1
26313
Refer to Figure 86, which, for clarity, greatly exaggerates
slack, and omits the idlers.
1. Measure the span for allowable slack:
1
Locate the longest span of each chain (usually the
span which does not run through the idlers).
2. Determine the ideal slack:
Long chains (over 91 cm / 36 inches):
1
⁄4inch per foot (2.1 cm/m)
Vertical short chains:
1
⁄4inch per foot (2.1 cm/m)
Horizontal short chains:
1
⁄2inch per foot (4.2 cm/m).
3. Measure the current slack :
2
Acting at a right angle to the chain span at the centre
of the span, deflect the chain in both directions. The
slack is the distance of the movement.
4. Adjust the idlers for ideal slack.
Whenever mounting a chain, make sure the clip at the
removable link is oriented to minimize snags.
Refer to Figure 87 (arrow shows chain direction)
Install clip with open end facing away from direction of
chain travel (shown by gray or striped arrows in chain
routing diagrams).
Figure 86
Measuring Chain Slack
Figure 87
Chain Clip Orientation
27264
26482
167-085M Table of Contents Index 2012-08-01
Page 81

Great Plains Manufacturing, Inc. Table of Contents Index Maintenance and Lubrication 77
Problem Clean-Outs
For normal unloading of residual materials at completion
of planting, see “Unloading the Cart” on page 47. If,
however, parking and storage recommendations have
not been followed, it is possible to have hard-to-remove
material present.
If the material fails to pass through the clean-out door,
take the following steps to remove it. Do not consider
entering the hopper until first completing these tasks.
Open the clean-out door.
Remove the strainer and evaluate the problem.
For example:
• If the problem is a single moveable large object, such
as a dead animal, fishing out from above may be the
solution.
• If the problem is congealed materials, scoop out a
sample from above and see if the mass dissolves in
water. If so, and there is a small amount of the material
involved, rinsing, or rinsing and pumping the hopper
from above may be the solution.
For small amounts of residual materials, poking with a
long pole may suffice to push it through the clean-out.
If poking doesn’t produce satisfactory results, and you
intend to try wash-out, at least poke one hole down to the
clean-out, so that water can flow out.
If wash-out is contemplated, start by introducing a small
amount of water, and make sure that it appears at the
clean-out within 15 minutes. If not, you will just be adding
water to the problem. The hopper is not designed to hold
water at full capacity. Add no more, remove meter box
instead, and clean out from below.
Removing Meter Box
Removing the meter box exposes 7×7 inch access holes
through which stubborn material may be extracted.
3
Refer to Figure 88
1. Not shown: Loosen the gearbox-to-meter chain idler
and remove the chain. Disconnect inlet and outlet
hoses. Disconnect or remove the seed rate sensor.
2. Loosen all the nuts securing the meter box to
the hopper bottom plate . Unscrew the nuts to the
bolt ends, but do not completely remove the nuts.
3. The meter box has a bead of silicone sealant
between it and the bottom plate. Use a pry tool to
free the meter box from the bottom plate.
4. Once hanging entirely on the loose bolts, remove the
nuts and lower the meter box from the hopper.
When re-mounting the meter box, scrape off the old
silicone sealant and replace it with fresh sealant.
2012-08-01 Table of Contents Index 167-085M
1 2
3
2
Figure 88
Remove Meter for Cleaning
1
26408
Page 82

78 ADC2350/E and ADC2350B/BE Table of Contents Index Great Plains Manufacturing, Inc.
Hopper Entry
Normal use of the hopper and routine maintenance do
not require entry. Ladders are provided in the hoppers,
but they are for emergency egress, and are not intended
for routine entry. However, do not remove the ladders, as
they are also pressure-balancing vent lines.
▲ A hopper that is full or merely appears full can be an
entrapment hazard. You can sink entirely into the grain, or
into a void, and suffocate in a matter of seconds. Grain
bridges and crusts are especially dangerous.
▲ You can be overcome by hazardous fumes very quickly even
in an empty hopper with the lid open.
▲ A partially full hopper, even with no bridging present, is a
suffocation risk.
Oxygen levels may be insufficient and/or
dust levels may be too high for breathing.
▲ Do not enter a hopper for loading material.
▲ Do not enter a hopper for unloading material.
▲ Do not enter a hopper for routine cleaning.
▲ Do not enter a hopper for any meter maintenance.
▲ Never enter a hopper without at least one trained and
equipped attendant present.
▲ Never enter a hopper for any reason unless you fully
comply with applicable laws, regulations, rules,
agreements, and the instructions in this section. Where
applicable laws, regulations, rules, agreements contradict
an instruction below, do not follow that instruction.
Depending on their use, the ADC2350/E and
ADC2350B/BE material hoppers may be or become
“permit-required confined spaces” under U.S. OSHA
regulations (29 CFR 1910.146) and similar regulations,
statutes, insurance agreements and local business
policy. A written policy and permitting process may be
required for any hopper entry.
Hopper entry may be necessary in some unusual
circumstances, such as:
• hopper level sensor replacement; or,
• removal of obstructions too difficult to pull out with the
meter box removed and not susceptible to fishing or
pumping out from the open lid.
Rapid Suffocation Hazard:
Encrusted grain may be loose and flowing beneath the crust.
Any hollow spaces are highly likely to have insufficient oxygen
and/or toxic gases from microbial action. Falling through a
crust in either case can result in death in a matter of seconds.
Never enter a hopper to dislodge a crust or bridge.
167-085M Table of Contents Index 2012-08-01
Page 83

Great Plains Manufacturing, Inc. Table of Contents Index Maintenance and Lubrication 79
Should such a situation arise, observe the following
precautions:
1. Evaluate the hazards
Review the material safety data sheets (MSDS) for
any treatments and/or fertilizers used in the hopper
since it was last thoroughly cleaned, and the most
recent materials even if the hopper was
subsequently cleaned. Retain the MSDS information
for any medical treatment that might be required.
2. Designate or engage a team
Hopper entry is never a single-person activity. At
least one attendant/observer is necessary. Give
priority to individuals already trained in confined
space operations. Designate a leader (who will not
be the entrant) with authority to terminate the activity.
3. Protect the team
Obtain the necessary safety equipment specified for
confined space exposure to those materials, paying
particular attention to respiratory support and
protection. This may include contaminant detection
equipment and positive ventilation to refresh air in
the hopper.
4. Equip the team
At least one attendant must be equipped with
communications capability, to summon outside aid in
the event that the hopper worker is overcome. Equip
the entrant with a safety harness and safety line.
5. Train the team
Review the hazards. Review the procedures.
6. Secure the cart
Block the cart wheels to prevent movement.
7. Disrupt crusting or bridging
From outside the hopper, break up any hard
surfacing on top of the material, or forming layers
within the material. Such layers are extremely
dangerous to stand on.
8. Empty the hopper
Follow the steps at “Unloading the Cart” on
page 47. If a blockage makes this impossible, use an
external pump line to remove as much material as
possible without performing a hopper entry. Pump
until at least some material is exiting the clean-out
door. Leave the clean-out door open.
9. Clean the hopper
From the outside at the walkboard, power-wash the
inside of the hopper. Use a mild detergent sprayer.
Rinse thoroughly.
10. Air the hopper
Leave the hopper lid and clean-out door open, and
do not commence work until the rinse water has
completely evaporated.
11. Plan the work. Work the plan.
Postpone the work if any team members, equipment
or other resources are missing, or weather/lighting
conditions are not favorable. Terminate and evacuate
if any unexpected situations arise.
Understand the use of the protective equipment.
Know the steps to take in emergencies. Practice
them. Train the observer to summon aid, and not
attempt hopper entry if the entrant is overcome.
2012-08-01 Table of Contents Index 167-085M
Page 84

80 ADC2350/E and ADC2350B/BE Table of Contents Index Great Plains Manufacturing, Inc.
Lubrication and Scheduled Maintenance
Intervals
Multi-purpose
spray lubricant
Multi-purpose
grease lubricant
Multi-purpose
oil lubricant
Inspection
34208
(operating hours)
50
at which service
is required
Hopper Lid Pivot Bar and Clamps
50
1 pivot and 1 clamp each of 2 lids; 4 sites total
Type of Lubrication: Spray
Quantity: Coat thoroughly
Meter Box Door Clamps
50
2 clamps each of 4 doors; 8 total
Type of Lubrication: Spray
Quantity: Coat thoroughly
Auger Storage Clamps
26345
26346
50
2 clamps
Type of Lubrication: Spray
Quantity: Coat thoroughly
26329
167-085M Table of Contents Index 2012-08-01
Page 85

Great Plains Manufacturing, Inc. Table of Contents Index Maintenance and Lubrication 81
Auger Swing Arm: Mount Pivot
1 zerk each pivot; 3 total
Type of Lubrication: Grease
Quantity: Until Grease emerges
Auger Swing Arm: Outer Pivot
1 zerk
Type of Lubrication: Grease
Quantity: Until Grease emerges
26406
50
50
Hub Chain
As Required
1 chain, inside left wheel
Type of Lubrication: Chain Lube
Quantity = Coat thoroughly
Lubricate chains any time there is a chance of
moisture, and when being stored at the end of the
planting season.
26407
26309
2012-08-01 Table of Contents Index 167-085M
Page 86

82 ADC2350/E and ADC2350B/BE Table of Contents Index Great Plains Manufacturing, Inc.
Driveshaft Output/Clutch Input Chain
As Required
1 chain, from left wheel to clutch
Type of Lubrication: Chain Lube
Quantity = Coat thoroughly
Lubricate chains any time there is a chance of
moisture, and when being stored at the end of the
planting season.
26313
Clutch Output/Gearbox Input Chains
As Required
1 chain each gearbox; 2 total
Type of Lubrication: Chain Lube
Quantity = Coat thoroughly
Lubricate chains any time there is a chance of
moisture, and when being stored at the end of the
planting season.
Gearbox Output/Meter Input Chains
As Required
One chain each meter; 2 total
Type of Lubrication: Chain Lube
Quantity = Coat thoroughly
Lubricate chains any time there is a chance of
moisture, and when being stored at the end of the
planting season.
26313
26313
167-085M Table of Contents Index 2012-08-01
Page 87

Great Plains Manufacturing, Inc. Table of Contents Index Maintenance and Lubrication 83
Main Wheel Bearings
Seasonal
2 bearings each wheel, 2 wheels; 4 total
Type of Lubrication: Grease
Quantity: Re-pack
26260
Caster Wheel Bearings (ADC2350B/BE only)
Seasonal
2 bearings each wheel, 2 wheels; 4 total
Type of Lubrication: Grease
Quantity: Re-pack
Caster Pivot (ADC2350B/BE only)
Seasonal
2 bearings
Type of Lubrication: Grease
Quantity: Re-pack
26450
26446
2012-08-01 Table of Contents Index 167-085M
Page 88

84 ADC2350/E and ADC2350B/BE Table of Contents Index Great Plains Manufacturing, Inc.
Options
Blockage Detector
The seed monitor supports sensors that monitor for
plugging in the one-inch, secondary hoses. The package
includes programmable blockage modules for each tower
and flow sensors for each secondary seed hose. The
blockage modules signal the monitor when flow stops at
a sensor. The monitor then sounds an alarm and
identifies the problem hose.
To order blockage sensors, contact your Great Plains
dealer.
16457
Implement, Row Spacing
CTA4000/HD-5010, 10 inch 168-410A
CTA4000/HD-6575, 7.5 inch 168-409A
CTA4000/HD-8006, 6 inch 168-408A
NTA3010-3610, 10 inch 168-405A
NTA3010-4875, 7.5 inch 168-404A
NTA3510-4010, 10 inch 168-407A
NTA3510-5575, 7.5 inch 168-406A
3N-4010HDA-6675, 7.5 inch 168-411A
3N-4010HDA-4810, 10 inch 168-412A
Part
Numbers
10 inch Seed Monitor Console
The standard Air Drill Carts seed monitor system
includes a 10 inch (25.4 cm) LCD color display (diagonal
measure).
This console may be purchased separately to upgrade
an older 5 inch (12.7 cm) console.
Description Part Number
DICKEY-john®IntelliAg® 10in
monitor
167-085M Table of Contents Index 2012-08-01
823-255C
25421
Page 89

Great Plains Manufacturing, Inc. Table of Contents Index Options 85
Alternate Flute Sets
The standard model ADC2350/E and ADC2350B/BE Air
Drill Carts have two fluted wheels (“stars”) and two filler
rings in each active meter compartment.
Alternate flute shafts are available for higher ( , ) rates
and for small seeds . These accessories replace the
existing 2-star shaft assembly with one having a
different star configuration. This provides different
seeding rates for the same Range and variable rate
gearbox setting. See “Changing Meter Flutes” on
page 66 for installation instructions.
If your seeding rates need to be higher than those listed
in the Seed Rate Manual, select one of the high rate
shafts.
• Replacing the standard 2-star shaft with a 3-star
shaft increases the seeding rate by approximately
3
50% (to 150% of standard rate).
• Replacing the standard 2-star shaft with a 4-star
shaft increases the seeding rate by approximately
4
double (to 200% of standard rate).
For small seeds (see list at right) or other seeds
substantially smaller than 12×4.7 mm (1⁄2×3⁄16inch), the
standard shaft may not provide sufficient precision and
uniform flow at very low rates. A small seeds flute
shaft is available that provides two half-width shallow
s
flute stars per compartment.
• For compatible seeds, replacing the standard 2-star
shaft with the small seeds shaft reduces the
seeding rate by approximately 80% (to 20% of
standard rate).
The kit required depends on the number of towers on the
implement and the number of stars desired. Order one
kit per meter (two per air cart)
Tested Small Seeds
The 167-085B Seed Rate Manual includes data for Small
Seeds shafts and the following seeds:
• Alfalfa (Medicago sativa)
• Canola (Brassica napus L., Brassica campestris L.,
Brassica Rapa var.m)
• Millet (Pennisetum glaucum, Setaria italica,
Panicum miliaceum, Eleusine coracana)
• Milo (Sorghum)
• Orchard Grass (Dactylis glomerata)
• Timothy (Phleum pratense)
s
2
s
3 4
s
3
4
2
32398
Stars
Implement Tow e rs
per
Outlet
NTA3010 4 3 168-401S
NTA3010 4 4 168-402S
NTA3010 4 2 Small 168-438S
NTA3510 5 3 168-385S
NTA3510 5 4 168-386S
NTA3510 5 2 Small 168-439S
CTA4000 5 3 168-385S
CTA4000 5 4 168-386S
CTA4000 5 2 Small 168-439S
CTA4000HD 5 3 168-385S
CTA4000HD 5 4 168-386S
CTA4000HD 5 2 Small 168-439S
3N-4010HDA 6 3 168-382S
3N-4010HDA 6 4 168-383S
3N-4010HDA 6 2 Small 168-440S
Part
Numbers
2012-08-01 Table of Contents Index 167-085M
Page 90

86 ADC2350/E and ADC2350B/BE Table of Contents Index Great Plains Manufacturing, Inc.
ADC2350/E Hitches
One hitch is selected upon initial order of an ADC2350/E
Air Drill Carts, and includes the spring wire loop, safety
chain, and all fasteners. Additional hitches may be
ordered for conversion in the field, and include extra hitch
mounting bolts, lock washers and nuts.
Hitch Description Option
1
Small Clevis (72) 170-039A
2
Small Strap (73) 170-059A
3
Large Strap, Welded (71) 170-038A
4
Large Strap, Cast (74) 170-004A
5
Category V, Cast (75) 170-073A
Hitch options are not applicable for the ADC2350B/BE
cart, which includes a pintle ring compatible with the rear
hitch of supported leading drills.
Part
Numbers
4
5
2
3
1
26432
Variable Rate Control
This option replaces the manual meter adjuster
jackscrew cranks with linear actuators controlled by the
seed monitor.
With this option, seed rate is set directly on the seed
monitor virtual terminal, and may be varied during
planting directly from the cab.
Description Part Number
ADC2350 VARIABLE RATE KIT 166-193A
This kit is factory-installed if ordered with the cart. It may
also be field-installed on any vintage ADC2350/E or
ADC2350B/BE, and includes an installation manual:
166-263M MANUAL INSTALL ADC2350 VAR RT
26308
167-085M Table of Contents Index 2012-08-01
Page 91

Great Plains Manufacturing, Inc. Table of Contents Index Appendix 87
Appendix
Specifications and Capacities
Tractor Requirements
Hopper Capacity
Seeding Rates (each meter)
Weight (empty)
Weight (full)
Hitch Load
Hydraulic Circuits
Hitch
Width
Length (auger stowed)
Height (auger stowed)
ADC2350 or ADC2350E
“Pull-Between” Cart
with CTA4000HD: 325 hp
with CTA4000: 300 hp
with NTA3510: 275 hp
with NTA3010: 250 hp
175 bushels 175 bushels
1.5 to 320 lbs/acre
(1.7 to 359 kg/ha)
8100 lbs (3674 kg) 9800 lbs (4445 kg)
32,100 lbs (14,560 kg) 32200 lbs (14606 kg)
9500 lb (loaded)
4309 kg
3 circuits required
load-sensitive or closed-center
15 to 30 gpm at 2000 psi
dedicated dual-link pintle hitch
9 feet 10 inches (3.0 m) 12 feet 6 inches (3.81 m)
25 feet 0 inches (7.62 m) 25 feet 0 inches (7.62 m)
11 feet 2 inches (3.4 m) 11 feet 10 inches (3.61 m)
ADC2350B or ADC2350BE
“Pull-Behind” Cart
with 3N-4010HDA: 300 hp
1.5 to 320 lbs/acre
(1.7 to 359 kg/ha)
(negligible)
1 circuit required
load-sensitive or closed-center
15 to 30 gpm at 2000 psi
Clearance
Tire Sizes
23 inches (58 cm) 31 inches (79 cm)
23.5L/55-26 12-Ply
30.5L R32 170 Load Index (16 Ply)
21.5L-16.1 14 Ply
Tire Inflation Chart
Tire Inflation Chart Tire Warranty Information
Tire Size Inflation
23.5L/55-26 12-Ply
30.5L R32 170 Load Index (16 Ply)
21.5L-16.1 14 Ply
2012-08-01 Table of Contents Index 167-085M
40 psi
276 kPa
30 psi
207 kPa
36 psi
248 kPa
All tires are warranted by the original manufacturer of the tire.
Tire warranty information is included with your manuals or
online at the manufacturer’s websites listed below. For
assistance or information, contact your nearest Authorized
Farm Tire Retailer.
ManufacturerWebsite
Firestonewww.firestoneag.com
Gleasonwww.gleasonwheel.com
Titanwww.titan-intl.com
Page 92

88 ADC2350/E and ADC2350B/BE Table of Contents Index Great Plains Manufacturing, Inc.
Torque Values Chart
Bolt
Size
in-tpi
1
⁄4-20
1
⁄4-28
5
⁄16-18
5
⁄16-24
3
⁄8-16
3
⁄8-24
7
⁄16-14
7
⁄16-20
1
⁄2-13
1
⁄2-20
9
⁄16-12
9
⁄16-18
5
⁄8-11
5
⁄8-18
3
⁄4-10
3
⁄4-16
7
⁄8-9
7
⁄8-14
1-8
1-12
1
⁄8-7
1
1
1
⁄8-12
1
1
⁄4-7
1
1
⁄4-12
3
⁄8-6
1
3
1
⁄8-12
1
1
⁄2-6
1
1
⁄2-12
Bolt Head Identification
Grade 2 Grade 5 Grade 8 Class 5.8 Class 8.8 Class 10.9
a
b
d
ft-lb
N-m
7.4 11 16
8.5 13 18
15 24 33
17 26 37
27 42 59
31 47 67
43 67 95
49 75 105
66 105 145
75 115 165
95 150 210
105 165 235
130 205 285
150 230 325
235 360 510
260 405 570
225 585 820
250 640 905
340 875 1230
370 955 1350
480 1080 1750
540 1210 1960
680 1520 2460
750 1680 2730
890 1990 3230
1010 2270 3680
1180 2640 4290
1330 2970 4820
N-m N-m
5.6 8 12
61014 5 811
11 17 25 12 19 27
13 19 27 13 21 29
20 31 44 24 39 53
22 35 49 29 45 62
32 49 70 42 67 93
36 55 78 44 70 97
49 76 105 66 77 105
55 85 120 68 105 150
70 110 155 73 115 160
79 120 170 105 165 230
97 150 210 115 180 245
110 170 240 145 230 300
170 265 375 165 260 355
190 295 420 205 325 450
165 430 605 230 480 665
185 475 670 355 560 780
250 645 910 390 610 845
275 705 995 705 1120 1550
355 795 1290 785 1240 1710
395 890 1440 1270 1950 2700
500 1120 1820 1380 2190 3220
555 1240 2010
655 1470 2380
745 1670 2710
870 1950 3160
980 2190 3560
Bolt Head Identification
Bolt
Size
ft-lb ft-lb ft-lb ft-lb ft-lb
mm x pitch
M 5 X 0.8
M 6 X 1
M 8 X 1.25
M 8 X 1
M10 X 1.5
M10 X 0.75
M12 X 1.75
M12 X 1.5
M12 X 1
M14 X 2
M14 X 1.5
M16 X 2
M16 X 1.5
M18 X 2.5
M18 X 1.5
M20 X 2.5
M20 X 1.5
M24 X 3
M24 X 2
M30 X 3.5
M30 X 2
M36 X 3.5
M36 X 2
a. in-tpi = nominal thread diameter in inches-threads per inch
b. N· m = newton-meters
c. mm x pitch = nominal thread diameter in mm x thread pitch
d. ft-lb = foot pounds
c
5.8 8.8 10.9
N-m N-m N-m
357
71115
17 26 36
18 28 39
33 52 72
39 61 85
58 91 125
60 95 130
90 105 145
92 145 200
99 155 215
145 225 315
155 240 335
195 310 405
220 350 485
280 440 610
310 650 900
480 760 1050
525 830 1150
960 1510 2100
1060 1680 2320
1730 2650 3660
1880 2960 4100
946
Torque tolerance + 0%, -15% of torquing values. Unless otherwise specified use torque values listed above.
25199
167-085M Table of Contents Index 2012-08-01
Page 93

Great Plains Manufacturing, Inc. Table of Contents Index Appendix 89
Chain Routing
26311
26313
Main Hub Chain
26313
Clutch Input Chain
Gearbox Input Chains Gearbox Output Chains
26313
2012-08-01 Table of Contents Index 167-085M
Page 94

90 ADC2350/E and ADC2350B/BE Table of Contents Index Great Plains Manufacturing, Inc.
Hydraulic Diagrams
ADC2350/E Hydraulic Diagram (S/N A1157T-)
26430
ADC2350/E Hydraulic Circuits
Used With Orange Blue Yellow Black
Cart
CTA4000
Cart
CTA4000HD
Cart
NTA3010
Cart
NTA3510
167-085M Table of Contents Index 2012-08-01
Auger
A
Marker
B
Marker
Auger
A
Marker
B
Marker
Auger
A
Marker
B
Marker
Auger
A
Marker
B
Marker
Not Used
C
Lift / Fold
D
Lower / Unfold
Not Used
C
Lift / Fold
D
Lower / Unfold
Not Used
C
Lift, Rod End
D
Lift, Base End
Not Used
C
Lift, Rod End
D
Lift, Base End
F
Fan ( only)
E
Not Used
F
Not Used
F
Fan ( only)
E
Not Used
F
Not Used
F
Fan ( only)
E
Fold, Rod End
F
Fold, Base End
F
Fan ( only)
E
Fold, Rod End
F
Fold, Base End
Fan Sump Return
G
Sump Return
Fan Sump Return
G
Sump Return
Fan Sump Return
G
Sump Return
Fan Sump Return
G
Sump Return
Page 95

Great Plains Manufacturing, Inc. Table of Contents Index Appendix 91
ADC2350/E Hydraulic Diagram (S/N A1158T+)
29780
ADC2350/E Hydraulic Circuits
Used With Orange Blue Yellow Black
Cart
CTA4000
Cart
CTA4000HD
Cart
NTA3010
Cart
NTA3510
Auger
A
Marker
B
Marker
Auger
A
Marker
B
Marker
Auger
A
Marker
B
Marker
Auger
A
Marker
B
Marker
Not Used
C
Lift / Fold
D
Lower / Unfold
Not Used
C
Lift / Fold
D
Lower / Unfold
Not Used
C
Lift, Rod End
D
Lift, Base End
Not Used
C
Lift, Rod End
D
Lift, Base End
F
Fan ( only)
E
Not Used
F
Not Used
F
Fan ( only)
E
Not Used
F
Not Used
F
Fan ( only)
E
Fold, Rod End
F
Fold, Base End
F
Fan ( only)
E
Fold, Rod End
F
Fold, Base End
Fan Sump Return
G
Sump Return
Fan Sump Return
G
Sump Return
Fan Sump Return
G
Sump Return
Fan Sump Return
G
Sump Return
2012-08-01 Table of Contents Index 167-085M
Page 96

92 ADC2350/E and ADC2350B/BE Table of Contents Index Great Plains Manufacturing, Inc.
ADC2350/E Hydraulic Fan (S/N A1157T-)
26322
167-085M Table of Contents Index 2012-08-01
Page 97

Great Plains Manufacturing, Inc. Table of Contents Index Appendix 93
ADC2350/E Hydraulic Fan (S/N A1158T+)
29774
2012-08-01 Table of Contents Index 167-085M
Page 98

94 ADC2350/E and ADC2350B/BE Table of Contents Index Great Plains Manufacturing, Inc.
ADC2350B/BE Hydraulic Diagram (S/N A1157T-)
27084
167-085M Table of Contents Index 2012-08-01
Page 99

Great Plains Manufacturing, Inc. Table of Contents Index Appendix 95
ADC2350B/BE Hydraulic Diagram (S/N A1158T+)
29775
2012-08-01 Table of Contents Index 167-085M
Page 100

96 ADC2350/E and ADC2350B/BE Table of Contents Index Great Plains Manufacturing, Inc.
ADC2350B/BE Hydraulic Fan (S/N A1157T-)
27093
167-085M Table of Contents Index 2012-08-01
 Loading...