

Great Computer JII-61, JII-101S, JII-76S, JII-132S, Jaguar II JII-61 User Manual
...
User Manual
Great Computer Corporation ©
V2 2003/7/3
Jaguar II User Manual
Important Information I
Thank you for purchasing the SignPal Series – Jaguar
ⅡⅡⅡⅡ
.
Before you use the cutting plotter, please make sure that you have read the safety
precautions and Instructions below.
Caution
!
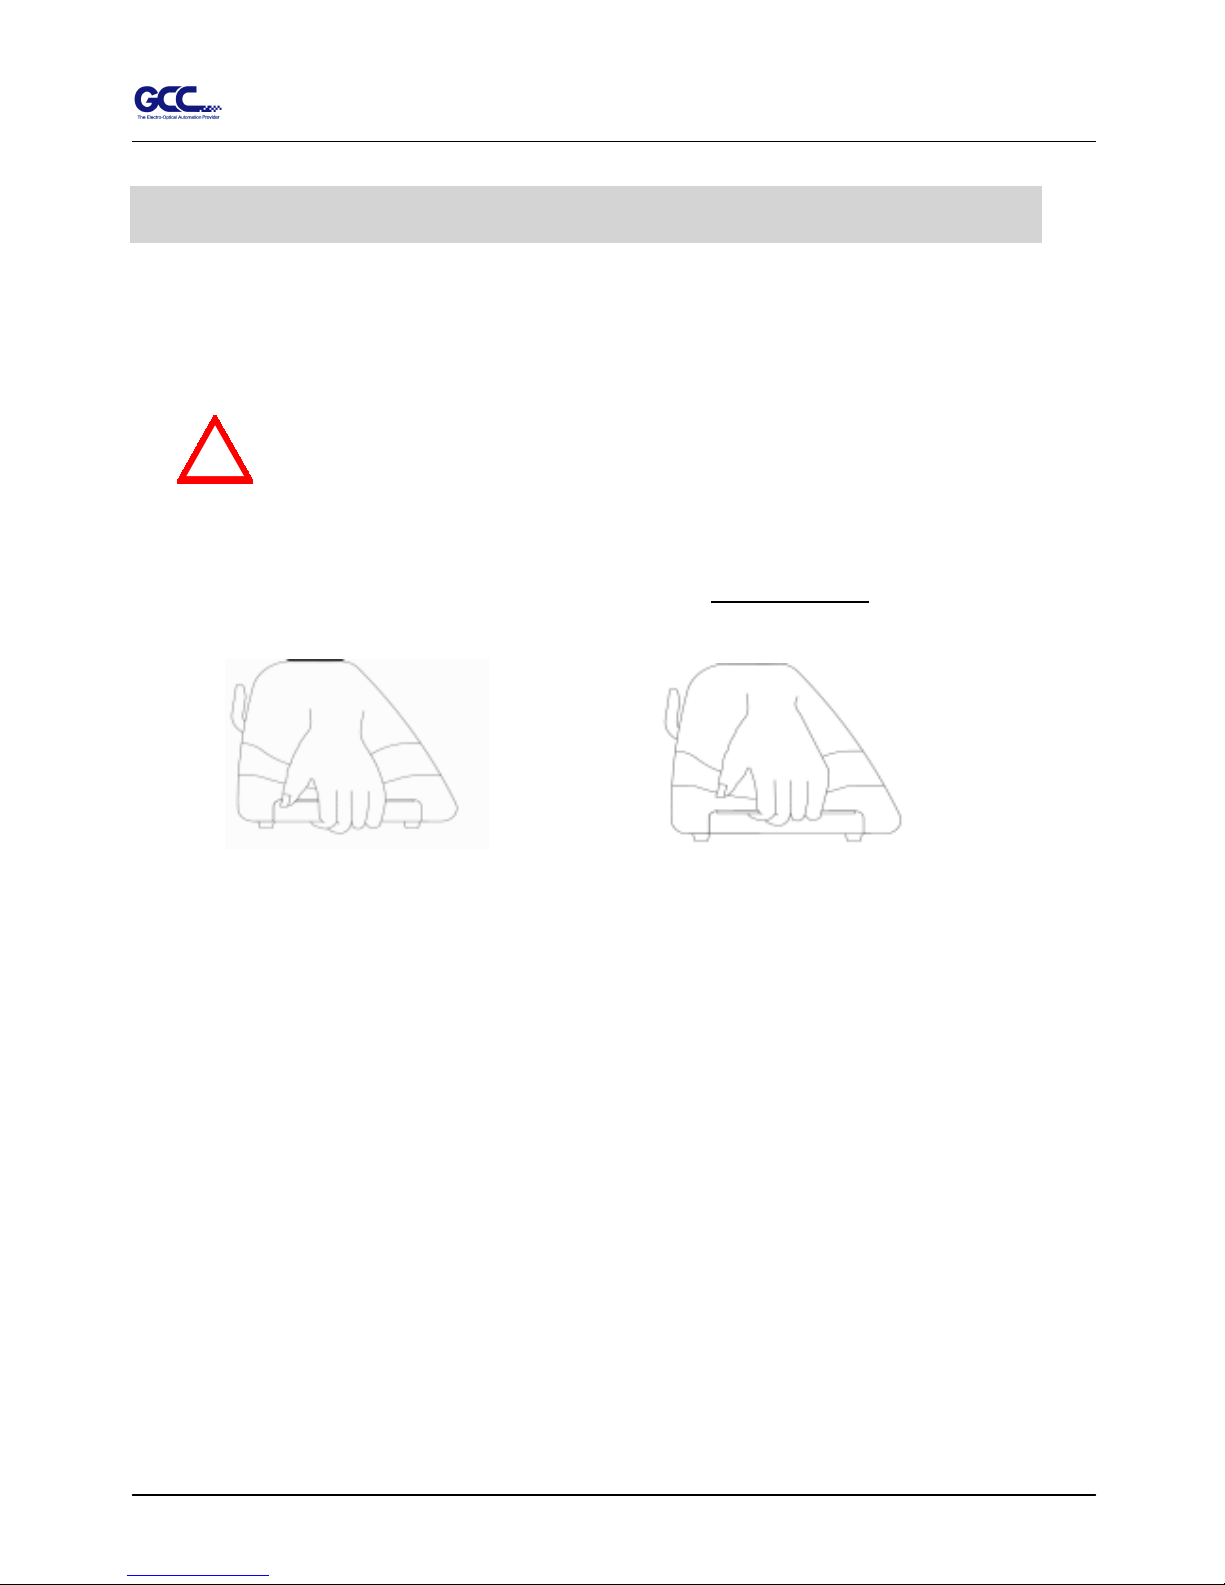
SAFETY PRECAUTIONS!
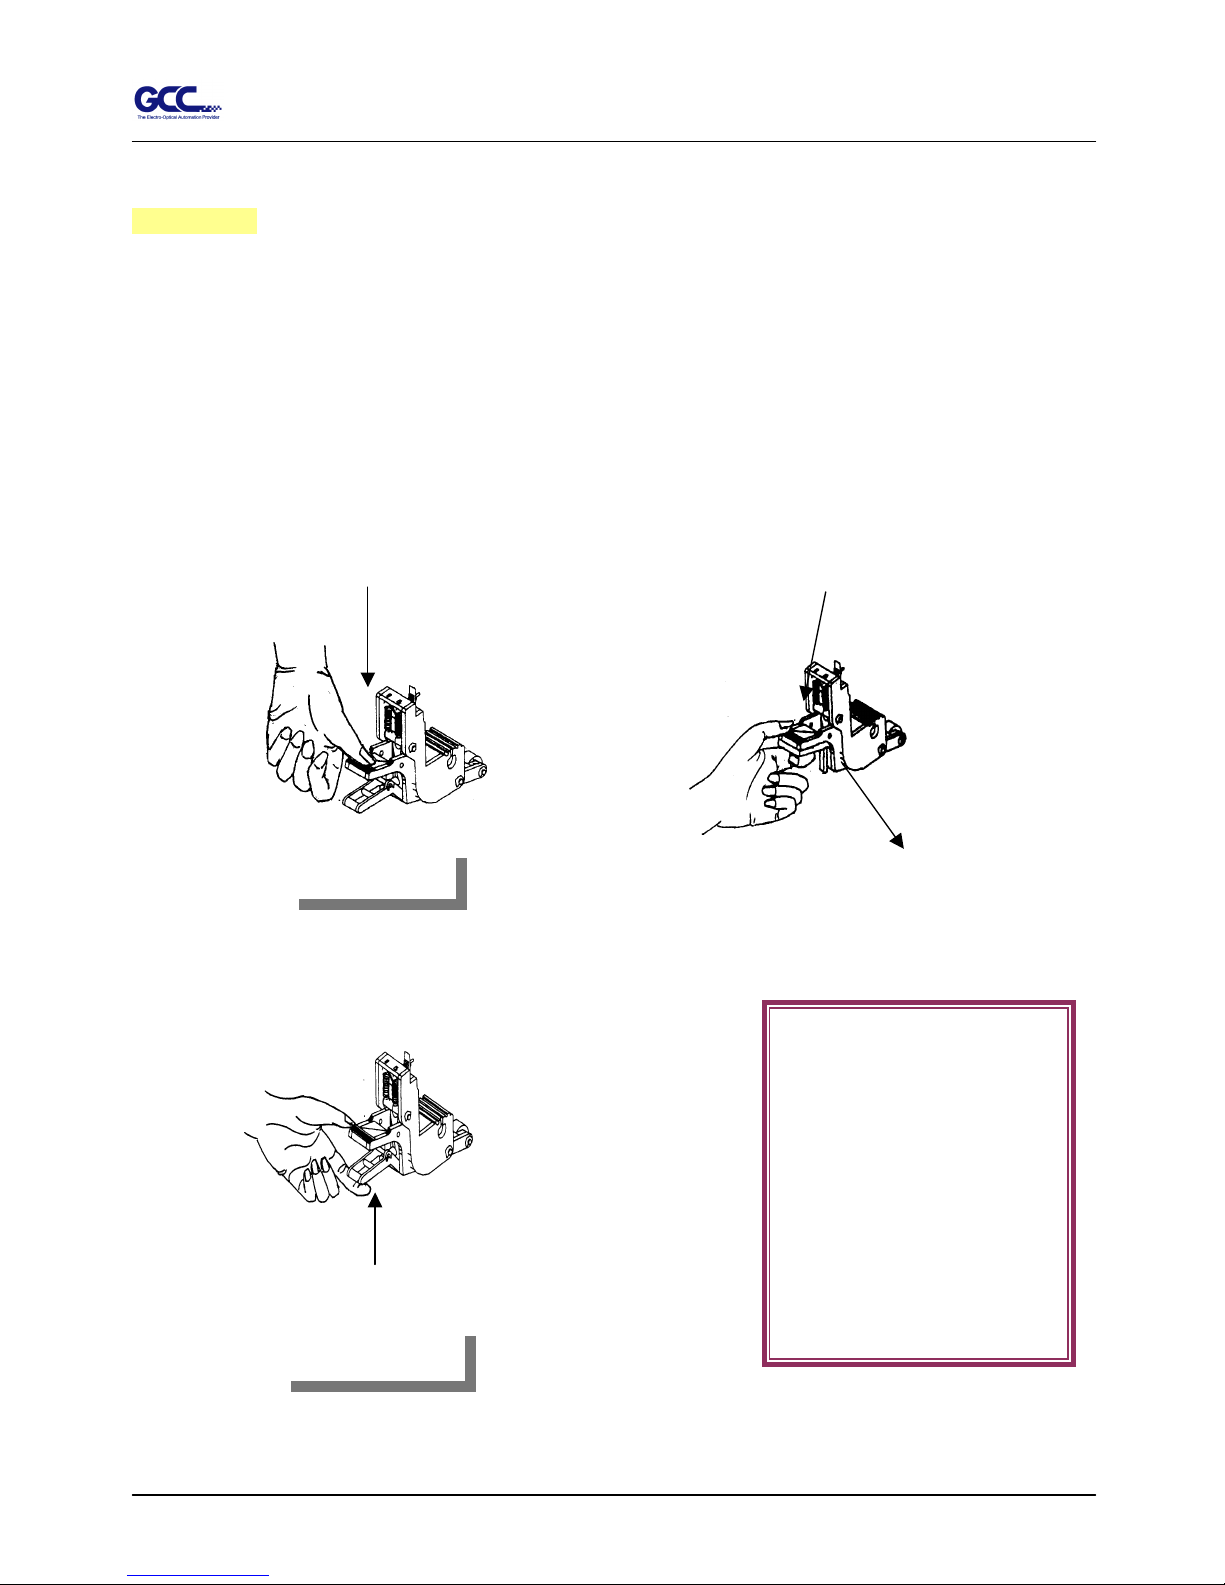
! For safety concern, please always hold the cutter firmly from the bottom when moving it. Do
not move the cutter by clasping the depression area on both sides.
# Do not shake or drop the blade holder, blade tip can fly out.
# During operation, do not touch any of the moving parts of this machine (such as the carriage).
Also be careful that clothing and hair do not become caught.
# Always connect the power cable to a grounded outlet.
# Always use the accessory power cable that is provided. Do not wire the power cable so that it
becomes bent or caught between objects.
# Do not connect the power cable to branching outlet to which other machines are also connected, or
use an extension cable. There is danger of overheating and of mis-operation of the machine.
# Keep the tools away from children where they can reach.
# Always put the pinch rollers within the white marks.
Important Information
O (correct)
X (Incorrect)
Jaguar II User Manual
Important Information II
HOW TO CUT 3mm LETTERS ?
# To obtain good quality output, narrow width media is suggested. However, if wide media is used,
you should:
1. Position two pinch rollers as close as possible to both edges of the cutting area.
2. Make sure the loaded media is held flat with equal tension across the platen.
3. Suggested operation settings:
Tool force: 55 gf. (or depending on the material)
Cutting speed: 45-50 cm/sec
Tool up speed: 45-60 cm/sec
Smooth cut: DisableCutting
Quality: Small Letter
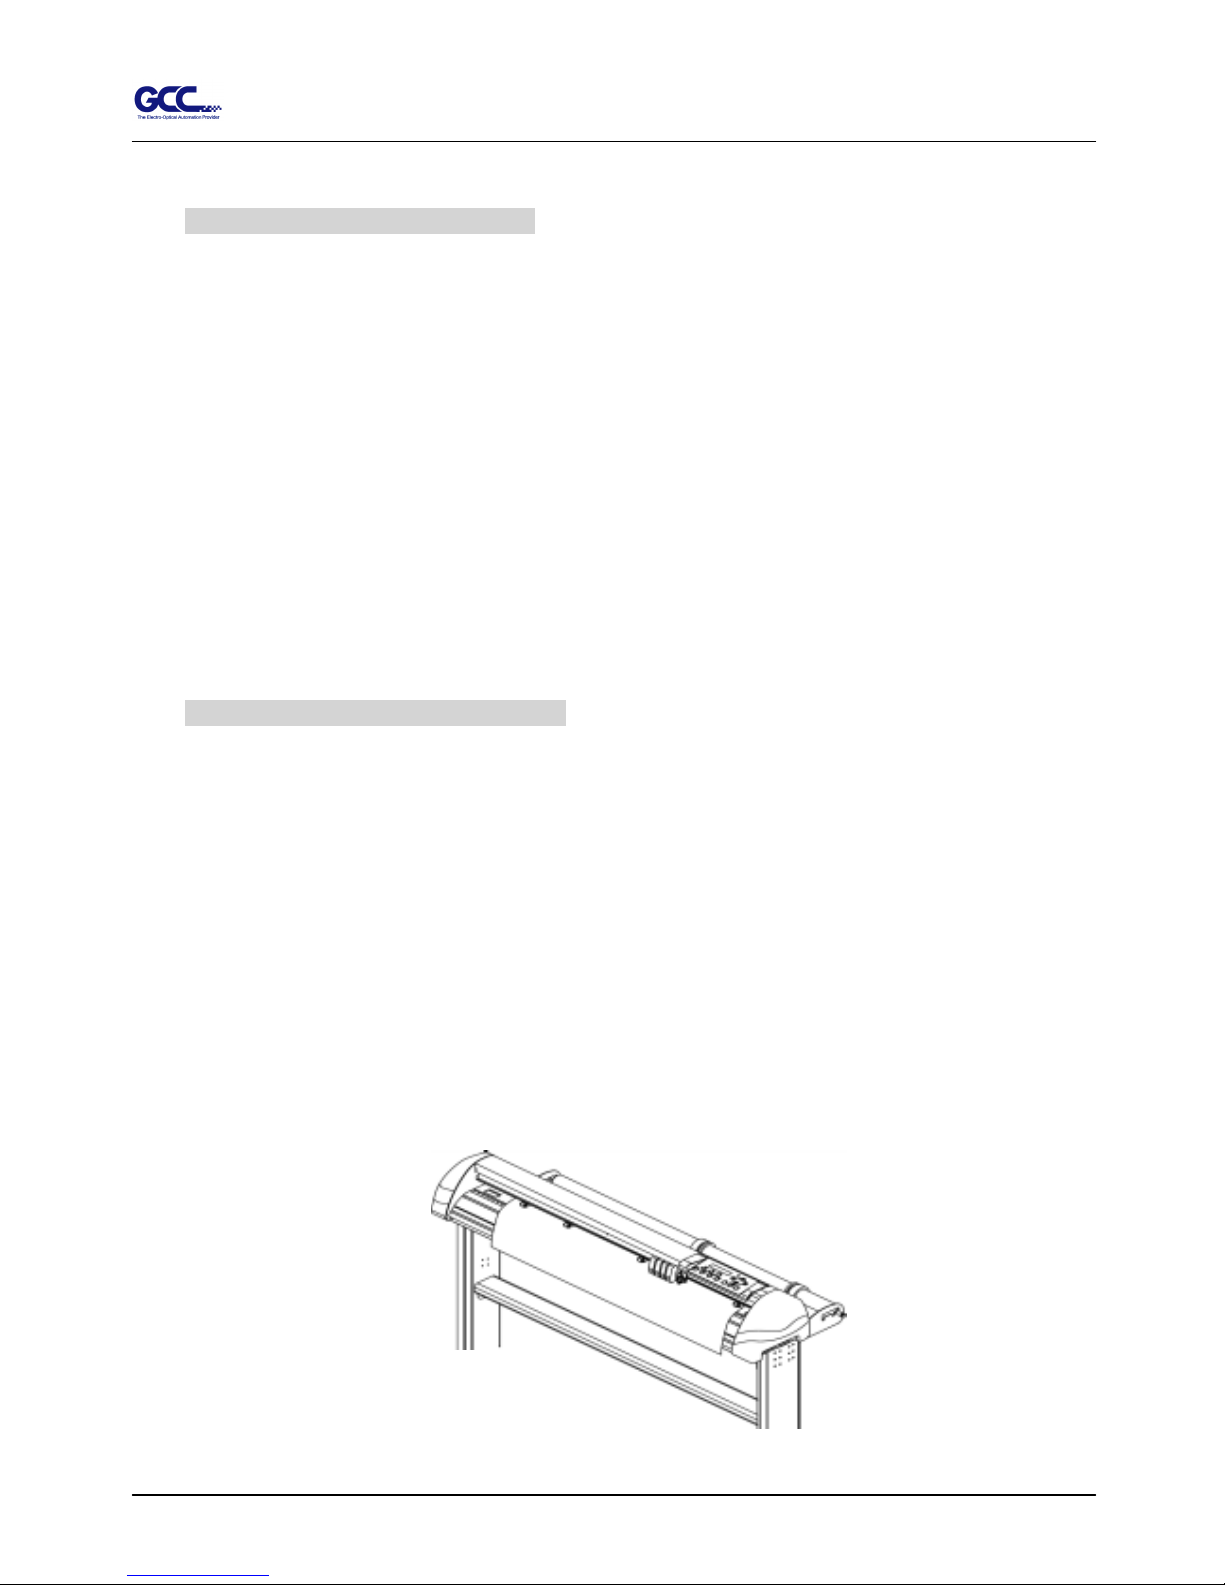
HOW TO MAKE A LONG PLOT ?
# When you are making a long plot with a roll of heavy and wide vinyl paper you need to use
AUTO UNROLL MEDIA function ( see page 41 ) :
1. If the length of graphic is between 3m and 5m, the cutting speed is better
slower than 45cm/sec and the cutting quality is set as Normal.
2. If the length is longer than 5 m, the CUTTING SPEED is better slower than
30 cm/sec.
3. After loading the roll media all pinch rollers are raised at this stage, flatten
the media on the platen and hold the front edge of the roll media firmly. (See
Figure 0-1)
Figure 0-1
Jaguar II User Manual
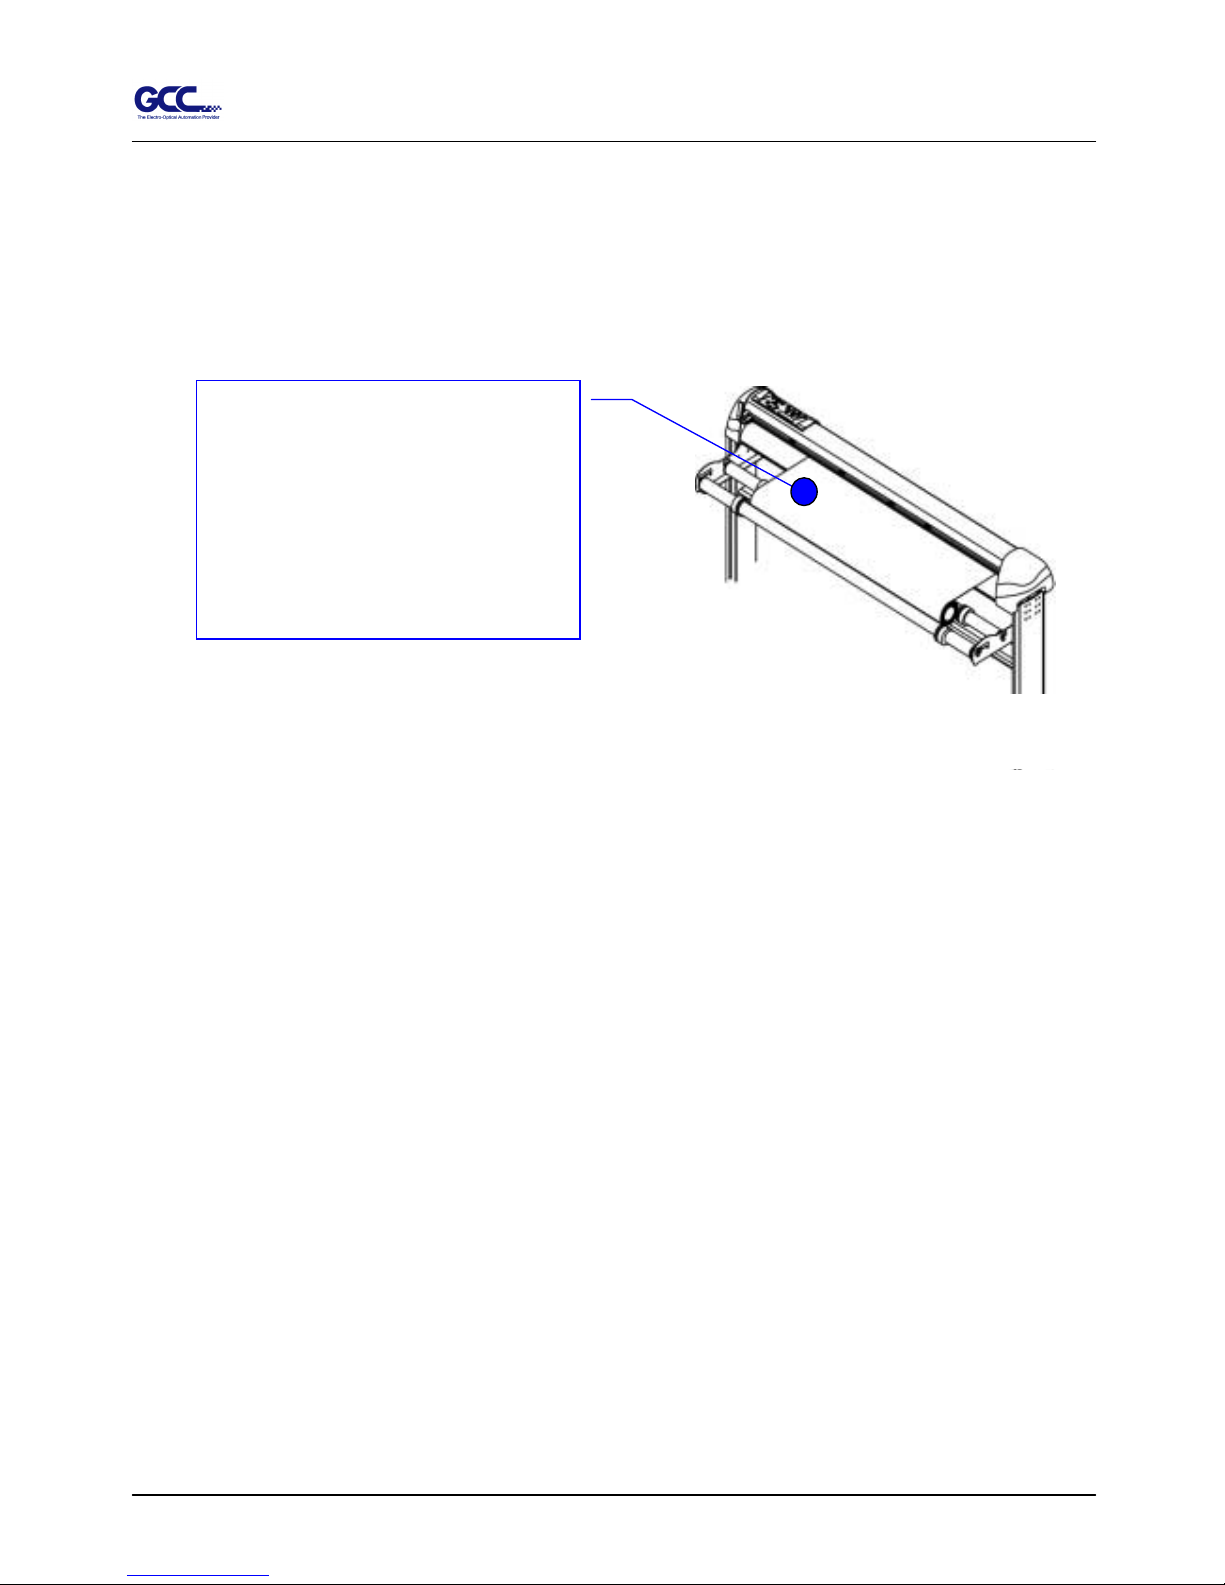
Important Information III
Then turn the roll downward to make an equal tension across the media
(See
Figure 0-2
)
4. Engage pinch rollers.
5. Fixes roll media guide bushes on the roll holder to secure the roll media.
6. The protrusion length of the blade should be longer than the thickness of the vinyl.
(Please see in the section of “ABOUT THE TOOL”.) After you notice all above then
you’ll enjoy your gigantic signs production!
♪ Make sure that the media
tension is equally distributed
from left to right. If the media
were not tighten enough against
the platen, it would cause
tracking problems.
Figure 0-2
Jaguar II User Manual
Important Information IV
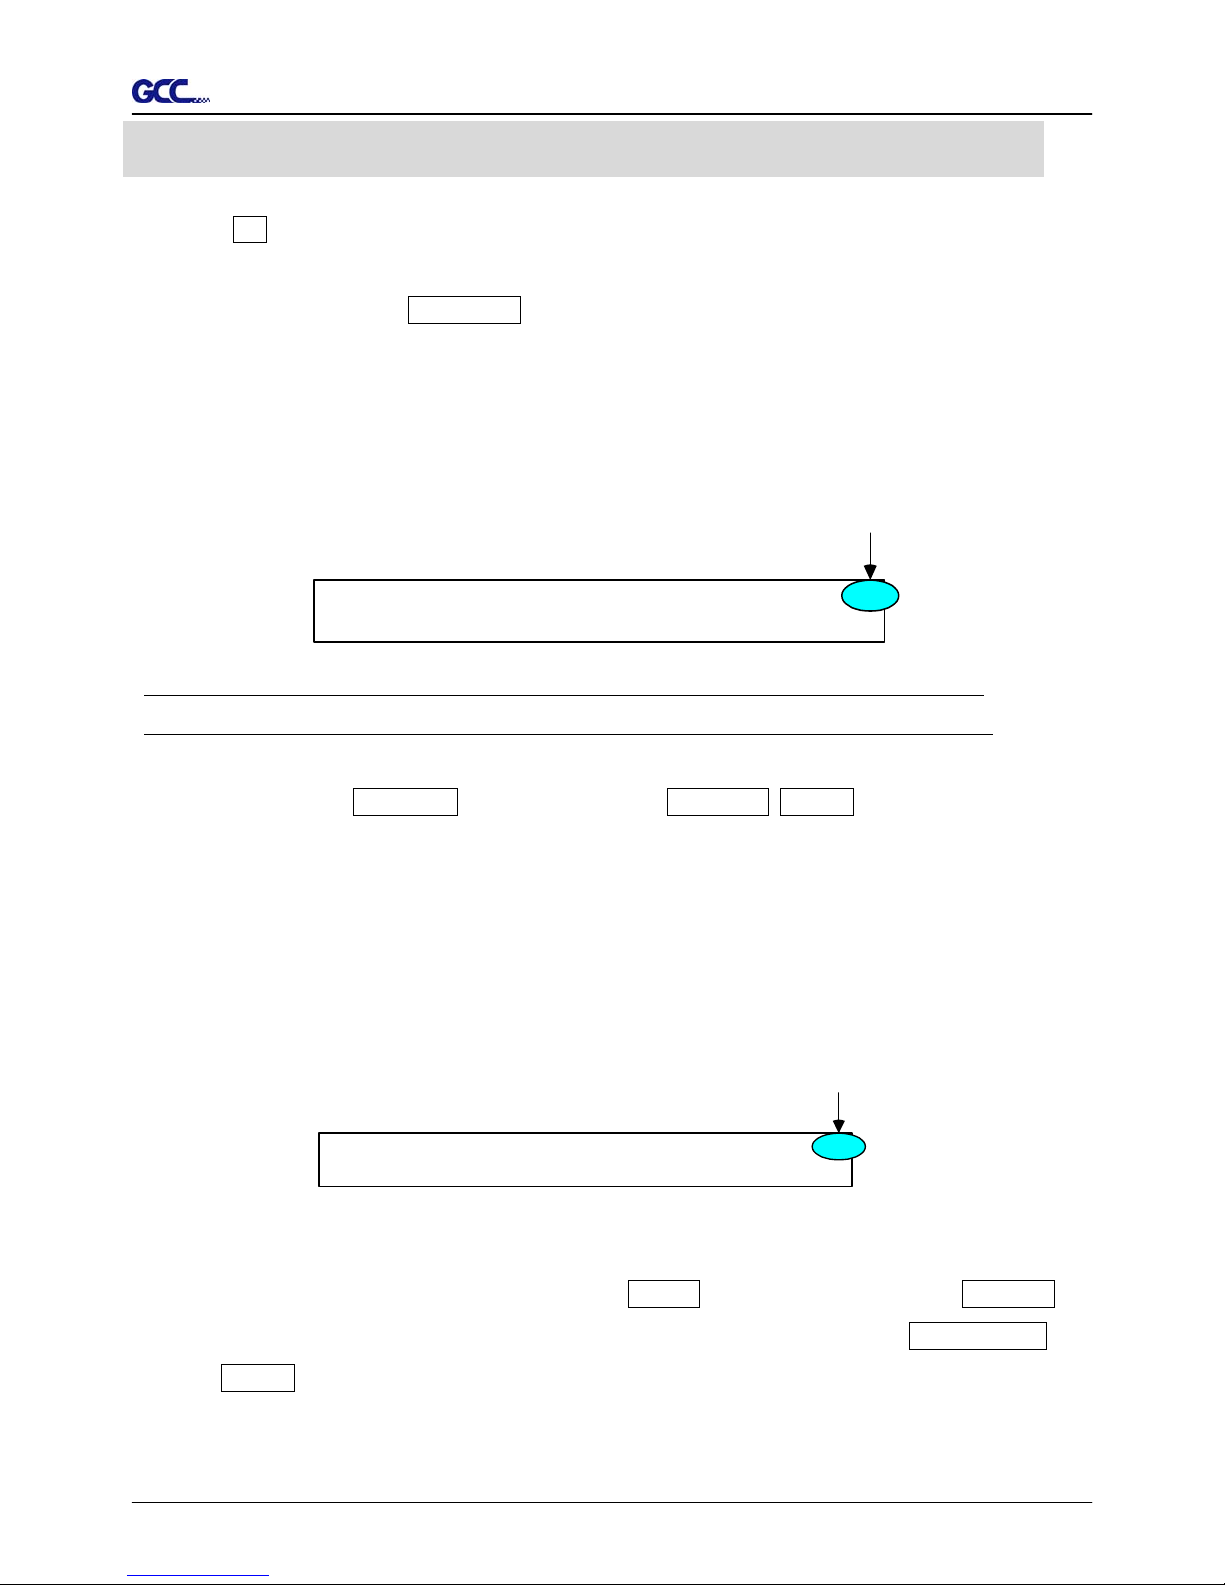
Warning
Never press the top release grip and pull the bottom release grip at the same time as the pictures
shown below:
○
○○
○ (CORRECT)
╳
╳╳
╳ (INCORRECT)
Press down
DISABLE
ENABLE
Pull up bottom release
Press down
Stop
Note:
In case the grips clipped
together due to your wrong
operation, please use a
tweezers to pull out the stop
bar when pressing down the
top release grip. Keep the
stop bar outside then release
Figure 0-3
Jaguar II User Manual
Quick Menu
Quick Menu V
1. Power ON. (LED lights on)
2. Place the media and lower down the pinch rollers (must position above the grid drums).
3. Sizing - Press the related Arrow Keys for roll (cut from the current position), edge (cut from the
edge) or single.
4. Setup computer and connect with cutting plotter properly.
5. On-line condition - Plotter is ready to receive data from computer.
LCM shows:
Rydaeortcveeei
L-: ----.-- W: -- .--
M
--
Only under the “Ready to Receive” can press setup keys, such as CUT_TEST, SPEED_KEY,
FORCE_KEY, OFFSET_KEY, MISC.KEY, TOOL_SELECT_KEY, and also the ARROW_KEYs.
Cutting test - Press CUT TEST, position carriage by arrow keys, ENTER.
Speed/Force/Offset - Press related key to adjust then repeat the step of Cutting Test for best
cutting result.
Function – Recut, Copy, Quality, Setup and Communication Setup follow the instruction shown
on LCM.
6. As the cutting plotter receive data from host, LCM displays as follow:
DPataI
SFO
rncsoes ing
---.-- ---.-- -.---
English Unit
E
When you are at this state, the only key you can press is Pause_Key.
7. Change the setting value during cutting - Press PAUSE, for continue cutting press RESUME.
8. Data Clear - Will terminate the cutting and clear the data in the buffer. Press DATA CLEAR
then ENTER.
Meter Unit
Jaguar II User Manual
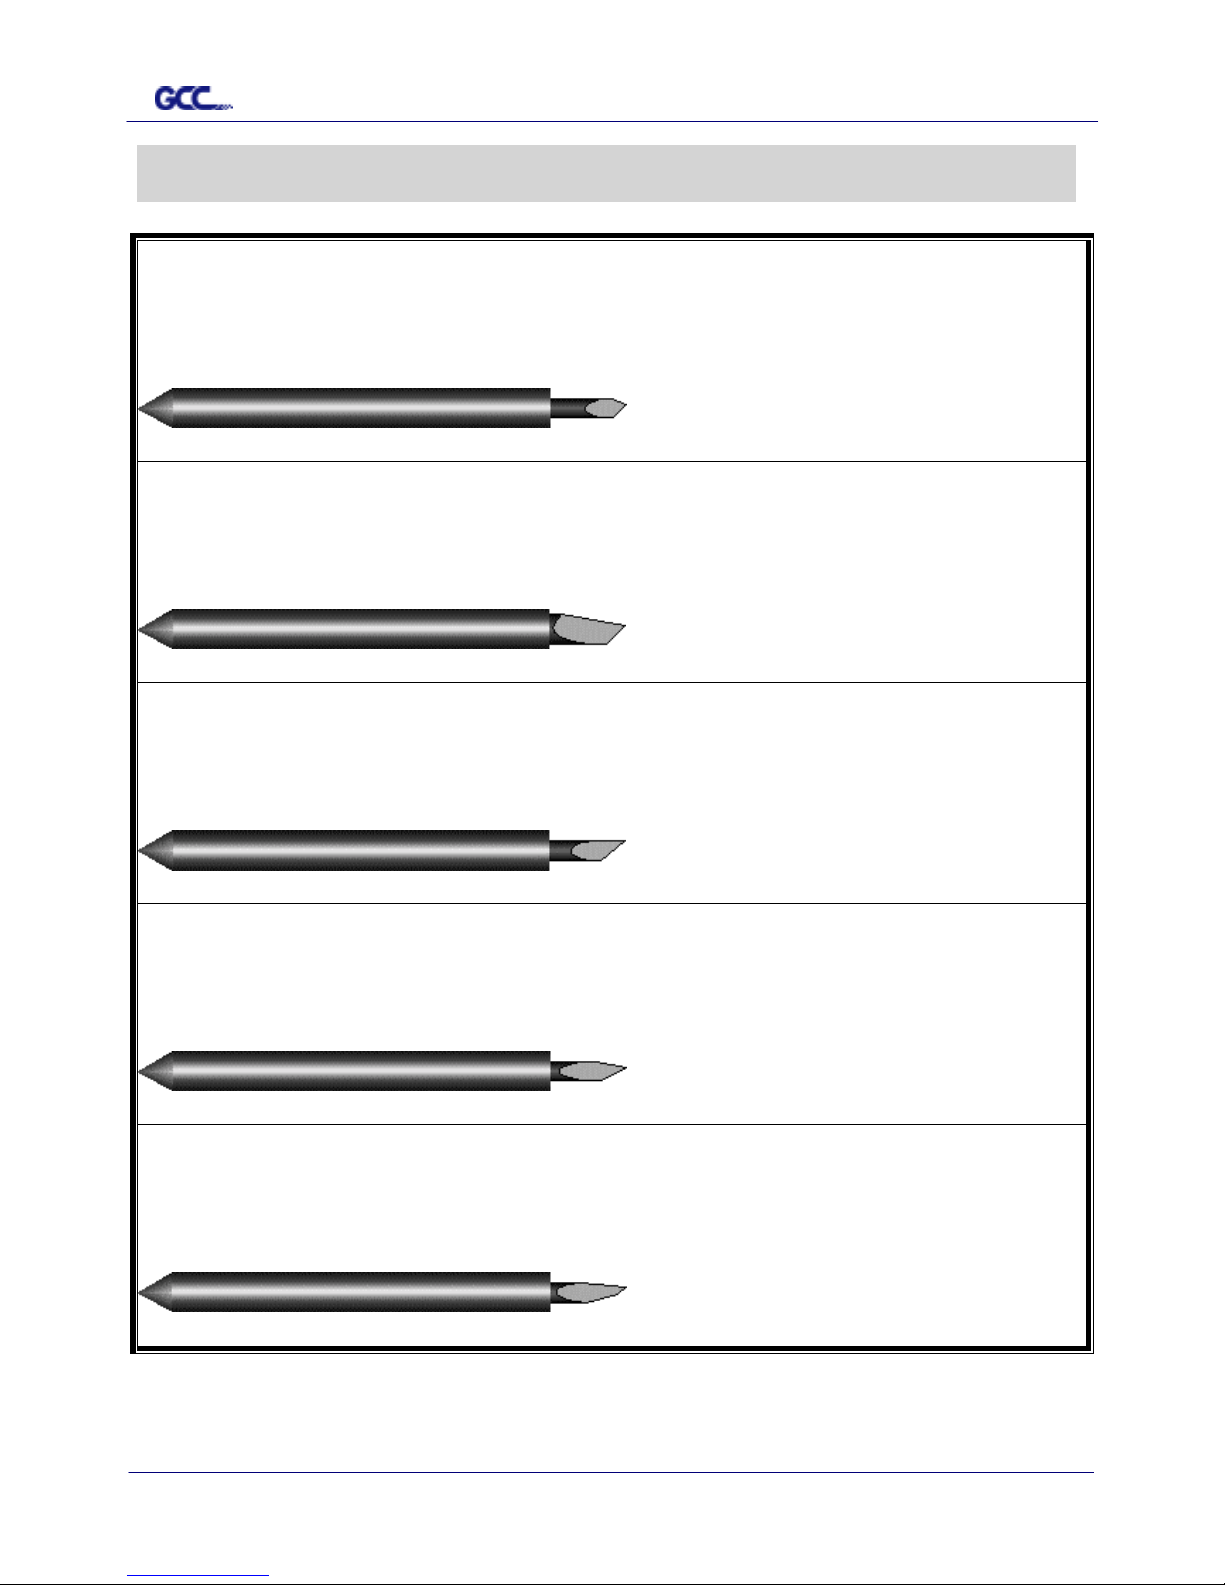
The Specification for GCC Blade VI
For cutting general signage vinyl. Blade with largest angle.
BK07026A
BK07026ABK07026A
BK07026A
GCB
GCBGCB
GCB----145S
145S145S
145S
The blade is 45°with Yellow Cap
Yellow Cap Yellow Cap
Yellow Cap, 0.25 mm blade offset and 5 miles life.
For cutting thick fluorescent and reflective vinyl. Also for cutting
detailed work in standard vinyl.
BK07027A
BK07027ABK07027A
BK07027A
GCB
GCBGCB
GCB----245R
245R245R
245R
The blade is 45° with Red Cap
Red Cap Red Cap
Red Cap, 0.25 mm offset and 5 miles life.
For cutting reflective vinyl, cardboard, sandblast, and stencil shar
p
edge.
BK07028A
BK07028ABK07028A
BK07028A
GCB
GCBGCB
GCB----360SB
360SB360SB
360SB
The blade is 60° with Green Cap
Green CapGreen Cap
Green Cap, 0.50 mm blade offset and 5 miles life.
For cutting thin sandblast mask and stencil with friction feed or
sprocket feed machine.
BK07029A
BK07029ABK07029A
BK07029A
GCB
GCBGCB
GCB----460SO
460SO460SO
460SO
The blade is 60° with Blue Cap
Blue Cap Blue Cap
Blue Cap, 0.25 mm blade offset and 5 miles life.
For Cutting small text and fine detail. Sharp blade with smallest
offset.
BK07030A
BK07030ABK07030A
BK07030A
GCB
GCBGCB
GCB----500
500500
500
The blade is 0.175 mm blade offset with Black Cap
Black Cap Black Cap
Black Cap and 5 miles life.
The Specification for GCC Blade
Jaguar II User Manual
About the tool VII
About the Tool
A generic term referring to the blade that cuts the sheet, the pen that does plotting, and the LED
bombsight (option) used for pointing to the reference point .
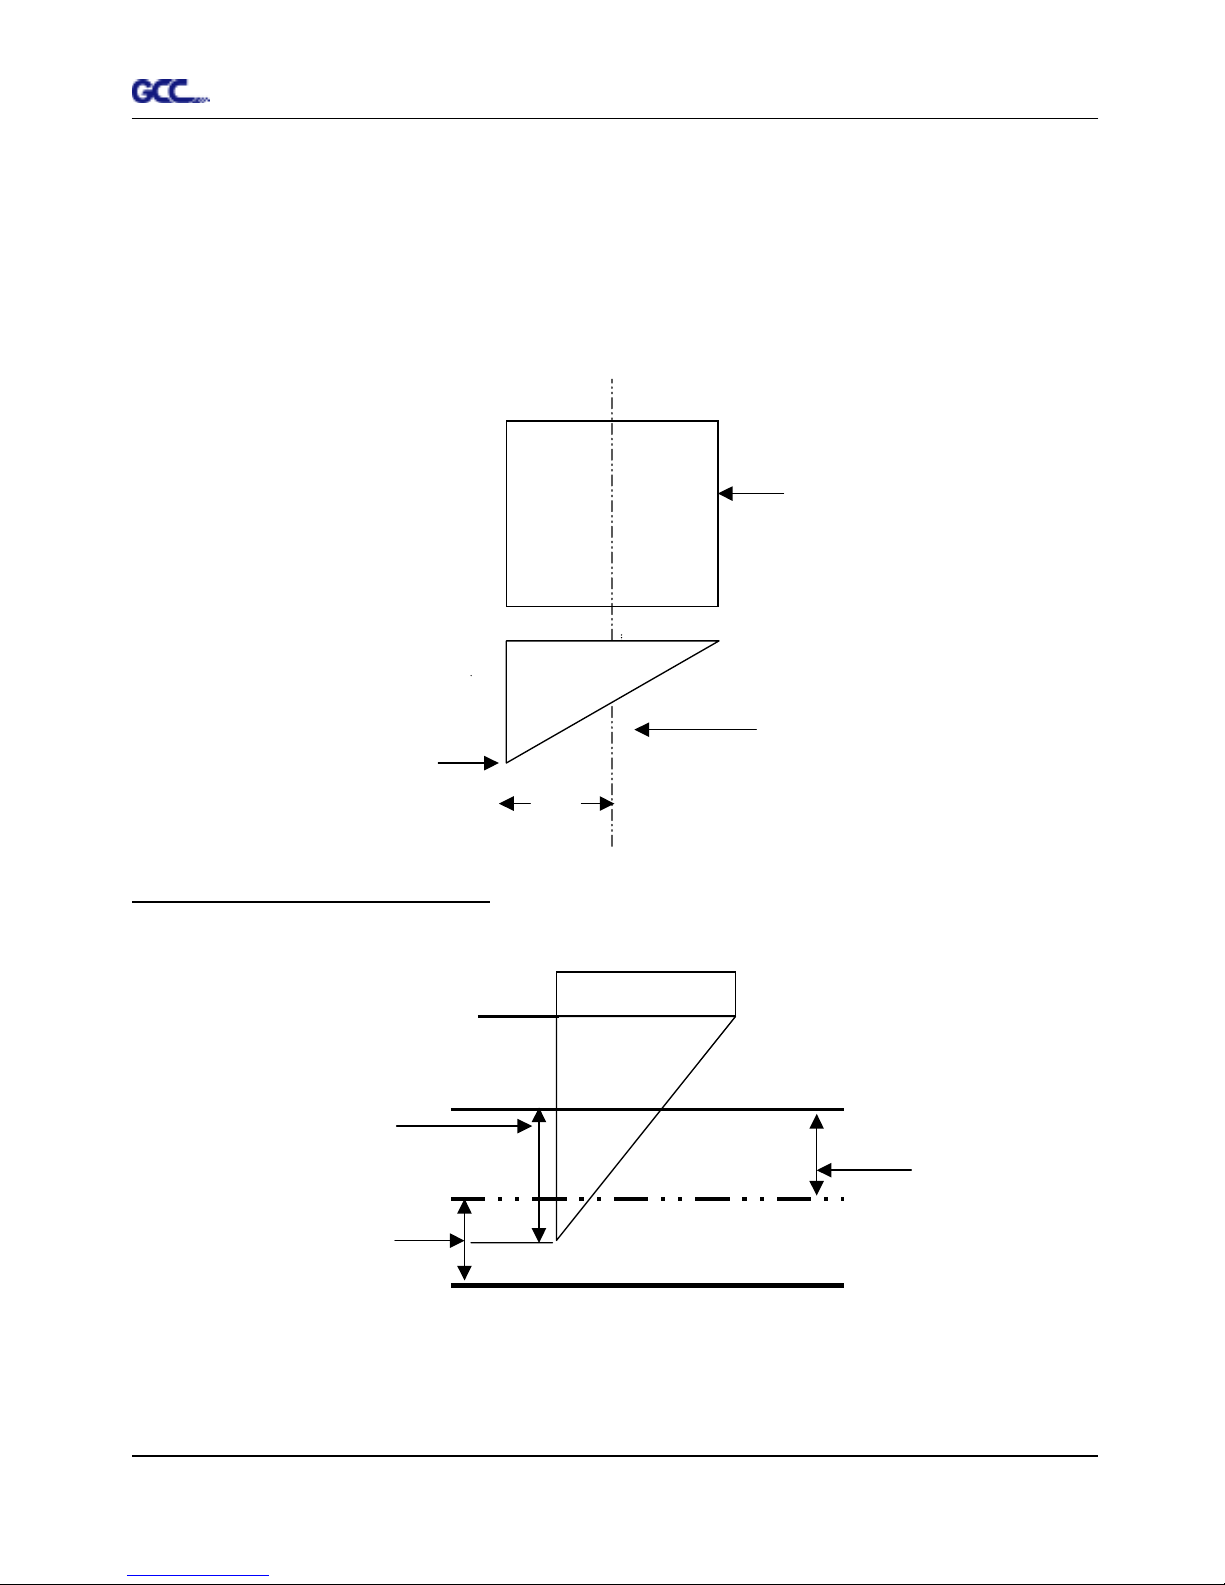
OFFSET is the distance that the blade tip is displaced from the centerline of the blade.
Protrusion Length of the Blade
Length of protrusion = t1 + t 2/ 2, but for your convenience you may just make it about 0.3~ 0.5 mm beyond the
blade holder tip.
Central line
Blade
Blade tip
offset
Thickness of the
base paper (t 2)
Thickness of
the film (t1)
Protrusion length
of the blade

Jaguar II
User Manual
Table of Contents
TTaabbllee ooff CCoonntteenntts
s
Important Information I
Quick Menu V
The Specification for GCC Blade VI
About the Tool VII
1. – Setting Up Your Sign Cutting Plotter 1-1
1.1 Checking supplied items 1-1
1.2 Front View of SignPal Jaguar II 1-2
1.3 Back View of SignPal Jaguar II 1-3
1.4 Whole View of SignPal Jaguar II 1-3
1.5 Left Hand Side of Jaguar II 1-4
1.6 Right Hand Side of Jaguar II 1-4
1.7 Control Panel 1-5
2. – Installation and Operation Procedure 2-1
2.1 Installation 2-1
2.2 Stand & Flexible Media Support System Installation 2-2
2.3 Desktop Flexible Media Support System Installation 2-5
2.4 Blade Installation 2-7
2.5 Media Loading 2-9
2.5.1 Loading the Sheet Media 2-9
2.5.2 Loading the Roll Media 2-10
2.6 Tracking Performance 2-13
2.7 Adjusting the Cutting Force and Offset 2-14
3. – Description of Features 3-1
3.1 Setting up Menu—Jaguar II in on-line mode 3-1
3.2 Setting up Menu—Jaguar II in off-line mode 3-2
3.3 Description of menu items 3-3
4. – Connecting Cutting Plotters 4-1
4.1 Universal serial bus(USB) 4-1
4.2 Parallel Transmission 4-1
4.2.1 Connection to the Parallel Port 4-1
4.3 Serial Transmission 4-2
4.3.1 Connection to the Serial Port
(RS-232C)
4-2
4.3.2 Transmitting Data to plotter 4-2
4.4 Interface for Macintosh Computer 4-3
5. – Maintenance 5-1
5.1 Cleaning the cutting Plotter 5-1
5.2 Cleaning the Grid Drum 5-2
5.3 Cleaning the Pinch Rollers 5-2
6. – Trouble Shooting 6-1
6.1 Non Operational Problems 6-1
6.2 Operational Problems 6-2

Jaguar II
User Manual
Table of Contents
6.3 Cutting Plotter Computer Communication Problems 6-3
6.4 Software Problem 6-4
6.5 Cutting Quality Problem 6-5
Appendix – Specification
Jaguar II User Manual
1. Setting Up Your Sign Cutting Plotter
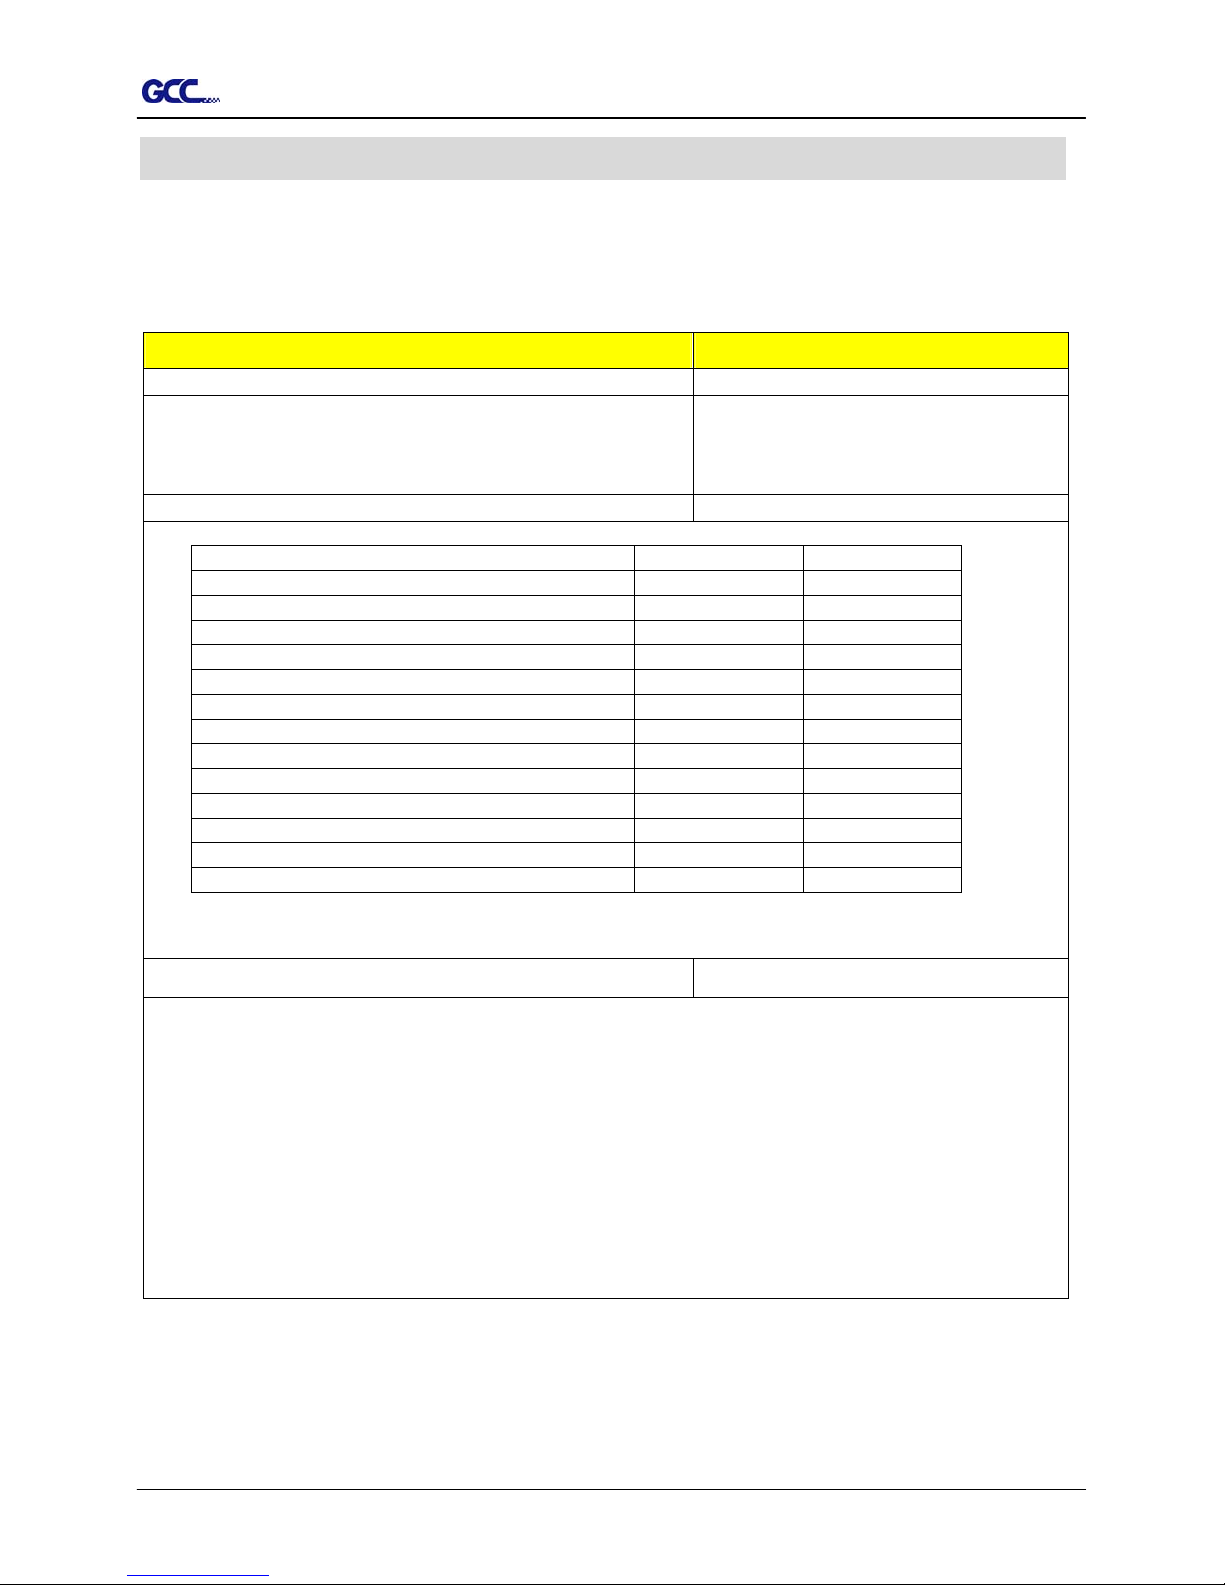
1.1 Checking supplied items
Please check carefully whether you have received all the items listed below. If you found
any item missing, please consult your local dealer.
SSttaannddaarrdd IItteemm
QQuuaannttiittyy
Cutting Plotter 1
Stand Set (Only for Jaguar JII-132S/101S/76S)
1 piece of H-shape stand
2 pieces of stands
1 piece of stand beam
1
Flexible Media Support System & Accessory Box 1
items 132S/101S/76S 61
1 set of Roll Media Flange (2 pieces)
1 set of Roll Holder (2 pieces)
1 set of Roll Holder Guide Bushes (4 pieces)
1 set of Roll Holder Support (2 pieces)
24 pieces of M6 screws
1 piece of M5 L-shape hexagon screw driver
1 piece of M6 L-shape hexagon screw driver
4 pieces of Hold Plugs
1 set of Desktop Support Brackets (2 pieces)
4 pieces of Plastic Foot
4 pieces of M4 screws
12 pieces of M6 screws
1 piece of M4 L-shape hexagon screw driver
Accessory Bag 1
1 piece of User’s Compact Disk
1 piece of AC power Cord
1 piece of data cable (RS-232C or print cable)
1 set of Blade Holder Assembly
1 piece of Blade
1 piece of Paper Sliter
1 piece of Cutting Pad for Vinyl cutting
1 Coil of Cutting Pad for paper cutting
1 piece of Tweez e rs
1 piece of Water-based Fiber-tip Pen
1 – Setting Up Your sign Cutting Plotter 1-1
Jaguar II User Manual
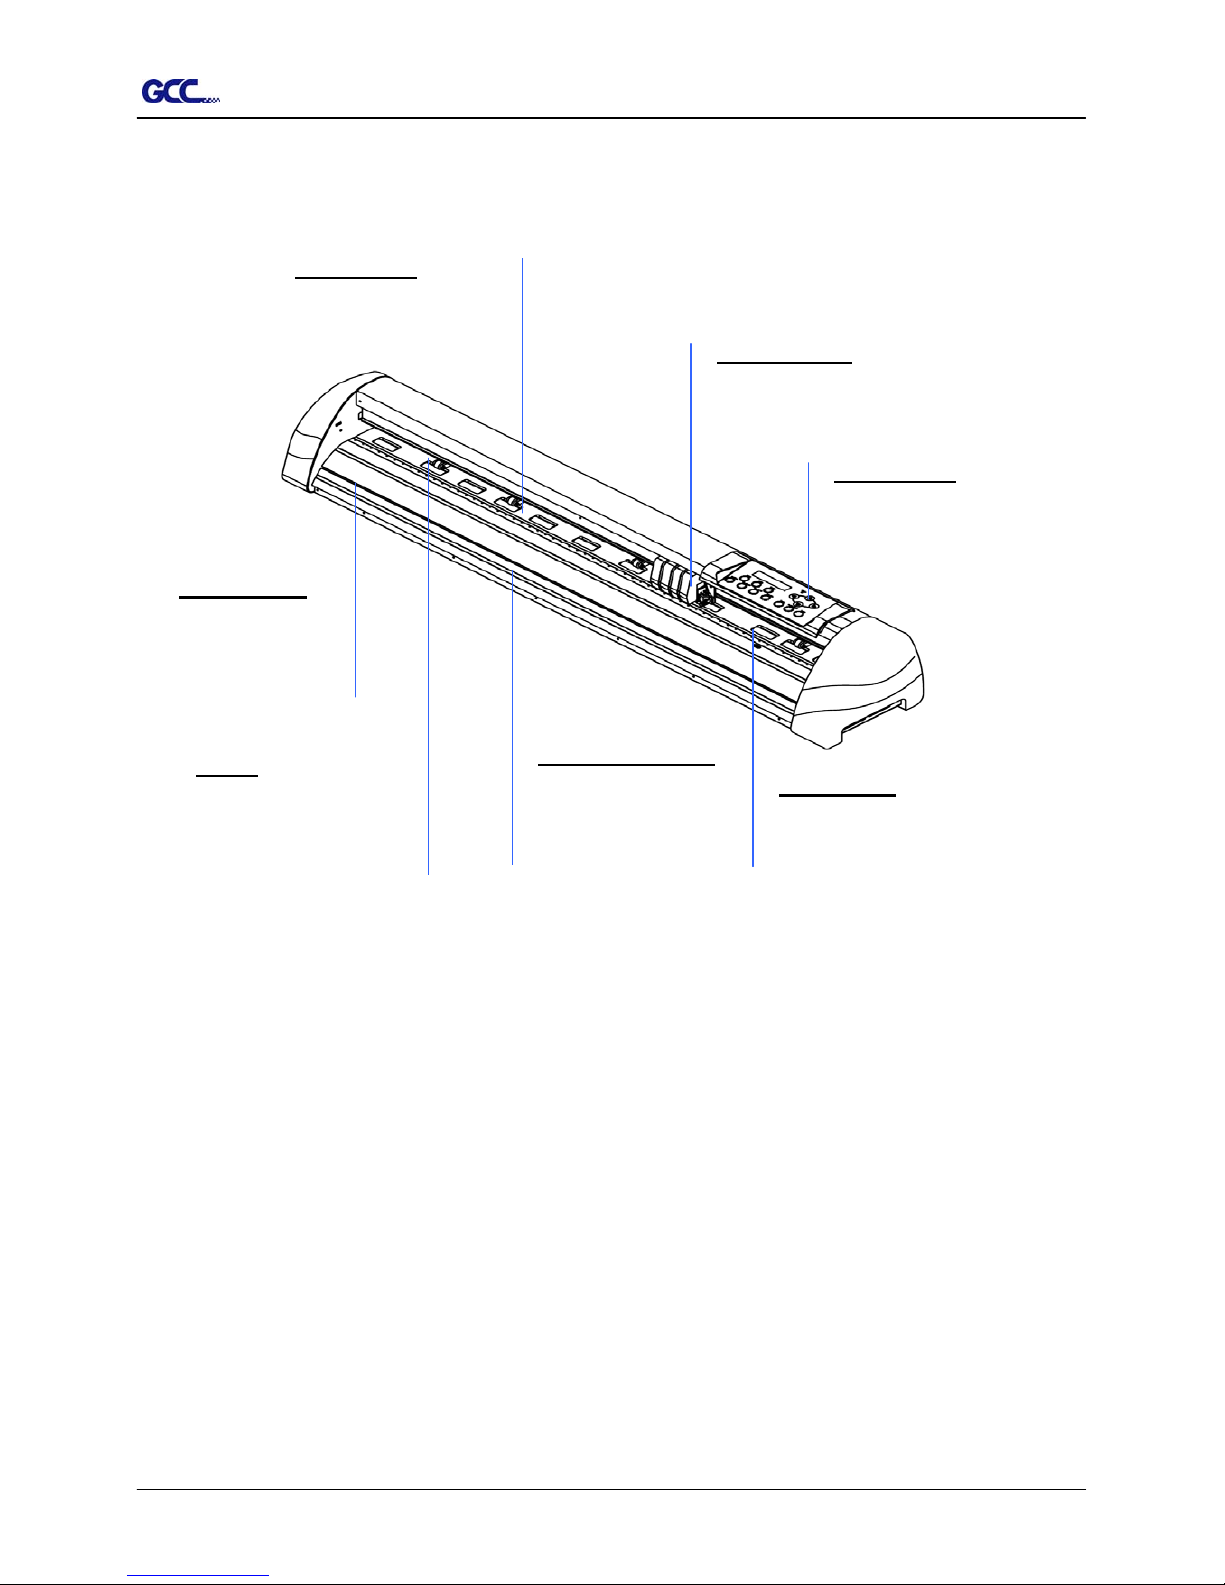
1.2 Front View of Jaguar (Figure 1-1)
Control panel – consists of 14
control keys and 1 LED and 1 LCM
showing messages and menus.
Platen -
p
rovides the
surface for holding an
d
supporting media while
performing cutting
SliterGroove –
sheets off the extra
media easily along
this groove.
Grid Drums move the
media back and fort
h
during operation.
Alignment Rulers -
Media can be aligned
with the clear guide line
marks
Tool Carriage –
p
erforms the
cutting with the installed blade
and
p
en.
Cutting Pad – provides the
protection of blade when the blade
is cutting.
Figure 1-1
1 – Setting Up Your sign Cutting Plotter 1-2
Jaguar II User Manual
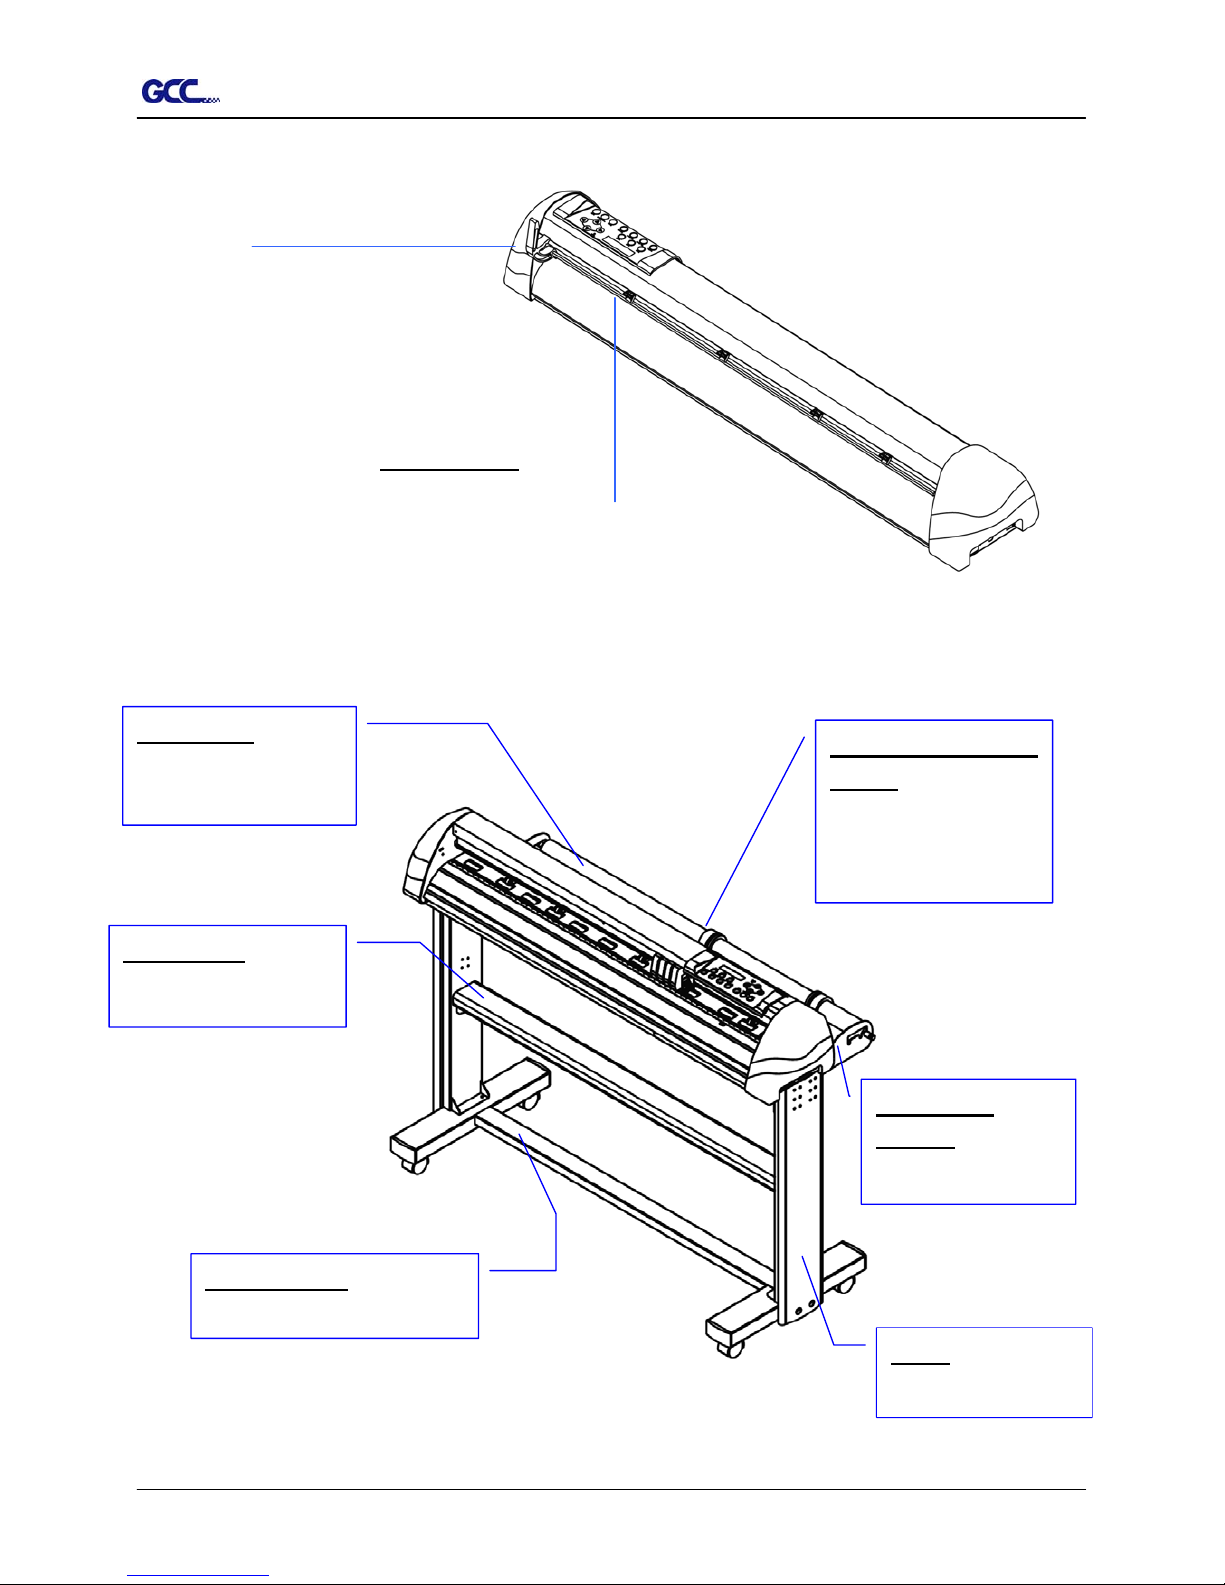
1.3 Back View of Jaguar (Figure 1-2)
Lever - raises o
r
lowers the pinc
h
rollers.
Pinch Rollers - hol
d
the media during cutting.
1.4 Whole View of Jaguar (
Figure 1-3)
e body.
Roll Holder
Support – supports
roll holders
Stand Beam –
stabilizes th
Stand - Supports the
cutting plotter body.
Roll Holder Guide
Bushes - Serve to keep the
roll media in place whe
n
media is pulled from the
roll.
Roll Holder - Holds an
d
supplies the roll media
for cutting.
H-shape Stand – Supports the
cutting plotter body.
Figure 1-3
Figure 1-2
1 – Setting Up Your sign Cutting Plotter 1-3
Jaguar II User Manual
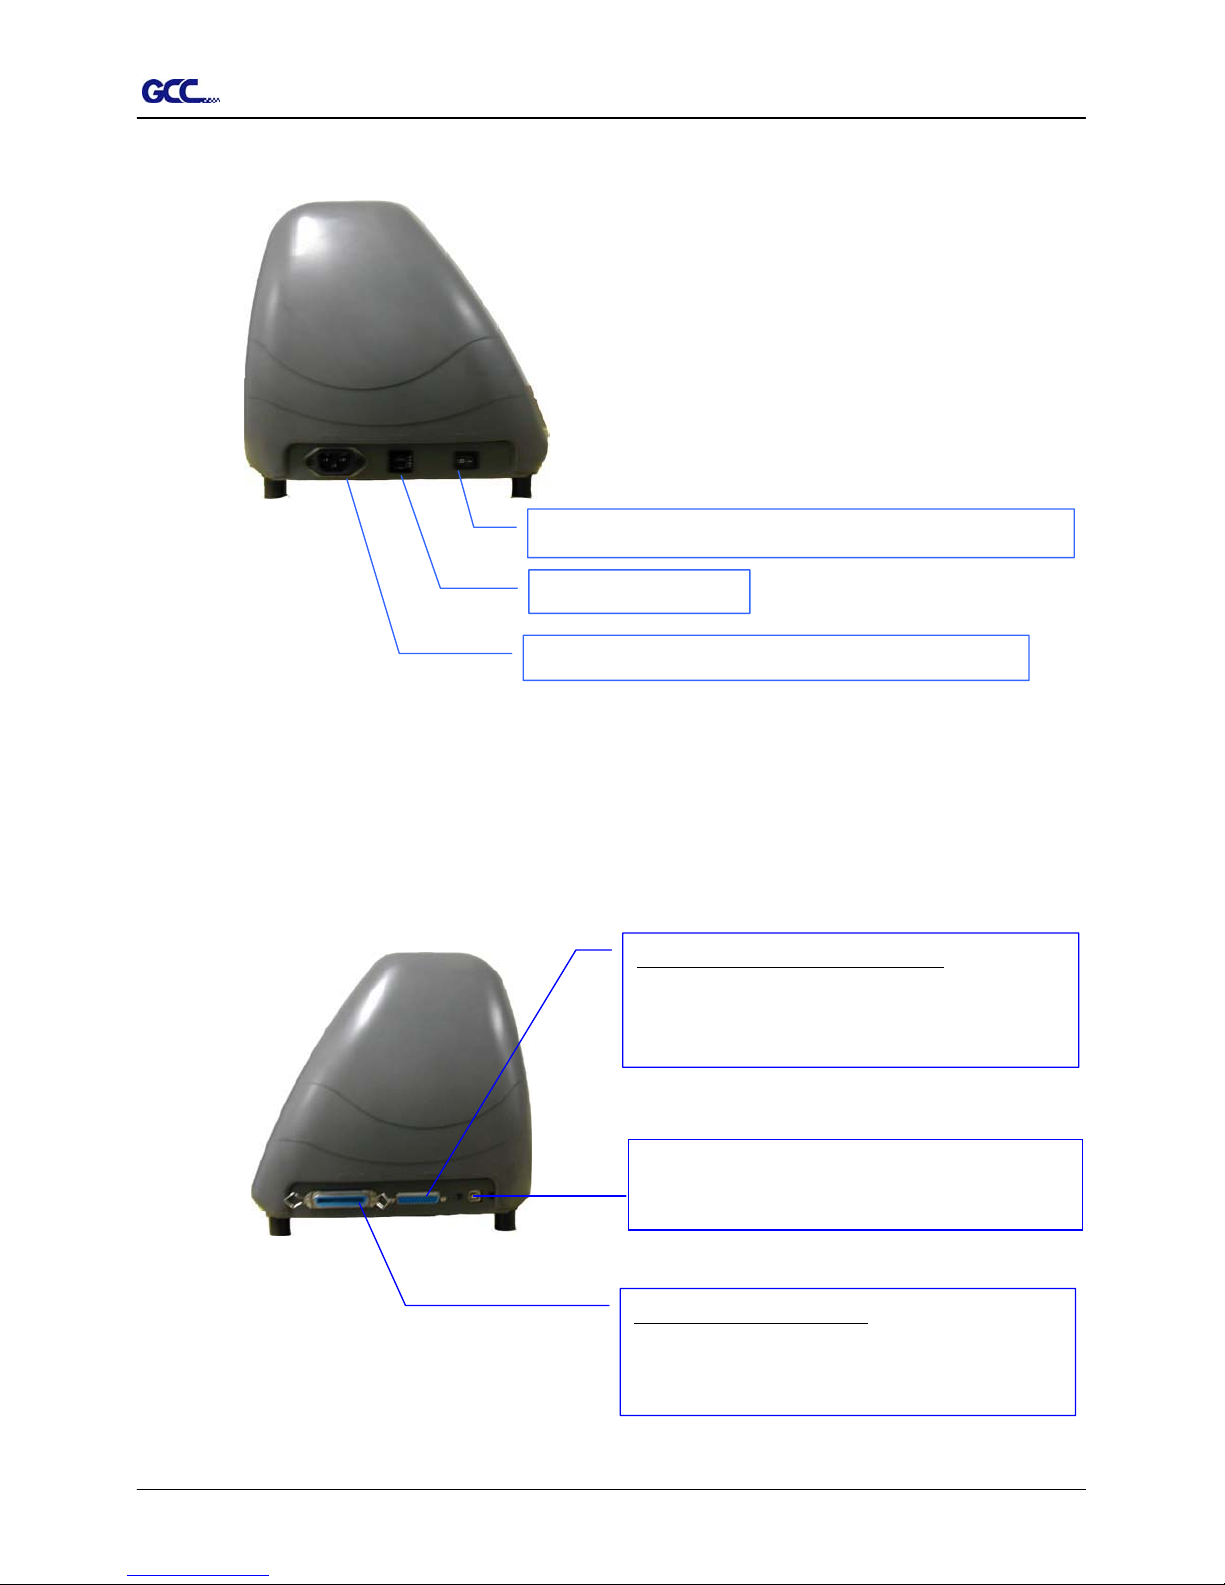
1.5 Left Hand Side of Jaguar (Figure 1-4)
Power Switch – On when switches to [I]; Off to [O]
AC Power Connector – used to insert the AC power cord.
Fuse – 3 Amp.
Figure 1-4
1.6 Right Hand Side of Jaguar (Figure 1-5)
Figure 1-5
USB Connector- used to connect the cutting
p
lotter to a computer through a USB cable.
Serial Interface Connector (RS232C) – used to
connect the cutting plotter to a computer through a
serial interface cable.
Parallel Interface Connector – used to connect the
cutting plotter to a computer through a parallel
interface cable
1 – Setting Up Your sign Cutting Plotter 1-4
Jaguar II User Manual
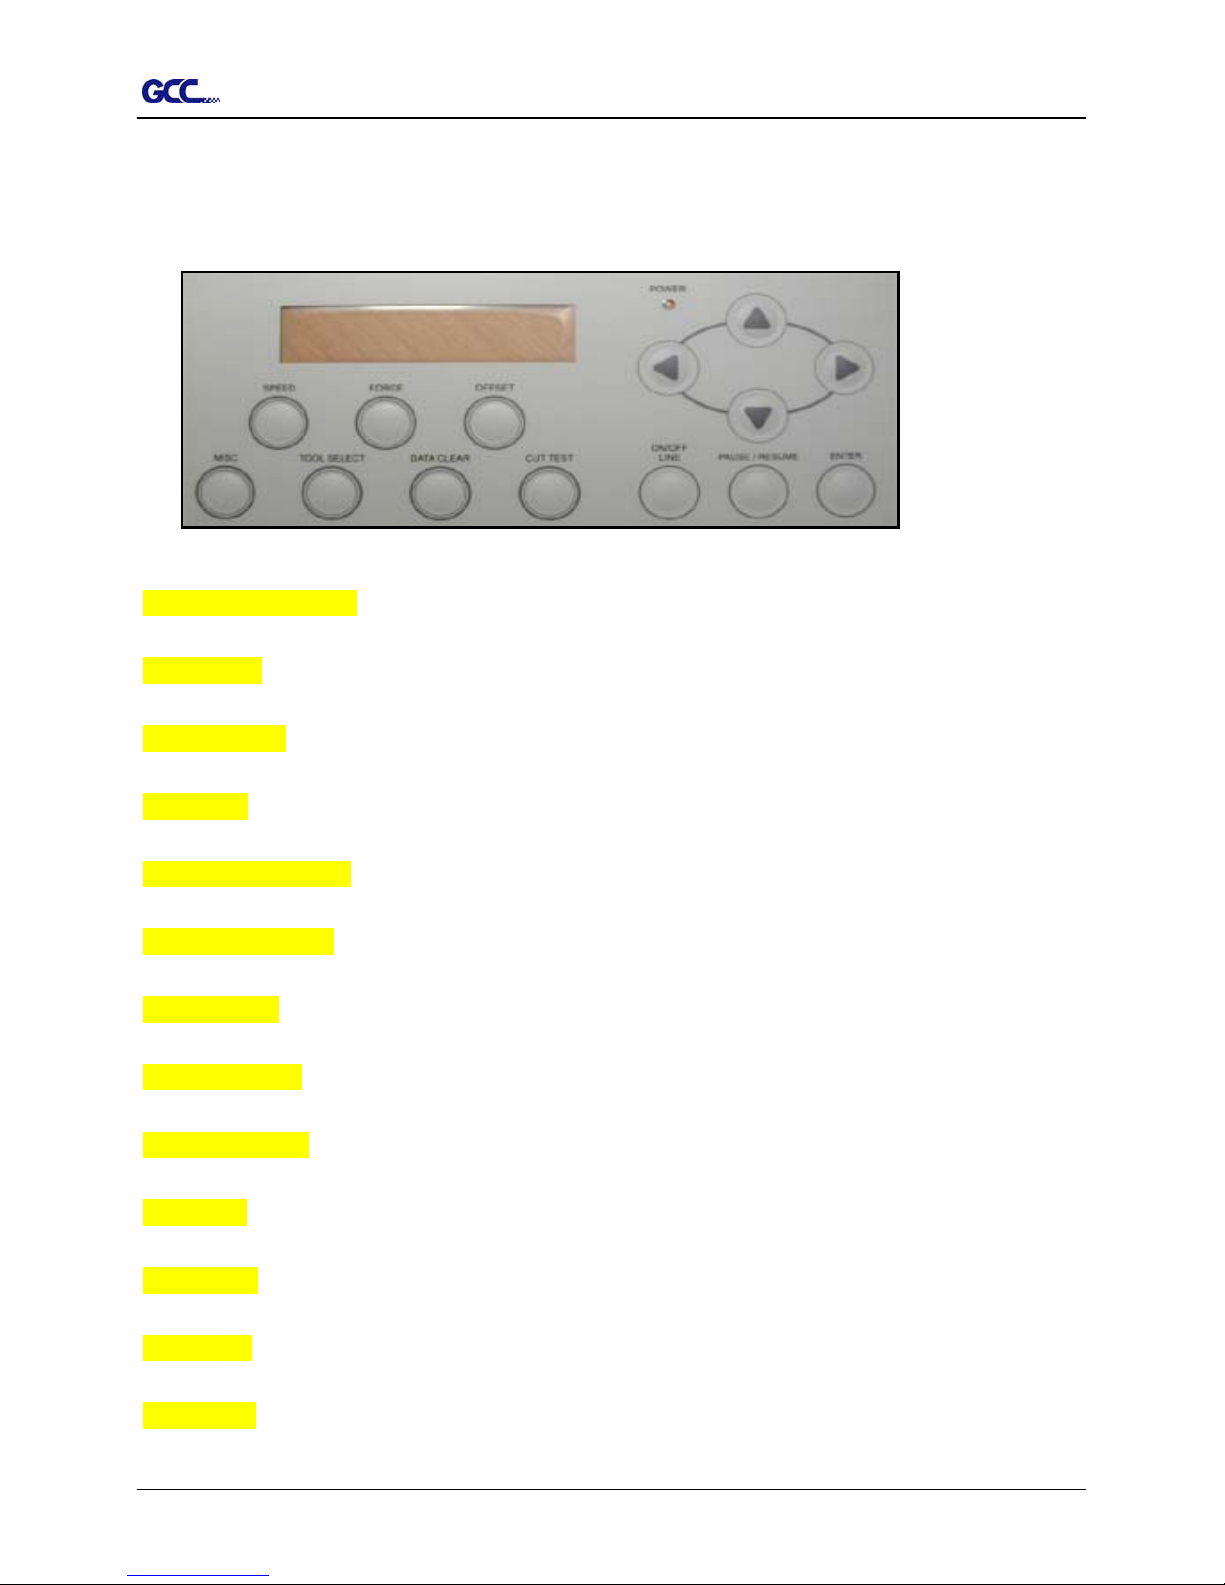
1.7 Control Panel (Figure 1-6)
Please refer to the Chapter3 – the description of operation for detailed explanation.
Figure 1-6
LCD Display Screen: various functional and error message are displayed here.
Power LED: it lights up when the power is on.
4 Arrow Keys: used to move the carriage or sheet or changing setting.
Enter Key: used to set item, registers the immediately preceding input value.
Pause/Resume Key: temporarily halts cutting in process or continues.
ON/OFF LINE Key: used to stop the cutting job or aborting the change of the setting.
Cut Test Key: executes a cutting test for verifying the blade force and offset are correct.
Data Clear Key: used to aborting the data being received.
Tool Select Key: used to selecting tools and setting the conditions.
Misc. Key: used to selecting items mentioned in Chapter 3.
Speed Key: used to selecting the cutting speed, up-speed, and cutting quality.
Force Key: used to select the cutting force.
Offset Key: used to adjust the setting value of the blade offset.
1 – Setting Up Your sign Cutting Plotter 1-5
 Loading...