

Page 1

DuraMax-HG
Rugged Handheld Quick Reference Guide
V 0.05 | Bulletin XXXX | Effective Spring 2007
Grayhill Part Number:
M1YY1023
561 Hillgrove Avenue
LaGrange, IL 60525
Phone: (708) 354-1040
Fax: (708) 354-2820
On the Internet:
http://www.grayhill.com/CustomMobile
Product Reference Guide
© 2007 Grayhill, Inc. | Proprietary Content | All Rights Reserved
Page 2

Copyright © 2007 Grayhill, Inc. All rights reserved.
p
t
p
p
The information supplied in this manual is believed to be reliable and accurate at the time of its publication. Grayhill, Inc. assumes no
responsibility for any errors, omissions, or the suitability of its product(s) for a particular application.
Warranty
Industrial Handheld Computers from Grayhill, Inc., (i.e., “Product”) are warrantied against defects in materials and workmanship under normal use,
for a period of 1 year from the date of purchase. This warranty does not apply to units that have been abused or stressed beyond the published
environmental and electrical specifications. In the event of a product failure due to materials or workmanship, Grayhill will repair or replace the
defective product. This warranty is limited to the original purchase price of the unit and does not cover installation, labor or any other contingent
costs. For warranty service, return the defective product to Grayhill, shipping prepaid, for prompt repair or replacement. The foregoing sets forth
the full extent of Grayhill’s warranties regarding the Product. Repair or replacement at Grayhill’s option is the exclusive remedy.
THIS WARRANTY IS GIVEN IN LIEU OF ALL OTHER WARRANTIES, EXPRESS OR IMPLIED; AND GRAYHILL SPECIFICALLY
DISCLAIMS ALL WARRANTIES OF MERCHANTABILITY OR FITNESS FOR A PARTICULAR PURPOSE. IN NO EVENT SHALL
GRAYHILL, ITS SUPPLIERS OR LICENSORS BE LIABLE FOR DAMAGES IN EXCESS OF TH E PURCHASE PRIC E OF THE PRODUC T;
FOR ANY LOSS OF USE; LOSS OF TIME; INCONVENIENCE; COMMERCIAL LOSS; LOST PROFITS OR SAVINGS; OR OTHER
INCIDENTAL, SPECIAL OR CONSEQUENTIAL DAMA GES ARISING OUT OF THE U SE OR INABILITY TO USE THE PRODUCT, T O
THE FULL EXTENT SUCH MAY BE DISCLAIMED BY LAW. SOME STATES DO N OT ALLOW THE EXCLUSION OR L IMITATION OF
INCIDENTAL OR CONSEQUENTIAL DAMAGES. THEREFORE, THE FOREGOING EXCLUSIONS MAY NOT APPLY IN ALL CASES.
This warranty provides specific legal rights. Other rights, which vary from state to state, may also apply.
Ordering Guide
All programs and files on the CD included with this Product are protected by copyright. Grayhill, Inc. authorizes duplication of the contained
rograms and files as necessary for use by the licensee; however, general distribution of these programs and/or files is strictly forbidden withou
rior written consent from Grayhill, Inc.
Grayhill Product Grayhill
Part Number
Rugged Mobile Handheld QVGA Display GPS, BlueTooth, IP67 M1YY1023-2
Rugged Mobile Handheld QVGA Display GPS, Barometer, Compass, 802.11, BlueTooth, IP67 M1YY1023-3
Handheld Lithium Ion Battery 10.5Whr M1YY1020-8
Handheld Lithium Polymer Battery 15.5Whr M1YY1020-3
Charging Cable with USB Host and USB Client Snap Version M1HH4151-1
Charging Cable with USB Host, USB Client, and RS-232 Snap Version M1HH4151-3
Auto Cable 01YY5061-2
USB To Serial Adapter 01YY5062-1
Evaluation Kit – 1 Handheld QVGA Display (M1YY1023-3) DURAMAXEVT35HG
1 Charging cable (M1HH4152-1)
1 Handheld Lithium Ion Battery (M1YY1020-3)
1 Handheld Product CD
1 Stylus
Audience
This manual is designed to be a quick reference resource for the Grayhill Handheld. The information it provides is intended for qualified electrical
ersonnel familiar with installing, programming, and maintaining industrial networks and industrial automation.
Product Reference Guide
© 2007 Grayhill, Inc. | Proprietary Content | All Rights Reserved
1
Page 3

Table of Contents
Warranty .................................................................................................................................................................... 1
Introduction................................................................................................................................................................ 3
Summary of Features .................................................................................................................................................................... 3
Typical Uses.................................................................................................................................................................................. 3
Handheld Product Components.................................................................................................... ................................................. 3
Evaluation Kit Contents................................................................................................................................................................5
Setting Up the Handheld............................................................................................................................................ 4
Charge the Handheld..................................................................................................................................................................... 4
Turn On the Handheld................................................................................................................................................................... 5
Align the Handheld Touch Screen................................................................................................................................................. 6
Resetting........................................................................................................................................................................................ 6
Using the Handheld.................................................................................................................................................... 7
Handheld Buttons............................................................................................................... ........................................................... 7
Connectivity.................................................................................................................................................................................. 8
Using the Stylus............................................................................................................................................................................ 8
Task Bar and Start Menu............................................................................................................................................................... 9
Pre-Installed Programs.................................................................................................................................................................. 9
Using the Keyboard......................................................................................................................................................................10
Changing Handheld Settings........................................................................................................................................................11
Field Swapping the Battery..........................................................................................................................................................12
Storing Data.............................................................................................................................................................13
Built-In Flash Memory.................................................................................................................................................................13
Wired Communications...........................................................................................................................................14
Running ActiveSync ....................................................................................................................................................................17
Disconnecting ActiveSync...........................................................................................................................................................17
Wireless Communications ....................................................................................................................................... 18
WiFi (802.11x).............................................................................................................................................................................18
BlueTooth.....................................................................................................................................................................................18
Compass and Barometer...............................................................................................................................................................19
GPS..............................................................................................................................................................................................19
Regulatory Information (Pending)........................................................................................................................... 20
FCC Notices.................................................................................................................................................................................20
Service Information.................................................................................................................................................. 21
Product Reference Guide
© 2007 Grayhill, Inc. | Proprietary Content | All Rights Reserved
2
Page 4

Introduction
r
The Grayhill Industrial Handheld Computer is a rugged handheld computer designed for use in heavy industrial o
commercial applications. The Handheld provides wireless connectivity and durable mobile personal computing
functionality for personnel working in extreme environments.
Summary of Features
• Environmentally Sealed and Submersible
• Daylight Viewing Ability
• 3.5” VGA (640x480) or QVGA (320x240) Transflective Display
• Ruggedness: Solid frame; industrial-strength, high-impact touch screen
• Dimensions: 7.6” x 3.3” x 1.7”
• Weight: 20oz. with battery
• Operating System: Windows CE 5.0
• Processor: Intel XScale PXA270 416 MHz
• Battery Life: 8 hours at maximum power consumption
• 64 MB RAM and 64 MB Non-Volatile Flash Memory: No loss of data upon hard reset
• Auxiliary Storage Capabilities: Secure Digital / Compact Flash
• Multiple On-Board Wireless Options: WiFi (802.11x), Bluetooth
• Wired Connections: Active Sync and USB via cable
• Audio: Speakers and Microphone
• GPS: On-board GPS with internal antenna and connection for external antenna
• Other Features: Compass, barometer, Hot Swap
Typical Uses
Wireless communications address a range of industrial and commercial communications challenges.
Communications using radio waves can be made over long distances; through the heat of blast furnaces; and in the
cold temperatures and precipitation that may be present at outdoor sites.
Whether working in construction, manufacturing, mining, or other physically demanding jobs, field personnel will
find the Grayhill Handheld useful because of its comprehensive communications options; and its ability to withstand
hard knocks, dusty job sites, extreme temperatures, rain, snow, and even submersion in water.
Handheld Product Components
The portable Handheld is housed in a 7.6” x 3.3” x 1.7” rugged plastic frame that features a rubber boot for added
durability. It features a 3.5” VGA or QVGA display with a rugged 5-wire touch screen. The Handheld also includes
two (2) keypads: one for navigation and one for numeric entry.
Accessories that accompany the Handheld include a Lithium Ion battery or Lithium Polymer Battery; an AC adapter
that includes USB Active Sync and USB Host; and a companion CD with an electronic version of this guide.
Product Reference Guide
© 2007 Grayhill, Inc. | Proprietary Content | All Rights Reserved
3
Page 5

Evaluation Kit Contents
The Handheld Evaluation Kit includes the following components. For detailed ordering information,
please refer to the Ordering Guide.
Handheld Kit Components
1 Handheld Standard
1 Handheld Stylus
1 Handheld Lithium Ion Battery (15.5Whr)
1 Handheld AC Adapter with USB Active
Sync connection and USB Host Connection
1 Handheld Product CD
Table 1
Grayhill Handheld
evaluation kit components
Setting Up the Handheld
The Grayhill Handheld is shipped with a rechargeable Lithium Ion battery, which is not installed at
time of shipment. Some initial setup is required.
Charging the Handheld
Before using your Handheld for the first time, charge its battery for abou t three (3) hours, connecting
the Handheld to an electrical outlet using the Grayhill Charging cable.
A completely charged battery will power the Handheld for eight (6-8) hours of maximum power
consumption, depending upon the type of battery ordered with the system.
Charging the Battery Using the AC Adapter
Attach the AC adapter to the Handheld’s external connector, then connect the power cord to an
electrical outlet. Refer to Figure 5.
!
WARNING: Use only a Grayhill-approved AC adapter with the Handheld. Use of another AC adapter
may cause a fire or an explosion. Always connect the AC adapter first to the Handheld. Use the adapter
with a properly grounded supply to avoid electric shock. Before plugging the power cord into the wall
socket, make sure its voltage and frequency match that of the AC adapter. If using an extension cord with
the AC adapter provided, ensure that the total current rating of the product does not exceed the current
rating of the extension cord.
Product Reference Guide
© 2007 Grayhill, Inc. | Proprietary Content | All Rights Reserved
4
Page 6
LEDs
g
g
g
g
• When the Handheld is fully charged, the green Power LED will glow steadily green.
• When the unit is unplugged from AC or the Battery is not charging, the LED will be off.
• While the battery is charging, the LED will glow steadily amber.
• If there is a low battery, the LED will flash red.
• If there is a fault or no battery present, the LED will glow steadily red.
Adapter Present
Battery Status Char
Battery Reports Fully Charged Green Green None
Battery Reports Fully Dischar
Battery Reports Between Char
Battery Status Unknown or
ed
ed and Discharged Amber None None
Disconnected
er ON Charger OFF Not Chargin
Amber Flash Red Flash Red
Red Red Red
No Adapter
Battery Status Lights
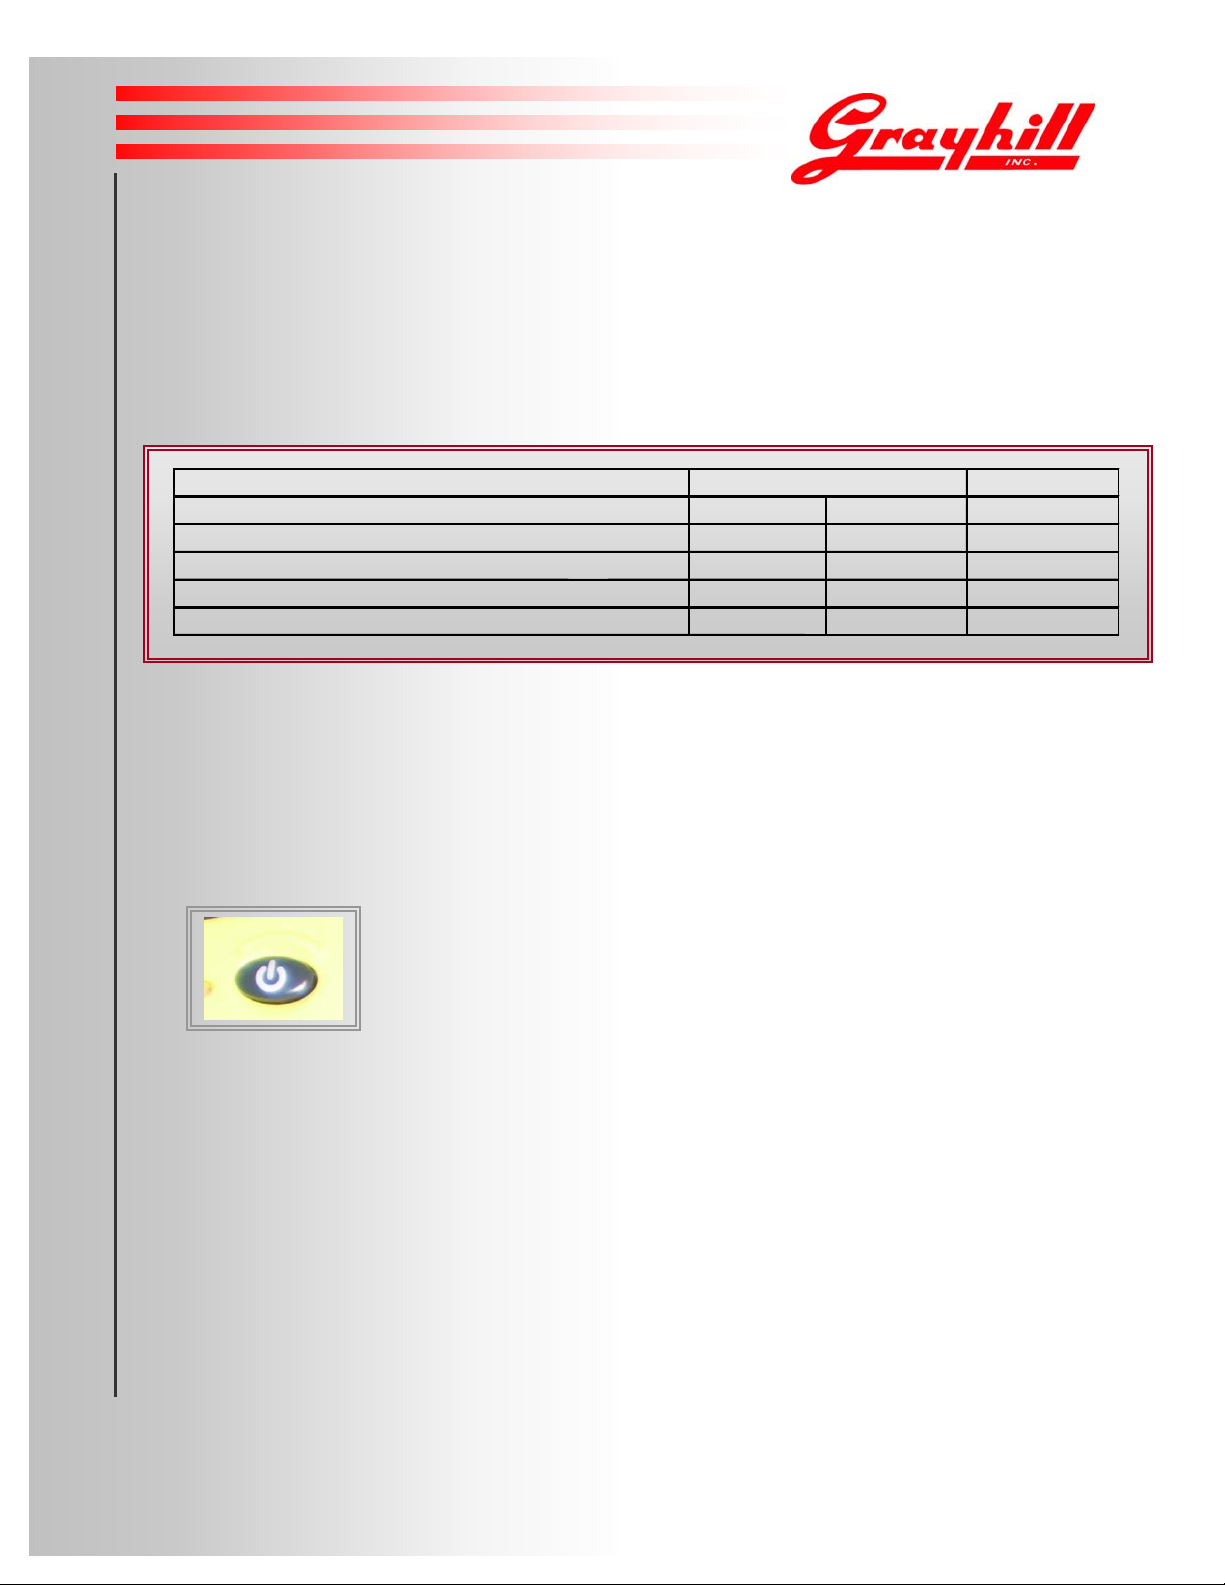
Turning On the Handheld
If your Handheld has been turned off, turn it on by pressing the Power button, which is located on the
lower center of the Handheld’s frame. The first time you power on your Handheld, it should take
approximately 45 seconds to activate.
Figure 1
Power button
Table 2
Instant On/Off
Once the unit is initially powered up, the Handheld will turn on instantly when you p ress the Power bu tton,
and turn off instantly when you press the Power button again. This instant on/off feature is designed to
facilitate work under harsh and unpredictable conditions.
Product Reference Guide
© 2007 Grayhill, Inc. | Proprietary Content | All Rights Reserved
5
Page 7
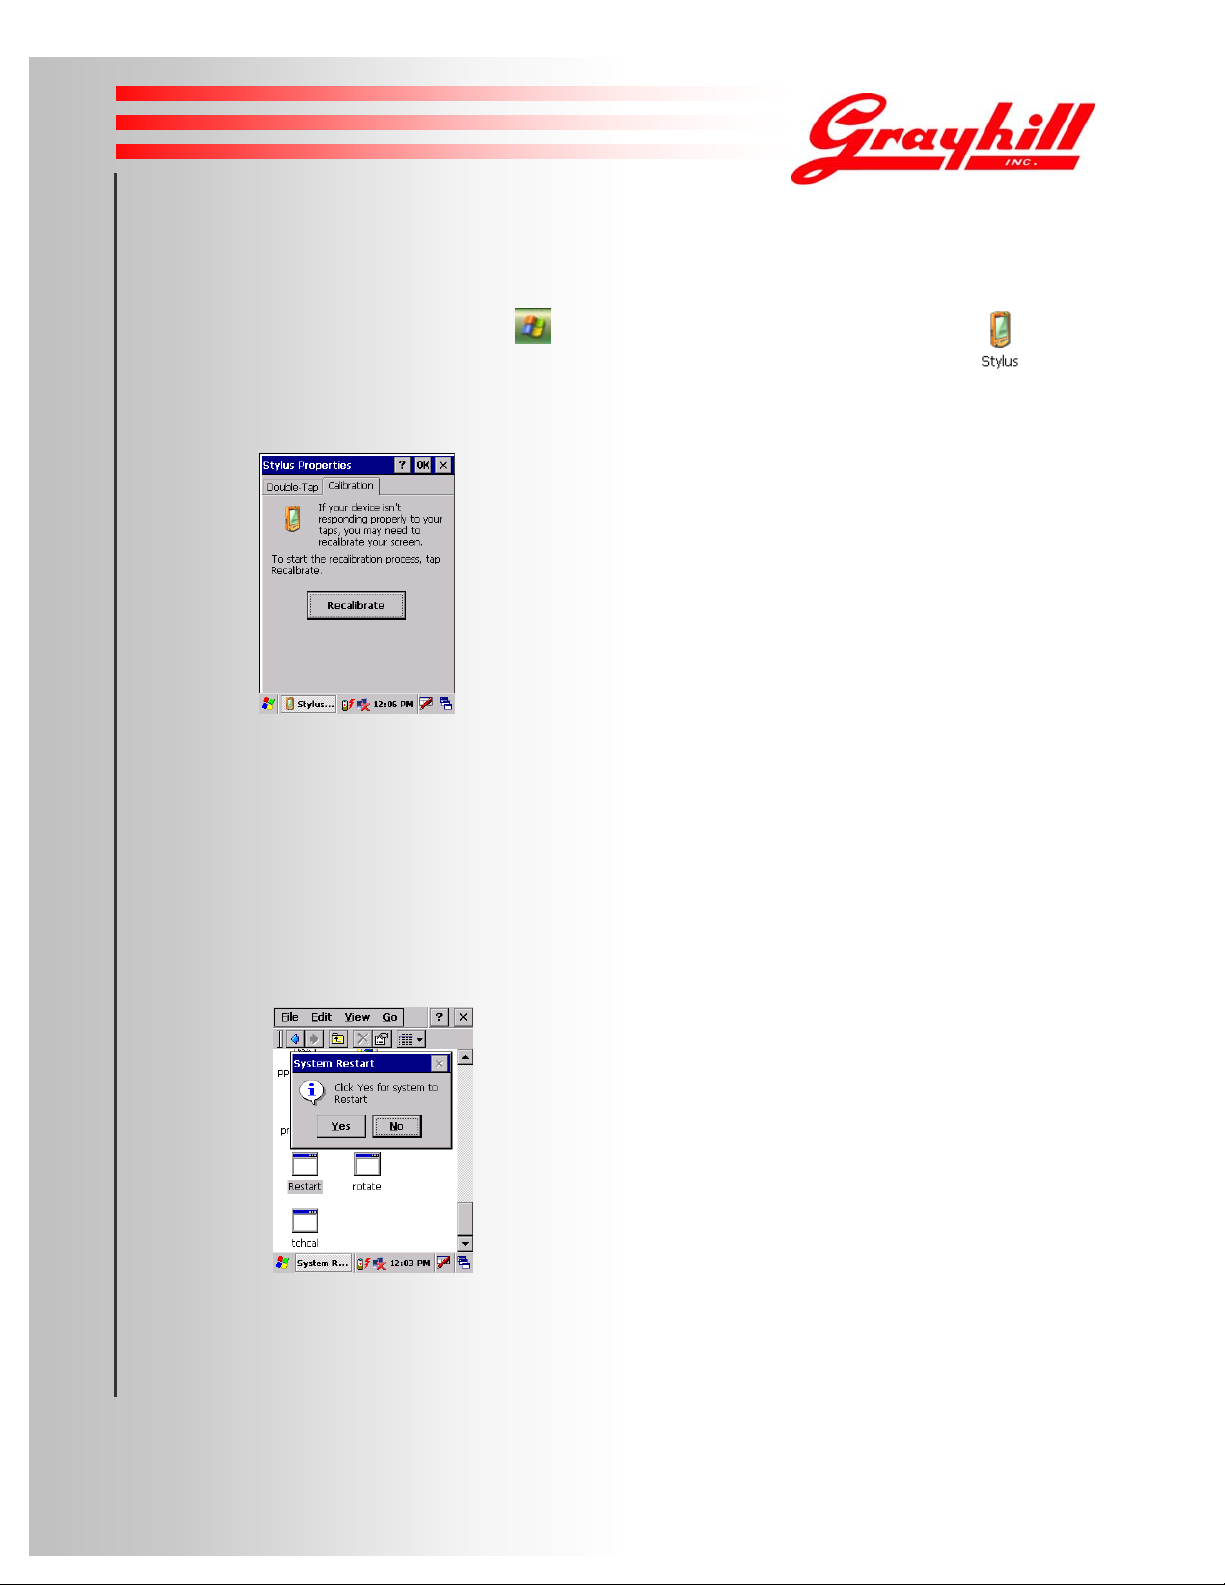
Aligning the Handheld Touch Screen
The Handheld’s touch screen may require initial calibration to align the touch screen cursor with the tip of
your stylus. To launch the calibration, tap
Click on the calibration tab, and then click on Recalibrate. To calibrate your screen, tap the
center of each alignment target with the tip of the stylus. Once the calibration is successful the screen will
prompt the user to press escape or tap the screen.
Figure 2
Recalibration Prompt Screen
; then tap Settings; then tap Control Panel; then tap .
Resetting
By default, the Handheld’s instant-off feature causes it to go into immediate “low power” mode where closed
programs are still in memory, but the screen’s backlight is off. If the Handheld will not be used in th e near
future, batteries should be removed.
Soft resets of the Handheld are accomplished by:
1) Selecting Restart, located in MyDevice>Windows>Restart.exe, or
2) Responding affirmatively to a request for restart from an installer or other program. When so instructed,
click Yes on the pop up box for restart.
Figure 3
Restart Prompt
To conduct a hard reset, hold the Power button down for 6-10 seconds, un til the screen goes black.
This will clear the Handheld's RAM and reload the OS from Flash.
Product Reference Guide
© 2007 Grayhill, Inc. | Proprietary Content | All Rights Reserved
6
Page 8

Using the Handheld
l
P
The Handheld’s external features are designed for use in harsh conditions or on rugged terrain. Its QVGA
or VGA display, external buttons, and battery are built to resist impact.
Handheld Buttons
Power / Sleep Button
Navigation
Hot Keys 4-6Hot Keys 1-3
Figure 4
Handheld front view
Power/Sleep Button
Firmly press the Power button on the bottom center of the Handheld frame to turn the Handheld on.
Press the Power button again to put it into low power mode.
Navigation Button
The Handheld features an 8-way navigation button, which can be customized.
Hot Keys
Function keys 1 – 6 are the hot keys. Three Hot Keys are located to the left of the navigation key, and three
Hot Keys are to the right. You may assign any functions you wish to each of these keys via Settings>Conto
anel>HotKey on the Start menu. The hot keys are programmed to the following default settings:
Hot Key 1: Tab, Hot Key 2: Backlight Control, Hot Key 3: Escape, Hot Key 4: Virtual Keyboard, Hot Key 5:
Start Menu, Hot Key 6: Enter.
Product Reference Guide
© 2007 Grayhill, Inc. | Proprietary Content | All Rights Reserved
7
Page 9

Connectivity
Main Port
USB A- Type Female
USB A - Type Male
Serial Cable
AC - Adapter
Figure 5
Handheld cable
• The main port to connect the cable is located on the bottom of the unit.
• The USB A-Type Female connector facilitates connectivity with peripherals, such as with an external keyboard
or a mass storage device.
• The USB A-Type Male connector is for connecting to another PC via Active Sync.
• The Serial Cable offers Serial Communications (RX and TX only).
• The AC adapter is capable of 100 VAC - 240VAC 50/60 Hz. Plugs for universal compatibility for other
countries other than US are available.
Using the Stylus
You may use the Handheld stylus like a mouse to navigate menus and select items on the Handheld touch screen.
Tapping: Tap the touch screen with the stylus to select or open an item. Tapping with the stylus is equivalent to
using your mouse to click an item on your PC screen.
Dragging: Place the stylus on the touch screen and drag the stylus across the screen to select text and images.
Drag the stylus down a list to select multiple items.
Product Reference Guide
© 2007 Grayhill, Inc. | Proprietary Content | All Rights Reserved
8
Page 10

Task Bar and Start Menu
F
When you power on the Handheld, the Task Bar will appear at the bottom of the Handheld display.
Task Bar
The Task Bar at the bottom of the display contains the Start menu and other items. You can perform a variety
of tasks by tapping your stylus on the corresponding Task Bar item.
Figure 6
Handheld task bar
Start Menu
You can display the Start menu by tapping . The Start menu drops down, showing utilities such as Programs,
avorites, Settings, Find, and Help for the current screen.
Figure 7
Handheld start menu
Factory-Installed Programs
Certain programs are pre-installed for you on the Handheld. When you first power on the Handheld, the following
programs will appear on the Start menu:
• ActiveSync
• Word Viewer
• Media Player
• Image Viewer
• Internet Explorer
• Windows Explorer
• PDF Viewer
• PowerPoint Viewer
• Excel Viewer
When the Handheld is connected to your regular computer via the Grayhill cable, you can install other programs on
the Handheld. Note: Each program must be compatible with CE 5.0. Also on a hard boot the program will be lost
and need to be re-installed.
Product Reference Guide
© 2007 Grayhill, Inc. | Proprietary Content | All Rights Reserved
9
Page 11

Using the Keyboard
N
A
l
The Handheld provides a soft keyboard that lets you type letters, numbers, and symbols by tapping them with the
stylus. When you tap a text entry field in a program, the soft keyboard is activate, as shown the figure below. Tap
each letter, number, or symbol in the order you wish to enter them into the text field. The soft keyboard can also be
accessed manually by tapping the keyboard icon in the lower right hand corner of the screen.
Figure 8
The Handheld soft keyboard
Special Keyboard Keys
ote that the soft keyboard also provides these special keys:
• Navigation keys to move within the text field
• Enter key
• Tab key
• All Caps key
• Shift key
• Control key
• Accent keys
To use the Navigation, Enter, and Tab keys, simply tap them. Tap the All Caps, Shift, or Control key, or one of the
ccent keys, then tap the appropriate letter, number, or symbol. Just as on a normal keyboard, simply tap the Al
Caps key again to enter lower-case letters.
Product Reference Guide
© 2007 Grayhill, Inc. | Proprietary Content | All Rights Reserved
10
Page 12

Changing Handheld Settings
P
g
Handheld settings, such as the brightness of the Handheld backlight, can be modified using Windows Control
anel Applets. Settings are stored in permanent flash memory and are maintained through a power reset or a
hard reset.
To chan
e a Handheld setting, tap ; then tap Settings;then tap Control Panel.
Figure 9
The Handheld control panel
Product Reference Guide
© 2007 Grayhill, Inc. | Proprietary Content | All Rights Reserved
11
Page 13

Field Swapping the Battery
The Handheld is designed to permit quick field swapping of the battery. It features ride-through technology that allows
users a full 45 seconds to swap the battery without requiring a hard-boot of the system.
Figure 10
Handheld battery
Battery Charging and Usage Tips
The batteries that may be used with the handheld utilize smart charging and smart gauging technology. To see the status
of the battery during discharge or charge, tap the Battery Icon in the lower portion of the display or simply open the
Battery control panel applet. To avoid damaging the battery when the handheld is not in use for more than 24 hours, the
battery should always be removed from the unit. Likewise, it should never be stored fully discharged or charged; rather,
it is recommended that the battery be stored at roughly 50% capacity. Should the battery discharge completely and not be
re-charged for long periods of time, its built-in recovery technology will minimize damage during re-charge. During this
interval, the unit is in "Zero Volt Discharge" recovery mode and it may seem that the battery is taking longer than usual to
charge. In fact, it may take several hours for the battery to recover and re-charge depending upon its state of discharge.
Figure 11
Stages of battery discharge & recovery
Product Reference Guide
© 2007 Grayhill, Inc. | Proprietary Content | All Rights Reserved
12
Page 14

Storing Data
f
There are multiple ways to store data content when using the Handheld. You can save content to:
• Handheld built-in flash memory
• Compact Flash or Secure Digital cards; slot is accessible via the top of the unit, under the
access door.
• Your desktop or laptop, via a wired or wireless connection
Storing data via wired or wireless connectivity is addressed in subsequent sections.
Figure 12
Compact Flash/Secure Digital slot
Built-In Flash Memory
In addition to 64 MB of RAM, the Handheld provides 64 MB of non-volatile flash storage. Once con tent is saved to flash
memory, it is permanently stored until a user deletes it. No loss of data stored in flash memory occurs even in the event o
a hard reset.
Product Reference Guide
© 2007 Grayhill, Inc. | Proprietary Content | All Rights Reserved
13
Page 15

Wired Communications
N
g
Wired data communications allow transfer of files for storage on your desktop or laptop; and installation of software
components on the Handheld.
Installing ActiveSync on Your Computer
ActiveSync is pre-installed on your Handheld, but may not be installed on your desktop or laptop computer . Run a sear ch
for ActiveSync on your regular computer if unsure whether or not it is installed on the computer.
Please note: ActiveSync must be installed on your re
If the ActiveSync application is not present on your regular computer, install ActiveSync from the Handheld Product CD.
You can also download the most current version of ActiveSync from
http://www.microsoft.com/windowsmobile/activesync/activesync45.mspx
ote that the ActiveSync installation steps may vary from the steps given here.
After starting Microsoft ActiveSync Setup on your regular computer, you will be asked for the folder in which
ActiveSync should be installed. We recommend the default folder. Click Next.
ular computer before you can run the utility.
Figure 13
ActiveSync’s Get Connected Dialog
Choosing the ActiveSync Partnership Type
ActiveSync offers two ways to connect from the Handheld to your computer. These different types of connections are
called partnerships. When installing, the next ActiveSync dialog asks you to choose either the Standard Partnership or
the Guest Partnership. There are advantages and disadvantages to each type of pa rtnership (see Table, following page).
Product Reference Guide
© 2007 Grayhill, Inc. | Proprietary Content | All Rights Reserved
14
Page 16

Figure 14
ActiveSync’s Partnership dialog
Table 3: Partnership Advantages & Disadvantages
Connection Type Advantages Disadvantages
Less Control: File
updating is automatic;
correct file updating is
dependent on correct
setup.
Less Safe: Unintended
file updates are possible.
More Lengthy Setup:
There are more questions
to answer when first
choosing this partnership.
Doubly Wrong: If your
regular computer’s clock is
wrong, your Handheld’s
clock will be wrong.
Synchronization Less
Certain: Since file
updating is manual, there
may be inconsistencies.
Takes Longer: Manual
updating requires
attention to detail.
Slower Connections:
Each time you connect,
ActiveSync will ask if you
want a Guest or a
Standard Partnership
connection.
Less Convenient: You
cannot connect via
wireless LAN.
SSttaannddaarrd
PPaarrttnneerrsshhiip
GGuueesst
PPaarrttnneerrsshhiip
d
p
t
p
Easier: Files on each computer are
automatically synchronized.
More Convenient: After the first
time, you can connect from Handheld
to PC via wired or wireless LAN.
Faster: Subsequent connections are
speedier, totally automatic.
More Flexible: This partnership offers
more file sharing options.
In Sync: Your Handheld’s clock is
automatically set to the time on your
regular computer’s clock.
More Control: Files are manually
moved/copied between computers.
Safer: Since you’re in control of file
synchronization, data cannot be
inadvertently written over.
Faster Setup: There are fewer
questions asked when setting up this
partnership type.
Allows for Multiple Partners: This
partnership is for use on shared or
borrowed computers.
Product Reference Guide
© 2007 Grayhill, Inc. | Proprietary Content | All Rights Reserved
15
Page 17

Standard Partnership
If ease of connecting and storing data is what you want, choose the Standard Partnership to have your data automatically
synchronized each time you connect using ActiveSync. You can establish one Standard Partn ership with your regular
computer, or you can establish two Standard Partnerships – perhaps one with your desktop computer, and one with your
laptop.
Guest Partnership
Choose a Guest Partnership if you share a computer with someone else, or if you are borrowing someone else’s computer.
You can set up multiple Guest Partnerships. If you can’t decide on a partnership type, establish a Guest Partnership while
you evaluate the benefits of a Standard Partnership. Remember that, with a Guest Partnership, you can opt for a Standard
Partnership connection each time you connect.
Indicating Your Partnership Choice
Once you have decided on the partnership type, click the checkbox next to the appropriate category, and click Next.
Choosing a Name for Your Handheld
Enter a unique name for your Handheld in the next dialog box, and click Next.
Selecting Information for Synchronization
If you have selected a Standard Partnership, the next dialog will ask you to indicate data type targets, such as the
Calendar, Inbox, etc., that you would like automatically synchronized. Select the checkboxes next to data types you want
ActiveSync to automatically synchronize. Deselect the checkboxes next to data types that are not to be automatically
synchronized. To customize settings for each program, select the data type, then click the Settings… button. When
finished, click Next.
Product Reference Guide
© 2007 Grayhill, Inc. | Proprietary Content | All Rights Reserved
16
Page 18

Running ActiveSync
ActiveSync compares the data on your Handheld with the data on your PC, and then updates all locations
with the most recent information. To run ActiveSync using the Grayhill Cable connection, follow these
steps:
• Start ActiveSync on your regular computer.
• Connect the Grayhill Cable, with the Handheld installed inside it, to your PC using the USB cable.
• ActiveSync automatically establishes a connection. This may take several seconds.
• If the PC detects the device but does not connect the Grayhill ghusbsh.inf file may need to be
installed.
• To install the Then ActivSync connects you will be prompted to install a new driver.
• Select the 'Install from a specific location' option and browse to the directory where you put
the ghusbsh.inf
• With a Guest Partnership, ActiveSync will ask if you want to connect using your Guest Partnership
or with a Standard Partnership. If you stay with a Guest Partnership:
• On your regular computer, open Windows Explorer and double-click the Explore icon to view the
file structure on your Handheld.
• In the Explore window, the Handheld file structure looks and acts like the file structure as shown in the Windows
Explorer window on your PC.
• Manually copy and paste files in between the two file structure windows.
• With a Standard Partnership, ActiveSync automatically synchronizes the data types you selected for
synchronization, using any customized settings you chose.
• To change ActiveSync’s data types or settings, click Tools, Options in the ActiveSync program
running on your regular computer.
• Once synchronization has completed, open Windows Explorer and double-click the Explore icon to
view the file structure on your Handheld in order to review the files that ActiveSync has
automatically updated for you.
Disconnecting ActiveSync
To avoid connection problems, disconnect ActiveSync on your Handheld before closing ActiveSync on
your regular computer:
• Tap the ActiveSync connection icon in the lower right corner of the Today screen.
• Tap Disconnect in the dialog that appears.
• Remove the USB cable from the Handheld and from your regular computer.
Product Reference Guide
© 2007 Grayhill, Inc. | Proprietary Content | All Rights Reserved
17
Page 19

Wireless Communications
WiFi (802.11x)
802.11b/g is an available option on the Handheld. To attain a wireless Internet connection, double-click
on the Network Icon at the bottom of the screen. The figure below shows this Icon with a Red X on it.
Figure 15
Network Icon at bottom of screen
BlueTooth
Bluetooth is an available option on the Handheld. To activate Bluetooth on the device, click on the
Bluetooth Device Properties Icon in the Settings>Control Pane. When the device is trying to connect
to an active device, click Scan Device. The device name will appear in the Untrusted box. Click right
arrow to move it to the Trusted box. To activate, click on the device and click Active. A check mark
will appear next to active.
Figure 16
Moving a device to the Trusted box
Product Reference Guide
© 2007 Grayhill, Inc. | Proprietary Content | All Rights Reserved
18
Page 20

Compass and Barometer
A compass and barometer is an available option. A simple test application is available. Compass and barometer
application of the Handheld are accomplished by selecting BarComp located in Mydevice>Windows>BarComp.exe
Figure 17
Testing the compass and barometer
GPS
GPS is available on the Handheld, which includes both an internal antenna and an MCX port for connecting an
external antenna. Communication to the GPS is accomplished with a custom application on COM 3 at 4800 Baud
with standard NMEA messages. Refer to SDK for more information.
Figure 18
External connection port
Product Reference Guide
© 2007 Grayhill, Inc. | Proprietary Content | All Rights Reserved
19
Page 21

Regulatory Information
t
An Grayhill Industrial Handheld Computer complies with Title 47, Part 15, Section 247 of the FCC Rules
for radio communication devices.
FCC Approved (USA)
FCC IDs:Industrial Handheld Computer – NMAM1YY10232
– NMAM1YY10233
Industry Canada Certified # : 2972A-M1YY10232
: 2972A-M1YY10233
FCC Notices
This device has been certified by the FCC for use with other products without any further certification (as
per FCC section 2.1091). Changes or modifications not expressly approved by Grayhill could void the
user’s authority to operate the equipment as well as the warranty.
This equipment has been tested and found to comply with the limits for a Class B d igital device, pursuan
to Part 15 of the FCC Rules. These limits are designed to provide reasonable protection against harmful
interference in a residential installation. This equipment generates, uses, and can radiate radio frequency
energy and, if not installed and used in accordance with the instructions, may cause harmful interference to
radio communications.
However, there is no guarantee that interference will not occur in a particular installation. If this equipment
does cause harmful interference to radio or television reception, which can be determined by turning the
equipment off and on, the user is encouraged to try to correct the interference by one or more of the
following measures:
Reorient or relocate the receiving antenna.
Increase the separation between the transmitter and the receiver.
Connect the transmitter into an outlet on a circuit different from that to which the receiver is connected.
Consult the dealer or ask an experienced radio/TV technician for help.
This wireless probable device has been tested in accordance with the measurement procedures specified in FCC
OET 65 SUPPPLEMENT C and IEEE Std. 1528-(July 2001), and has been shown to be capable of compliance for
localized specific absorption rate *SAR) for uncontrolled environment/general population exposure limits
specified ins OET 65.
Product Reference Guide
© 2007 Grayhill, Inc. | Proprietary Content | All Rights Reserved
20
Page 22

Service Information
For service and repair information, please contact:
Grayhill, Inc.
561 Hillgrove Avenue
LaGrange, IL 60525
Phone: (708) 354-1040
Fax: (708) 354-2820
Product Reference Guide
© 2007 Grayhill, Inc. | Proprietary Content | All Rights Reserved
21
 Loading...