

WEIGHING SCALE user manual
Please read this manual carefully before operation
----Important safety info
----Warranty
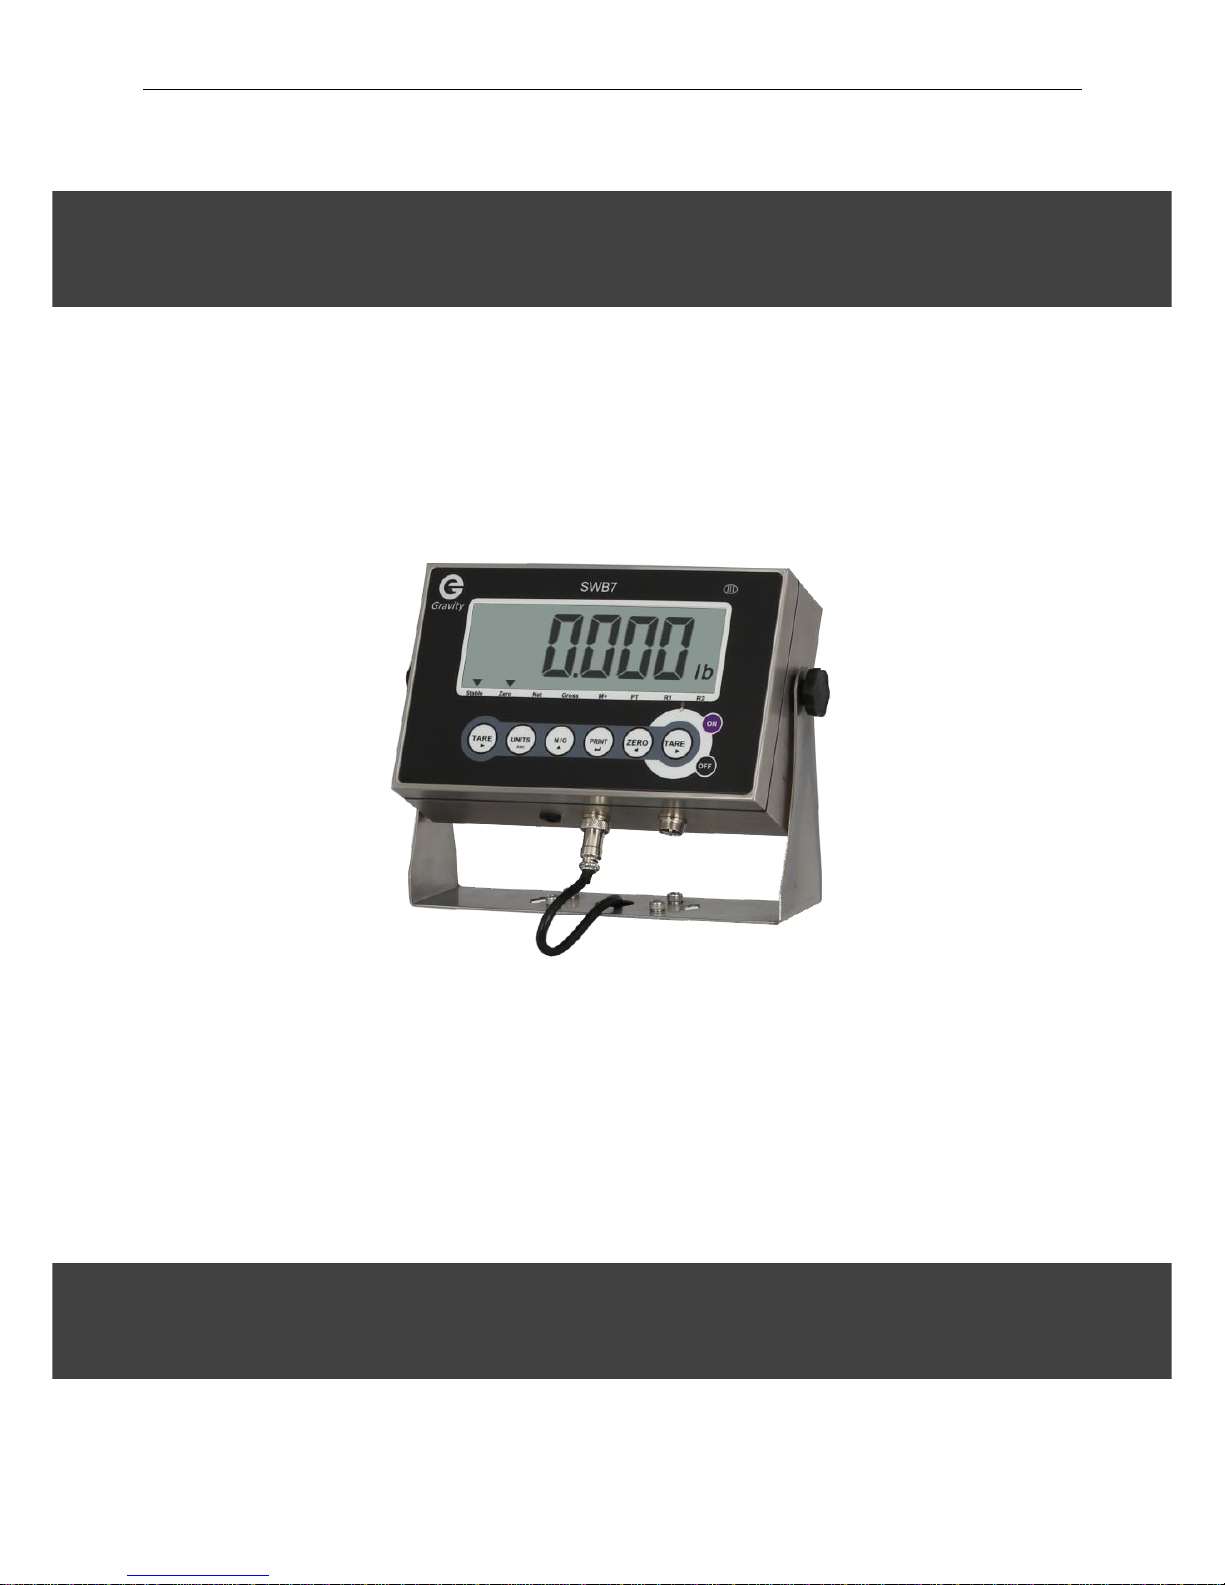
Model: SWB7
GRAVITY MEASUREMENT, INC.

@SWB7 USER MANUAL
2
Important Safety Information
READ ALL INSTRUCTIONS BEFORE USING SCALES TO ENSURE MAXIMUM
SAFETY, BEST PERFORMANCE, AND TO GAIN KNOWLEDGE OF OUR SCALE,
IT IS ESSENTIAL THAT YOU OR ANY OTHER OPERATOR OF THE SCALE READ
AND UNDERSTAND THE CONTENTS OF THIS MANUAL BEFORE OPERATING
THE DEVICE.
When using an electrical device, basic precautions should always be followed,
including the following:
1. Please use only the original power cord or DC adapter supplied with the scale.
Other cords or adapters may damage the scale.
2. DC adaptor is used to charge the battery, and scale can operate without DC
adaptor.
3. Avoid using long power extension cords – this may cause interference
4. Do not use on surfaces or in areas where vibration, air movement or
temperature change.
Do not place in direct sunlight or near air conditioning vents.
5. Avoid high humidity (greater than 80%) that might cause condensation, and
keep away from direct contact with water and other corrosive chemicals.
6. Static may influence the weighing result. To reduce the static, wipe the pan and
scale with anti‐static wipes.
7. Don’t impact or drop heavy objects on the scale – this may affect accuracy, or
cause damage. Do not stack material on the scale when it is not in use.
8. Battery should be removed if the scale is not used for a long period of time.
Battery should be recharged every 3 months.
9. Place items to be weighed as close to center of the pan as possible
10. Only use fingers to operate the keypad. Do not press with hard or sharp
objects.

@SWB7 USER MANUAL
3
Warranty
Gravity Measurement, Inc. (Schenectady, New York) offers one-year limited
warranty (parts and labor) for the components failed due to defects in materials or
workmanship. Warranty starts from the date of delivery.
During the warranty period, should any repairs be necessary, the purchaser must
inform its supplier or Gravity Measurement. The company or its authorized technician
reserves the right to repair or replace the components at any of its workshops
depending on the severity of the problems. However, any freight involved in sending
the faulty units or parts to the service center should be borne by the purchaser.
The warranty will cease to operate if the equipment is not returned in the original
packaging and with correct documentation for a claim to be processed. All claims are
at the sole discretion of Gravity Measurement.
This warranty does not cover equipment where defects or poor performance is
due to misuse, accidental damage, exposure to radioactive or corrosive materials,
negligence, faulty installation, unauthorized modifications or attempted repair or
failure to observe the requirements and recommendations as given in this User
Manual. Additionally, rechargeable batteries (where supplied) are not covered under
warranty.
Repairs carried out under the warranty does not extend the warranty period.
Components removed during the warranty repairs become the company property.
@SWB7 USER MANUAL
4
What is inside Box
AC/DC adaptor (110V)
SWB7 indicator
Two wire seals. The wire seal is used usually by the inspector of Department of Weight and
Measure or authorized dealer. The wire seal is threaded through a metal rode that protrudes
through the bottom of the device and also through a hole in the scale base adjacent to the
metal rode.
Set up
1) Place this product on a firm and smooth place, don´t place it in vibration or shaking,
use bench for use on four only adjust foot, adjust the balance using the bubble level.
2) Use independent source, avoid other electrical disturbance.
3) Don´t put any object on the platter when turn on the balance.
4) Please, turn on 2-3 minutes before using.
5) Avoid temperature change too large and air flow strenuous sites.
6) Don´t overload the balance, don´t exceed the maximal capacity.
SYSTEM POWER CONSUMPTION
Main system power consumption: about 12mA
Main system power consumption (with backlight): about 36mA
Main system power consumption (with backlight and RS-232): about 48mA
Battery life: none backlight, about 320 hours.
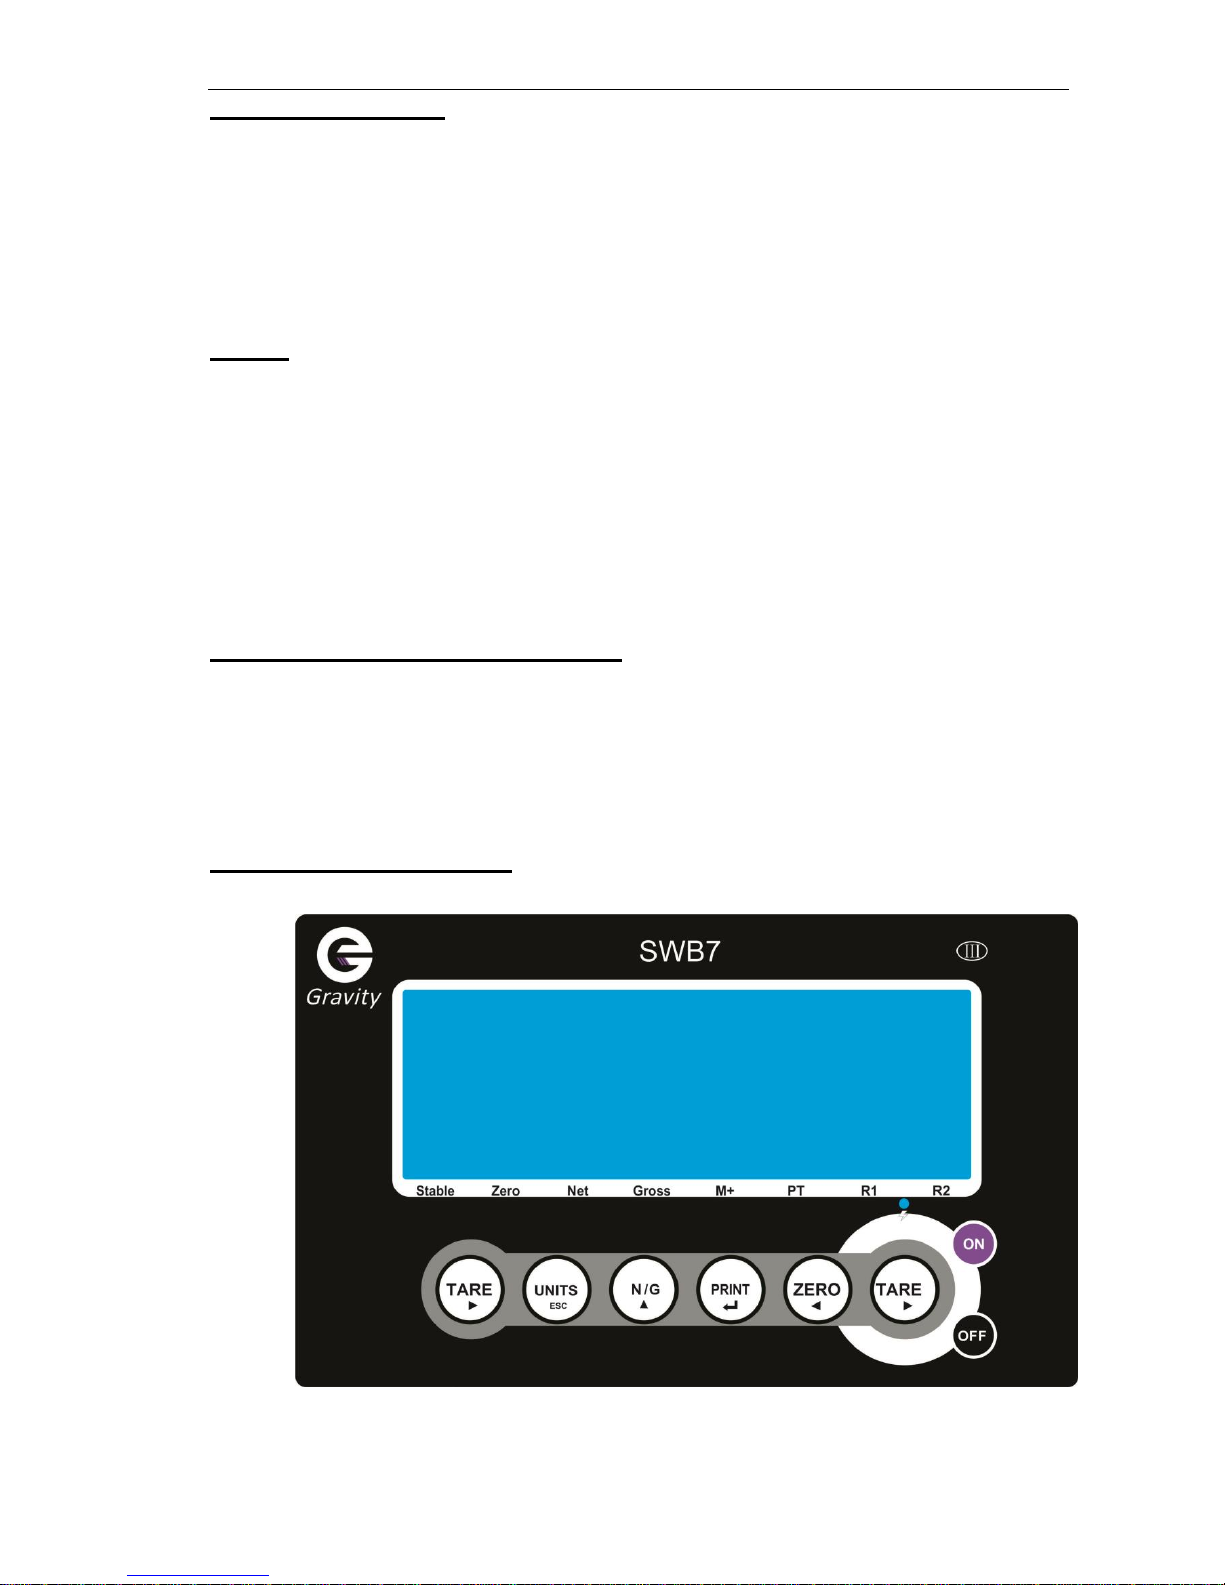
DISPLAY DESCRIPTION
SWB7 Model:
@SWB7 USER MANUAL
5
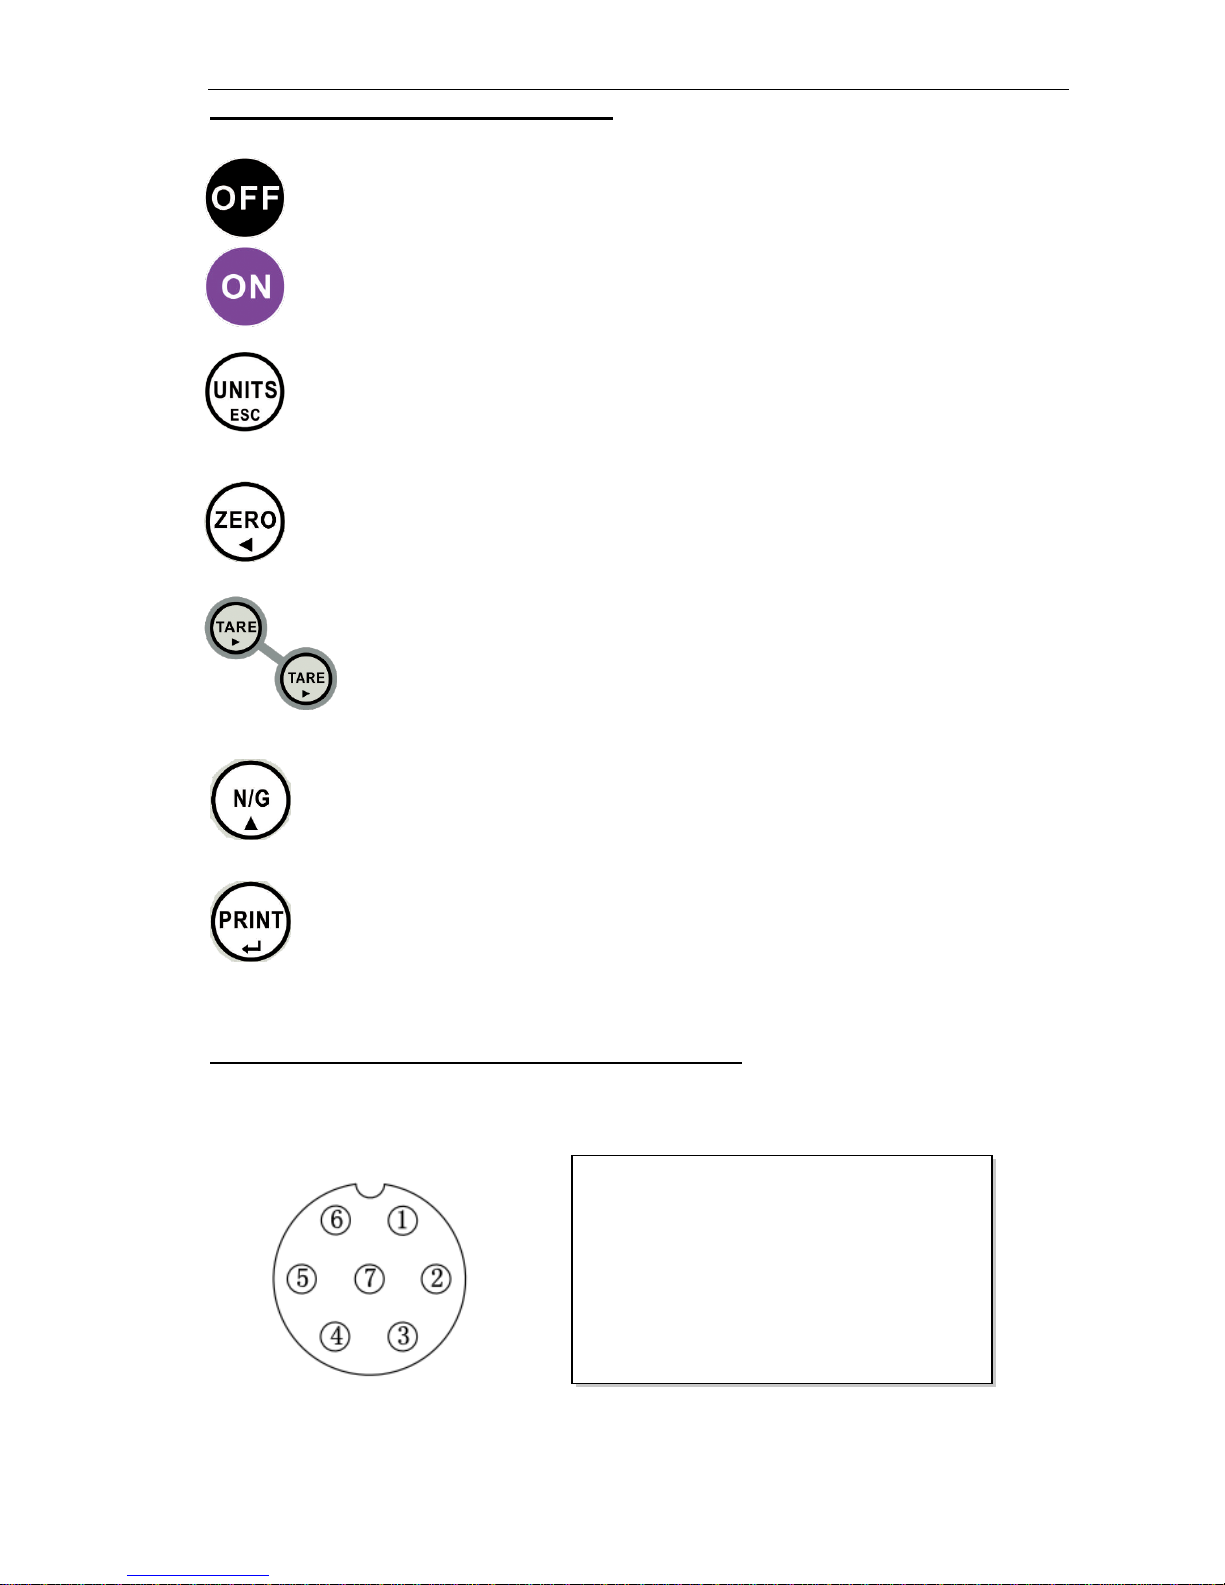
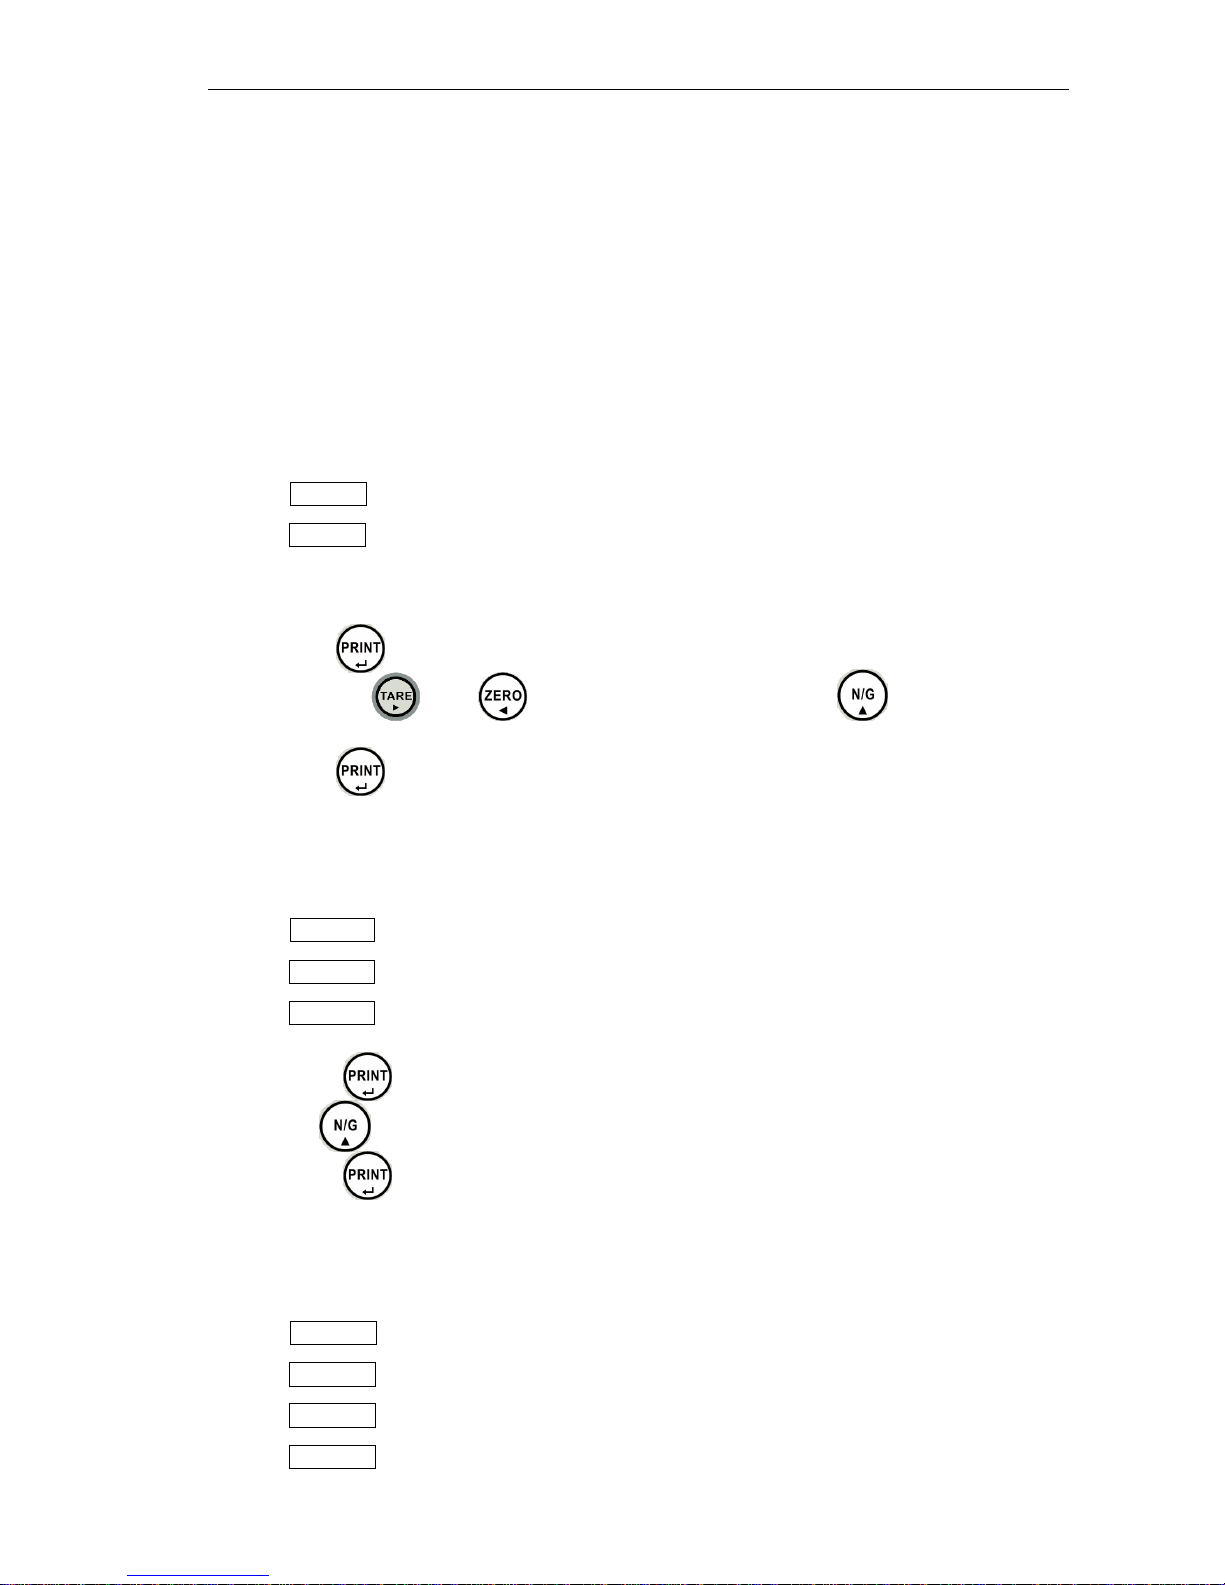
BASIC FUNCTION OPERATION
Press and hold this key for 2 seconds to turn off the balance.
Press this key to turn on the balance
1. To select the desired weight unit.
2. To exit from setup mode.
1. To reset the weight to zero “0”, but the display value has to be
lesser than ± 2% of maximum capacity.
2. To move one space to the left or downward in setup mode.
1. To subtract the container´s weight.
2. To move one space to the right or upward in setup mode.
1. To view gross or net weight when the balance is on tare
status. All other keys will be disabled when gross weight is activated.
2. To increase values upward in setup mode.
1. Key of confirmation in setup mode.
2. Manually transmitting data through RS232 to computer or
printer.
CONNECTION OF LOAD CELL AND RS232
1) Connection of the load cell to indicator
INDICATOR LOAD CELL
1 ------------- +Excitation
2 ------------- +Sense
3 ------------- -Excitation
4 ------------- -Sense
5 ------------- +Signal
6 ------------- (GND) shield
7 ------------- -Signal
@SWB7 USER MANUAL
6
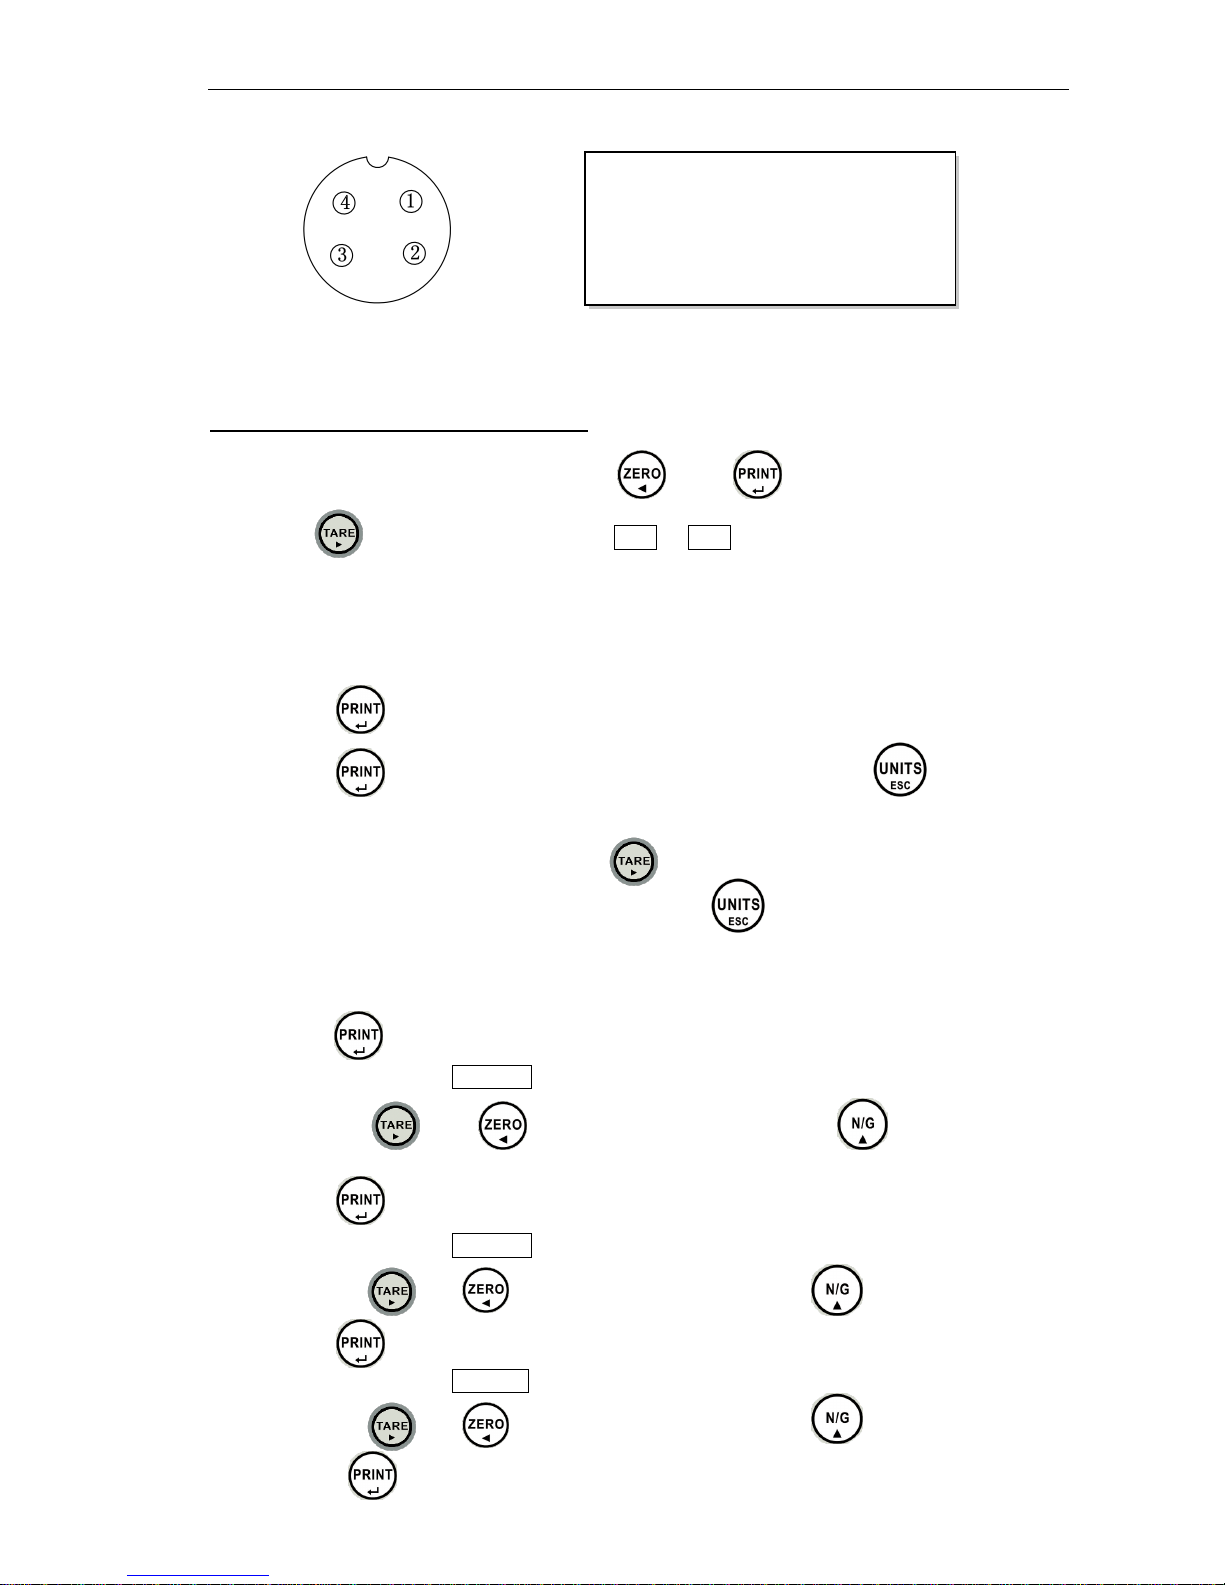
2) Connection of RS232 to PC or Printer
BASIC PARAMETER SETTING
To access to functions setting, press the and key at the same time.
Press the to select the parameter (UF-1 ~ UF-9)
“*” This flag indicates that the function is locked when “Approval Version”.
UF-1 A/D count
1. Press the key to view the A/D count.
2. Press the key to view the the battery voltage or press the key to exit
back to menu UF-1
3. To move to next parameter press the key.
4. To exit and return to normal weighing press the key.
UF-2 High / Low limits setting
1. Press the key to enter.
2. The display will show 00.000L (set low limit).
3. Use the keys and to move cursor and press the to select
number.
4. Press the key to confirm.
5. The display will show 00.000H (set high limit).
6. Use the keys and to move cursor and press the to select number.
7. Press the key to confirm.
8. The display will show o .000 ,look at the remarks below.
9. Use the keys and to move cursor and press the to select number.
10. Press the key to confirm.
INDICATOR PC/PRINTER
1 ------------- RXD
2 ------------- TXD
3 ------------- GND
4 ------------- NC
@SWB7 USER MANUAL
7
Remarks: 0 0 0
A B C
A -- Buzzer on: 0= Stable not required 1= Stable required
B – LCD indicator and RELAY on: 0= Stable not required 1= Stable required
C -- Buzzer beeps when: 0= Buzzer off 1= OK 2= LO and HI
Low limit set as 0 will clear all check weigh values.
This function is locked when UF-5 is set as “HoLD 1”
UF-3 Auto-power off
Modes: AoFF00 :Auto-turn off disable.
AoFF01 : The balance will automatically turn off after 1 minute of non use.
This time can be set up to 99 minutes.
1. Press the key to access to auto-power configuration.
2. Use the keys and to move cursor and press the to select
number.
3. Press the key to confirm.
UF-4 Backlight setting
Modes: lit a : Automatic
lit on : Backlight on
litoFF : Backlight off
1. Press the key to access to backlight configuration.
2. Use the key to select the desired mode.
3. Press the key to confirm.
UF-5 HOLD function (*)
Modes: HoLd 0 : Disable
HoLd 1 : Animal (motion) hold function
HoLd 2 : Peak value hold (when held can press any key to cancel)
HoLd 3 : Stable hold (when held can press any key to cancel)

@SWB7 USER MANUAL
8
HoLd 4 : Stable hold (when held can auto cancel at zero)
1. Press the key to access to hold function configuration.
2. Use the key to select the desired mode.
3. Press the key to confirm.
Remarks: HoLd 1 :
1. Press the key will show PCT002 which means 2% of tolerance.
2. Use the keys and to move cursor and press the to select
number, this can set the range from 001 ~ 100 units of the animal hold.
3. Press the key will show TiME 8
4. Use the key to select 1,2,4,8,16,32 or 64 times within the hold range.
5. Press the key to confirm.
UF-6 RS-232 Output
1. Press the key to enter.
2. The display will show 232 1 .
3. Press the key to select the modes.
4. Press the key to confirm, and will show b 9600 .
5. Use the key to select the baud rate.
6. Press the key to confirm.
Modes: 232 0 : RS-232 disable
232 1 : Stable output – Format 1
232 2 : Stream output – Format 1
232 3 : Manual output – Format 1
232 4 : Stable output – Format 2
232 5 : Stream output – Format 2
232 6 : Manual output – Format 2
232 7 : Manual accumulate output – Format 3
232 8 : Auto accumulate output – Format 3
232 9 : Manual accumulate output – Format 4
232 10 : Auto accumulate output – Format 4
232 11 ~ 232 13 : LP50 printer is used

@SWB7 USER MANUAL
9
Baud rate: B 1200 : Baud rate 1200
B 2400 : Baud rate 2400
B 4800 : Baud rate 4800
B 9600 : Baud rate 9600
B19200 : Baud rate 19200
B38400 : Baud rate 38400
Remarks:
Format 1 o
utput examples
:
Format 2 o
utput examples
:
Format 3 o
utput examples
:
Format 4 o
utput examples
:
Format 3 and format 4 if you want to print the total weight, press the key
twice, and the accumulative weight will be removed.
Communication Protocol:
UART signal of EIA-RS232 C
Format:
1. Baud rate: 9600
2. Data bits : 8 bits
3. Parity bits: None
4. Stop bits : 1 bit
Format 1 (232 1 – 3):
HEAD1 (2 BYTES)
HEAD2 (2 BYTES)
OL – Overload
ST – Stable
NT – Net weight
US – Unstable
GS – Gross weight
Fixed 18 BYTES ASC
II (kg g t lb)
ST,GS,+ 1.000lb
+ 1.000lb
S/N WT/lb
--------------0001 2.205
0002 2.205
--------------0002 4.410
TICKET NO.0001
G 3.000lb
T 1.000lb
N 2.000lb
TOTAL NUMBER
OF TICKETS 0001
TOTAL
NET 2.000

@SWB7 USER MANUAL
10
1
2
1
1
2
1
1
2
3
4
5
6
7
8
1
2
1
2
HEAD1
,
HEAD2
,
DATA
UNIT CR LF
Fixed 21 BYTES ASC
II (tl.T lboz)
1 2 1
1 2 1 1 2 3 4 5 6 7 8 9 1 2 3 4 1 2
HEAD1
,
HEAD2
,
DATA
UNIT
CR LF
Fixed 19 BYTES ASC
II (pcs)
1
2
1
1
2
1
1
2
3
4
5
6
7
8
1
2
3
1
2
HEAD1
,
HEAD2
,
DATA
UNIT
CR L
F
1. Example +0.876 kg Stable net weight :
S
T
,
N
T
,
+
0
0
0
.
8
7
6
k
g
0D
0A
2. Example -1.568 lb unstable gross weight :
U
S
,
G
S
,
-
0
0
1
.
5
6
8
l
b
0D
0A
3. Example -20. 5.40 lb oz unstable gross weight :
S
T
,
G
S
,
-
1
0
﹒
0
5
﹒
4
0
l
b
o
z
0D
0A
4. Example +1000 pcs stable net weight :
S
T
,
N
T
,
+
0
0
0
1
0
0
0
p
c
s
0D
0A
Format 2
(232 4 ~ 6) :
Fixed 12 BYTES ASC
II (kg g t lb)
1
2
3
4
5
6
7
8
1
2
1
2
DATA
UNIT
CR LF
Fixed 15 BYTES ASC
II (tl.T lboz)
1
2
3
4
5
6
7
8
9
1
2
3
4
1
2
DATA
UNIT
CR
L
Fixed 13 BYTES ASC
II (pcs)
1 2 3 4 5 6 7 8 1 2 3 1 2
DATA
UNIT
CR LF

@SWB7 USER MANUAL
11
Output examples :
1. Example +0.876 kg stable net weight :
+
0
0
0
.
8
7
6
k
g
0D
0A
2. Example -1.568 lb unstable gross weight :
-
0
0
1
.
5
6
8
l
b
0D
0A
3. Example -20. 5.40 lb oz unstable gross weight :
-
1
0
﹒
0
5
﹒
4
0
l
b
o
z
0D
0A
4. Example +1000 pcs stable net weight :
+
0
0
0
1
0
0
0
p
c
s
0D
0A
UF-7 Speed setting (*)
Modes: spEED1 : Standard speed
spEED2 : High speed
spEED3 : Low speed
1. Press the key to enter.
2. Press the key to select the desired mode.
3. Press the key to confirm.
UF-8 Zero tracking(*)
Modes: Zp 0 : OFF
Zp 1 : One division tracking at zero
Zp 2 : Two division tracking at zero
Zp 3 : Three division tracking at zero
Zp 4 : Four division tracking at zero
Zp 5 : Five division tracking at zero
1. Press the key to enter.
2. Press the key to select the desired mode.
3. Press the key to confirm.
UF-9 G Value setting

@SWB7 USER MANUAL
12
1. Press the key to display the G value of manufacture place.
2. If set the G value of local press the key and then press the or
key and key to input the new G value.
3. Press the key to confirm.
Weight Calibrations (*)
1. In weight mode, press the and keys, the display will show ECF-1 .
2. Press the or keys to select ECF-1, ECF-2or ECF-3
ECF-1 Zero and Span Calibration
1. Press the key to enter, display will show cALZ .
2. Press the key to calibrate zero point.
3. The display will show the calibration weight 00.6.000 .
4. Use the keys and to select the digit,press key to input the
weight value.
5. Put the calibration weight on the platter and press the key to calibrate.
The scale will return to weighing mode automatically.
ECF-2 Zero Calibration
1. Press the key to enter, display will show cALZ .
2. Press the key to calibrate zero point.
3. The scale will return to weighing mode automatically.
ECF-3 Span Calibration
1. Press the key to enter, display will show the calibration weight 00.6.000 .
2. Use the keys and to select the digit,press key to input the
weight value.
3. Put the calibration weight on the platter and press the key to calibrate.
The scale will return to weighing mode automatically.

@SWB7 USER MANUAL
13
Advanced Function (Service Manual) –copied from SWB6
Warning: The following functions are only for trained scale dealers and distributors,
not for the end users.
For end users, do not modify it by yourself. Please consult our distributors or your
local authorized metrology workers. Wrong operation may cause the compliance
issue or wrong performance of the scale.
Display the version number
Keep pressing the【M+】key (not release) and turn on the indicator, after the finish of
self-checking it will display the version number -1 0 0 9 11 , Release the【M+】key
and the indicator will turn off automatically.
Configuration
Keep pressing the【ON/T】key (not release) while turning on the indicator. After selfchecking finishes, it displays P 0 00 0 . Input the password P 0 0 2 0 , and then press
【M+】to enter the parameter setting mode
*Press【ON/T】key or【MR/MC】key to shift between functions LF-1 ~ LF-8.
*Press 【ON/T】【 MR/MC】【 N/G】to move and change the digits
*Press 【UNIT/ESC】to quit and the indicator will restart for normal weighing mode
Approval Calibrations and Functions Setup (Lock section):
LF1 Weight Calibration
LF2 Parameter Setting
LF3 Linearity Calibration
LF4 A/D Converting Speed
LF5 Zero Tracking
LF6 Approval Version
LF7 Gravity Adjustment
LF8 Zero
CAL switch has to be ON
Password required when CAL switch is OFF
LF1 Weight Calibration
Press【M+】key to enter zero calibration CALZ .
Make sure nothing on the platform of the scale and press 【M+】to finish zero

@SWB7 USER MANUAL
14
calibration
Display the full capacity 03 00 . 00
*Full capacity weights recommended for calibration of the scale, or at least 60% F.S.
to assure the accurate weighing, it’s not allowed to do with 1% F.S weight or more
than 100%F.S.weight.
Change the display value to be the same as the test weight.
Press 【M+】, the digits will twinkle
Place the test weights on the platform (example of 300Kg)
Press【M+】until the indicator recognizes the weight correctly.
Finish of calibration.
LF2 Parameter Setting
Press【M+】key to enter parameter setting mode and it will display the internal A/D
value (not fixed).
Press【M+】key to set the weight units 1 1 0 0 0 2 (both kg and lb units are enabled
with calibration using unit lb)
110002
ABCDEF
A 0= disabled 1=Kg 2=Ton 3=g
B 0= disabled 1=lb 2=lb/oz
C 0= disabled 1=TW Kg 2=HK kg 3=VISS
D 0= disabled 1=PCS off 2=PCS ON
E 0= disabled 1=Multi interval 2=Multi range
F 1=Calibration In Kg 2=Calibration in lb
Press【M+】key to set the capacity of the scale 00 0 3 0 0
Press【M+】key to set the decimal point d P 0 . 0 0
Using【ON/T】key or【MR/MC】key to shift it from 0.0 until 0.00000
Press【M+】key to set the division d iv 0 1
Using【N/G】key to shift it between 01/02/05/10/20/50
LF3 Linearity Calibration
Press【M+】key to set the linearity calibration W 0
Press 【ON/T】key to enter next step W 1
Put 1/3F.S. test weight and press【ON/T】to enter next step W 2
Put 2/3F.S. test weight and press【ON/T】to enter next step W 3
Put 100%F.S. test weight and press【ON/T】to enter next step W 4
Press 【M+】key to exit and back to LF- 3
LF4 A/D Converting Speed
The same operation as Weighing Speed

@SWB7 USER MANUAL
15
*It was blocked when UF-5 set of HOLD 1
*1=15Hz 2=30Hz 3=7.5Hz
LF5 Zero Tracking
The same operation as UF 8 Zero Track
*It was blocked when UF-5 set of HOLD 1(animal weighing)
LF6 Certification Status
nonE is for non-certified scales, and oiML is for NTEP (United States) or OMIL
(Europe)
LF7 Gravity Adjustment
The same operation as UF 9 Gravity Adjusting
LF8 Zero
Press【M+】key to set the initial zero function S E t Z Y
y Reset of the zero point each time when the scale switches on
n Disable resetting zero when switching on the scale

@SWB7 USER MANUAL
16
Officially Distributed By
GRAVITY MEASUREMENT, INC.
 Loading...