

Page 1
Nicht für Kinder unter 36 Monaten
geeignet. Enthält Kleinteile, die
verschluckt werden können.
(Erstickungsgefahr!)
ACHTUNG
!
14+
0-3
GRAUPNER/SJ GmbH • Henriettenstr.96, D-73230 KIRCHHEIM/TECK GERMANY
Deutsch
INNOVATION & TECHNOLOGY
No. 21014
Seite 1-10
Page 11-19
Page 20-28
Arligh Burke
Page 2

2
Deutsch
Inhaltsverzeichnis .............................................................. 2
Vorwort ..............................................................................3
Kurzbeschreibung des Produkts........................................3
Bestimmungsgemäße Verwendung...................................3
Technische Daten .............................................................. 3
Empfohlenes Zubehör für 21014 ....................................... 4
Packungsinhalt .................................................................. 4
Bedeutung der Symbole .................................................... 5
Warn- und Sicherheitshinweise ......................................... 5
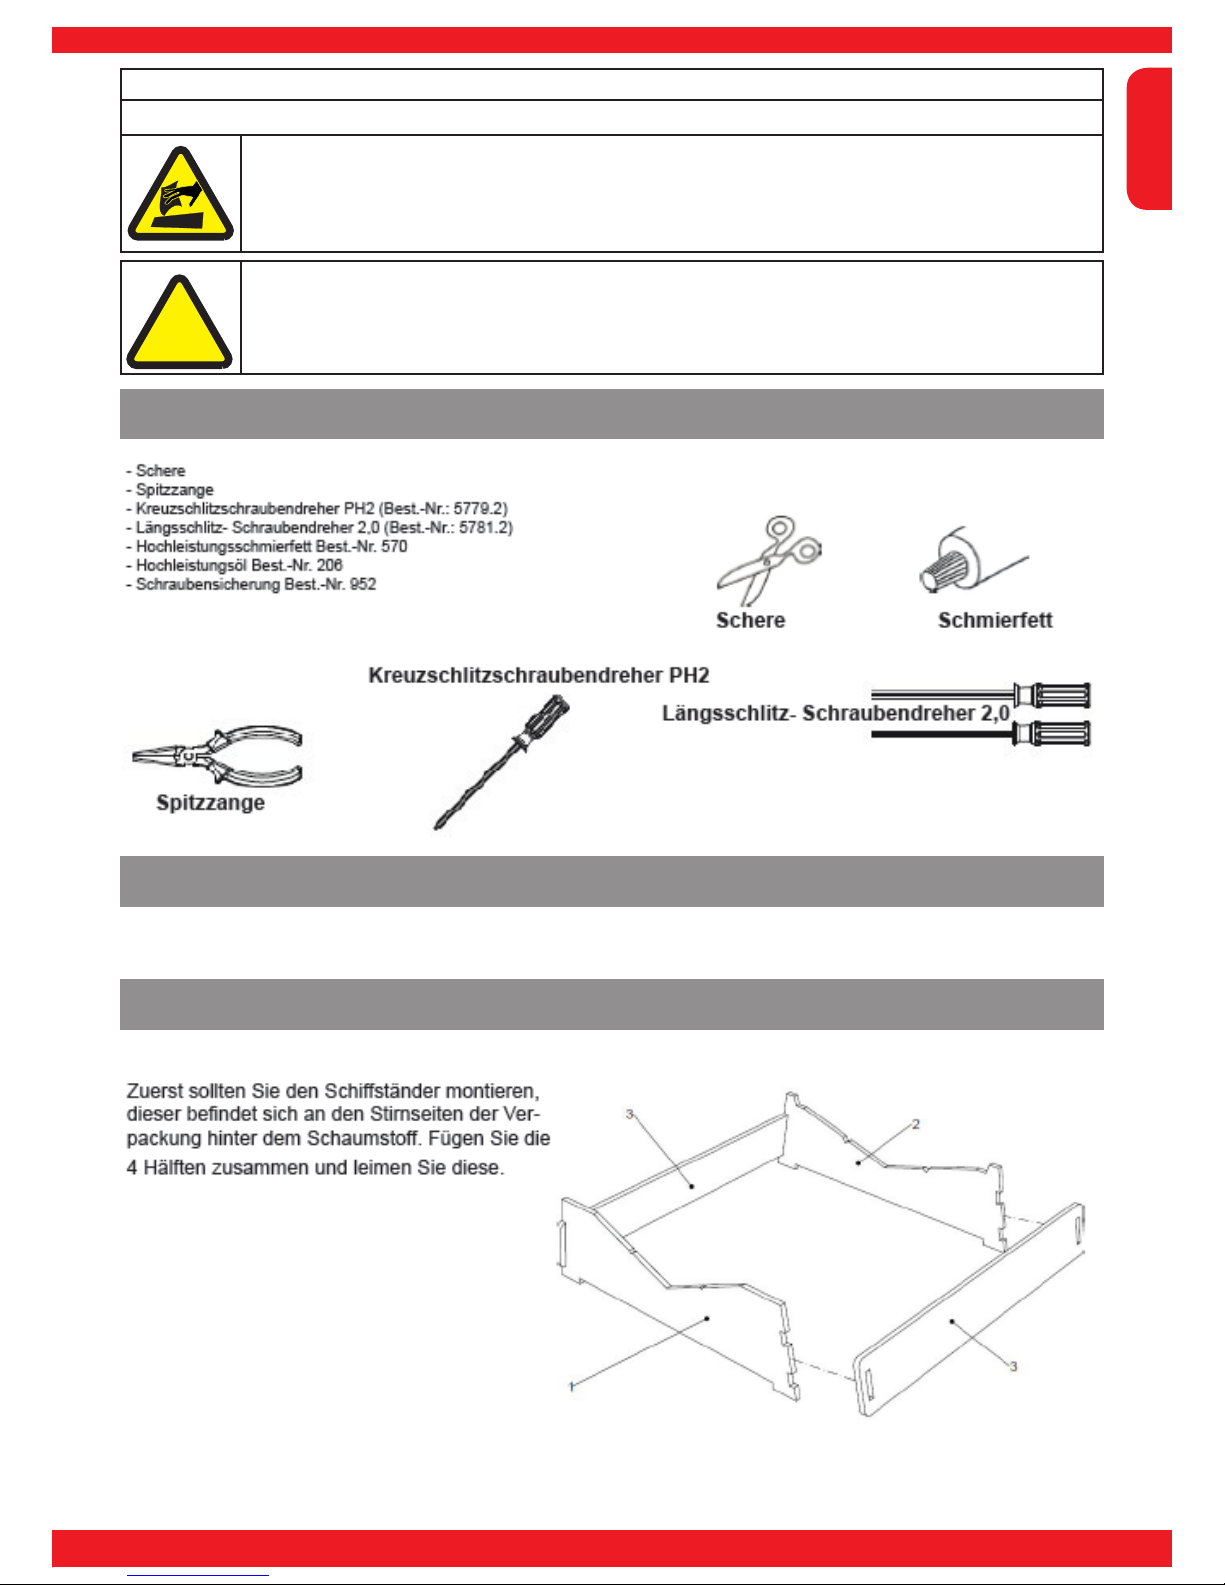
Benötigtes Werkzeug und empfohlenes Zubehör zur Montage 7
Montage Schritt 1 (Modell auspacken) .............................. 7
Montage Schritt 2 (Schiffständer zusammenbauen) .........7
Montage Schritt 3 (Kontrolle der Schrauben) .................... 8
Montage Schritt 4 (Installation der RC-Komponenten) ...... 8
Montage Schritt 5 (Pege und Wartung) ...........................9
Anleitung zur Fehlersuche ............................................... 10
Hinweise zum Umweltschutz ........................................... 29
Konformitätserklärung .....................................................30
Garantieurkunde ..............................................................31
Inhaltsverzeichnis
Page 3

3
INNOVATION & TECHNOLOGIE
Deutsch
Achtung!
Vor der Montage und Inbetriebnahme des Models sollten Sie unbedingt die Anleitung vollständig lesen.
!
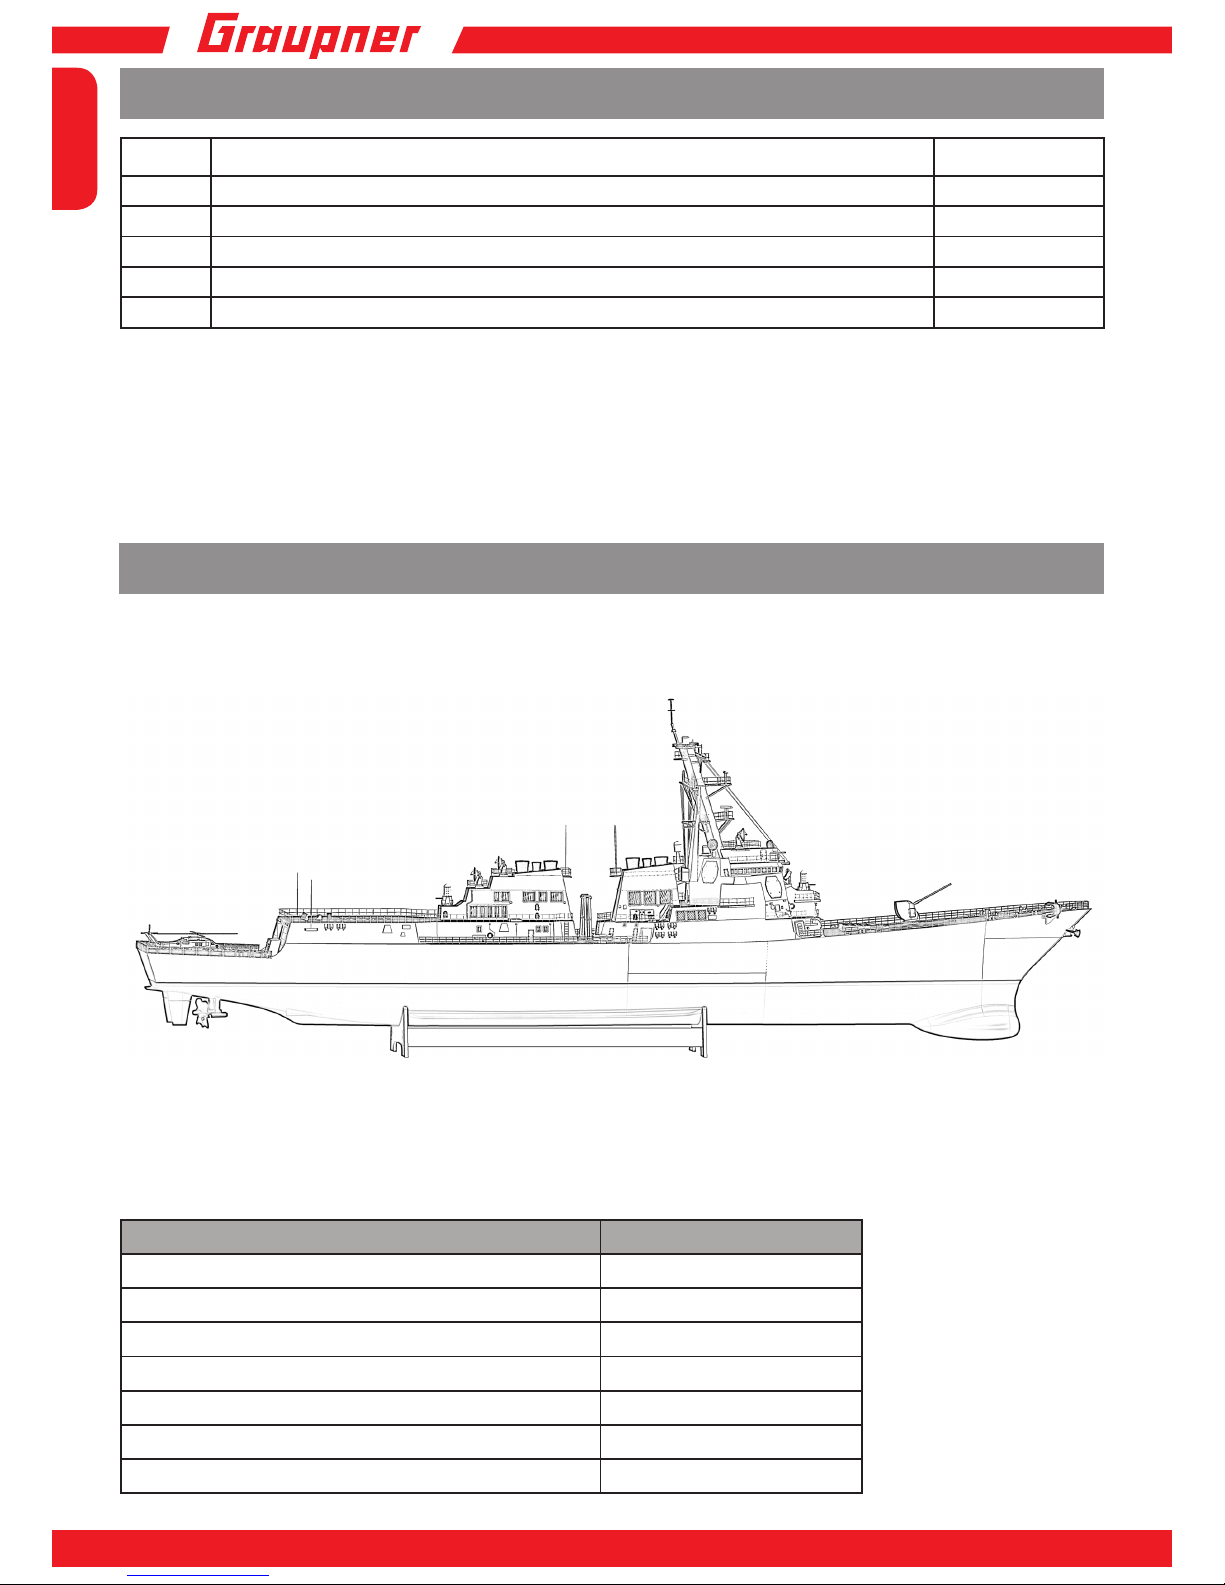
Länge 1550 mm
Gesamthöhe ca. 520 mm
Gesamtgewicht ca. 11000 g
Breite ü.a 250 mm
Maßstab 1:100
Bestimmungsgemäße Verwendung
Das Modell wurde als Schiffsmodell konzipiert, zum Betrieb auf Gewässern, welche den Bestimmungen in dieser Anleitung entsprechen und ist nur für diesen Zweck geeignet. Für jegliche unsachgemäße Handhabung, außerhalb dieser
Bestimmungen wird keine Garantie oder Haftung übernommen.
Vorwort
Kurzbeschreibung des Produkts
Technische Daten
Vielen Dank, dass Sie sich für den Kauf des Graupner Modells „Arligh Burke“ Best.-Nr. 21014 entschieden haben.
Graupner Modelle stehen für hohe Qualität. Wir achten auf Stabilität an den Schlüsselstellen in der Serienproduktion.
Durch den hohen Grad der Vormontage, mit Motor, Ruderanlage und einem hohen Detailierungsgrad durch CNCBearbeitung des Modells reicht das Modell sehr nahe an das Original heran.
Vor der Montage und Inbetriebnahme des Modells sollten Sie unbedingt die Anleitung vollständig lesen. Sowohl für
Probeläufe als auch beim Ersteinsatz müssen Sie die Sicherheitsbestimmungen der Anleitung
unbedingt beachten.
Dieses Modell ist eines aus der Serie der GRAUPNER/SJ PREMIUM-Line, diese Serie von besonders hochwertigen
Fertigmodellen, ist bisher in dieser Detaillierung auf dem Markt unerreicht. Um diese hochwertige Ausführung zu erreichen, ist der Rumpf aus stabilem GFK, die Aufbauten und das Deck aus gelaserten ABS-Teilen sowie viele Kleinteile
aus Metall gefertigt und schon vormontiert. Der Rumpf,Teile der Aufbauten, die Masten und die Beschlagteile sind mit
seidenmatten Farben spritzlackiert und die Dekors aufgebracht. Dank der vielen Details und Beschlagteilen wirkt das
Modell besonders originalgetreu. Der Einbau der RC-Komponenten ist durch die ausreichend großen Öffnungen im
Deck einfach und schnell zu bewerkstelligen. Um das Modell fahrbereit zu machen, müssen nur die RC-Komponenten
und der Fahrakku eingebaut sowie geringe Lötarbeiten ausgeführt werden, schon ist das Modell fahrbereit.
Page 4
4
Deutsch
Stkz. Bezeichnung No.
1x MC 12 HoTT Fernsteuerung 33112
1x Regler 40A 2875
1x Bleiakku 768
1x G2 Steckersystem 2989
1x
Faston Flachstecker 4,8 mm 3597
Arligh Burke Premium Line
Rumpf und Aufbauten Inklusive
Kran Inklusive
Motoren (2x) Inklusive
Regler nicht Inklusive
Akku nicht Inklusive
Ladegerät nicht Inklusive
Sender nicht Inklusive
Empfohlenes Zubehör für 21014
Packungsinhalt
Page 5
5
INNOVATION & TECHNOLOGIE
Deutsch
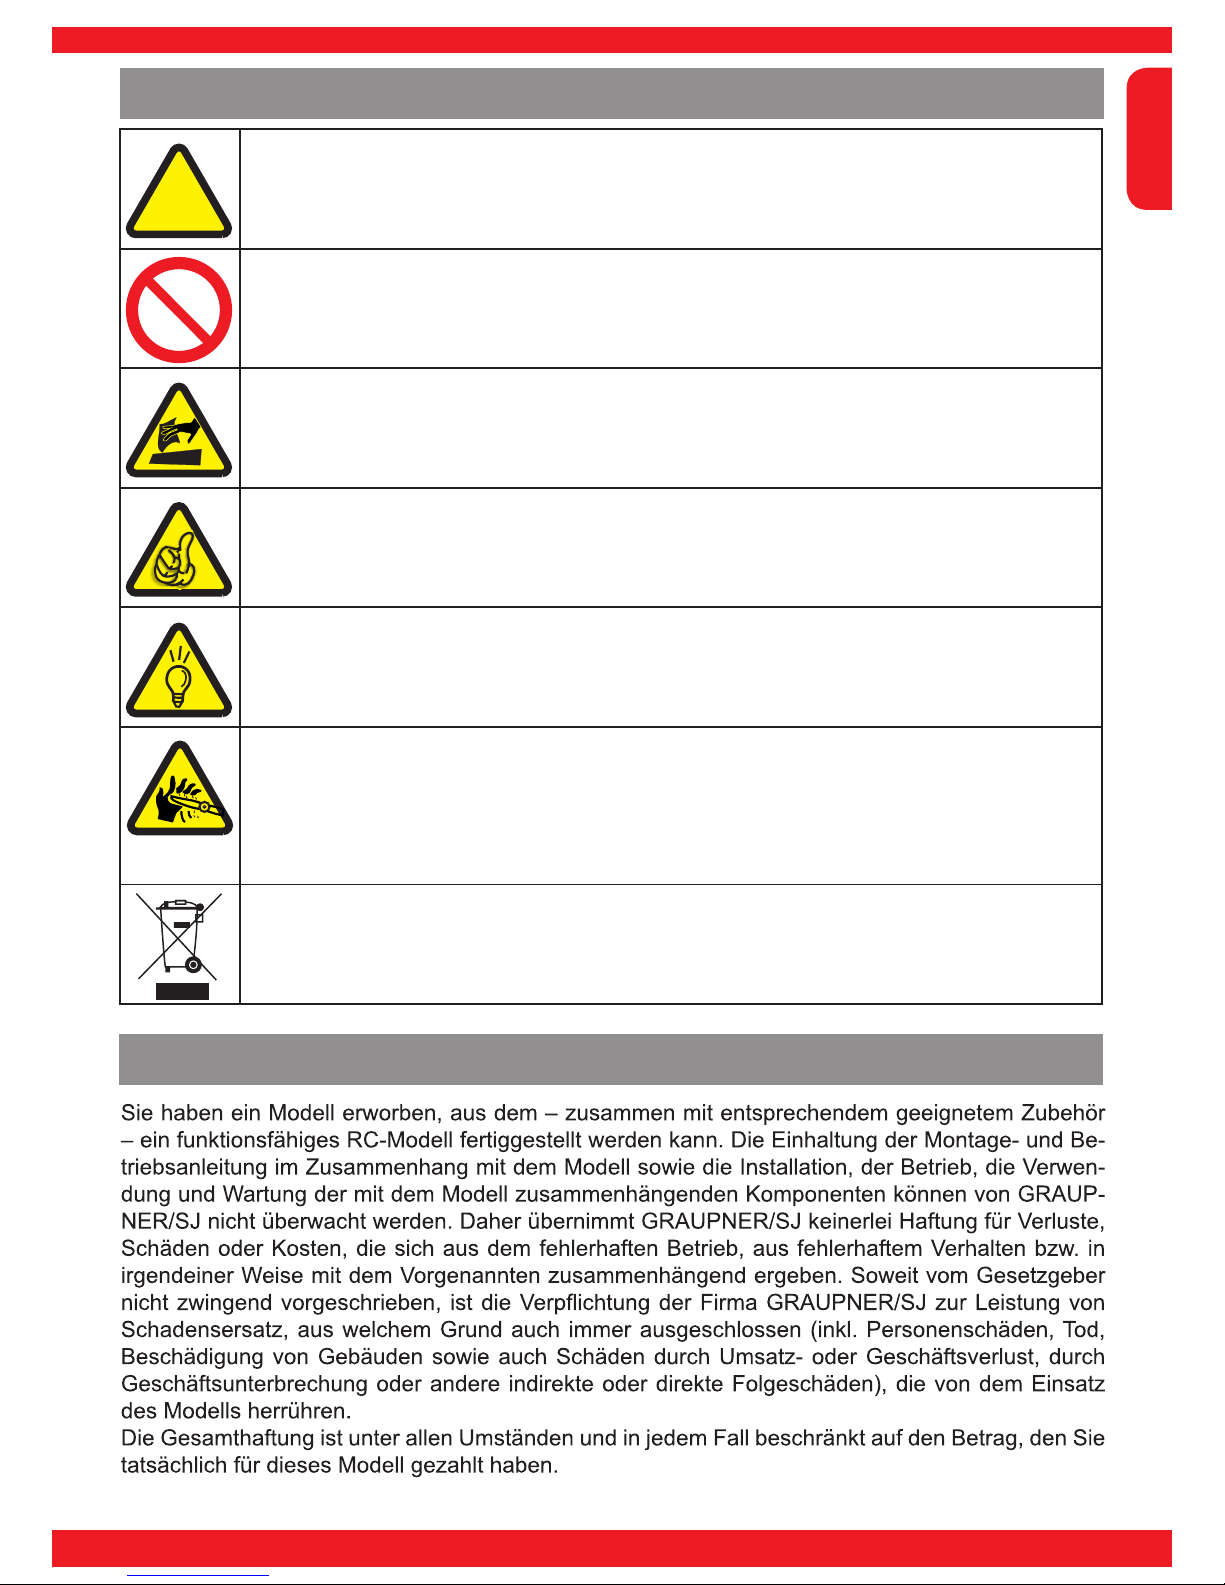
Achtung!
Dieses Symbol hebt folgende Hinweise hervor welche durch den Anwender unbedingt beachtet werden müssen! Jegliche Missachtung der nebenstehenden Hinweise, kann die sichere
Funktion wie die Sicherheit des Betreibers selbst beeinträchtigen.
Warnung!
Dieses Symbol hebt Verbote hervor welche unbedingt durch den Anwender eingehalten werden müssen! Jegliche Missachtung der nebenstehenden Verbote kann die Funktionsfähigkeit
sowie die Sicherheit des Betreibers beeinträchtigen.
Pege und Wartung!
Dieses Symbol hebt Hinweise zur Pege und Wartung des Produktes hervor welche durch den
Betreiber unbedingt beachtet werden sollten um lange Haltbarkeit des Produktes zu gewährleisten
Hinweis!
Dieses Symbol hebt Hinweise hervor welche durch den Betreiber unbedingt beachtet werden
sollten um einen sicheren Betrieb des Gerätes zu gewährleisten.
Tip!
Dieses Symbol hebt Tipps und Erfahrungen beim Bau eines Modells hervor, wie Sie mögliche
Schwierigkeiten oder Beschädigungen vermeiden können und gibt Hilfestellungen zur Lösung
möglicher Probleme.
Rotierender Antrieb!
Dieses Symbol hebt Verletzungsrisiken beim Betreiben eines Rotors hervor welche durch den
Anwender unbedingt beachtet werden müssen! Jegliche Missachtung der nebenstehenden
Hinweise kann zu schweren Verletzungen des Betreibers führen, zu Unwucht des Rotors oder
das Modell stark beschädigen und in der Nähe von Personen können die herumiegenden
Teile zu schwersten Verletzungen führen.
Entsorgungshinweise
Dieses Symbol hebt folgende Hinweise hervor wie einzelne Materialien oder Produkte durch
den Anwender unbedingt entsorgt werden müssen!
Warn- und Sicherheitshinweise
!
Bedeutung der Symbole
Page 6
6
Deutsch
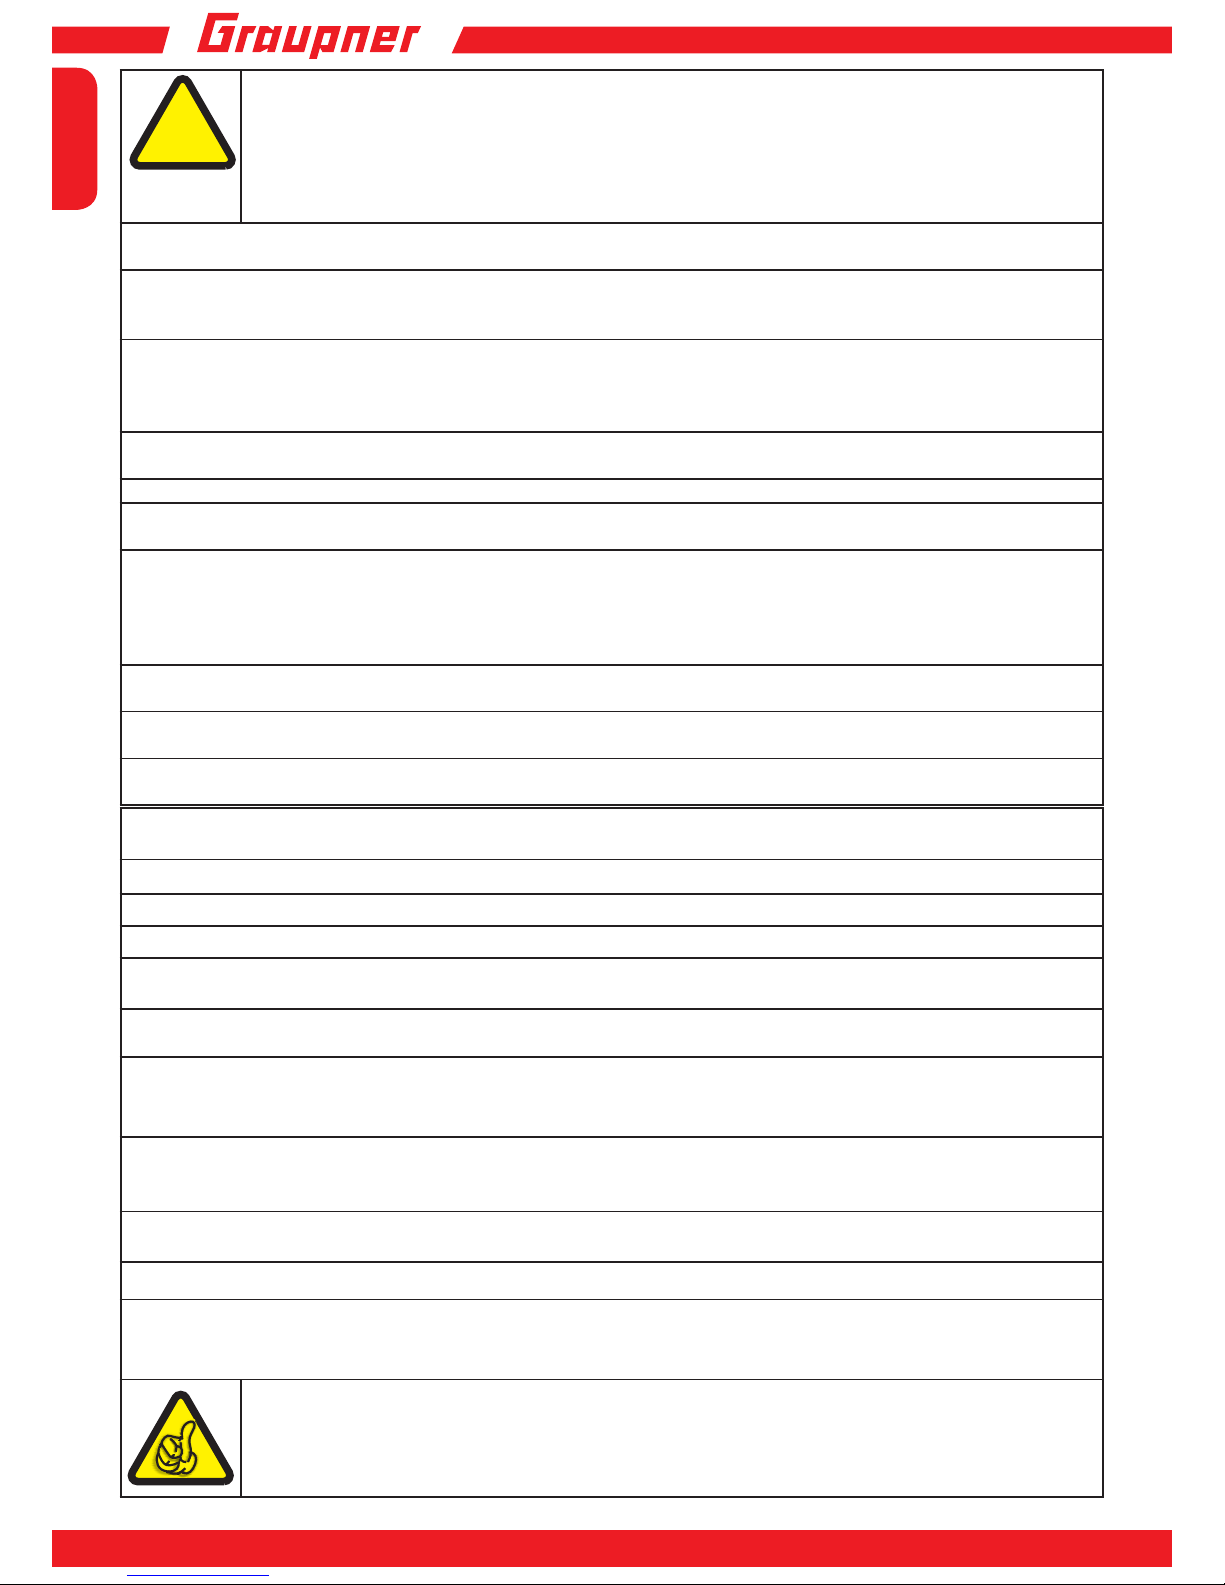
Achtung!
Niemals Gegenstände/ Fremdkörper in den laufenden Propeller halten und dafür sorgen, dass
keine Gegenstände/ Fremdkörper in den laufenden Propeller gelangen können. Geschieht
dies, kann durch die plötzlich auftretende Unwucht des Propellers das Modell stark beschädigt
werden. In der Nähe von Personen können die herumiegenden Teile zu schwersten Verletzun-
gen führen.
Niemals in den laufenden Propeller greifen und den Propeller in der Hand haltend betreiben, dies führt zu
Handverletzungen. Der Propeller kann durch die Rotationskräfte leicht außer Kontrolle geraten.
Sich niemals vor/hinter dem Propeller aufhalten. Durch unsachgemäße Montage oder unvorhersehbare
Umstände kann sich der Propeller von der Welle lösen. Bei ungewöhnlichen Geräuschen den Propeller
stoppen.
Der Propeller muss fest xiert sein. Richten Sie den Propeller nicht auf Personen oder Tiere, testen Sie den
Propeller nicht in der Hand. Sich niemals vor dem Propeller aufhalten. Durch unvorhersehbare Umstände
kann sich der Propeller von der Welle lösen. In der Nähe von Personen können die herumiegenden Teile zu
schwersten Verletzungen führen.
Die Kombination Motor + Rotor + Welle nicht während des Betriebs anfassen, da dies zu Verletzungen führen kann. Nach dem Betrieb Motor, Welle, Regler und Akku abkühlen lassen, erst dann anfassen!
Das Betreiben des Modells unter Einuss von Medikamenten, Alkohol, Drogen, usw. ist verboten
Jegliche Abweichung von der Anleitung wirken sich eventuell auf die Funktion und Betriebssicherheit des
Modells aus und müssen unter allen Umständen vermieden werden.
Bevor Sie ein RC-Modell in Betrieb nehmen, müssen Sie sich über die gesetzlichen Bestimmungen informieren, denn ein RC-Modell unterliegt den hierfür geltenden Gesetzen. Den Gesetzen ist in jedem Falle Folge zu leisten. Achten Sie hierbei auf die Gesetze der jeweiligen Länder. Prüfen Sie vor dem ersten Einsatz
des Modells, ob Ihre Privat-Haftpichtversicherung den Betrieb von RC-Modellen dieser Art mit einschließt.
Schließen Sie gegebenenfalls eine spezielle RC-Modell-Haftpichtversicherung ab.
RC-Modelle sind sehr anspruchsvolle und gefährliche Gegenstände und erfordern vom Betreiber einen hohen Sachverstand, Können und Verantwortungsbewusstsein.
Klebstoffe und Lacke enthalten Lösungsmittel, die unter Umständen gesundheitsschädlich sein können.
Beachten Sie daher unbedingt auch die entsprechenden Hinweise und Warnungen der Hersteller.
Das Modell darf nur mit dem von uns empfohlenen Zubehör betrieben werden, da sonst die Funktionalität
nicht gewährleistet werden kann.
Die Inbetriebnahme und der Betrieb des Modells erfolgt einzig und allein auf Gefahr des Betreibers. Nur ein
vorsichtiger und überlegter Umgang beim Betrieb schützt vor Personen- und Sachschäden.
Das Modell ist nicht für Kinder unter 14 Jahren geeignet.
Beachten Sie beim Einsatz von Werkzeugen die möglichen Gefahren durch diese.
Beachten Sie die Empfehlungen und Hinweise zu Ihrer Fernsteuerung und Zubehörteilen.
Kontrollieren Sie, bevor Sie das Modell benuzen, dieses auf eine sichere Funktion der Fernsteuerung sowie
die Steckverbindungen auf sichere und feste Verbindung.
Trockenbatterien zur Stromversorgung dürfen niemals nachgeladen werden. Nur Akkus dürfen nachgeladen
werden.
Die Reichweite der Fernsteuerung muss vor Fahrtbeginn überprüft worden sein. Laufen Sie hierzu mit
eingeschaltetem Modell ca. 100 m vom Sender weg, ein Helfer bedient währenddessen den Sender. Hierbei
müssen alle Funktionen problemlos ausgeführt werden können.
Beachten Sie, dass Funkgeräte oder Sendeanlagen die Funktion des Modells stark stören können. Achten
Sie möglichst darauf, dass keines dieser Geräte in der Nähe betrieben wird während Sie das Modell betreiben.
Die Batterien und Akkus dürfen nicht kurzgeschlossen werden sowie nicht direkt dem Wasser ausgesetzt
werden.
Bringen Sie bei einer evtl. Bergung des Modells sich nicht selbst sowie andere in Gefahr.
Beachten Sie, dass Funkgeräte oder Sendeanlagen die Funktion des Modells stark stören können. Achten
Sie möglichst darauf, dass keines dieser Geräte in der Nähe betrieben wird während Sie das Modell betreiben.
Hinweis!
Entnehmen Sie den Fahrakku und die Senderbatterien bzw. -akkus bei Nichtgebrauch des
Modells.
!
Page 7
7
INNOVATION & TECHNOLOGIE
Deutsch
Setzen Sie das Modell nicht starker Luftfeuchtigkeit, Hitze, Kälte sowie Schmutz aus.
Sichern Sie das Modell und den Sender beim Transport gegen Beschädigung sowie Verrutschen.
Pege!
Säubern Sie das Modell und den Sender nur mit geeigneten Reinigungsmitteln. Geeignet ist
ein fusselfreies Tuch. Verwenden Sie niemals chemische Reiniger, Lösungsmittel, Reinigungs-
benzin, Spiritus oder ähnliches.
Achtung!
Der Betriebsanleitung in ihren Abschnitten und Schritten ist unbedingt zu folgen.
Benötigtes Werkzeug und empfohlenes Zubehör zur Montage
!
Montage Schritt 1 (Modell auspacken)
Packen Sie das Modell vorsichtig aus. Lösen Sie mit der Schere vorsichtig die Haltebänder. Danach ziehen
Sie das Modell vorsichtig nach oben aus der Verpackung und lösen dann alle Schaumstoffteile.
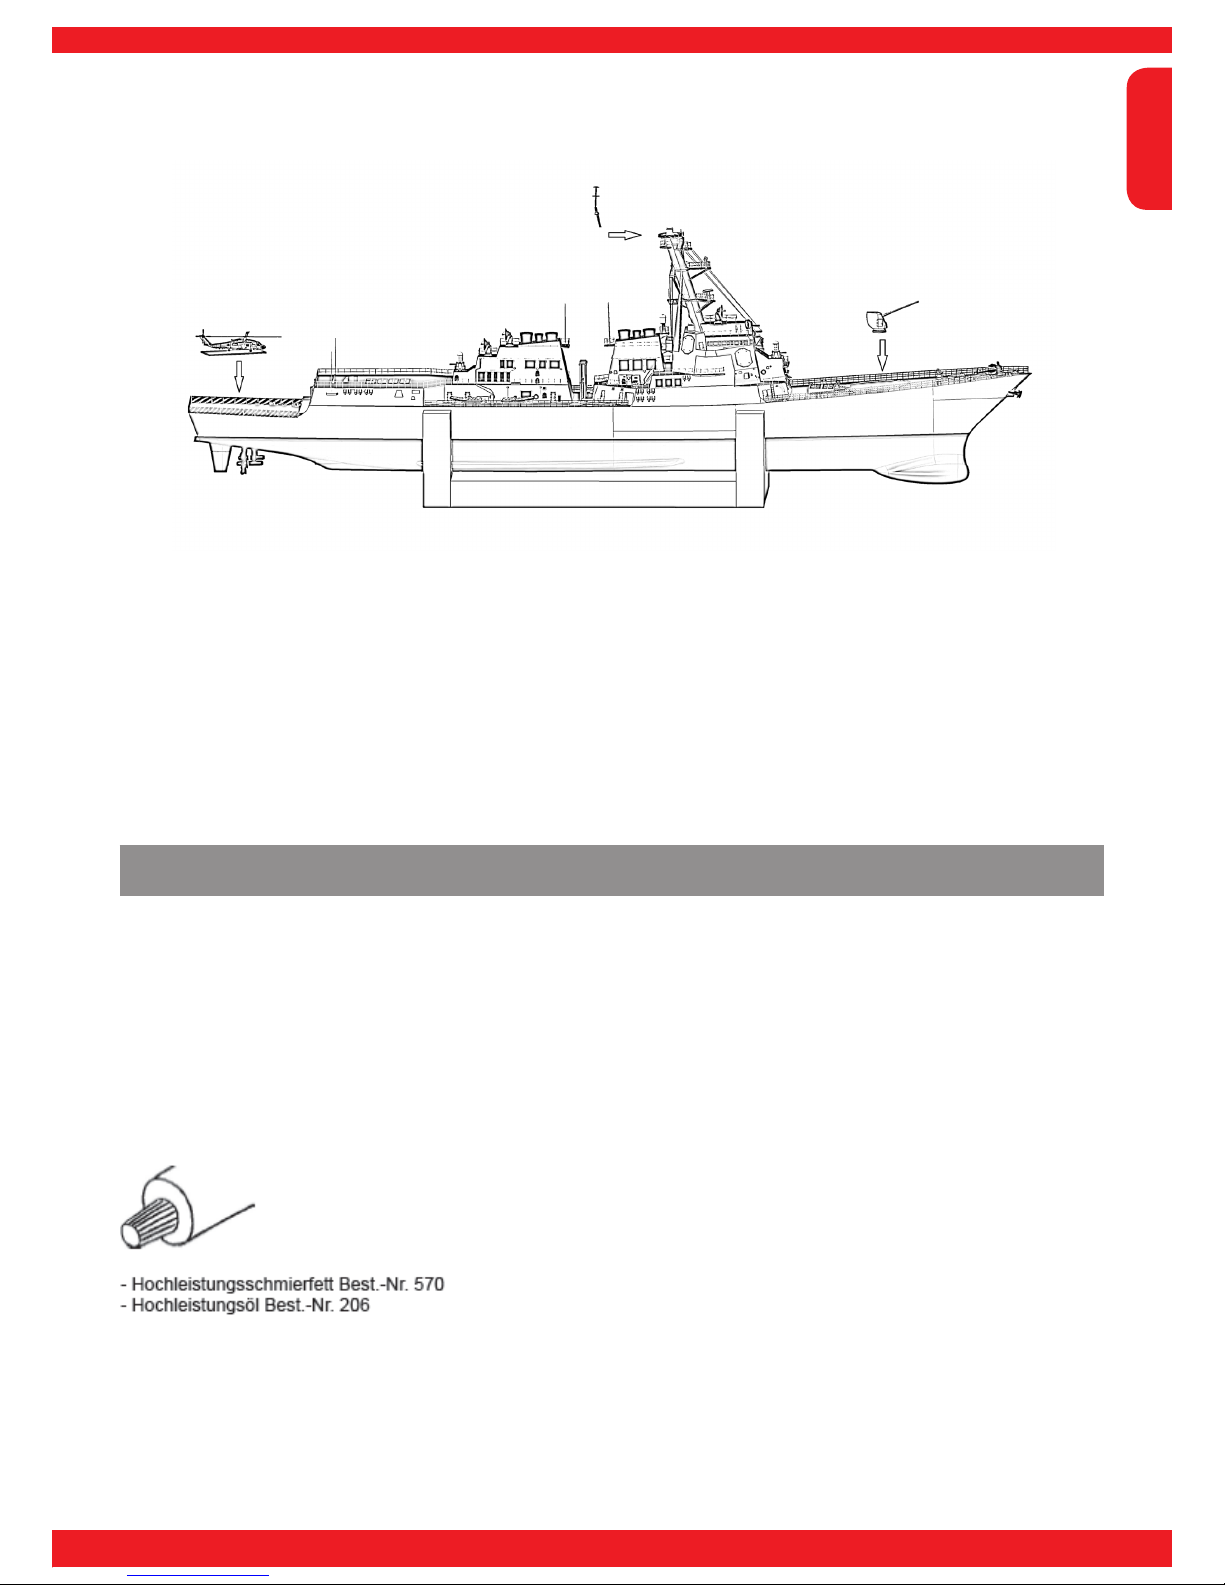
Montage Schritt 2 (Schiffständer zusammenbauen)
Page 8
8
Deutsch
Montage Schritt 3 (Kontrolle der Schrauben)
Montage Schritt 4 (Installation der RC-Komponenten)
Kontrollieren Sie die Schrauben der Wellenkupplung, der Motorenhaltebügel und der Propeller auf einen festen Sitz,
da diese sich durch den Transport evtl. gelockert haben könnten. Das können Sie überprüfen, indem Sie am Propeller
ziehen, sollte sich die Welle nach hinten rausziehen lassen, ist eine der Madenschrauben locker. Ziehen Sie diese
dann wieder vorsichtig fest. WICHTIG: Sichern Sie die evtl. lockeren Madenschrauben mit Schraubensicherungslack,
z.B. UHU Schraubensicher (Best.-Nr. 952), da diese sich durch Vibrationen während des Betriebs lösen könnten. Die
Madenschrauben werden mit dem Längsschlitz-Schraubendreher gelöst, halten Sie die Welle mit einer achen Spitzzange fest um nicht zu verrutschen.
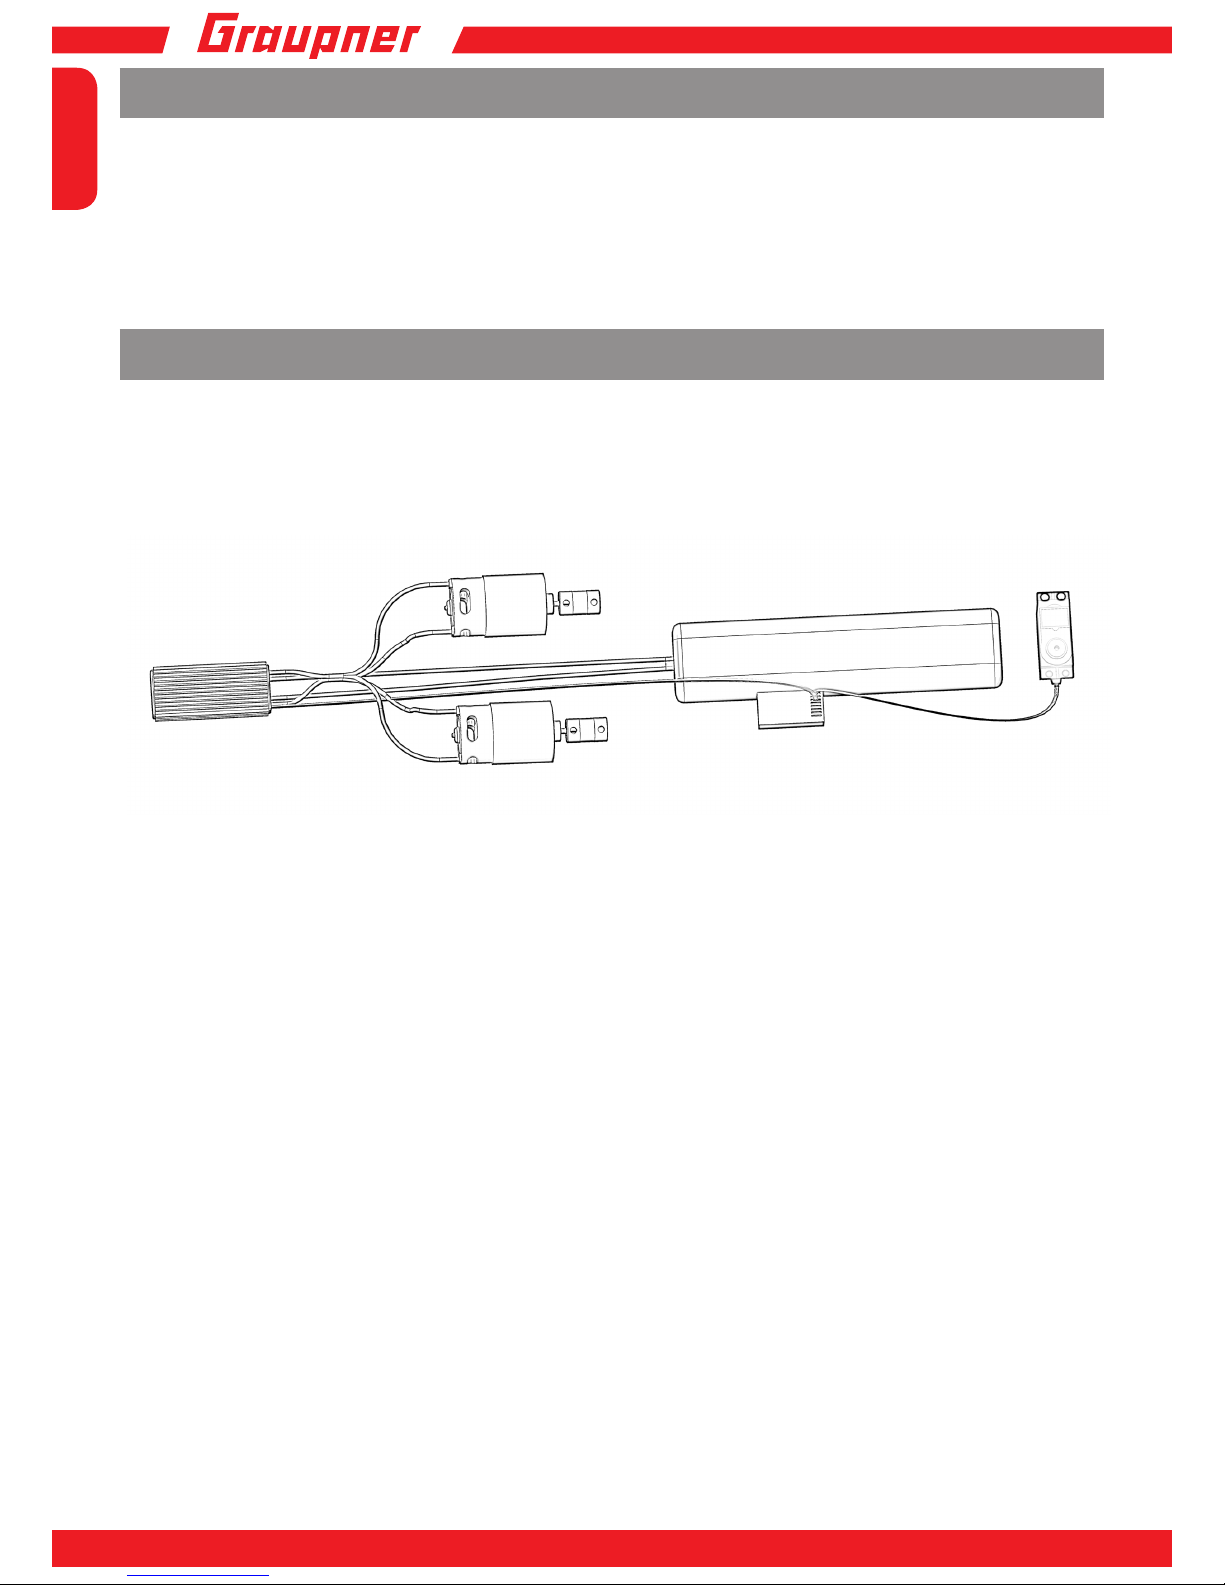
Richten Sie sich nach dem Schaltplan. Achten Sie auf die Drehrichtung der Motoren, wenn der Akku angeschlossen
ist, sollen die Antriebe so drehen, dass das Modell vorwärts fahren würde.
Montieren Sie die Akkus mit Klettband in dem Modell. HINWEIS: Durch das Klettband können Sie die Position der
Akkus leicht verändern, um die optimale Trimmlage zu erreichen. Die Akkus werden typischerweise im Viererblock direkt vor den Motoren platziert.Legen Sie bei Bedarf noch Ballastgewicht in den Rumpf. Hierzu eignen sich besonders
Flachprole aus Stahl oder Blei. Trimmen Sie das Modell aus und xieren Sie die Ballastgewichte mit Klebstoff. TIPP:
Wenn Sie die Ballastgewichte mit Klettband befestigen, können Sie diese bei Bedarf (z.B. leichteren Transport)
entnehmen. TIPP: Um ohne Nachtrimmen wieder die richtige Position der Gewichte iederzunden, sollten Sie die Position mit wasserfestem Farbstift markieren. Montieren Sie den Empfänger unter dem Deck und die Fahrtregler rechts
und links an der Bordwand mittels Klettband.
Page 9
9
INNOVATION & TECHNOLOGIE
Deutsch
Die Antenne wird mit Klebeband möglichst im Bereich der Süllränder des Aufbaus xiert. Diese muss immer über der
Wasserlinie liegen, da die Antenne sonst keinen bzw. schlechten Empfang hat. Haken Sie die Beiboote am Aufbau
ein. TIPP: Für alle folgenden Arbeiten sollten Sie das Modell auf den Schiffsständer stellen
Ziehen Sie den Aufbau vorsichtig nach oben ab um die Akkus plazieren zu können. Jetzt können Sie den Aufbau
vorsichtig nach oben abnehmen. Löten Sie an die Motoren einen Stecker an. Richten Sie sich nach dem Schaltplan
auf Seite 8. Achten Sie auf die Drehrichtung der Motoren, wenn der Akku angeschlossen ist, sollten die Schiffsschrauben sich so drehen, dass das Modell vorwärts fahren würde. HINWEIS: Um den Stecker leichter anlöten zu können,
empehlt es sich, den folgenden Tipp zu verwenden: Mit einer sogenannten dritten Hand können Sie die Stecker auch
direkt im Modell anlöten.
Montage Schritt 5 (Pege und Wartung)
Säubern Sie das Modell nach jedem Gebrauch. Entfernen Sie evtl. eingedrungenes Wasser. Sollte Wasser in die RCKomponenten gedrungen sein, legen Sie diese trocken und schicken Sie die RC-Komponenten zur Kontrolle an die
zuständige GRAUPNER/SJ Servicestelle ein.Säubern Sie das Modell und den Sender nur mit geeigneten Reinigungsmitteln. Geeignet ist ein fusselfreies Tuch. Verwenden Sie niemals chemische Reiniger, Lösungsmittel, Reinigungsbenzin, Spiritus oder ähnliches.
Schmieren Sie die Antriebswelle nach Ende des Betriebs mit einem kleinen Tropfen Öl an den Lagern ab. Auch die
äußeren Wellenlager bei den Propellern müssen geschmiert werden. Verwenden Sie zum Schmieren des Antriebs nur
Öl, welches das Wasser nicht gefährdet bzw. verschmutzt (z.B. Best.-Nr.206). Nach Ende der Fahrsaison sollte die
Welle demontiert werden und mit wasserneutralem Fett (z.B.
Best.-Nr. 570) neu abgeschmiert werden.
Jungfernfahrt
Laden Sie die Akkus und testen Sie die Funktionen des Modells. Sichern Sie alle Abdeckungen, so dass diese nicht
herunterfallen können und so, dass kein Wasser in das Modell eindringen kann. Nun können Sie die Jungfernfahrt
starten.
Während der Jungfernfahrt langsam beginnen; machen Sie sich zuerst mit dem Fahrverhalten des Modells vertraut.
Testen Sie die Lenkung, den Bremsweg, und die Reichweite.
Wenn das Modell zu „hüpfen“ beginnt, verändern Sie die Position des Antriebs, bis das Modell wieder sauber läuft,
oder bewegen Sie die Batterien nach vorn. Viel Spaß mit Ihrem Modell Arligh Burke Best.-Nr.: 21014
Page 10
10
10
Deutsch
Anleitung zur Fehlersuche
Problem Mögliche Fehler Maßnahmen
Motor läuft
nicht an
Motorkabel ausgesteckt/abgerissen
Kabel einstecken/ neu anlöten
Fahrakku leer Akku wechseln oder auaden
Fernsteuerung funktioniert nicht
richtig, Gastrimmung falsch
eingestellt
Fernsteuerung überprüfen, Trimmung korrekt einstellen
Motor defekt Motor ersetzen
Gastrimmung falsch eingestellt Gastrimmung auf neutral stellen
Motor läuft
rückwärts
Servoreverseschalter Gas
verstellt
Servoreversschalter in die richtige Position bringen
Motor hat keine
Leistung
Fahrakku ist fast leer Akku wechseln oder auaden
Gastrimmung falsch eingestellt Gastrimmung auf neutral stellen
Antrieb läuft schwer Antrieb überprüfen, reinigen und Welle fetten
Antrieb ist sehr laut Welle und Motor prüfen
Motor wird sehr warm Motor abkühlen lassen, Motor überprüfen, Wasserküh-
lung installieren, Welle reinigen und fetten
Modell ist
schwer zu
steuern
Senderbatterie leer Batterien wechseln oder Akkus auaden
Lenktrimmung verstellt Lenktrimmung überprüfen und neu einstellen
Störungen Eine kurze Pause machen und dann neu versuchen
Gastrimmung falsch eingestellt Gastrimmung auf neutral stellen
Modell hat keine Funktion
Sender und Empfänger nicht
gebunden
Sender und Empfänger neu binden (Anleitung der
Fernsteuerung)
Störungen Eine kurze Pause machen und dann neu versuchen
Gastrimmung verstellt Gastrimmung auf neutral stellen
LED´s am Sender leuchten
nicht
Kontrollieren Sie, ob das Modell und Sender einge-
schaltet sind. Überprüfen Sie auf leere Akkus
Modell ist sehr
laut
Propeller wurde beschädigt Ersetzen Sie den Propeller
Welle verschmutzt oder schwer-
gängig
Welle reinigen und neu fetten
Schrauben haben sich gelöst Kontrollieren Sie den Sitz aller Schrauben und ziehen
Sie diese fest.
Bauteile haben sich gelöst Kontrollieren Sie alle Bauteile und befestigen Sie
diese wieder
Page 11

11
11
Table of content
Table of Contents ..............................................................................11
Foreword........................................................................................... 12
Brief description of product............................................................... 12
Intended use..................................................................................... 12
Specications.....................................................................................12
Recommended accessories for 21014..............................................13
Package Contents............................................................................ 13
Meaning of symbols .........................................................................14
Warning and Safety instructions...................................................... .14
Tools and accessories recommended for installation....................... 16
Installation Step 1 (Model) Unpack ...................................................16
Installation Step 2 (boatstand assemble) ..........................................16
Installation Step 3 (control of screws)............................................... 16
Installation Step 4 (installation of the RC components) ....................17
Installation Step 5 (maintenance)..................................................... 18
Troubleshooting Guide................................................................... ..19
Environmental information............................................................... 29
Declaration of Conformity..................................................................30
Warranty Certicate........................................................................ .31
Page 12

12
Attention!
You must read through every part of these instructions before assembling and using the
model.
!
Length 1550 mm
Total height approx. 520 mm
Total weight approx. 11000 g
Beam approx. 250 mm
Scale 1:100
Forword
Brief description of the product
Intended use
Technical data
Thank you for choosing to purchase the Graupner/SJ model „Arligh Burke“, order no. 21014. Graupner/SJ models
stand for high quality. We pay great attention to stability at the key points in series production. Due
to extensive prefabrication, including motor and rudder system, as well as the high degree of detail made possible by
CNC processing, this model very closely replicates the original.It is quite important that these instructions are read
completely prior to assembly and rst-time use of the model. The safety rules stated in these instructions must be
followed during trial runs as well as initial use and thereafter.
This boat is a member of the GRAUPNER PREMIUM line, a series of particularly high-quality ready-made models with
an unprecedented level of detailing.The core of this high-quality model is the robust moulded GRP hull, complemented
by the superstructure and deck which are constructed from laser-cut ABS parts. Many of the small items are of metal,
and almost
everything is factory-assembled. The hull, parts of the superstructure, the masts and ttings are spraynished using
semi-matt paints, and the decals are already applied. The many details and scale ttings give
the boat an impressive scale appearance.
The ample deck openings make it a simple matter to install the RC components, and the procedure is quickly completed. To prepare the boat for running all you have to do is install the RC components and the drive
battery, carry out a little soldering, and the model is ready for the water.
This model is designed to be a ship model for operation on bodies of water which meet the stipulations described
in these instructions and is only suitable for this purpose. No guarantee or liability is accepted for any
improper handling outside the scope of these stipulations.
Page 13

13
Parts Name No.
1x MC 12 HoTT remote control 33112
1x regulator 40A 2875
1x lead acid battery 768
1x G2 connector system 2989
1x
Faston tabs 4.8 mm
3597
Arligh Burke Premium Line
Hull and superstructure Included
Crane Included
Motor (2x) Included
ESC`s Not Included
accumulator Not Included
charger Not Included
transmitter Not Included
Recommended accessories for 21014
Operating instructions
Page 14

14
!
Attention!
This symbol calls attention to the following notices which must be observed unconditionally
by the user. Any disregard for the accompanying notices can impair safe operation and even
endanger the operator.
Warning!
This symbol calls attention to prohibitions which must be observed unconditionally by the
user. Any disregard for the accompanying prohibitions can impair functionality and endanger
the operator.
Care and maintenance!
This symbol calls attention to notices regarding care and maintenance of the product which
should be observed by the operator in order to ensure a long service life for the product
Note!
This symbol calls attention to notices which should be observed by the operator to ensure
safe operation of the device.
Tip!
This icon highlights tips and experience-based recommendations on how to avoid potential
difculties or damage when building a model, and provides assistance in solving potential
problems.
Rotating drive!
This icon points out possible hazards when operating a rotor that the user must be aware
of. Disregarding any of the following instructions can lead to serious operator injury, rotor
imbalance, or major damage to the model, and nearby individuals may be seriously injured by
ying parts.
Disposal instructions
This symbol calls attention to the following notices regarding how individual materials and
products must be disposed of by the user.
Warning and safety notices
Explanation of symbols
Page 15

15
The model is started and operated solely at the operator's own risk. Careful and conscientious operation is
necessary to prevent personal injury and property damage.
The model is unsuitable for children younger than 14 years of age.
When using tools, be aware of any potential damage associated with these tools.
Follow the recommendations and instructions regarding your remote control and accessories.
Before you use the model, make sure that the remote control works properly, and make sure that the plug-in
connections are safe and snug.
Do not recharge dry cell batteries for supplying power. Only rechargeable batteries may be recharged.
Determine the range of the remote control before operation. While the model is turned on, walk
approximately 100 m away from the transmitter, and have an assistant operate the transmitter. All of the
functions must be fully operable.
Note that radios or transmitters can signicantly impair the functioning of the model. Take every precaution
to ensure that none of these devices are operating close by while you are using the model.
The dry cell and rechargeable batteries may not be short-circuited and may not be directly exposed to
water.
While retrieving the model, make sure that you do not injure yourself or others.
Note that radios or transmitters can signicantly impair the functioning of the model. Take every precaution
to ensure that none of these devices are operating close by while you are using the model.
Notice!
Remove the power battery and the transmitter and dry cell or rechargeable batteries when you
are not using the model.
Keep the model from being exposed to strong humidity, heat, cold and soiling.
When transporting the model, secure it to prevent damage or sliding.
Attention!
Never try to grab the propeller while it is rotating or operate the propeller while holding in your
hand; this will cause hand injury. The propeller can easily become uncontrollable due to the
rotational forces.
Never place objects or foreign bodies in the operating propeller, and take preventative measures to ensure
that no objects or foreign bodies can enter the operating propeller. If this occurs, the sudden imbalance of
the propeller can cause major damage to the model. Nearby individuals can be seriously injured from ying
parts.
Never stand in front of or behind the propeller. The propeller can come off the shaft if it is not properly
installed, or from unforeseeable circumstances. Stop the propeller if you hear unusual noises.
The propeller must be securely xed. Do not point the propeller towards people or animals, and do not test
the propeller in your hand. Never stand in front of the propeller. The propeller can come off the shaft from
unforeseeable circumstances. Nearby individuals can be seriously injured from ying parts.
Never grab the assembly of the motor, rotor and shaft while it is operating since this can cause injury. After
operation, let the motor, controller and battery cool down before you touch them.
It is forbidden to operate the model under the inuence of medications, alcohol or drugs
Any deviations from the instructions may affect the functioning and safety of the model and must always be
avoided.
Before starting an RC model, you need to be familiar with the applicable laws since specic laws govern RC
model. The relevant laws must always be followed. Obey applicable national laws. Before you use the model
for the rst time, nd out whether your personal liability insurance covers the operation of RC models of
this kind. If necessary, purchase a special policy that covers RC models.
RC models are hazardous and require a great deal of time and attention as well as a high level of
knowledge, ability and responsibility from the user.
Adhesives and paints contain solvents which may be hazardous to health in certain circumstances. It is
therefore essential to observe the manufacturer's instructions and warnings.
The model may only be operated with the accessories that we recommend; otherwise, function cannot be
guaranteed.
Page 16

16
Care!
Only use appropriate cleansers to clean the model and transmitter. A lint-free cloth is
appropriate. Do not use chemical cleaners, solvents, gasoline, ethyl alcohol or similar
cleaners.
Operating instructions
Attention!
Follow all the steps of the operating instructions.
Tools and recommended accessories for installation
!
Installation Step 1 (Model unpack)
Unpack the model carefully. Loosen with scissors carefully remove the retaining straps. Then pull the model
carefully from the packaging, and then remove all foam parts.
Installation Step 2 (boatstand assemble)
Page 17

17
Installation Step 3 (Check the screw)
Installation Step 4 (installation of the RC components)
Check the screws on the shaft coupling, the motor mounting bracket and the propeller on a rm seat, as
these might have come loose during transport if necessary. You can check this by pulling on the propeller,
the shaft should be pull out to the rear, is one of the set screws loose. Then pull it back gently laid. IMPORTANT:
Back up any loose set screws with thread lock, eg UHU security screws (Order No. 952), as they
may become loose due to vibration during operation. The grub screws are loosened with the longitudinal slot
screwdriver, hold the shaft with a at nose pliers rmly to avoid slipping.
Please act according to the wiring diagram. Pay attention to the direction of rotation of the motors when the battery is
connected, the drives should rotate so that the model would move forward.
Install the batteries with velcro in the model. NOTE: The Velcro strap you can change the position of the batteries easy
to achieve the optimal trim. The batteries are typically in block of four right in front of the engines you platziert.Legen
when required ballast in the hull. These elements can be particularly at sections of steel or lead. Trim the model
and secure the ballast weights with adhesive. TIP: If you attach the allastgewichte with Velcro, you can if necessary
(eg ease of transport) found. TIP: To iederzunden the correct position of the weights again without re-trimming, you
should mark the location with waterproof crayon. Mount the receiver under the deck and the speed controller left and
right to the hull by means of Velcro.
Page 18

18
The antenna is xed with adhesive tape as possible in the coamings of construction. This must always be above the
water line, since the antenna otherwise has no or poor reception. Hook the tenders on construction. TIP: For all subsequent work, you should place the model on the boatstand
Drag to place the structure carefully to top off the batteries . Now you can remove the build up carefully. Solder the
motors to a plug. Please act according to the wiring diagram on page 17. Pay attention to the direction of rotation of
the motors when the battery is connected, the propellers should rotate so that the model would move forward. NOTE:
In order to solder the connector easier, it is recommended that you use one of the following tips. TIP 1: With a socalled third hand you can solder directly in the model the plug.
Installation step 5 (maintenance)
Clean the model after each use. Remove any water seepage. If water has penetrated into the RC components,
dry them out and send the RC components, a control to the appropriate Graupner / SJ service
center.
Clean the model and the transmitter using suitable cleaning agents. Suitable is a lint-free cloth. Never use
chemical cleaners, solvents, benzene, alcohol or the like.
Lubricate the drive shaft to the end of the operation with a small drop of oil on the bearings from. Also,
the outer shaft bearings must be lubricated at the propellers. Use to lubricate the drive only oil that does
not endanger or contaminated (eg Order No. 206) the water. After the end of the driving season, the shaft
should be disassembled and re-lubricated with water neutral grease (Order No. 570).
Maiden voyage
Charge the batteries and test the functions of the model. Secure all cover so that they can not fall down and so that no
water can penetrate into the model. Now you can maiden voyage.
Slow start during the maiden voyage; familiarize yourself rst with the driving behavior of the model familiar. Test the
steering, braking distance, and the range.
If the model begins „bounce“ to change the position of the drive until the model is running smoothly again, or move the
battery forward.
Have fun with your model Arligh Burke Order No .: 21014
- High-performance grease Order No. 570
- High performance oil Order No. 206,
Page 19

19
Troubleshooting Guide
Problem possible error Actions
Motor will not
start
Motor cable unplugged / demolished
Plug in cable / new solder
Drive battery empty Changing the battery or charging
Remote control does not work
correctly, incorrectly adjusted
throttle trim
Check remote control, adjust trim correctly
Defective motor Replace the motor
Throttle set incorrectly Set trim to neutral
Motor runs in
reverse
Servo reverse switch throttle
displaced
Bring servo reverse switch into the correct position
Engine has no
power
Drive battery is almost empty Changing the battery or charging
Throttle set incorrectly Set trim to neutral
Drive is running hard Check drive, clean and grease the shaft
Drive is very loud Check shaft and motor
Motor gets very hot Allow engine to cool, check engine, install water
cooling, clean and grease the shaft
Model is dif-
cult to control
Transmitter battery empty Change batteries or recharge batteries
Displaced steering trim Check and adjust steering trim
Interference Take a short break and then re-try
Throttle set incorrectly Set trim to neutral
Model has no
function
Transmitter and receiver are not
bound
Transmitter and receiver rebind (manual of the trans-
mitter)
Interference Take a short break and then re-try
Displaced throttle trim Set trim to neutral
LEDs on the transmitter does
not light up
Check that the model and transmitter are turned on.
Check for empty batteries
Model is very
noisy
Propeller was damaged Replace the propeller
Shaft is dirty or difcult to move Clean the shaft and regrease
Screws are loose Check the placement of all screws and tighten.
Components have dissolved Check all components and attach them again
Page 20

20
Table des matières
Table des matières............................................................... 20
Avant-propos........................................................................ 21
Brève description du produit ................................................21
Utilisation prévue................................................................. 21
Spécications....................................................................... 21
Les accessoires recommandés pour 21014.........................22
Contenu de l’emballage........................................................22
Signication des symboles................................................... 23
Avertissement Prescriptions de sécurité et.......................... 23
Outils et accessoires recommandés pour l’installation........ 25
Installation Étape 1 (modèle) Déballez ................................25
Installation Étape 2 (support du bateau assembler)............ 25
Installation Étape 3 (contrôle de vis).................................... 26
Installation Étape 4 (installation des composants RC) .........26
Installation Etape 5 (entretien)..............................................27
Guide de dépannage ...........................................................28
Informations environnementales .........................................29
Déclaration de conformité.................................................. .30
Certicat de garantie ...........................................................31
Page 21

21
Avant-propos
Attention !
Avant le montage et la mise en service du modèle réduit, il est absolument nécessaire de lire
cette notice dans son intégralité.
!
Utilisation conforme
Brève description du produit
Longueur 1550 mm
Hauteur totale env. 520 mm
Poids total env. 11000 g
Largeur, env. 250 mm
Echelle de reproduction, env. 1:100
Caractéristiques techniques
Merci d‘avoir choisi d‘acheter le modèle Graupner / SJ „Arligh Burke“, réf. 21014 modèles Graupner / SJ représentent
haute qualité. Nous prêtons une grande attention à la stabilité au niveau des points clés dans la production en série.
dû au vaste préfabrication, y compris le moteur et le système de gouvernail, ainsi que le degré élevé de détail rendu
possible par le traitement CNC, ce modèle reproduit de très près la original.It est très important n‘a instructions de
synthèse sont lus complètement avant le montage et la première utilisation du modèle. Les consignes de sécurité
indiquées dans les instructions de synthèse doivent être respectées lors pistes d‘essai ainsi que l‘utilisation initiale et
par la suite.
Ce bateau est un membre de la ligne PREMIUM GRAUPNER, une série de modèles en particulier de haute qualité
prêts à l‘emploi avec un niveau de detailing.The cœur de ce modèle de haute qualité sans précédent est la robuste
coque polyester moulée, complétée par la superstructure et le pont qui sont construits à partir de pièces en ABS découpées au laser. Un grand nombre des petits éléments sont en métal, et presque
tout est assemblé en usine. La coque, parties de la superstructure, les mâts et les raccords sont spraynished utilisant
des peintures semi-mat, et les vignettes ne est déjà appliquée. Les nombreux détails et accessoires d‘échelle donnent
le bateau une impressionnante apparence d‘échelle.
Les larges ouvertures de pont en font une question simple à installer les composants RC, et la procédure est rapidement achevé. Pour préparer le bateau pour la course tout ce que vous avez à faire est d‘installer les composants RC
et le lecteur
batterie, effectuer un peu de soudure, et le modèle est prêt pour l‘eau.
Ce modèle est conçu pour être un modèle de navire pour fonctionner sur des plans d‘eau qui répondent aux stipulations décrites dans ce mode, et ne convient à cet effet. Aucune garantie ou responsabilité ne est acceptée pour tout
une mauvaise manipulation en dehors du champ d‘application de ces dispositions.
Page 22

22
Accessoire recommandé pour le 21014
Qté Description Réf.
1x Télécommande MC 12 HoTT 33112
1x Régulateur 40A 2875
1x batterie au plomb 768
1x Système de connecteur G2 2989
1x
Languettes Faston 4,8 mm
3597
Contenu de la boîte
Arligh Burke Prêt à voler
Coque et la superstructure inclus
Grue inclus
Moteur (2x) inclus
ESC`s Non inclus
accumulateur Non inclus
chargeur Non inclus
émetteur Non inclus
Page 23

23
Signication des symboles
Attention !
Ce symbole met en évidence les remarques qui suivent, qui doivent impérativement être
respectées par l'utilisateur ! Le non-respect des consignes situées à côté peut entraver le
fonctionnement sécurisé, ainsi que la sécurité de l'exploitant lui-même.
Avertissement !
Ce symbole met en évidence des interdictions, qui doivent impérativement être respectées
par l'utilisateur ! Le non-respect des interdictions situées à côté peut entraver le bon
fonctionnement, ainsi que la sécurité de l'exploitant.
Entretien et maintenance !
Ce symbole met en évidence des remarques concernant l'entretien et la maintenance
du produit, qui doivent impérativement être respectées an de garantir une durée de vie
prolongée du produit
Remarque !
Ce symbole met en évidence des remarques concernant l'entretien et la maintenance du
produit, qui doivent impérativement être respectées an de garantir un fonctionnement
sécurisé de l'appareil.
Conseil !
Ce symbole met en évidence des conseils et des astuces permettant d'éviter de potentielles
difcultés ou détériorations lors de la construction du modèle réduit, et des remèdes pour la
résolution de problèmes potentiels.
Attention au rotor !
Ce symbole met en garde l'utilisateur contre les risques de blessure associés au rotor, qui
doivent impérativement être pris en compte ! Toute négligence des remarques qu'il précède
peut causer des blessures graves à l'utilisateur, un déséquilibrage du rotor ou des dommages
graves au modèle réduit, et les pièces projetées peuvent causer des blessures très graves aux
personnes qui se trouvent dans le voisinage de l'appareil.
Remarques relatives à l'élimination
Ce symbole met en évidence les remarques indiquant comment les différents matériaux ou
produits doivent impérativement être éliminés par l'utilisateur !
!
Avertissements et consignes de sécurité
Page 24

24
La mise en service et l'utilisation du modèle réduit se font entièrement aux risques et périls de l'utilisateur.
Seul un maniement attentif et minutieux protège contre les dommages corporels et matériels.
Ce modèle réduit n'est pas adapté pour les enfants de moins de 14 ans.
Si vous utilisez des outils, veuillez faire attention aux risques qu'ils comportent.
Veuillez respecter les recommandations et conseils de la télécommande et des accessoires.
Avant d'utiliser le modèle réduit, veuillez vérier le bon fonctionnement de la télécommande, ainsi que les
raccordements, qui doivent être solides et sûrs.
Les piles sèches ne doivent jamais être rechargées sur le secteur. Seuls les accumulateurs peuvent être
rechargés.
La portée de la télécommande doit être vériée avant le début du vol. Pour ce faire, éloignez-vous de
l'émetteur d'environ 100 m avec le modèle réduit allumé, pendant qu'un assistant actionne la télécommande.
Toutes les fonctions doivent être disponibles sans problème.
Les appareils de radio ou les postes d'émission peuvent perturber fortement le fonctionnement du modèle
réduit. Vériez dans la mesure du possible qu'aucun de ces appareils ne seront utilisés dans le voisinage
pendant que vous faites fonctionner le modèle réduit.
Les piles et les accumulateurs ne doivent pas être court-circuités ni exposés à un contact direct avec de
l'eau.
Au cas où le modèle réduit devrait faire l'objet d'un sauvetage, veillez à ne pas vous mettre en danger.
Les appareils de radio ou les postes d'émission peuvent perturber fortement le fonctionnement du modèle
réduit. Vériez dans la mesure du possible qu'aucun de ces appareils ne seront utilisés dans le voisinage
pendant que vous faites fonctionner le modèle réduit.
Attention !
Ne jamais approcher la main du hélice en marche et ne jamais faire fonctionner en tenant le
hélice dans la main, cela causerait des blessures à la main. Le hélice peut s'emballer légèrement à cause de la force de rotation.
Ne jamais laisser des objets/corps étrangers entrer en contact avec le hélice lorsqu'il est en marche. Si un
objet/corps étranger entre en contact avec le hélice, le déséquilibrage soudain du hélice peut endommager
gravement le modèle réduit. Les pièces projetées peuvent causer des blessures très graves aux personnes
qui se trouvent dans le voisinage de l'appareil.
Ne jamais se tenir devant/derrière le hélice. En cas de montage incorrect ou de circonstances imprévues, le
hélice peut se détacher de son arbre. Arrêter le hélice en cas de bruits inhabituels.
Le hélice doit être solidement monté. Ne pas diriger le hélice vers des personnes ou des animaux, ne pas
tester le hélice dans la main. Ne jamais se tenir devant le hélice. Le hélice peut se détacher de son arbre
à cause de circonstances imprévues. Les pièces projetées peuvent causer des blessures très graves aux
personnes qui se trouvent dans le voisinage de l'appareil.
Ne pas toucher l'ensemble moteur + hélice + arbre pendant le fonctionnement, car cela peut entraîner des
blessures graves. Après utilisation, laisser le moteur, l'arbre, le régulateur et l'accumulateur refroidir avant
de les toucher.
Il est interdit de faire fonctionner le modèle réduit sous l'inuence de médicaments, de l'alcool, de drogues,
etc.
Toute dérogation aux instructions de la notice peut affecter le fonctionnement et la abilité du modèle réduit
et doit être évitée à tout prix.
Avant de faire fonctionner un modèle réduit télécommandé, vous devez vous informer sur les dispositions
légales, car les modèles réduits télécommandés sont soumis aux lois et règlements applicables. La loi doit
être respectée dans tous les cas. Veuillez respecter les lois de votre pays. Avant la première utilisation du
modèle réduit, veuillez vérier si votre assurance responsabilité civile privée couvre l'utilisation de modèles
réduits télécommandés. Le cas échéant, veuillez vous munir d'une assurance responsabilité civile spéciale
pour les modèles réduits télécommandés.
Les modèles réduits télécommandés sont des appareils délicats et dangereux qui exigent de leur pilote une
grande connaissance technique et un grand sens des responsabilités.
Les colles et les vernis contiennent des solvants qui, dans certaines conditions, peuvent s'avérer dangereux
pour la santé. Les remarques et mises en garde de leur fabricant doivent donc impérativement être respectées.
Ce modèle réduit doit être utilisé exclusivement avec les accessoires que nous conseillons, car sinon son
fonctionnement ne peut pas être garanti.
Page 25

25
Remarque !
Retirez l'accumulateur de propulsion et les piles ou accumulateurs de l'émetteur lorsque le
modèle réduit n'est pas utilisé.
N'exposez pas le modèle réduit à une forte humidité atmosphérique, à des températures très chaudes ou
très froides, ou aux salissures.
Lors du transport, protégez le modèle réduit et l'émetteur contre les dommages et les coups.
Entretien !
Nettoyez le modèle réduit et l'émetteur uniquement à l'aide de produits de nettoyage
appropriés. Utilisez un chiffon qui ne peluche pas. N'utilisez jamais de produit nettoyant
chimique, solvant, essence de nettoyage, alcool ou produits similaires.
!
Attention !
Suivre impérativement chaque section et étape des instructions d'utilisation.
Outils et accessoires recommandés pour l‘installation
Installation Etape 1 (Modèle déballage)
Décompressez le modèle avec soin. Desserrez avec des ciseaux retirer soigneusement les sangles de retenue.
Ensuite, tirez le modèle soigneusement de son emballage, puis retirez toutes les pièces de mousse.
Installation Etape 2 (support du bateau assembler)
Tout d‘abord, vous devez expédier le montage du
stand, il est situé à l‘extrémité de l‘emballage derrière la mousse. Additionner les quatre moitiés et les
coller.
Pinces
Tournevis cruciforme PH2
Tournevis à lame plate 2,0
- Ciseaux
- Pinces
- Tournevis cruciforme PH2 (PN: 5779,2)
- Tournevis à lame plate 2,0 (Ordonnance n º 5781,2)
- Graisse haute performance No. 570
- Haute No. d‘huile de performances 206,
- Vis de xation Ordre 952
Ciseaux Graisse
Page 26

26
Installation Étape 3 (Vériez la vis)
Installation Étape 4 (installation des composants RC)
Vérier que les vis de l‘accouplement de l‘arbre, le support de montage du moteur et l‘hélice sur un siège ferme, comme ceux-ci auraient pu se détacher pendant le transport si nécessaire. Vous pouvez le vérier en tirant sur l‘hélice,
l‘arbre doit être retirer à l‘arrière, est l‘une des vis de xation lâches. Puis tirez doucement le dos posé. IMPORTANT:
Sauvegarder toutes les vis de xation lâches avec serrure de l, par exemple UHU vis de sécurité (No de commande
952), car ils peuvent se desserrer à cause des vibrations pendant le fonctionnement. Les vis sans tête sont desserrés
avec la fente longitudinale tournevis, maintenez l‘arbre avec un plat pince fermement pour éviter de glisser.
Se il vous plaît agir selon le schéma de câblage. Faites attention à la direction de rotation des moteurs lorsque la bat-
terie est connecté, les lecteurs devraient faire pivoter an que le modèle serait aller de l‘avant.
Installez les piles avec velcro dans le modèle. NOTE: La bande velcro, vous pouvez changer la position des piles
faciles à réaliser la garniture optimale. Les piles sont généralement dans le bloc de quatre juste en face des moteurs
en cas de besoin, vous platziert.Legen ballast dans la coque. Ces éléments peuvent être particulièrement sections
plates d‘acier ou de plomb. Coupez le modèle et de sécuriser les masses d‘alourdissement avec de la colle. CON-
SEIL: Si vous xez le allastgewichte avec velcro, vous pouvez si nécessaire (par exemple, la facilité de transport)
trouvé. ASTUCE: Pour iederzunden la position correcte des poids nouveau sans ré-ajustement, vous devez marquer
l‘emplacement au crayon étanche. Installez le récepteur sous le pont et le régulateur de vitesse gauche et droit de la
coque au moyen de Velcro.
Page 27

27
L‘antenne est xé avec du ruban adhésif que possible dans les hiloires de construction. Il doit toujours être au-dessus
de la ligne d‘eau, puisque l‘antenne a par ailleurs pas ou mauvaise réception. Accrocher les offres sur la construction.
ASTUCE: Pour tous les travaux ultérieurs, vous devez placer le modèle sur le support du bateau
Faites glisser pour placer soigneusement la structure pour couronner les batteries. Maintenant, vous pouvez supprimer l‘accumulation attentivement. Souder les moteurs à un bouchon. Se il vous plaît agissent selon le schéma
de câblage à la page 26. Faites attention à la direction de rotation des moteurs lorsque la batterie est connecté, les
hélices doivent tourner de sorte que le modèle serait aller de l‘avant. NOTE: An de souder le connecteur plus facile,
il est recommandé que vous utilisez l‘un des conseils suivants. ASTUCE 1: Avec une troisième main soi-disant vous
pouvez souder directement dans le modèle de la che.
Installation étape 5 (de maintenance)
Nettoyez le modèle après chaque utilisation. Retirer toute inltration d‘eau. Si l‘eau a pénétré dans les composants
RC, séchez-les et envoyez-les composants RC, une commande à l‘Graupner / service de SJ appropriée
centre. Nettoyez le modèle et l‘émetteur utilisant des agents de nettoyage appropriés. Convient est un chiffon non
pelucheux. ne jamais utiliser nettoyants chimiques, des solvants, de benzène, de l‘alcool ou similaires.
Graisser l‘arbre d‘entraînement à la n de l‘opération avec une petite goutte d‘huile sur les paliers de. Aussi,
les roulements de l‘arbre extérieures doivent être lubriés à hélices. Utilisez pour lubrier le lecteur que de l‘huile qui
fait pas mettre en danger ou contaminés (par exemple, l‘ordonnance no 206) de l‘eau. Après la n de la saison de
conduite, l‘arbre doit être démonté et ré-lubrié avec de l‘eau de la graisse neutre (N ° 570).
voyage inaugural
Rechargez les batteries et testez les fonctions du modèle. Fixez toutes les garanties de sorte qu‘ils ne peuvent pas
tomber et de telle sorte que l‘eau ne puisse pénétrer dans le modèle. Maintenant, vous pouvez Maiden Voyage.
Démarrage lent pendant le voyage inaugural; vous familiariser d‘abord avec le comportement de conduite du modèle
familier. Testez la direction, la distance de freinage, et la gamme.
Si le modèle commence „rebond“ pour changer la position de l‘entraînement jusqu‘à ce que le modèle est en cours
d‘exécution en douceur de nouveau, ou déplacer la batterie avant.
Amusez-vous avec votre modèle Arligh Burke Référence:. 21014
- Graisse haute performance No. 570
- Haute No. d‘huile de performances 206,
Page 28

28
28
Instructions de dépannage
problème possible erreur actions
Le moteur ne
démarre
Câble moteur débranché /
démoli
Branchez le câble / nouvelle soudure
Conduisez batterie vide Changer la batterie ou la charge
La télécommande ne fonctionne
pas correctement, le trim des
gaz mal réglé
Vériez la télécommande, réglez couper correctement
moteur défectueux Remplacer le moteur
Accélérateur mal réglé Régler la garniture à neutre
Le moteur
tourne en sens
inverse
Commutateur d‘inversion servo
de gaz déplacé
Apportez commutateur inverse servo dans la position
correcte
Le moteur n‘a
pas le pouvoir
Batterie du lecteur est presque
vide
Changer la batterie ou la charge
Accélérateur mal réglé Régler la garniture à neutre
Variateur est en marche difcile Contrôler l‘entraînement, nettoyer et graisser l‘arbre
Drive est très fort Vérier si l‘arbre et le moteur
Moteur devient très chaud Laisser refroidir le moteur, vérier le moteur, installer
l‘eau de refroidissement, nettoyer et graisser l‘arbre
Le modèle est
difcile à contrôler
Batterie d‘émetteur vide Changez les piles ou les batteries de recharge
Trim de direction déplacée Vériez et ajustez le trim de direction
ingérence Prenez une courte pause, puis réessayez
Accélérateur mal réglé Régler la garniture à neutre
Modèle n‘a pas
de fonction
Émetteur et le récepteur ne
sont pas liés
Emetteur et récepteur rebind (manuel de l‘émetteur)
ingérence Prenez une courte pause, puis réessayez
Trim déplacés Régler la garniture à neutre
LED sur l‘émetteur ne s‘allume
pas
Vériez que le modèle et l‘émetteur sont allumés.
Vériez les piles vides
Le modèle est
très bruyant
Hélice a été endommagée Remplacer l‘hélice
Shaft est sale ou difcile à
déplacer
Nettoyer l‘arbre et graisser
Vis sont desserrées Vériez la position de toutes les vis et serrer.
Les composants ont dissous Vériez tous les composants et les attacher à nou-
veau
Page 29

29
INNOVATION & TECHNOLOGIE
Deutsch
29
Das Symbol auf dem Produkt, der Gebrauchsanleitung oder der Verpackung weist
darauf hin, dass dieses Produkt am Ende seiner Funktionsdauer nicht über den
normalen Haushaltsabfall entsorgt werden darf. Es muss an einem Sammelpunkt für
das Recycling von elektrischen und elektronischen Geräten abgegeben werden.
Die Werkstoffe sind gemäß ihrer Kennzeichnung wiederverwertbar. Mit der Wieder-
verwendung, der stofichen Verwertung oder anderen Formen der Verwertung von
Altgeräten leisten Sie einen wichtigen Beitrag zum Umweltschutz.
Batterien und Akkus müssen aus dem Gerät entfernt werden und bei einer entsprechenden Sammelstelle getrennt entsorgt werden. Bitte erkundigen Sie sich bei der
Gemeindeverwaltung über die zuständige Entsorgungsstelle.
Hinweise zum Umweltschutz
Environmental protection information
The symbol on the product, its operating instructions or packaging indicates that
this product may not be disposed of as common household waste at the end of its
service life. It must be sent to a recycling collection point for electrical and electronic
equipment.
Individual markings indicate which materials can be recycled. By reusing the product,
recycling the materials or recycling used equipment in other ways, you make an
important contribution to protecting the environment.
Any batteries (including rechargeable batteries) must be removed from the device
and disposed of separately at an appropriate collection point. Please inquire with
local authorities to nd the appropriate waste collection center.
Remarques relatives à la protection de l’envi-
ronnement
Le symbole sur le produit, la notice d'utilisation ou l'emballage indique que ce produit
ne doit pas être jeté avec les déchets ménagers normaux à la n de sa durée de vie.
Il doit être déposé dans un point de collecte pour le recyclage d'appareils électriques
et électroniques.
Les matériaux sont recyclables conformément à leur identication. En choisissant le
recyclage, la valorisation des déchets ou toute autre forme de réutilisation d'appareils
usagés, vous contribuez considérablement à la protection de l'environnement.
Les batteries et accumulateurs doivent être retirés de l'appareil et éliminés
séparément auprès d'un centre de collecte approprié. Veuillez vous renseigner
auprès de l'administration municipale an de connaître le centre de collecte
compétent.
Page 30

30
30
Deutsch
EG Konformitätserklärung
Declaration of Conformity
Graupner/SJ GmbH
Henriettenstraße 96
D-73230 Kirchheim/Teck
erklärt, dass das Produkt: Motor und Servo aus Graupnet/SJ Harro Koebke
declares that the product
Verwendungszweck: Motor und Servo zur Steuerung von Modellen
Intended purpose Motor and servo to control rc-models
bei bestimmungsgemäßer Verwendung den grundlegenden Anforderungen der EMVRichtlinie (EMC) 2004/108/EG entspricht.
complies with the essential requirements of EMV-Richtlinie (EMC) 2004/108/EG), when used for its
intended purpose
Angewendete harmonisierte Normen:
Harmonised standards applied
Elektromagnetische Verträglichkeit; Electromagnetic compatibility
EN 61000-6-1:2007
EN 61000-6-3:2007+A1:2011
EN 55014-1:2006+A1:2009
EN 61000-3-2:2006+A1:2009+A2:2009
EN 61000-3-3_2008
EN 55014-2:1997+A1:2001+A2:2008
EN 60950-1_2006+A11:2009
Kirchheim, 12. Juni 2013 Ralf Helbing, Geschäftsführer
Ralf Helbing, Managing Director
Graupner/SJ GmbH Henriettenstraße 96 D-73230 Kirchheim/Teck Germany
Tel: 07021/722-0 Fax: 07021/722-200 EMail: info@graupner.de
Konformitätserklärung
Page 31

31
INNOVATION & TECHNOLOGIE
Die Fa. Graupner/SJ GmbH, Henriettenstrasse 96, 73230
Kirchheim/Teck gewährt ab dem Kaufdatum auf dieses
Produkt eine Garantie von 24 Monaten. Die Garantie gilt
nur für die bereits beim Kauf des Produktes vorhandenen Material- oder Funktionsmängel. Schäden, die auf
Abnützung, Überlastung, falsches Zubehör oder unsachgemäße Behandlung zurückzuführen sind, sind von der
Garantie ausgeschlossen. Die gesetzlichen Rechte und
Gewährleistungsansprüche des Verbrauchers werden
durch diese Garantie nicht berührt. Bitte überprüfen Sie
vor einer Reklamation oder Rücksendung das Produkt
genau auf Mängel, da wir Ihnen bei Mängelfreiheit die
entstandenen Unkosten in Rechnung stellen müssen.
Graupner/SJ GmbH, Henriettenstrasse 96, 73230
Kirchheim/Teck, Germany guarantees this product for a
period of 24 months from date of purchase. The guarantee applies only to such material or operational defects
witch are present at the time of purchase of the product.
Damage due to wear, overloading, incompetent handling or the use of incorrect accessories is not covered by
the guarantee. The user´s legal rights and claims under
guarantee are not affected by this guarantee. Please
check the product carefully for defects before you are
make a claim or send the item to us, since we are obliged
to make a charge for our cost if the product is found to be
free of faults.
La société Graupner/SJ GmbH, Henriettenstrasse 96,
73230 Kirchheim/Teck, Allemagne, accorde sur ce produit
une garantie de 24 mois à partir de la date d´achat. La
garantie prend effet uniquement sur les vices de fonctionnement et de matériel du produit acheté. Les dommages
dûs à de l´usure, à de la surcharge, à de mauvais accessoires ou à d´une application inadaptée, sont exclus de
la garantie. Cette garantie ne remet pas en cause les
droits et prétentions légaux du consommateur. Avant
toute réclamation et tout retour du produit, veuillez s.v.p.
contrôler et noter exactement les défauts ou vices, parce
que nous sommes obligés de vous facturer nos frais,
bien que le produit se trouve en bon état.
Firmenstempel und Unterschrift des Einzelhändlers
Stamp and signature of dealer
Cachet et signature du vendeur
Wir gewähren auf dieses Erzeugnis eine / This product is / Sur ce produit nous accordons une
Garantie von
warrantied for
garantie de
24
Monaten
months
mois
Graupner Zentralservice
Postanschrift: Graupner/SJ GmbH
Service
Henriettenstrasse 96
D-73230 Kirchheim
Servicehotline
Mo - Do: 09:15 - 17:00
Freitag: 09:15 - 13:00 Uhr
aus deutschen Netzen: 07021 72 21 30
aus ausländischen Netzen: 0049 7021 72 21 30
Email: service@graupner.de
weitere Servicestellen nden Sie im Internet unter
http://www.graupner.de/de/service/servicestellen.aspx
For adresses of service points outside of germany please
refer to www.graupner.de/en/service/servicepoints.aspx.
Pour adresses des points de service situés en dehors de
l‘Allemagne s‘il vous plaît se référer à
www.graupner.de/fr/service/service.aspx.
Garantie-Urkunde
Warranty certicate / Certicat de garantie
Übergabedatum:
Date of purchase/delivery:
Date d’achat :
Name des Käufers:
Owner´s name:
Nom de I`acheteur :
Straße, Wohnort:
Complete address:
Adresse complète :
Deutsch
31
INNOVATION & TECHNOLOGIE
Best.-Nr. 21014
24
Garantieurkunde
Page 32

GRAUPNER/SJ GMBH
POSTFACH 1242
D-73220 KIRCHHEIM/TECK
GERMANY
http://www.graupner.de
Änderungen sowie Liefermöglichkeiten vorbehalten.
Lieferung nur durch den Fachhandel. Bezugsquellen werden nachgewiesen. Für Druckfehler kann keine Haftung
übernommen werden.
Printed in China PN.SH-01
Obwohl die in dieser Bedienungsanleitung
enthaltenen Informationen sorgfältig auf
ihre Funktion hin überprüft wurden, kann
für Fehler, Unvollständigkeiten und Druckfehler keinerlei Haftung übernommen werden. Die Fa.
Graupner|SJ GmbH behält sich das Recht vor, die
beschriebenen Hardware-, Software- und/oder Konstruktionsmerkmale jederzeit unangekün digt zu ändern.
Die vorliegende Bedienungsanleitung dient
ausschließlich Infor mations zwecken und kann
ohne Vorankündigung geändert werden. Die
jeweils aktuelle Version nden Sie im Internet
unter www.graupner.de auf der entsprechenden Produktseite.
GRAUPNER/SJ GMBH
POSTFACH 1242
D-73220 KIRCHHEIM/TECK
GERMANY
http://www.graupner.de
We reserve the right to make modication and alter
delivery options. Only dealers are authorized to make
deliveries. Suppliers subject to verication. No liability is
assumed for printing errors.
Printed in China PN.SH-01
Although we have carefully checked the
information contained in these operating
instructions and checked that it is correct, we
can accept no liability of any kind for mistakes,
incomplete information and printing errors. Graupner/SJ
GmbH reserves the right to alter the described features
of the hardware, software and design at any time without
prior notication.
These operating instruction are exclusively for
information purposes and are subject to
change without prior notication. The current
version can be found on the Internet at unter
www.graupner.de on the corresponding product page.
GRAUPNER/SJ GMBH
POSTFACH 1242
D-73220 KIRCHHEIM/TECK
GERMANY
http://www.graupner.de
Sous réserve de modications et de disponibilité. En
vente uniquement chez les détaillants spécialisés.
Certicats d’origine disponibles. La société décline toute
responsabilité en cas d’erreurs d’impression.
Printed in China PN.SH-01
Bien que les informations contenues dans
cette notice d‘utilisation et leur application
aient été vériées avec soin, nous déclinons
toute responsabilité en cas d‘erreurs, d‘incomplétudes et fautes d‘impression. La société Graupner|SJ
GmbH se réserve le droit de modier sans préavis les
caractéristiques logicielles, matérielles et/ou constructives à tout moment.
.
La présente notice d‘utilisation a été rédigée à
des ns exclusives d‘information et peut être
modié sans préavis. La version actuelle est
disponible sur Internet unter www.graupner.de
sur la page produit correspondante.
32
 Loading...