

GrateGlow New Pimlico, New Mayfair, 32 339 21, 32 339 23, New Chelsea User Instructions
...
THE GAS CONSUMERS' COUNCIL
(GCC) IS AN INDEPENDENT
ORGANISATION WHICH PROTECTS
TU"
INTEREST OF GAS USERS.
lU NEED ADVICE, YOU WILL FIND
TELEPHONE NUMBER IN YOUR
ilL TELEPHONE DIRECTORY
ER GAS.
GratE£low
THE ALL NEW CAPITAL
COLLECTION
R.S.
LPG
Cat 13PG31 at 37mbar.
For use in GB and lE.
THIS lEAFLET IS INTENDED TO HELP YOU UNDERSTAND AND USEYOUR NEW FIRE EFFICIENTLY.
PLEASE READ THESEINSTRUCTIONS BEFORE USING THE FIREAND KEEP FOR FUTURE REFERENCE.
58083
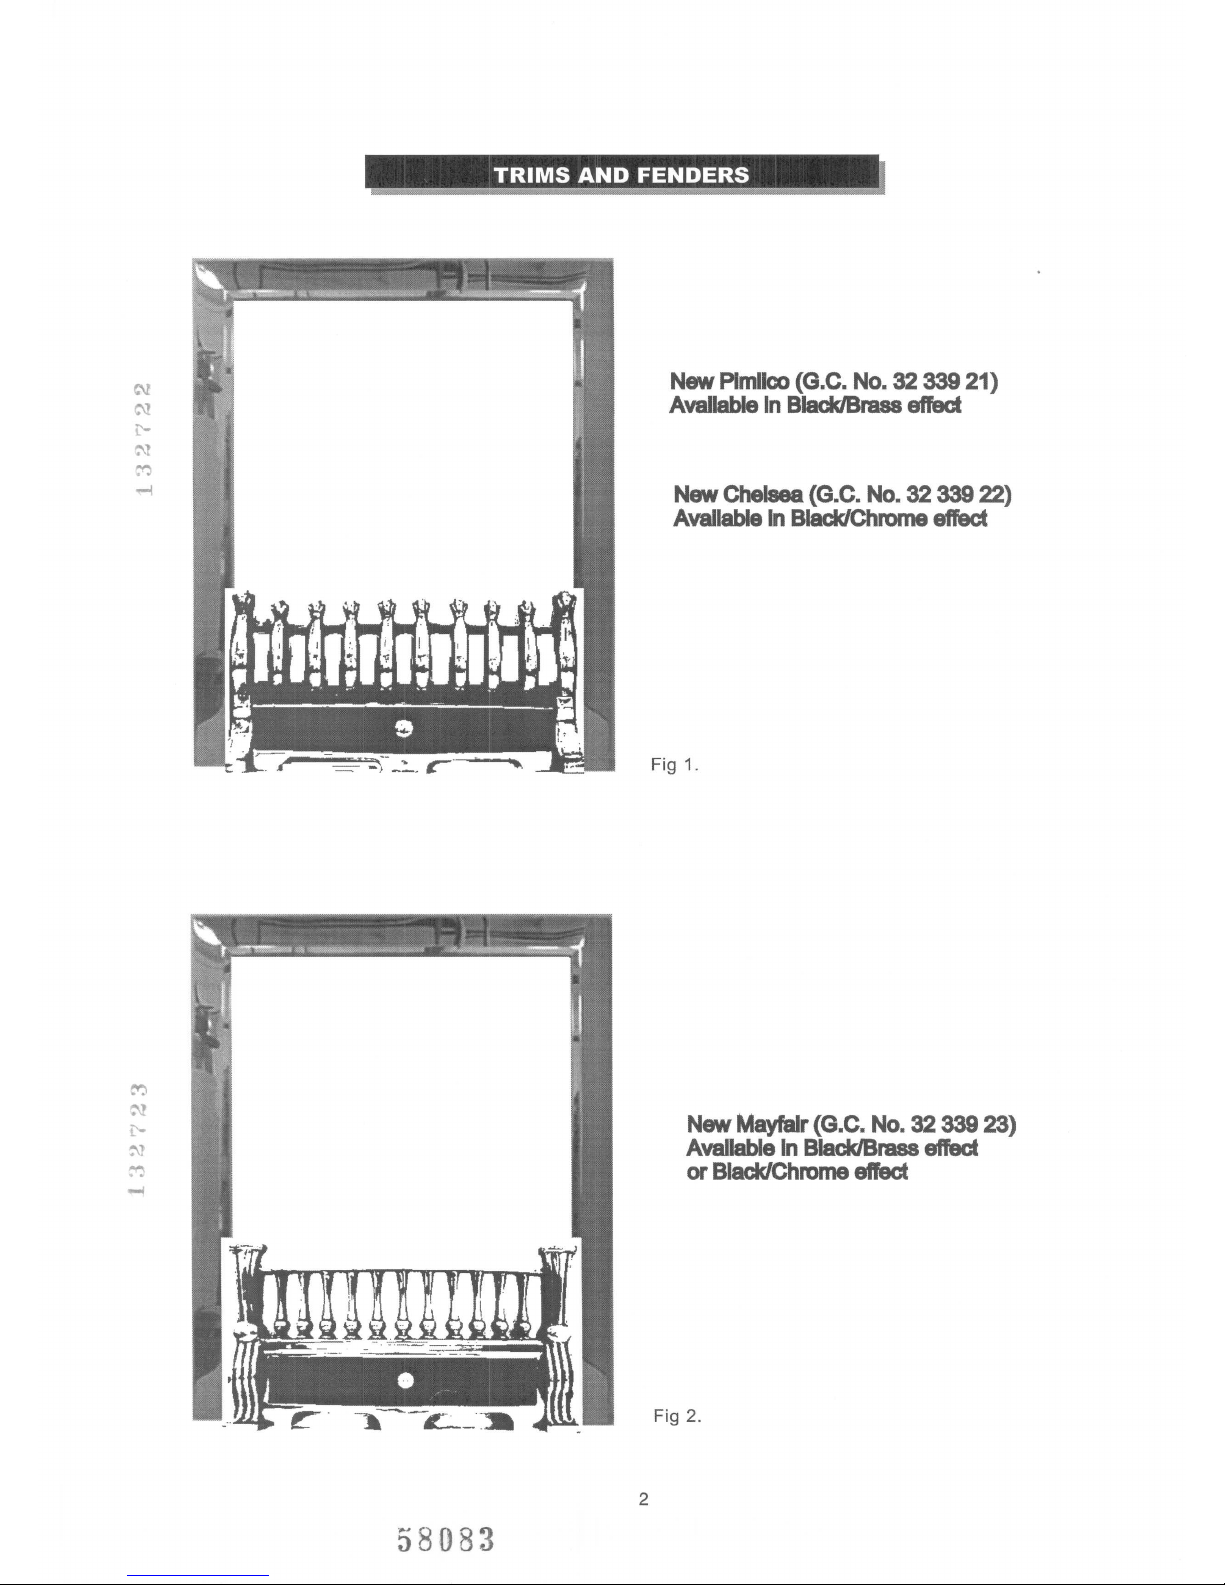
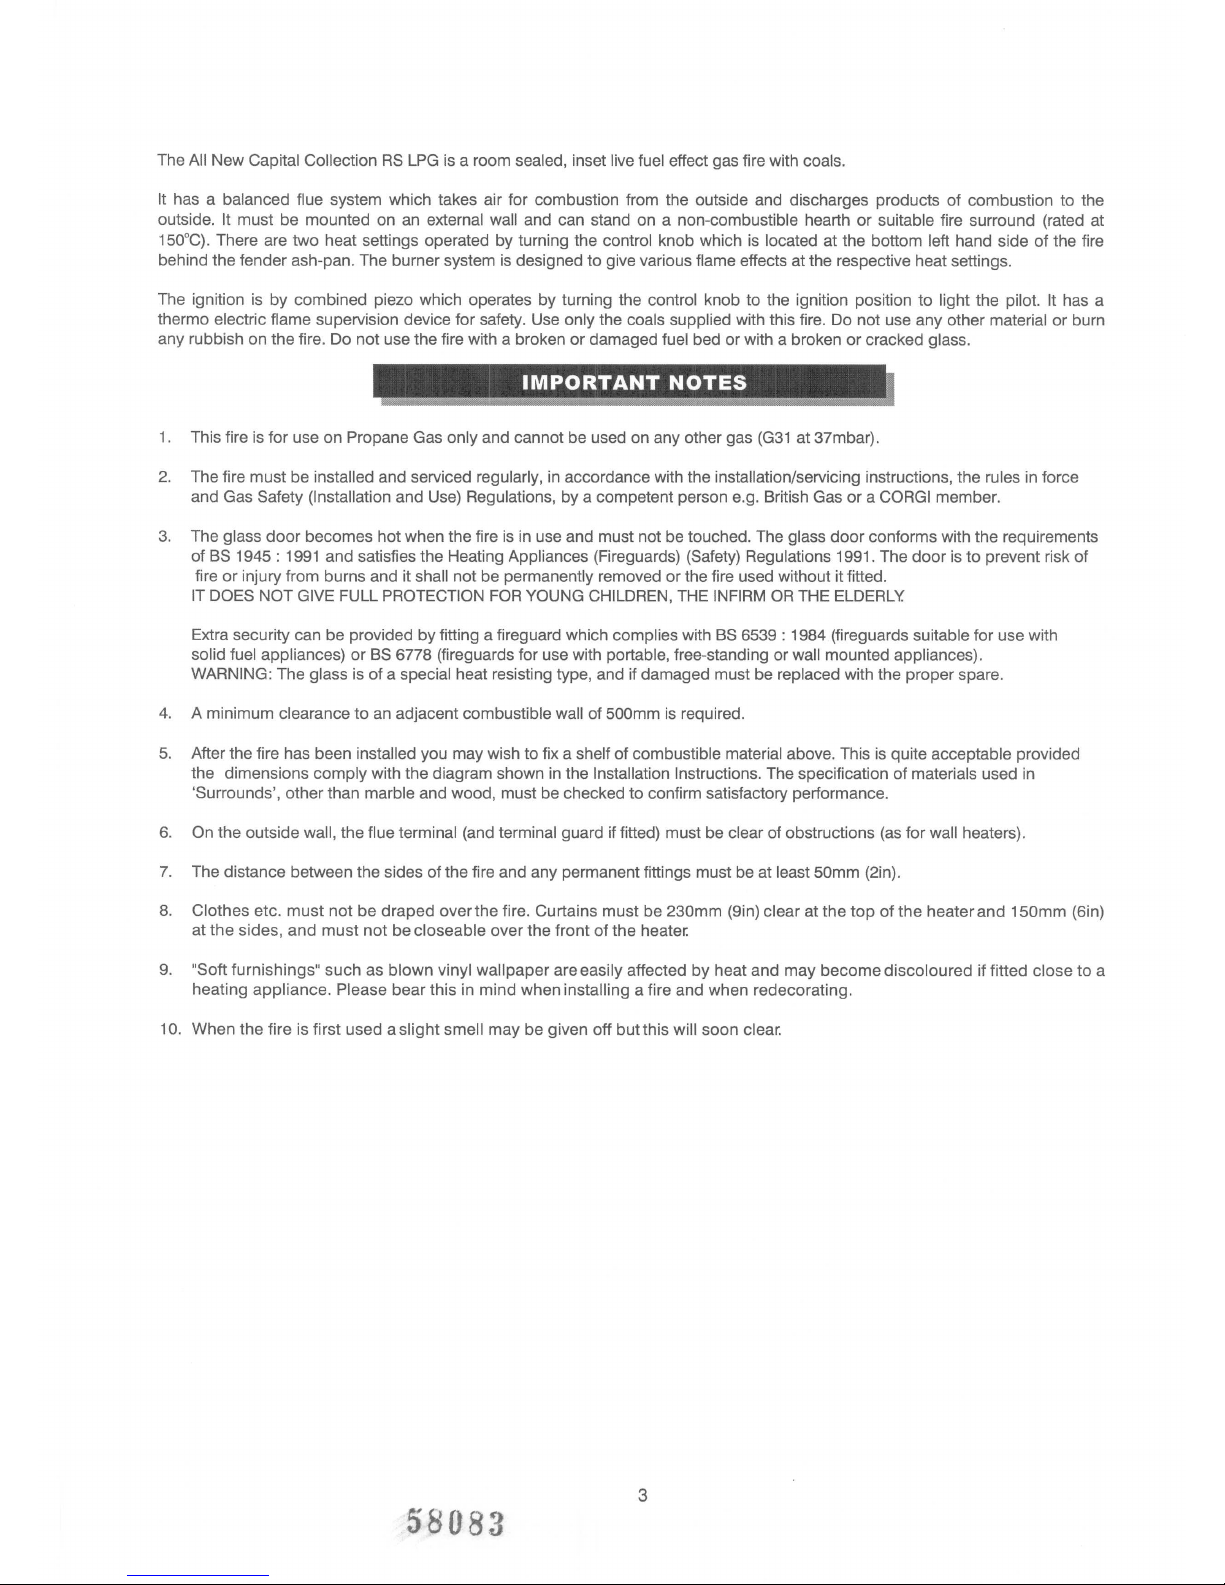
TRIMS AND FENDERS
New Plmllco (G.C. No. 32 339 21)
Available In BlacklBrass effect
New Chelsea (G.C. No. 32 339 22)
Available In Black/Chrome effect
New Mayfair (G.C. No. 32 339 23)
Available In BlacklBrass effect
or Black/Chrome effect
It has a balanced flue system which takes air for combustion from the outside and discharges products of combustion to the
outside. It must be mounted on an external wall and can stand on a non-combustible hearth or suitable fire surround (rated at
150°C). There are two heat settings operated by turning the control knob which is located at the bottom left hand side of the fire
behind the fender ash-pan. The burner system is designed to give various flame effects at the respective heat settings.
The ignition is by combined piezo which operates by turning the control knob to the ignition position to light the pilot. It has a
thermo electric flame supervision device for safety. Use only the coals supplied with this fire. Do not use any other material or burn
any rubbish on the fire. Do not use the fire with a broken or damaged fuel bed or with a broken or cracked glass.
IMPORTANT NOTES
2. The fire must be installed and serviced regularly, in accordance with the installation/servicing instructions, the rules in force
and Gas Safety (Installation and Use) Regulations, by a competent person e.g. British Gas or a CORGI member.
3. The glass door becomes hot when the fire is in use and must not be touched. The glass door conforms with the requirements
of BS 1945 : 1991 and satisfies the Heating Appliances (Fireguards) (Safety) Regulations 1991. The door is to prevent risk of
fire or injury from burns and it shall not be permanently removed or the fire used without it fitted.
IT DOES NOT GIVE FUll PROTECTION FOR YOUNG CHilDREN, THE INFIRM OR THE ELDERLY.
Extra security can be provided by fitting a fireguard which complies with BS 6539 : 1984 (fireguards suitable for use with
solid fuel appliances) or BS 6778 (fireguards for use with portable, free-standing or wall mounted appliances).
WARNING: The glass is of a special heat resisting type, and if damaged must be replaced with the proper spare.
5. After the fire has been installed you may wish to fix a shelf of combustible material above. This is quite acceptable provided
the dimensions comply with the diagram shown in the Installation Instructions. The specification of materials used in
'Surrounds', other than marble and wood, must be checked to confirm satisfactory performance.
8. Clothes etc. must not be draped overthe fire. Curtains must be 230mm (9in) clear at the top of the heater and 150mm (6in)
at the sides, and must not be closeable over the front of the heater.
9. "Soft furnishings" such as blown vinyl wallpaper are easily affected by heat and may become discoloured if fitted close to a
heating appliance. Please bear this in mind when installing a fire and when redecorating.
58083

TO LIGHT AND OPERATE
WARNING: If the flames are found to be extinguished and the control is not in the OFF position, the control knob should be returned to
the OFF position and no attempt should be made to light the gas until at least 3 minutes have elapsed.
SAFETY
The fire is fitted with a flame supervision device which will shut off the gas supply iffor any reason the pilot goes out.
The control knob is located behind the fender ash-pan door. Depress the control knob and rotate to the PILOT / IGN position until the
ignition sparks. If the pilot did not light return the control knob to the OFF position and try again. Once the pilot is lit keep the control knob
pushed in for a further 10 seconds before releasing. The pilot should remain lit. Refer to Fig. 7 for viewing ofthe pilot when lit.
When the pilot is established, Turn the control knob to the HIGH position. Your fire is now operating on full heat input. You may now turn
the control knob to the LOW position ifdesired.
HEAT SETTINGS
There are two heat settings HIGH and LOW (see Fig 3). Setting LOW is the lowest setting and
gives gas at a minimum rate to the burner
58083

CLEANING YOUR FIRE
(SEE COAL BED)
This product uses fuel effect pieces containing Refractory Ceramic Fibre (RCF), which are
man-made vitreous silicate fibres. Excessive exposure to these materials may cause temporary
irritation to eyes, skin and respiratory tract, consequently, it makes sense to take care when
handling these articles to ensure that the release of dust is kept to a minimum.
NOTE: Abrasive cleaners should never be used.
All cleaning should be carried out when the fire is cold. As the fire is used, the bright metal finish around the fuel bed will darken to
enhance the fuel effect. There is no need to use metal polish on these parts as the discoloration is normal. Generally the fire would
only need dusting. Any painted surface or metal part may be cleaned with a damp cloth. Any stains on the glass can be remove
with a non-abrasive cleaner or ceramic hob cleaner. The fuel effect components may be cleaned with a soft brush. It is
recommended that a vacuum cleaner is not used.
TO REMOVE THE GLASS DOOR
1. Remove the trim by pulling it off the bottom
magnets and lifting upwards.
2. Remove the door fixing screws, then
withdraw downwards and outwards
3. Replacement is the reversal of removal, but
slide the top of the door against the body
of the fire to ensure location in the top clip
58083

COAL BED
Place the coals as shown below.
Remove in the reverse order.
Should any soot accumulate on the coals, they should be removed for cleaning. Cleaning should be carried
out in a well ventilated place or in the open air, by gently brushing with the pieces held away from your face
to avoid inhaling the dust. We do not recommend the use of a normal domestic vacuum cleaner which may
blow dust back into the air.
DO NOT USE THE FIRE WITH BROKEN ORMISSING COALS.
USE ONLYTHE COALS SUPPLIEDWITH FIRE.
co
C'-l
i:"-
N
I-
~
c".:;
~
N
-::!
N
.•.1
2. Slide the rear coal down against the rear of the
fire, where it sits on the coal base. Slide the back
brick into the slot of the rear coal, ensuring it is
clear of the flue outlet.
00
N
i:"-
:'\1
~
I-
....•
c".:;
t\,j
-::!
N
er:
The front coals interlock and must be fitted in the 4.
correct order. Feed in the front RH coal, decorative
face forward, until it sits on the front flange and is
positioned forward by it's spacers.
Repeat for the LHfront coal.
58083
Position the six loose coals in their locations in
the coal base, and resting on the ledge of the rear
coal. Ensure that the decorative faces are
uppermost and that the narrow end of each coal
is at the front.

SPARES AND SERVICE
For spares and service apply to your local supplier or installer stating the model (see page 2 for G.C. No.) and finish. This
information and the serial number of the appliance isshown on the data badge located on the left hand side of the base of the
appliance.
Advantage should be taken of yearly servicing/inspection by a CORGI registered service agent to ensure continued safe and
efficient operation of the fire.
GRATEGLOW FIRES
Mill Lane, Old Swan, Liverpool. L13 4AJ. England.
Telephone: 0151-252-6610 Fax: 0151-220-5277
Website: www.grateglow.com Email: info@grateglow.com
A ~ GROUP COMPANY
58083
 Loading...