

Page 1

J
K
310 Series
MANUAL NO.JS310-UM-251
SignJet
Service Manual
JS310-UM-251-03-9370
Page 2

iJS310-UM-251-9370
HISTORY OF REVISIONS
No. Date issued Description of revision Page Edition
1 06.08.31 First printing All 01
2 06.12.07 Additional parts added for the parts list. 115 to 132 02
3 07.07.18 Part number of the GTC Flange Set was corrected. 130 03
Page 3

iiJS310-UM-251-9370
CONTENTS
1. Safety information
...............................................................................................................................1
1.1 Safety precautions
.................................................................................................................................1
1.2 Important Safety Information
.....................................................................................................2
1.3 Caution When Using Printer
........................................................................................................2
1.4 Guide When Using Ink
......................................................................................................................2
1.5 Choosing Printer Installation Place
........................................................................................3
1.6 Warning, Caution and Attention
...............................................................................................3
2. Technical Parameters
.......................................................................................................................5
3. Product Configuration
....................................................................................................................7
3.1 Main Unit
....................................................................................................................................................7
3.2 Accessories
.................................................................................................................................................8
3.3 Consumables
...........................................................................................................................................12
4. Basic Panel Operation
...................................................................................................................13
4.1 Menu Structure of Control Panel
............................................................................................13
4.1.1 Function description of the keys ..................................................................................................13
4.1.2 Menu structure ...................................................................................................................................14
4.2 Description of menu function
.....................................................................................................15
4.3 LCD display for normal usage
..................................................................................................21
4.3.1 LCD display during printing .......................................................................................................21
4.3.2 LCD display when printing is paused ......................................................................................21
4.3.3 System warning and error display .............................................................................................22
4.4 Printing Steps
........................................................................................................................................23
5. Assembling the Printer and the Installation Procedure
.............................25
5.1 Notes on the Installation Environment
................................................................................25
5.1.1 Installation Space ..............................................................................................................................25
Page 4

iiiJS310-UM-251-9370
5.1.2 Installation Space ..............................................................................................................................25
5.1.3 Power Supply Specifications .........................................................................................................26
5.2 Removing the Printer from its Packaging
........................................................................27
5.3 Mounting the Ink Tanks
................................................................................................................31
5.4 Mounting the Waste Ink Tanks
................................................................................................32
5.5 Connecting the Power Supplies
.................................................................................................33
5.6 Setting the Print Speed
...................................................................................................................34
5.6.1 Turning on the printer power supply ........................................................................................34
5.6.2 Setting the print head carriage speed .......................................................................................34
5.6.3 Setting the media feed speed ........................................................................................................34
5.7 Executing the Moving Test
...........................................................................................................35
6. Initial Ink Induction Procedure
..........................................................................................37
6.1 Initial Cleaning of the Ink Supply Tubes and the Sub Tanks
.............................37
6.2 Initial Cleaning of the Cleaning Solution Supply Tubes
........................................44
6.3 Print head height Adjustment
....................................................................................................46
6.4 Mounting the Print heads
.............................................................................................................47
6.5 Initial Print head Cleaning Procedure
................................................................................51
6.6 Ink Induction
.........................................................................................................................................54
7. Media Loading Procedure
.........................................................................................................57
7.1 Loading the Media
..............................................................................................................................57
7.2 Adjusting the auto feed function
..............................................................................................61
7.3 Winding the Media onto the Take-up Unit
.......................................................................63
7.4 Adjusting the auto take-up function
......................................................................................66
7.5 Setting the Media Width
................................................................................................................68
8. Print head Adjustment Procedures
.................................................................................69
8.1 Setting the Print head Drive Voltage
....................................................................................69
Page 5

ivJS310-UM-251-9370
8.2 Installing the Printer Adjustment Utility Software “Try”
...................................70
8.3 Connecting the Print Heads
........................................................................................................72
8.4 Launching the Try Utility
.............................................................................................................73
8.5 Printing the Nozzle Check Pattern
........................................................................................74
8.6 Adjusting the Positions of Print heads of the Same Color
.....................................75
8.7 Adjusting the Positions of Print heads of a Different Color
.................................79
8.8 Media Feed Amount Compensation
......................................................................................81
8.9 Bi-directional Printing Band Adjustments
......................................................................84
9. Procedures when leaving the printer for a long time
...................................87
9.1 Dispose the ink from the printer
..............................................................................................87
9.2 Induction of the cleaning solution
...........................................................................................88
9.3 Moisturizing of print head
...........................................................................................................89
10. Procedures when you transport the printer
........................................................ 91
10.1 Dispose the cleaning solution from the printer
...........................................................91
10.2 Fixing the printhead carriage
.................................................................................................91
10.3 Discard the waste ink
....................................................................................................................92
11. Troubleshooting
.................................................................................................................................93
11.1 Printing is not performed
...........................................................................................................93
11.2 Unsatisfactory printing
................................................................................................................93
11.3 Cleaning cannot be performed
...............................................................................................96
11.4 Other problems
...................................................................................................................................97
11.5 Additional Troubleshooting
......................................................................................................98
12. Consumables
......................................................................................................................................103
13. How to use the Print head position alignment jig
....................................... 105
Page 6

vJS310-UM-251-9370
14. Ink supply system diagram
.................................................................................................107
15. Recommended print conditions
.....................................................................................109
16. Upgrading of firmware
............................................................................................................ 111
17. AC cable alteration procedure from CEE to NEMA
...............................113
18. Maintenance parts lists
...........................................................................................................115
18.1 Recommend Parts List
................................................................................................................115
18.2 Electrical part
................................................................................................................................... 116
18.3 Control panel
.....................................................................................................................................119
18.4 Main Frame
........................................................................................................................................120
18.5 Sensor part
..........................................................................................................................................122
18.6 Inkjet part
............................................................................................................................................124
18.7 Cables
......................................................................................................................................................129
18.8 Accessories
...........................................................................................................................................130
Page 7

Page 8

1. Safety information
1JS310-UM-251-9370
1. Safety information
Before use your Inkjet Digital Printer, please read following safety information carefully and pay more
attention to the cautions on the Printer.
1.1 Safety precautions
• Install over-current and over-voltage facility for printer power.
Failure to follow this guide could result in electric shock, personnel injury and fire.
• Clean the ink channels with solution matching to the used ink.
Failure to follow this guide could result in filter clog and ink channel blockage.
• Besides the ground-line for power, another unattached ground-line should be connected outdoor.
Failure to follow this guide could result in abnormal work status of printer.
• Static prevent facility should be settled on the carpet or in dry climate.
Failure to follow this guide could result in print head or other parts damage on the printer.
• Waiting for 10 minutes at least after power off to transport, connect and check the printer.
Failure to follow this guide could result in electric shock.
• Printer should be settled on flat floor and be adjusted horizontally.
Failure to follow this guide could reduce the print resolution.
• Clean the print head and ink channel with solution after long-time printing.
Failure to follow this guide could result in print head damage and ink channel clog.
• Never put hands on depend fence while the printer is working.
Failure to follow this guide could result in hand crushing.
• Never put hands into the heating board while the board is heating.
Failure to follow this guide could result in hand scald.
• Never put hands on rotating rollers while the printer is working.
Failure to follow this guide could result in hand crushing.
• Don’t open the electric tank in normal condition.
Failure to follow this guide could result in electric shock.
Page 9

1. Safety information
2JS310-UM-251-9370
1.2 Important Safety Information
• Do not block the hole on the cover.
• Do not insert any object into the Printer groove. Don’t let any kind of liquid splash into Printer.
• Only use the power supply according to the label.
• Connect all the equipment to a properly grounded socket. Avoid the socket in the same circuit with copy
machine or air conditioner.
• Avoid to using the socket controlled by the wall switch or by auto timer.
• Please keep Printer away from the latent source of electromagnetic disturbance. For example,
loudspeaker or wireless phone.
• If you use additional cable, please make sure that total amperage of the equipment connecting with
cable shall not exceed the amperage of the power supply. Moreover, the amperage of all equipment
connecting with wall socket does not exceed the amperage of the wall socket.
• Do not use damaged Electrical Power wire.
• Do not repair Printer by yourself.
• Shut off the power and ask experienced technician for help, if the following situations occur:
Power cable or plug is damaged.
Liquid splashes into printer.
Printer falls down or broken.
Printer cannot work properly or change in property.
1.3 Caution When Using Printer
• Don’t use your hand to move print head; otherwise the printer will be damaged.
• Always use power switch to turn On/off the printer. Before shutting down the Printer, do not pull out
Power Supply wire or Data Wire.
• Before moving the printer, please make sure the print head is fixed at original position.
1.4 Guide When Using Ink
• Never put the ink near open flames. Failure to follow this warning might result in fire.
• Do not swallow ink or avoid its splashes on the eye.
• If ink spills on the skin, please wash with soap and water. If ink splashes into eye, please wash with
water immediately and consult a doctor as required.
• If it is swallowed, do not try to vomit it forcefully, but see a doctor.
• Do not shake the ink cartridge in case ink leak is caused.
• After using for a certain period (generally 3 months), you should take off the ink cartridge, clean it and
dry it.
• Please keep surrounding clean when you replace a new ink container. It helps you improve printing
quality.
• Do not mix the waste ink with any other chemicals and solvent when you displace the waste ink.
Also dispose the waste ink as the industrial waste (waste oil).
Page 10

1. Safety information
3JS310-UM-251-9370
1.5 Choosing Printer Installation Place
• Put printer at a horizontal and stable place with enough space; otherwise, the Printer may not work
properly.
• Don’t leave Printer at a place where temperature and humidity change severely. Avoid direct sunlight,
strong light or heat.
• Avoid shaking or vibrating.
• Keep sufficient room around printer for air circulation.
• Place printer nearby the wall socket, so that it is easy to connect or disconnect the power supply
1.6 Warning, Caution and Attention
Warning
Must obey in order to ensure personal safety.
Caution
Must obey in order to protect the machine.
Attention
Contain some important and useful information about operation.
Page 11

Page 12

2. Technical Parameters
5JS310-UM-251-9370
2. Technical Parameters
Product JS310-25ES JS310-18ES
Printer Technique Xaar 126 300dpi piezo head, 8 head inside
Resolution 200dpi, 400dpi
Color Quality Photo effect including 2 levels: Basic and High Quality
Max. Media Width 2530 mm
(thickness less than 1 mm)
1860 mm
(thickness less than 1 mm)
Man. Printing Width 2471 mm 1800 mm
Min. Printing Size A4 or 210 mm (thickness less than 1 mm)
Output (m2/h)
(Designed values, not from
measurement)
Mode Output (m2/h)
180 x 200 dpi 2pass 27.5
180 x 200 dpi 4-2pass 14.5
180 x 200 dpi 3pass 19.2
180 x 200 dpi 6-3pass 10.5
180 x 200 dpi 4pass 14.5
180 x 200 dpi 8-4pass 7.5
180 x 200 dpi 6pass 10.5
180 x 200 dpi 8pass 7.5
300 x 300 dpi 14.5
Display LCD display with 8 keys panel, self-diagnosis available
Ink Type Solvent based ink: C, M, Y, K and solvent based solution
Ink Supply Mode 300 ml/min auto ink supply by electric pump, volume of main tank
1000 ml/color
Ink Inspection System Auto/manual ink supply, low ink detector
Printing Driver Support many RIP drivers
Operation Platforms Multi-operation platforms (Windows 2000, XP, etc.)
Media Type Flex, vinyl, window film, polyester, etc.
Media Transmission Roll media or sheet media (bigger than A4 or 210 mm)
Media Processing Auto feeding and take-up system,
weight less than 70 kg/roll
Auto feeding and take-up system,
weight less than 40 kg/roll
Print head Height 3 mm to 5 mm above media adjustable
Pre-heater & Dry System Auto heating after electrifying, the tiptop temperature is about 40˚C
Clamp Manual adjustment media width
Print head Cleaning System Auto positive pressure cleaning
Safety System Inside safety lock with auto shutting down function
Page 13

2. Technical Parameters
6JS310-UM-251-9370
Product JS310-25ES JS310-18ES
Print Interface USB2.0 interface (Windows 2000, NT, XP, etc.)
Noise
Printing status less than 70 db / waiting status less than 40 db (ISO7779)
Printer Size (including ink tank) / Net Weight
L 3820 mm x H 1190 mm x W 890 mm / 330 Kg L 3103 mm x H 1160 mm x W 890 mm / 270 Kg
Package Size / Net Weight
L 3920 mm x H 1365 mm x W 960 mm / 470 Kg L 3220 mm x H 1365 mm x W 960 mm / 400 Kg
Input Voltage AC 200 to 240V, 50Hz/60Hz
Voltage for the Heating and Drying System
AC 200 to 240V, 50Hz/60Hz
Power (AC 220V applied) 2000W
Working Environment Temperature: 20˚C to 28˚C, Humidity: 40% to 70%
The parameters above are subject to be changed.
Page 14

3. Product Configuration
7JS310-UM-251-9370
3. Product Configuration
3.1 Main Unit
(1)
(2)
(3)
(4)
(5)
(6)
(9)
(10)
(8)
(7)
(1) LCD Control Panel
(2) Press roller control pole
(3) Ink tanks & Solution tank
(4) DRYER Power Socket
(5) Take-up Roller
(6) Cleaner
(7) Media Feeding Roller
(8) Waste Ink Tanks
(9) PRINTER Power Socket & HEATER Power Socket
(10) Media Feeding System
Page 15

3. Product Configuration
8JS310-UM-251-9370
3.2 Accessories
No. Item Q’ty Remark
1 Printhead 8 Xaar 126-300
2 Power cable 3 UL cord/250V/4 m
3 USB interface cable 1 4 m
4 Ink tank 4
5 Solution tank 1
6 Screw M4*12 8 Spare parts
7 File bag 1
8 Tool box 1
9 Software CD 1 RIP
10 Software CD
1 Utility, “Try”
11 Non-woven fabric
1 2 m
12 Sealing washer
2 Spare parts
13 Wet keeping frame
1
14 Brush
4
15 User’s Manual
1
16 Set-up Guide
2 English: 1, Spanish: 1
17 Maintenance of print head Manual
1
18 Quick Install Manual
1
19 Try Important Setup Sheet
1
20 Waste ink tank
2
21 Bracket, Waste ink tank
2
22 ø3/5 Soft tube
1 1 m, Spare part
23 ø4/6 Soft tube
1 1 m, Spare part
24 Clamp, Printhead 10
25 Inlet tube assembly
4 Tube connector for 126 printhead x 2
ø3/5 Soft tube (100 mm) x 2
ø3/5 Soft tube (200 mm)
F type 3/5 connector
Y type 3-way connector
26 Outlet tube assembly
8 Tube connector for 126 printhead
ø3/5 Soft tube (80 mm)
F type 3/5Connection cable, Printhead
connector
Cap, Connector
27 Connection cable, Printhead
8
28 Screw for printhead alignment
3
29 Flange, Take-up roller
2
30 Light bulb
1 Spare parts
31 Empty core
2 Inner diameter 3 in, Length 36 in
32 Packing list
1
33 Jig, Head height adjustment
1
34 Tube clamper
8
35 AC Plug
3 250V
36 Media Flange
2
Page 16

3. Product Configuration
9JS310-UM-251-9370
No.1 Printhead No.2 Power cable
No.3 USB interface cable No.4 Ink tanks, No.5 Solution tank
No.6 Screws, M4*12 No.7 File bag
No.8 Tool box No.9, 10 SSoftware CD
Page 17

3. Product Configuration
10JS310-UM-251-9370
No.11 Non-woven fabric No.12 Sealing washers
No.13 Wet keeping frame No.14 Brushes
No.20 Waste ink tank No.21 Bracket, Waste ink tank
No.22, 23 Ø3/5, Ø4/6 Soft tube No.24 Clamp, Printhead
Page 18

3. Product Configuration
11JS310-UM-251-9370
No.25 Inlet tube assembly No.26 Outlet tube assembly
No.27 Connection cables, Printhead No. 28 Screws for printhead alignment
No.29 Flange, Take-up roller No.30 Light bulb
No.31 Empty core No.32 Jig, Head height adjustment
Page 19

3. Product Configuration
12JS310-UM-251-9370
No.34 Tube clamper No.35 AC Plug
No.36 Media Flange
3.3 Consumables
• Ink
Eco-Friendly Solvent Eco-Friendly Solvent Pure Solvent
Black
IJ-80050Bk IJ-80100K IJ-80200K
Cyan
IJ-80050C IJ-80100C IJ-80200C
Magenta
IJ-80050M IJ-80100M IJ-80200M
Yellow
IJ-80050Y IJ-80100Y IJ-80200Y
CAUTION: Do not use non-specified inks.
• Flash solution
IJ-80050S (For IJ-80050 Ink)
IJ-80100S (For IJ-80100 Ink and IJ-80200 Ink)
Page 20

4. Basic Panel Operation
13JS310-UM-251-9370
4. Basic Panel Operation
4.1 Menu Structure of Control Panel
LCD
Function Keys
Direction Keys
4.1.1 Function description of the keys
Direction keys
(1) Operation via control panel:
UP and DOWN ARROW key: Scroll the menus for selection; reduce or increase the values on LCD.
LEFT and RIGHT ARROW key: Move the cursor position over the number string on LCD.
Function keys
(1) ONLINE:
Switch the printer online and offline / press down and hold it for several seconds to pause printing.
Waiting
Online
(2) ESC:
Cancel operation and return to up-level menu.
(3) ENTER:
Confirm and execute the operation.
(4) FUNC:
Shift to special function. Combine with LEFT ARROW key to test print when the printer is waiting.
Key combination
FUNC + LEFT ARROW key. Test print when printer is waiting.
Page 21

4. Basic Panel Operation
14JS310-UM-251-9370
Basic operation
After power on the printer, the system executes X and Y motion test and p/h test.
Booting >System
>Y Motor
>X Motor
Check ->Print head
After self-test, the system moves the p/h carriage back to original position. The LCD displays printer model
and version number and then shift to basic operation menu shown as below. That stands for the printer is ready.
Menu -> 1. Ink Status +
2. Heat Status +
3. Cleaning Toll +
OFFLINE 4. Print para +
4.1.2 Menu structure
Menu structure includes main menus and sub menus. Main menus followed by “+” s have sub menus inside.
Submenus followed by “-” s have no lower level inside.
Main menu includes items as below:
-> 1. Ink Status +
2. Heat Status +
3. Cleaning Tool +
4. Print para +
5. Application +
6. Engineer Set +
Press UP and DOWN ARROW keys to scroll the menus upward and downward. Press ENTER to unwrap
submenus. For example, while the arrow points to “1. Ink Status”, press ENTER to unwrap the submenu. LCD
displays details of submenu M1 as below:
On the LCD, M1 stands for this submenu under main menu No.1. Here press ESC key, it returns the display to
main menu.
Arrow points to the first line on the LCD. Scroll the submenus by pressing UP and DOWN keys same as main
menu. The submenu followed by a “-” means has no lower submenu inside. Press ENTER key to execute the
operation. Here press ESC key, operation will be canceled.
Menu -> Ink Status
M1 Cha C M Y K cm
Rn _ _ _ _ _ _ _
OFFLINE Al _ _ _ _ _ _ _
Page 22

4. Basic Panel Operation
15JS310-UM-251-9370
4.2 Description of menu function
Main menu Submenu Function description
Ink Status
Ink Status
Ch A C M Y K c m
Rn _ _ _ _ _ _ _
Al _ _ _ _ _ _ _
Ink status displays.
The LCD display details as below:
Ink Status
Cha C M Y K cm
Rn _ _ _ _ _ _ _
Al _ _ _ _ _ _ _
Item Ch: stands for ink channels. A means all
channels;
Item Rn: displays ink supply status of
corresponding channel;
Item AL: displays ink lack alarming of
corresponding channel; Press
ENTER
to refill
ink and cancel alarming.
Heat Status
Heat Status
FH Pre P/H
Tem 00 00 00
Set 00 00 00
Heating status displays.
The LCD display details as below:
Heat Status
FH Pre P/H
Tem 00 00 00
Set 00 00 00
Item
Tem
: displays actual temperature;
Item
Set
: displays setup temperature.
Cleaning Tool
Firing
Press
ENTER
key to execute the operation,
“
Busy
” flashes on the LCD. P/Hs spray
downward to prevent nozzle clogs. The LCD
stops flashing after firing finishes.
Press
ENTER
key again to execute P/H firing
one more time if necessary.
Jam Test
Press
ENTER
key to execute the operation of
test printing.
Clean POS
Press
ENTER
key to execute the operation of
moving P/H carriage to cleaning position.
Home Post Press
ENTER
key execute the operation of
returning the P/H carriage to original position.
Auto Clean Press
ENTER
key execute the operation of
negative pressure cleaning automatically.
Page 23

4. Basic Panel Operation
16JS310-UM-251-9370
Main menu Submenu Function description
Print Para
Print Post
Number string “XXXX” flashed on the LCD.
Here press and key to move the cursor
position over the number string and press
LEFT
or
RIGHT
ARROW key to increase or
reduce the value of the flashing number. Press
ENTER
to save the number as print position.
Images and test print start from this position.
Here press key combination
FUNC
+ UP
or
DOWN
ARROW key to move the media
forward or backward; press key combination
FUNC
+
LEFT
ARROW key to move the
P/H carriage to printing position It will tell the
position set well or not. Press any key to return
the P/H carriage to original position.
Bi-dir. Adj
This function is used to adjust bi-direction
printing to ensure bi-direction printing quality.
The LCD displays details as below after
pressing
ENTER
key:
Menu -> 2BID Adjust
XXXX
OFFLINE
Press
UP
or
DOWN
ARROW key to increase
or reduce the value “
XXXX
” by 1. Press
ENTER
to save it as bi-direction compensation.
To adjust the compensation accurately, adjust
the P/Hs to an inch in TRY one by one.
Print Speed
This function is used to adjust the scan speed of
the P/H carriage. The LCD displays details as
below:
Menu -> 2Pirnt Speed
Norm
OFFLINE
Press UP or
DOWN
ARROW key to select
from the 3 options.
High
scan speed will reduce printing quality.
Low
scan speed will increase printing quality
but reduce printing speed. The suggestion is
Norm
.
Page 24

4. Basic Panel Operation
17JS310-UM-251-9370
Main menu Submenu Function description
Print Para
Feed Speed
The LCD displays details similar to Print speed.
“
Norm
” flashes as the default option.
Press UP or
DOWN
ARROW key to select
from the 3 options.
The suggestion is “
Norm
”
Firing Vol
“
XXXX
” flashes on the LCD.
Press UP or
DOWN
ARROW key to increase
or reduce the value by 1.
This value is the firing volume of P/Hs for auto
spray (that means all nozzles are unclogged).
Flash Mode
3 options altogether are ready for flash mode
selection: 0, 1 and 2.
0 stands for P/H does not flash during
printing.
1 stands for P/H flashes only once during
the whole printing.
2 stands for P/H flashes once every
forward and backward.
Press or key to select from the 3 options.
Page 25

4. Basic Panel Operation
18JS310-UM-251-9370
Main menu Submenu Function description
Print Para
PH Volt. Set
This function is used to set Voltage of P/Hs.
The LCD displays details as below:
Menu -> PH 1 Voltage
PH 2 Voltage
PH 3 Voltage
OFFLINE PH 4 Voltage
Here press
UP
or
DOWN
ARROW key to
scroll the submenu. The LCD will display
values as below:
Menu ->1 PH 1 Voltage
0099
0182
OFFLINE
The upper number is adjustable EF value of P/H
and the down number indicates voltage value of
P/H.
Press
LEFT
or
RIGHT
ARROW to move the
cursor position over the number string and press
UP
or
DOWN
ARROW key to increase or
reduce the flashing number of EF value.
The 8 P/Hs setup from 1 to 8:
PH 1 Voltage
for P/H C1;
PH 2 Voltage
for P/H C2;
PH 8 Voltage
for P/H K2.
Application
UV Lamp Power No operation.
Front Heater
“45” flashes on the LCD as default setting at the
unit of centigrade degrees. Press
UP
or
DOWN
ARROW key to increase or reduce the value of
temperature.
For normal condition, keep the default value.
Pre Heater
“40” flashes on the LCD as default setting at the
unit of centigrade degree. Press
UP
or
DOWN
ARROW key to increase or reduce the value of
temperature.
For normal condition keep the default value.
PH Heater No operation.
Page 26

4. Basic Panel Operation
19JS310-UM-251-9370
Main menu Submenu Function description
Application
Media Detect
Press
ENTER
to execute the operation, the
LCD displays OFF means the function is switch
off when the printer is waiting.
OFF
(function switch off)
Press UP or
DOWN
ARROW key to switch on
the function.
ON
(function switch on)
Pull up the press pole and then pull it down, the
LCD displays details as below:
Menu Media Detect
Star: 0000mm
Lenth: 0000mm
OFFLINE
Press
ENTER
key to start media edge
detecting. Press
ESC
to cancel the operation.
After detecting, “OK” displays means the
detecting is successful and saves the result as
print position, which should add the value of
offset set at below step. “
Error
” displays means
the detecting is failed and the value of print
position does not change.
Media Offset
“XXXX” flashes on the LCD. Press Up or
Down key to increase or reduce the value. This
value added to the value of media detecting is
saved as the value of print position.
Take Up Detect No operation.
T Neg. Pressure No operation.
Curve of ink
Select ink curves in the 12 options from 0 to 11.
LCD displays details as below:
1 2 3 4
The name of ink curve indicates as below.
1.
Xr
stands for XAAR print head.
2. 2 stands for 200 dpi print head.
3
stands for 300 dpi print head.
3. S stands for solvent based ink type.
O
stands for oil based ink type.
U
stands for UV ink type.
4. Ink name
Page 27

4. Basic Panel Operation
20JS310-UM-251-9370
Main menu Submenu Function description
Engineer Set
Clean Post No operation.
Printer Width No operation.
Moving Test
Press
ENTER
to execute the operation.
The LCD displays details as below:
Menu ->Moving Test
0000
OFFLINE
And P/H carriage moves back and forth to
simulate printing, but P/H not spray.
It’s used for mechanical test. The number on the
LCD indicates times the P/H carriage moves
back and forth.
Default Set No operation.
Y Test Speed No operation.
X Test Speed No operation.
Page 28

4. Basic Panel Operation
21JS310-UM-251-9370
4.3 LCD display for normal usage
4.3.1 LCD display during printing
Printing
TORAL: XXXX
FINISH: XXXX
ONLINE RIP READY: XXXX
Total lines for printing
Lines of RIP ready
Lines finished
The LCD displays total lines for printing, lines finished and lines of RIP ready during printing.
4.3.2 LCD display when printing is paused
P/H nozzles may be clogged during printing, so it needs cleaning.
Press and hold
ONLINE
key to pause the printing until the LCD displays “
Busy
”.
The P/H carriage returns to original position after it finishes the current line printing. The LCD displays menus
as below:
Waiting 1. Ink status
2. Heat status
3. Cleaning tool
ONLINE 4. Continuous
5. Cancel
Press UP or
DOWN
ARROW key to select “
Cleaning tool
” function in the menu and execute cleaning.
Select “
Continuous
” to continue printing or “
Cancel
” to cancel printing.
Page 29

4. Basic Panel Operation
22JS310-UM-251-9370
4.3.3 System warning and error display
1. Warning:
Warn1: UV lamp is NOT ready;
Warn2: Press pole is NOT pulled down;
Warn3: The system is executing ink refilling;
2 Error:
When one of the errors listed below occurs during printing, the printer will run normally but give alarm
for warning.
Err5: Ink refill overtime;
Err6: The safety bottle is full;
Err7: For solvent based printer: The waste ink bottle is full;
For UV printer: The safety bottle in manometer is full;
Err8: Null
Errors listed below indicate the detail for further check when self test fails
Err9: Y raster count direction differs from motion direction;
Err10: Y raster signal is NOT detected;
Err11: Y raster error too big;
Err12: Reverse count abnormal;
Err13: Self test for main board failed;
Err14: Version of assistant board NOT matches main board;
Page 30

4. Basic Panel Operation
23JS310-UM-251-9370
4.4 Printing Steps
On normal condition, the steps are as follows:
1. Power on the printer
2. Turn on the computer
Note:
It is recommended to turn on the printer before computer. Otherwise the connection may fail.
3. Load media, put down the press bar to press on media.
4. Clean the head and start the self-diagnosis till no nozzle clogging.
5. Press ONLINE.
Menu -> 1. Ink Status +
2. Heat Status +
3. Cleaning Toll +
OFFLINE 4. Print para +
OFFLINE
MODE
Offline mode Online mode
6. Trim the pattern for printing, and save it in computer.
7. Open GRAPHTEC RIP.
8. Create new file.
9. Read the pattern for printing.
10. Adjust the position, size, property, and resolution of the pattern.
11. Printer setting
(1) Select File/Printer setting. Below dialogue box shows:
(2) Select the type of printer as “GRAPHTEC Printer” and the model as “JS300-18ES”.
Page 31

4. Basic Panel Operation
24JS310-UM-251-9370
(3) Click the “Printer setting”. Set the relevant value in the following dialogue box.
a. Select the printing resolution.
b. Select BID or single direction printing. BID has higher efficiency than single direction.
Note:
The horizontal parameters, BID compensation and feeding compensation should be adjusted already
before your printing; otherwise the printing quality will be reduced.
Details of the functions above and others referred to the Sign Jet RIP Manual
12. Click “Printing Project” to print.
13. LCD displays as below when printing:
Printing
TORAL: XXXX
FINISH: XXXX
ONLINE RIP READY: XXXX
Total lines for printing
Lines of RIP ready
Lines finished
14. If clogging appears during the printing, press ONLINE for a longer time (3s) to pause printing for print head
cleaning. After cleaning, press ONLINE to go on printing.
Cleaning procedure during printing:
P/H nozzles may be clogged during printing, so it needs cleaning.
Press and hold ONLINE key to pause the printing until the LCD displays “Busy”. The P/H carriage returns to
original position after it finishes the current line printing. The LCD displays menus as below:
Waiting 1. Ink status
2. Heat status
3. Cleaning tool
ONLINE 4. Continuous
5. Cancel
Press UP or
DOWN
ARROW key to select “
3. Cleaning tool
” function in the menu and execute cleaning.
Select “
Continuous
” to continue printing or “
Cancel
” to cancel printing.
15. Press ONLINE when the printing is all finished. Then the printer is under the Offline mode.
Note:
To cancel printing operation, usually do in RIP. If you want to cancel printing directly on the printer,
press ONLINE button after the menu “printing cancel” appears in software.
Page 32

5. Assembling the Printer and the Installation Procedure
25JS310-UM-251-9370
5. Assembling the Printer and the Installation Procedure
5.1 Notes on the Installation Environment
5.1.1 Installation Space
Sufficient space must be left in front of, behind, and at both sides of the printer not only for normal operating
procedures such as the replacement of consumable, the handling of printed materials, and for ventilation, but also
for the replacement of parts in the event of a malfunction. Ensure that the space left around the printer is as shown in
the following diagram.
CAUTION:
Do not install the printer in an unsteady location such as on a rickety base or on a sloping surface.
There is a risk of injury if the printer falls or topples over.
5.1.2 Installation Space
Use the printer in the following temperature and humidity ranges.
Temperature: 20 to 28˚C
Humidity: 40 to 70% (non-condensing)
CAUTION:
If the printer is used outside the specified temperature and humidity ranges, the print quality may be
adversely affected and the printer may malfunction.
Page 33

5. Assembling the Printer and the Installation Procedure
26JS310-UM-251-9370
5.1.3 Power Supply Specifications
The power supply specifications for this printer are as follows. Make sure that the power supply used conforms to
the printer specifications.
• Printer control power supply: AC200 to 240 V, 50/60Hz
• Heater power supply: AC200 to 240 V, 50/60Hz
• Drying fan power supply: AC200 to 240 V, 50/60Hz
*Power Supply Precautions:
(1) Install the printer near a power outlet that is within easy reach.
(2) Do not connect the printer to the same power supply line that is used for noise-generating devices such as
photocopying machines, air conditioners and motors.
(3) Connect the printer to a separate power outlet. Do not connect other devices to the same power outlet.
Page 34

5. Assembling the Printer and the Installation Procedure
27JS310-UM-251-9370
5.2 Removing the Printer from its Packaging
Follow the procedure described below to unpack the printer.
(1) Remove the top panel and the four side panels.
Waste ink tanks Accessories box
Printer fastenings (8 locations)
(2) Remove the accessories box and the waste ink tanks.
Page 35

5. Assembling the Printer and the Installation Procedure
28JS310-UM-251-9370
(3) Remove the printer fastenings.
Printer fastenings (8 locations)
(4) Move the printer off the base used to hold it in place.
Use a forklift to raise the printer off the base.
Insert the forklift prongs here.
CAUTION:
Before raising the printer, align the direction of the wheels with the direction of the rectangular holes.
If they are not aligned, the wheels will catch on the edges of the holes when the printer is raised.
Page 36

5. Assembling the Printer and the Installation Procedure
29JS310-UM-251-9370
Align the direction of the wheels with the
rectangular holes before raising the printer.
CAUTION:
The printer weighs approximately 270 kg (JS310-18ES) or 330 kg (JS310-25ES). There is a risk of lower
back injury to the person(s) attempting to lift the printer. Use a forklift to move the printer.
CAUTION:
When raising the printer off the base used to hold it in place, make sure that the printer’s weight is
evenly balanced.
(5) Move the printer.
Unlock the casters, and then move the printer to its installation location.
If the installation location is on a different level or if there is a steep slope leading up to it, use a forklift or
crane to move the printer.
CAUTION:
The printer weighs approximately 270 kg (JS310-18ES) or 330 kg (JS310-25ES). There is a risk of lower
back injury to the person(s) attempting to lift the printer. Use a forklift or crane to move the printer if
the installation location is on a different level or if there is a steep slope leading up to it.
(6) Lock the casters.
Lock the casters
Page 37

5. Assembling the Printer and the Installation Procedure
30JS310-UM-251-9370
(7) Remove the plastic sheets and fastening bands.
Remove the print head carriage fastening (remove
the screws).
CAUTION:
Store the print head carriage fastening in a
safe place so as not to lose it.
Page 38

5. Assembling the Printer and the Installation Procedure
31JS310-UM-251-9370
5.3 Mounting the Ink Tanks
Follow the procedure described below to mount the four ink tanks (C, M, Y, K) and the solution tank.
(1) Remove the cap from the tip of each of the ink tubes protruding from the printer.
(2) Attach an ink tank to each of the tubes, making sure that the color of the sticker affixed to the ink tank matches
the color of the ring on the ink tube. The tube without a colored ring is the tube for the cleaning solution.
Attach the solution tank to this tube.
(3) Mount the ink tanks and the solution tank onto the printer.
Page 39

5. Assembling the Printer and the Installation Procedure
32JS310-UM-251-9370
5.4 Mounting the Waste Ink Tanks
Follow the procedure described below to mount the two waste ink tanks.
(1) Attach the waste ink tank mounting brackets to the printer.
Using the screws provided, attach one bracket to the left side and one to the right side of the printer.
(2) Connect the tubes to the waste ink tanks.
Mount the waste ink tanks on the brackets. Insert the corresponding waste liquid tubes protruding from the
printer into the opening of each waste ink tank.
CAUTION:
Store the caps that were removed from the waste ink tanks in a safe place so as not to lose them.
Page 40

5. Assembling the Printer and the Installation Procedure
33JS310-UM-251-9370
5.5 Connecting the Power Supplies
The printer is provided with three power supplies: a printer power supply, a heater power supply, and a dryer power
supply. Connect a cable to each power supples, making sure that the cable conforms to the specifications.
(1) Connect the power supply cables to the power supply connectors.
PRINTER power supply
HEATER power supply
DRYER power supply
(2) Check that all of the power supply switches are off.
Lower position
Lower position
PRINTER power supply switch HEATER power supply switch
Forward position
Middle position
DRYER power supply switch Media Feeding System switch
(3) Insert the plug of each power supply into a power outlet.
(4) Turn on the cleaner power supply.
The lower position is the ON position
for the power supply.
The upper or middle position is the
OFF position.
Page 41

5. Assembling the Printer and the Installation Procedure
34JS310-UM-251-9370
5.6 Setting the Print Speed
5.6.1 Turning on the printer power supply
When the power is turned on, the printer begins a self-test operation (the print head carriage and the feed rollers
move). When the self test has been completed, wait until the main menu is displayed on the LCD.
Since ink has not yet been supplied to the printer, a “
No Ink
” alarm will sound after several minutes have elapsed.
This alarm does not indicate a malfunction, and no action is required.
5.6.2 Setting the print head carriage speed
(1) From the main menu, select [
Print Para
] and then press the
ENTER
key.
(2) From the submenu, select [
Print Speed
] and then press the
ENTER
key.
(3) Select “
Norm
”, and then press the
ENTER
key.
(4) Return to the main menu.
5.6.3 Setting the media feed speed
(1) From the main menu, select [
Print Para
] and then press the
ENTER
key.
(2) From the submenu, select [
Feed Speed
] and then press the
ENTER
key.
(3) Select “
Norm
”, and then press the
ENTER
key.
(4) Return to the main menu.
Page 42

5. Assembling the Printer and the Installation Procedure
35JS310-UM-251-9370
5.7 Executing the Moving Test
Execute the Moving Test to ensure that the lubricating oil is spread evenly on the print head carriage rails and the
feed rollers.
• If the power is turned off, turn it on.
• Since ink has not yet been supplied to the printer, a “
No Ink
” alarm will sound after several minutes have elapsed.
This alarm does not indicate a malfunction, and no action is required.
Executing the moving test
(1) From the main menu, select [
Engineer Set
] and then press the
ENTER
key.
(2) From the submenu, select [
Moving Test
] and then press the
ENTER
key.
(3) Let the operation continue for approximately 15 minutes.
Check that there are no abnormalities during the moving test operation.
If there are any abnormalities such as an unusual noise or if the printer doesn’t operate, turn off the power
supply and contact your sales representative or nearest Graphtec vendor.
(4) End the Moving Test.
Press the
ESC
key to end the moving test. When the test has ended, return to the main menu.
• Hold down the
ESC
key until the print head carriage stops at the Home position.
Page 43

Page 44
6. Initial Ink Induction Procedure
37JS310-UM-251-9370
6. Initial Ink Induction Procedure
6.1 Initial Cleaning of the Ink Supply Tubes and the Sub Tanks
• If the power is turned off, turn it on.
• Since ink has not yet been supplied to the printer, a “
No Ink
” alarm will sound after several minutes have elapsed.
This alarm does not indicate a malfunction, and no action is required.
Moving the print head carriage to the cleaning position
(1) From the main menu, select [
Cleaning Tool
] and then press the
ENTER
key.
(2) From the submenu, select [
Clean Post
] and then press the
ENTER
key.
(3) The print head carriage moves to the cleaning position and then stops.
Checking that the clips on the sub tanks have been released
(4) Open the panel behind the cleaning position.
(5) Check that the tube clamper on each of the sub tanks is in the open position. If any of the clampers is in the
closed position, open it.
Tube clamper:
Check that the clampers for all four colors
are open.
(6) Check that all the tube caps are closed firmly.
Tube cap:
Tighten the caps using long-nose pliers.
Check that the tube caps for all five caps
are closed firmly.
Page 45

6. Initial Ink Induction Procedure
38JS310-UM-251-9370
Pouring 150 to 200 cc of cleaning solution into each ink tank
(7) Pour 150 to 200 cc of cleaning solution into each of the four ink tanks (C, M, Y, K).
• 150 to 200 cc guideline amount: The level where the filter in the ink tank is covered.
Feeding the cleaning solution to the sub tanks
(8) From the main menu, select [
Ink Status
] and then press the
ENTER
key. The “
No ink
” alarm sounds and
then stops, and the ink pump operates to feed the cleaning solution to the sub tanks.
If the “
No ink
” alarm sounds once again, from the main menu, select [
Ink Status
] and then press the
ENTER
key once more. The alarm will stop sounding when the four sub tanks (C, M, Y, K) are filled with cleaning
solution. At this time there will be no operating noise from the ink pump.
(9) Visually check that the sub tanks are sufficiently filled with cleaning solution.
The tanks should be filled up to approximately the level indicated by the white line.
(10) Turn off the printer power supply.
Page 46

6. Initial Ink Induction Procedure
39JS310-UM-251-9370
Removing the print head carriage cover and the print head protector
(11) Open the panel in front of the cleaning position.
Cleaning position cover:
Open the front panel by raising the top
half and lowering the bottom half.
(12) Remove the two screws holding the print head carriage cover, and then detach the print head carriage cover.
Print head carriage cover
Remove the screws at the left and right
sides and then detach the cover.
(13) Detach the print head protector.
Pull and then turn the knobs to detach the print head protector.
Print head protector
Knobs
Pull and then turn
about 90 degrees.
Pull and then turn
about 90 degrees.
Page 47

6. Initial Ink Induction Procedure
40JS310-UM-251-9370
Connecting the inlet tubes
(14) Open the rear panel, and then remove the two screws holding rear of the main board cover.
Main board cover
Remove the screws.
Open the rear panel.
(15) Open the front panel, and then detach the main board cover from the grooved pins.
Main board cover
Open the front panel.
(16) Remove the main board cover from the right side as shown in the below picture.
Main board cover
(17) Remove the two screws holding the fixer, and then detach the fixer.
Fixer
Remove the screws.
Page 48

6. Initial Ink Induction Procedure
41JS310-UM-251-9370
(18) Attach the four inlet tubes provided to the 3-way valves on the print head carriage.
Inlet tube
Make sure that the tubes are firmly
connected to the 3-way valve.
(19) Put the inlet tube through bottom of a board, and wire it forward as shown in the below picture.
3-way valves
PCB board
PCB fixing studs
Inlet tubes
Inlet tube Fixing plate
Rear
Front
(20) Set the 3-way valve for each ink tank to the ink supply position.
Ink tank 3-way valve
(4 valves)
Turn to the ink
supply position
(21) Turn on the printer power supply.
When the power is turned on, the printer begins a self-test operation (the print head carriage and the feed
rollers move). When the self test has been completed, wait until the main menu is displayed on the LCD.
Moving the print head carriage to the cleaning position
(22) From the main menu, select [
Cleaning Tool
] and then press the
ENTER
key.
(23) From the submenu, select [
Clean Post
] and then press the
ENTER
key.
(24) The print head carriage moves to the cleaning position and then stops.
Page 49

6. Initial Ink Induction Procedure
42JS310-UM-251-9370
Feeding the cleaning solution in the sub tanks through the inlet tubes
(25) Position the end of each inlet tube so that it faces the waste liquid slot underneath.
(26) Press the Ink button at the cleaning position to feed the cleaning solution through the inlet tubes.
Continue to feed the cleaning solution through the tubes until they are clean (approximately 20 seconds).
Ink button
CAUTION:
Take care not to get cleaning solution stains on your clothing.
Feeding out any cleaning solution remaining in the inlet tubes
(27) Press the Ink button to feed out any cleaning solution remaining in the inlet tubes. When the “
No ink
” alarm
sounds, from the main menu, select [
Ink Status
] and then press the
ENTER
key to continue the cleaning
solution removal operation.
(28) Continue feeding out the cleaning solution until the “No ink” alarm sounds once again.
(29) Turn off the printer power supply.
Page 50

6. Initial Ink Induction Procedure
43JS310-UM-251-9370
Empty out the cleaning solution from the sub tanks
CAUTION:
First of all, remove the waste ink tanks mounted in the printer, and then discard the cleaning solution
from the sub tanks into the waste ink tanks.
(30) Remove the cap from each sub tank.
If the cap is difficult to remove, use pliers or similar to grip the cap and open it.
Pliers
CAUTION:
When opening the cap, be sure to grasp
the upper corners of the tank.
(31) Empty out the cleaning solution from each sub tank.
Tilt the sub tank, and then pour the cleaning
solution into the waste ink tank positioned
underneath it.
(32) Reattach the cap on each of the sub tanks, and then leave them to dry out for at least 10 minutes.
Page 51

6. Initial Ink Induction Procedure
44JS310-UM-251-9370
6.2 Initial Cleaning of the Cleaning Solution Supply Tubes
(1) Turn on the printer power supply.
When the power is turned on, the printer begins a self-test operation (the print head carriage and the feed
rollers move). When the self test has been completed, wait until the main menu is displayed on the LCD.
• Since ink has not yet been supplied to the printer, a “
No Ink
” alarm will sound after several minutes have
elapsed. This alarm does not indicate a malfunction, and no action is required.
(2) Move the print head carriage to the cleaning position.
(a) From the main menu, select [
Cleaning Tool
] and then press the
ENTER
key.
(b) From the submenu, select [
Clean Post
] and then press the
ENTER
key.
The print head carriage will move to the cleaning position and then stop.
(3) Pour approximately 150 cc of cleaning solution into the solution tank.
(4) Set the 3-way valve for the solution tank to the supply position.
Solution tank 3-way valve
Turn to the supply position
(5) Set the 3-way valve for each ink tank to the cleaning position.
Ink tank 3-way valve
(4 valves)
Turn to the cleaning position
Page 52

6. Initial Ink Induction Procedure
45JS310-UM-251-9370
(6) Feed the cleaning solution through the inlet tubes.
(a) Position the end of each inlet tube so that it faces the waste liquid slot underneath.
(b) Press the Solution button at the cleaning position to feed the cleaning solution through the inlet tubes.
Ink button
(c) Hold down the Solution button until the cleaning solution passes through the tubes.
CAUTION:
Take care not to get cleaning solution stains on your clothing.
(7) Empty out the cleaning solution from the solution tank.
CAUTION:
First of all, remove one of the waste ink tanks mounted in the printer, and then discard the cleaning
solution from the solution tank into the waste ink tank.
(8) Feed out any cleaning solution remaining in the inlet tubes.
Press the Solution button once again to feed out any cleaning solution remaining in the inlet tubes.
Continue holding down the button until all the fluid has been removed from the tubes.
Page 53

6. Initial Ink Induction Procedure
46JS310-UM-251-9370
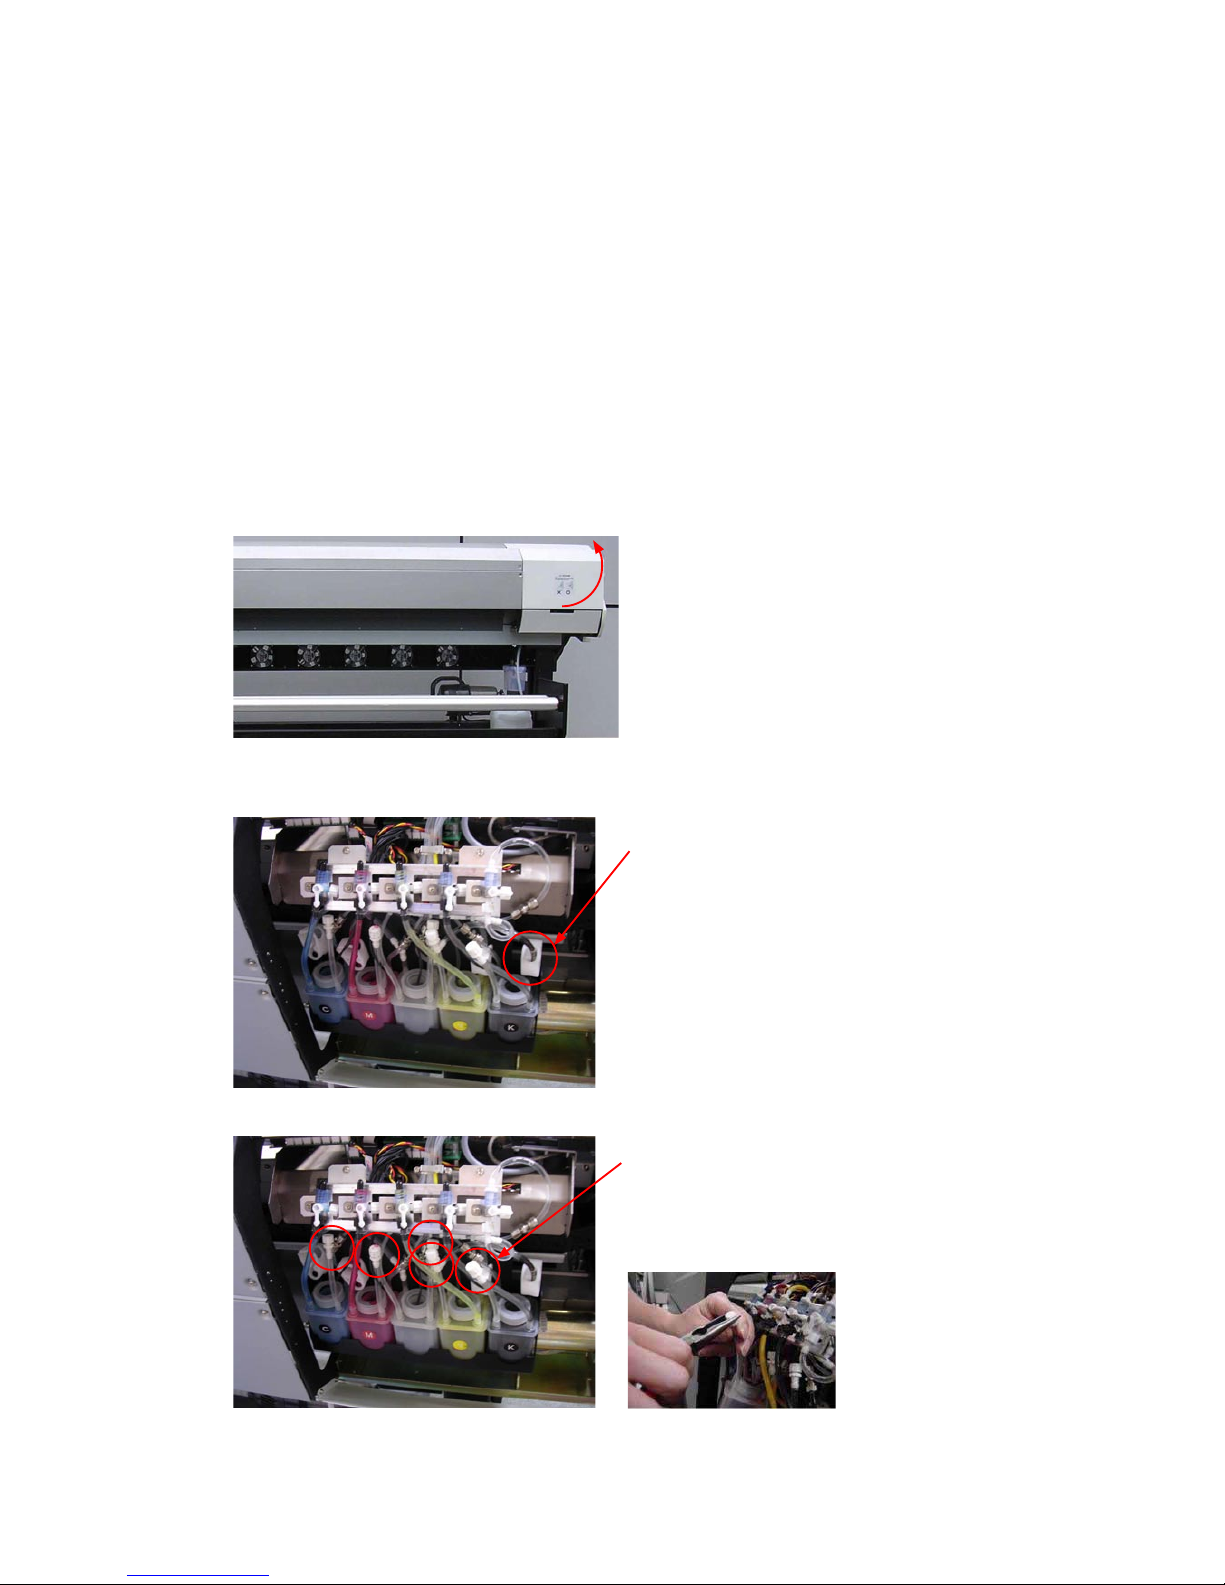
6.3 Print head height Adjustment
Adjust the print head height using the print head height adjustment jig.
(1) Loosen the screws holding the print head frame.
(2) Insert the print head height adjustment jig under the print head frame.
Head height adjustment Jig
(3) Adjust the print head height to the following position.
The height adjustment position
Print head Frame
• When the head protector is not attached.
(Standard)
• When a print head rubs with the media.
• When the head protector is attached.
Jig
(4) Tighten the screws holding the print head frame.
Page 54

6. Initial Ink Induction Procedure
47JS310-UM-251-9370
6.4 Mounting the Print heads
• If the print head carriage is not at the cleaning position, move it to the cleaning position.
Moving the print head carriage to the cleaning position
(a) From the main menu, select [
Cleaning Tool
] and then press the
ENTER
key.
(b) From the submenu, select [
Clean Post
] and then press the
ENTER
key.
(1) Turn off the printer power supply.
Turn off the printer power supply before mounting the print heads.
• Performing the print head mounting operation while the power supply is on may result in damage to the
printer or to the print heads. Make sure that the power supply is turned off.
(2) Mount the print heads in order from the left-hand side.
Mount the print heads in the order shown below, starting from the left-hand side. The procedure described
below is the procedure for mounting one print head. Repeat the procedure of step from (3) to (10) for all eight
print heads.
S
E
Print head mounting order
Page 55

6. Initial Ink Induction Procedure
48JS310-UM-251-9370
(3) Write down the print head mounting position and the serial number.
These will be required for a later procedure.
Print head mounting position
Outlet side
Inlet side
Serial number
(4) Attach an outlet tube and tube clamper (provided as accessories) to the print head.
Leave the tube clamper open.
Clamper
Outlet tube
Page 56

6. Initial Ink Induction Procedure
49JS310-UM-251-9370
(5) Remove the caps attached to the print head, and then insert the inlet tube and outlet tube into the print head
inlet.
Outlet tube
Inlet tube
CAUTION:
Do not mistake the color of tubes when connecting the inlet tubes.
(6) Attached to the print head clamper to the print head and the inlet tube joints.
Print head clamp
Print head clamp
Check the orientation.
(The longer dimension is the horizontal direction.)
CAUTION:
Do not touch the surface of the print head nozzles.
Page 57

6. Initial Ink Induction Procedure
50JS310-UM-251-9370
(7) Loosen the top and the left screws, and remove the right screw.
Loosen
Remove
Loosen
(8) Mount the print head, and then reattach the right screw.
(9) Tighten the top, left and right screws to fasten the print head in place.
Page 58

6. Initial Ink Induction Procedure
51JS310-UM-251-9370
6.5 Initial Print head Cleaning Procedure
A new print head contains a protecting liquid. Before using the print head, follow the procedure described below to
clean the print head.
(1) Pour cleaning solution into the solution tank.
Pour a generous amount of cleaning solution into the solution tank.
Solution tank:
Pour a generous amount of cleaning solution
into the tank, up to the level indicated by the
white line.
(2) Turn on the printer power supply.
When the power is turned on, the printer begins a self-test operation (the print head carriage and the feed
rollers move). When the self test has been completed, wait until the main menu is displayed on the LCD.
• Since ink has not yet been supplied to the printer, a “
No Ink
” alarm will sound after several minutes have
elapsed. This alarm does not indicate a malfunction, and no action is required.
(3) Move the print head carriage to the cleaning position.
(a) From the main menu, select [
Cleaning Tool
] and then press the
ENTER
key.
(b) From the submenu, select [
Clean Post
] and then press the
ENTER
key.
The print head carriage moves to the cleaning position and then stops.
(4) Check that the 3-way valve for the solution tank is set to the supply position.
• If the lever is at a different position, move it to the supply position.
Solution tank 3-way valve
Turn to the supply position
Page 59

6. Initial Ink Induction Procedure
52JS310-UM-251-9370
(5) Clean the outlet tubes.
Follow the procedure described below to clean the cyan outlet tube. Clean the magenta, yellow and black
outlet tubes in the same way.
(a) Set the lever of the 3-way valve for the cyan ink tank to the cleaning solution supply position. Set the
lever on all the other 3-way valves to the ink supply position.
Cyan ink 3-way valve only
Turn to the solution supply position
All other 3-way valves
Turn to the ink supply position
(b) Remove the cap from the one (cyan) of the outlet tubes.
Outlet tube cap
Outlet tube
(c) Position the open end of the outlet tube so that it is facing the waste liquid slot.
Waste liquid slot
(d) Press the Solution button to feed the cleaning solution through the outlet tube.
Continue to hold down the Solution button until the cleaning solution flows out of the outlet tube.
• Cleaning solution may be emitted from the print head nozzles.
CAUTION:
Take care not to get cleaning solution stains on your clothing.
(e) Reattach the outlet tube cap that was removed in Step (b), and then remove the cap from the second outlet
tube.
Page 60

6. Initial Ink Induction Procedure
53JS310-UM-251-9370
(f) Press the Solution button in the same way as described in Step (d) to feed cleaning solution through the
outlet tube. Position the open end of the outlet tube so that it is facing the waste liquid slot.
Continue to hold down the Solution button until the cleaning solution flows out of the outlet tube.
• Cleaning solution may be emitted from the print head nozzles.
CAUTION:
Take care not to get cleaning solution stains on your clothing.
(g) Reattach the outlet tube cap to the outlet tube.
(h) Clean the magenta, yellow and black outlet tubes in the same way.
(6) Clean the print head nozzles.
(a) Set the levers on the cyan and magenta 3-way valves to the cleaning solution supply position.
(b) Set the levers on the yellow and black 3-way valves to the ink supply position.
(c) Press the Solution button to feed cleaning solution through the cyan and magenta print head nozzles.
Hold down the Solution button until the cleaning solution flows out of all four print heads.
(d) Set the levers on the yellow and black 3-way valves to the cleaning solution supply position.
(e) Set the levers on the cyan and magenta 3-way valves to the ink supply position.
(f) Press the Solution button to feed cleaning solution through the yellow and black print head nozzles.
Hold down the Solution button until the cleaning solution flows out of all four print heads.
(7) Leave the print heads in this status for 10 minutes to ensure that the protecting liquid is completely dissolved.
Leave the print heads in this status for 10 minutes.
(8) Feed out any cleaning solution remaining in the print heads.
Using the procedure described in step (6) above, feed out any remaining cleaning solution from all of the print
head nozzles.
Page 61

6. Initial Ink Induction Procedure
54JS310-UM-251-9370
6.6 Ink Induction
• If the power supply is turned off, turn it on and then move the print head carriage to the cleaning position.
• Since ink has not yet been supplied to the printer, a “
No Ink
” alarm will sound after several minutes have
elapsed. This alarm does not indicate a malfunction, and no action is required.
(1) Pour ink into the ink tanks.
Pour a generous amount of ink into each ink tank. Make sure that the ink color matches the color code label
on each of the tanks.
CAUTION:
Make sure that you do not get ink stains on your clothing.
Ink tanks
Pour a generous amount of ink into each tank, up to
the level indicated by the white line.
(2) Feed the ink to the sub tanks.
From the main menu, select [
Ink Status
] and then press the
ENTER
key.
The “
No ink
” alarm sounds and then stops, and the ink pump operate to feed the ink to the sub tanks.
If the “
No ink
” alarm sounds once again, from the main menu, select [
Ink Status
] and then press the
ENTER
key once more.
The alarm will stop sounding when the four sub tanks (C, M, Y, K) are filled with ink.
At this time there will be no operating noise from the ink pump.
(3) Visually check that the sub tanks are sufficiently filled with ink.
The tanks should be filled up to approximately the level indicated by the white line.
Page 62

6. Initial Ink Induction Procedure
55JS310-UM-251-9370
(4) Set the levers of the 3-way valves for each ink tank to the ink supply position.
Turn to the ink supply position
(5) Feed ink through the outlet tubes.
Perform the following procedure for both outlet tubes on each of the print heads.
(a) Remove the outlet tube cap.
(b) Position the open end of the outlet tube so that it is facing the waste liquid slot.
(c) Press the Ink button located at the cleaning position to feed ink through the outlet tube.
• Hold down the Ink button for approximately 10 seconds.
• Ink may be emitted from the print heads.
CAUTION:
Take care not to get ink stains on your clothing.
(d) Press the Ink button once again. When ink flows out of the outlet tube, firmly close the tube clamper.
Make sure not to allow any air to enter the outlet tube.
Close the tube clamper.
(e) Reattach the outlet tube cap, and then tighten the caps using long-nose pliers.
(f) Open the tube clamper on the outlet tube.
Page 63

6. Initial Ink Induction Procedure
56JS310-UM-251-9370
(6) Feed ink through the nozzles.
Check that all the outlet tube caps have been firmly inserted.
Press the Ink button once again to feed ink through all the nozzles.
(7) Use the brushes provided to clean the surface of all the print head nozzles.
Printing will not be performed correctly if the nozzle surfaces are wet. Use the brushes provided to wipe the
nozzles clean.
CAUTION:
If the print heads will not be used for a long period of time, attach the wet keeping frame to the print
head carriage (see “Maintenance of print head Manual”).
Page 64

7. Media Loading Procedure
57JS310-UM-251-9370
7. Media Loading Procedure
7.1 Loading the Media
(1) Mount the media on the media feeding rollers as shown in the figure below.
• Inside wound
Print side: inside
Media
Feeding roller
• Outside wound
Print side: outside
Media
Feeding roller
CAUTION:
As the media is heavy, at least two persons are required for the loading operation.
Take care not to drop the roll. Dropping the roll on your foot may result in injury.
(2) Insert the media flange into a madia roll.
Media flange
Media
Page 65

7. Media Loading Procedure
58JS310-UM-251-9370
(3) Turn the knob to the red arrow direction to fix the media flange firmly.
(4) Insert the media flange to the other side of media roll likewise.
Note: Don’t use the media flanges when the media may be bended beneath the burden of its weight.
May be wrinkled up the media by the heavy roll media.
(5) Feed the media a distance of approximately 1 m.
Use the following procedure to feed the media a distance of approximately 1 m.
(a) Set the rotation direction switch on the media feeding system.
Inside wound media: [
] direction Outside wound media: [ ] direction
Page 66

7. Media Loading Procedure
59JS310-UM-251-9370
(b) Press down the “I” (Manual) side of the selector switch on the media feeding system.
Right-hand position
(c) When the media has been fed approximately 1 m, return the selector switch to the position between the “II”
and “I” markings (the OFF position, “O” ).
Center position
(6) Load media on the platen surface.
(a) Raise the press roller control lever.
Press roller control lever
(b) Remove the screws from the flap at the rear of the printer and open the flap.
Remove these two screws and open the flap.
Page 67

7. Media Loading Procedure
60JS310-UM-251-9370
(c) Insert the leading edge of the media from the rear of the printer towards the front.
(d) Align the left edge of the media with the rear guide and front guide scales at the left of the printer,
making sure that the media is not loaded at an angle.
(e) Lower the press roller control pole to hold the media in place.
(f) Close the flap and Replace the screws to the flap at the rear of the printer.
(g) Align the media edge guards with the left and right edges of the media.
Slide each media edge guard
to approximately the position
indicated by the dotted line.
Page 68

7. Media Loading Procedure
61JS310-UM-251-9370
7.2 Adjusting the auto feed function
(1) Feed the media manually.
Press down the “I” side (Manual) of the selector switch on the media feeding system.
When the media has passed over the media sensor (or just before the media reaches the floor), return the
selector switch to the position between the “II” and “I” markings (the OFF position, “O”).
(2) Place the empty core provided on top of the media as shown in the picture below.
Empty core
(3) Use a screwdriver to turn the trimmer fully to the left for the rear media sensor.
The orange LED goes out (only the green LED remains lit).
LED
(4) Gradually return the trimmer to the right.
Stop at the position where the orange LED lights.
Page 69

7. Media Loading Procedure
62JS310-UM-251-9370
(5) Set the rotation direction switch on the media feeding system to the direction opposite to the direction set
earlier.
Inside wound media: [ ] direction Outside wound media: [ ] direction
(6) Rewind the media manually.
Set the selector switch on the media feeding system to the “I” (Manual) position, rewind the media to the
position where the orange LED does not light, and then return the selector switch to the position between the
“II” and “I” markings (the OFF position, “O”).
(7) Check that the orange LED does not light even if an object is placed behind it.
Empty core
Media
Feeding roller
Place an object here to
check the sensor.
Sensor
Check that the orange
LED does not light
even if an object is
placed behind the
sensor.
(8) Check that the media stops at the sensor after it has been fed automatically.
Set the selector switch on the media feeding system to “II” (Auto).
Left-hand position
Page 70

7. Media Loading Procedure
63JS310-UM-251-9370
7.3 Winding the Media onto the Take-up Unit
(1) Mount the take-up core flanges and the take-up core.
(a) Raise the take-up roller at the left-hand side and remove it.
Take-up roller
(b) Slide one of the flanges onto the roller and then fasten it in place at the right.
Flange
Use these two screws to
fasten the flange.
(c) Insert the take-up core onto the right flange.
Take-up core
(d) Insert the other flange into the left edge of the take-up core.
Flange
Use these two screws to
fasten the flange.
Take-up core
(e) Return the take-up roller to its original position.
Page 71

7. Media Loading Procedure
64JS310-UM-251-9370
(2) Feed the media up to the take-up roller position.
(a) Set the take-up roller selector switch to the position between the “II” and “I” markings (the OFF position,
“O”).
Center position
(b) From the main menu, select [
Print Para
] and then press the
ENTER
key.
(c) From the submenu, select [
Print Post
] and then press the
ENTER
key.
(d) While holding down the
FUNC
key, press the
DOWN
ARROW key to feed the media.
(f) When the media has reached the take-up roller position, with a little extra length added to facilitate the
take-up operation, release the keys.
(3) Align the take-up core with the media width.
Loosen the flange screws, and align the take-up core with the width of the media.
Flange
Loosen these two screws
(4) Use a length of tape to attach the leading edge of the media to the take-up core.
Page 72

7. Media Loading Procedure
65JS310-UM-251-9370
(5) Place an empty core on top of the media to provide winding tension.
Empty core
Page 73

7. Media Loading Procedure
66JS310-UM-251-9370
7.4 Adjusting the auto take-up function
(1) Manually feed the media until it passes over the sensor (or until just before it reaches the floor).
While holding down the
FUNC
key, press the
DOWN
ARROW key.
(2) Turn the trimmer fully to the left.
The orange LED goes out.
LED
(3) Gradually return the trimmer to the right.
Stop at the position where the orange LED lights.
(4) Check that the media stops at the sensor after it has been automatically taken up.
Set the selector switch on the take-up unit to “II” (Auto).
Left-hand position
Page 74

7. Media Loading Procedure
67JS310-UM-251-9370
(5) Check that the media is not taken up when an object is placed in front of the sensor.
Empty core
Media
Take-up roller
Place an object here to
check the sensor.
Sensor
The take-up roller does
not take up the media
even when an object is
placed in front of the
sensor.
Page 75

7. Media Loading Procedure
68JS310-UM-251-9370
7.5 Setting the Media Width
CAUTION:
If the power supply has been turned off, remove the wet keeping frame, and then turn on the power
supply.
(1) Enable the media width detection function.
(a) From the main menu, select [
Application
] and then press the
ENTER
key.
(b) From the submenu, select [
Media Detect
] and then press the
ENTER
key.
(c) Select “ON”, and then press the
ENTER
key.
(2) Detect the media width.
(a) Raise the pinch rollers, and then lower them.
(b) The loaded media is detected, and the following screen appears.
Menu Media Detect
Warm2 Star: 0000mm
Lenth: 0000mm
OFFLINE
(c) Press the
ENTER
key to start the media detection operation.
(d) When the media has been detected, “OK” is displayed on the screen.
If you want to cancel the media detection operation, press the
ESC
key.
If the printer was not able to detect the media correctly, “
Error
” is displayed on the screen.
If this happens, check the media loading position and then perform the media detection operation once
again.
Page 76
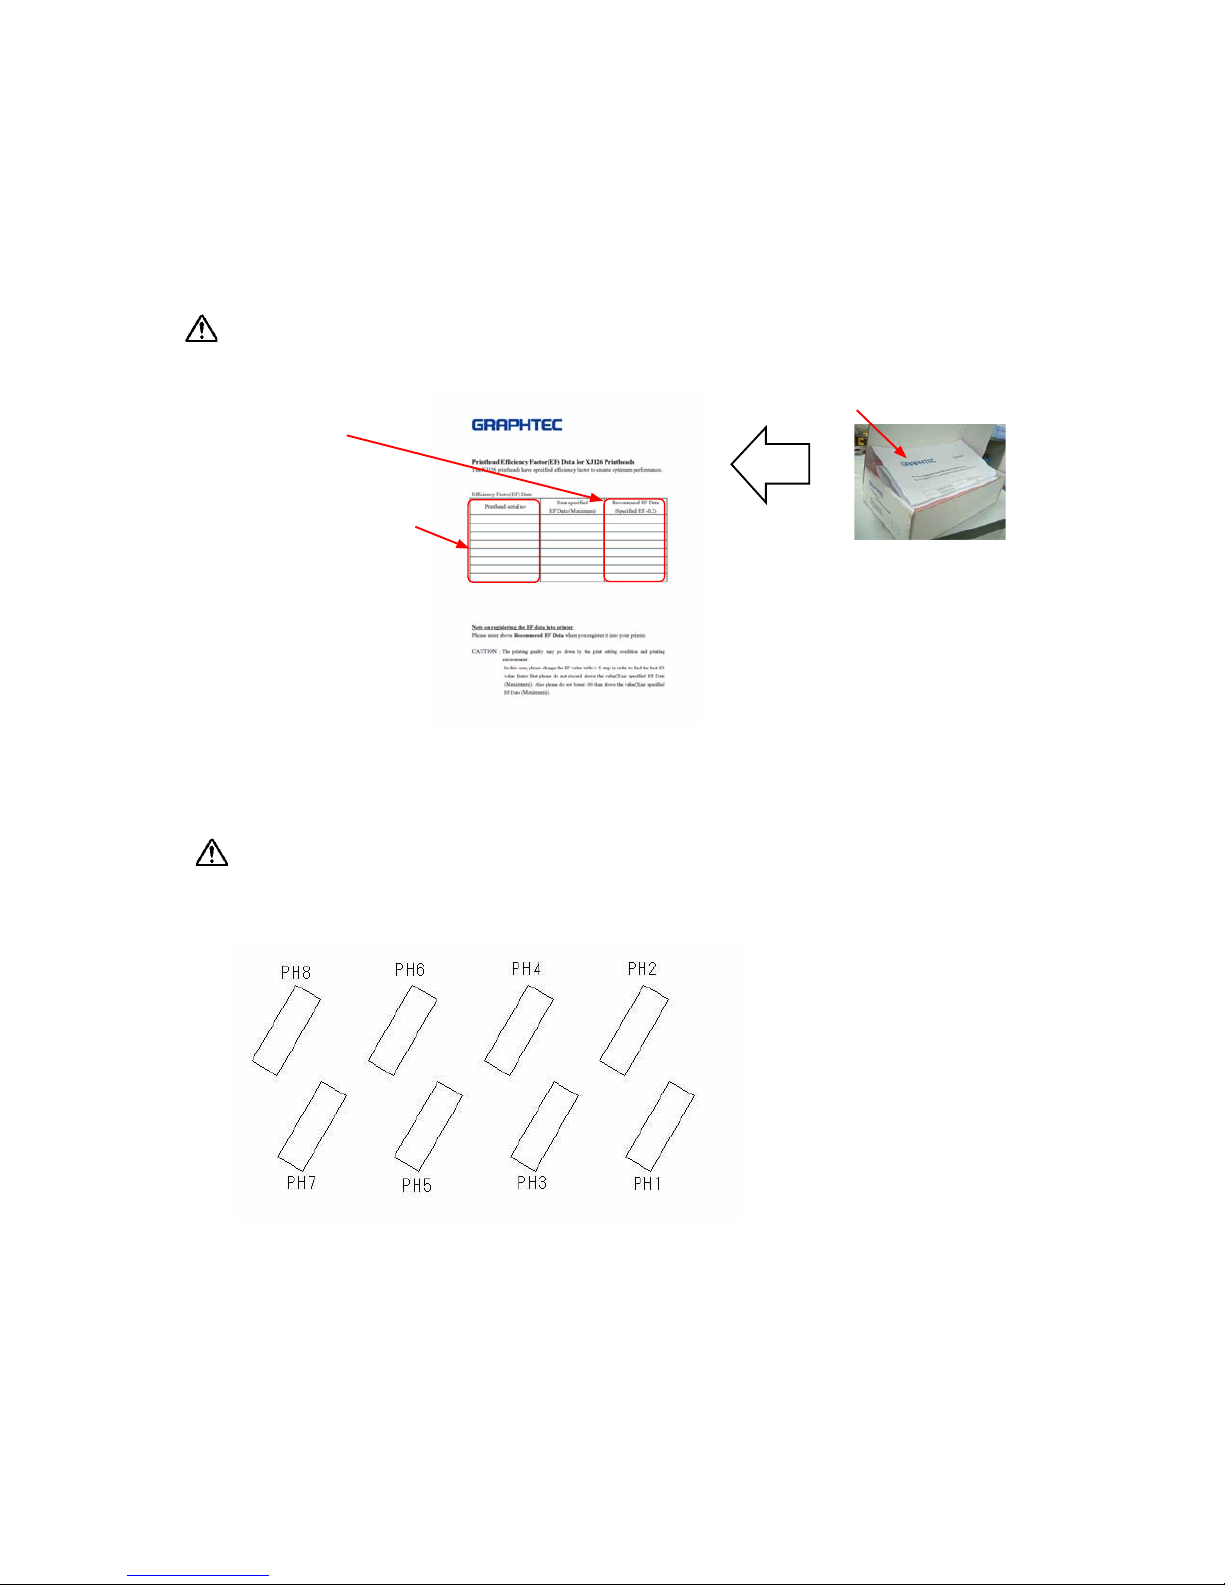
8. Print Head Adjustment Procedures
69JS310-UM-251-9370
8. Print head Adjustment Procedures
8.1 Setting the Print head Drive Voltage
The optimum drive voltage varies with each print head. Follow the procedure given below to register the EF values
printed EF data sheet; “Print head Efficiency Factor (EF) Data for XJ126 Print heads” into the print head package to
the printer.
CAUTION:
If the power supply has been turned off, remove the wet keeping frame, and then turn on the power supply.
EF value
(Recommend EF Data)
Serial number
Print head package
EF data sheet
(1) From the main menu, select [
Print Para
] and then press the
ENTER
key.
(2) From the submenu, select [
PH Volt Set
] and then press the
ENTER
key.
(3) Enter the EF values for
PH1
to
PH8
, and then press the
ENTER
key.
CAUTION:
Enter the “Recommend EF Data” when you register it into your printer.
Example: If the Recommend EF Data is 0.85, enter 0085.
Print head mounting position
(4) Return to the main menu, select [
Application
], and then press the
ENTER
key.
(5) From the submenu, select [
Curve of ink
] and then press the
ENTER
key.
(6) Select “0003 Xr2S JS”, and then press the
ENTER
key.
Page 77

8. Print Head Adjustment Procedures
70JS310-UM-251-9370
8.2 Installing the Printer Adjustment Utility Software “Try”
CAUTION:
Do not connect the printer via the USB cable to your computer before installing the “Try USB driver”.
(1) Insert the “Try” CD in your computer’s CD drive.
(2) Double-click the icon of setup.exe in the “Try Setup.Graphtec V*.*” folder to run the Setup.
(3) Specify the destination folder on the following display, and then click the “Next >”.
(4) Select the setup mode at the following displays, and then click the “Next >”.
Typical
: Installs the “Program Files”, “Samples”, “Card Components” and “USB Components” files.
(Recommended).
Compact
: Installs the “Program Files” files.
Custom
: Installs the files selected from “Program Files”, “Samples”, “Card Components” and “USB
Components”.
Page 78

8. Print Head Adjustment Procedures
71JS310-UM-251-9370
(5) Confirm installing software at the following display, and then click the “Next >”.
The Setup Status appears.
(6) When installation has been completed, the following screen appears.
Before you use the “Try” utility, you must restart your computer.
Select “Yes, I want to restart my computer now.” and then click “Finish” to restart your computer.
(7) Use the USB cable provided to connect the printer’s USB port directly to the computer’s USB port.
Page 79

8. Print Head Adjustment Procedures
72JS310-UM-251-9370
8.3 Connecting the Print Heads
(1) Turn off the printer power supply.
(2) Connect the print head cables provided as shown in picture below.
Connect each print head cables to each print
heads.
Connect each print head cables to the print
head carriage PCB connectors.
(3) Attach the fixer as shown in picture below.
Tighten the screws.
Put the cable through
a guide.
Fixer
(4) Attach the main board cover as shown in picture below.
Main board cover
Open the front panel.
Main board cover
Main board cover
Tighten the screws.
Open the rear panel.
Page 80

8. Print Head Adjustment Procedures
73JS310-UM-251-9370
8.4 Launching the Try Utility
(1) Turn on the printer power supply.
CAUTION:
Remove the wet keeping frame, before turn on the power supply.
(2) Launch the Try program.
Select [
Try
] from [
Programs
] in the [
Start
] menu.
(3) The following screens are displayed.
(4) Specify the printer you will use.
When using this software for the first time, a printer must be selected.
Select “
JS310-xxES
” from “
Printer
” on the menu bar.
Page 81

8. Print Head Adjustment Procedures
74JS310-UM-251-9370
8.5 Printing the Nozzle Check Pattern
Before performing any adjustments, print the nozzle check pattern and check the printing status of the nozzles.
If there are several non-firing nozzles, perform a printhead cleaning operation.
(1) Print the nozzle check pattern.
(a) From the main menu, select [
Cleaning Tool
] and then press the
ENTER
key.
(b) From the submenu, select [
Jam Test
] and then press the
ENTER
key.
(c) Printing of the nozzle check pattern will start automatically.
Non-firing areas (Missing dots and scratchy lines)
Satisfactory printing (no non-firing nozzles)
When there are non-firing nozzles
(2) When there are non-firing nozzles perform the print head cleaning.
(a) From the main menu, select [
Cleaning Tool
] and then press the
ENTER
key.
(b) From the submenu, select [
Clean Post
] and then press the
ENTER
key.
(c) The print head carriage moves to the cleaning position.
(d) Check that the levers on the 3-way valves for each of the ink tanks are in the ink supply position.
(e) Press the Ink button located at the cleaning position to feed ink through the print heads.
(f) From the main menu, select [
Cleaning Tool
] and then press the
ENTER
key.
(g) From the submenu, select [
Auto Clean
] and then press the
ENTER
key.
(h) Negative pressure cleaning is executed, and then the printhead carriage returns to the Home position
automatically.
(3) Print the nozzle check pattern once again and check the status of the nozzles. If several nozzles are still not
firing, repeat the nozzle check and cleaning procedures.
Page 82

8. Print Head Adjustment Procedures
75JS310-UM-251-9370
8.6 Adjusting the Positions of Print heads of the Same Color
Here we will describe the adjustment procedure for the cyan print heads. Perform the same procedure for the
magenta, yellow, and black print heads.
(1) Select the print mode.
(a) Press the
ONLINE
key on the control panel to put the printer into ONLINE status.
(b) On the menu bar, click
File -> Print Setup
.
(2) Set the following settings to print adjustment pattern:
(a) Apply a check in the box in front of “Color C” (Cyan).
This depends on which color is adjusted.
(b) Remove the checks from the boxes in front of the other three colors (Color M (Magenta), Color Y (Yellow),
and Color K (Black)).
This depends on which color is adjusted.
(c) Select “Test Mode” for “Print Mode”.
(e) Remove the check from the box in front of “BiDirection”.
(d) Click “OK”.
(3) Select an adjustment pattern and print it.
(a) On the menu bar, click
File
->
Open
.
(b) Open the file “
C: /Try/SmallGrid126.group
”
(c) Click the button on the tool bar to print the selected pattern.
Page 83

8. Print Head Adjustment Procedures
76JS310-UM-251-9370
(d) Only cyan will be printed as shown in picture below.
.
(e) If you want to suspend the printing operation, press the
ESC
key.
To restart printing, select “
Continuous
” from the menu displayed on the printer’s LCD and then press the
ENTER
key.
Waiting 1. Ink status
2. Heat status
3. Cleaning tool
OFFLINE 4. Continuous
5. Cancel
(f) If you want to quit the printing operation, select “
Cancel
” from the menu displayed on the printer’s LCD
and then press the
ENTER
key.
Waiting 1. Ink status
2. Heat status
3. Cleaning tool
OFFLINE 4. Continuous
5. Cancel
(4) Adjust the print head tilt for rear and front of the print heads.
(a) Adjust the print heads tilt so that the vertical lines are vertical.
(b) If the vertical lines are not vertical, adjust the screws used to fasten the print heads.
Upper screw
Print Head
Left screw
Rigth screw
How to tilt the printing line in anticlockwise direction:
Loosen a right screw, and then tighten a left screw.
How to tilt the printing line in clockwise direction:
Loosen a left screw, and then tighten a right screw.
1
3
2
The line printed
by the print head
of rear.
The line printed by
the print head of
front.
Page 84

8. Print Head Adjustment Procedures
77JS310-UM-251-9370
(5) Align the vertical lines for the front and rear print head.
(a) Use the Try utility to make adjustments so that the vertical lines are perfectly aligned in the vertical
direction.
(b) Click the “More” button from the Print Setup menu to display the Important Setup menu.
(c) The “Warning: Change these parameters carefully!” message is displayed. Click “Yes”.
(d) Adjust the Horizontal Space of Important Setup menu to become straight line for the rear and front print
head.
-
+
The line printed
by the print head
of rear.
The line printed by
the print head of
front.
Adjust these value to move horizontal printing
position of the front print head.
Increasing the value:
Print position is moved to right.
Decreasing the value:
Print position is moved to left.
Page 85

8. Print Head Adjustment Procedures
78JS310-UM-251-9370
(6) Adjust the spacing between diagonal lines for the front and rear print head.
Adjust the spacing so that the diagonal lines are perfectly aligned with each other.
The line printed
by the print head
of rear.
The line printed by
the print head of
front.
Upper screw
Upper screw
Rera Print Head
Left screw
Left screw
Rigth screw
Rigth screw
1
3
2
Front Print Head
1
3
2
How to up the printing line:
Loosen an upper screw, and then tighten
a left and a right screws.
How to down the printing line:
Loosen a left and a right screws by the
same rotation, and then tighten an upper
screw.
(7) Print the adjustment pattern once again and check the results of the adjustments made.
Repeat the printing and adjustment procedures until the positions of the vertical and diagonal lines are
satisfactorily aligned.
This pattern is printed by a front
and rear print heads.
(8) Perform the same adjustment procedures for the magenta, black, and yellow print heads.
Page 86

8. Print Head Adjustment Procedures
79JS310-UM-251-9370
8.7 Adjusting the Positions of Print heads of a Different Color
Using the cyan print head as the reference print head, perform adjustments to ensure the most optimal positions for
the magenta, yellow and black print heads. Here we will describe the adjustment procedure for the magenta print
head, using the cyan print head as the reference print head. Perform adjustments for the yellow and black print heads
in the same way.
(1) Select the print mode.
(a) Press the
ONLINE
key on the control panel to put the printer into ONLINE status.
(b) On the menu bar, click
File -> Print Setup
.
(2) Set the following settings to print adjustment pattern:
(a) Apply a check in the boxes in front of “Color C” (Cyan) and “Color M” (Magenta).
This depends on which color is adjusted.
(b) Remove the checks from the boxes in front of “Color Y” (Yellow), and “Color K” (Black).
This depends on which color is adjusted.
(c) Select “Test Mode” for “Print Mode”.
(e) Remove the check from the box in front of “BiDirection”.
(d) Click “OK”.
(3) Select an adjustment pattern and print it.
(a) On the menu bar, click
File
->
Open
.
(b) Open the file “
C: /Try/SmallGrid126.group
”
(c) Click the button on the tool bar to print the selected pattern.
Page 87

8. Print Head Adjustment Procedures
80JS310-UM-251-9370
(4) Use the Try utility to adjust the spacing between print heads of a different color.
Follow the procedure described below to align the magenta lines with the cyan lines.
(a) Use the Try utility to make adjustments so that align the magenta lines with the cyan lines.
(b) Click the “More” button from the Print Setup menu to display the Important Setup menu.
(c) The “Warning: Change these parameters carefully!” message is displayed. Click “Yes”.
(d) Adjust the Horizontal Space and Vertical Space of Important Setup menu to align the magenta lines with
the cyan lines.
(e) Increase or decrease the setting values until the magenta lines are aligned on top of the cyan lines.
-
-
+
+
Adjust the magenta line to on the cyan line.
Adjust the horizontal space for the
front head and rear head of magenta.
At this time, increase and decrease
the adjustment value of a front head
and rear head at equal value.
Adjust the vertical space
for the head of magenta.
(f) Print the adjustment pattern once again and check the results of the adjustments made.
(g) Repeat the printing and adjustment procedures until all the colors are aligned.
(5) Perform adjustments for the yellow and black print heads in the same way.
Page 88

8. Print Head Adjustment Procedures
81JS310-UM-251-9370
8.8 Media Feed Amount Compensation
The setting for the media feed amount (Feed Compensate on the Try utility) varies according to the thickness of the
media used. Change this setting whenever you change the type of media used.
(1) Select the print mode.
(a) Press the
ONLINE
key on the control panel to put the printer into ONLINE status.
(b) On the menu bar, click
File -> Print Setup
.
(2) Set the following settings to print adjustment pattern:
(a) Apply a check in the box in front of “Color C” (Cyan).
This depends on which color is adjusted.
(b) Remove the checks from the boxes in front of the other three colors (Color M (Magenta), Color Y (Yellow),
and Color K (Black)).
This depends on which color is adjusted.
(c) Select “Test Mode” for “Print Mode”.
(e) Remove the check from the box in front of “BiDirection”.
(d) Click “OK”.
(3) Select an adjustment pattern and print it.
(a) On the menu bar, click
File
->
Open
.
(b) Open the file “
C: /Try/SmallGrid126.group
”
(c) Click the button on the tool bar to print the selected pattern.
(d) Only cyan will be printed.
Page 89

8. Print Head Adjustment Procedures
82JS310-UM-251-9370
(4) Use the Try utility to adjust the spacing between each printed bands.
(a) Use the Try utility to make adjustments so that the vertical lines and the diagonal lines are connected as
straight lines.
(b) Click the “More” button from the Print Setup menu to display the Important Setup menu.
(c) The “Warning: Change these parameters carefully!” message is displayed. Click “Yes”.
(d) Adjust the Feed Compensate of Important Setup menu to align the printed bands.
(e) Increase or decrease a value of Feed Compensate until each band is connected.
Adjust this value to connect each printed bands.
+ -
Page 90

8. Print Head Adjustment Procedures
83JS310-UM-251-9370
(5) Print the adjustment pattern once again, and check the results of the adjustments made.
(6) Repeat the printing and adjustment procedures until satisfactory adjustment results have been achieved.
Page 91

8. Print Head Adjustment Procedures
84JS310-UM-251-9370
8.9 Bi-directional Printing Band Adjustments
The bi-directional band adjustment settings need to be changed if changes are made to the following two parameters.
Whenever these parameters are changed, make the adjustment settings accordingly.
• The printhead carriage speed
• The media thickness
The following describes the adjustments made to the cyan printhead.
Make adjustments in the same way for the magenta, yellow, and black print heads.
(1) Select the print mode.
(a) Press the
ONLINE
key on the control panel to put the printer into ONLINE status.
(b) On the menu bar, click
File -> Print Setup
.
(2) Set the following settings to print adjustment pattern:
(a) Apply a check in the box in front of “Color C” (Cyan).
This depends on which color is adjusted.
(b) Remove the checks from the boxes in front of the other three colors (Color M (Magenta), Color Y (Yellow),
and Color K (Black)).
This depends on which color is adjusted.
(c) Select “Test Mode” for “Print Mode”.
(d) Apply a check in the box in front of “BiDirection”.
(e) Click “OK”.
Page 92

8. Print Head Adjustment Procedures
85JS310-UM-251-9370
(3) Select an adjustment pattern and print it.
(a) On the menu bar, click
File
->
Open
.
(b) Open the file “
C: /Try/SmallGrid126.group
”
(c) Click the button on the tool bar to print the selected pattern.
(d) Only cyan will be printed.
(4) Use the Try utility to adjust the spacing between each printed bands.
(a) Use the Try utility to adjust the bi-directional printing band.
(b) Click the “More” button from the Print Setup menu to display the Important Setup menu.
(c) The “Warning: Change these parameters carefully!” message is displayed. Click “Yes”.
(d) Perform adjustments accordingly while viewing the printed results.
+
-
Printing direction
Printed from the right.
Printed from the left.
(Return pass)
Page 93

8. Print Head Adjustment Procedures
86JS310-UM-251-9370
(e) Adjust the position of the vertical lines printed on the return pass.
To shift the lines to the left: Increase the setting value.
To shift the lines to the right: Decrease the setting value.
(f) Adjust the Bidirection Compensation of Important Setup menu to align the printed bands.
(5) Print the adjustment pattern once again and check the results of the adjustments made.
(6) Repeat the printing and adjustment procedures until the vertical lines printed on the outward and return
passes form continuous straight lines.
(7) Perform adjustments in the same way for the magenta, yellow and black print heads.
(8) Attach the print head carriage cover when you completed all adjustment which described in the Section 8.
Print head carriage cover
Tighten the screws at the left and right
sides to attach the cover.
Page 94

9. Procedures when leaving the printer for a long time
87JS310-UM-251-9370
9. Procedures when leaving the printer for a long time
If you leave the printer for a long period of time (2 weeks or longer), please dispose all ink from the printer, fill the
ink tubes and the print heads by the cleaning solution, cover the print heads by the wet keeping frame and the wet
keeping polyethylene films by following procedures.
9.1 Dispose the ink from the printer
(1) Move the printhead carriage to the cleaning position.
(a) From the main menu, select [
Cleaning Tool
] and then press the
ENTER
key.
(b) From the submenu, select [
Clean Post
] and then press the
ENTER
key.
(c) The printhead carriage moves to the cleaning position and then stops.
(2) Set the 3-way valve for each ink tank to the ink supply position.
(3) Empty out the ink from the ink tanks.
CAUTION:
First of all, remove the waste ink tanks mounted in the printer, and then discard the ink from the ink tanks
into the waste ink tanks.
(4) Feed out any ink remaining in the Print Head nozzles.
(a) Press the Ink button to feed out any ink through the Print Head nozzles.
(b) When the “
No ink
” alarm sounds, from the main menu, select [
Ink Status
] and then press the ENTER
key to continue the ink removal operation.
(c) Continue feeding out the ink until the “
No ink
” alarm sounds once again.
(5) Turn off the printer power supply.
(6) Empty out the ink from the sub tanks.
CAUTION:
First of all, remove the waste ink tanks mounted in the printer, and then discard the ink from the sub tanks
into the waste ink tanks.
(a) Remove the cap from each sub tank.
If the cap is difficult to remove, use pliers or similar to grip the cap and open it.
(b) Empty out the ink from each sub tank.
(c) Close the cap, and replace each sub tank.
(Refer to Section 6.1 Initial Cleaning of the Ink Supply Tubes and the Sub Tanks) Empty out the cleaning
solution from the sub tanks.)
Page 95

9. Procedures when leaving the printer for a long time
88JS310-UM-251-9370
9.2 Induction of the cleaning solution
(1) Pour 150 to 200 cc of cleaning solution into each ink tank.
Pour 150 to 200 cc of cleaning solution into each of the four ink tanks (C, M, Y, K).
• 150 to 200 cc guideline amount: The level where the filter in the ink tank is covered.
(2) Turn on the printer power supply.
(a) The ink pump operates to feed the cleaning solution to the sub tanks.
(b) If the “
No ink
” alarm sounds, from the main menu, select [
Ink Status
] and then press the
ENTER
key.
(c) The alarm will stop sounding when the four sub tanks (C, M, Y, K) are filled with cleaning solution.
(d) At this time there will be no operating noise from the ink pump.
(3) Move the printhead carriage to the cleaning position.
(a) From the main menu, select [
Cleaning Tool
] and then press the
ENTER
key.
(b) From the submenu, select [
Clean Post
] and then press the
ENTER
key.
(c) The printhead carriage moves to the cleaning position and then stops.
(4) Feed out any cleaning solution through the Print Head nozzles.
(a) Press the Ink button to feed out any cleaning solution through the Print Head nozzles.
(b) Continue to feed the cleaning solution through the Print Head nozzles until they are clean (approximately
20 seconds).
Page 96

9. Procedures when leaving the printer for a long time
89JS310-UM-251-9370
9.3 Moisturizing of print head
(1) Put a clean unwoven fabric on the sponge of wet keeping frame.
Cut an unwoven fabric,and fold
it.
Then put the unwoven fabric
on the sponge.
(2) Drop some cleaning solution on the unwoven fabric.
Drop some flush solution.
(3) Cover the wet keeping frame the print head.
Cover the wet-keeping frame.
(4) Wrap the print head unit with fresh keeping polyethylene film.
Page 97

Page 98

10. Procedures when you transport the printer
91JS310-UM-251-9370
10. Procedures when you transport the printer
If you transport the printer, please dispose the ink from the printer by the procedures that are described at the
section 9.1, then fill the ink tube and the printhead by the cleaning solution by the procedures that are described at
the section 9.2. After that, please dispose the cleaning solution by following procedures and transport the printer.
10.1 Dispose the cleaning solution from the printer
(1) Move the printhead carriage to the cleaning position.
(a) From the main menu, select [
Cleaning Tool
] and then press the
ENTER
key.
(b) From the submenu, select [
Clean Post
] and then press the
ENTER
key.
(c) The printhead carriage moves to the cleaning position and then stops.
(2) Turn off the printer power supply.
(3) Empty out the cleaning solution from the ink tanks and the solution tank.
CAUTION:
First of all, remove the waste ink tanks mounted in the printer, and then discard the cleaning solution from
the ink tanks and the solution tank into the waste ink tanks.
(4) Empty out the cleaning solution from the sub tanks.
CAUTION:
First of all, remove the waste ink tanks mounted in the printer, and then discard the cleaning solution from
the sub tanks into the waste ink tanks.
(a) Remove the cap from each sub tank.
If the cap is difficult to remove, use pliers or similar to grip the cap and open it.
(b) Empty out the cleaning solution from each sub tank.
(c) Close the cap, and replace each sub tank.
(5) Turn on the printer power supply.
(a) The ink pump operates to feed out the any cleaning solution remaining in the tubes to the sub tanks.
(b) When the “
No ink
” alarm sounds, from the main menu, select
[Ink Status
] and then press the
ENTER
key to continue the cleaning solution removal operation.
(c) Continue feeding out the cleaning solution until the “No ink” alarm sounds once again.
(6) Turn off the printer power supply.
(7) Empty out the cleaning solution from the sub tanks once more.
10.2 Fixing the printhead carriage
Covering the printhead by the wet keeping frame and the fresh keeping polyethylene film following the procedures
that are described at section 9.3 Moisturizing of print head, then fixing with some adhesion tape to resist movement.
Page 99

10. Procedures when you transport the printer
92JS310-UM-251-9370
10.3 Discard the waste ink
(1) Remove the tubes from the waste ink tanks.
(2) Take out the waste ink tanks from the printer.
(3) Displace the waste ink to the plastic bottle that you provided
CAUTION:
Do not mix the waste ink with any other chemicals and solvent when you displace the waste ink. Also dispose
the waste ink as the industrial waste (waste oil).
(4) Replace the waste ink tanks, and connect the tubes.
Page 100

11. Troubleshooting
93JS310-UM-251-9370
11. Troubleshooting
11.1 Printing is not performed
Symptom Cause Solution
Power is not being supplied. The power cable is not connected. Check that the power cable is firmly
inserted.
Power is not being supplied to the power
outlet.
Check that a power voltage conforming
to the power supply specifications is
being supplied.
A “COM Timeout” message
appears on the computer screen.
The printer is not online. Check whether the printer is online. If it
is not online, press the ONLINE key to
put the printer online.
The printer is not connected to the
computer’s USB port.
Check that the printer’s USB port is
connected to the computer’s USB port.
Check that the USB cable is firmly
inserted.
The printhead carriage stops
suddenly.
The wet keeping frame is still attached
to the printhead carriage.
Remove the wet keeping frame and then
turn the power off and back on again.
11.2 Unsatisfactory printing
Symptom Cause Solution
The printed results are scratchy. Insufficient ink. If the “No ink” alarm sounds, refill the
ink tank(s) and then press the ESC key.
Clogged nozzles. Print the nozzle check pattern to check
the nozzles (see Section 8.5 Printing the
Nozzle Check Pattern).
If there are several clogged nozzles,
perform a printhead cleaning operation .
Dirty nozzle surface. Use the brush(es) provided to clean the
surface of the nozzles.
Incorrect EF value settings. Input the correct values (see Section 8.1
Setting the Printhead Drive Voltage).
There is a bend somewhere in one of the
ink tubes.
Check whether there is a bend in the ink
tubes connected to the ink tank, or in the
inlet tubes.
The printing gradually becomes
faint.
Insufficient ink. If the “No ink” alarm sounds, refill the
ink tank(s) and then press the ESC key.
Cleaning solution has become mixed in
with the ink.
Check the 3-way valve for each ink tank.
If any of the levers is set incorrectly,
move it to the ink supply position.
 Loading...