


Yoyo Data Loggers
User Guide

33784 V1.0 Yoyolog User Guide
www.grantinstruments.com Page 1
Copyright
© 2017 All rights reserved.
The contents of this User Guide could be changed anytime without prior notice. Grant
Instruments Ltd. disclaims liability for these changes.
In using this software, Grant Instruments Ltd. takes no liability for any kind of loss or
damage including all direct or indirect damages resulting from body injury, profit loss,
operation interruptions, information or data loss. Further limitations are described in the
license agreement, when installing the software. When installing the software, you agree
to accept these terms.
No part of this publication may be reproduced for any purpose or transmitted in any form
or in any means either electronic or mechanic without written permission from Grant
Instruments Ltd.
Key Account Manager
If you have any questions about installation or functionality of the software, please contact your local dealer or:
Grant Instruments (Cambridge) Ltd
Shepreth,
Cambridgeshire
UK
SG8 6GB
Tel: +44 (0)1763 260811
Fax: +44 (0)1763 262410
www.grantinstruments.com
salesdesk@grantinstruments.com
Trademarks
MS-DOS, Windows XP/Win7/Win8/Win10 are registered trademarks of Microsoft Corporation. All other product names are trademarks or registered trademarks of the respective
owners.

33784 V1.0 Yoyolog User Guide
www.grantinstruments.com Page 2
1 Content
1
Content ................................................................................................................ 2
2
Hardware Checklist ............................................................................................ 4
3
Quickstart ............................................................................................................ 5
4
General information ............................................................................................ 6
4.1
Installing batteries ............................................................................. 9
4.2
Software installation ........................................................................ 10
5
Main Software-Menu ......................................................................................... 11
5.1
Preferences and general Setup ...................................................... 12
5.2
Search for devices........................................................................... 13
6
Logger Identification ........................................................................................ 13
7
Logger Control .................................................................................................. 16
7.1
Online- Meter ................................................................................... 16
7.1.1 Storing measurements while online metering ............................. 16
7.2
Start/stop logger .............................................................................. 17
7.2.1 Active Start and Active Stop ........................................................ 19
7.3
Download Data ................................................................................ 21
7.4
Logger Setup - General ................................................................... 22
7.5
Logger Setup – Sensor Slots .......................................................... 22
7.6
Wiring external sensors ................................................................... 25
7.6.1 Additional information on sensor connection .............................. 27
7.7
Logger Setup – Configuring Alarms ................................................ 29
7.8
Display logged data as a graph ....................................................... 29
7.9
Display logged data as a table ........................................................ 30
7.10 Exit .................................................................................................. 30
8
Additional functions ......................................................................................... 31
8.1
Batch command- automatic conversion .......................................... 31
8.2
ASCII Stream-functionality .............................................................. 31
9
Troubleshooting ............................................................................................... 32
10 Understanding LEDs ........................................................................................ 33

33784 V1.0 Yoyolog User Guide
www.grantinstruments.com Page 3
11 Password protection ........................................................................................ 34
12 Important notes for measuring humidity ........................................................ 35
13 Calibration/Maintenance .................................................................................. 36

33784 V1.0 Yoyolog User Guide
www.grantinstruments.com Page 4
2 Hardware Checklist
Included in delivery for all loggers are:
- 2nd Generation Data logger series “yoyolog”
- Lithium battery SL550/S for 2YL-T14-4M/14E-4M, 2YL-RH24-4M/24E-4M
- Lithium battery type LITH12 (SL-750/S) for all other models
- USB cable
- Software YoyoView for download
at
http://www.grantinstruments.com/yoyo/downloads/
Further options include:
- Calibration certificate
- Carrying case
- Wall holder, metal strip and seal
- Connection cables YY-CS-4, YY-CU-4, YY-CI-4, YY-CP-4
for 2YL-T11-4M/T12-4M/M90-4M/M91-4M

33784 V1.0 Yoyolog User Guide
www.grantinstruments.com Page 5
3 Quickstart
Receive your first readings in six easy steps:
►Install YoyoView
Execute file …\setup.exe
► Open the logger by unscrewing its rear cap. Insert the battery. Connect the USB cable
to the respective ports of the logger and your PC.
► The Operating System will detect the device automatically. Wait for the notice that the
device can be used.
► Start YoyoView. The program automatically recognizes the logger and displays a picture. Double click on the logger picture to select the logger.
► Right click on the logger and select Metermode. After a few seconds, you will be able
to see online readings from your logger on the screen.
Start logging in two additional steps
►Again Right Click on the logger picture and then click at Start Logger.
► Click on Start Logger now. The logger will start on the nearest minute with the preset
interval of 10 seconds. The loggers blue LED will flash accordingly.
Graph measured data in just another step
►Click at Download Data.
Stored readings will be downloaded, saved as an ASCII file, and a graph is displayed.

33784 V1.0 Yoyolog User Guide
www.grantinstruments.com Page 6
4 General information
The 2nd Generation yoyo-series consists of a large variety of loggers. The full range of
loggers is shown on page 7.
Many of the yoyo-series of loggers have internal sensors such as humidity/temperature,
barometric pressure and light.
Other models have sensor slots to which external sensors may be connected. Some of
these sensors are combined sensors (for example humidity and temperature). Such a
combined sensor (for example YSRHT-120-2) can be connected to a single slot.
The loggers have a memory capacity for 4,000,000 readings.
It can be set to either “stop-when-full“ or ring-buffer mode (continuous mode).
The device offers an internal battery monitoring. YoyoView software will warn you if you
need to replace the battery. In addition, the LED flashing periodically indicates the need
for the battery to be replaced (see chapter 0, understanding LEDs for further information).
The device can be controlled over the USB cable. It only takes a few clicks to select the
relevant parameters.
If you require information or technical support for 1st Generation yoyo loggers, please
contact Grant instruments support@grantinstruments.com .
1st Generation models are identified by model prefix YL e.g. YL-T10

33784 V1.0 Yoyolog User Guide
www.grantinstruments.com Page 7

33784 V1.0 Yoyolog User Guide
www.grantinstruments.com Page 8
All 2nd Generation “yoyo“- Models at a Glance:
Measured parameters and connectable external sensors
Models
Internal Sensors
External Sensors
YoYo
2nd
generation
Temperature Humidity
Barometric
Pressure
Illuminance
PT100/PT100
0/Thermis-
tor/Thermo-
couple Volt-
age/Cur-
rent/Pulse,
Digital RH/T
Probes, Water
Detector, Soil
Moisture Sen-
sor
ELV/ Strain
Gauge
Thermo-cou-
ple with mini
ISA
2YL-T10-4M
x
2YL-T10E-4M
x
2YL-T11-4M
x (1)
2YL-T12-4M
x (1)
2YL-T14-4M
x
2YL-T14E-4M
x
2YL-T15-4M
x
2YL-T16-4M
x
2YL-RH20-4M
x x
2YL-RH20E-4M x x
2YL-RH23-4M
x x x
2YL-RH23E-4M
x x x
2YL-RH24-4M
x x
2YL-RH24E-4M
2YL-M36-4M
x
2YL-M37-4M
x x
2YL-M61-4M
x
2YL-M62-4M
x x x
2YL-M90-4M
x x x (1,2)
2YL-M90E-4M
x x x (1,2)
2YL-M91-4M
x x x x x (1,2)
1 = connecting thermocouples requires cable type YY-CTC-4
3 = connecting voltage/currrent/pulse signals require special
cable types YY-CU-4/YY-CI-4/YY-CP-4
A full list of specifications can be found on our website
33784 V1.0 Yoyolog User Guide
www.grantinstruments.com Page 9
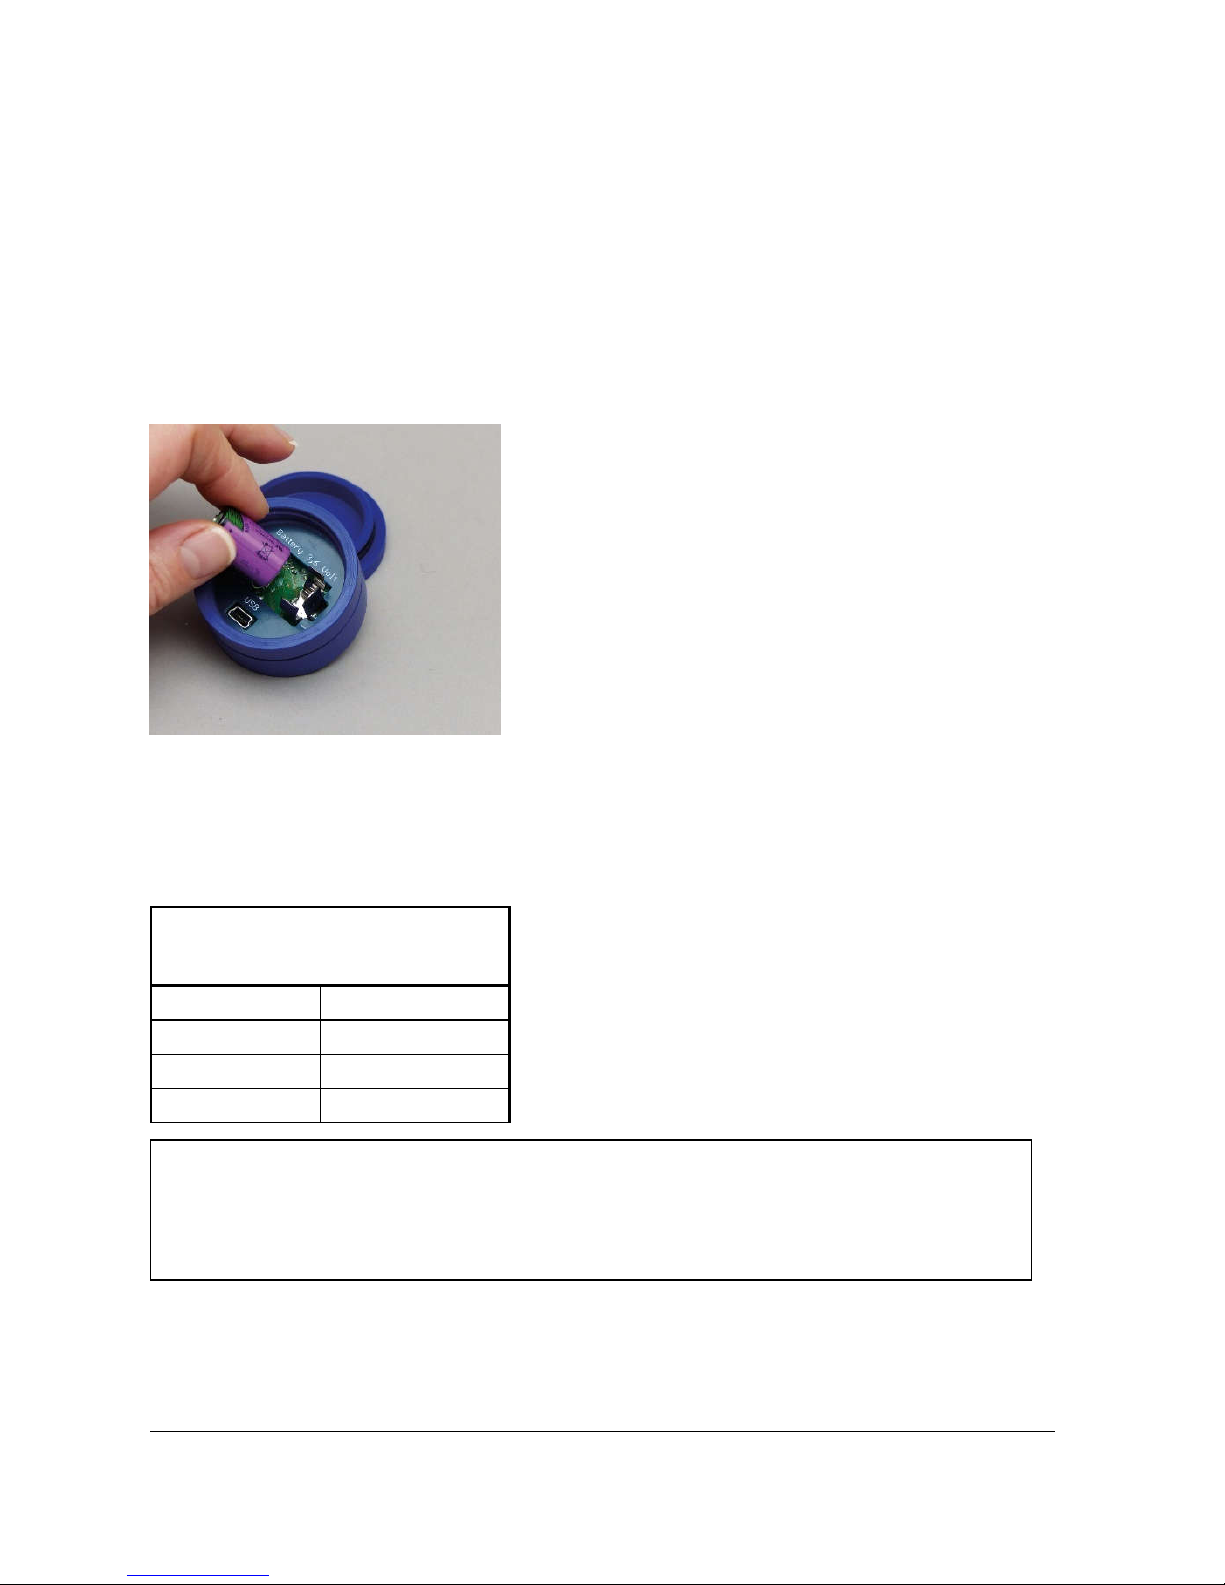
4.1 Installing batteries
The logger’s power supply is provided by a 3.6V lithium battery.
The following list shows which battery shall be used for your logger:
- Lithium battery SL-550/S for 2YL-T14-4M/T14-E-4M and 2YL-RH24-4M/RH24-E-4M
- Lithium battery type SL-750/S for all other models
The logger offers internal battery monitoring.
YoyoView will indicate when the battery will require
replacing. In addition, the LED flashing periodically
indicates the need for the battery to be replaced (see
chapter 0, understanding LEDs for further information).
To insert a battery into the datalogger, unscrew the
back cover of the logger then insert the battery keeping the correct polarity.
When the battery has been fitted the LED on the front of the logger will start flashing in
red/green/blue after a few seconds to indicate it is operating.
Battery life
The battery life depends mainly on the logging interval selected. The table gives an overview for typical
intervals.
yoyo-Logger
Interval
Battery life
>1 min 4 years
10 sec 230 days
1 sec 25 days
Some other factors reduce battery life- e.g., low temperatures decrease battery life. Downloading data or operation in MeterMode, Active start option enabled will also cause an increased energy consumption, which further decreases battery life.

33784 V1.0 Yoyolog User Guide
www.grantinstruments.com Page 10
5 Software installation
The Software YoyoView can be downloaded on our website at:
http://www.grantinstruments.com/yoyo/downloads/
If you require a USB-stick containing the software you may order it separately.
Hard-/Software Minimum-Configuration Recommended Configuration
Computer: Intel Pentium, 1 GHz Intel Pentium III, 2 GHz
Operating system:
Windows XP/Win7/8/9/10
Windows 7/8/9/10
RAM: 512 MB 1 GB or more
Monitor: Any windows-supported monitor
Monitor with VGA- or higher
resolution graphic
Mouse: Any windows-supported mouse Any windows-supported mouse
Port: 1 free USB-port 1 free USB-port
Printer: Any windows-supported printer Any windows-supported printer
After unzipping the file start the setup program Setup_YoyoView_ For-
Windows.exe which will guide you through the installation progress.Choose appropriate folder and after a few seconds the software
has been installed.
You will now be prompted to install
the USB driver.
Click at Install and wait until the driver has been installed.
After the setup has been completed activate the box
and click at Done to directly run YoyoView.
NOTE: If YoyoView is not started automatically,
please start it up manually. You will find
it as usual in your Start section of the
windows software as well as a shortcut
on your desktop.

33784 V1.0 Yoyolog User Guide
www.grantinstruments.com Page 11
5.1 Main Software-Menu
Within the main menu you will find most important functions as well as important information about the logger and the logger status.
Hovering over the logging symbol will show logging interval.
 Loading...