

Granite Ware F0730, F0731 Instruction Manual And Users Manual
Pressure Canner
And Pressure Cooker/Steamer
Instruction Manual and User Guide
© 2013 Columbian Home Products, LLC www.columbianhp.com

2
TABLE OF CONTENTS
1. Important Safeguards……………………………………………. 3
2. Your New Pressure Canner……………………………………… 4
3. Component Part Descriptions …………………………………… 5
4. Replacement Parts………………………………………………... 7
5. Before Using Your New Pressure Canner……………………….. 8
6. Pressure Canning General Information…………………………... 8
7. Canning at Altitude: Adjustment Guide………………………….. 9
8. Using Your Pressure Canner……………………………………… 10
9. Cleaning and Maintenance………………………………………... 15
10. Model Number & Company Information…………………………. 15
11. Replacement Part Guide…………………………………………... 16
12. USDA Food Classifications & Cooking Times…………………… 17
13. Additional Recipe and Information Resources……………………. 20

3
This GraniteWare® product is a listed appliance. The following Important Safeguards
are recommended.
IMPORTANT SAFEGUARDS
When using pressure cookers, basic safety precautions should always be followed:
1. Read all instructions.
2. Do not touch hot surfaces. Use handles or knobs.
3. Close supervision is necessary when the pressure cooker is used near children.
4. Do not place the pressure cooker in a heated oven.
5. Extreme caution must be used when moving a pressure cooker containing hot liquids.
6. Do not use pressure cooker for other than intended use.
7. This appliance cooks under pressure. Improper use may result in scalding injury.
Make certain unit is properly closed before operating. See “Using Your Pressure
Canner, pages 10-14.”
8. Do not fill the unit over 2/3 full. When cooking foods that expand during cooking
such as rice or dried vegetables, do not fill the unit over 1/2 full. Over filling may
cause a risk of clogging the vent pipe and developing excess pressure. See “USDA
Food Classifications and Recommended Cooking Times, pages 18-20.”
9. Be aware that certain foods, such as applesauce, cranberries, pearl barley, oatmeal or
other cereals, split peas, noodles, macaroni, rhubarb, or spaghetti can foam, froth, and
sputter, and clog the pressure release device (steam vent). These foods should not be
cooked in a pressure cooker.
10. Always check the pressure release devices for clogging before use.
11. Do not open the pressure cooker until the unit has cooled and all internal pressure has
been released. If the handles are difficult to push apart, this indicates that the cooker
is still pressurized – do not force it open. Any pressure in the cooker can be
hazardous. See “Using Your Pressure Canner, pages 10-14.”
12. Do not use pressure cooker for pressure frying with oil.
13. When the normal operating pressure is reached, turn the heat down so all the liquid,
which creates the steam, does not evaporate.
14. SAVE THESE INSTRUCTIONS.
4
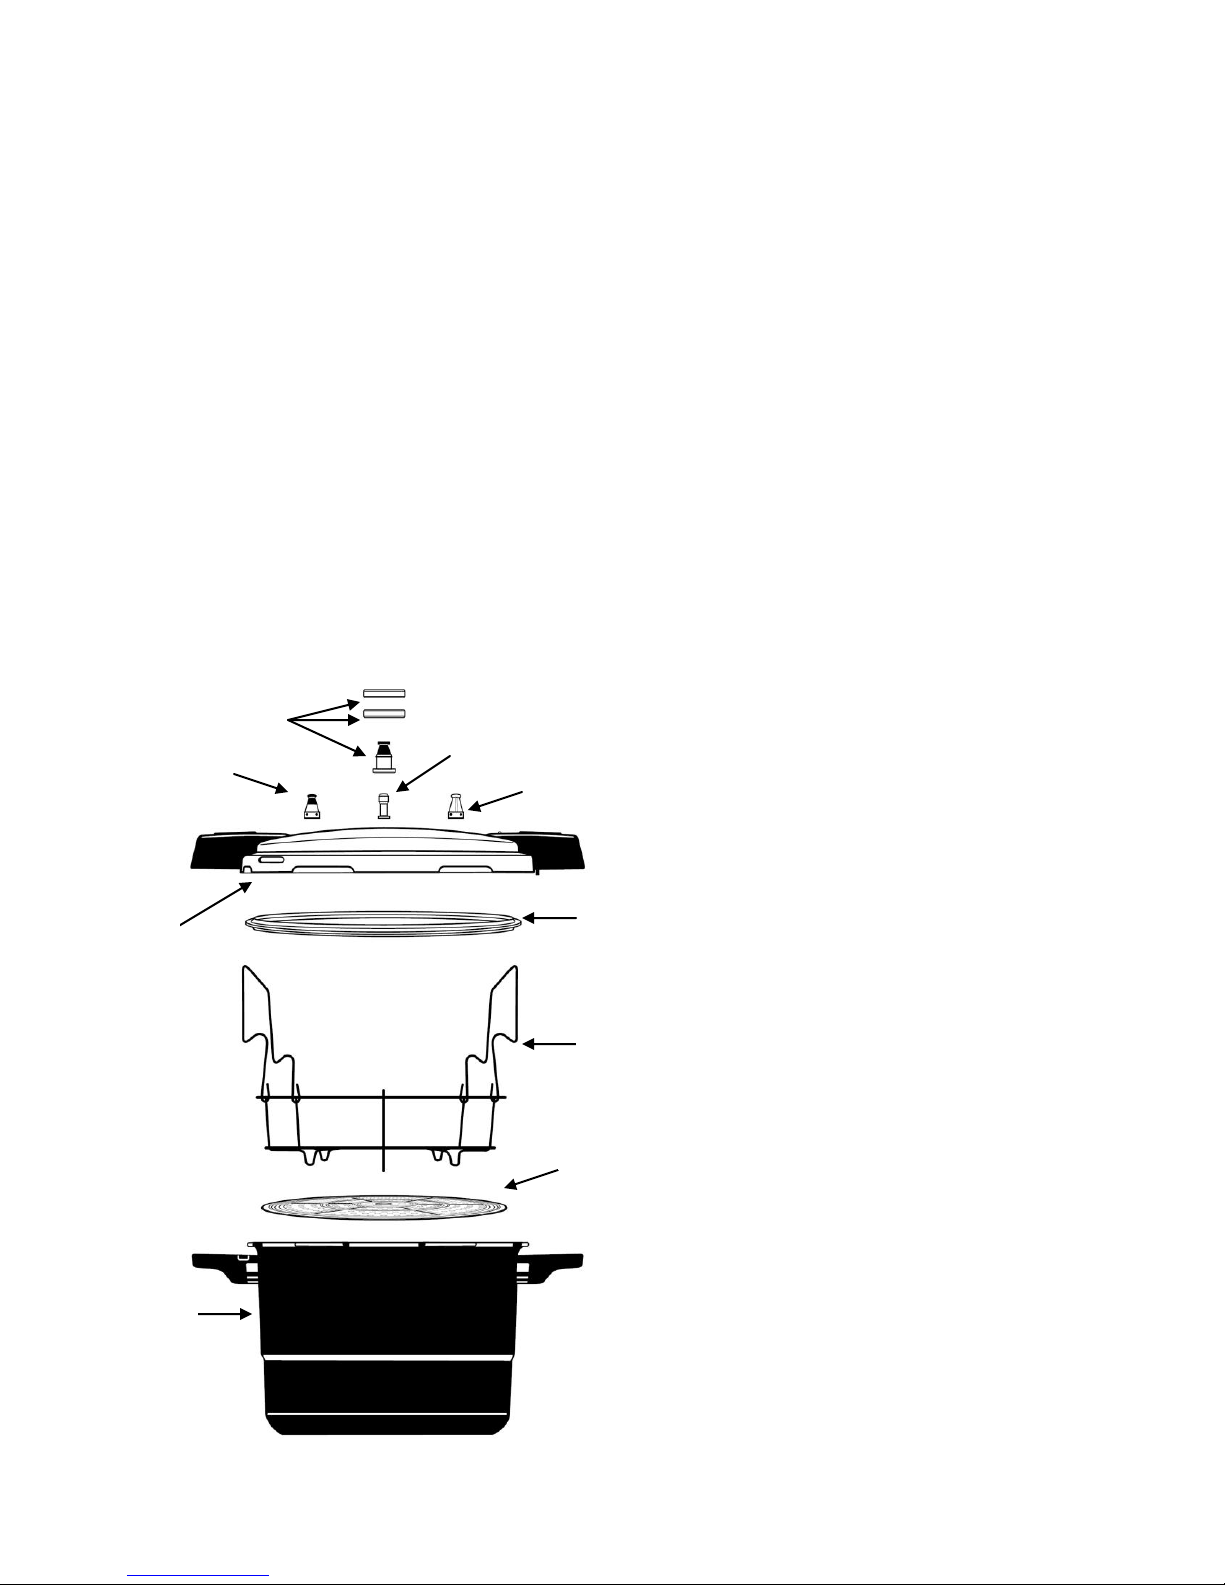
1. Adjustable 3-piece Pressure
Regulator
2. Vent Pipe
3. Back-up Safety Valves
4. Lid Gasket Sealing Ring
5. Canning Rack
6. Steamer Insert
7. Lid
8. Body
YOUR NEW PRESSURE CANNER
This GraniteWare® canner/cooker/steamer is a large capacity pressure vessel designed for
home canning your favorite fruits, vegetables, meats and poultry. Because of its hard
anodized finish – a high-end cookware feature – the canner can also be used as a pressure
cooker and steamer with outstanding results and no adverse affects on the taste or color of
your food.
The canner achieves the high temperatures required for safely processing foods through
heated water which produces steam and pressure inside the canner. The United States
Department of Agriculture (USDA) endorses the pressure canner as the only safe method for
canning meats, poultry and low-acid vegetables.
Pressure cooking is fast, healthy and cost-effective. This GraniteWare® pressure cooker
preserves flavor and nutrients, tenderizes tough cuts of meat, and cooks many foods in onethird to one-tenth the time compared to traditional methods, and it is large enough to create
family-sized meals with ease.
5
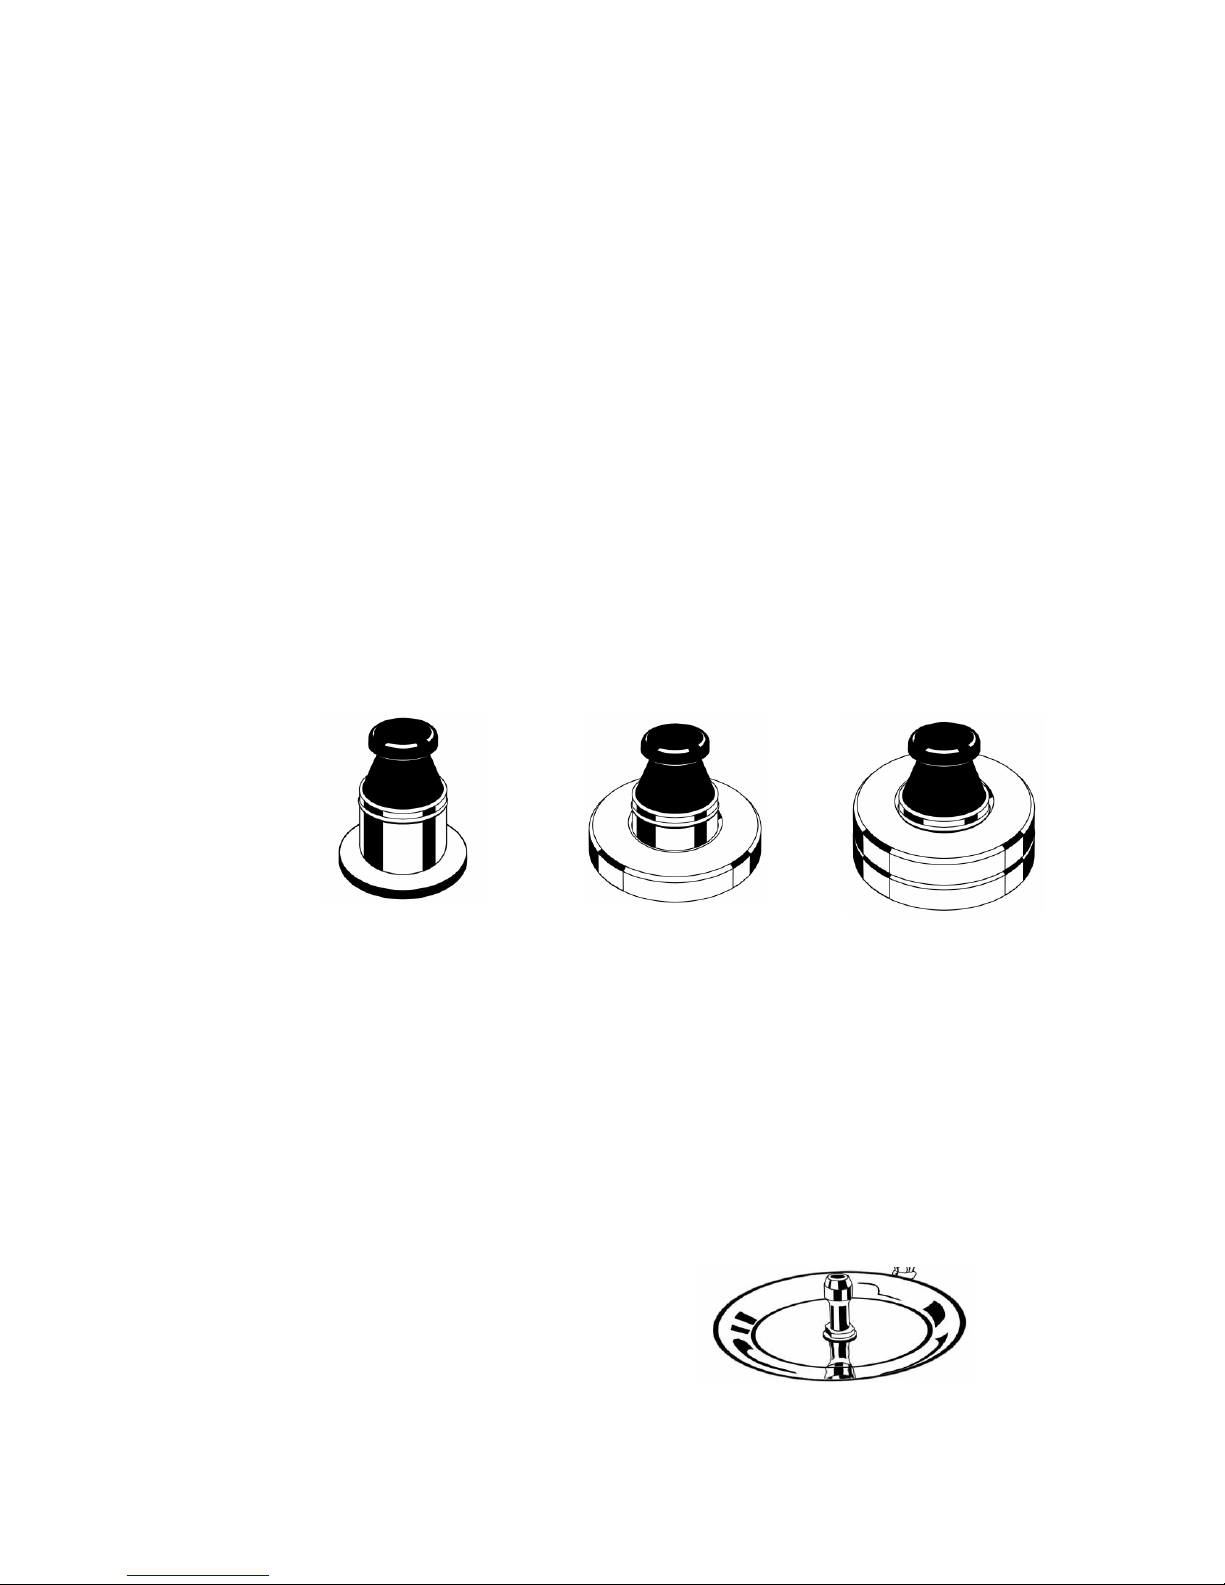
1. ADJUSTABLE 3-PIECE PRESSURE REGULATOR
The Pressure Regulator controls the pressure inside the canner. When normal
operating pressure is reached, the pressure regulator will begin to rock. Gradually
lower the heat as necessary to maintain the pressure. Correct pressure is indicated
by a consistent gentle rocking of the pressure regulator. It is normal for some
steam to be released when the proper pressure is attained.
The Pressure Regulator is calibrated for three different pressure levels measured
in pounds per square inch or psi (5 psi, 10 psi or 15 psi). The Pressure Regulator
maintains 15 psi of pressure when completely assembled with the two additional
weighted rings included.
For different pressure levels (See Canning at Altitude, page 9), the regulator can
be adjusted by removing the appropriate number of weighted rings. With both
rings removed, the regulator by itself maintains 5 psi. If 10 psi is required, add
one ring to the regulator. If 15 psi is required, add both rings to the regulator.
5 psi Pressure Regulator 10 psi Pressure Regulator 15 psi Pressure Regulator
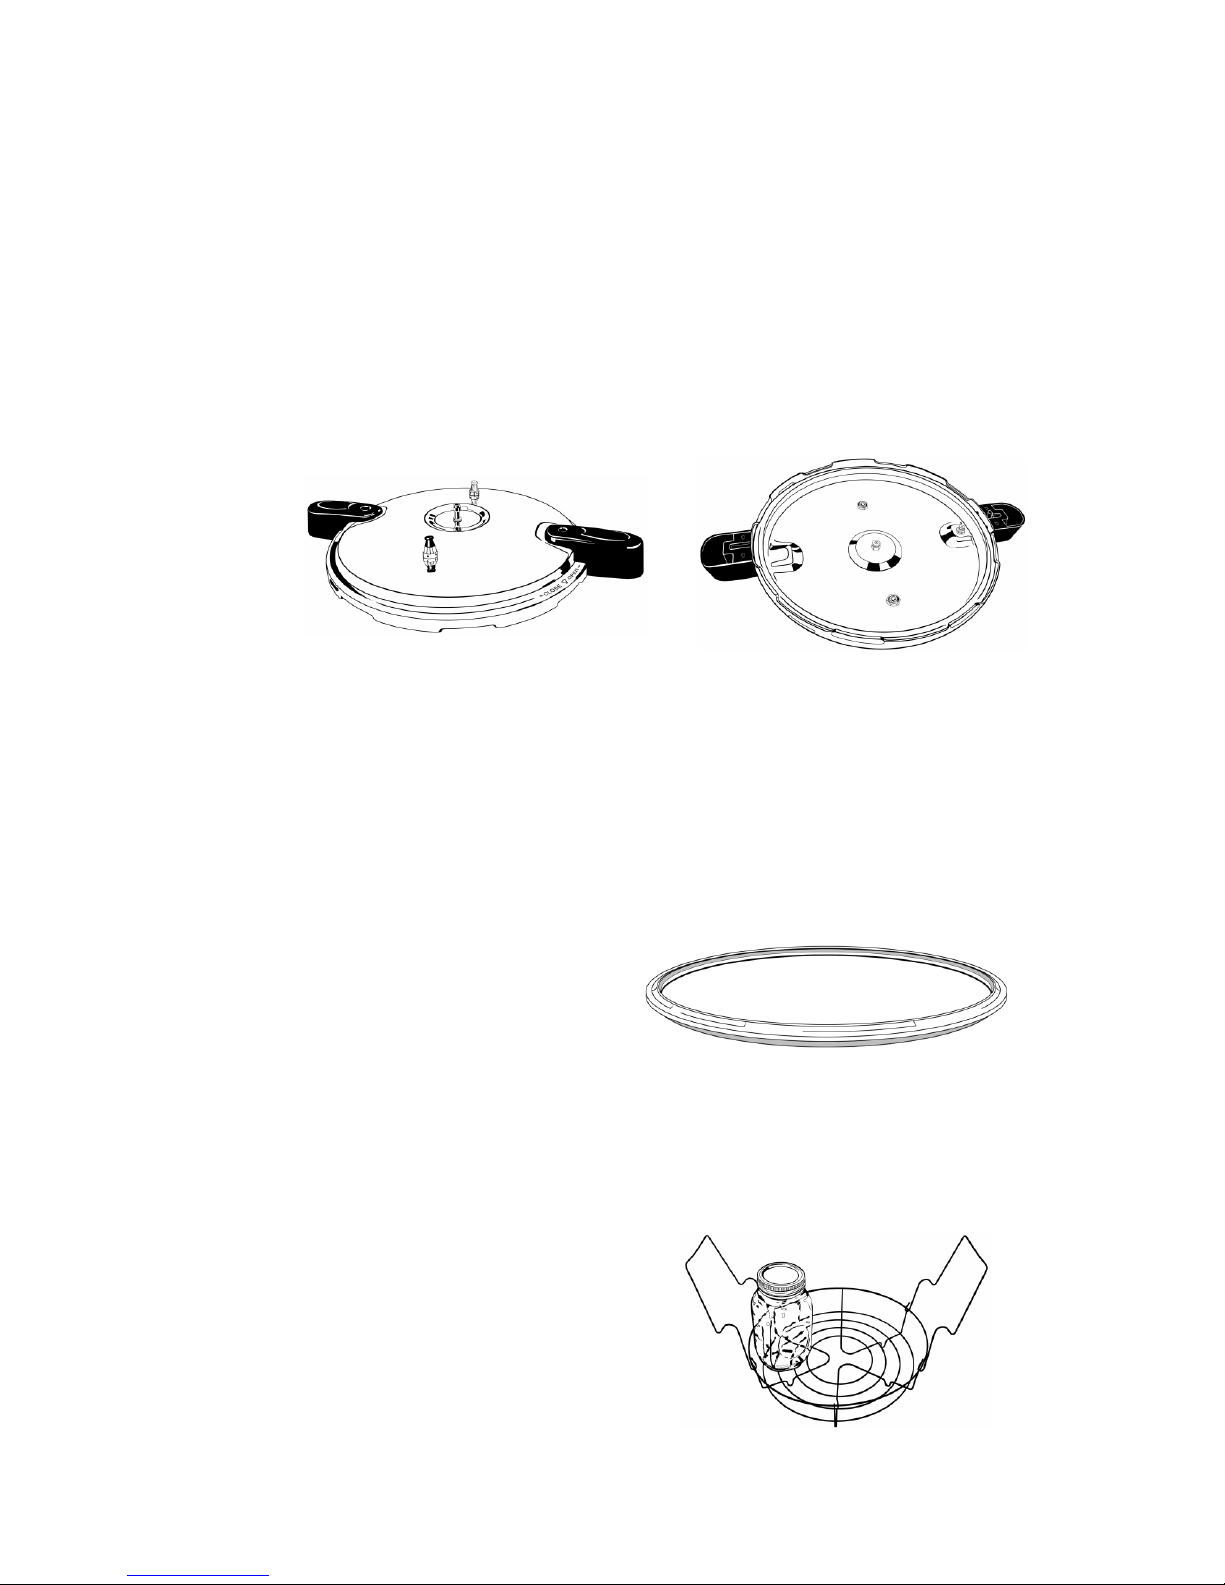
2. VENT PIPE
The vent pipe is located in the center of the lid. Steam will pass through the vent
pipe to the Pressure Regulator. It is extremely important to keep the vent pipe
clean and unobstructed. The Pressure Regulator sits loosely on the vent pipe.
Push the Pressure Regulator downwards on the vent pipe until it clicks into place.
The Pressure Regulator will move around when in place but is secured from
lifting off by the safety catch. To remove the Pressure Regulator from the vent
pipe, hold the regulator by the black top and pull directly upwards firmly until it
passes over the safety catch. NOTE: Do not remove the Pressure Regulator
while pressure is in the vessel.
6
3. BACK-UP SAFETY VALVES
Two (2) additional safety valves are found on the top of the lid. One black cap
safety valve is set to go off as back-up pressure release if the main pressure
regulator fails or is clogged. The second safety valve is all metal and will exhaust
residual pressure while sounding a whistling alarm.
The valves can be removed for cleaning and inspection by loosening their nut on
the underside of the lid. Turn the nut counterclockwise (left) to loosen and
remove the valves. Be sure to replace the valves and tighten the attachment nut
by turning it clockwise (right) until secure.
4. LID GASKET SEALING RING
The lid gasket is a flexible silicone ring that fits inside the canner cover and forms
a pressure-tight seal between the body of the canner and the cover during use.
Remove the gasket sealing ring before each use and inspect it for signs of wear
and rigidity. The ring should bend easily and be free from holes or tears.
Periodic light oiling with mineral oil will keep the ring flexible. We recommend
replacing the lid sealing ring each canning season.
5. CANNING RACK
The canning rack holds jars off the bottom of the pot. Never place glass jars
directly into the canner without the rack. The rack holds 7 quart jars, 8 pint jars
or 24 half-pint jars. Lower the rack into the canner when ready to process your
food. Fold handles inward so they do not touch the canner lid.
 Loading...