

Page 1
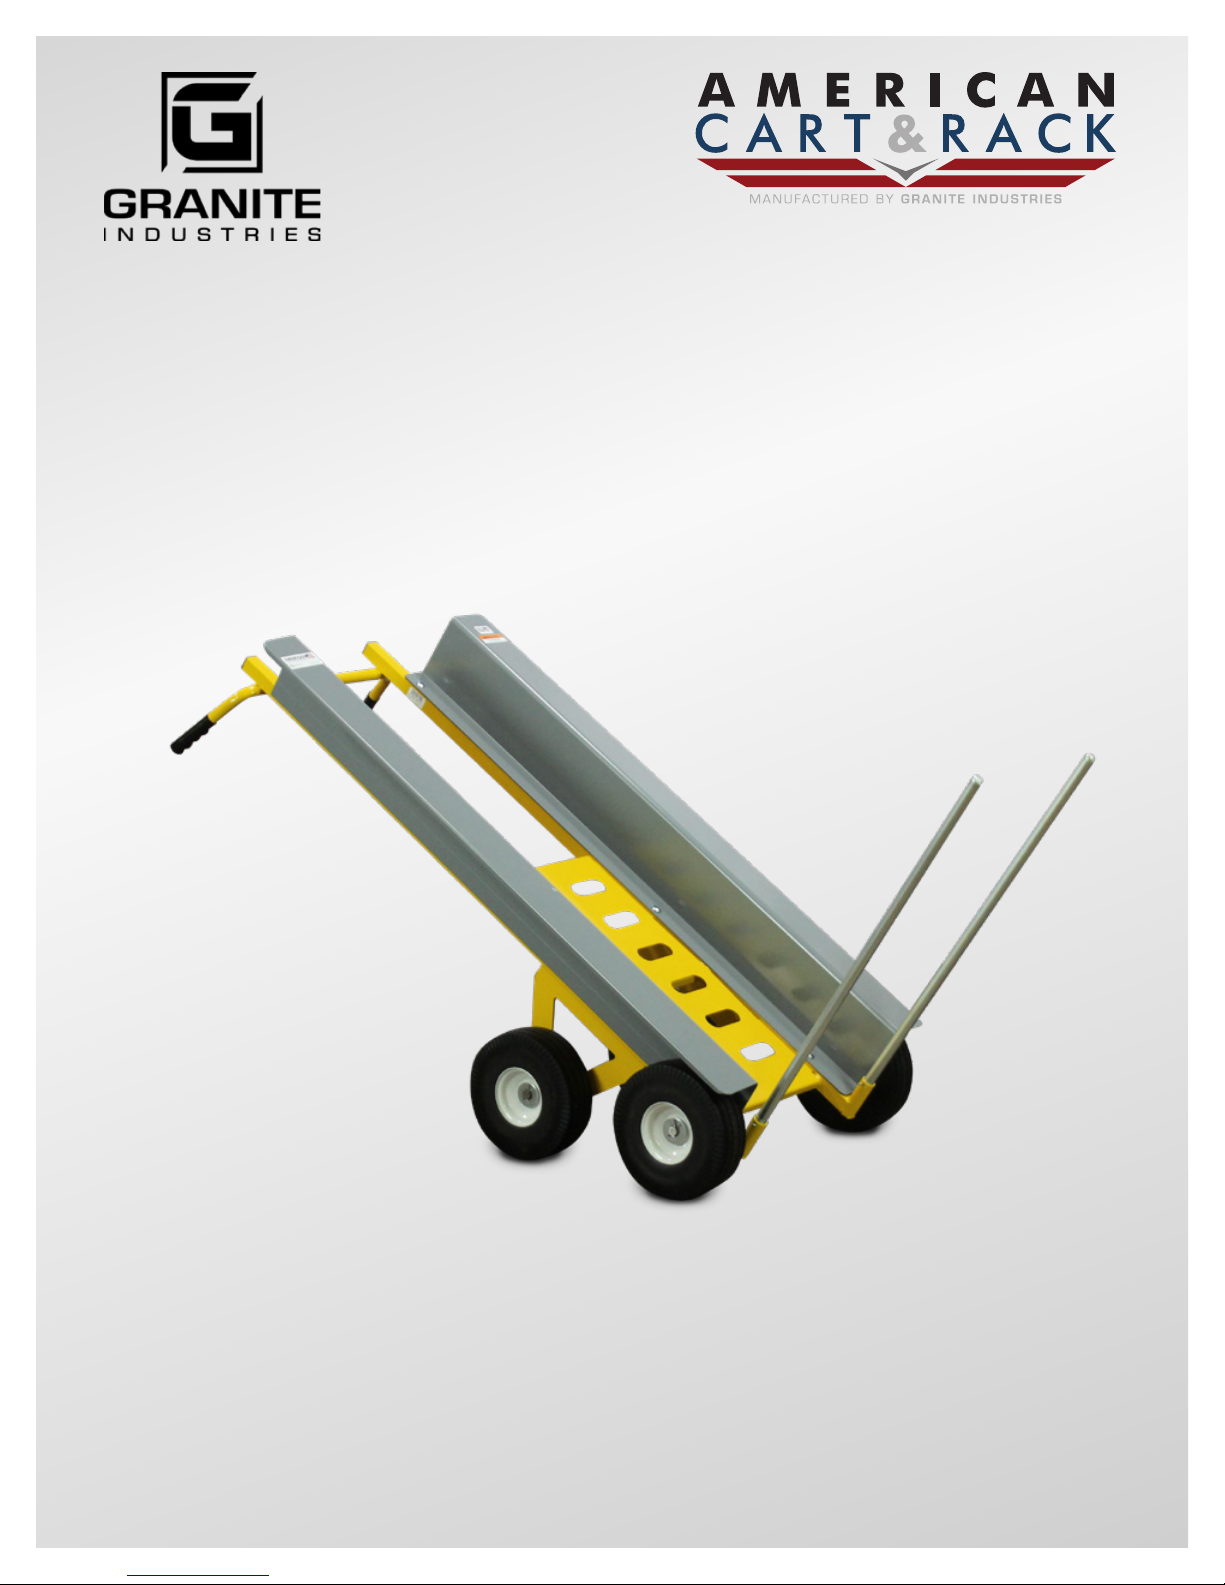
MANTIS
INSTRUCTION MANUAL
Revised: JULY 2017
67092-75
Page 2

CONTENTS
WARRANTY
Specs ......................................................................3
Parts Diagram ........................................................4
Assembly .............................................................5-7
TOOLS NEEDED
• 9/16” Wrench
• Ratchet with 9/16” Socket
• Needle Nose Pliers
• Box Cutters / Utility Knife
STANDARD ON ALL
AMERICAN CART PRODUCTS
Made in the USA
Hand crafted at our Ohio plant.
Heavy-duty comes standard
American Carts are all built to heavy duty specs
Flat-free tires
10 inch closed-cell tires that will never go flat
Powder coated nish
Protects the steel and provides a lasting finish
D-Brackets
One piece design holds the axle in place and
3 Year Limited Warranty. Carts, excluding any
finishes, casters and wheels are warranted for three
(3) years from date of original purchase. Casters
and wheels are warranted for 90 days from date of
original purchase. We will repair, without charge,
any defect due to faulty material or workmanship.
These warranties do not cover failures due to
abuse, misuse, improper installation, accidental
damage or when repairs or modifications have been
made or attempted to be made by anyone other
than Granite Industries. Any defective products
that meet warranty specifications and Granite
Industries approval, may be returned to the factory
to be repaired or replaced free of charge. (Granite
Industries will pay to ship replacement item(s) to the
customer; however the customer is responsible for
shipment of products to the factory.) This remedy
is the sole remedy in contact, tort or otherwise,
and Granite Industries is not liable for incidental,
consequential or special damages. These warranties
give you specific legal rights, and you may have
other rights which vary from state to state. Should
you have any questions, contact Granite Industries
(Proof of purchase may be required).
supports the load
Steel construction
Built from American sourced steel
Easy to operate
Designed to get work done with less muscle
strain and simple operation
2
Customer Service
877-447-2648
M-F, 8am - 5pm EST
Page 3
SPECS
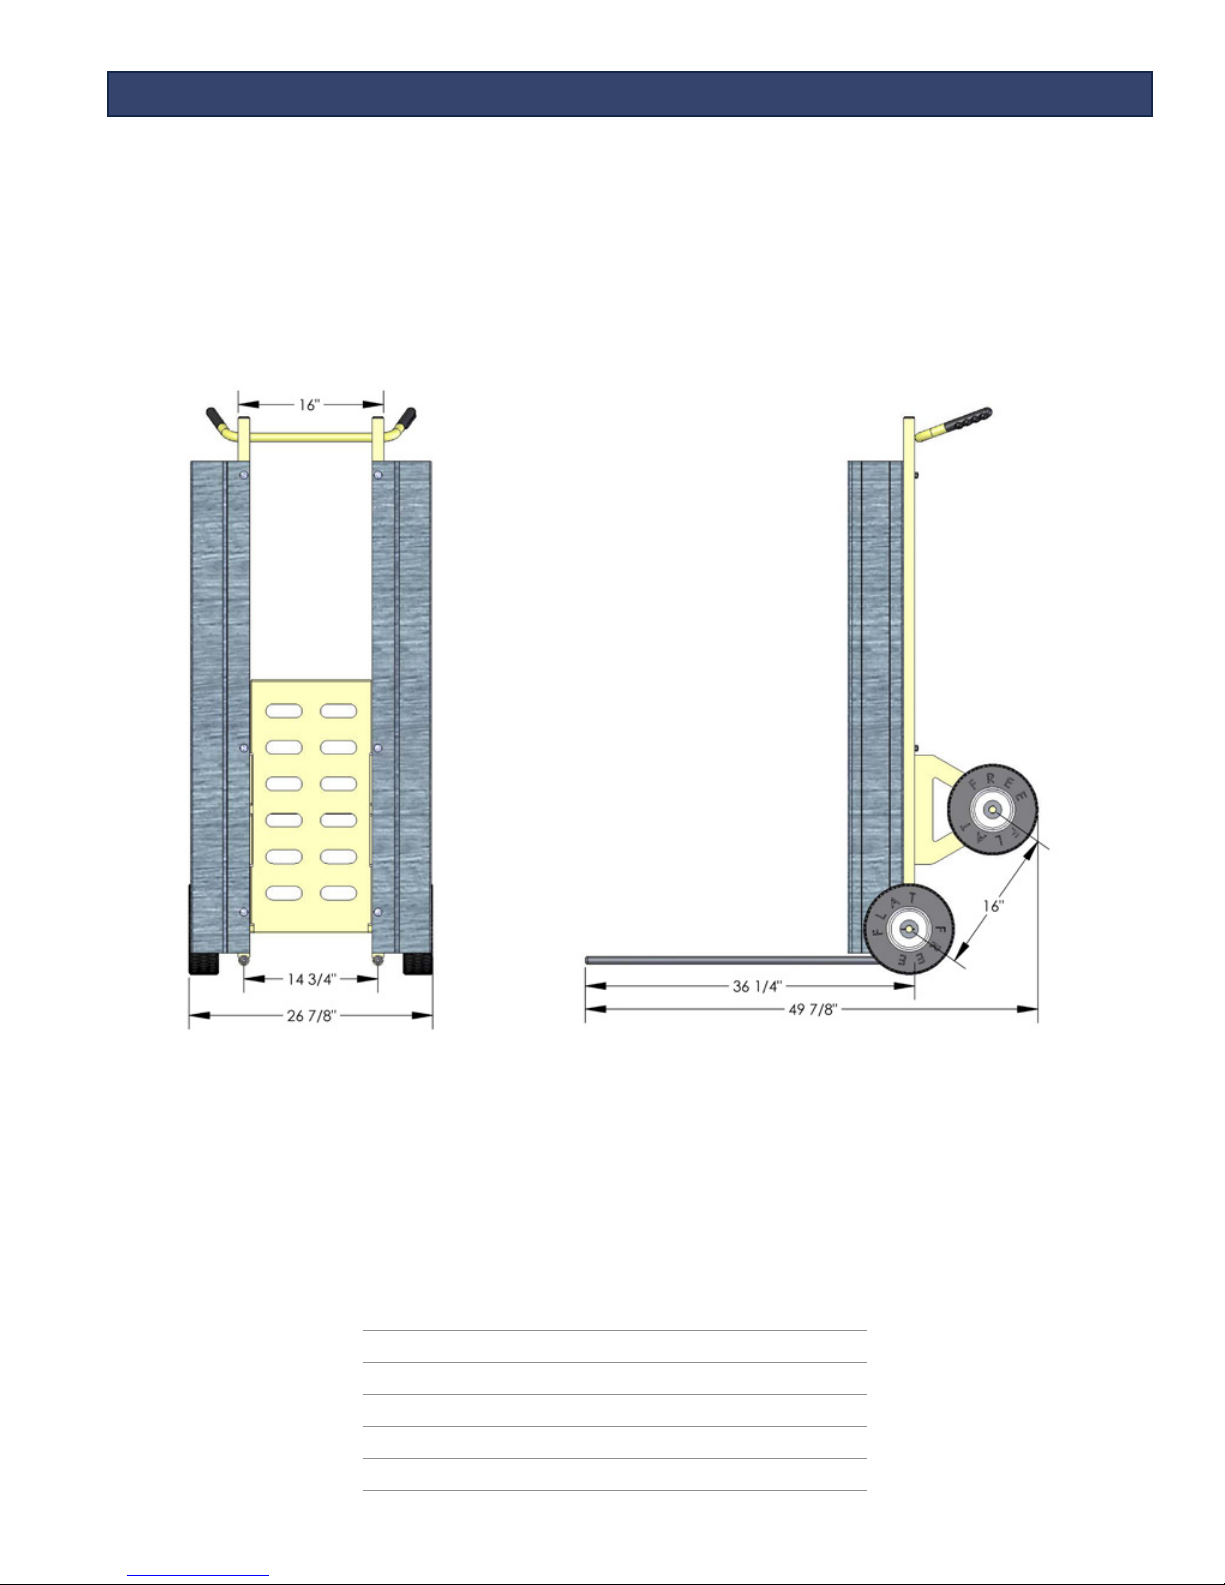
Dimensions:* W: 27” D: 74” H: 39”
Forks: L: 34” Spaced 14 3/4” apart
Weight: 88 lbs.
Capacity: 50 chairs Capacity: 750 lbs.
Typically Ships: UPS; some assembly required
*Measurements taken on 4 wheels
3
Page 4
PARTS DIAGRAM
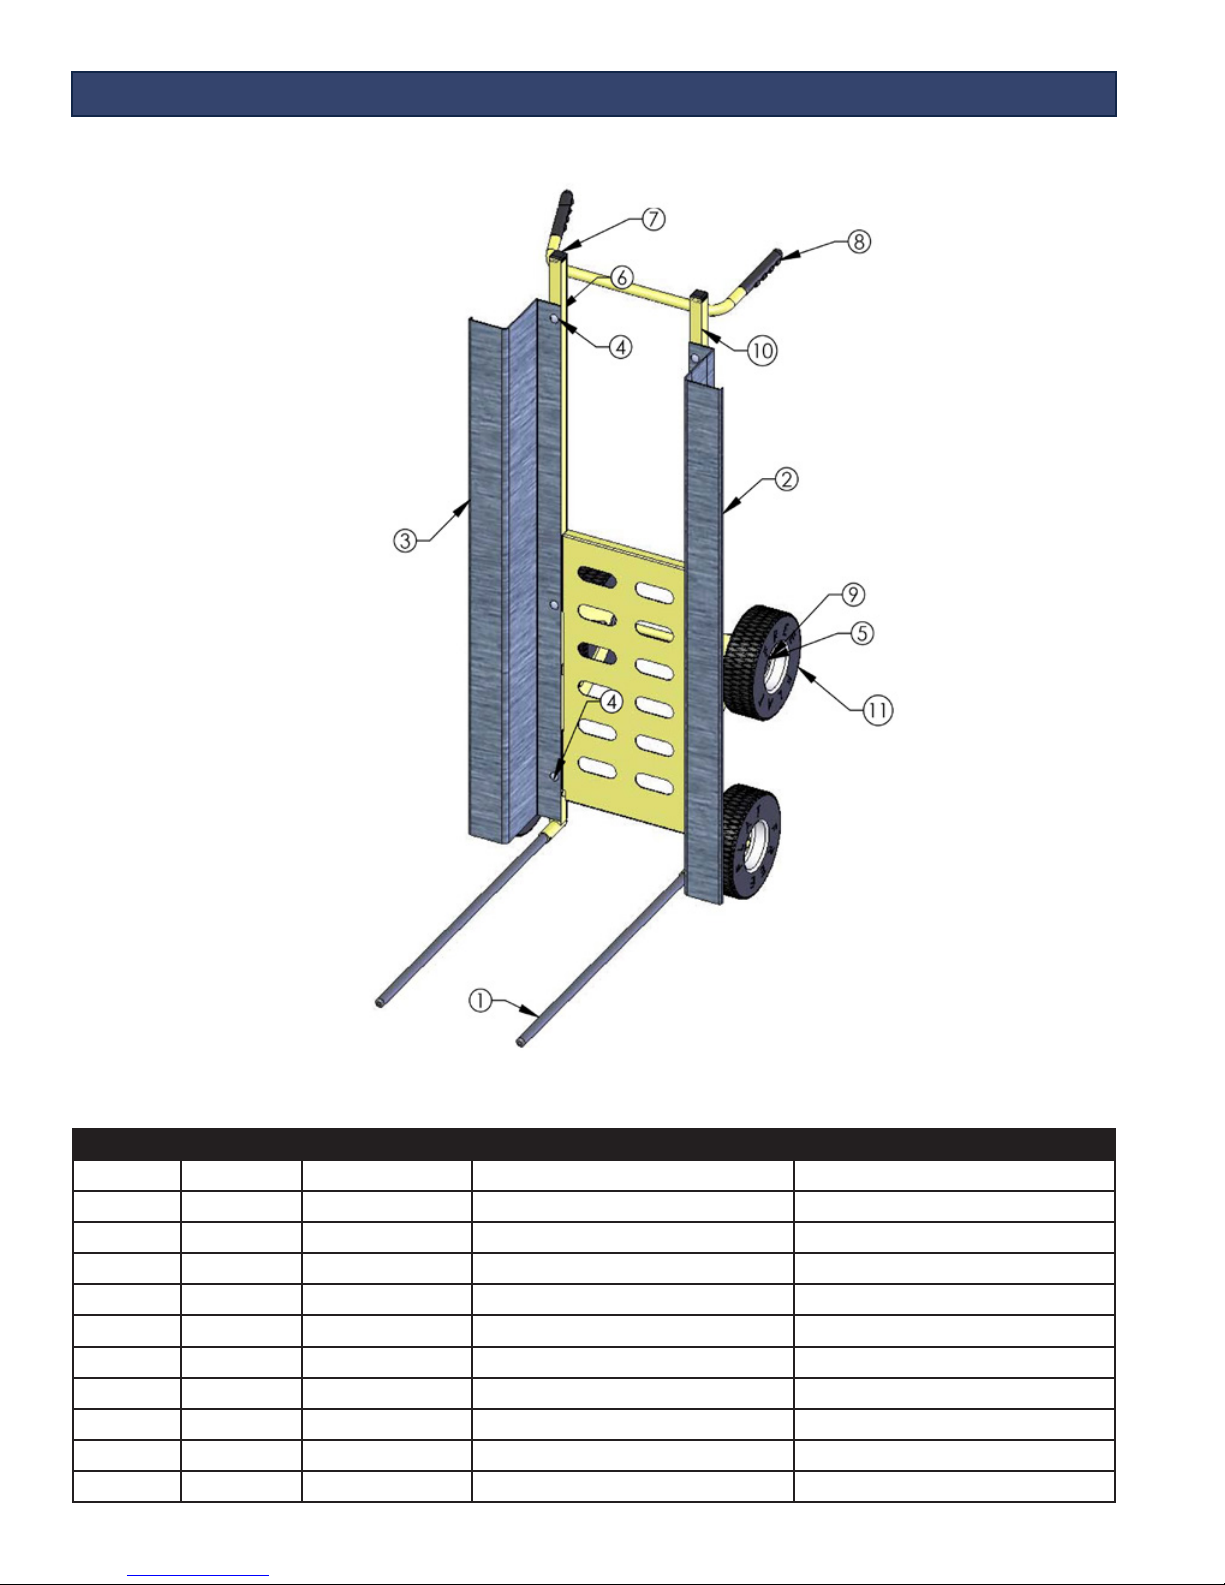
ITEM NO QTY PART NO DESCRIPTION
1 2 MI-04-0450 MANTIS FORK
2 1 MI-08-0513 RIGHT MANTIS FENDER
3 1 MI-08-0514 LEFT MANTIS FENDER
4 6 PI-01-0158 3/8"CARRIAGE BOLT (1 3/4" L)
5 4 PI-01-0226 1-1/4" COTTER PIN
6 6 PI-01-0236 3/8"LOCK NUT USE 9/16” WRENCH/SOCKET
7 2 PI-04-0108 1-1/4" SQUARE CAP
8 2 PI-04-0109 HAND GRIP
9 6 PI-01-0451 3/4" WASHER
10 1 MI-12-5663 CART BODY
11 4 PI-06-0115 10” STEEL OFFSET HUB WHEEL
4
Page 5
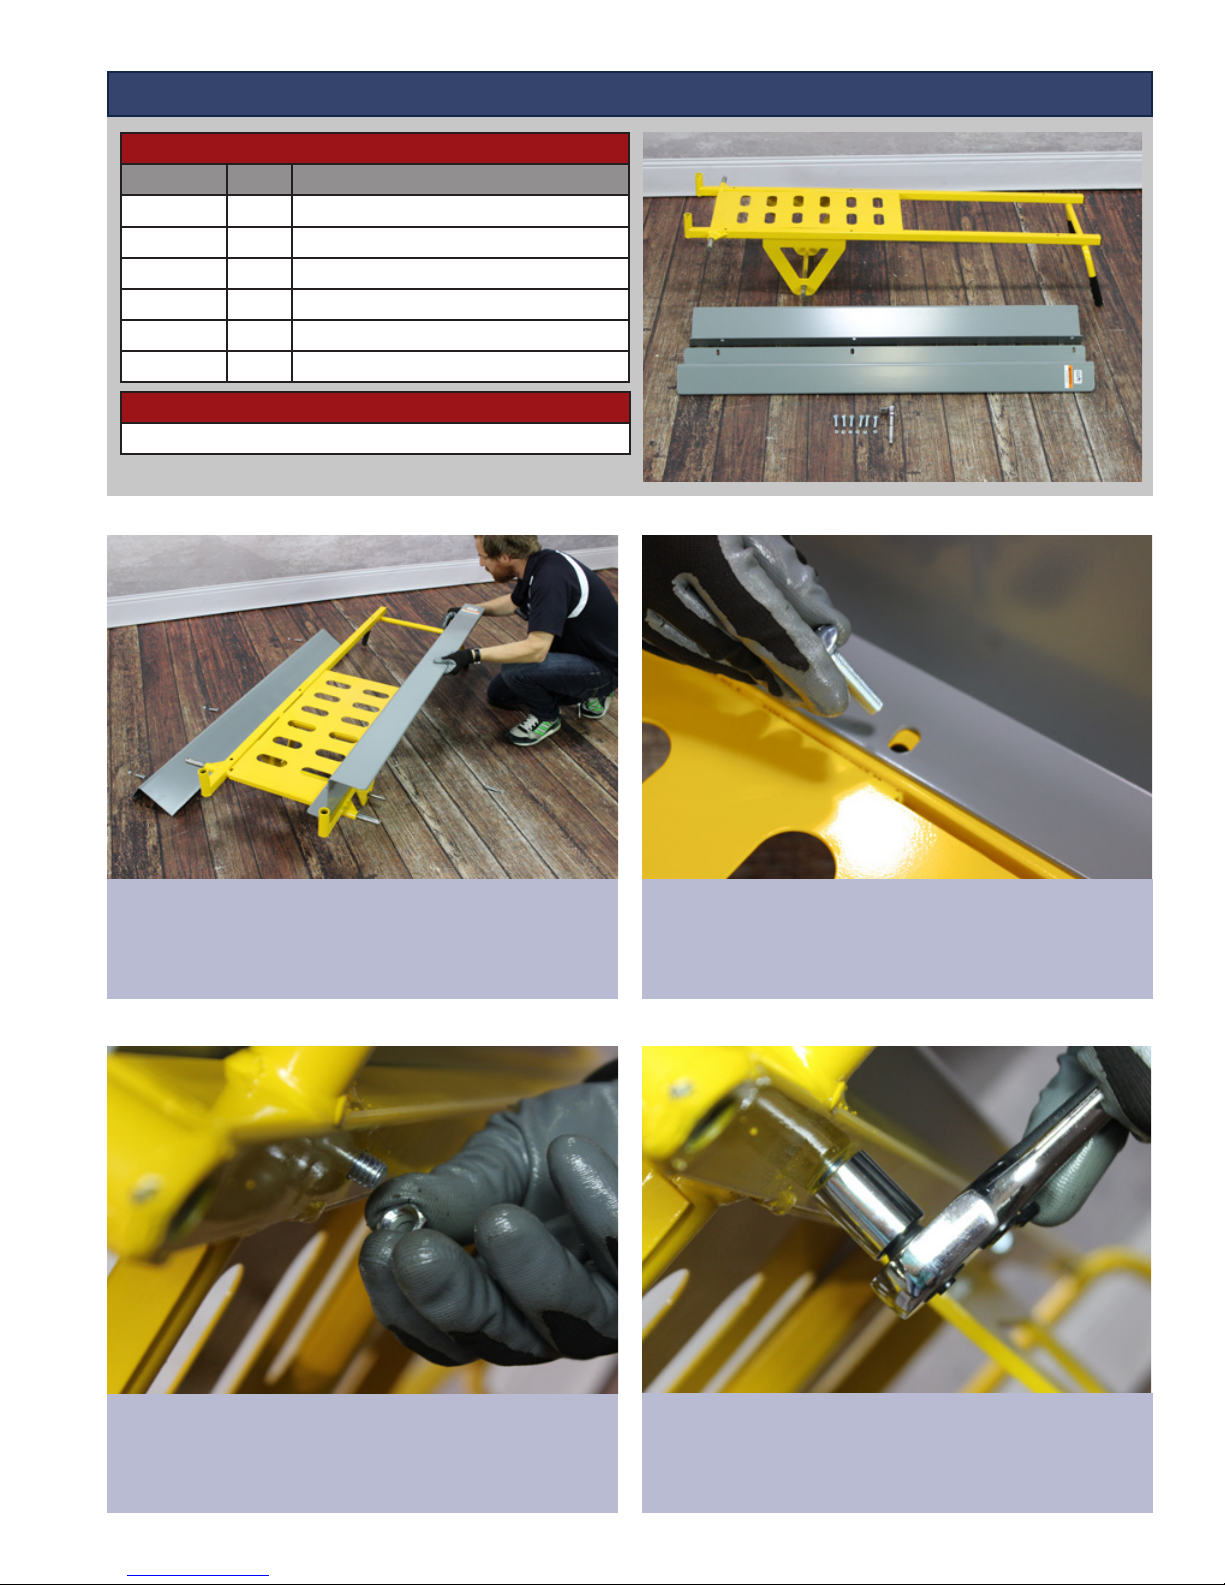
STEP 1: INSTALL FENDERS
COMPONENTS
ITEM NO QTY DESCRIPTION
1 1 Multi Mover Cart Body
2 1 Right Mantis Fender
3 1 Left Mantis Fender
4 6 3/8” Carriage Bolt
6 6 3/8” Lock Nut
10 1 Cart Body
TOOLS
9/16” Wrench/Socket
1
3
With the cart resting on the axles, align one
of the fenders over the cart body.
Finger tighten the lock nut onto the
carriage bolt. Repeat steps 2 & 3.
Insert the carriage bolts into the 3 holes.
2
Tighten the nut down with a 9/16”
wrench/socket. Repeat for all bolts.
Repeat steps 1-4 to install the
second fender.
4
5
Page 6
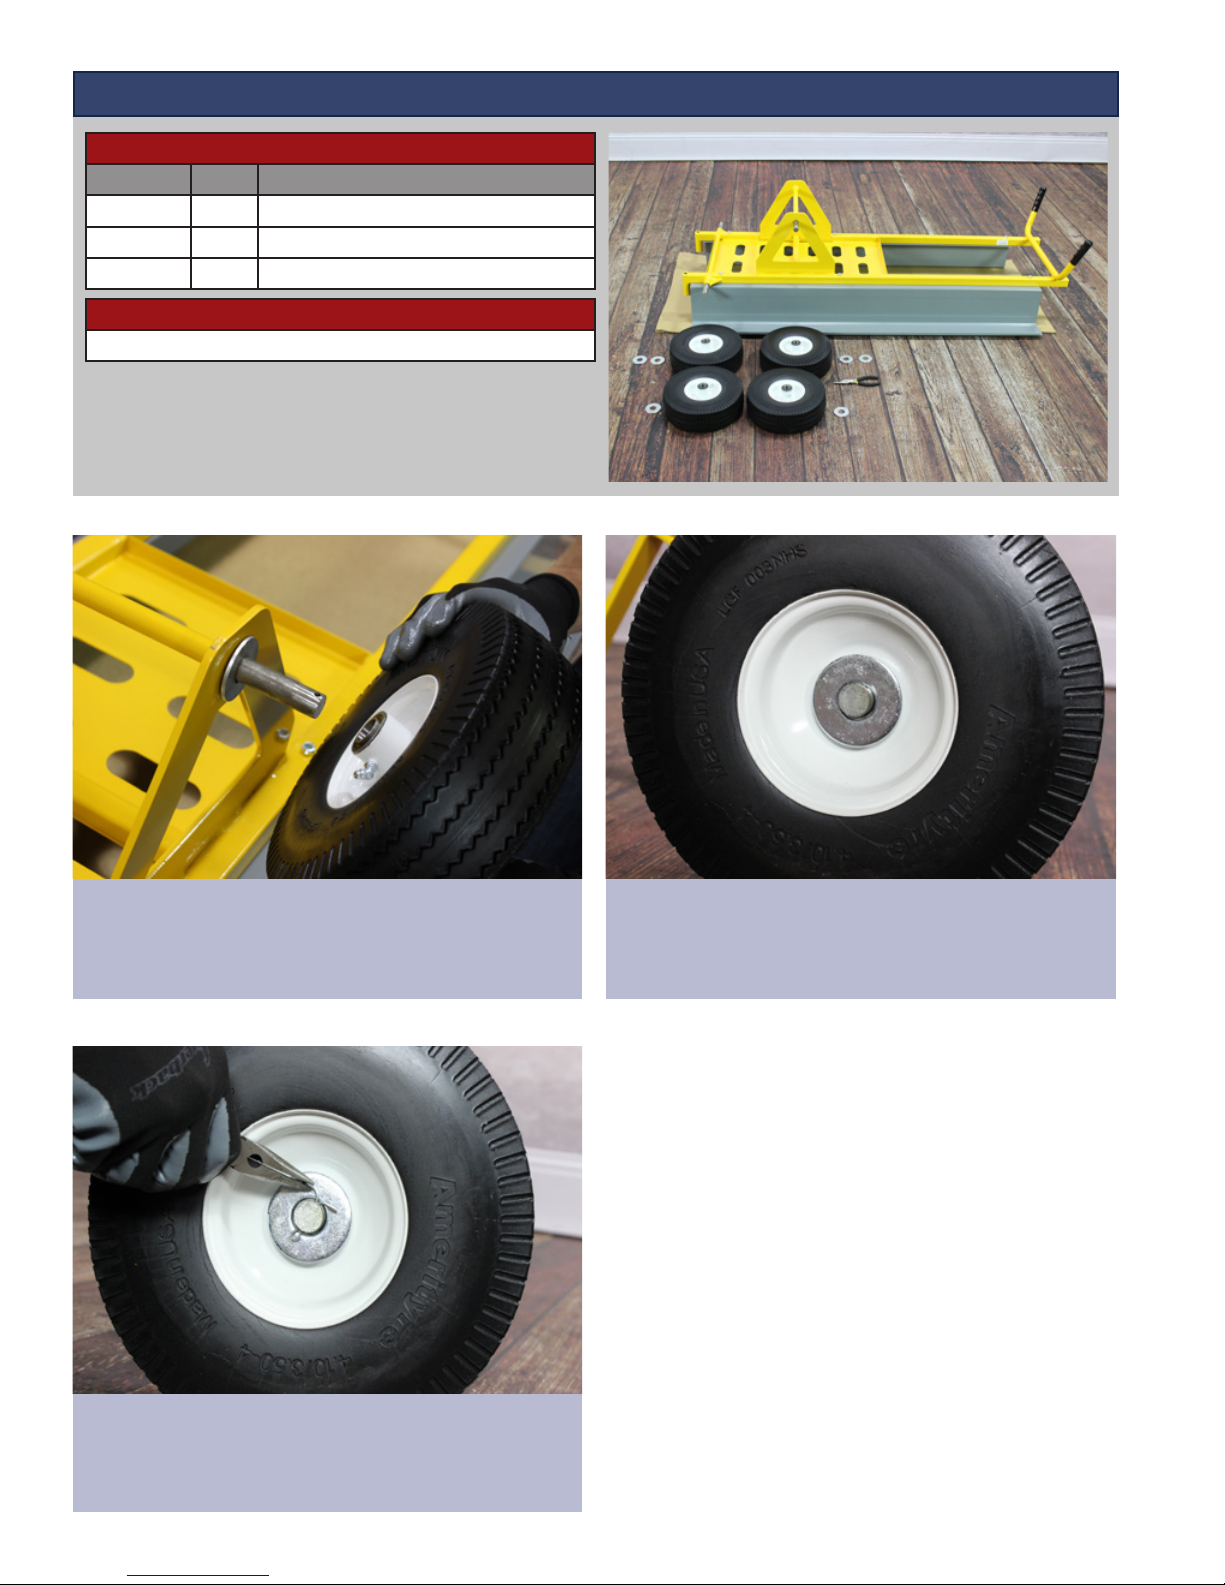
STEP 2: REAR WHEEL ASSEMBLY
COMPONENTS
ITEM NO QTY DESCRIPTION
5 2 1-1/4” Cotter Pin
9 4 3/4” Washer
11 2 10” Offset steel hub wheel
TOOLS
Needle nose pliers
1
3
6
Slide a 3/4” Washer onto rear axle followed
by one of the steel hub wheels.
The offset side of the wheel should be facing
the cart body.
Insert a cotter pin and bend the prongs
outward to secure it in place with a needle
nosed pliers. Repeat steps 1-3 on the
other side.
Install a second 3/4” washer onto the wheel.
2
Page 7
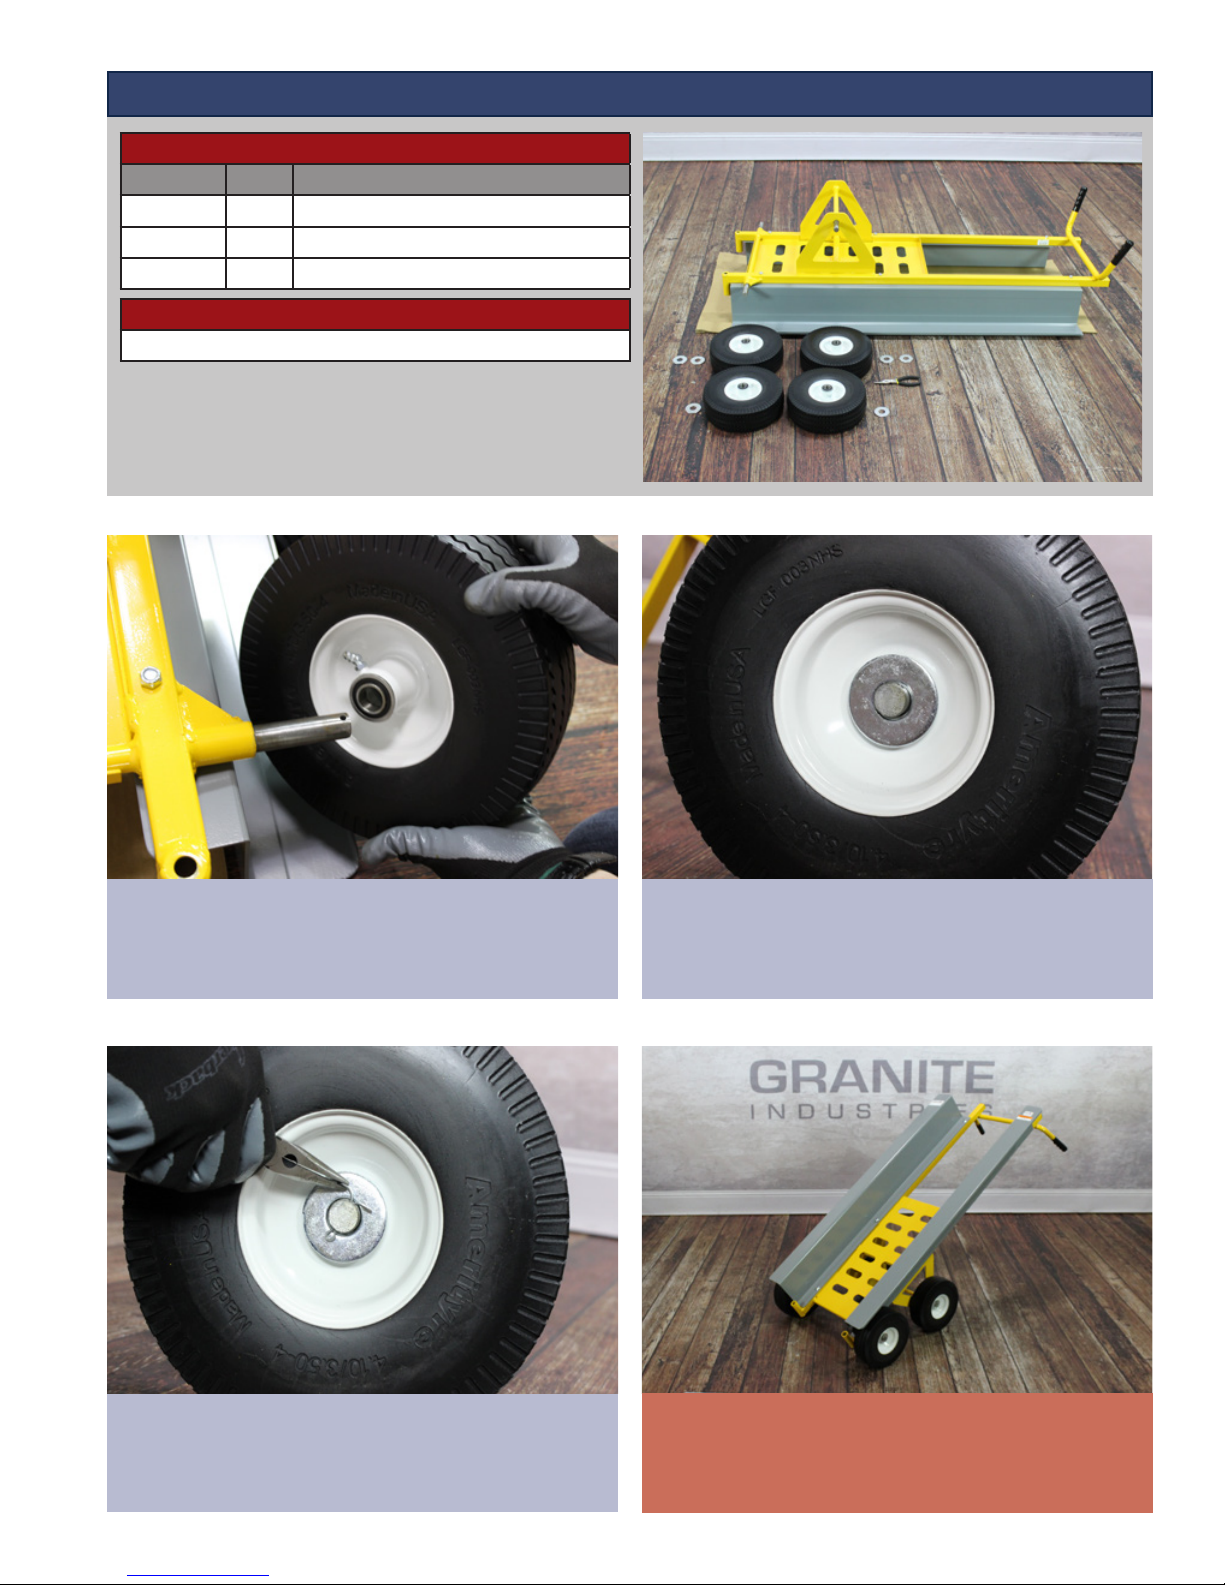
STEP 3: FRONT WHEEL ASSEMBLY
COMPONENTS
ITEM NO QTY DESCRIPTION
5 2 1-1/4” Cotter Pin
9 2 3/4” Washer
11 2 10” Offset steel hub wheel
TOOLS
Needle nose pliers
1
3
Slide a 10” steel hub wheel onto the front
axle. The offset side of the wheel should be
facing the cart body.
Insert a cotter pin and bend the prongs
outward to secure it in place with a needle
nosed pliers. Repeat steps 1-3 on the
other side.
Install a second 3/4” washer onto the wheel.
2
P
CHECK POINT
Your cart should look like this.
If so, continue onto the next step.
7
Page 8
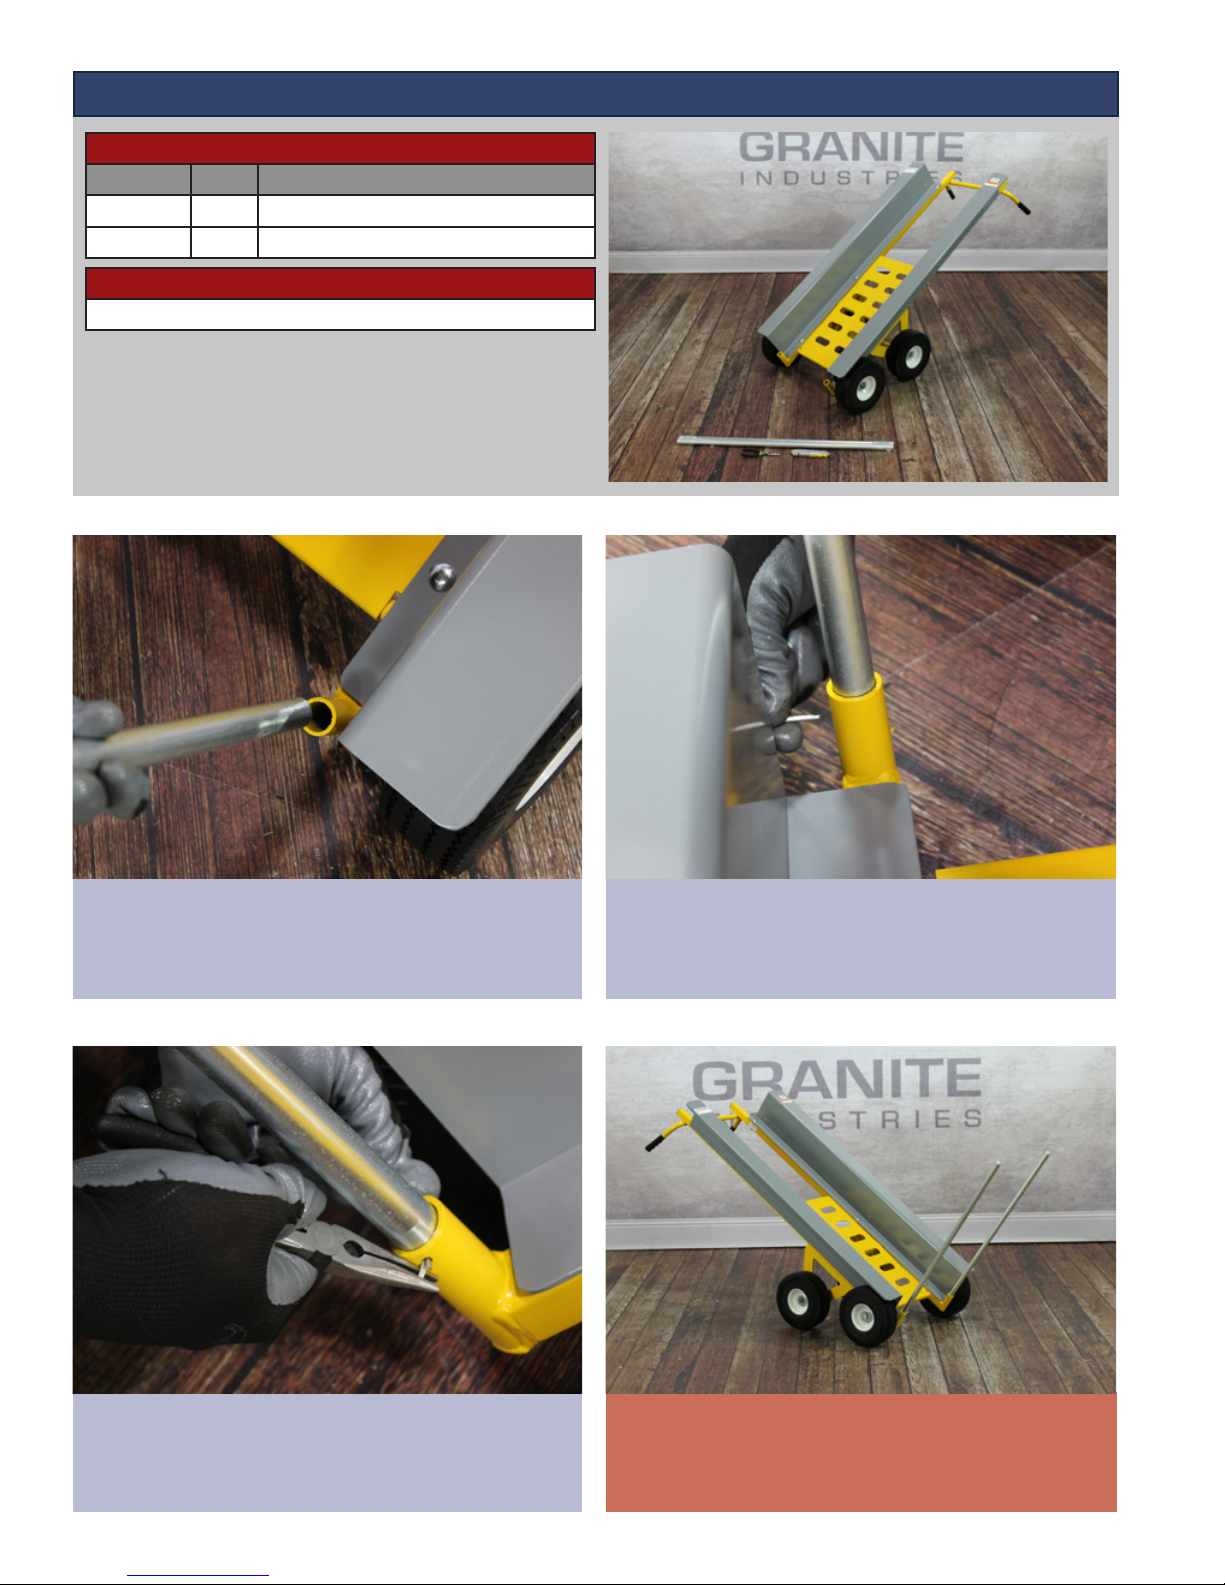
STEP 4: FORK INSTALLATION
COMPONENTS
ITEM NO QTY DESCRIPTION
1 2 Mantis Fork
5 2 1-1/4” Cotter Pin
TOOLS
Needle nose pliers
1
3
8
Insert the forks into the fork pockets on the
front of the cart.
With a needle nosed pliers bend the ends
of the cotter pin outward, locking the forks
in place.
Slide a cotter pin through the fork pocket
and fork.
2
Your Mantis is now fully assembled.
 Loading...