


Shenzhen Guangwen Industrial Co.,Ltd
Interactive Conference Board
Operating Manual V3.0
Shenzhen Guangwen Industrial Co.,
U.S. Stock Symbol:
Add.: 4th Floor, D Building, Jinhao Pioneer Park, Guanlan
Subdistrict,
Shenzhen, China.
+86 (0755)29737673
The power of final interpretation of all the information in this article belongs to
Shenzhen Guangwen Industrial Co., Ltd. Unauthorized and permitted copying is not
recognized and should be prohibited.
【Thisdocumentmay notfullyreflectall thelatestchangestothe product,whichever
is the actual product.】

Shenzhen Guangwen Industrial Co.,Ltd
Contents
I
System Description.................................................................................................................. 3
1.1
Conference System................................................................................................................ 3
1.2
Sidebar.
1.2.1
1.3
Notification............................................................................................................................. 7
1.3.1
1.3.2
1.4
Status Bar.............................................................................................................................. 10
1.5
System Settings...................................................................................................................10
1.5.1
1.5.2
1.5.3
1.5.4
1.5.5
1.5.6
II
Software Details..................................................................................................................... 22
2.1
Electronic whiteboard.
2.1.1
2.1.2
2.1.2 Common functions................................................................................................. 29
2.2
File Management..................................................................................................................34
2.2.1
2.2.2
2.2.3
2.2.4
2.2.5
2.3
VIP Reception
2.3.1
2.3.2
2.4
Miracast.................................................................................................................................45
2.4.1
2.4.2
2.4.3
2.5
Multi-screen interaction.................................................................................................. 47
2.5.1
2.5.2
2.5.3
2.6
More Applications.............................................................................................................50
2.6.1
2.6.2
....................................................................................................................................
Function Introduction................................................................................................3
Open manner............................................................................................................. 7
Function Introduction.............................................................................................. 8
General.
Network.
Time.
Intelligent.................................................................................................................. 19
Channel...................................................................................................................... 20
System.
UI Display.
More menus.
Interface Introduction............................................................................................. 34
Categories list............................................................................................................34
Expanded Menu........................................................................................................37
Display usage.............................................................................................................39
Tool bar..................................................................................................................... 40
Interface Introduction............................................................................................ 42
Function application.................................................................................................42
Network need...........................................................................................................45
Miracast Device pair with the board.................................................................. 45
Miracast Device pair with Laptop....................................................................... 46
Application specification...................................................................................... 47
OI (Operating instructions).
Interface instructions.............................................................................................48
APK..............................................................................................................................50
Hover menu..............................................................................................................50
.......................................................................................................................
....................................................................................................................
....................................................................................................................................
.......................................................................................................................
.........................................................................................................
....................................................................................................................
...............................................................................................................
.......................................................................................................................
................................................................................
3
10
14
18
21
22
22
22
42
47
Page 2 of 51
Shenzhen Guangwen Industrial Co.,Ltd
I System Description
1.2
Sideba
1.2.1
Function Introduction
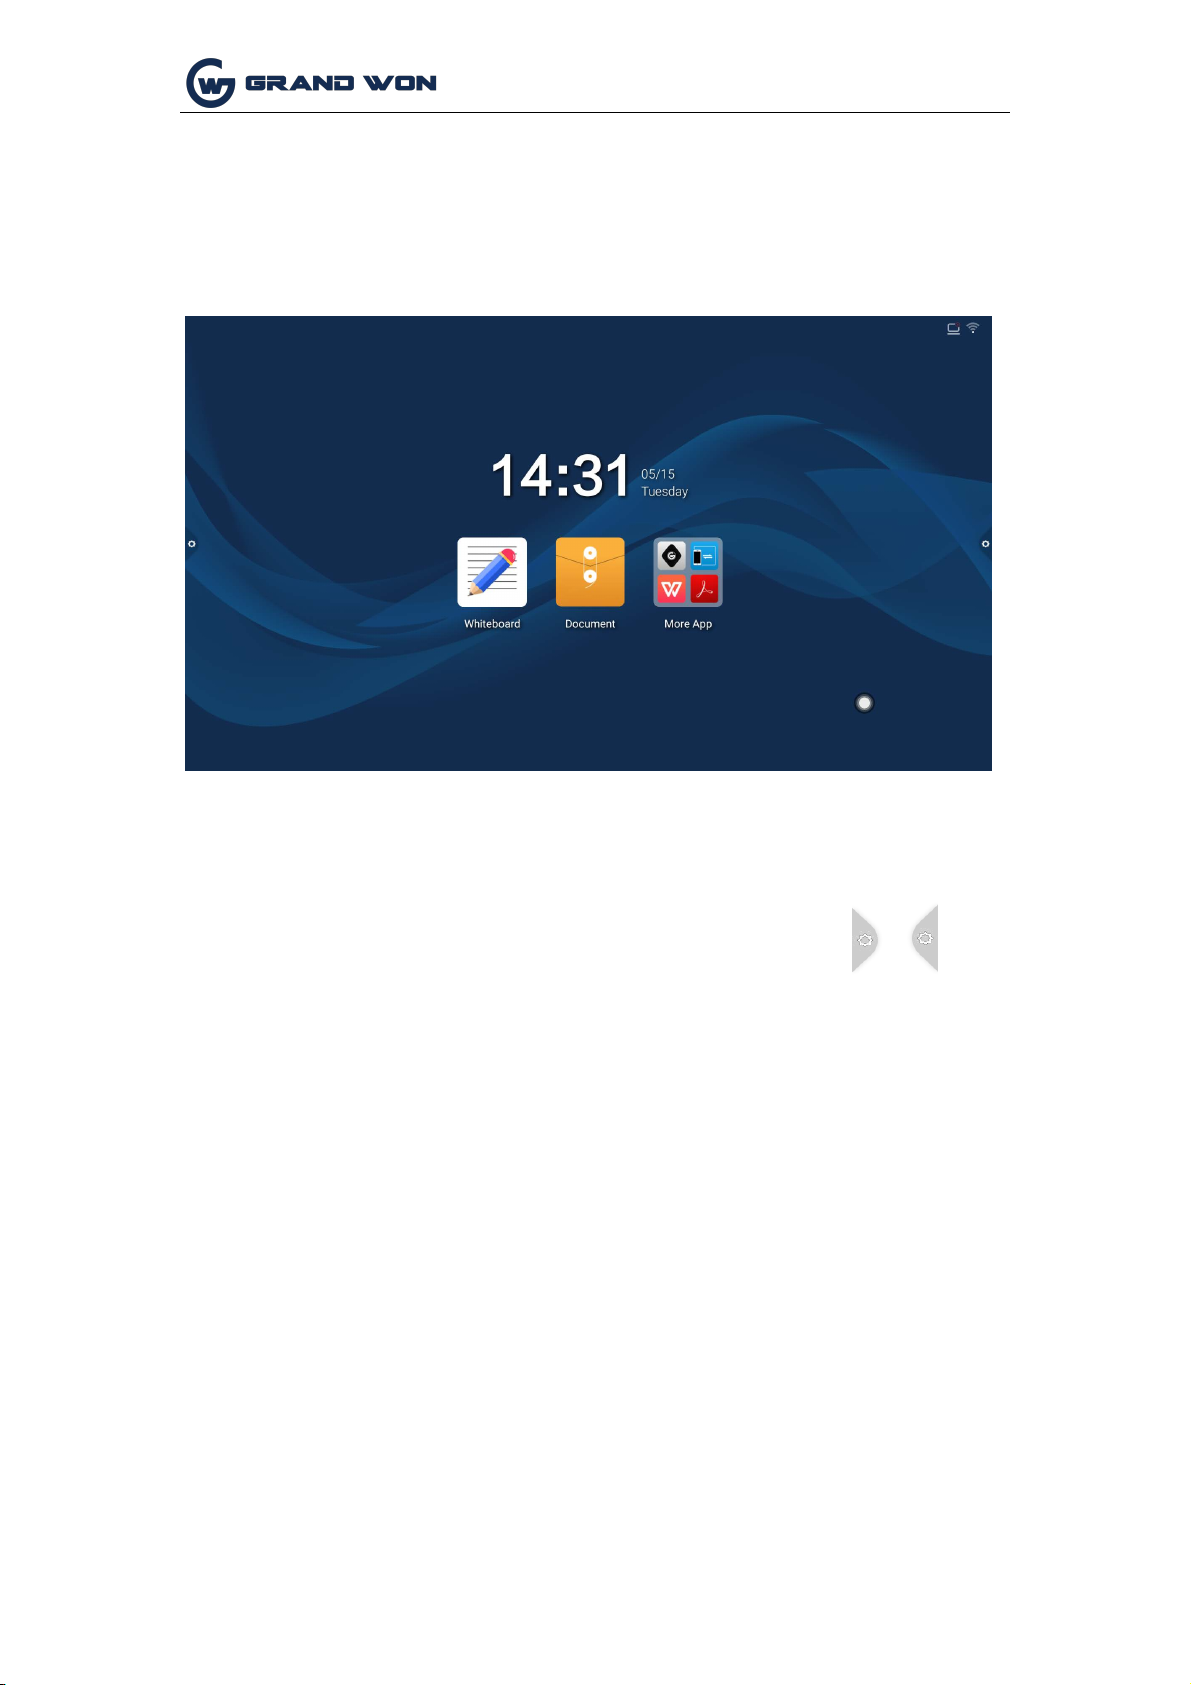
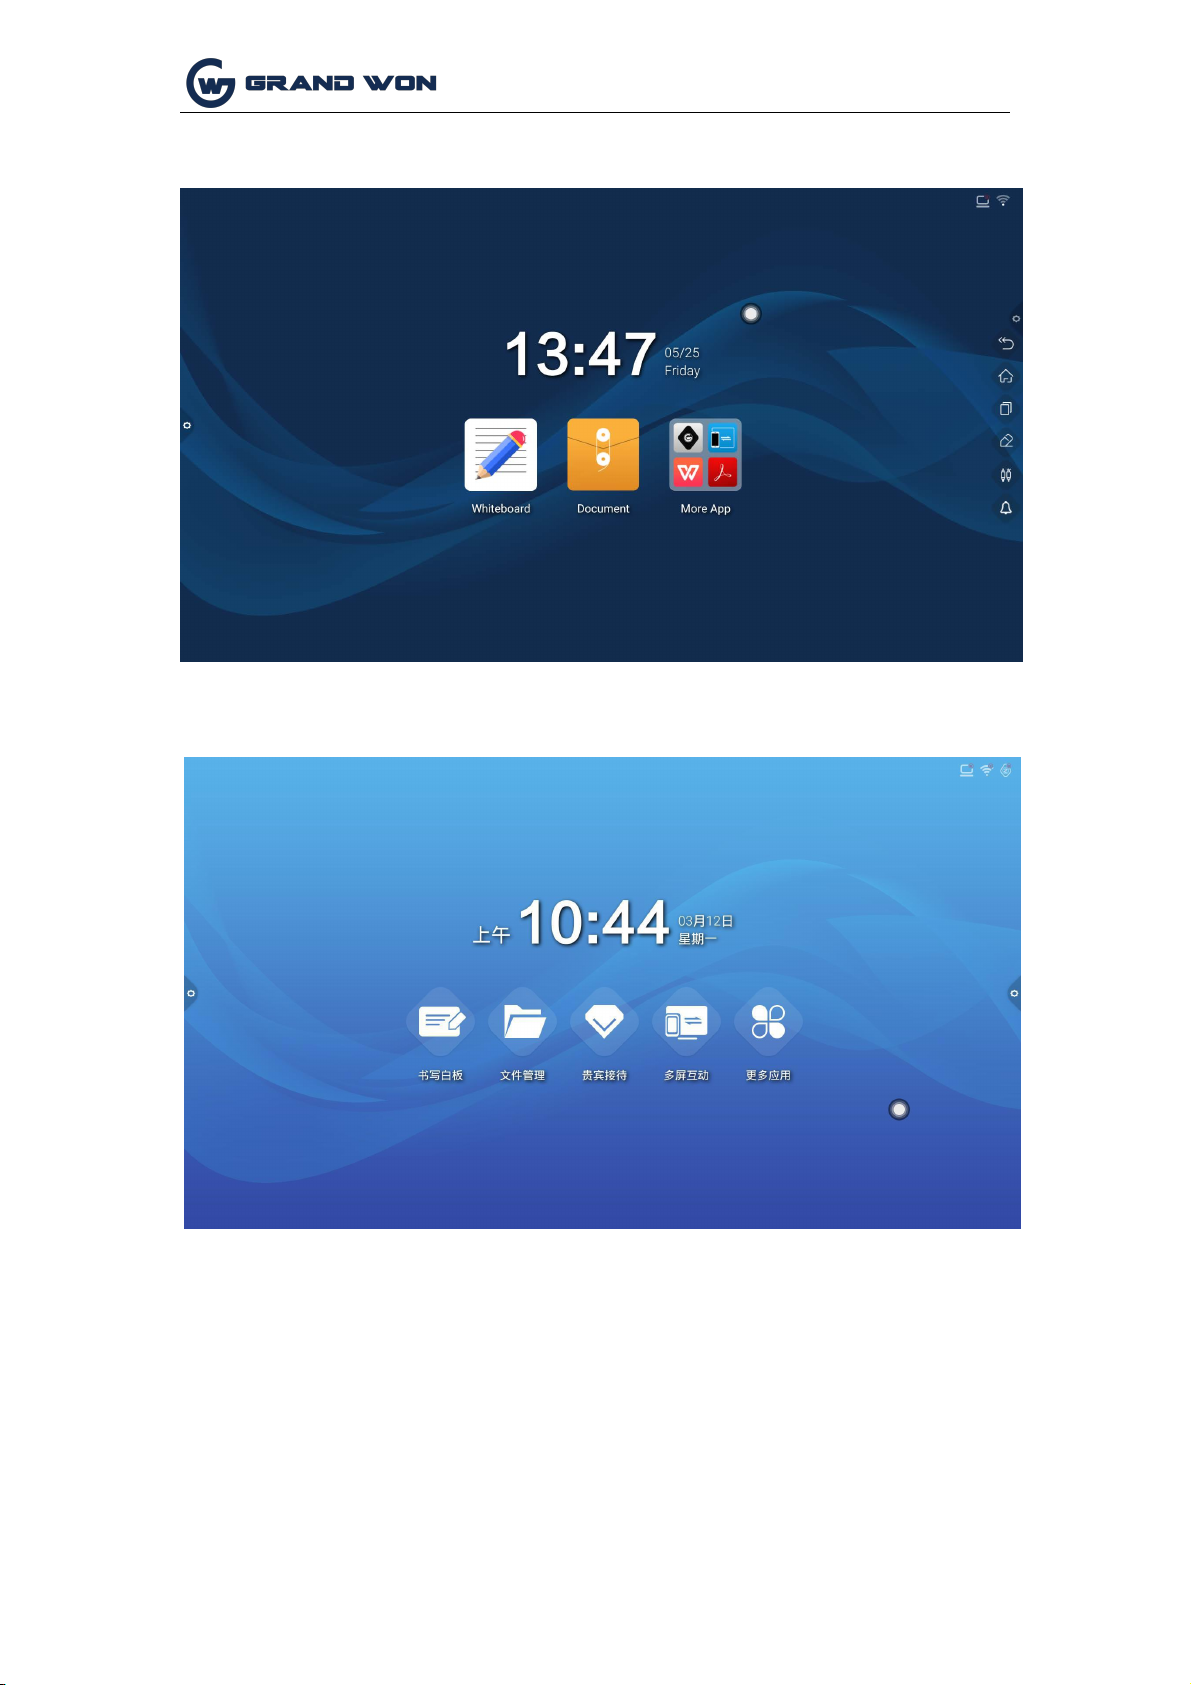
1.1 Conference System
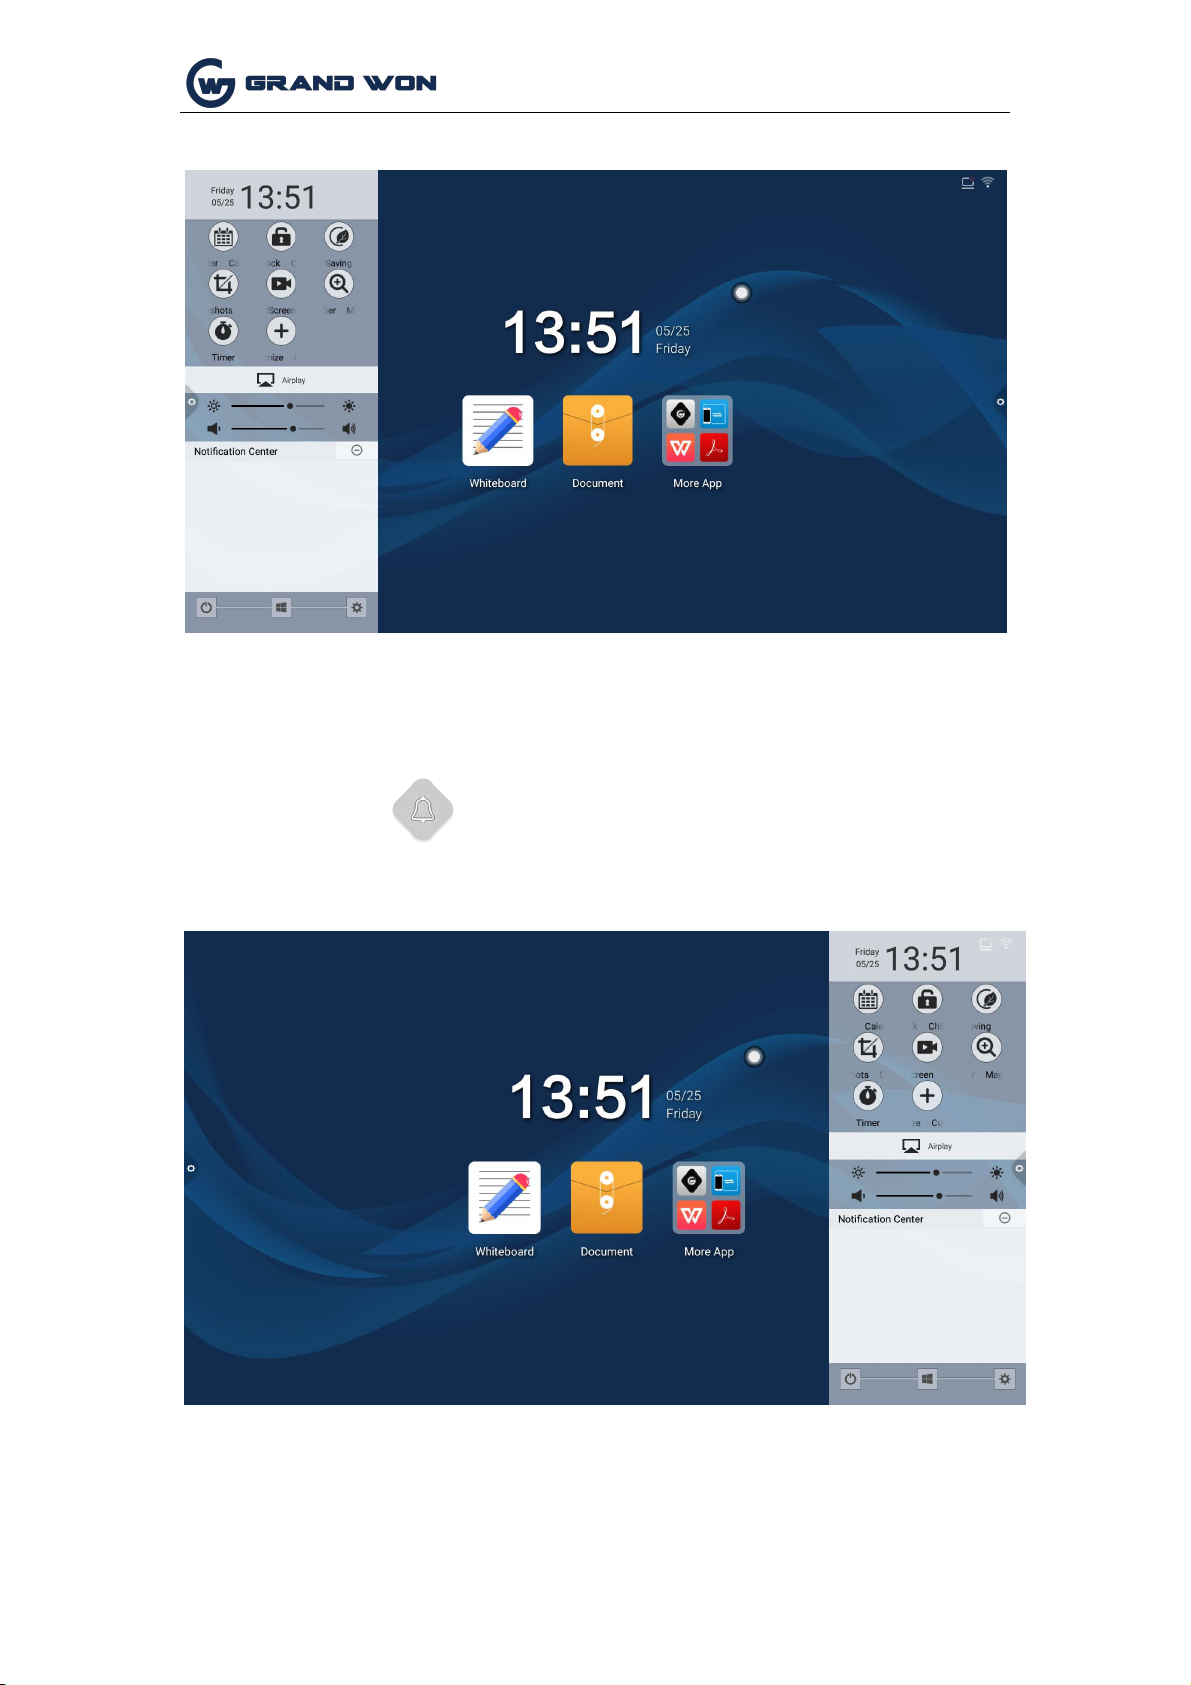
After the boot is completed, the system enters the main interface by default.
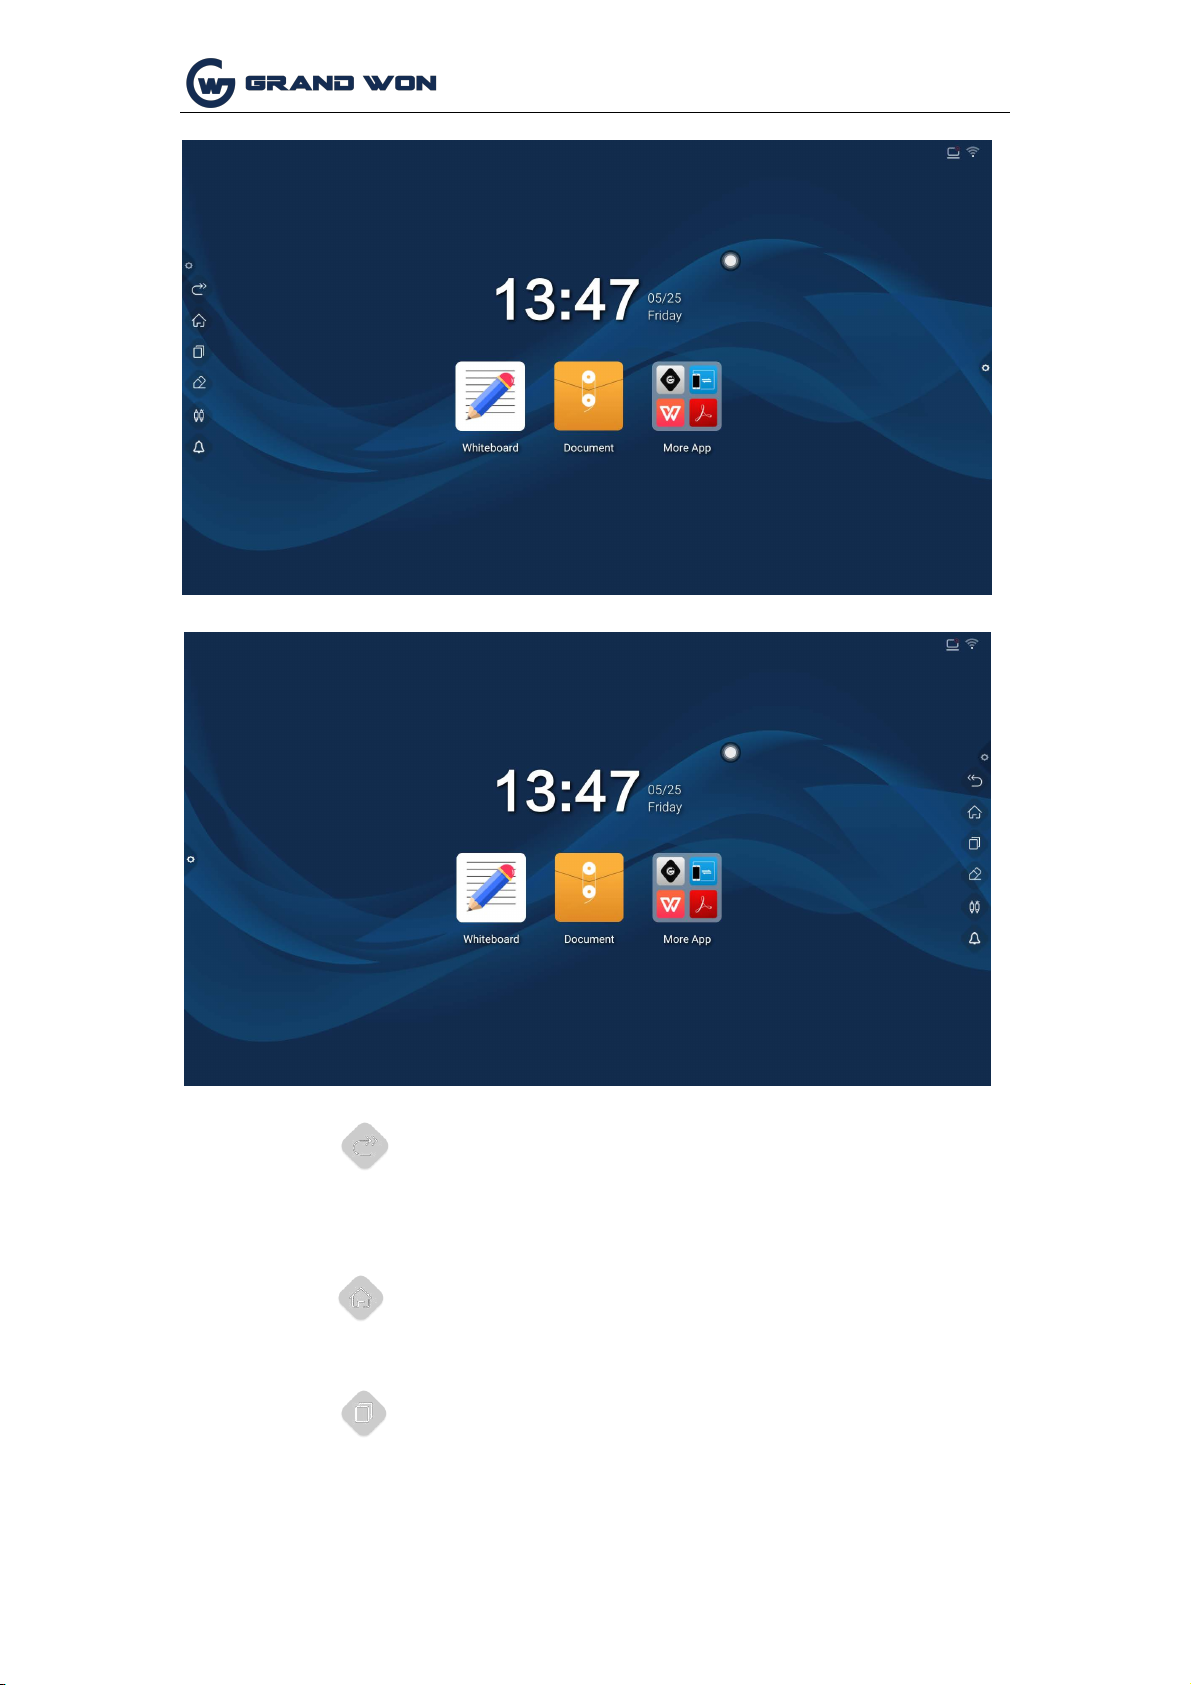
The sidebar is divided into left and right sidebars. Click the icon floating on the left/
right side of the screen to bring up the sidebar. The function buttons that are
expanded are: return, homepage, task, signal comment, source, and notification
center. . No operation in the sidebar expansion state is automatically hidden after
three seconds.
Page 3 of 51
Shenzhen Guangwen Industrial Co.,Ltd
1.
Return
2.
Click
3.
Homepage
Icon, to return or exit the current program.
Click
Icon, enter the main interface of the system.
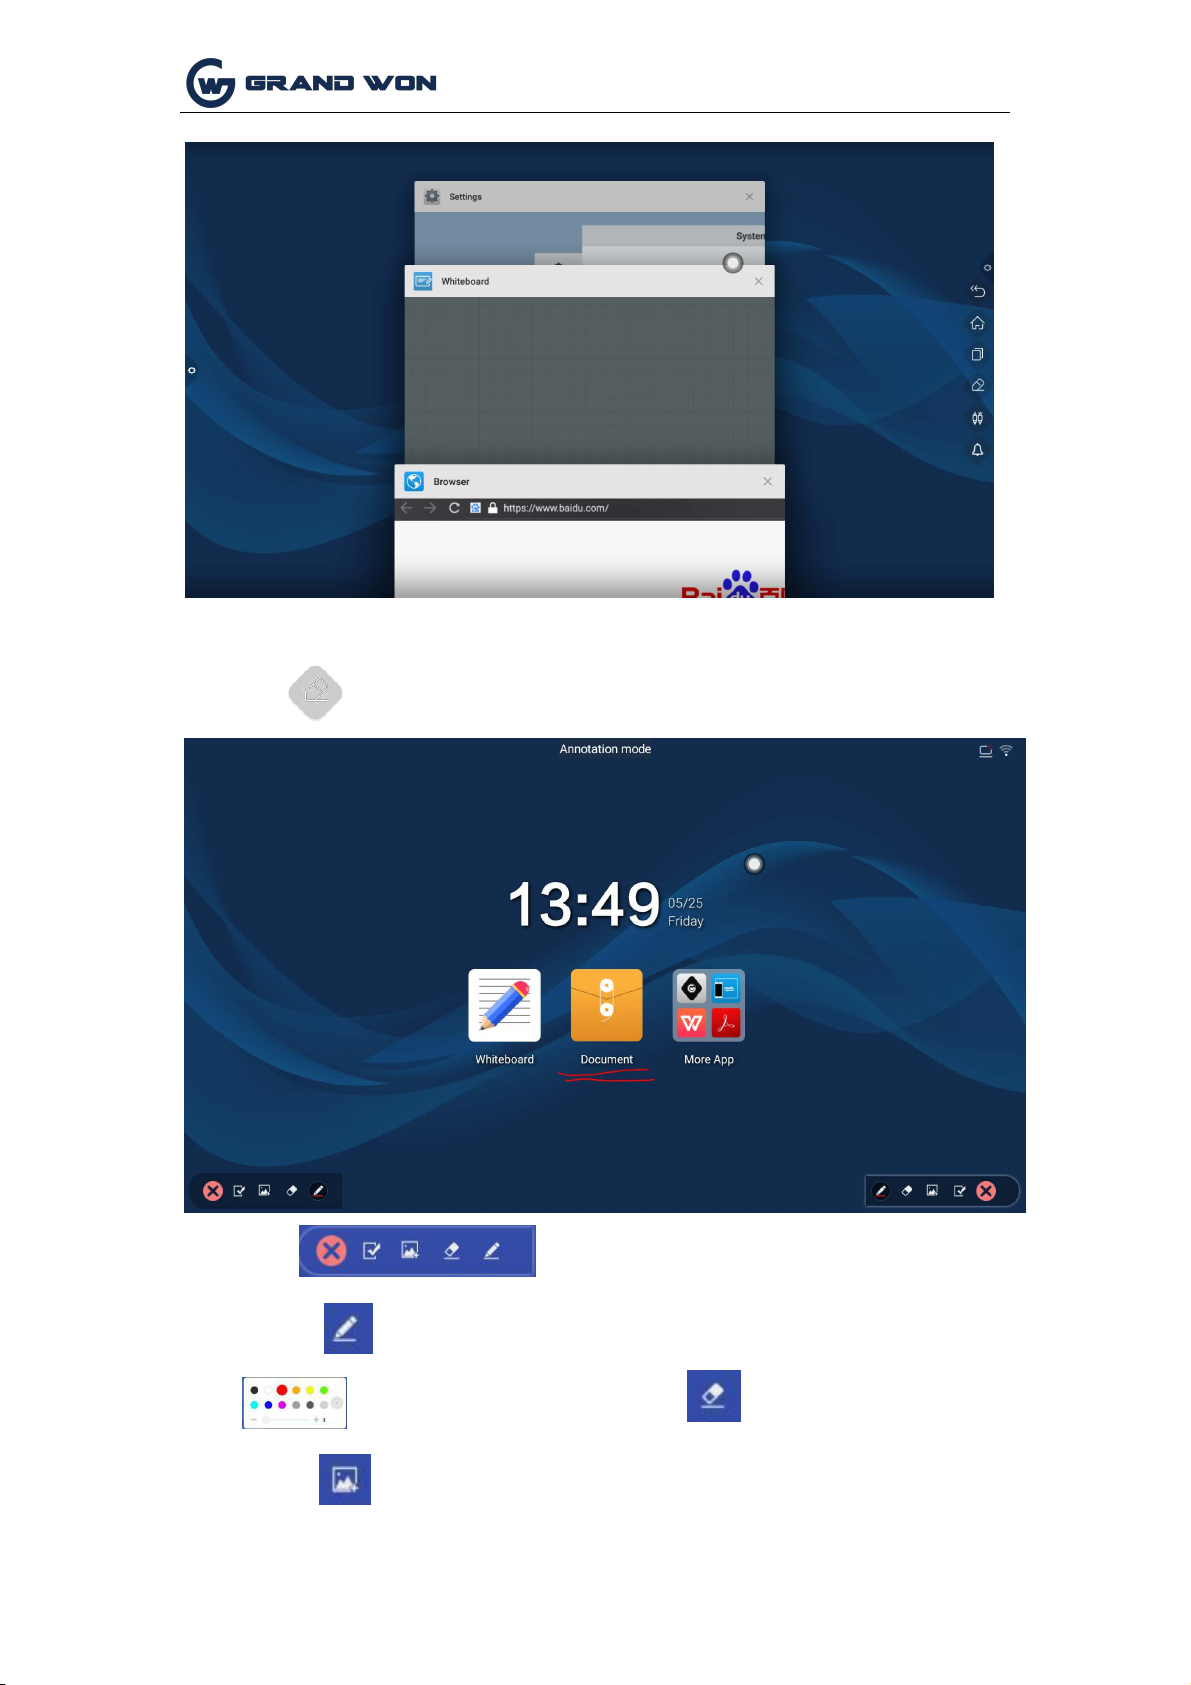
3.
Task
Click
Icon, enter the task management interface, you can choose
to open or close the application.
(1)In the multitasking state, touch the task list area and swipe up or down to
(2)Touch the thumbnail of the task to swipe left or right until it slides out of the
view the task list.
task list area to release the thumbnail.
Page 4 of 51
Shenzhen Guangwen Industrial Co.,Ltd
4. Comment
Click
Tool bar
Icon, to open the comment.
Operating instructions
Click
Enable the brush, touch the long press to call out the menu bar
Set Brush Color and brush size.
Enable eraser
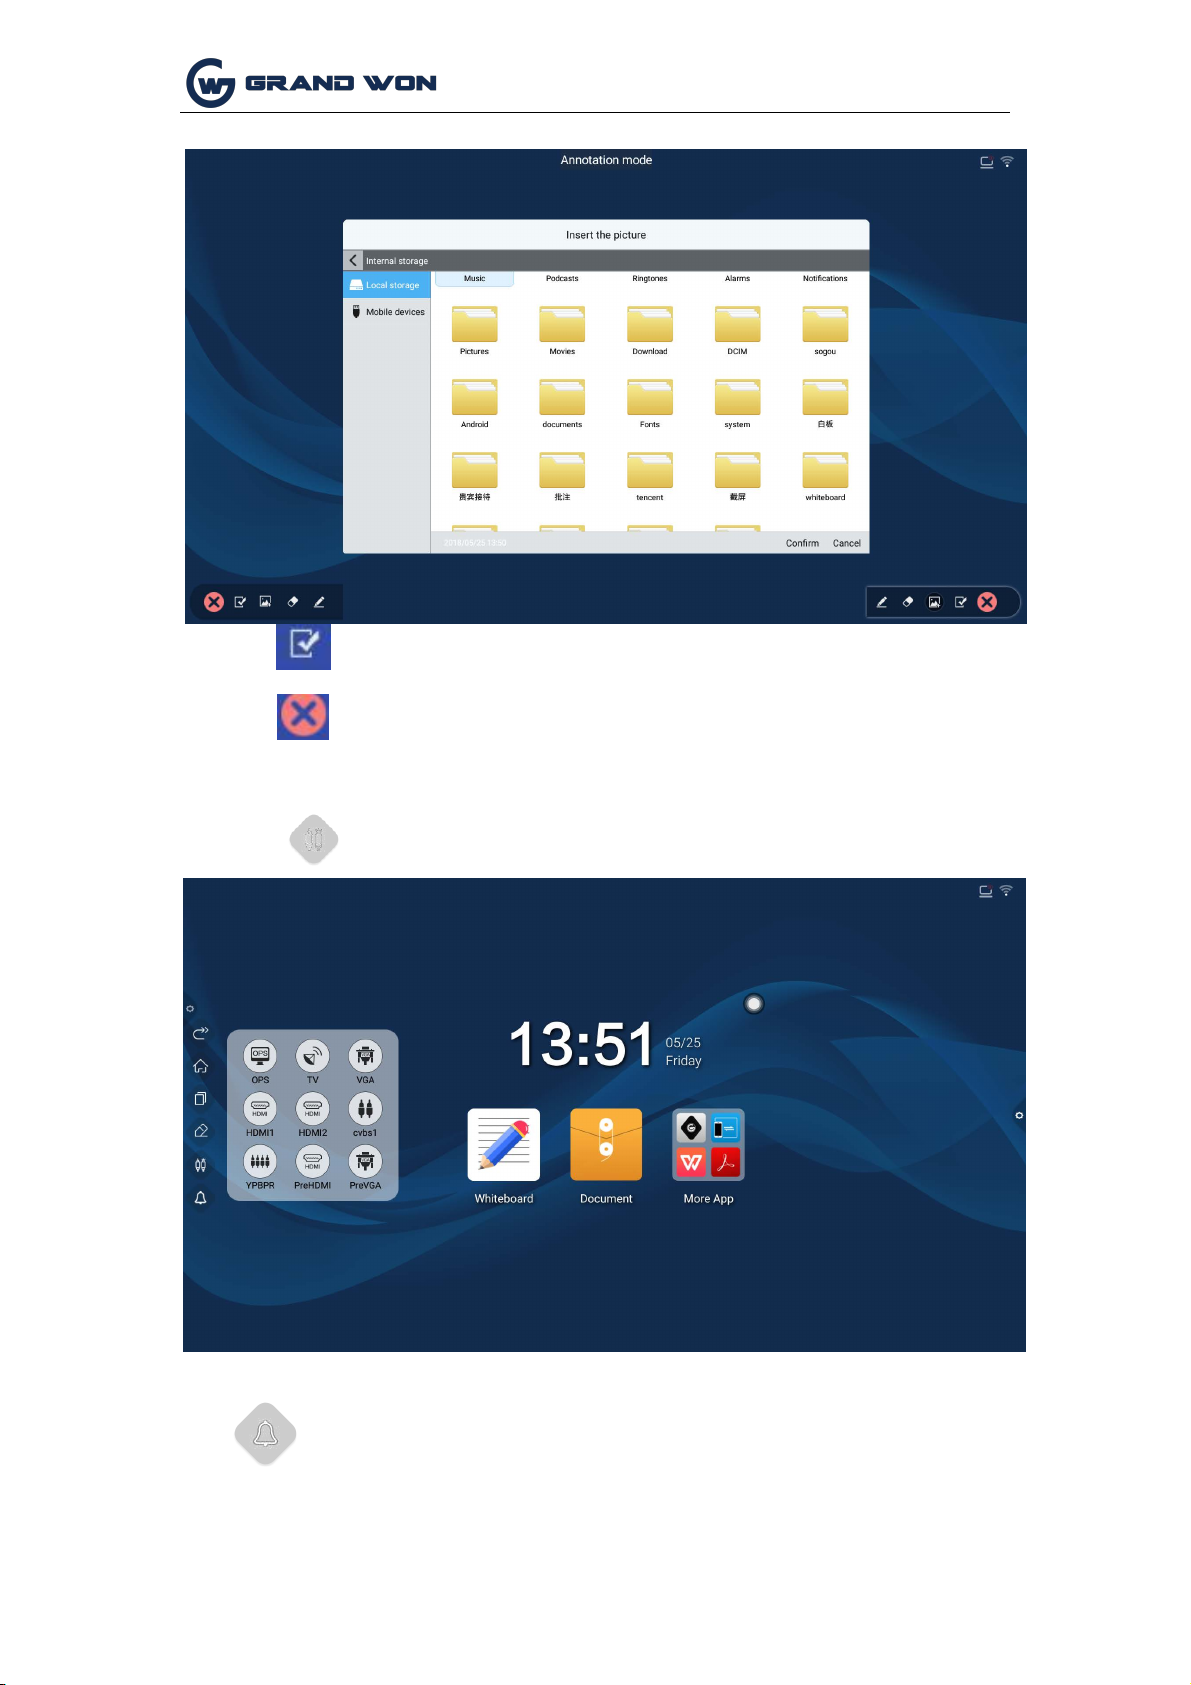
Enable picture insertion to insert pictures of external storage devices.
Page 5 of 51
Shenzhen Guangwen Industrial Co.,Ltd
Touch
Exit comment mode;
Click
Icon, evoke the source channel list, and the user can choose to
switch the desired channel.
6. Notification
Touch
5. signal source
Enable the save annotation function, select the QR code get the picture
to share or take away.
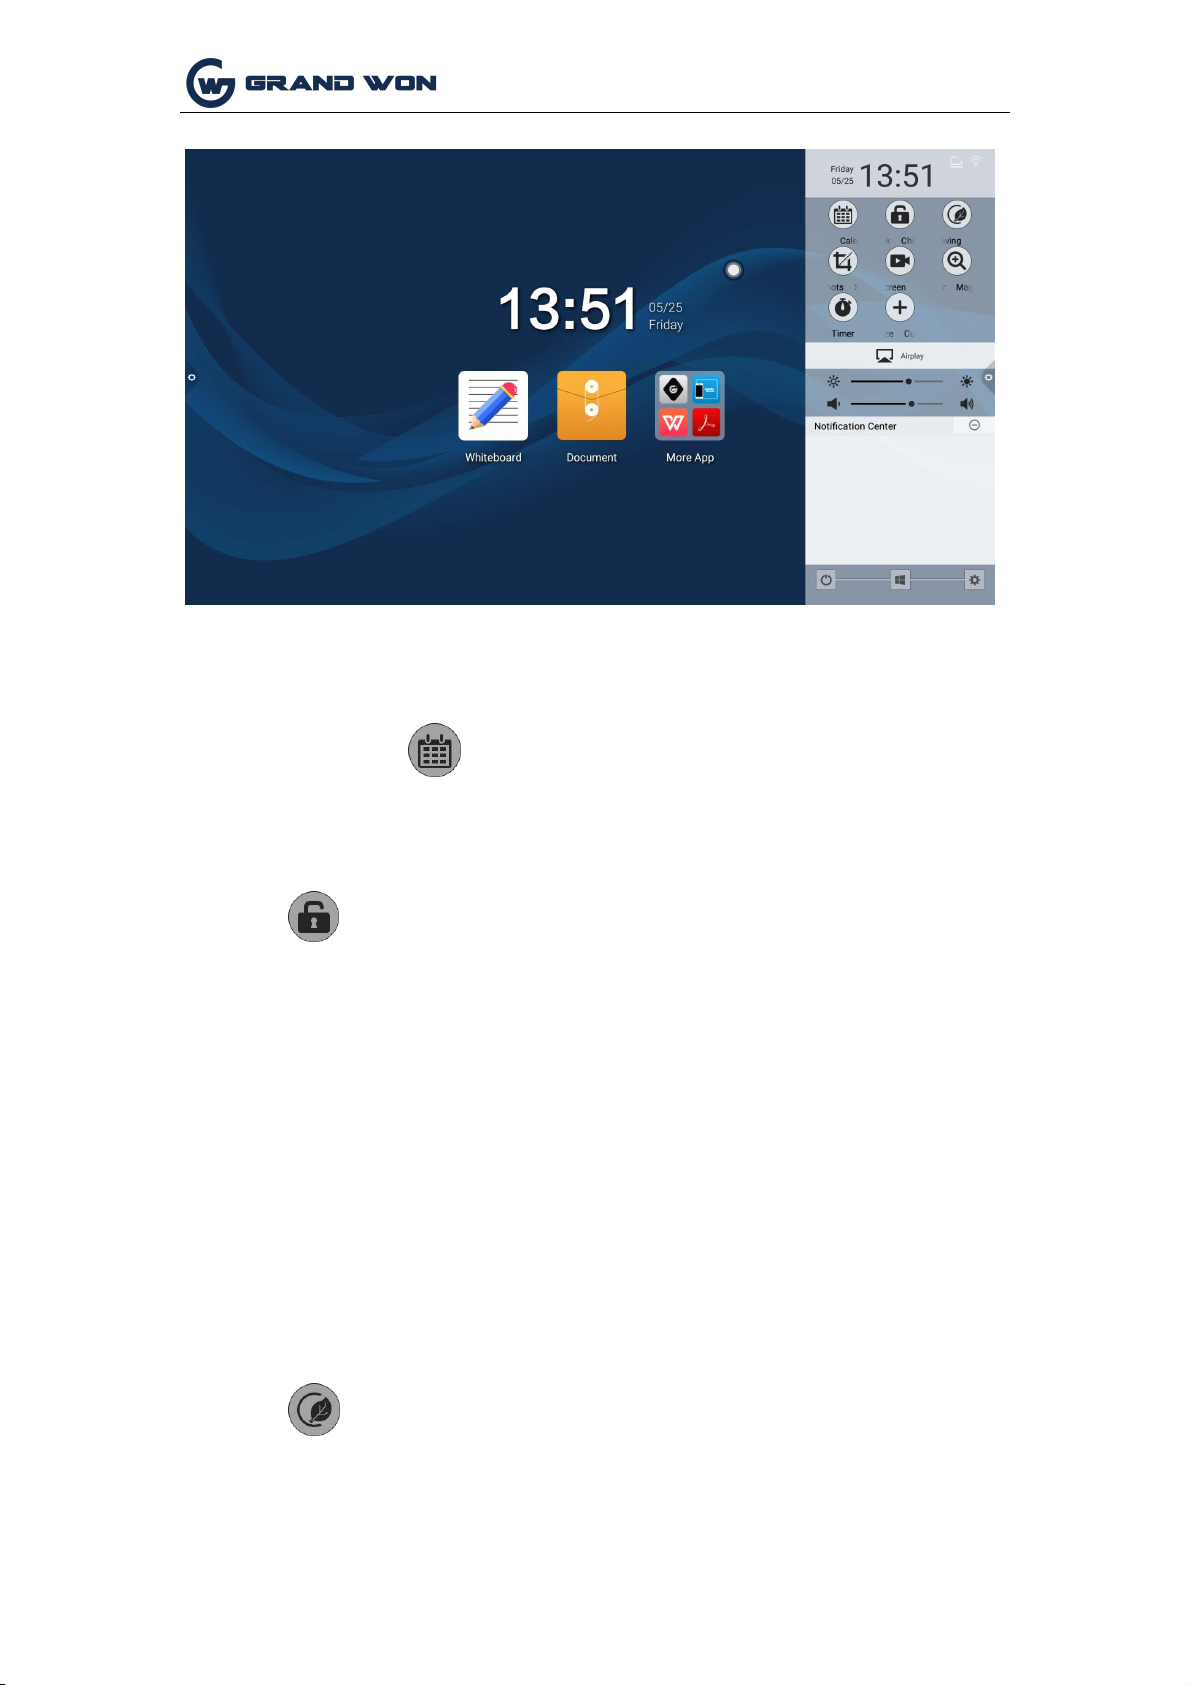
Click
Icon, called out the notification panel, as shown below Notification
center panel contains sometimes Display, common application shortcuts, and custom
add applications, brightness, sound, notification center letters.
Page 6 of 51
Shenzhen Guangwen Industrial Co.,Ltd
1.3
Notification
1.3.1
Open manner
1.
Touch the icon in the navigation bar
2.
Swipe inward from the left/right edge of the screen interface;
Page 7 of 51
Shenzhen Guangwen Industrial Co.,Ltd
1.3.2
1.calendar
Touch the notification
panel and mark to add
events.
2.
Child lock
Icon, you can call up the calendar display interface, the user can view
the time.
(1)
Password unlock: Click, enter 2580, and click OK to unlock. (The initial
(2)
Remote unlock: Press F9 on the remote to unlock.
(3)
Unlock the combination of keys: Press the key source twice, then press the
3, Energy saving
Click
Turn off the screen backlight state, touch the screen or press the key,
remote control energy-saving key to turn off the energy-saving.
Function Introduction
Click
The icon, the system enters the lock screen state, at this time the touch, buttons,
remote control functions are locked can not be used.
The unlocking method is as follows:
password is 2580, the user can enter the settings to change the password)
sound again, then click the sound to reduce.
Note: Need to add or subtract sounds in the signal source interface is feasible.
Page 8 of 51
Shenzhen Guangwen Industrial Co.,Ltd
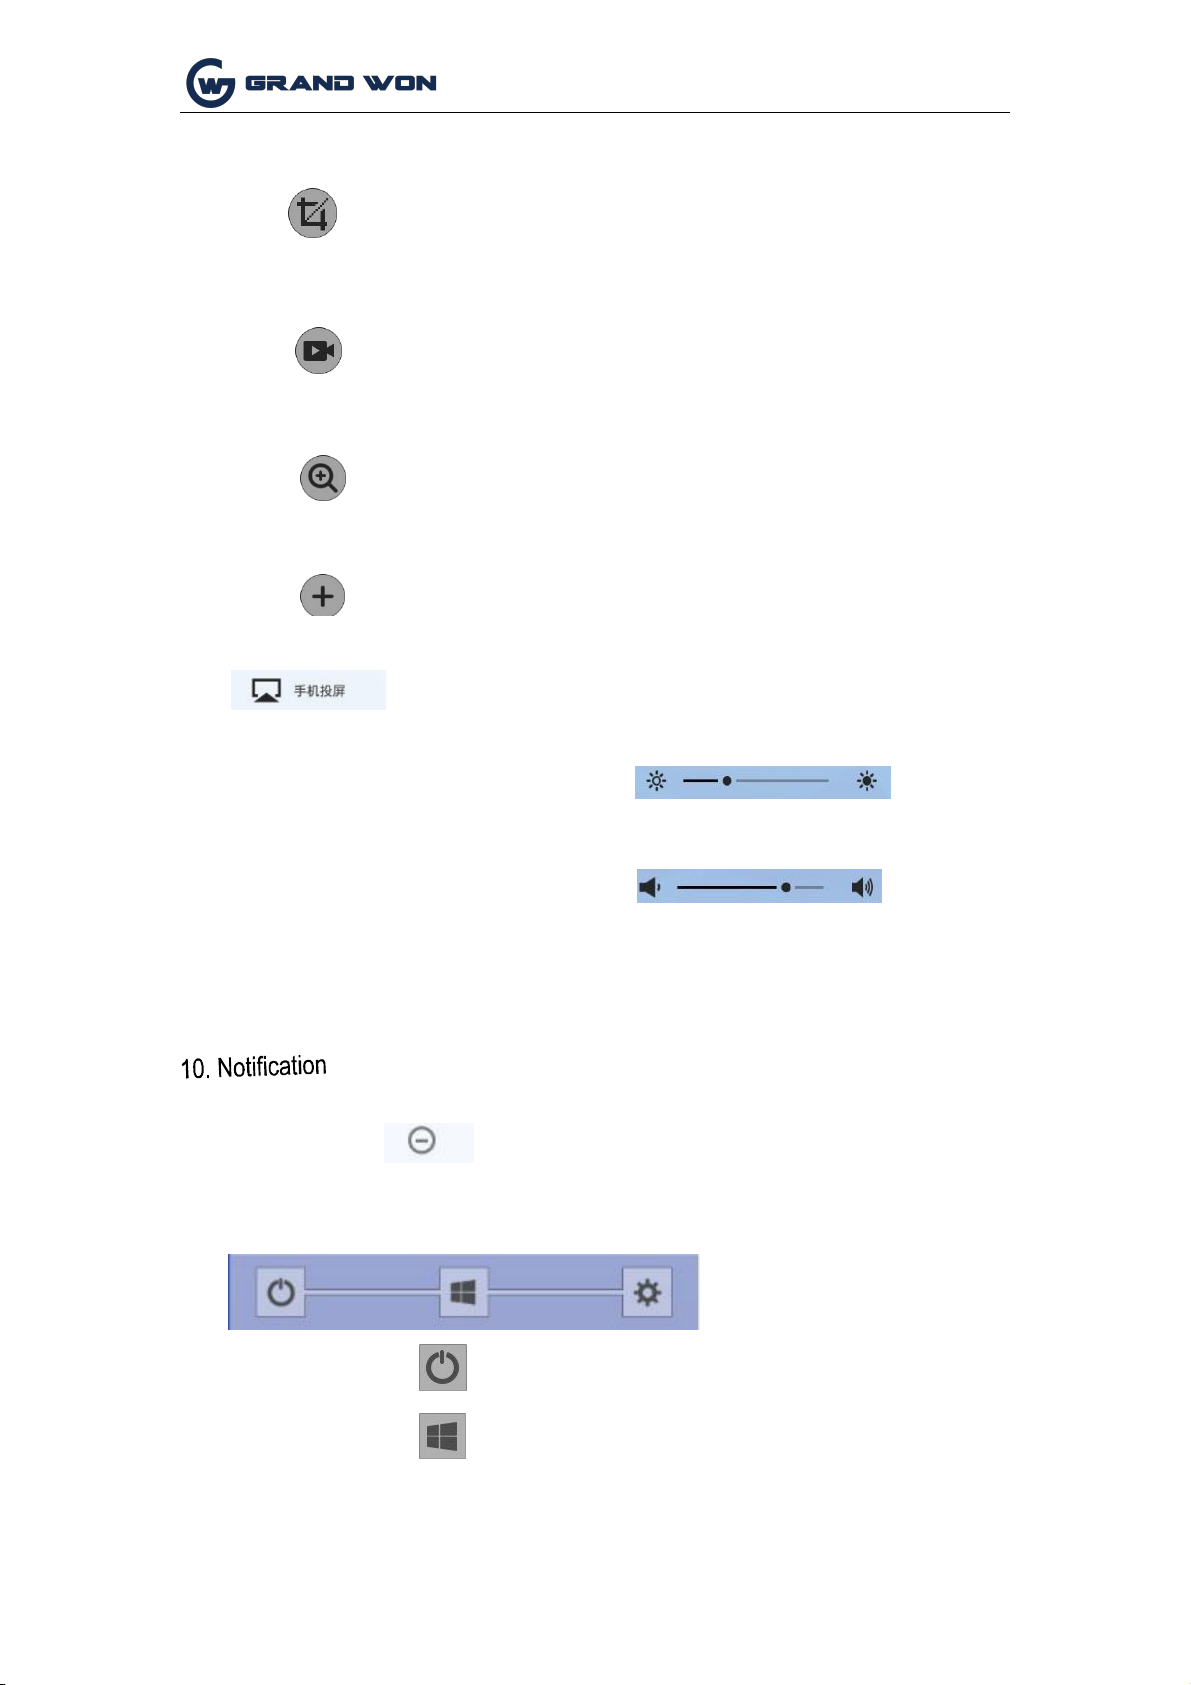
4.
Screenshot
Click
5.
Recording
The screen can be full screen shots, free screenshots and other operations.
6.
Magnifier
Click
7.
user-defined
Click
8.
Mobile Miracast
Call up the magnifying glass function to enlarge the selected area.
users can choose to add common applications.
Enter the mobile phone screen operation description interface, the user
according to the operation process to achieve mobile screen transmission
function.
9.
Brightness and Sound Adjustment
(1)
Brightness adjustment: Touch the slide backlight progress bar to adjust the brightness of
(2)
Sound adjustment: Touch the slide sound progress bar to adjust the conference machine
11.
The bottom bar
(1) Shutdown:
Click
(2) OPS: Touch
Icon, you can turn off the board.
Icon, switch directly to the built-in computer channel.
Click
the screen backlight.
can open the recording function, click the start button to start recording, click to
end recording, The file is automatically saved to the built-in storage.
sound size.
System application notifications or third-party application notifications are all displayed on the
notification bar. Click Open, swipe to delete, and click to clear allmessages.
Page 9 of 51
Shenzhen Guangwen Industrial Co.,Ltd
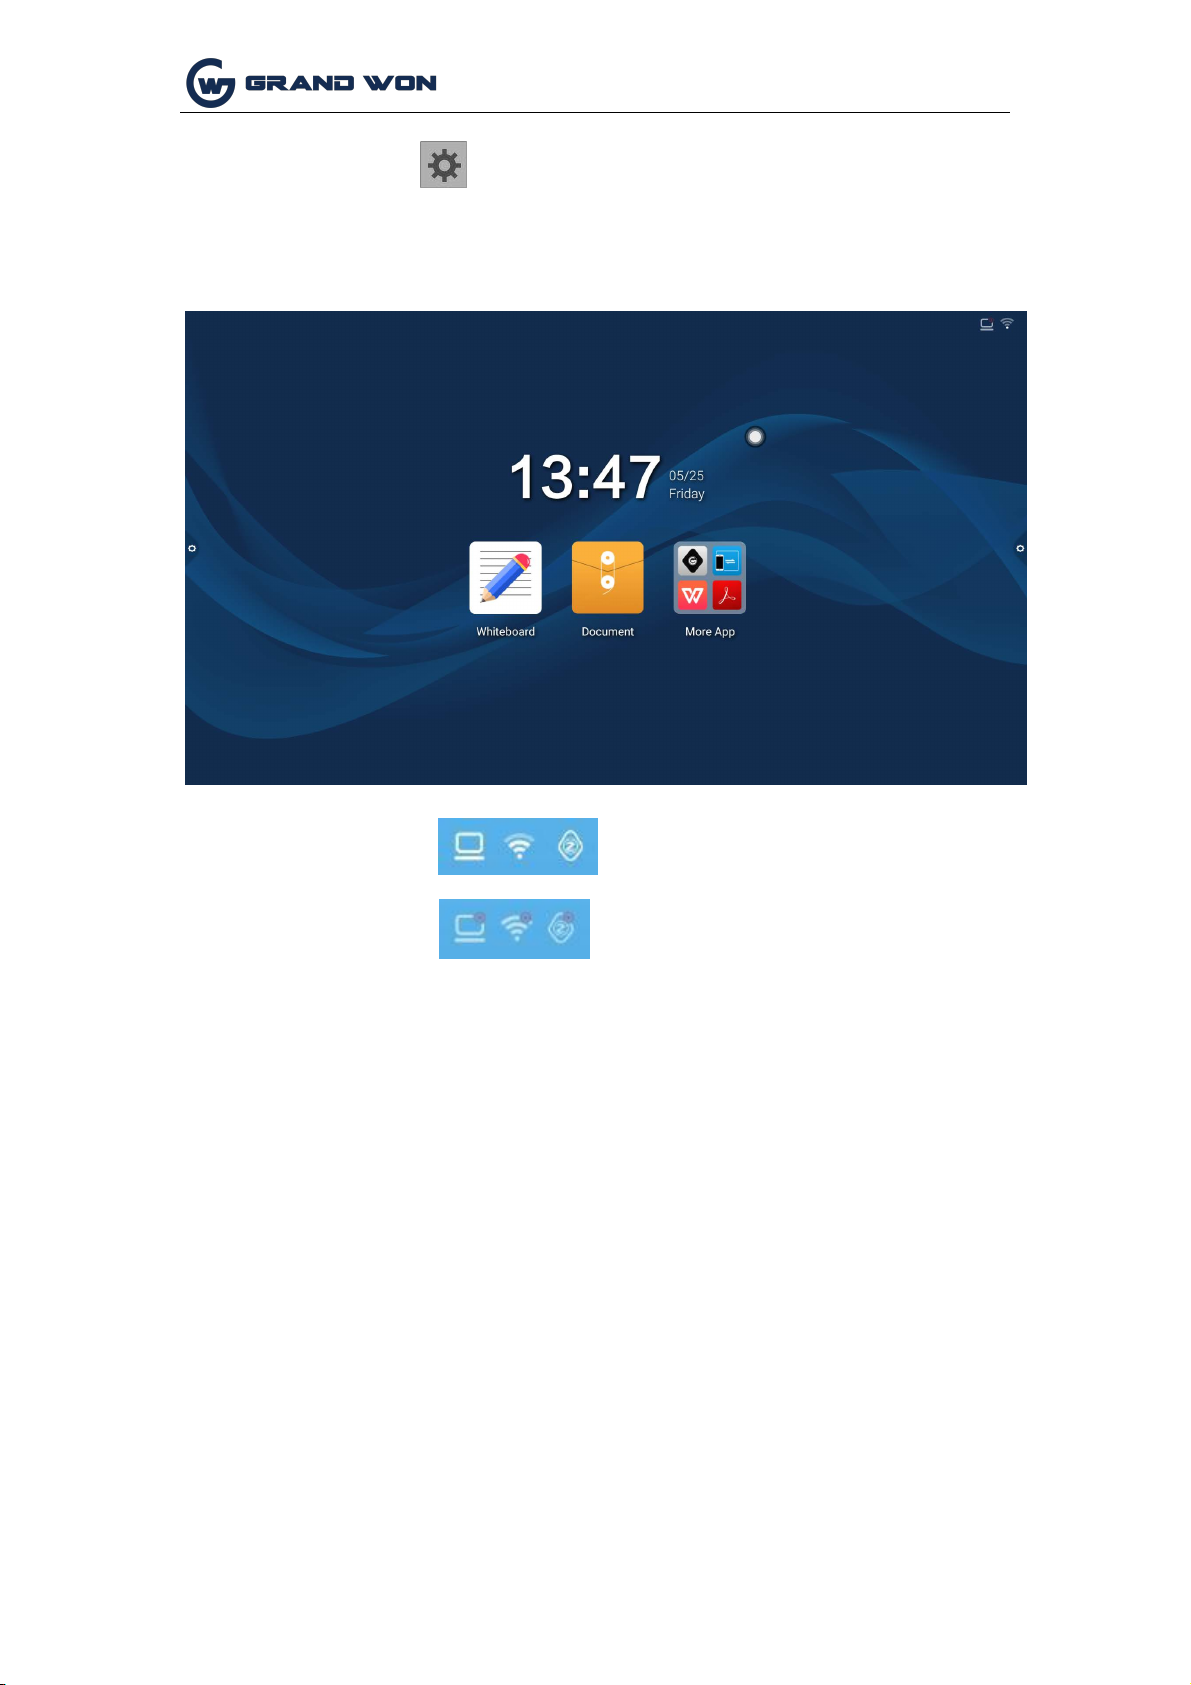
(3)Settings: touch
Icon, enter the system settings interface.
1.
Connection status::
2.
Not connected:
1.4 Status Bar
The status bar mainly shows the connection status of wired network, wireless network,
and Miracast device. as the picture shows:
1.5 System Settings
System settings include general, network, time, smart, channel, and system settings.
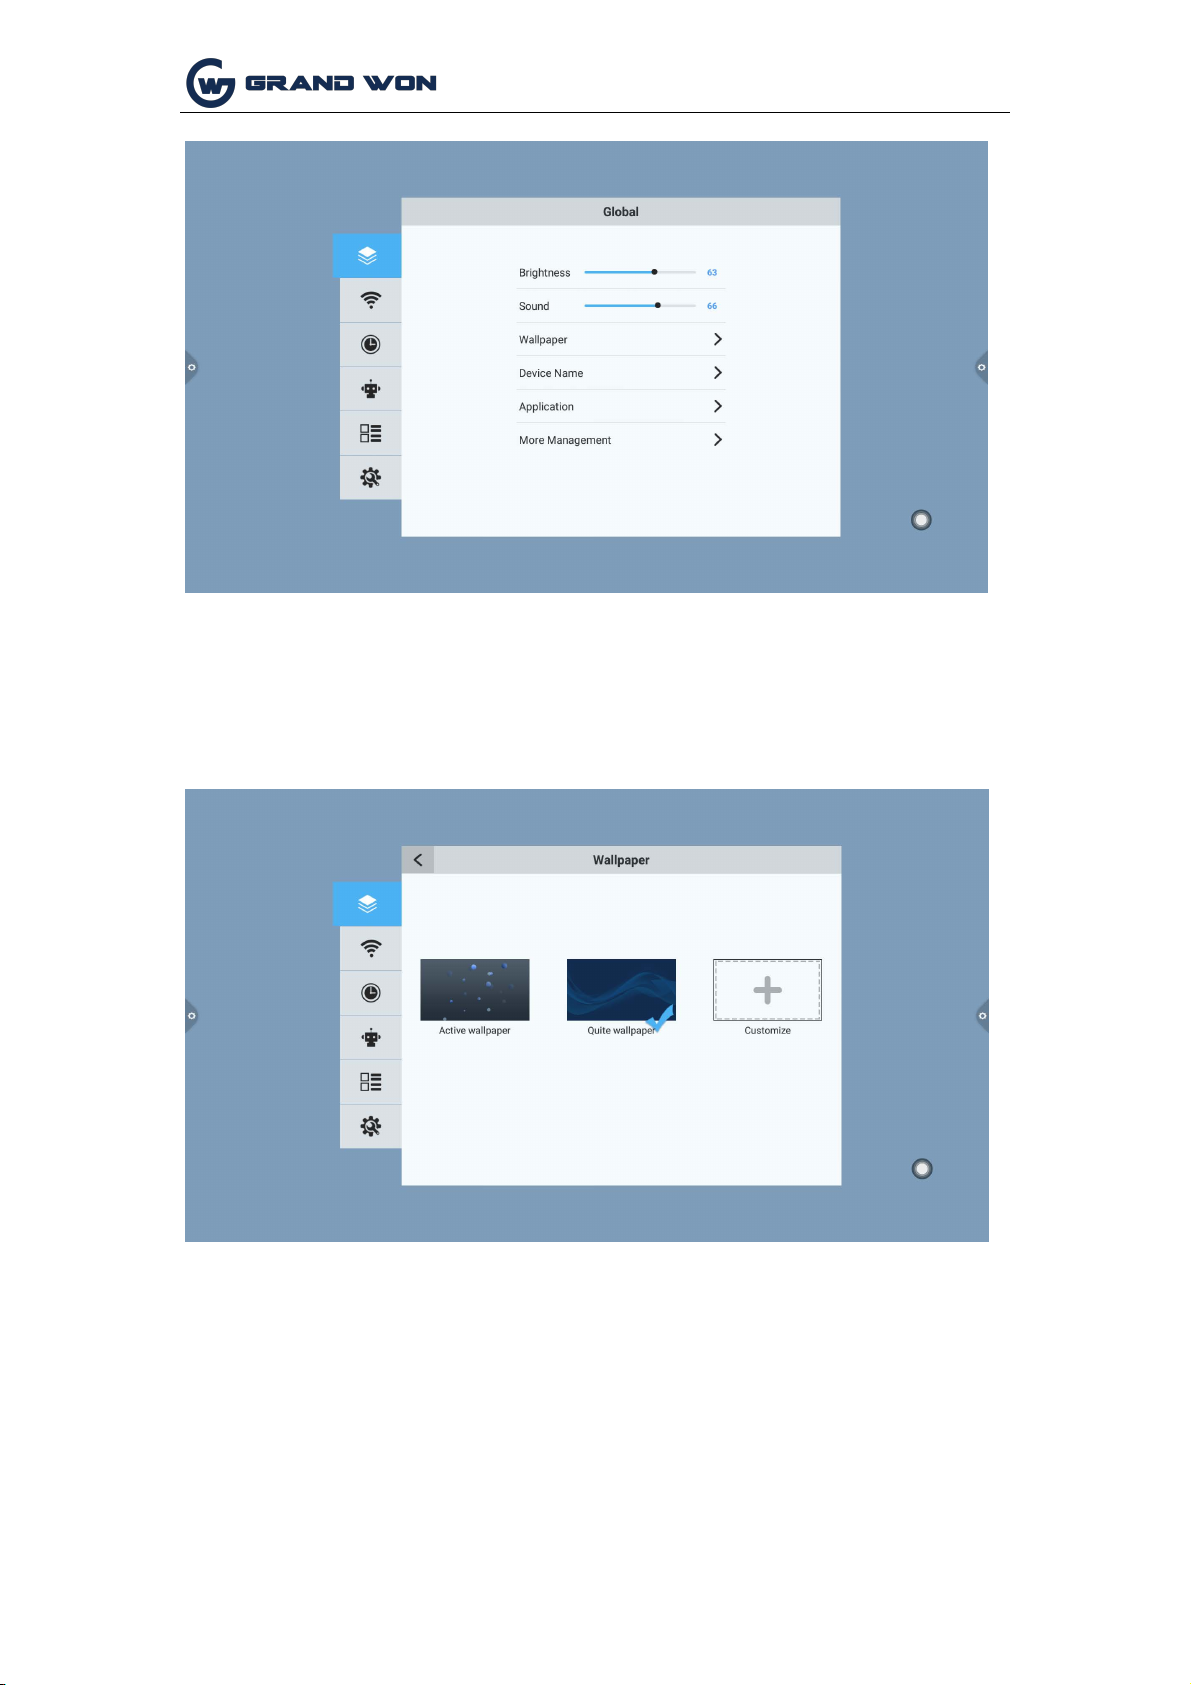
1.5.1 General
General settings interface, you can adjust the system sound, brightness, replace
the system theme wallpaper, modify the device name and view system applications.
Page 10 of 51
Shenzhen Guangwen Industrial Co.,Ltd
1.
Wallpaper
2.
Devicename
Wallpapers have live wallpapers, static wallpapers and can also be added by custom.
Custom added wallpapers will be saved in the static wallpaper and can be deleted by
long press.
User-friendly design, the user can modify the device name
in the device name.
Page 11 of 51

Shenzhen Guangwen Industrial Co.,Ltd
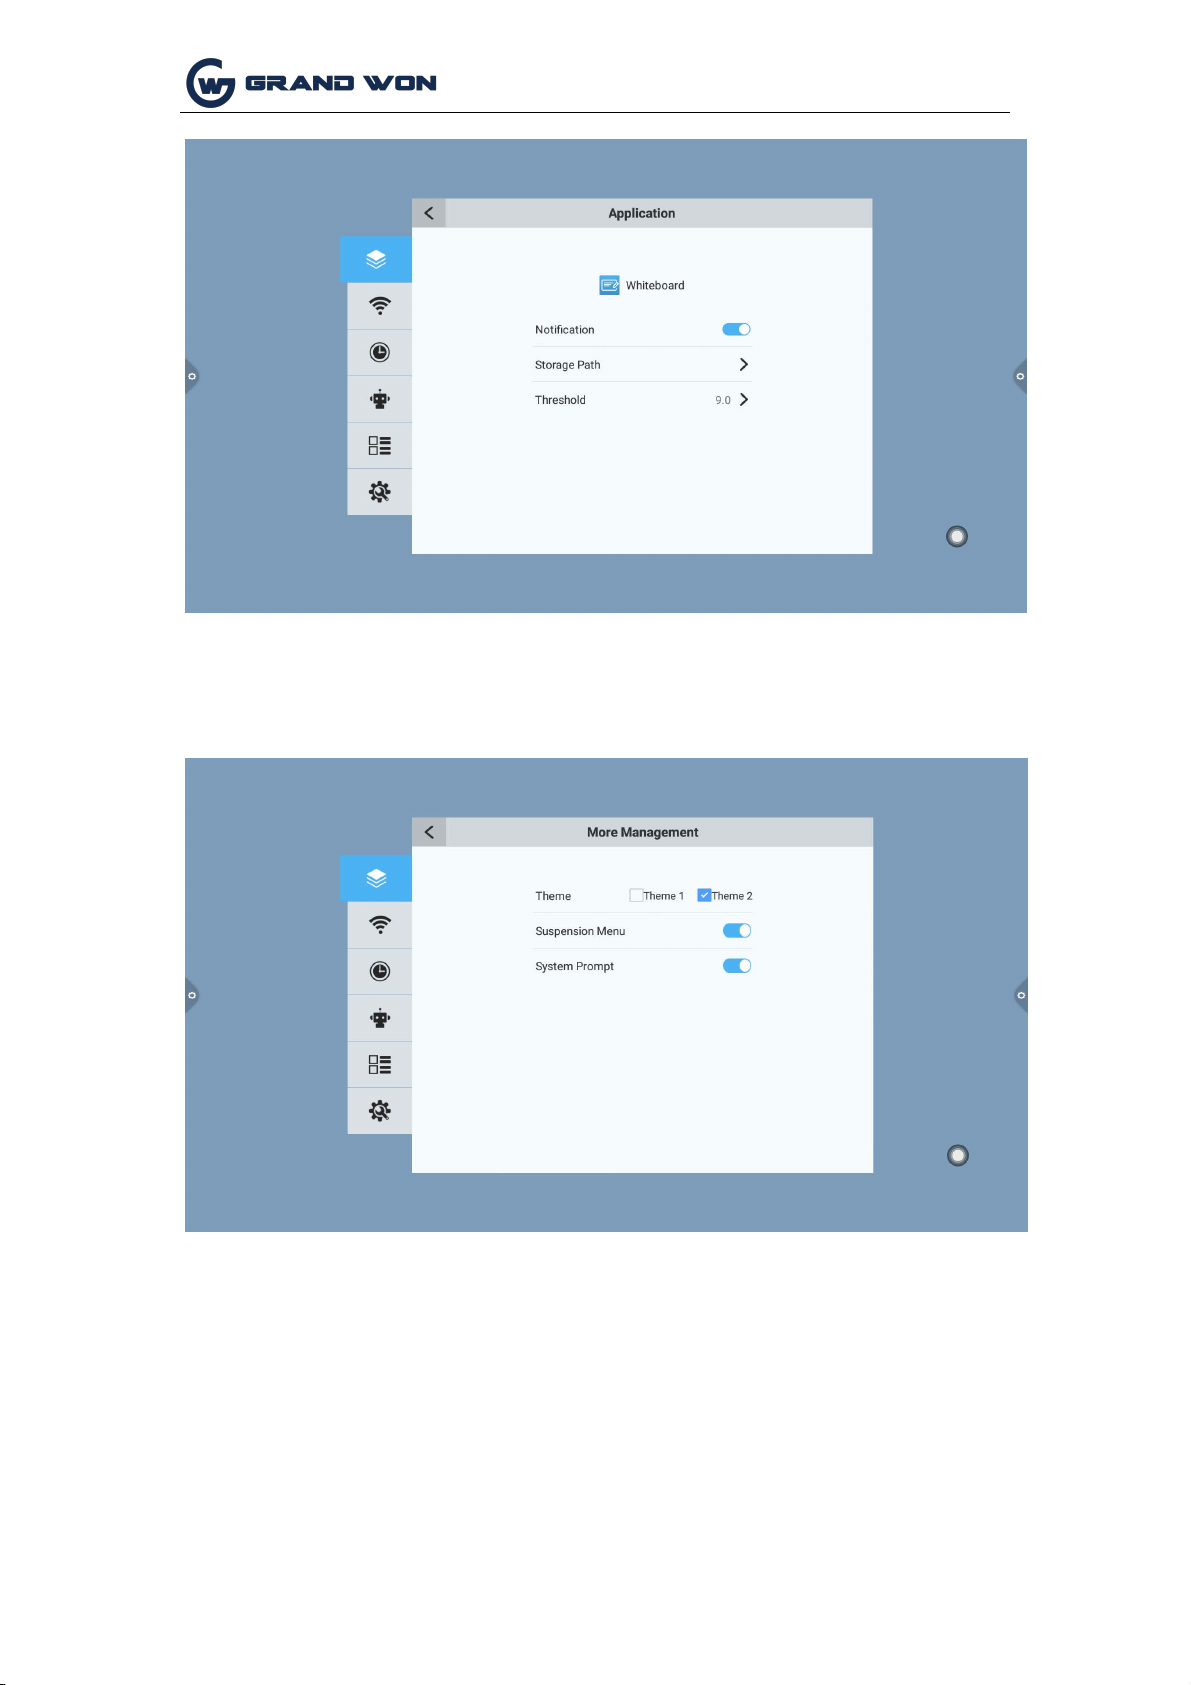
3. Application Management
You can check the storage usage, or some settings for the application
software.
(1) The default application of the system, such as a whiteboard, can
be used to modify notification pushes, file save paths, thresholds,
so on.
and
(2) System third-party applications: There are notifications for
pushing, uninstalling, clearing cached data, etc.
Page 12 of 51
Shenzhen Guangwen Industrial Co.,Ltd
4. More management
In more applications, you can change the theme, turn on/off the hover menu, system
prompts, and more.
Page 13 of 51
Shenzhen Guangwen Industrial Co.,Ltd
Theme 1:
Theme 2:
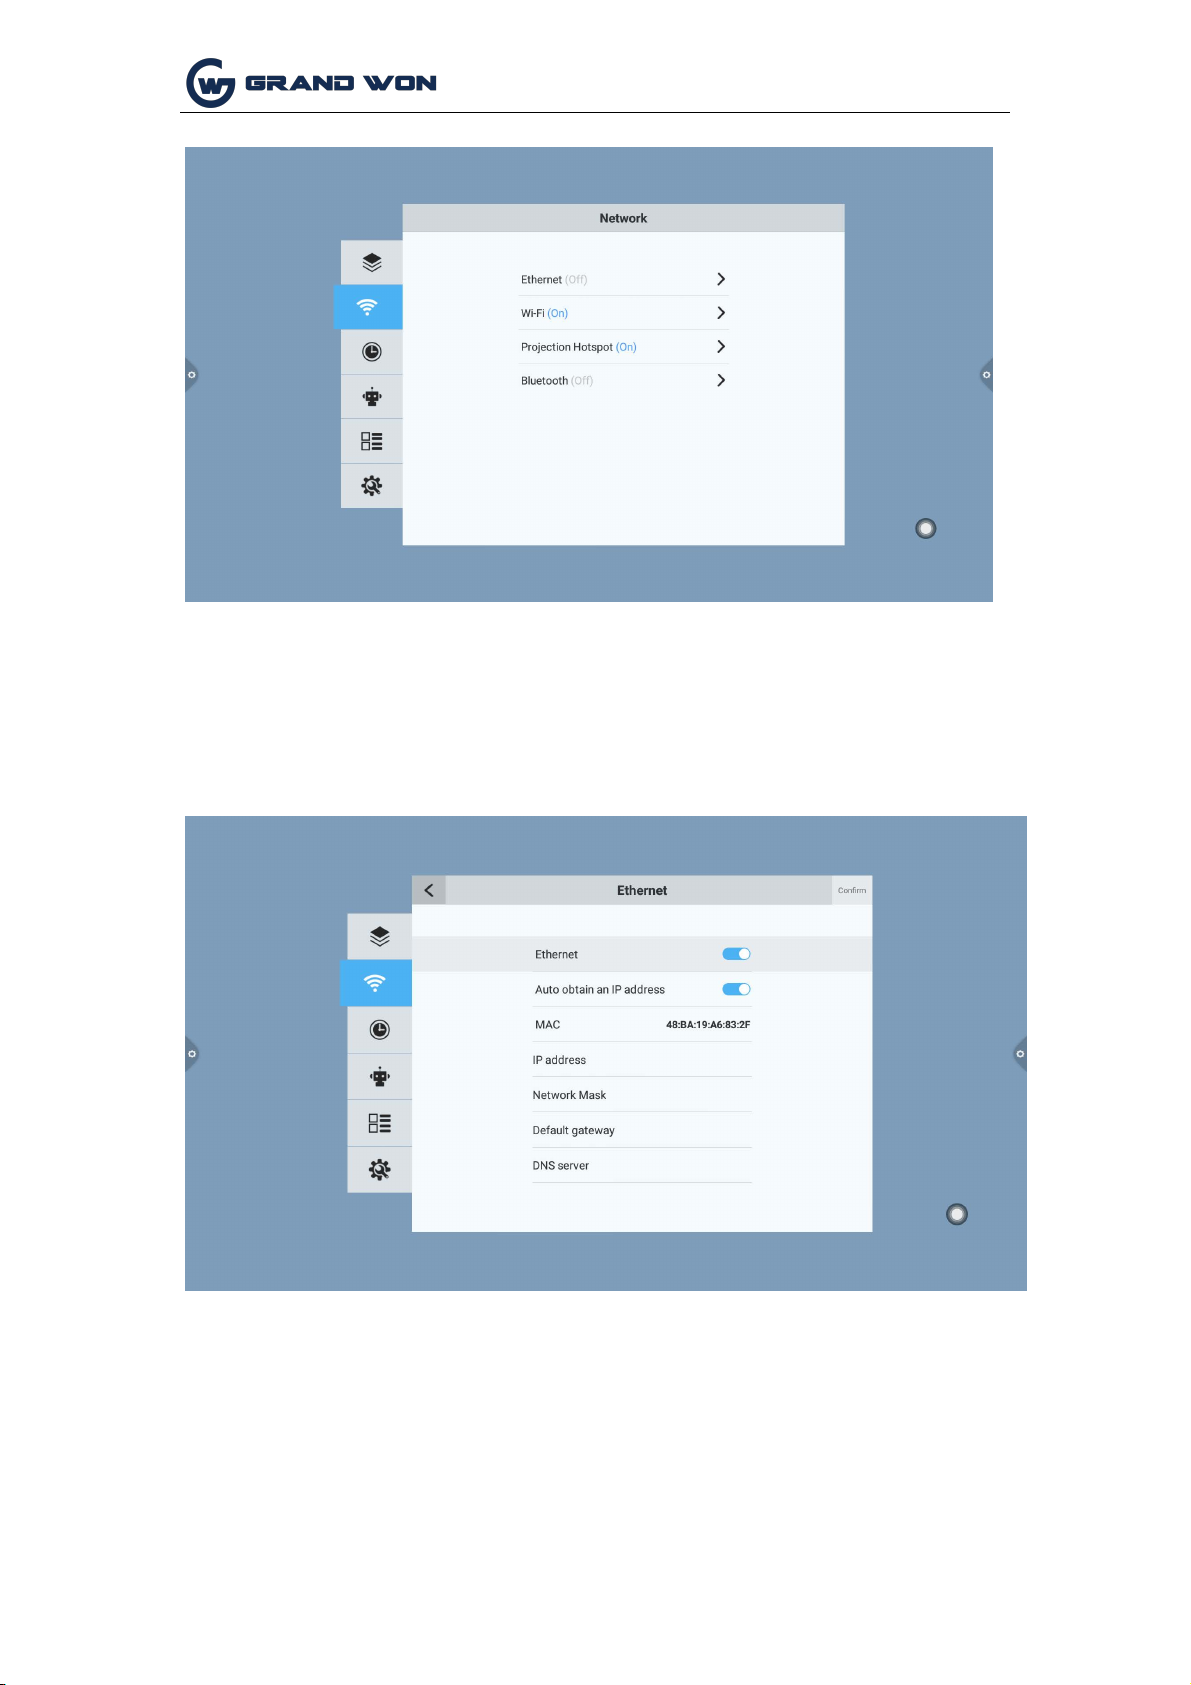
1.5.2 Network
Under the network interface, the functions of the wired network, the
wireless network, and the wireless hotspot are mainly set.
Page 14 of 51
Shenzhen Guangwen Industrial Co.,Ltd
1.
Wired network
2.
Wireless network
In the wired network interface, you can view the MAC address, IP address, and other
information. By default, the IP address is enabled by default. After the automatic
acquisition is disabled, you can manually modify the parameters such as the IP
address and subnet mask.
Turn on the wireless network switch button, which will automatically obtain the display of
available wireless networks.
Page 15 of 51

Shenzhen Guangwen Industrial Co.,Ltd
3. 2.4 hotspot
The 2.4G hotspot setting interface can change the hotspot name,
security, password and other parameters.
Note: 2.4G hotspots and wireless networks cannot be turned on at
the same time.
Page 16 of 51

Shenzhen Guangwen Industrial Co.,Ltd
1.5.3 Time
The time setting interface allows you to change the system time, time zone, and time
display format. The network synchronization switch is turned on by default. If you
need to manually set the time, you must turn off the network synchronization.
Page 18 of 51

Shenzhen Guangwen Industrial Co.,Ltd
1.5.4
Intelligence
1.
Smart identification: The default is on state, but when the system detects that
2.
Child lock password: Set the unlock password and the initial password is 2580.
3.
Standby mode: After setting the standby mode, the system will prompt to
Under the smart setting interface, you can change the child lock password, set the
standby mode, timer switch, and power button functions.
there is a signal source access, it will automatically switch to change the channel.
enter the standby state when the set time arrives.
Page 19 of 51

Shenzhen Guangwen Industrial Co.,Ltd
4. Multi-function power button: (1) Off: Press the power button to directly shut down;
1.5.5
Channel
1.
Manual search: Search for a specific station by manually switching
2.
Automatic search station: Select the automatic detection station to save
(2) 2 in 1: Press the power button, the function menu will pop up, you can choose to
enter the energy-saving mode, turn off the machine; (3) three A: Press the power
button, the function menu will pop up, you can choose to enter the energy saving
mode, turn off the all-in-one, and turn on/off the built-in computer. Bring up the
function menu, it will turn off the all-in-one automatically after 5s without any
operation.
Channel options can only be operated on digital TV channels.
channels.
the signal radio station after the automatic detection channel.
3. Program List: The searched radio channels will be displayed in the
program list. Users can switch to view existing channels in this list.
Page 20 of 51

Shenzhen Guangwen Industrial Co.,Ltd
1.5.6 System
(1)
Local upgrade: Copy the firmware to the root directory of the U disk. The U disk
(2)
Online upgrade: Check whether the latest version of the firmware is released
The system setup options are mainly for the system input method, language display
settings and system update and upgrade, etc. You can also check the system version
information and built-in storage usage.
System upgrade: divided into local upgrades and online upgrades.
is connected to the multimedia USB port of the all-in-one. Select the local update
and update it.
through the network for downloading and updating.
Page 21 of 51

Shenzhen Guangwen Industrial Co.,Ltd
II Software Description
1.
The conference board's default pencil tool is selected and can be written directly.
2.
Support two-point roaming, two-point zoom function.
2.1.2 More Menus
2.1 Electronic Whiteboard 2.1.1
Interface Display
Click on the conference whiteboard icon on the main screen.
1. Click (more menu icon) in the lower left corner of the interface to pop up and
display the lower level content menu;
Page 22 of 51

Shenzhen Guangwen Industrial Co.,Ltd
2. Content Menu Icon Function Operating Instructions:
(1)
Open the file: Click the icon to open the file in the directory where the
(2)
Save file: Click the icon to save the content currently being written.
whiteboard file is saved (the default path directory is the built-in storage/whiteboard),
click the file to open it directly, and you can edit and save it again.
The default time is named and saved. The user can customize the name and save it.
The user can customize the whiteboard file to select built-in storage or U disk to
save.
Page 23 of 51

(3) Scan Code Sharing: Click on the icon to generate a two-dimensional code
window under the connected network. The current conference record code will be
taken away through the WeChat Scan function; if prompted, return to the home page
and click to enter the system. Set up a network connection and rescan the code after
successful connection.
Page 24 of 51

(4) Export pictures: Click the icon to export the contents of the whiteboard
to the picture format *.jpg. The storage location of the exported pictures can be either
a. If you use QQ email to log in, the password needs to enter the authorization code
b. If you use an enterprise email, such as foxmail, change the SMTP address to
built-in storage or U disk.
(5) E-mail sending: Click the icon. When you use the e-mail sending function for
the first time, you need to set the e-mail sender's e-mail related information on the e-
mail login interface as shown in the figure:
to log in successfully; (Authorization code in the QQ mailbox settings to open the
SMTP service can view the authorization code)
smtp.exmail.qq.com, and check Use SSL to log in.
c. After the login is successful, the user enters the email address of the recipient, clicks to send the
content of the conference whiteboard record to the recipient's mailbox in the PDF format file, and
Page 25 of 51

Page 26 of 51
clicks on the settings to modify the current account.

(6)
Insert material: Click the icon to open the local storage or U disk image file, the
user can select the picture can be inserted into the whiteboard, the image can be
(7)
Replace the background: Click the icon to replace the whiteboard background
annotated and written; Another way is to have access to the camera device, can
Calling the camera to take a picture, and inserting the photographed picture on the
whiteboard, the picture can be annotated and written
Page 27 of 51

(8)
About the whiteboard: Click the icon to check the version information.
(9)
Exit the whiteboard: Click the icon. When there is content on the whiteboard,
exit the whiteboard pop-up prompt: The whiteboard is not saved. Save the whiteboard
and exit the whiteboard. According to whether or not to carry out functional
operations; in the absence of content on the whiteboard, click on the whiteboard to
exit directly;
Page 28 of 51

2.1.2
Common Functions Menu
1.
Brush tool
(1)
Click on the to bring up the brush tool menu. The default brush is a pencil.
You can click on the switch marker to write.
(2)
Modify the thickness and color of the handwriting: Swipe left and
right to modify the thickness of the handwriting, and
system preset color swatch to change the color, thickness and color of the handwriting. The preview
icon shows the modified thickness and color.
click
the
Page 29 of 51

Eraser
(1)
Wipe: the icon to perform fine erase operation on the written content;
(2)
Circle wipe: Click icon to erase the erased area in the erasure circle;
3. Insert shape
(1)
Click
to bring up the shape tool menu, select the straight line by default;
(2)
Adjust the line thickness, color: The user
selects the shape, the left shows the corresponding shape, left and right slide to adjust
the thickness, in the color swatch to replace the color, the color swatch will preview
the selected thickness and color.
Page 30 of 51

4. Cancel and reback
(1) Cancel: click the icon to cancel the previous step operation, and up to 10
steps of cancel can be supported at a time;
(2) reback: click the icon to re-execute the canceled operation, with up to 10
steps of reback supported at a time.
5. Selection function
(1) click on the selected option, interface by writing mode switching selection
mode, can drawing the interface handwriting, shape, and then move, delete, copy and
paste functions to insert the picture move, delete, copy and paste, rotate zoom function
operation;
Page 31 of 51

6. Slide full screen delete function
Click the icon, pull out the slider , and drag the icon to the right
to clear the current screen writing.
7. Left-right switching function
Click the icon to switch the left and right position of more multi-function
icon , switching function icon and up and down page function icon, page
preview function icon, and add page function icon .
Page 32 of 51

8. Page preview
(1) open the page preview and pop-up window: click to display the
current page as the selected state
(2) add pages: click the icon to add pages;
(3) delete page: in the page preview window, click the delete button in the
upper right corner of the page to delete the page or delete the page at the bottom of
the page preview window .
(4) pages function: click on the left and right page button and icon flip
effect can be realized next page, can also be the page preview window, preview
the page more than a limited amount of preview, sliding up and down quickly
find page, click on the selected, achieve the function next page.
Page 33 of 51

2.2 Document management
2.2.1 Interface introduction
1. Touch, open file management application, and display external SDcard and USB
external storage device on the left side of the file browser.
2.2.2 classification display
1. When "document" is clicked, the main contents are: Word, EXCEL, PDF and TXT.
Page 34 of 51

深圳市广闻实业有限公司
2.Click "image" to display the image format file, as shown in the figure.
3. When "audio" is clicked, the audio format file is displayed, as shown in the
figure.
4. When "video" is clicked, the video format file is displayed, as shown in the figure
Page 35 of 51

深圳市广闻实业有限公司
5. Search function: enter the name of the file that the user needs to find in the
search bar. After clicking search, the file that is searched will be displayed in the main
content window, as shown in the figure.
6. Click the icon to sort, and the sorting list will pop up, sorted by size, name,
type and time,there are four kinds of sorting methods. Users can sort the files
according to their own needs, as shown in the figure.
Page 36 of 51

深圳市广闻实业有限公司
2.2.3 extension menu
Click the icon to display Settings, language, favorites, and version information, as
shown in the picture.
Page 37 of 51

深圳市广闻实业有限公司
1. Display Settings can set the font display and background color display of the file
manager.
2. The language of choice is simplified Chinese and English.When the system language is
switched, the language of the file browser will be the same switching with the system, no
manual switching.
Page 38 of 51

深圳市广闻实业有限公司
3. The favorites
(1) file collection: select the files that need to be collected and click collect.
(2) view files: when viewing the files or folders in the favorites, double-click to receive the
files or folders.
(3) remove the collection files: click to select the files or folders to be moved out, and then
click to remove the collection folder.
(4) exit the collection folder: click the area outside the collection folder interface to exit.
2.2.4 display mode
1. Icon display icon display can be divided into large icon display and small icon display.
1. Information about viewing
the file browser version
Page 39 of 51

深圳市广闻实业有限公司
2.Listing presentation
1. Click the multi-select button to select multiple folders simultaneously
2.2.5 toolbar
2. Extension tools
When entering the selected state, the extension toolbar will pop up, where copy, cut, delete,
rename, compress, encrypt, collect and other functions.
Page 40 of 51

深圳市广闻实业有限公司
(1) file encryption a. Open password protection: click encryption and enter the password by
selecting files or folders to be protected for a long time
Ok.After the file is encrypted, the file cannot be deleted, copied, cut or renamed.
B. Remove password protection: long press to select the protected file or folder, click to
decrypt, and enter the password to remove the password protection of the file or folder, as
shown in the figure.
Page 41 of 51

深圳市广闻实业有限公司
2.3 VIP reception
2.3.1 interface description
Click the VIP reception application icon to enter the application homepage.The main
interface is divided into topic bar and preview display bar.
The theme bar is divided into welcome module, industry theme module and signature
picture module.Users can customize topics, edit topics, etc. under the welcome module,
industry topic module, etc.Signed images can only be deleted.
2.3.2 function application
Open the subject image in the preview display bar
Page 42 of 51

深圳市广闻实业有限公司
1. Text editing:
(1) click the icon , and you can enter the state of text editing.When in a text editing
state, you can enter text by touching the keyboard, and by clicking on three function
icons , you can select the font, size and color of the text.
(2) the edit menu will pop up at the top of the subject interface of the edit box after long
press, and the content of the edit box will be selected, cut, copied and deleted through the
edit menu, as shown in the figure
(3) save: click the icon to save it. Save it as the theme image, which will be displayed
under the theme.
2. Display the signature mode, then enter the signature state. In the signature state, the
written content can be manually touched, as shown in the figure
Page 43 of 51

深圳市广闻实业有限公司
(1) writing: click the icon, then you can choose the thickness and color of the drawing
(2) Eraser: a. Click the icon to clear the contents edited under the signature state;B.
line, as shown in the figure.
Click to bring up the eraser function.
(3) qr code sharing: click the icon and save the signed images of the theme field in
person. If you are connected to the Internet, scan the qr code with your mobile phone to
view and download the saved theme pictures.As shown in the figure
2.4 wireless transmission screen wireless
transmission screen (this function requires the
purchase of G share) G share adapter, as shown in
the figure below:
Page 44 of 51

深圳市广闻实业有限公司
2.4.1 network requirements
1. Before using the wireless transmission function of G fexiang, it is necessary to ensure
that the wireless hot spots /5G hot spots have been turned on
(wireless hotspots and 5G hotspots can only be turned on one.)Note: a. The wireless
hotspot function system is off by default. If the wireless hotspot is on, 5G hotspot and
Wi-fi shuts down automatically.
B. If the conference tablet is configured with 5G WiFi module, 5G hotspot function will be
opened by default after program update;If no 5G-WiFi module is configured, it is in a gray
state (uneditable state).
2.4.2 G share is paired with the conference board
G share insert USB ports conference tablet, tablet pairing with meeting, G share when have
a flashing blue light, is working with meeting tablet matching, and install the software, blue
lights flashing, no longer match.
Tablet (note: a meeting with most 8 pcs of G share parts match to one by one under the
same network environment, when meeting tablet response to send the application, interface
display only a connected device.)
2.4.3 G share is connected with the computer
1. Running pairing
(1) automatically run: G share inserted into the computer USB port (e.g., laptop), paired with
computer, and the accessories display lamp has been flashing blue light, is working with the
computer in the match, as shown in figure:
(2) manual operation: turn on the computer software installation (part of the anti-virus
software will intercept the running program loaded by the screen transmitter, and then
manually select the optical disk to run the DazzleShare application).
Page 45 of 51

深圳市广闻实业有限公司
2. When the pairing of G share and the computer is successful, the "key" will pop up on
the computer side to connect to the host machine successfully share "prompts, and
accessories display lights no longer flashing blue lights.
3. Wireless Screen sharing
Press the G share button, the blue light will turn red, that is, the screen transmission and
sharing will be successful.Press the button again, and the screen will exit and be Shared on
the screen to be uploaded.
2.5 multi-screen interaction
2.5.1 application description (this function require purchase)
The application of the main function is: the mobile content, tablet or computer through
wireless transmission, the content of the projection to the meeting a whole machine, truly
achieve the projection equipment and is the function of the wireless transmission of
projection device screen (note: mobile phone, tablet or computer, tablet with meeting on the
same LAN).
2.5.2 operating instructions
1. Click to open the multi-screen interactive interface and download and install the
client according to the operation steps shown on the screen.(there is no need to install the
client for IOS system)
2. The mobile phone can realize wireless screen shooting by running the client software, as
shown in the figure.
Page 46 of 51

深圳市广闻实业有限公司
Android system
1.Modify device name
2.5.3 multi-screen interactive interface
IOS
system
click multi screen interface icon
bring up as below page:
Page 47 of 51

深圳市广闻实业有限公司
The device name and connection password can be changed in this interface.The
connection password only works for android phones.When the password is turned on, the
android phone connects to the conference tablet ,When you need to enter the connection
password to connect to the screen.
2. Network display
Network 1 is a 5G hot network, and SSID and password can be modified in "menu-network-
5g hot spots".When 5G hotspot is opened, the first column of the network displays the SSID
and password of 5G hotspot.When the 5G hotspot closes, it shows "no".
Network 2 is the conference flat wireless network.When the conference board is connected
to the wireless network, the name of the wireless network will be displayed in column 2 of
the network.Showing "nothing" indicates that the conference tablet wireless network is not
connected.
Network 1 and network 2 can exist at the same time. When users use multi-screen
interactive functions, they choose to connect to one of the networks to ensure that the
mobile phone and the conference tablet are on the same LAN.
Note: network 1 cannot access the Internet.
Page 48 of 51

深圳市广闻实业有限公司
2.6 more applications
2.6.1 APK application
Click the icon to enter more application interface of the conference system, where
users can view or open the APK application installed by themselves, as shown in the figure.
2.6.2 suspension menu
1. Icons can be moved at will and displayed in any interface.Clicking open allows you to
quickly start applications from within the menu, and you can customize other applications to
add to the floating menu bar.
2. Add: icon , select the application to add in the pop-up menu bar.
3. Delete the shortcut icon of the application.
Page 49 of 51

Add
Delete
FCC STATEMENT
This device complies with Part 15 of the FCC Rules. Operation is subject to the
following
two conditions:
(1) This device may not cause harmful interference, and
(2) this device must accept any interference received, including interference that may
cause undesired operation.
NOTE 1: This equipment has been tested and found to comply with the limits for a Class
B digital device, pursuant to part 15 of the FCC Rules. These limits are designed to
provide reasonable protection against harmful interference in a residential
installation.
This equipment generates, uses and can radiate radio frequency energy and, if not
installed and used in accordance with the instructions, may cause harmful interference
to
radio communications. However, there is no guarantee that interference will not occur in
a particular installation. If this equipment does cause harmful interference to radio or
television reception, which can be determined by turning the equipment off and on, the
user is encouraged to try to correct the interference by one or more of the following
measures:
- Reorient or relocate the receiving antenna.
- Increase the separation between the equipment and receiver.
-Connect the equipment into an outlet on a circuit different from that to which the
receiver is connected.
-Consult the dealer or an experienced radio/TV technician for help.
NOTE 2: Any changes or modifications to this unit not expressly approved by the party
responsible for compliance could void the user's authority to operate the equipment.
The information listed above provides the user with information needed to make him or
her aware of a RF exposure, When the device is used above 20 cm, the device complies
with RF specifications and this radio is within FCC exposure limits.
Page 50 of 51
 Loading...