

Page 1
GRANDVIEW REPRODUCING GENUINE COLORS
GRANDVIEW REPRODUCING GENUINE COLORS
Installation Guide for
Large stage series super mobile screen
Grandview Crystal Screen Canada Ltd.
#11- 3751 North Fraser Way,
Marine Way Business Centre,
Burnaby, BC, Canada V5J 5G4
Tel: 1-604-412-9777 Fax: 1-604-412-9796
Website: www.grandviewscreen.ca
Guangzhou Grandview Crystal Screen Co., Ltd.
P.O. 511400 Federal Ind. Zone No. 363, Yushan West Road,
Shiqiao, Panyu District, Guangzhou, Guangdong, China
Tel: +8620-8489-9499 Fax: +8620-8480-3343
Website: www.grandviewscreen.com
ISO9001:2000
International Certification
Model: LS-Zxx
Thank you for purchasing a Grandview projection screen.
Before use, please read instructions carefully. After installation, keep instructions for future reference.
Page 2
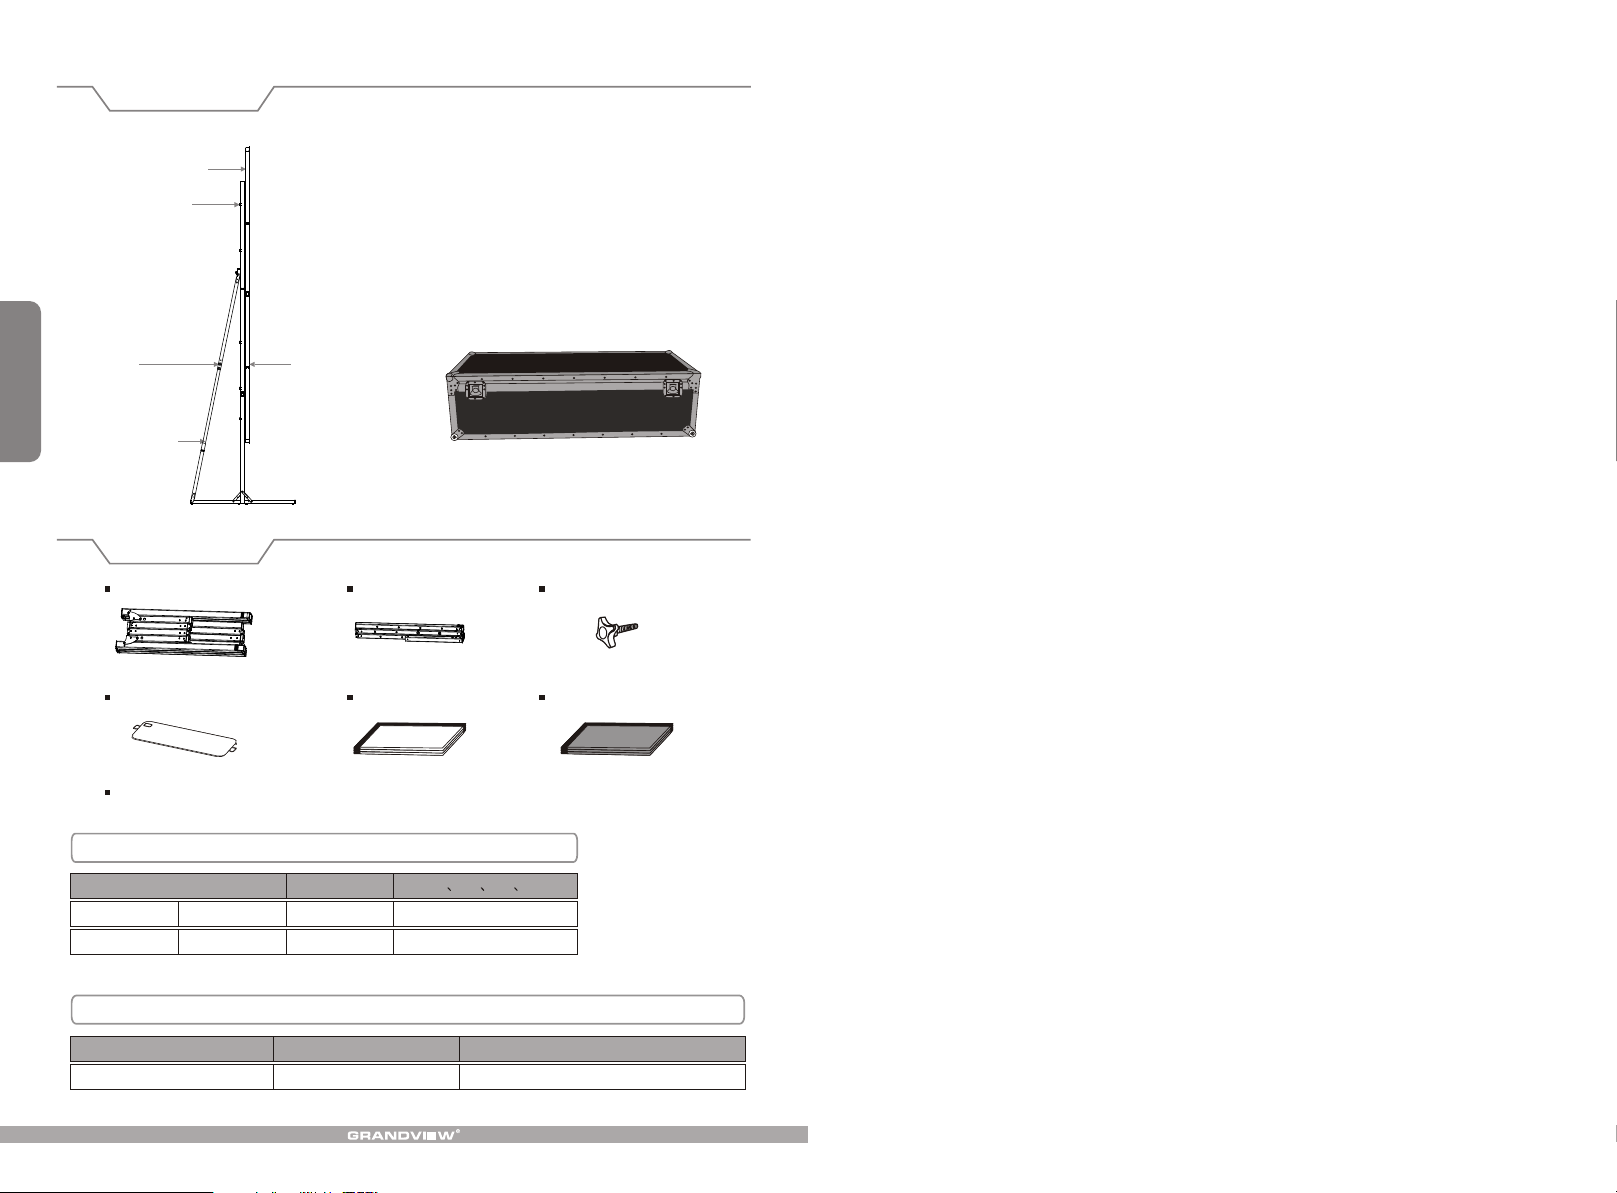
Description
Screen Frame
Support Bar
Leg
1
Extension
Accessories
Screen Frame ( 1p c)
Fabric Package Bag ( 1pc )
Instruction Manual ( 1pc )
Accessories List
Specification(in)
Name
Screw Bar
Sizes and specifications are subject to change at anytime.
Unit
Pcs
Screen
Transportable Case
Legs ( 2pcs ) Tightening knobs
( 1pc )White screen
120 150 180 200
100
Qty
14
Qty
12
( )Gray screen Optional
Frame Specifications
Model
Large-Stage Super Mobile series
Sizes and specifications are subject to change at anytime.
Sizes
32 mm x 32 mm
Application
Applies up to 200" Large Stage Super Mobile screens
Page 3
Warnings
Please read the following as any damage to the screen surface will affect the quality of the picture:
1.Avoid contact or touching the screen surface as it may cause scratches or tears.
2.Do not write or draw on the surface
3.Clean the screen with a soft cloth and lukewarm water. Do not use any detergent or cleaning products.
To avoid injury, two people are necessary for both assembly and storage.
Please use in a location shielded from the elements, especially wind. A strong wind may cause the screen
to fall. All pieces of the frame and stand must be used together. The screen can be used separately.
To prevent unnecessary damage, the operating and maintenance of the screen should be done by adults.
Please fold up screen and return all parts into the case after every use.
Installation
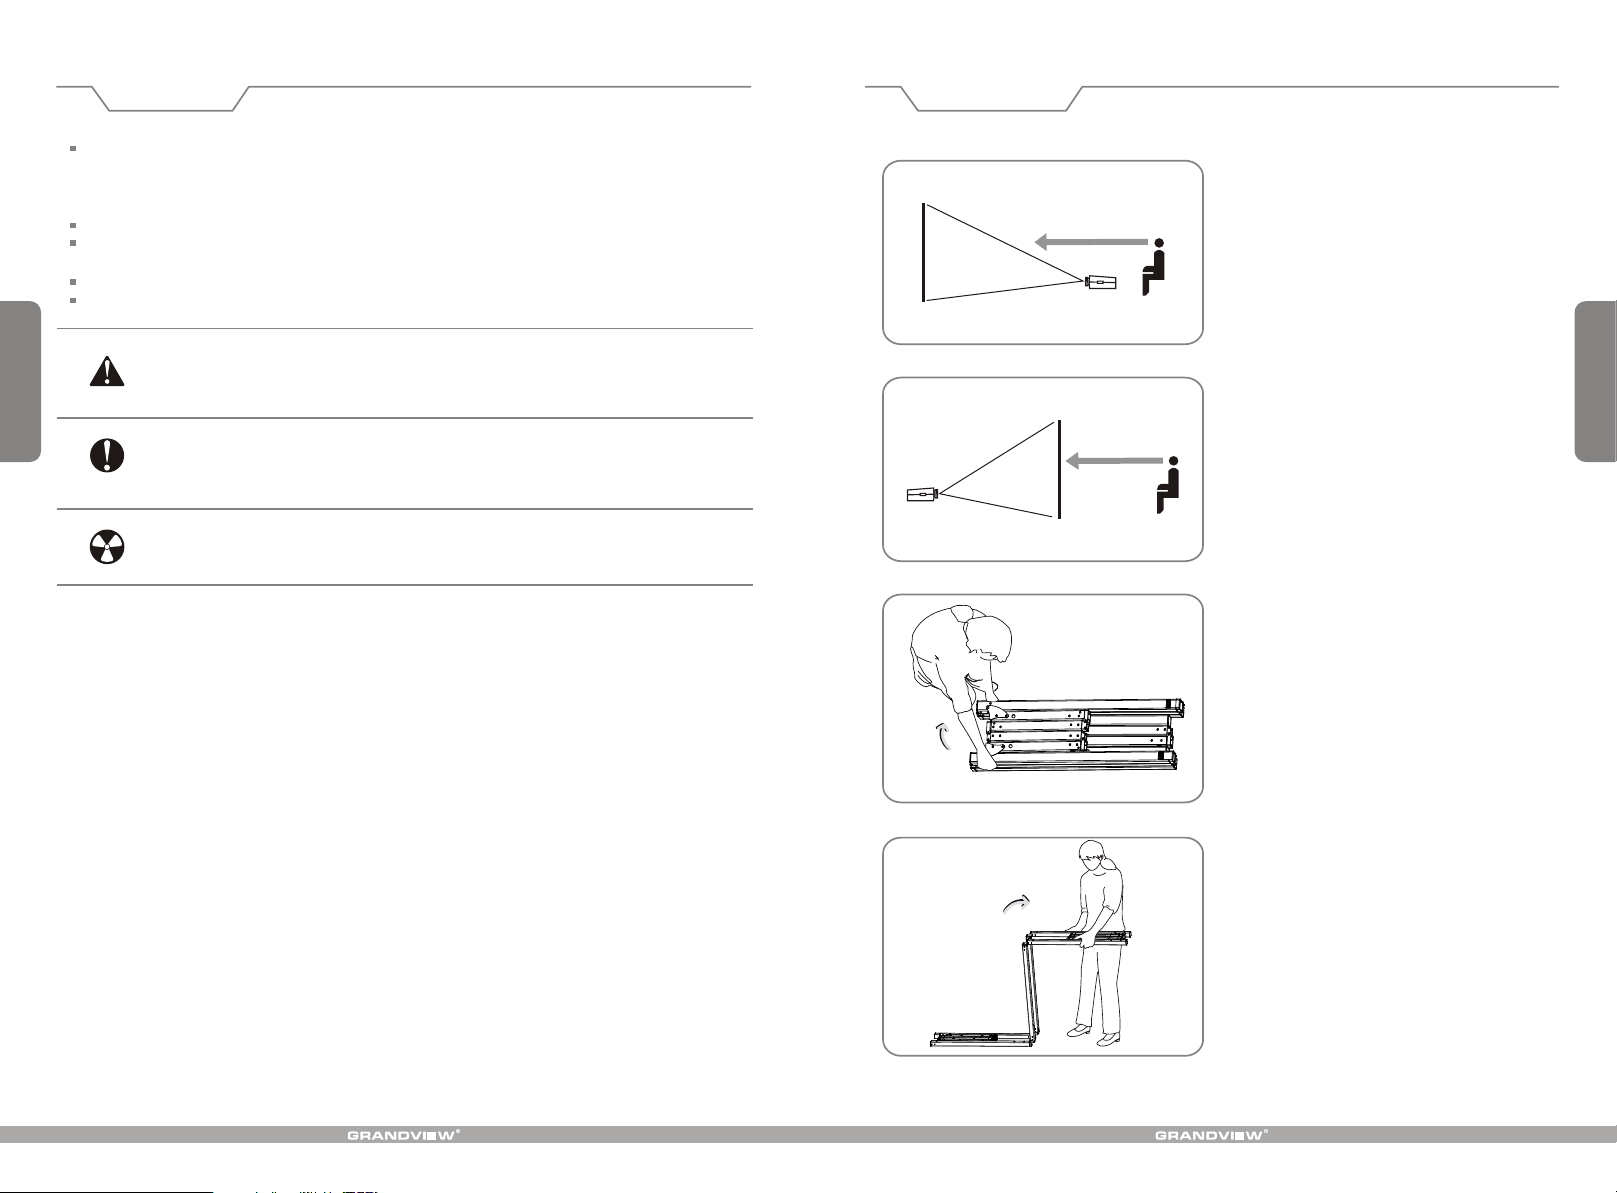
This projection screen should be installed at the
best possible viewing position for the audience.
Front projection ( Figure 1 ) and Rear projection
( Figure 2 ). Install according to material chosen.
Figure 1
9
Ignoring the safety warnings may lea d to in juri es and/or damaging the product.
Store back into transporting case after use
Avoid conditions such as wind and rain when used outside
Do not take apart and replace with unknown parts. If there are any problems, please contact your local dealer.
Product specifications are subject to change.
Figure 2
Figure 3
Unpack and extend frame on a flat surface
1.
( Figure 34).
-
2
Figure 4
Page 4
Installation
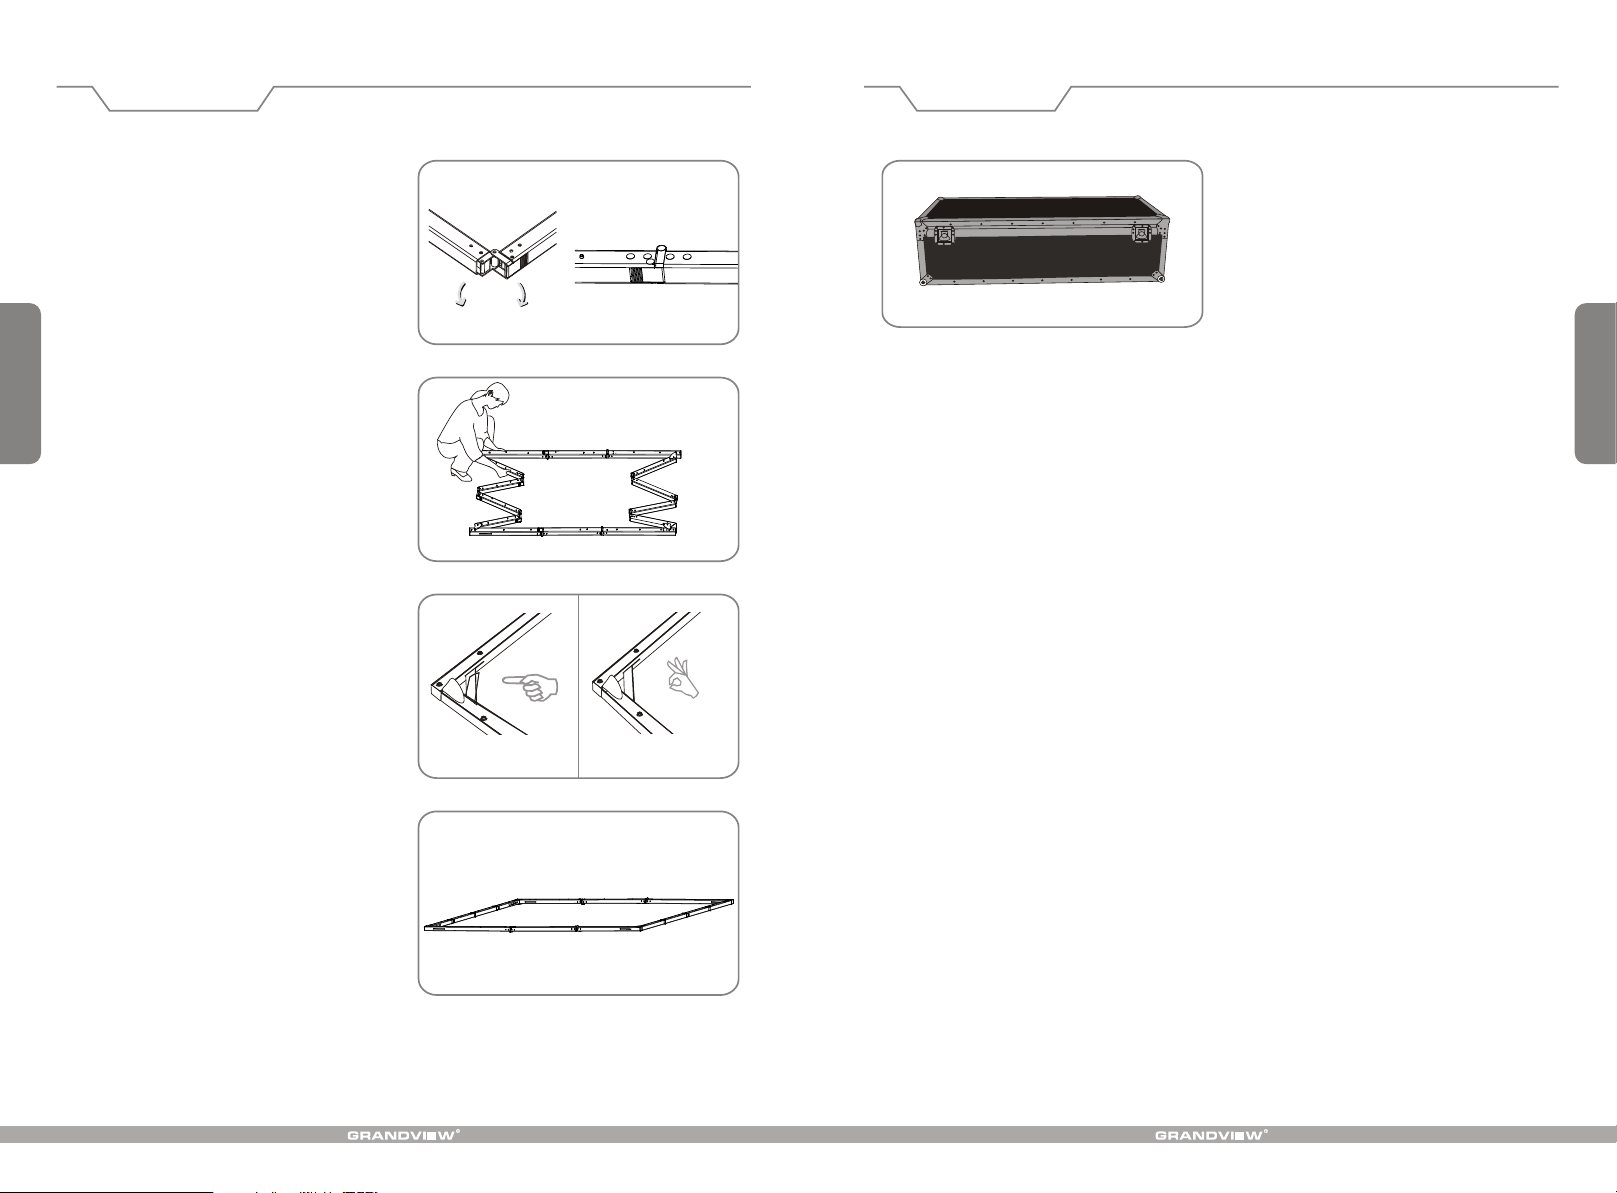
To secure frame, "click" hinges into place
2.
( Figure 5 - 6 ).
Disassembly
11. Store firstly frame and legs on the bottom
layer of the freight case, fabric on top layer
( Figure 30 ).
3
Make sure 4 corners are 90 degrees then
3.
secure with support beams ( Figure 7 - 9 ).
"click"
Figure 5
Figure 6
Figure 8Figure 7
Figure 30
8
Figure 9
Page 5
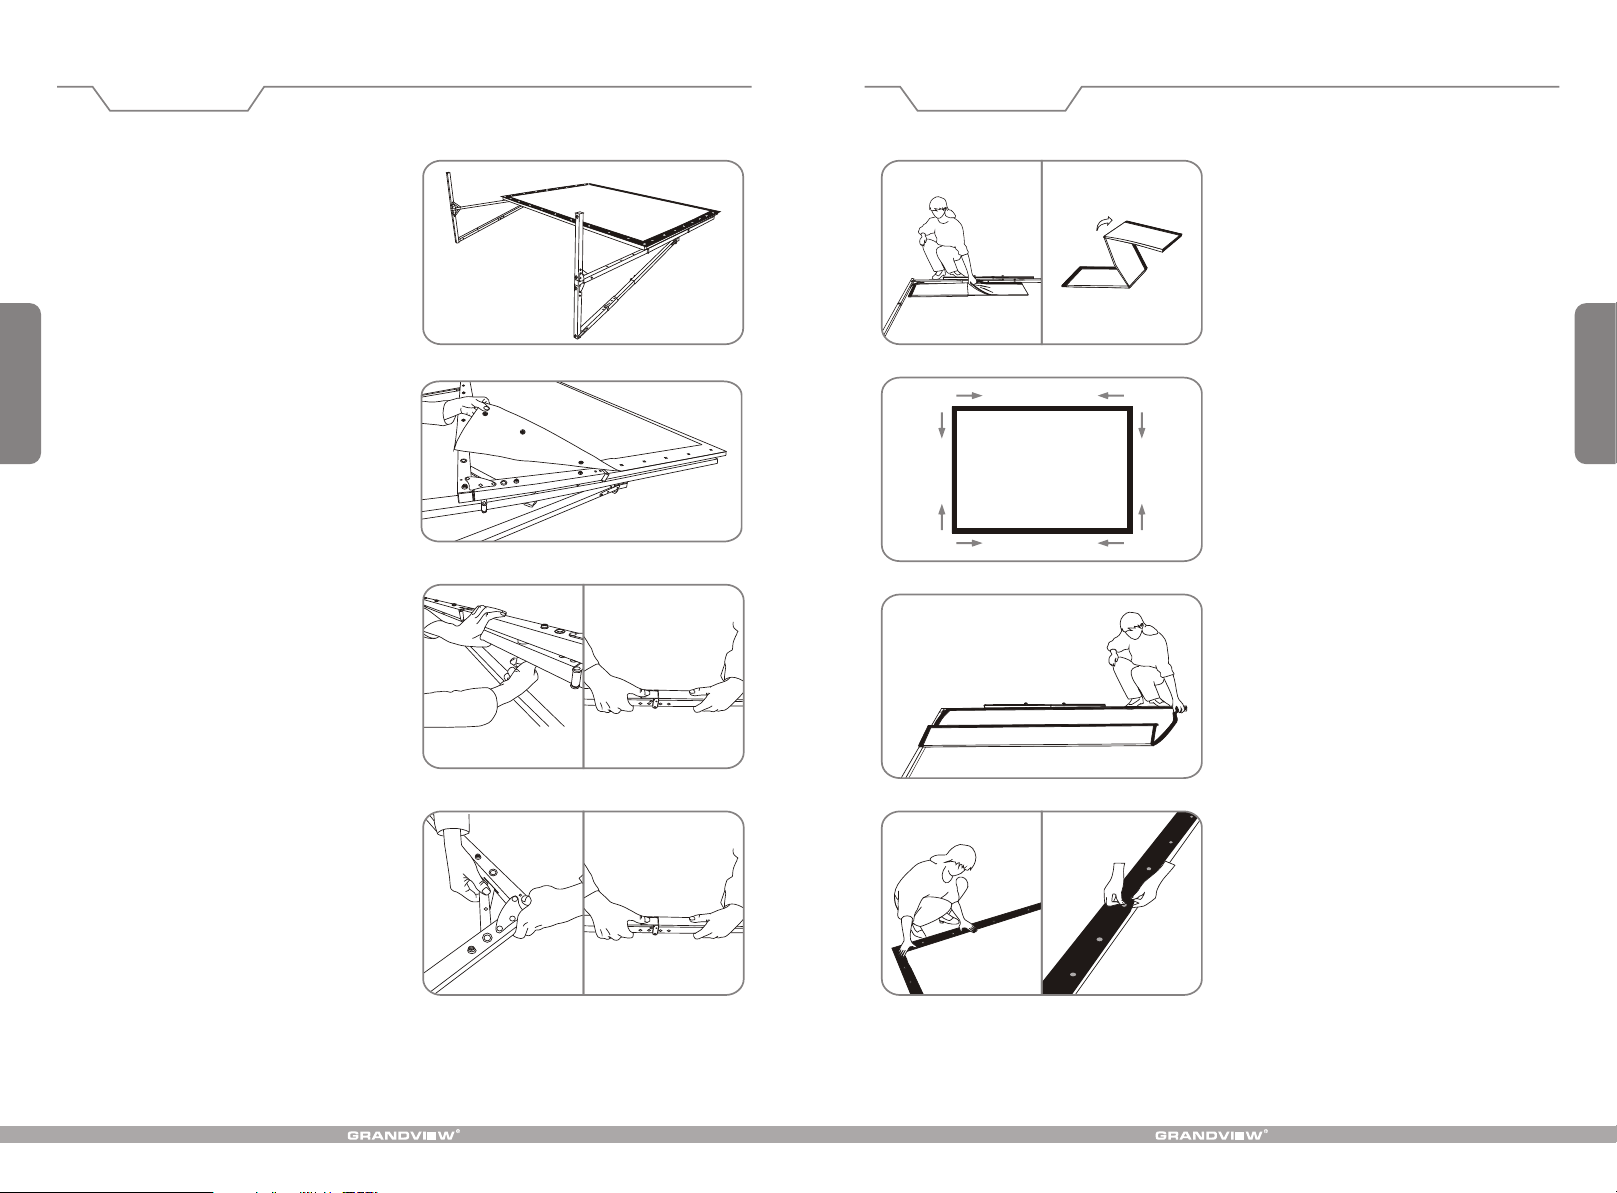
Disassembly
Installation
7
1. Lay down the screen on flat ground ( Figure 24 ).
2. Take off screen from the frame by releasing
the buttons then fold ( Figure 25 ).
3. Screw off the black knobs and fold the legs
with releasing the locking system
( Figure 26 - 27 ).
Figure 24
Figure 25
Figure 10 Figure 11
Figure 12
4.
Unfold screen fabric and lay over frame
re
( Figu 10 - 11).
5. t
Snap screen buttons to frame. Star at top
re
and finish at bottom (Figu 12 - 15).
4
4. Release the support beam on frame corners
( Figure 28 ) as well as the locking buttons on
the frame, then fold the frame from both
sides ( Figure 29 ).
Figure 26 Figure 27
Figure 28 Figure 29
Figure 13
Figure 14 Picture 15
Page 6
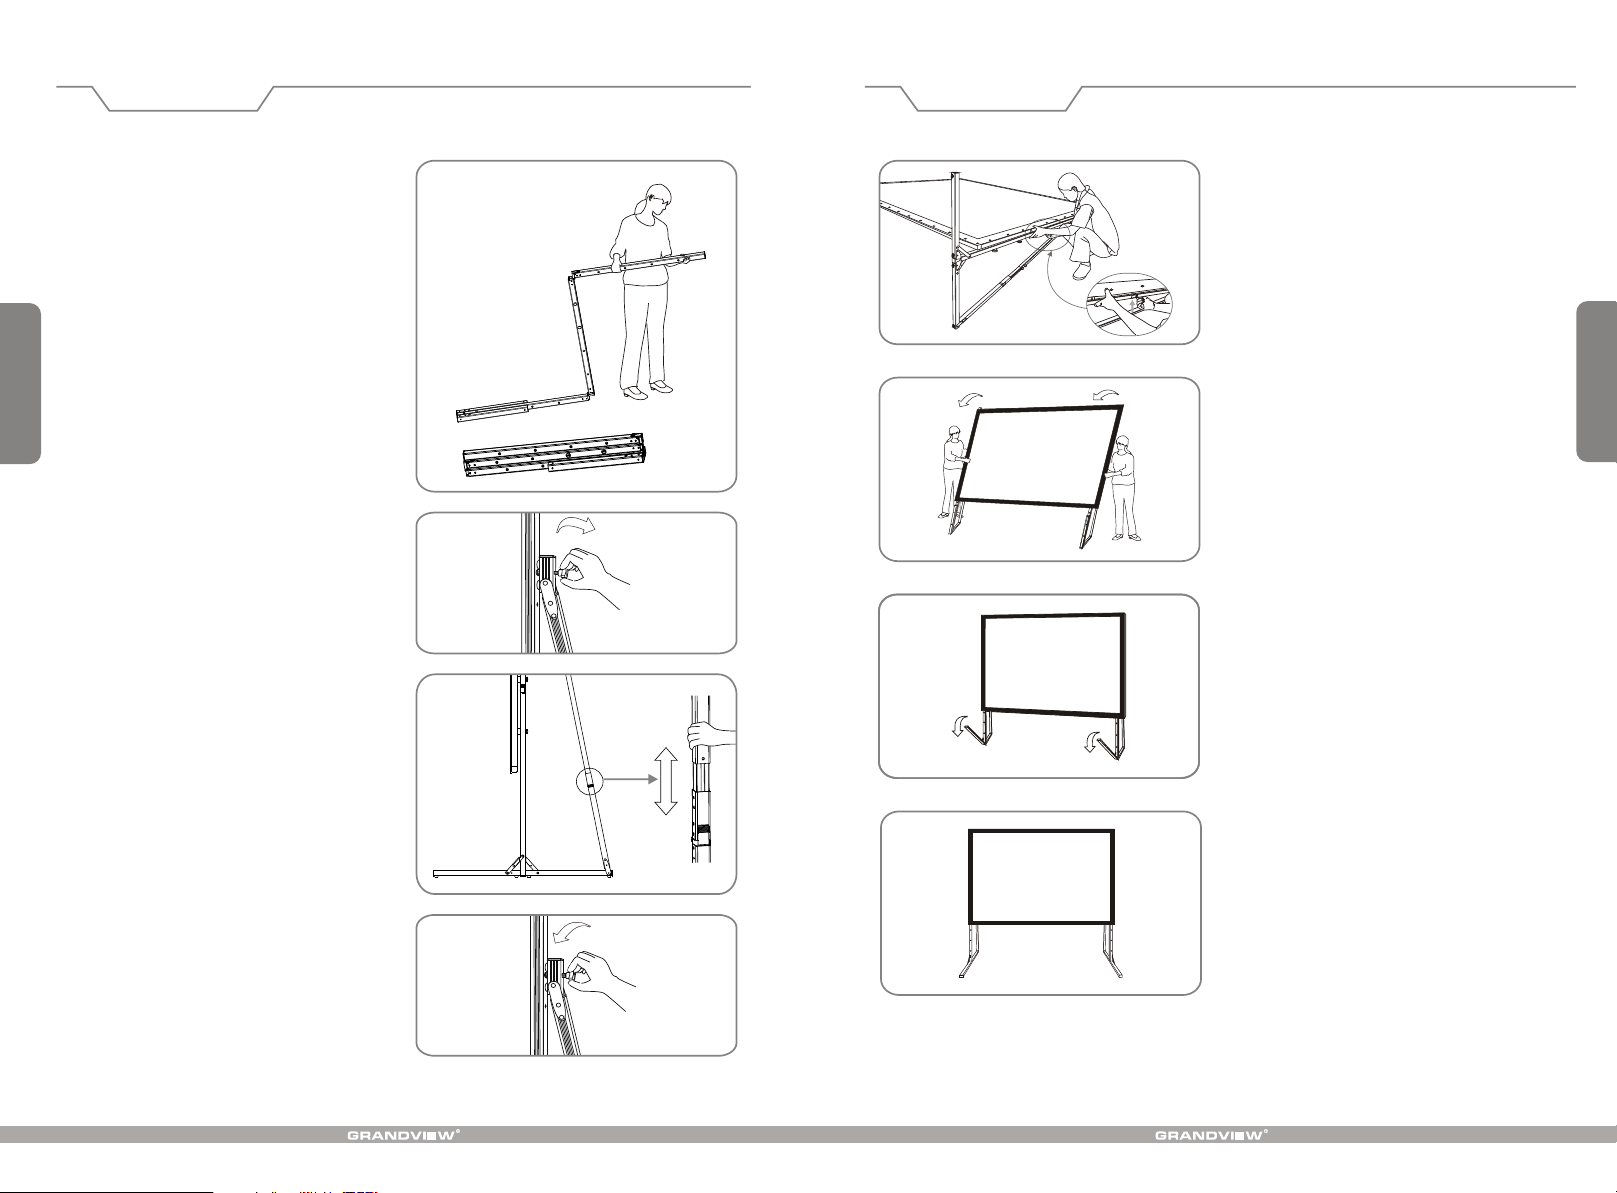
Installation
Installation
6. re Unpack and extend legs ( Figu 16 ).
5
7.
Set frame to desired height then extend legs
accordingly and fasten with black knob
re
( Figu 17-19 ).
Figure 16
Figure 17
Figure 20
Figure 21
8. It's best to attach legs to frame on flat ground.When
raising the screen, ensure Grandview logo and
double-sided snaps (for masking custom masking
-curtain) are on bottom ( Figure 20 - 21 ).
6
9. Pull down front feet for stability ( Figure 22 - 23 ).
Figure 18
Figure 19
Figure 22
Figure 23
 Loading...