

Page 1
To the owner
This screen is designed for
education, presentations or as
a large computer monitor. It will
give you bright portable images
up to 2.5 metres wide.
Protecting your screen
Store the screen rolled up to
protect the surface material from
damage.
Check the screen for dirt or other
foreign matter that may become
trapped in the casing before rolling back into the case.
Cleaning your screen
Clean the screen using warm
water, a mild detergent and a
soft cloth. Dry the screen before
rolling back into the case.
Never use strong cleaners,
solvents or abrasives on the
screen as this may damage the
surface
For more information please go to
www.projectisle.com.au
or call 1300 88 11 79
Tripod User Guide
May08 - V1.1
Page 2
Setting up your screen
Lock
Unlock
L ock ed
co nditi on
U nloc ke d
co nditi on
Lock
Unlock
Lock
Unlock
L ocked
con ditio n
U nloc ke d
con ditio n
Lock
Unlock
Lock
Unlock
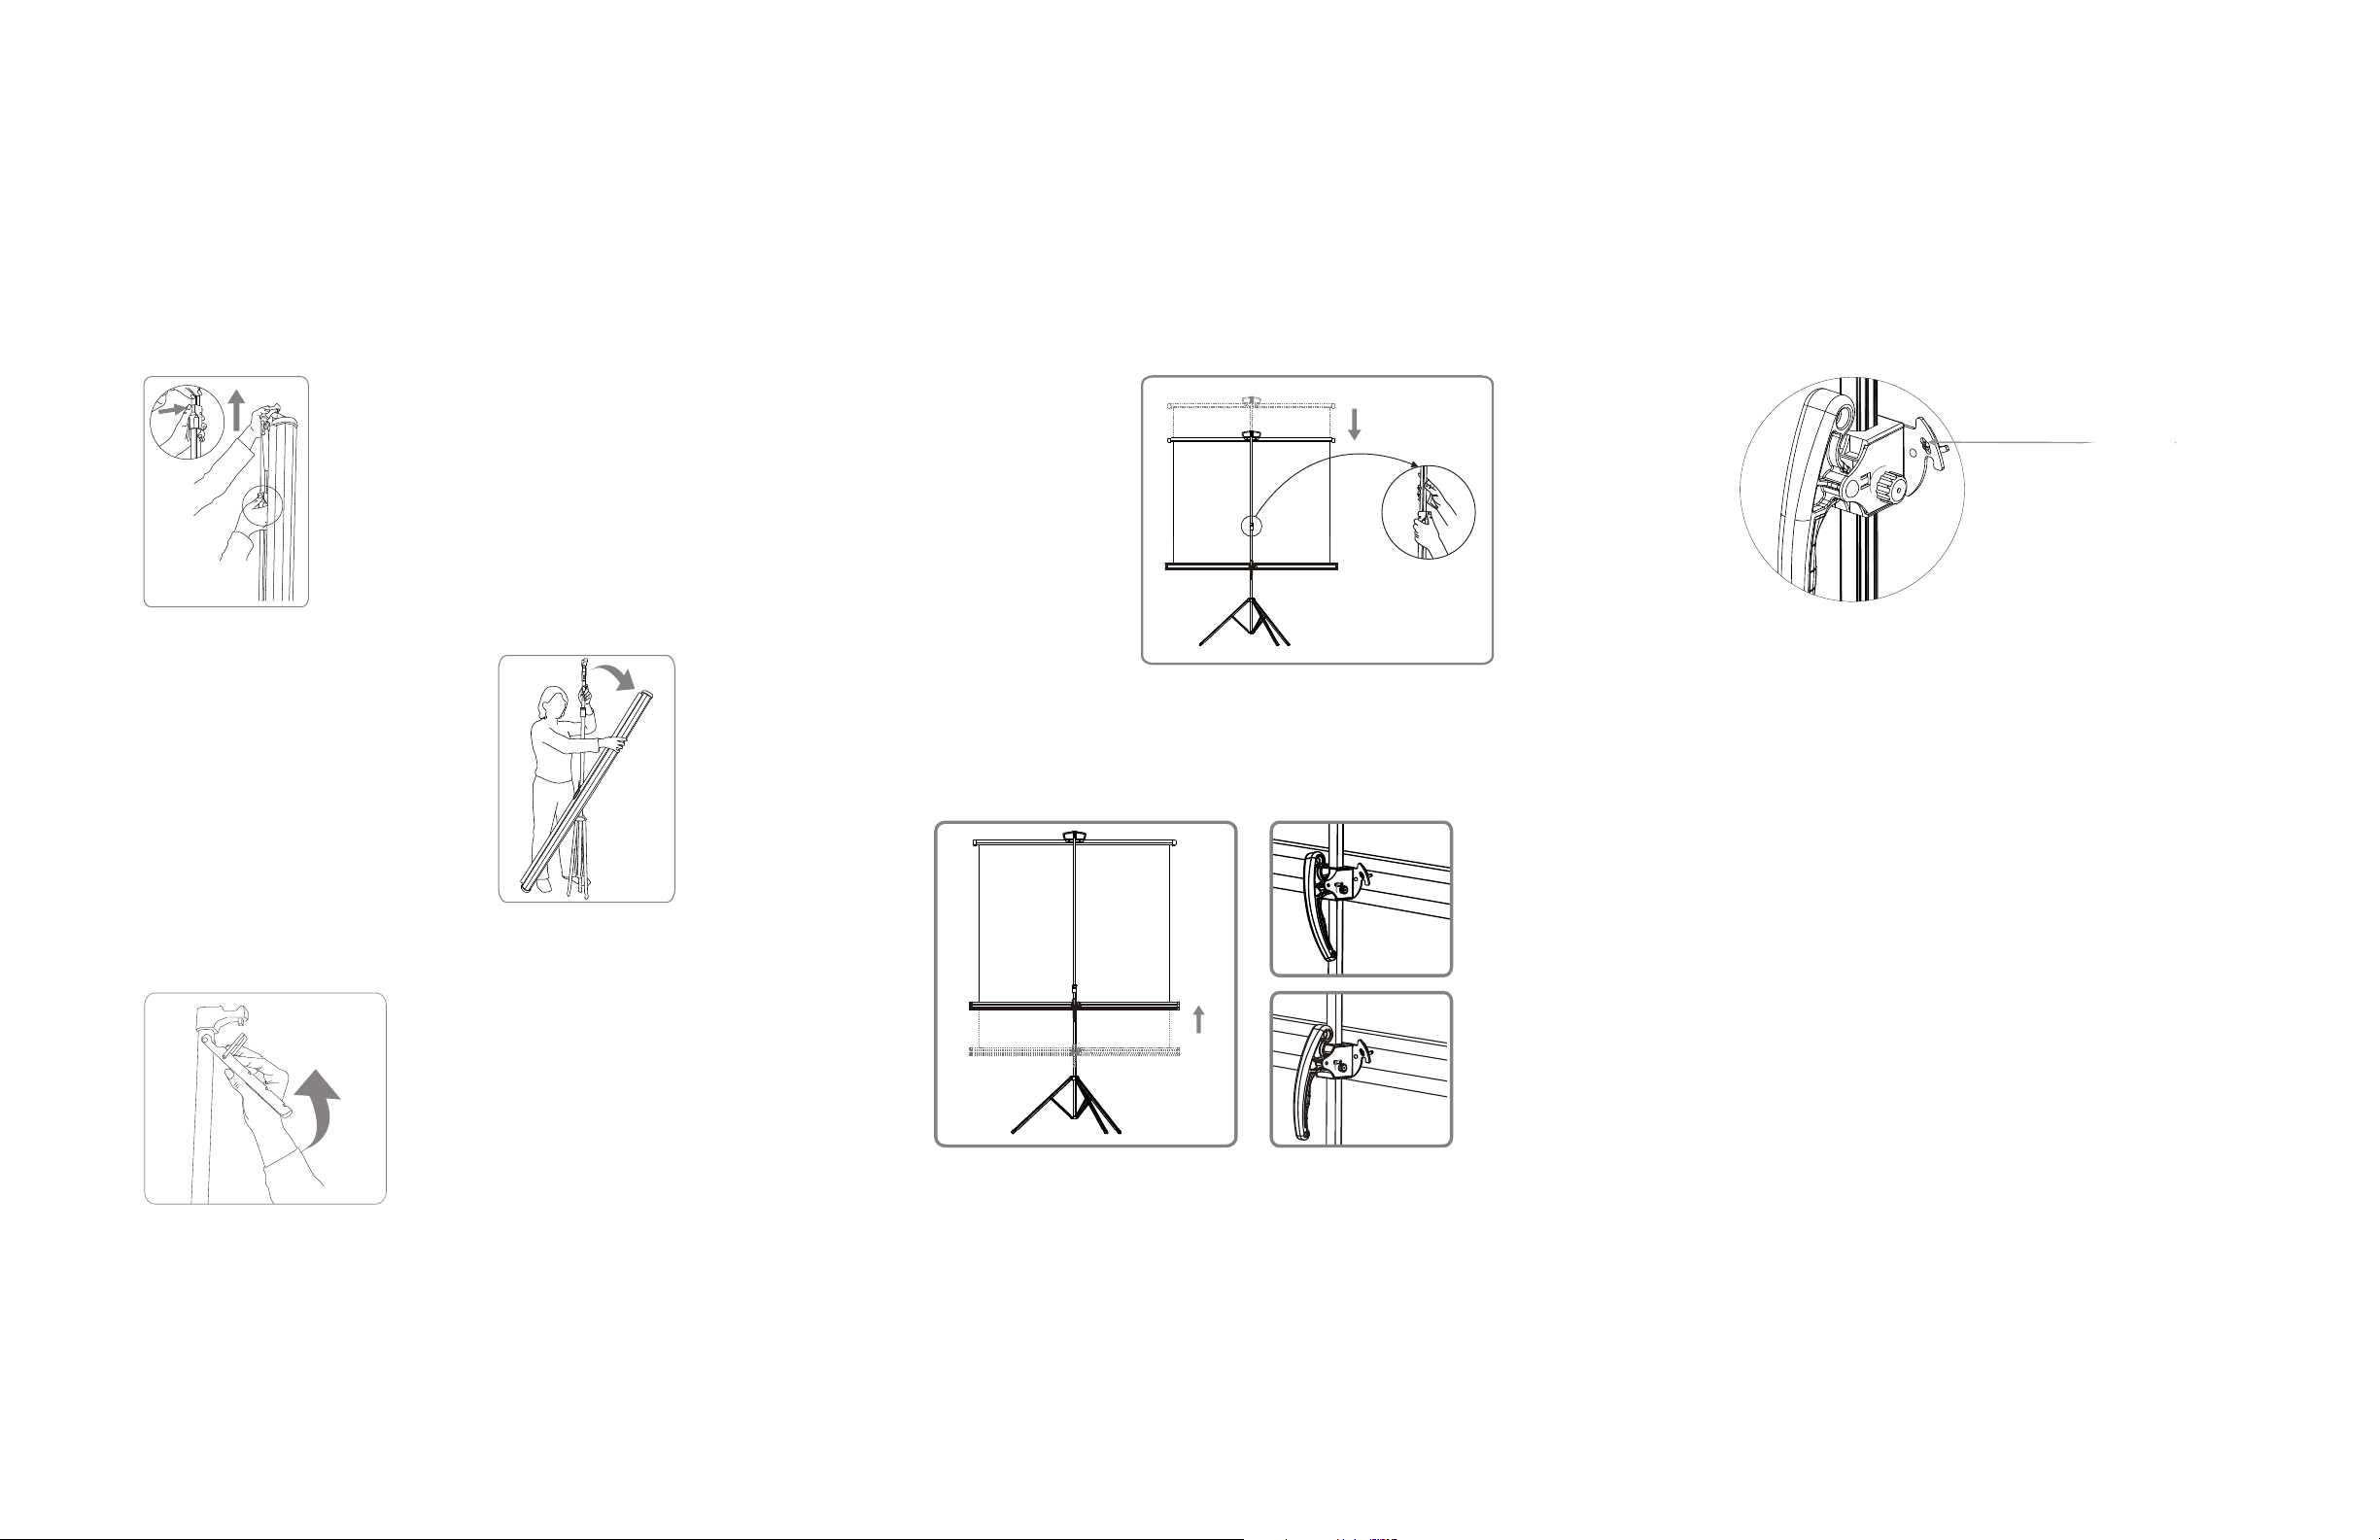
Housing adjuster
Adjusting your screen
Adjusting your screen tilt
Stand the screen vertically and
carefully spread the tripod legs out
fully.
Raise the top hook
using the coloured
button to release the
top locating pin.
Rotate the screen
casing to the
horizontal position.
You can set the height as well as the
shape of the viewing area by adjusting the
top and bottom of the screen.
To adjust the
top bar press
the coloured
button while
lifting with your
other hand.
Adjust the height of the bottom casing
using the locking handle.
The screen can be adjusted for
uneven ground using the housing
adjustment.
Packing up your screen
Pack your screen by reversing the
assembly instructions with special
Lift the screen using
the ring and place
onto the top hook.
Use the optional
extension rod
if you require a
greater screen
angle.
attention to the following.
Lower the top bar using the
coloured button before
unhooking the screen. Gently
retract the screen into the
casing, do not let it go too fast.
Ensure that the screen is packed
correctly before transportation.
Be sure to lock the handle securely with
the coloured knob after adjustment.
 Loading...