

GrandTec Grand iUSB HUB, Grand iUSB HUB P499 User Manual

User’s Manual
ISSUE: 2008/10/21
P/N: 3449900
GRAND iUSB HUB
Share up to four USB devices on your network

FCC
CE

INDEX
1. Package Contents……………..…....……………………..
1
2. Introduction………………..………..……….……………...
1
3. Product Features…….………….…………….…………...
1
4. Hardware Overview……………..…………….…………...
2
5. Installation……….…………………….……..……..………
2
6. Using the iUSB HUB……………..…………..……..……..
3
6.1 Status of USB Servers & Devices..………………..….
4
6.2 Accessing a USB Device………………………………
6
6.3 Making a Disconnect Request..………………………
8
6.4 Server Configuration……….…….…………………….
9
6.5 Other Functions…………..….…………………………
12
7. Network Printer Wizard Software………..………..……...
16
8. F A Q …………………………………………………..……...
18
1
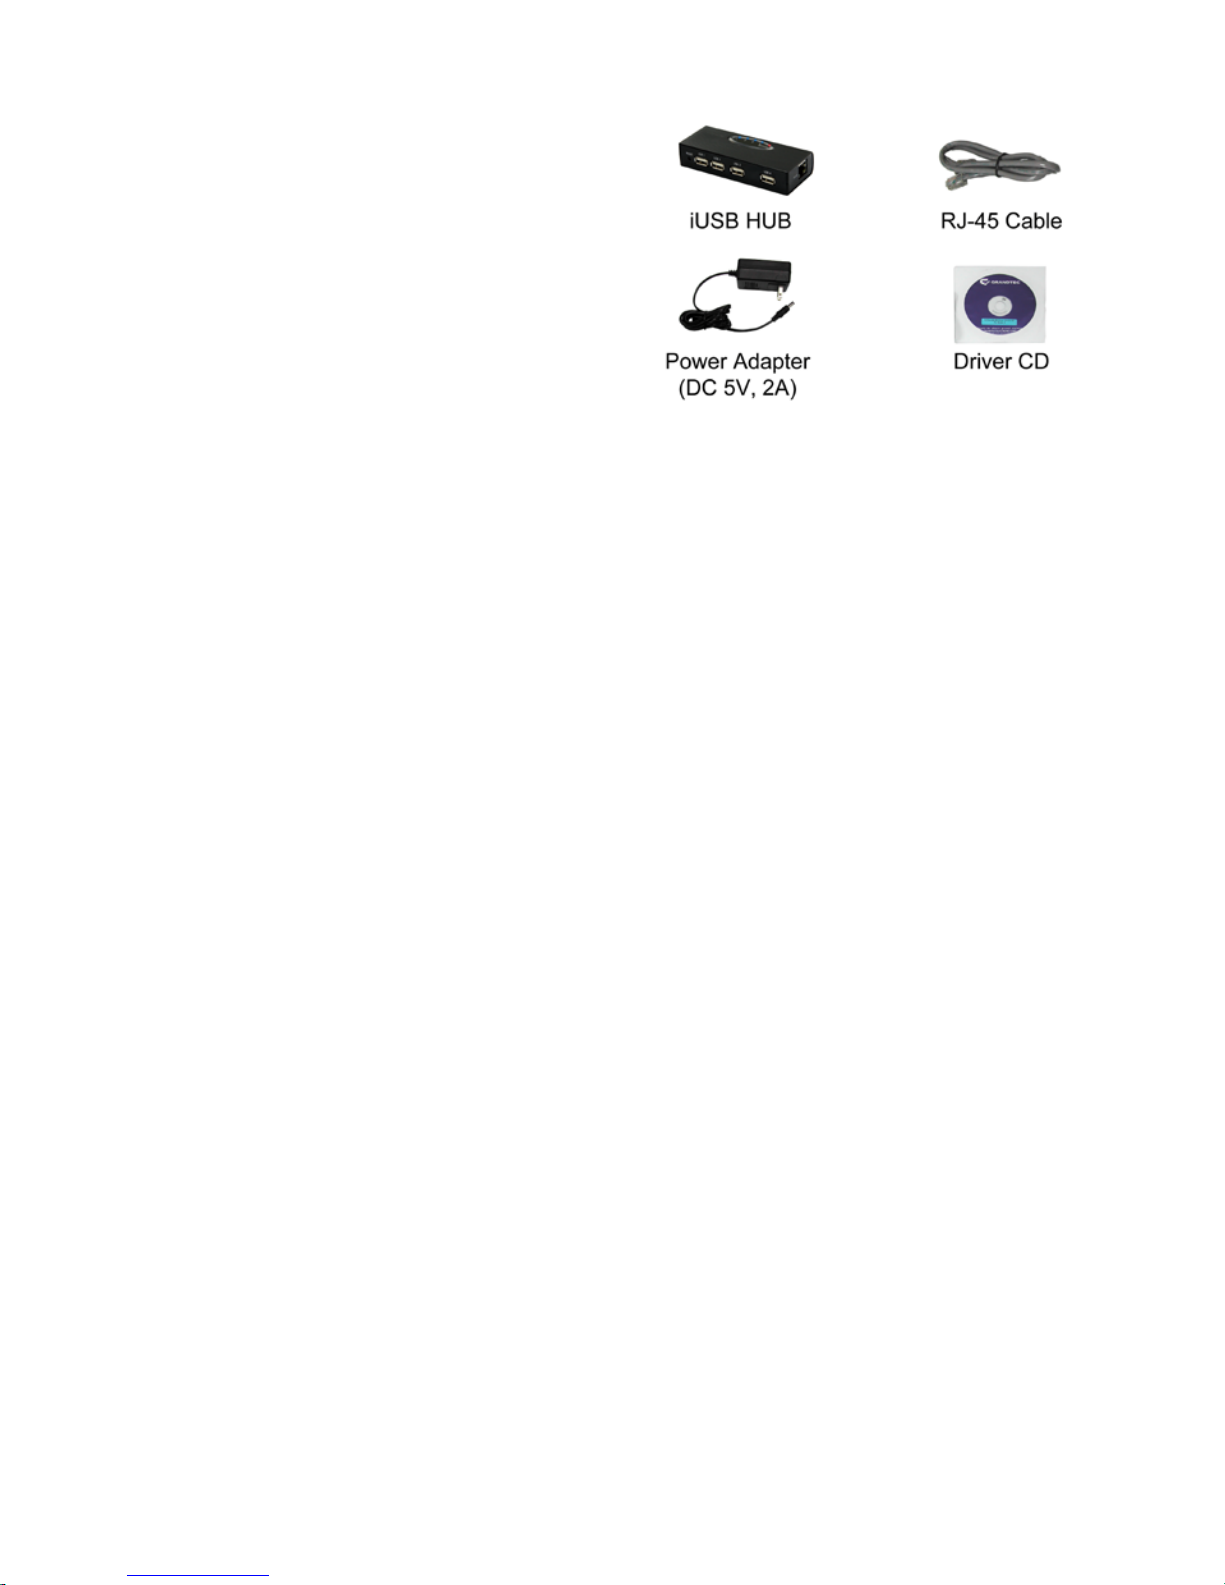
1. Package Contents
This package contains the following items:
iUSB HUB
RJ-45 Cable
Power Adapter (DC 5V, 2A)
Driver CD (Driver & User Manual)
2. Introduction
The Grand iUSB HUB is a network-enabled USB HUB. The iUSB HUB lets you share
up to four USB devices such as card reader, external hard drives, external DVD-R OM, flash
drives or printers on your network.
Connects the iUSB HUB t o a wired or wireless hub, all users on the network can access
the USB devices without cable clutter around your computer.
With the Grand iUSB HUB, you can back up and access data from networked storage
device, and can also print files to the USB printer in your living room from your bedroom. The
Grand iUSB HUB can network your USB device to enhance economic efficiency. It is ideal for
home office, small office or classroom use.
3. Product Features
Plug & play. Installs in seconds.
Supports 4 USB 2.0 ports for connecting to USB devices such as printer, external
DVD-ROM, scanner, hard driver or card reader.
Supports one RJ-45 port for connecting your network.
Supports 10/ 100Base-T Ethernet.
Bundled Management Software
- Centralized remote USB server management and status monitoring.
- Centralized remote printer management and status monitoring.
Power Supply: DC 5V.
Dimensions: 115(L) x 43(W) x 25(H) mm.
Not compatible with Windows Vista 64 bit.
NOTE: Each USB device limits one person to connect.
2
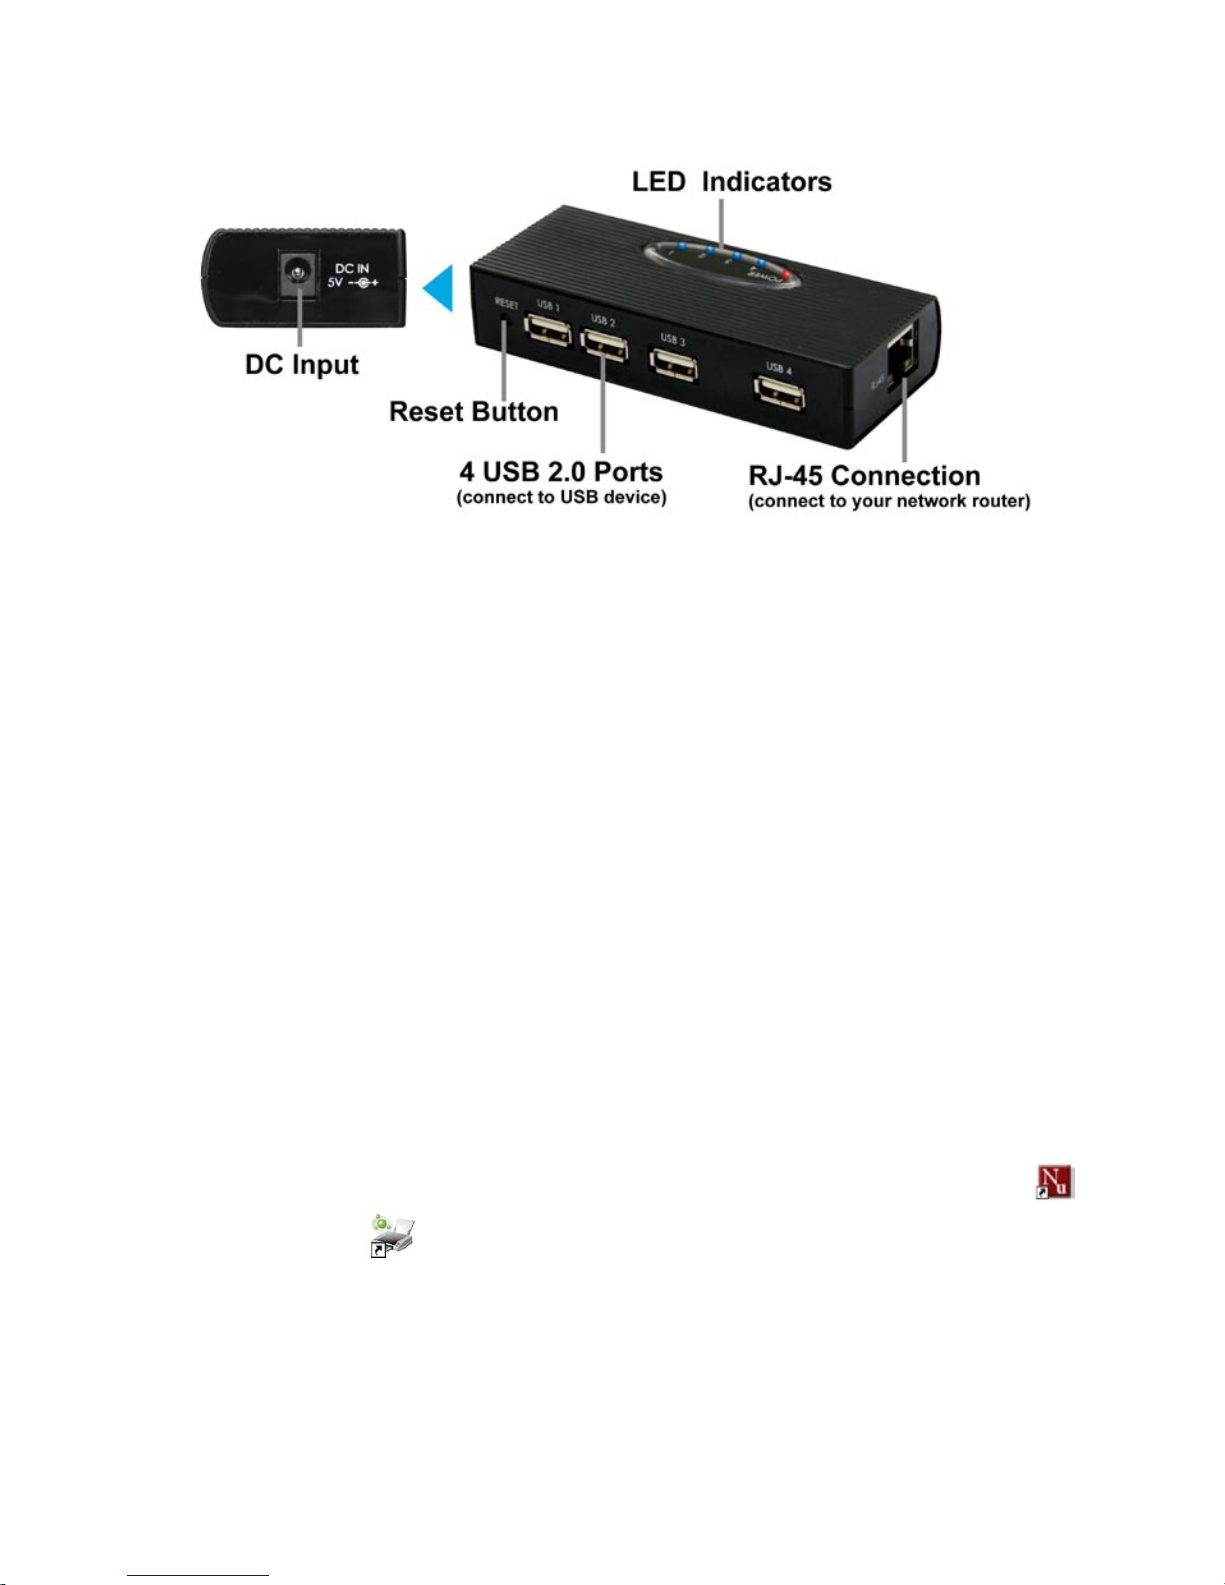
4. Hardware Overview
5. Installation
Step 1: Plug the power adapter into the Grand iUSB HUB.
Step 2: Connect the Grand iUSB HUB to your network router by using the provided RJ-45
cable.
Step 3: Install the USB Server program
- Insert the Driver CD into your CD-ROM driver, double-click the folder (Grand iUSB
HUB Driver) to open it.
- Execute the EXE file to install the USB Server program.
- Follow the instructions of the wizard to complete the installation process.
Step 4: After finishing USBServer program installation, the shortcut icons (USB Server &
Network Printer W izard ) will appear on your desktop.

3
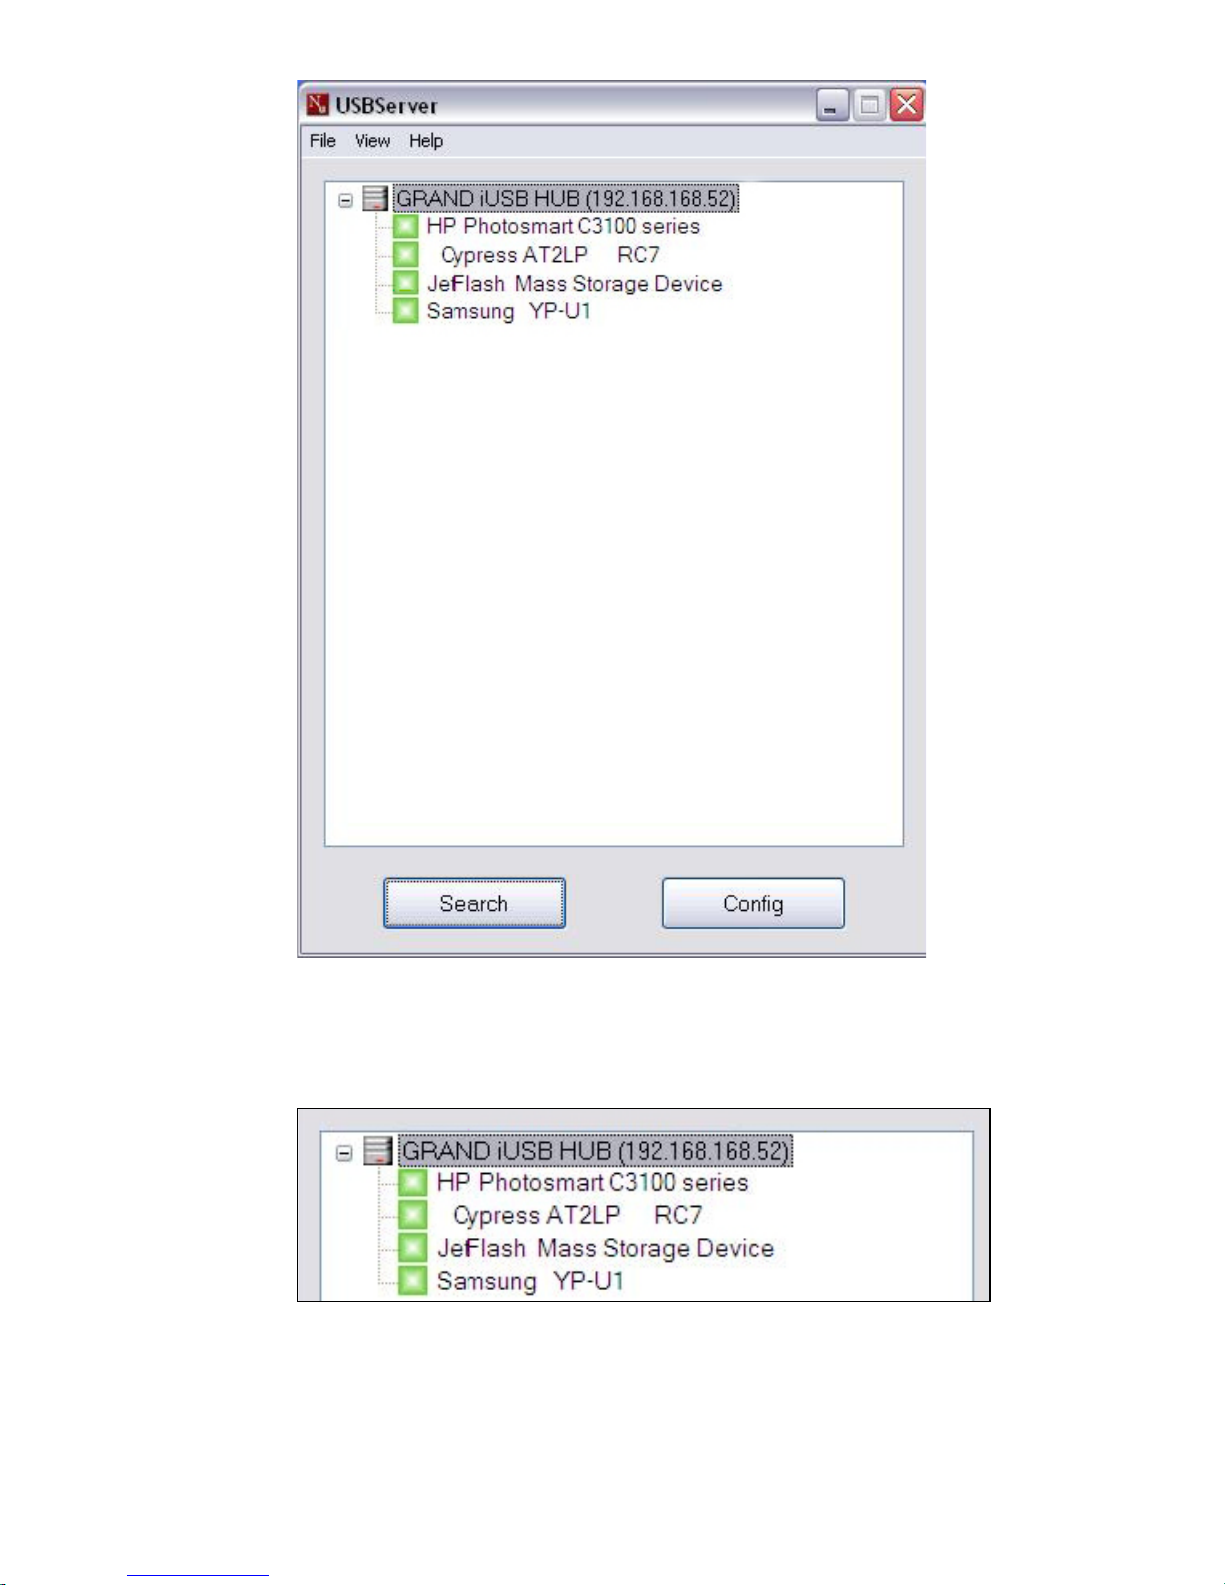
6. Using the iUSB HUB
Double click the shortcut icon of USBServer on the desktop to run the program. The main
dialog box of USBServer is shown below. It is consisted of a Control Menu (File, View and
Help), a tree view (list the USB Servers and devices in the network), a button of Search to get
the current USB Servers and devices in the network, and a button that toggles between
Config and Connect depending on the node you select on the tree view. It toggles to Config
when a server is selected on the tree view and to Connect when a device is selected. The
tree view displays the all the USB Servers and devices your PC has access to.
NOTE: You will be allowed to set an alias name for each of the servers for easy recognition.
The alias name with its IP address will be displayed on the tree view. The way to set alias
name will be described in the “Config.” section below.
4
6.1 Status of USB Servers & Devices
Each status is represented by an icon of different color.
Green Icon: Indicates the device is available for you to use.
Orange Icon: Indicates the device is used by yourself.
 Loading...