

Grand Mirrors RM 130 Installation Manual

INSTALLATION MANUAL
RM 130
Table of Contents
Materials included in the box
Installation
Parts and Function: WIFI LED Controller
Parts and Function: Remote Control
Parts and Function: Application
Installation: Application
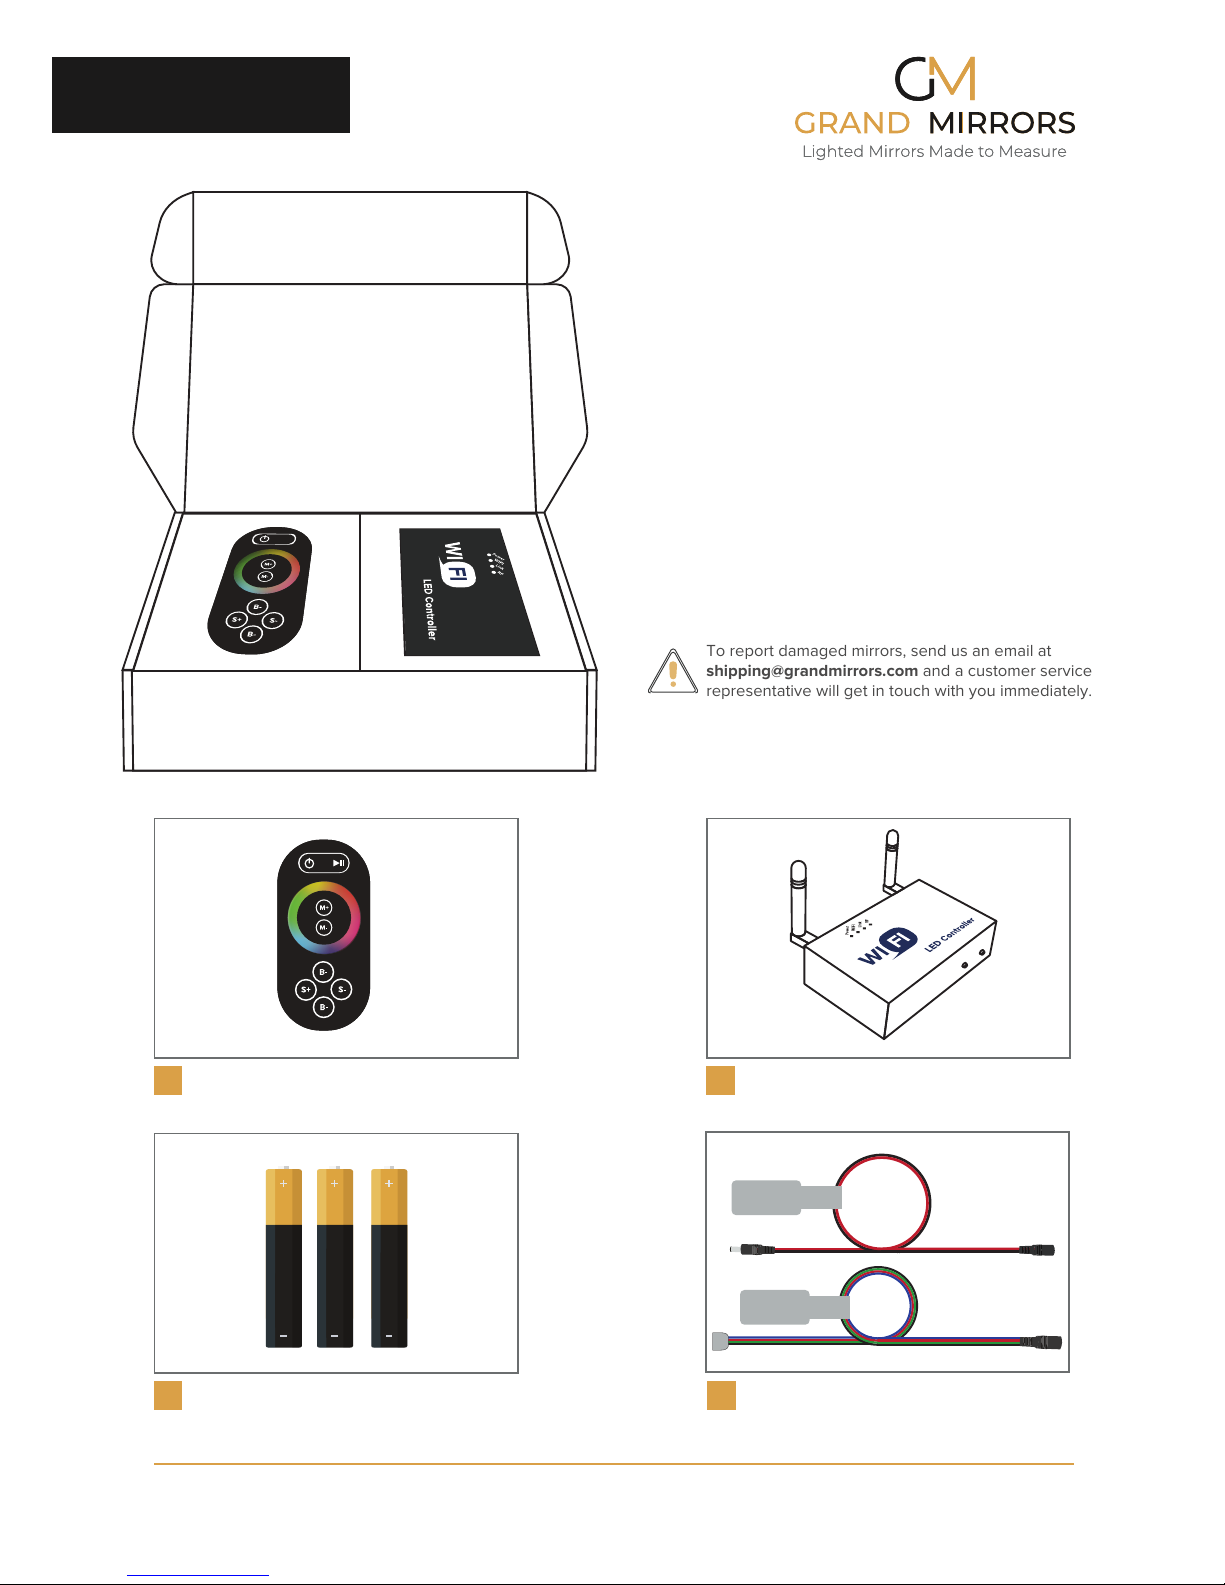
3 AAA Batteries
3
RM 130 Remote
1
Connecting Cords
4
Unboxing
Copyright © 2012-2018 Grand Mirrors Inc., Cerritos, California.
All rights reserved. Patents Pending used under license.
Grand Mirrors Inc.
12611 Hiddencreek Way Unit M,
Cerritos, CA 90703 USA
To report damaged mirrors, send us an email at
shipping@grandmirrors.com and a customer service
representative will get in touch with you immediately.
Check each and every item to ensure that they
arrived in good condition. Damages must be
reported within 24 hours of receiving the package.
WIFI LED Controller
2
MATCH
FUNCTION
Controller to
Mirror
Controller to
Power Supply

Installation
Match
Copyright © 2012-2018 Grand Mirrors Inc., Cerritos, California.
All rights reserved. Patents Pending used under license.
Grand Mirrors Inc.
12611 Hiddencreek Way Unit M,
Cerritos, CA 90703 USA
The 4-colored cord of the WIFI Controller
should be attached to the same colored
cord at the back of the mirror.
Plug the power supply to a power source.
RM 130 Complete Setup
The black and red cord with the female end
goes to the power supply.
Take note of the arrows in the plugs. They both
have to be one one side and pointing at each
other.
To match the remote simultaeneously press
the match button on the WIFI Controller and the
power button on the remote.
The lights on the mirror would blink a couple of times
indicating that the matching is successful.
8
9
A
6
7
4
5
3
C
B
0
F
E
D
2
1
MATCH FUNCTION
SSID
8
9
A
6
7
4
5
3
C
B
0
F
E
D
2
1
MATC H FUNCTION
SSID
 Loading...