

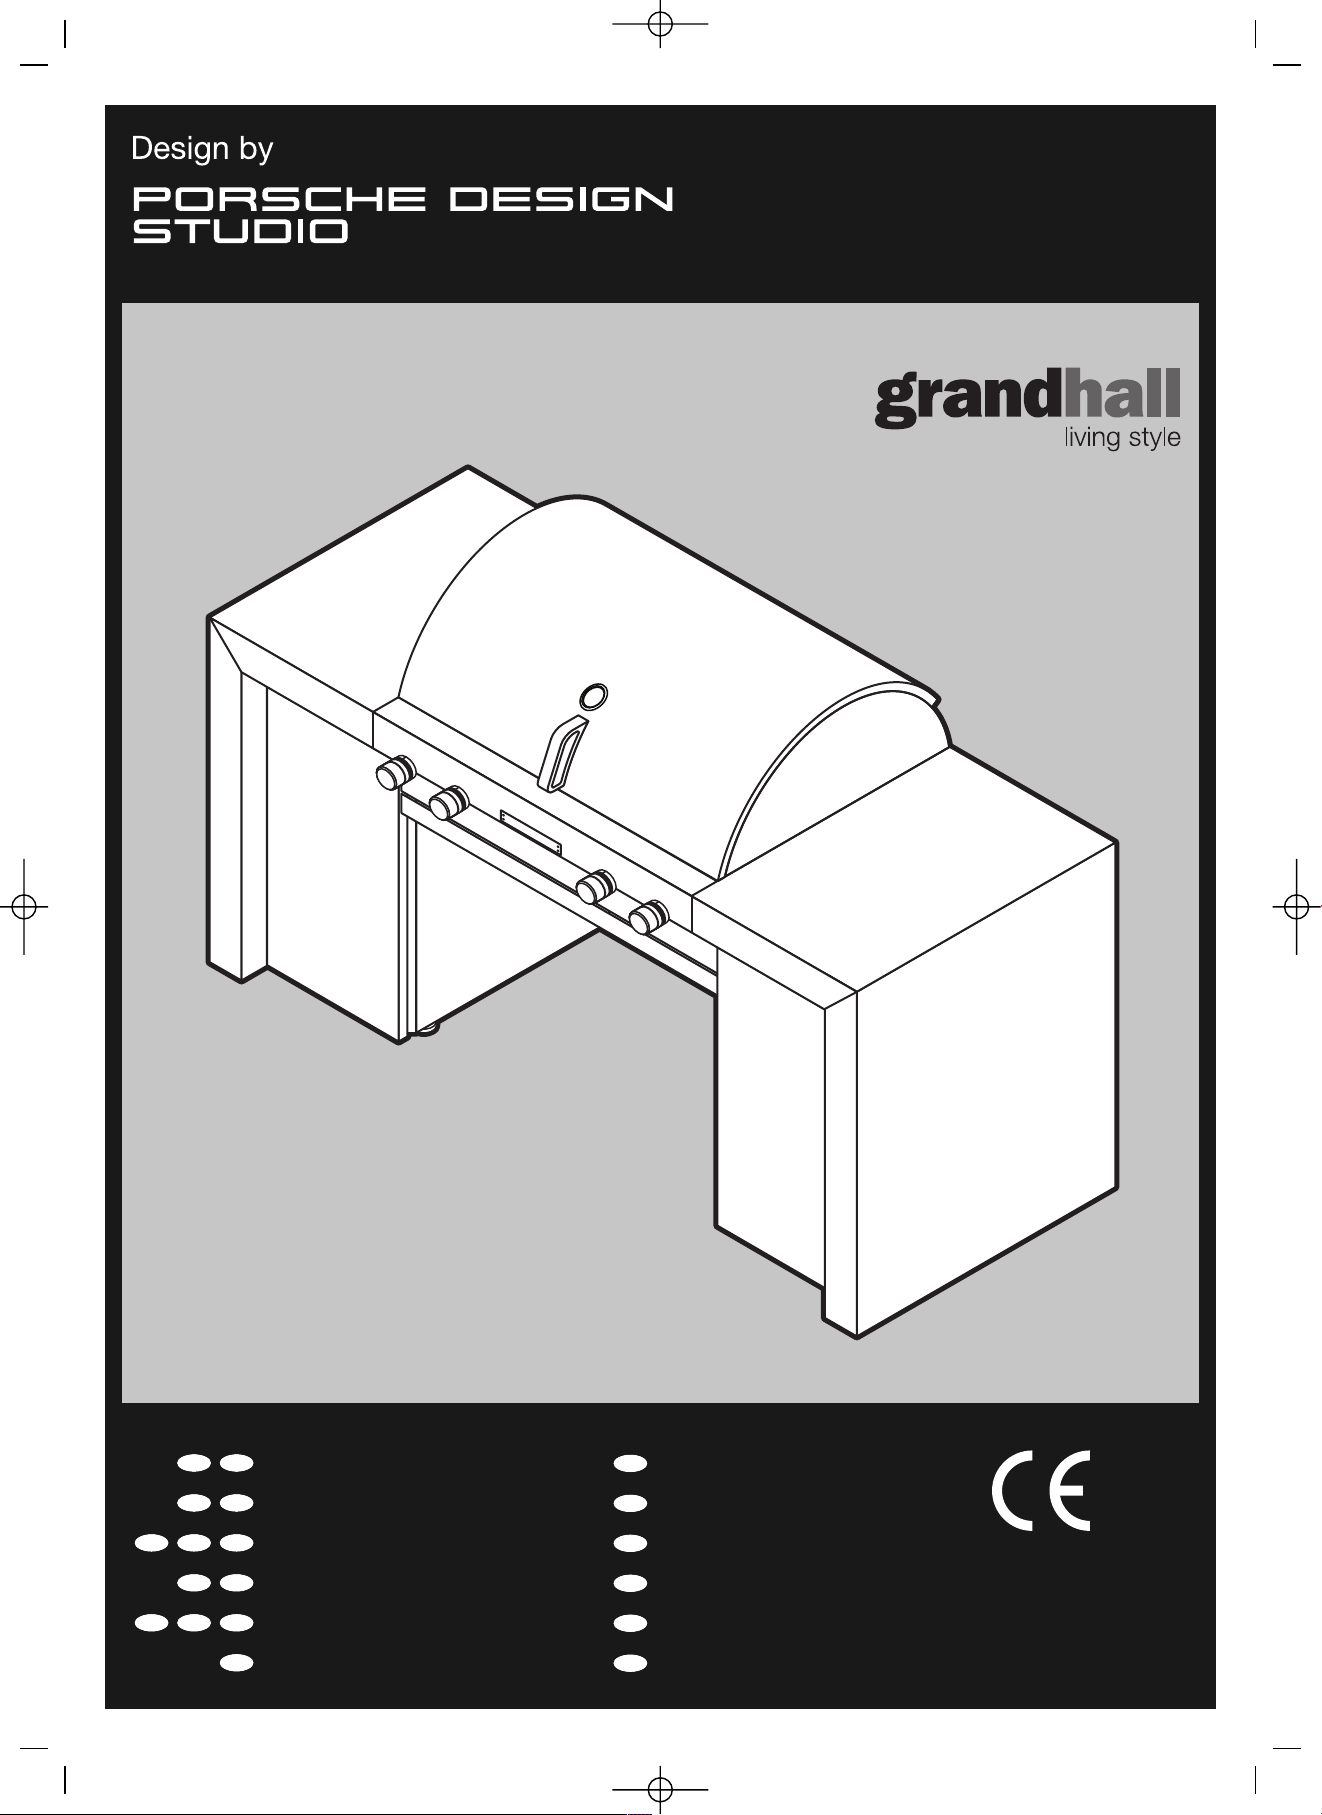
Grandhall X series Assembly Instructions Manual
Assembly instructions
Instructions d’assemblage
Montageanweisungen
Istruzioni per il montaggio
Montage-instructies
Montering
Kokoamisohjeet
Instrucciones de armado
Instruções para Montagem
Monterings ve jl ed ni ng
Montering
Instrukcje
0087
GB
FR
DE
IT
NL
SE
FI
ES
PT
DK
NO
PL
IE
CH
CH
CH
BE
AT
LU
X-series
P80184008A 171109 17/11/09 6:21 PM Page 1
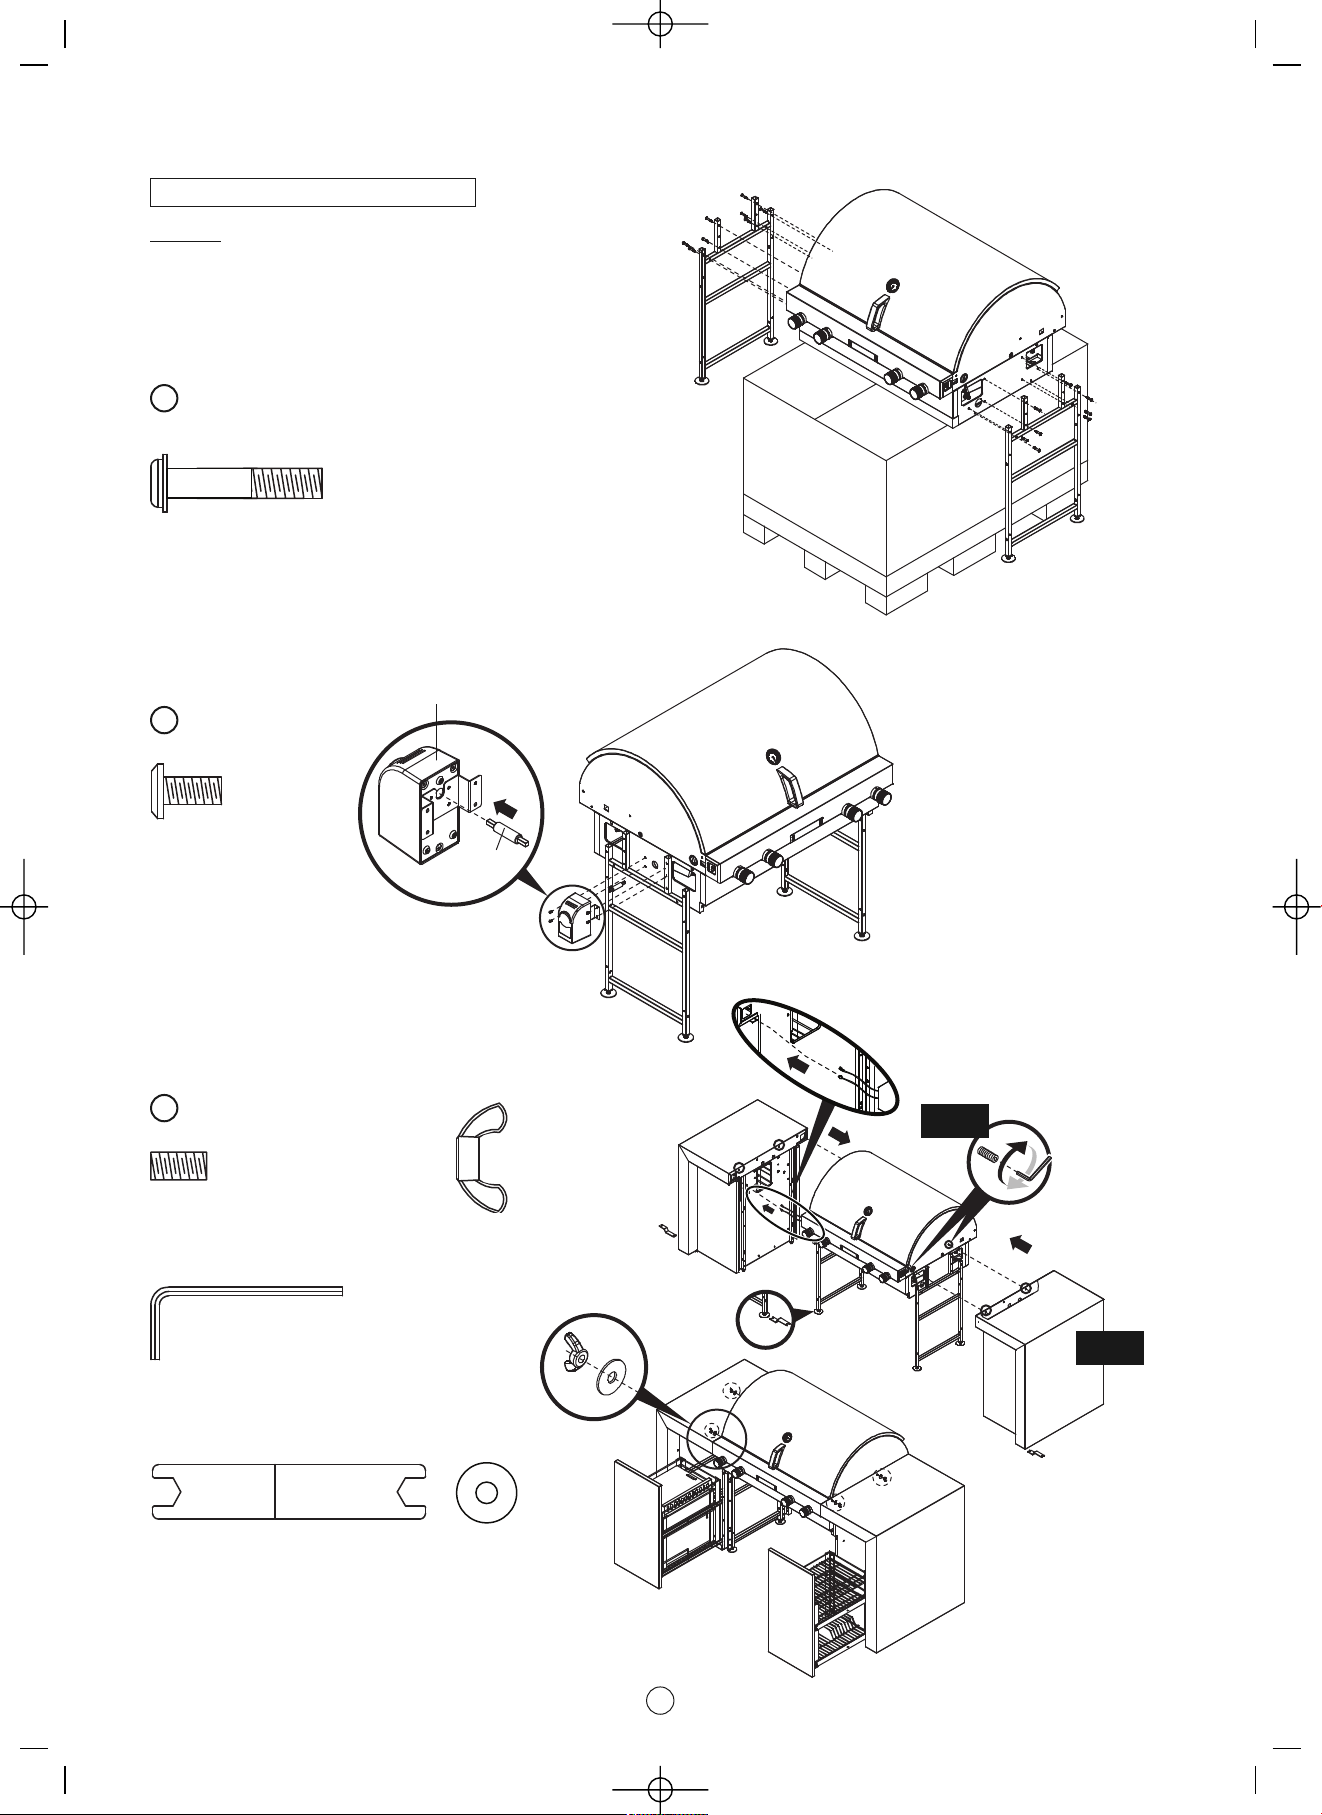
ASSEMBLY
2
CAUTION: Two people are needed to assemble this appliance.
Lay a piece of cardboard on the ground (refer to Pre-Assembly
instructions). With the help of an assistant remove the barbecue
head from the carton and put it on the cardboard. Retain the box
for the following step.
Install island side panel bracket assembly.
Place the barbecue head on the carton as shown.
1
Phillips-head screw 1/4" x 15/16"
Qty. 16
Part # S125G04092
Pan-head screw 3/16" x 3/8"
Qty. 4
Part # S182G03062
Socket-head cap screw 1/4" x 3/4"
Qty. 4
Part # S164G04121
Socket-head cap screw 1/4" x 3/4"
Qty. 1
Part # P05515006B
Wrench
Qty. 1
Part # P05515129C
Install island side table module.
3
Wing nut 1/4"
Qty. 4
Part # S355G04001
Plain washer 5/16"
Qty. 4
Part # S411G05101
Install rotisserie motor.
2
2ND
1ST
Gear shaft
Ref # 7b
Ref # 7a
P80184008A 171109 17/11/09 6:21 PM Page 2
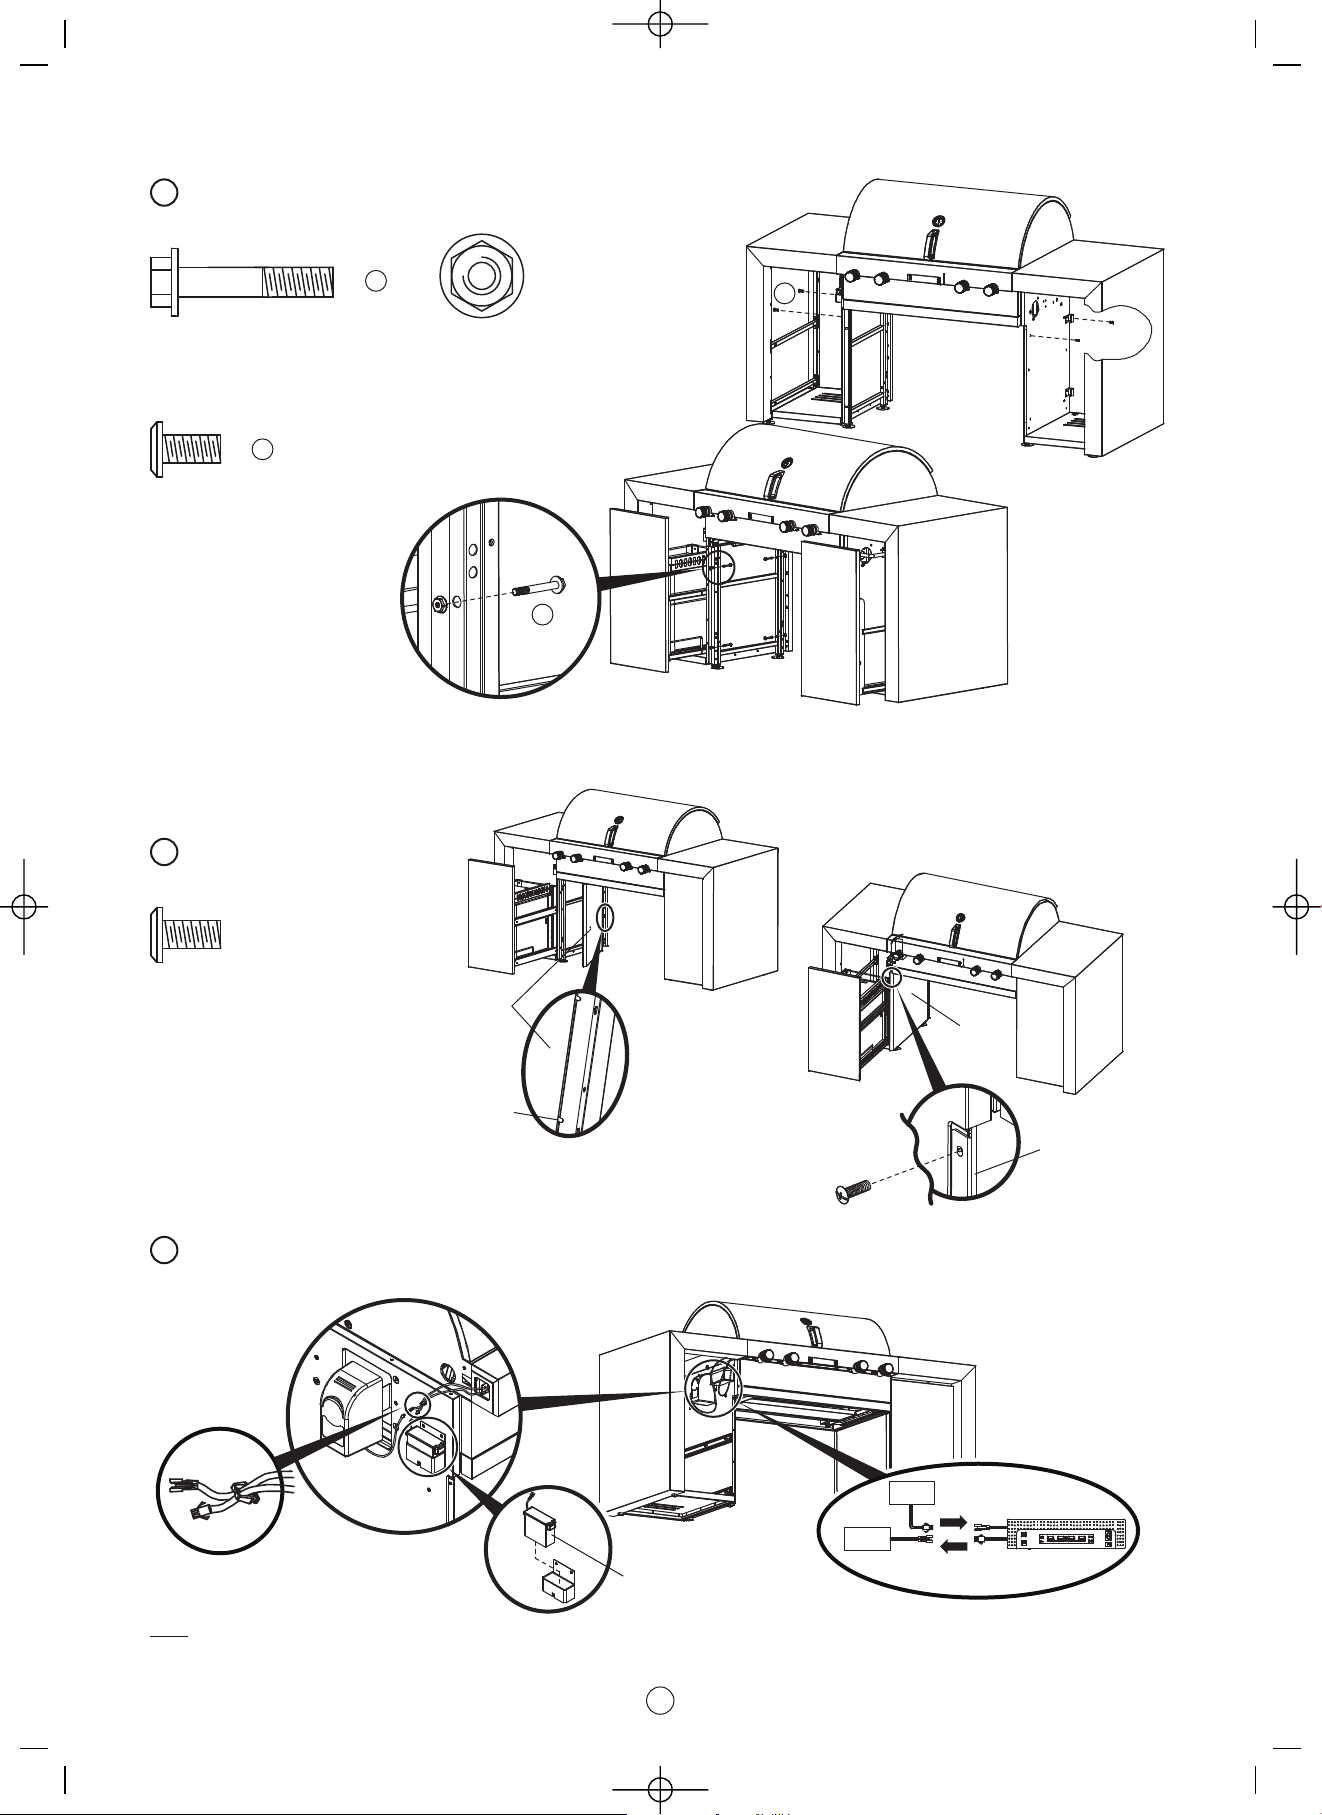
3
Install island side panel bracket assembly to island side panel set.
4
Hex-head screw 1/4" x 21/16"
Qty. 8
Part # S165G04092
Install island decorative panel.
Repeat steps for installing the right
island decorative panel.
5
Install island battery pack and connect electric wires.
NOTE
: If the battery pack is worn out, AA batteries can be installed in the battery box (Ref # 59a) as a back up. Refer page 9.
6
Pan-head screw 3/16" x 3/8"
Qty. 8
Part # S182G03062
Pan-head screw 3/16" x 3/8"
Qty. 4
Part # S192G03062
Flange nut 1/4"
Qty. 8
Part # S313G04092
DC battery
DC motor
The decorative
panel crosses over
the side panel
Pin
Ref # 74
Ref # 74
Ref # 59
A
B
A
B
P80184008A 171109 17/11/09 6:21 PM Page 3
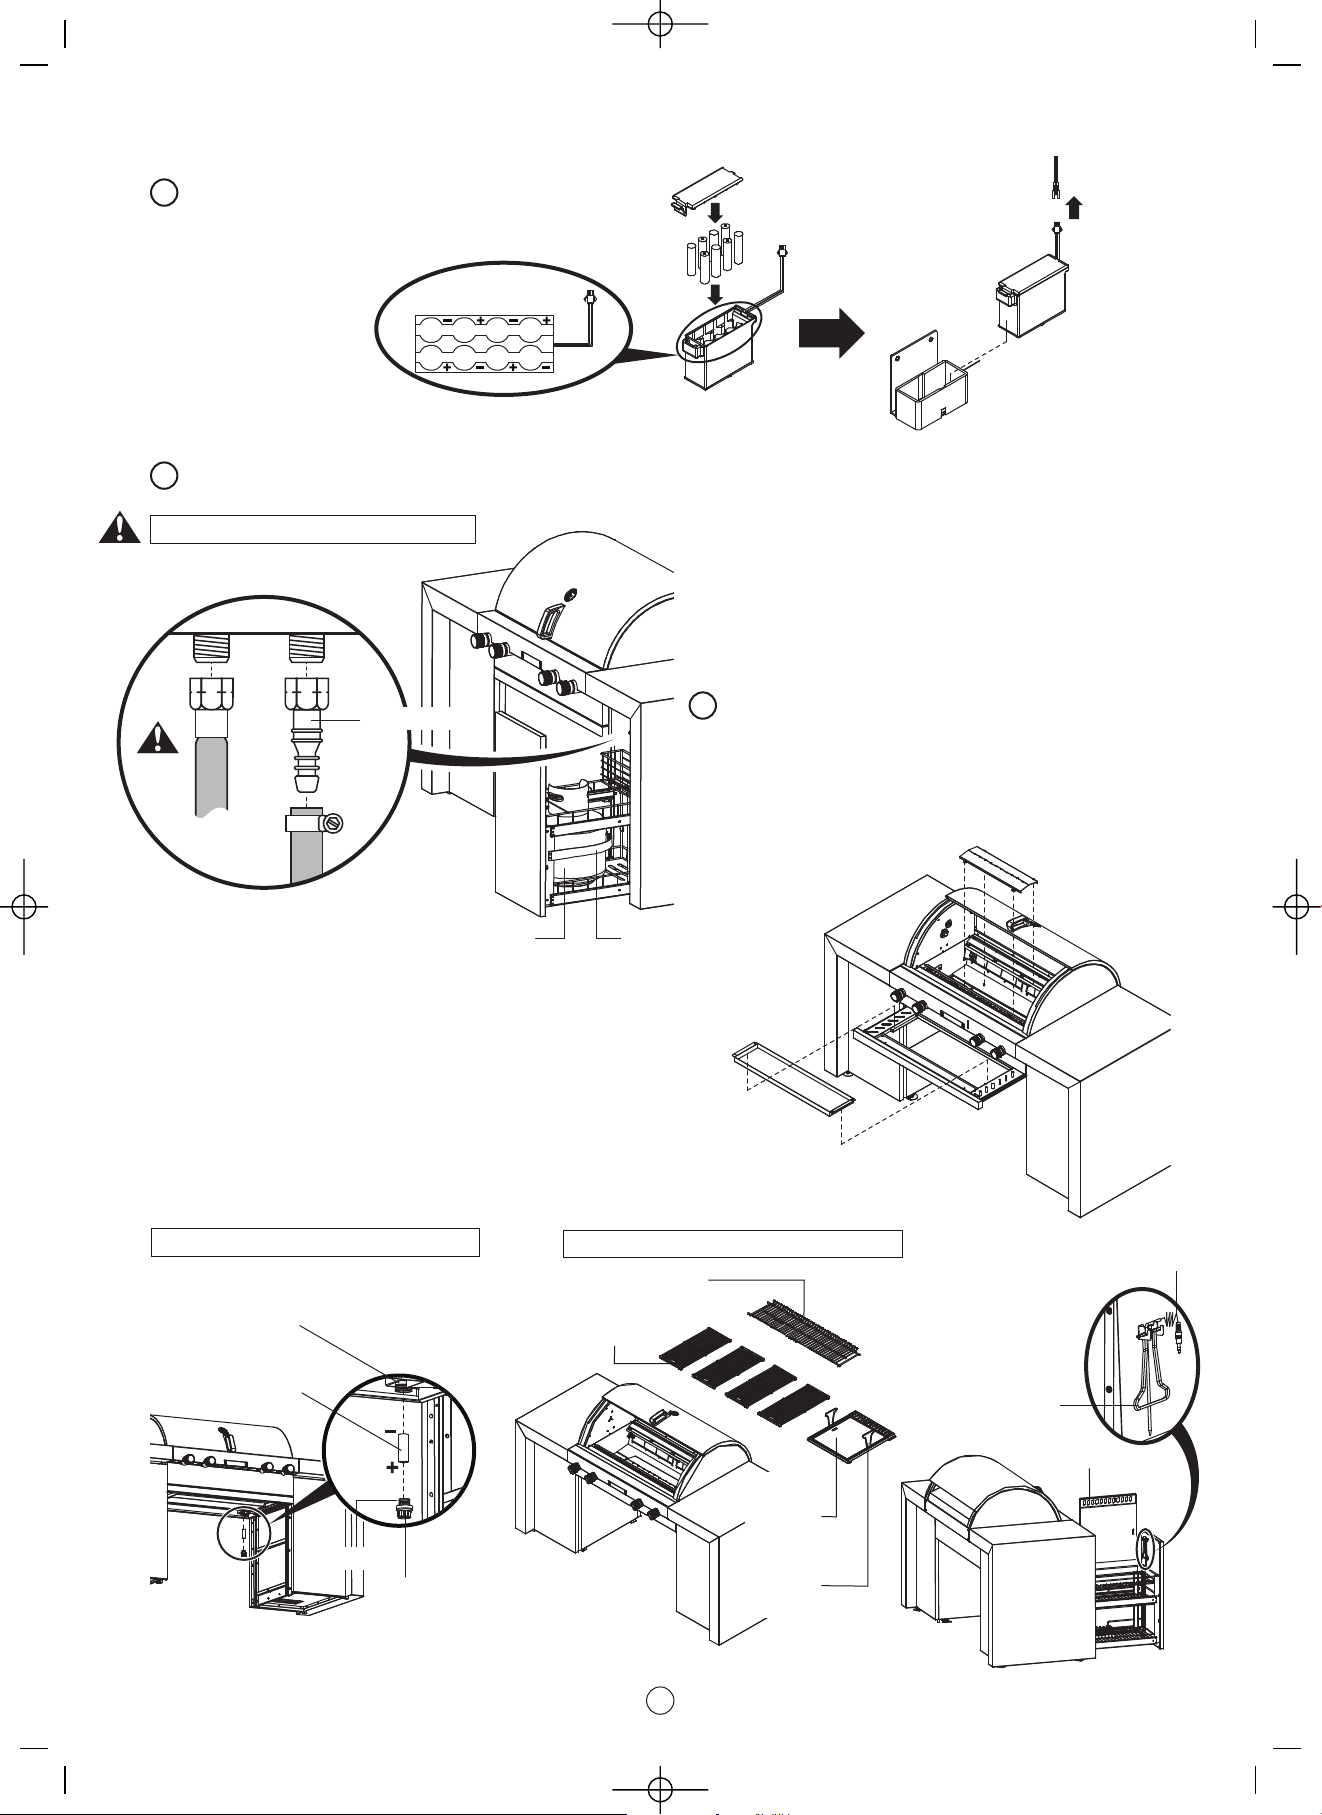
COOKING COMPONENT INSTALLATION
IGNITION BATTERY
Install gas cylinder.
8
Igniter c ap
AA x 8
Spring
Igniter s lot
AA battery
Hotplate
(optional)
Ref # 9a
Warming / secondary
cooking rack, Ref # 8
Cooking grids, Ref # 9
4
Install back up batteries in the battery box and connect wires.
7
LEAK CHECK GAS CONNECTIONS
Install grease tray heat shield and grease tray.
Place the four pins on the grease tray heat shield into the four
holes in the grill bowl as shown.
Pull out the grease tray bracket. Place the grease tray into the
grease tray bracket as shown. Push the grease tray bracket
back into position.
9
Ref # 91Gas cylin der
Ref # 22
Hotplate handle
(optional)
Ref # 9b
Hot plate storage
Ref # 9a
Hot plate handle
and temperature
probe storage
Ref # 9b
Ref # 87
P80184008A 171109 17/11/09 6:21 PM Page 4
 Loading...