

grandfire Kamado User Manual
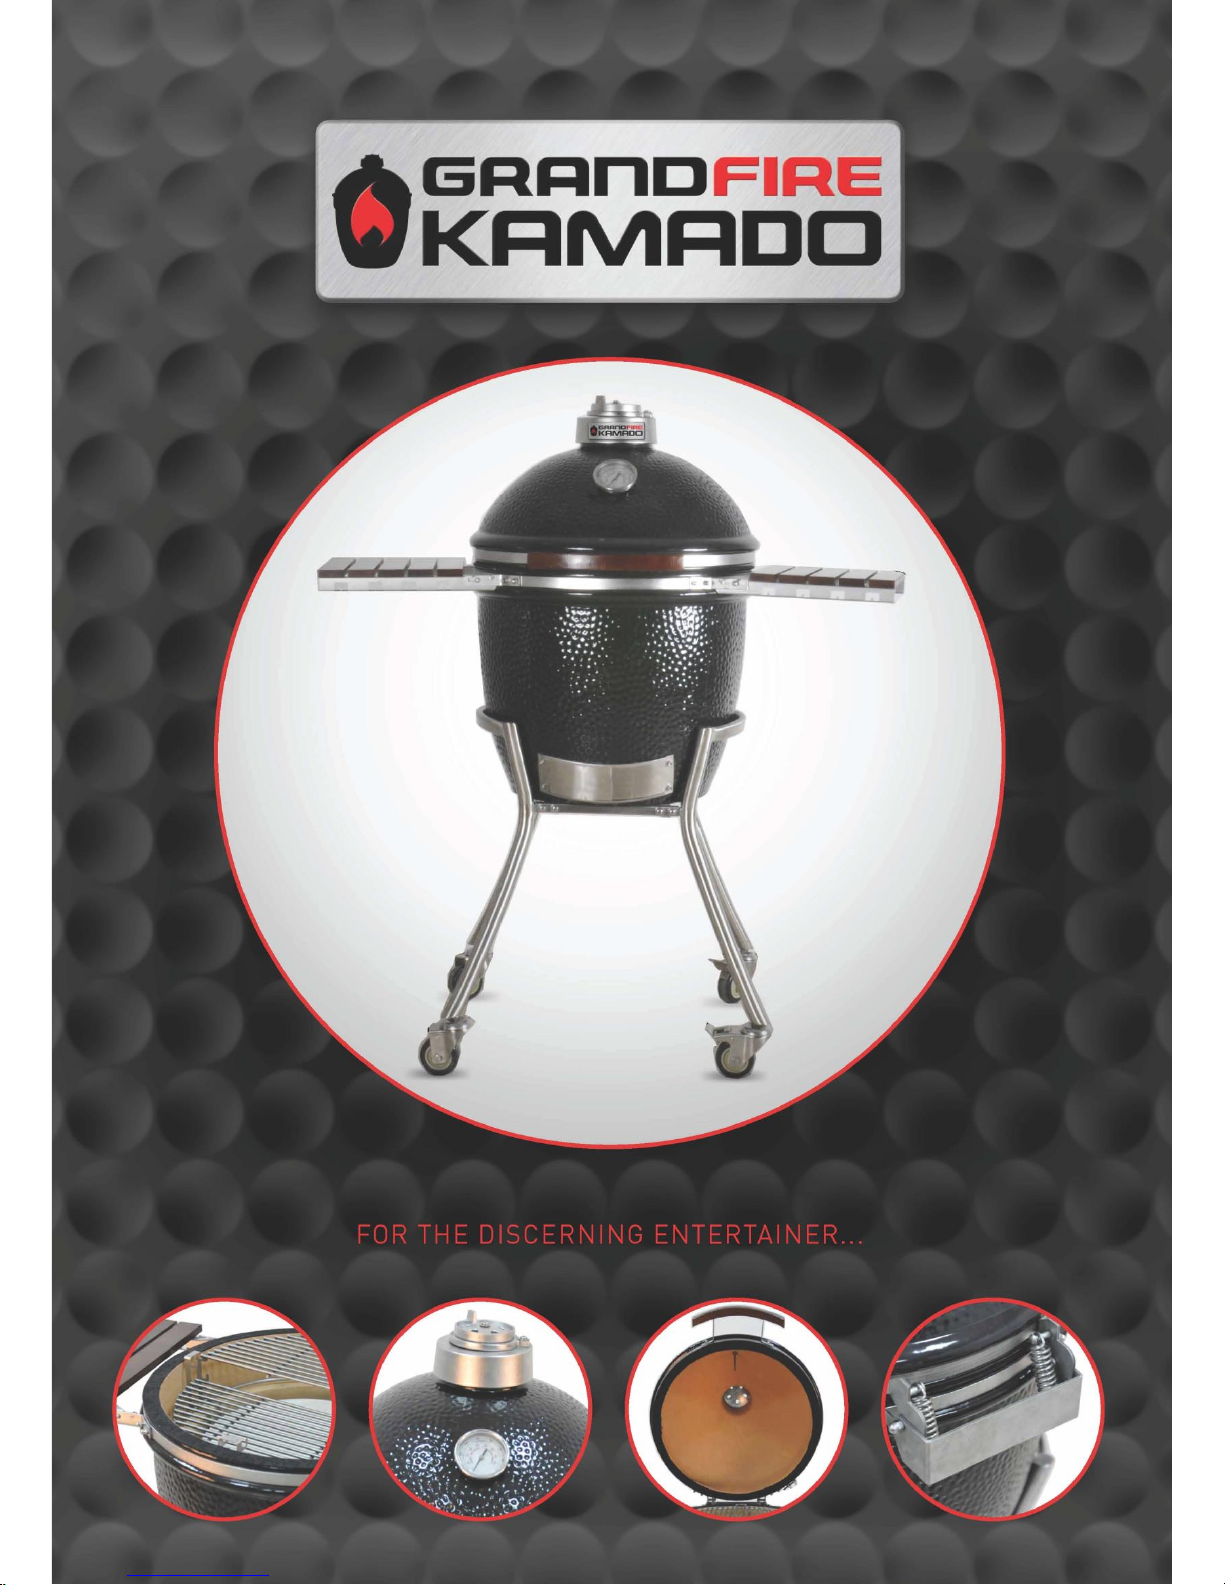

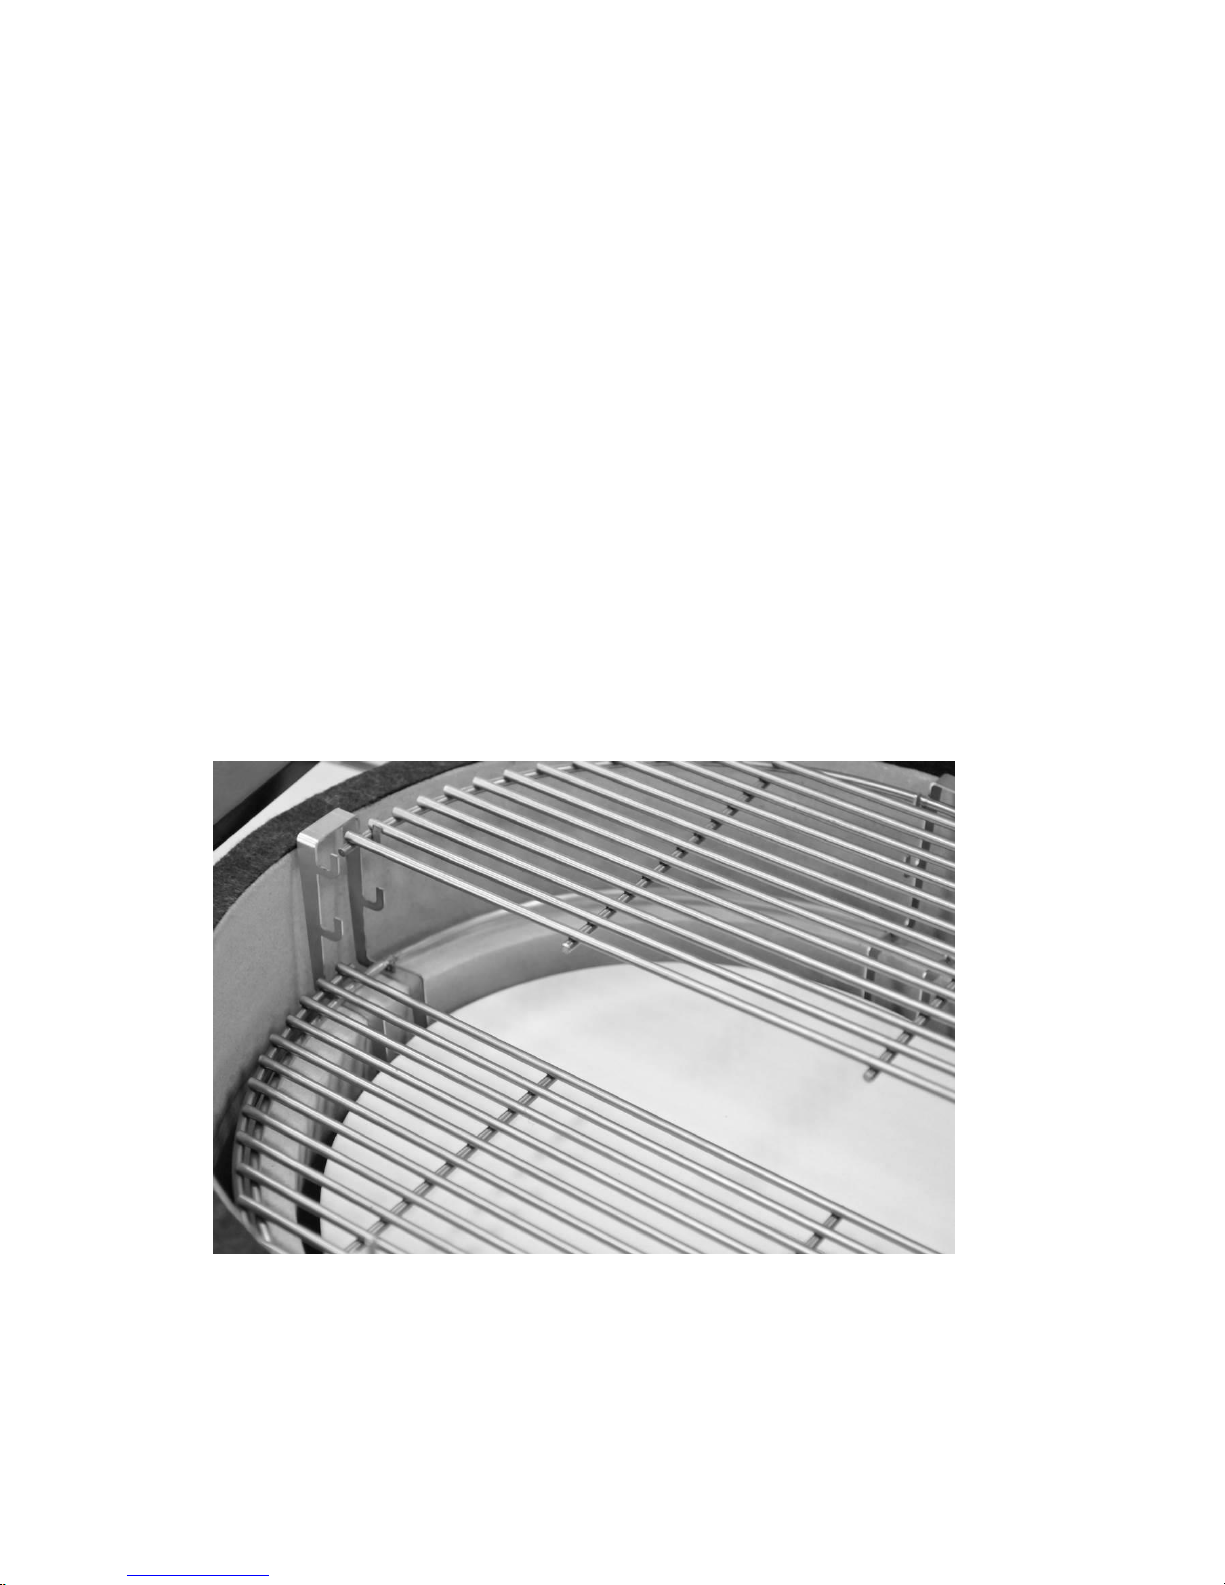
TABLE OF CONTENTS
Warnings Before Use …….…………………………………….……………Page 2
Assembling Your GrandFire Kamado Grill …………………….…………..Page 3
Lighting Instructions…………………………………………….…………....Page 4
Controlling the Temperature…………………………………….…………. Page 5
Flashback……………………………………………………….…………….Page 6
Removing Ashes……………………….……………………….…………...Page 6
Care& Maintenance…………………………………………….………...…Page 6
GrandFire Kamado Grills Parts List ………………………….…………...Page 8
Grandfire Kamado Grill Spec.………………………………….…………..Page 9
GrandFire Kamado Accessories……………………………….…………..Page 10
Warranty Services……………………………………………….…………..Page 11

WARNINGS BEFORE USE
OUTDOOR USE ONLY!
ALWAYS EXERCISE CAUTION WHEN USING ANY HOT COOKING DEVICE; THE GRANDFIRE KAMADO COOKING GRID AND CHARCOAL ARE
HOT WHEN IN USE!
ALWAYS USE EXTREME CARE WHEN TRANSPORTING, MOVING OR
LOADING AND UNLOADING AS PRODUCT IS HEAVY AND PERSONAL
INJURY CAN OCCUR IF DROPPED OR TIPPED OVER.
NEVER ATTEMPT TO MOVE, ROLL ORTRANSPORT THE KAMADO
WHILE CHARCOALS ARE HOT!
ALWAYS EXERCISE EXTREME CAUTION WHEN LIGHTING CHARCOAL,
USING FIRE STARTERS, COOKING WITH HOT CHARCOAL OR HANDLING HOT COOKING SURFACES.
NEVER ATTEMPT TO USE THE HANDLE, SIDE SHELVES AND HINGE
ASSEMBLY AS A PERSONAL SUPPORT OR GRAB-RAIL, AND NEVER
ALLOW CHILDREN TO PLAY NEAR A HOT KAMADO
ALWAYS BE AWARE OF FIRE HAZARDS
Do not leave a lit Grandfire Kamado with the dome open if it is unattended.
Do be aware of dry leaves, decking and other combustible materials that
may be in proximity to a Grandfire Kamado while it is in use, as they may
present a fire hazard if any hot charcoal or sparks are allowed to come
into contact.
Do be aware of your surroundings if using a Grandfire Kamado while
camping or cook outside, as any open flame can present a hazard to
people and property.
Do be aware that your relevant territorial authority may specify distance
to place any outdoor cooker from a structure or may limit outdoor flame
of any type during drought or fire hazard periods.
2
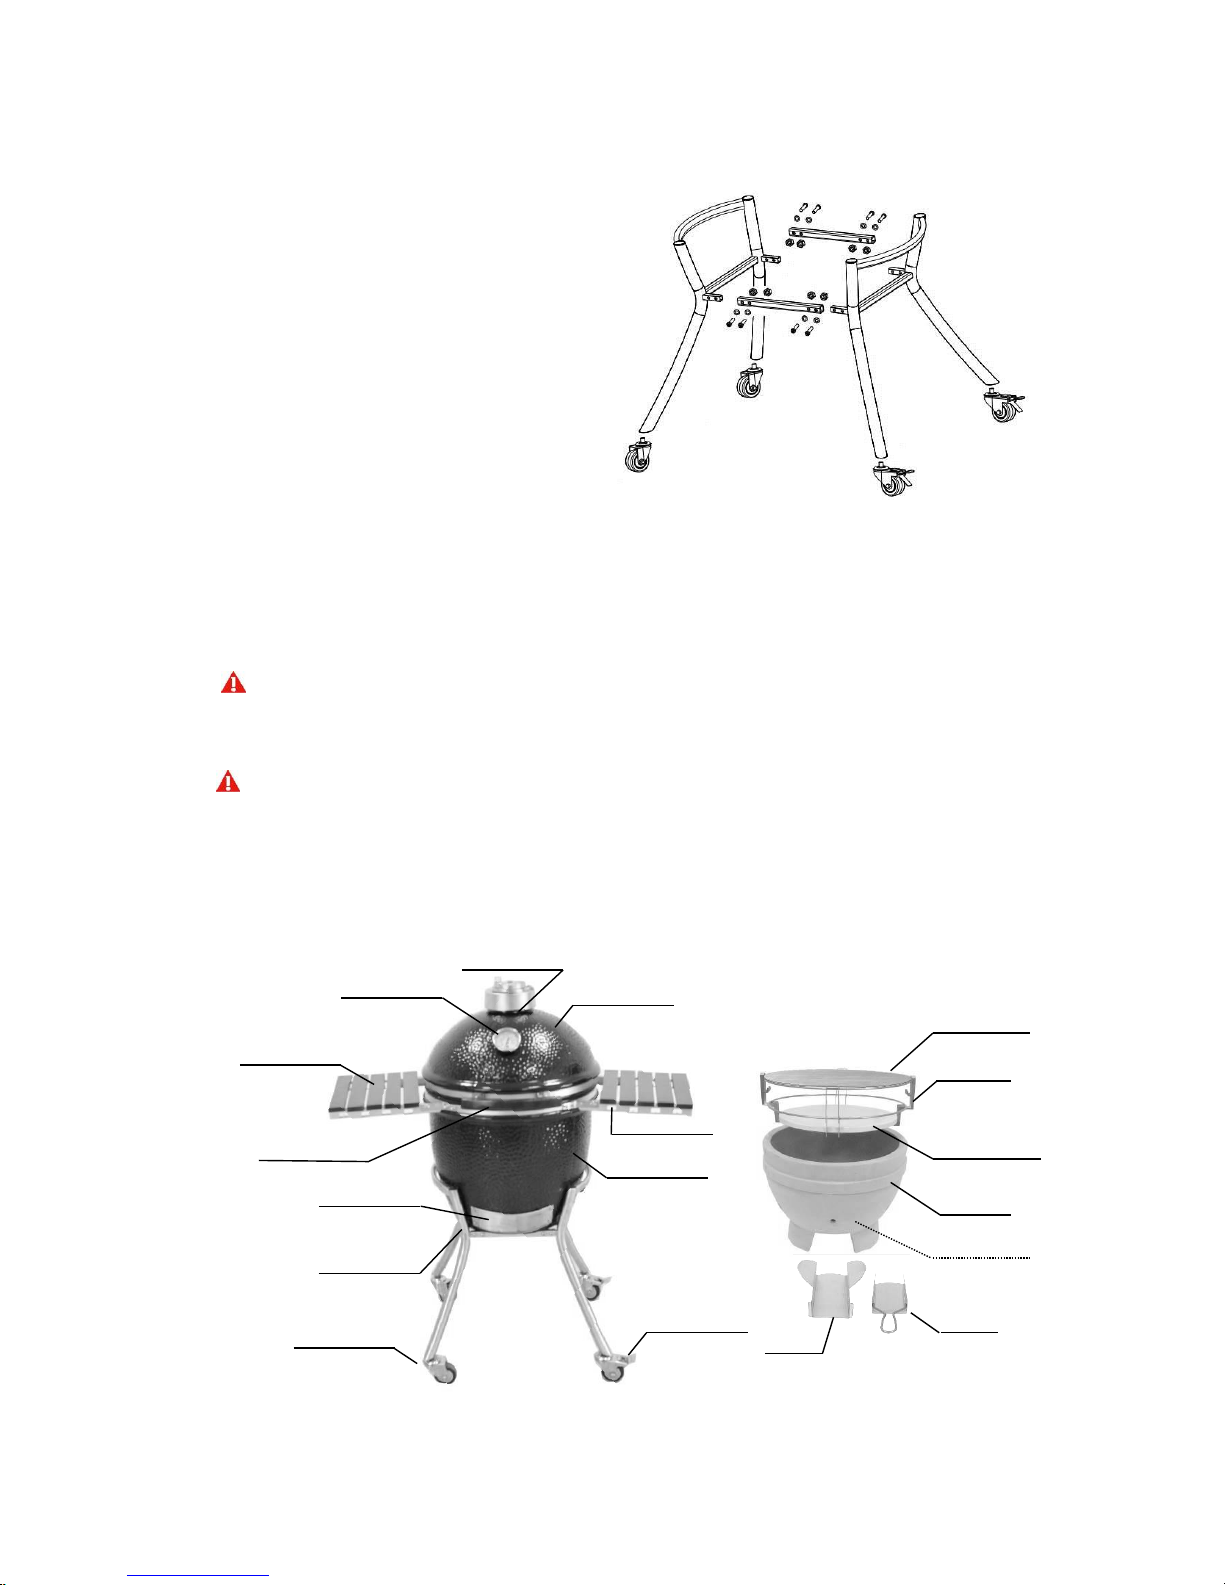
ASSEMBLING YOUR GRANDFIRE KAMADO
ASSEMBLING GRANDFIRE KAMADO
WITH A CART
1. Cut the plastic bands and remove the
top and side walls of box.
2. Use 8 bolts and nuts provided to
assemble the stainless steel cart as
per the illustration diagram. Install
the casters last.
3. Open the grill and remove the components by removing all the packing
materials.
4. Place assembled cart on a secure Ievel surface before inserting the grill.
5. Gently lift the grill and place it in the cart. Adjust the position so the front of the
grill is centered in the opening of surrounding.
TWO PEOPLE WILL BE REQUIRED TO LIFT THE GRILL INTO THE CART!
6. Open the dome and place the ash slot and ash tray in the bottom center, the ash
tray handle should direct to the draft door.
CAUTION THE GRILL MAY TIP OVER WHEN DOME IS OPEN WITHOUT
COMPONENTS INSIDE THE GRILL!
7. Place the fire box into the grill and align the opening at the bottom of the fire box
with the opening in the draft door. This allows the air to flow freely into the grill.
Top Vent
Thermometer
Bamboo
Side Shelves
Utensil Hooks
Lower Vent
Stainless
Steel Caster
Stainless
Steel Cart
Bamboo Handle
Upper Dome
Bottom Body
COMPONENTS
INSIDE
Cooking Grate
Charcoal Pan
Fire Box
Grate Rack
Heater Deflector
Locker Caster
Ash Slot
Ash Tray
3
 Loading...