

Grand Banks 1996 Eloise 42 Classic Operation Manual

OPERATION MANUAL
FOR
Eloise
Welcome aboard our 1996 Grand Banks 42 Classic!
We are happy you have chosen “Eloise” for your vacation and take pride in sharing her with you.
We are sure you will enjoy cruising the islands of the Pacific Northwest.
These instructions are designed to make your cruise more pleasurable. In general, the operation of
the boat is fairly self-explanatory. Hopefully this will help with most of the basic operational
questions, some of which are unique to this vessel. If you have questions about the boat or about
places to visit, please do not hesitate to ask the AYC staff.
At the end of your trip please take a moment to enter your name and any comments in our guest log
located in the third drawer under the captain’s seat at the main helm. Your comments are important
to us as we continue to upgrade “Eloise” after each charter season in order to make your next trip
even more memorable.
Enjoy your trip!

TABLE OF CONTENTS
Boat Operation
Engine Inspection
Start-Up
Shutdown
Getting Underway
Cruising
Glendinning Synchronizers
Docking
Fueling
Boat Electrical
A.C. (Shore) Systems
Inverter
Generator
D.C. (House) S ystems
Batteries
Sanitation Systems
Marine Toilets
Holding Tank
Y-Valve
Water Systems
Fresh Water Tanks
Fresh Water Pump
Hot Water
Electric Hot W ater Tank
Everhot System
Showers
Galley
Stove/Oven
Refrigeration/ Freezer
Microwave

Heating Systems
Webasto Hy dronic Heating
System Operations
Heat only option
Heat with continues hot wate r option
Heat only option
Electronics
VHF Radio, Depth Sounder, Radar
GPS/Plotter
Entertainment
AM/FM Radio
CD player
TV/DVD
Anchoring/Mooring Cans
Barbecue
Dinghy/Outboard
Crabbing/Fishing
Other: Bilge Pumps/Safety

BOAT OPERATION
Engine Inspection
Remember your “WOBBS” every morning: Water (Coolant), Oil, Bilges (Inspect and Pump-out), Belts and
Sea Straines.
Check the water levels in the batteries. After a long day of cruising or after a couple of days on shore
power, the water levels may drop depending on temperatures and battery use. Use distilled water provided
and the battery filler container. Extremely low water can result in permanently dead batteries, so check
them often.
Check the level of COOLANT in the expansion tanks - but never when the engine is hot. Check the level
of OIL in each engine by chec king the dipsticks located on each engine. Look at the etch marks on each
dipstick that indicate the proper oil level. DO NO T OVERFILL OIL! Only f ill if oil levels are below the
second dip stick mark from the top. Fill to the top scratch mark if adding oil. Please use a paper towel or oil
rag to wipe off any spills. Check the general condition of the BELTS, HOSES, and FUEL LINES. Note any
new oil or fluid leaks and look for the source to make sure there is not a loose bolt or clamp that needs
adjusting.
Bilges should never have oil in them. Sometimes the water may be dark but there should never be oil
floating on the top. If you find oil, look for the source. Oil discharges, even accidental, can cause serious
fines for the boat operator.
Ensure the valve on each RAW WATER is in the ‘open’ position (lever in-line with valve).
Check the glass of each for debris. Using a flashlight to shine through the strainer will help to see the
amount of debris. If necessary, close the seacock, open the strainer cover, clean the strainer, and
reassemble. Wipe down with a rag and check for water leaks from the top of the strainer. Remember to
reopen the seacock. Check your generator RAW WATER THRU-HULL and STRAINER as well and
follow the same procedure.
Start-Up
Before starting the engines, do your inspection. The engines should be started from the lower helm station.
Ensure GEARSHIFTS are in ‘neutral’, or the engines cannot be started because of the “neutral lockout”.
Check that THROTTLES are back to the idle position.
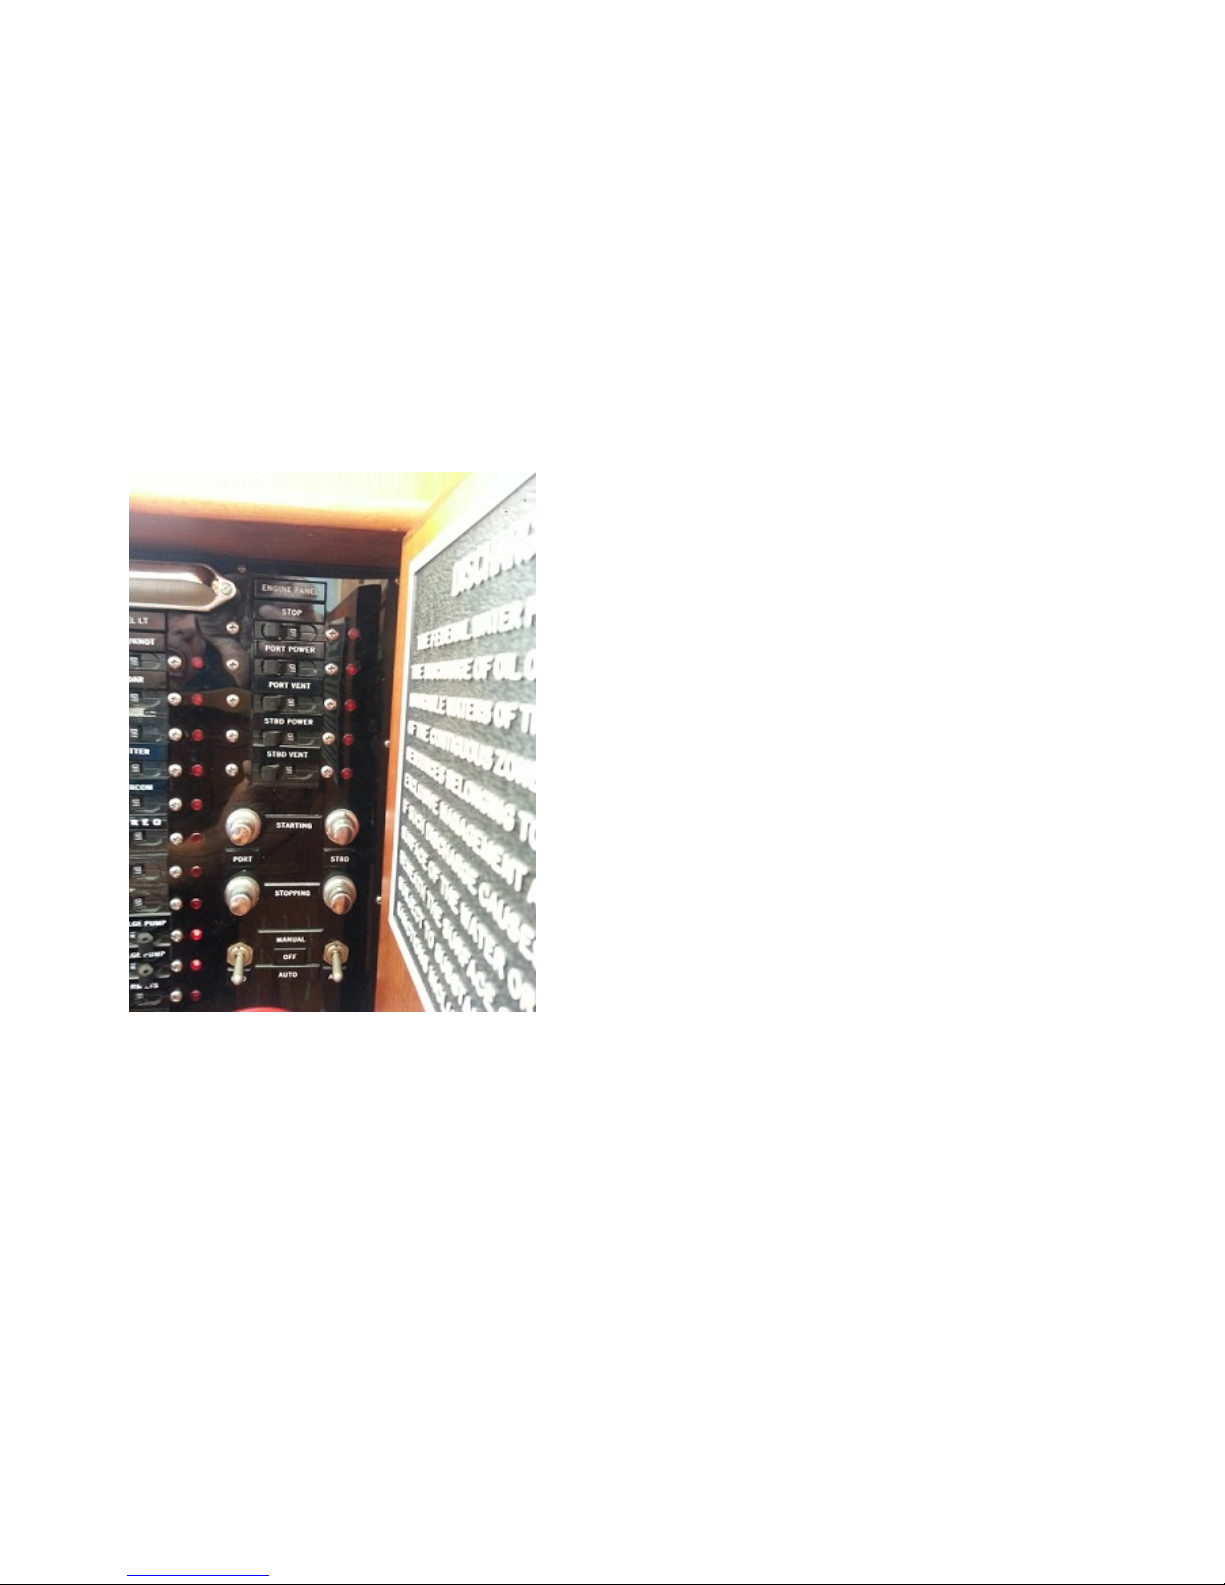
Engine Switch Panel
Once you have checked the engine room and are ready to start the engines, follow this sequence:
1. Turn on the STOP s witch. This switch must remain on while the engines are running in order to
STOP them.
2. Turn on the engine POWER switch. This will cause the oil pressure buzzer to turn on which is
normal.
3. Press the STARTING button to start the engine. Listen carefully to hear when the engine starts
over the buzzer noise and release the start button to avoid damaging the starter. Note that the buzzer
will go off until the oil pressure rises – about 10 seconds. If the buzzer does not go off in 20
seconds, push the engine STOPPING button and turn off power switch. Check engine for cause of
low oil pressure. After resolution repeat steps 1 – 3.
4. With engine running, move throttle to 700 RPM to warm up engine.
5. REPEAT procedure for other ENGINE.

If the engine cranks slowly or fails to turn over, check the condition of the battery on the Five Battery Volt
Meter to the right of the helm. If the battery is low, you may have to run the generator for a short while t o
charge the batteries. If so, see generator operations to start. After starting make sure you switch the charger
breaker on.
Move the THROTTLES to raise the engine speed to 700 rpm on the TACHOMETER. Check to make sure
water is being expelled from the exhaust at the stern. Warm the engine for about 5 minutes and reduce RPM
to idle before engaging transmission. Observe the readings of the gauges. The oi l pressure will register
about 60 PSI. Cold engine temperatures should rise slowly after 10 minutes or so.
Note -- If oil pressure is low after 30 seconds, shut down engine, and inspect engine compartment and look
for possible cause (for example, loss of oil.) Caution -- If an engine is overheating or ther e is lack of raw
water expelled in the engine exhaust, stop the engine immediately. Recheck the raw water-cooling system to
ensure the seacock is ‘open’ (handle in-l ine with valve). Next, check the raw water strainer for debris.
Remove the strainer, clean, re-assemble, and reopen the raw water intake valve (seacock). Restart the
engine and re-check water flow from the exhaust. If water is not flowing properly, the RAW WATER PUMP
may need to be serviced. Seek help from AYC.
Shut-Down
Before shutting down, allow the engines ‘idle’ for about 5 minutes to c ool them gradually and uniformly.
This is most important after a long run at top speed. The time engaged in preparing to dock the boat is
usually sufficient. Ensure each GEARSHIFT is in the ‘neutral’ position and each THROTTLE is in the ‘idle’
position. Turn off engines by pushing the STOP BUTTONS. When the engines stop the oil pressure
warning buzzers will sound. Turn off the engine power breakers and the STOP switch.
Getting Underway
Retrieve the boarding ladder and place in the lazarette. DISCONNECT the shore power cord (see 110-Volt
next page). Close the PORTHOLES, WINDOWS, and FORWARD HATCH. Turn on your VHF and
electronics. ASSIGN crew members their various positions. Once outside the marina and out of the traffic
lane, for crew safety, idle the engines while crew brings in fenders and lines.
Cruising
All close quarters maneuvering should always take place at the FLYBRIDGE HELM for the best visibility.
Engage the GEARSHIFTS. Ensur e the throttles are in t he ‘idle’ position before engaging the gearshifts to
avoid transmission damage. Cruising speed is a maxi mum of 2000 RPM. If you run at 7Kts or less, you
will use only 2-3 gallons of diesel per hour. We have found that cruising at or a round 1650 RPM’s provides
a good speed and fuel efficiency. Your speed will vary depending upon the weight and load and weather
conditions.
Glendinning Synchronizer
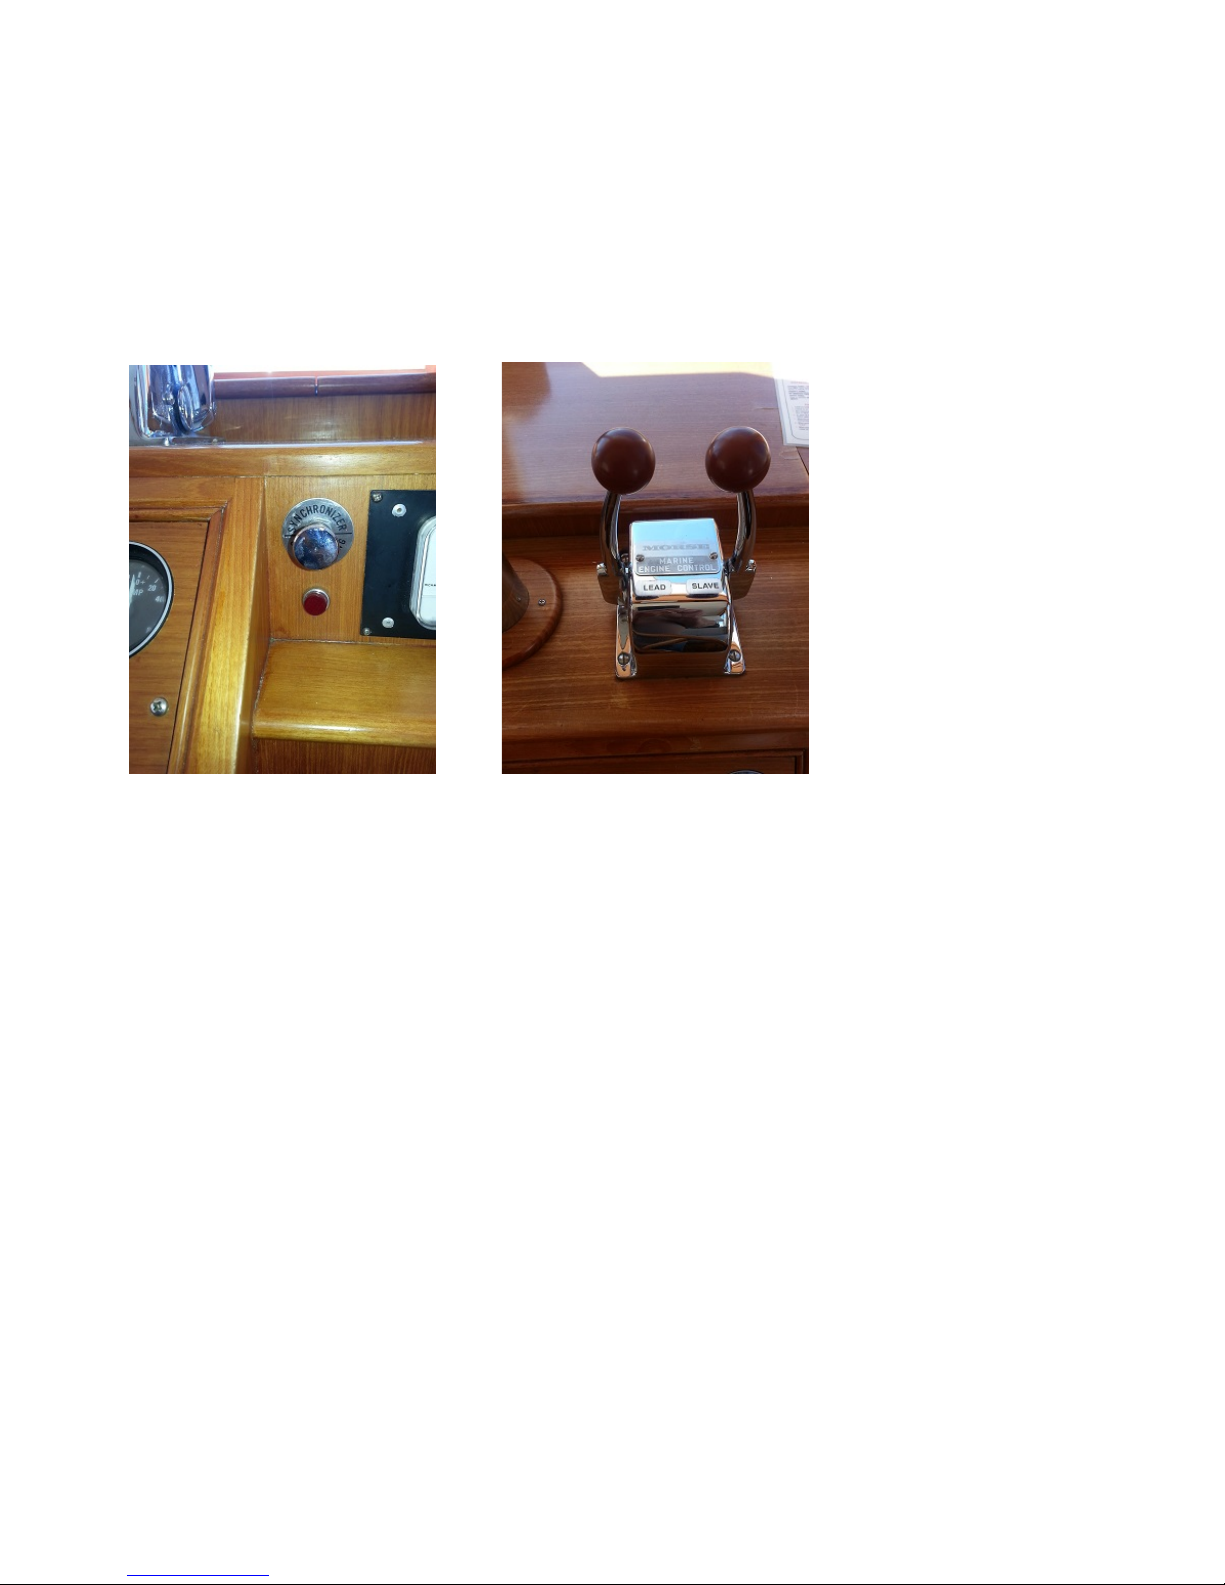
Eloise is equipped with Glendinning Engine Synchronizers. The synchronizer is designed to control and
match the RPM’s of the SLAVE engine to that of the LEAD engine thus reducing unnecessary stress on the
engines . The controls to engage the synchronizer are l ocated at bot h the upper and lower helms with a push
pull switch. The throttle controls at each station are marked one as LEAD and the other as SLAVE. The
SLAVE is the starboard engine and the LEAD is the port engine.
After you leave your docking area or marina you may now utilize the synchronizers.
To operate:
1. Have both engines running and advanced speed slightly above idle.
2. Switch SYNCHRONIZER ON-Pilot light will be ON.
3. MOVE SLAVE ENGINE THROTTLE LEVER TO MAXIMUM SPEED POSITION-since the
SYNCHRONIZER is now controlling the slave engine, the lever is “limp” or non-effective.
Advancing the slave engine lever eliminates the SYNCHRONIZER of undue strain in moving the
entire control cable system.
4. Both engines are now under the control of a single movement of the lead engine control and may be
advanced or retarded through the entire cruising range.
5. To disengage-switch OFF SYNCHRONIZER – move engine lever back towards idle. It will
automatically re-engage with the engine control. A safety collar assures positive return to idle when
switching OFF and moving lever back.
Note – Eloise has ample power if needed should wind or currents slow your progress. Avoid engine
speeds over 2000RPM as it causes higher engine temperature, possible damage, and much higher fuel
consumption.

Docking
During docking, use the FLYBRIDGE HELM
for greater visibility to the stern. While moving slowly to the
dock or mooring locations, center the WHEEL using the rudder position indicator and us only the
GEARSHIFTS and THROTTLES to maneuver the boat. Have your crew ready the lines and fenders and
give clear instructions on how you will be docking. Often times your crew will need to step off f rom the
swim step with the stern line. Another crew member will need to be at the bow or mid-ships to hand over
the next lines.
After you have docked retrieve the boarding ladder from the lazarette and attach the stay cable to prevent the
ladder from being knocked into the water. Run the cable from a r ear cleat thr ough the line hole not over the
varnished toe rail.
Fueling Up
OPEN FILLER CAPS located on each side of the salon with a DECK FITTING KEY (spanner wrench)
which is kept in a small compartment on the dash, to the right of the wheel and above the power panels.
There is a vent on the hull below the filler cap. It will spray fuel if you overfill.
MAKE SURE YOU HAVE THE RIGHT FUEL! DIESEL! DIESEL! DIESEL
! DOUBLE-
CHECK! Gasoline can destroy a diesel engine!
Before pumping fuel, have an oil/fuel sorbs handy to soak up spilled fuel. You should have a rough idea of
the number of gallons you will need by checking the sight tubes on the fuel tanks in the engine room. Note
the sight tubes have valves at t op and bottom that must be opened in order to get an accurate readi ng. Each
tank holds 300 gallons. Close sight tube valves for safety when you have read them.
If you have skin sensitivities to diesel, wear rubber gloves.
pump slowly and evenly, and note the sound of the fuel flow. Pumping too fast may not allow enough time
for air to escape (even with the large fuel intake) which will result in spouting from the tank opening. As the
tank fills, the sound will rise in pitch or gurgle. The sound may indicate that the tank is nearly full. Top off
carefully, and be prepared to catch spill ed fuel. Spillage may result in a nasty fine from law enforcement.
Caution -- Clean up any splatter and spillage immediately for environmental, health and deck safety
reasons. Wash hands with soap and water thoroughly.
Place the DIESEL nozzle into the tank opening,

BOAT ELECTRICAL
The electrical system is divided into two distribution systems: 110-volt AC and 12-volt DC. The systems are
controlled from the two ELECTRICAL PANELS located on the right side of the main helm. The DC
ELECTRICAL PANEL located above the AC Panel, where the BATTERY SWITCHES ARE FOUND.
When not connected to shore power, batteries are providing all power. Therefore, monitor the use of
onboard electricity with the FIVE BATTERY VOLT monitor and turn off electrical devices that are not
needed.
110-Volt AC System
SHORE POWER supports all AC equipment and receptacles on board, as well as the charger.
BEFORE CONNECTING TO SHORE POWER, MAKE SURE THE INVERTER IS OFF.
To connect to shore power, determine what amperage is being supplied from the dock connection. Then,
plug the appropriate cor d (50 or 30 amp) into either the af t or forward plug locati on then plug into the dock
receptacle. If necessary, add a CORD ADAPTER. Cords coming off the bow can be wrapped loosely around
the bow line and should never be in the water. Most marinas provide 30 amp power not 50 amp.
If you’re on 30 amp and the dock breaker pops off when you plug in, make sure to turn off the hot water
heater and other AC outlets and try again. Hot water heater, hairdryer, coffee maker, and toaster in any
combination can pop the breaker.
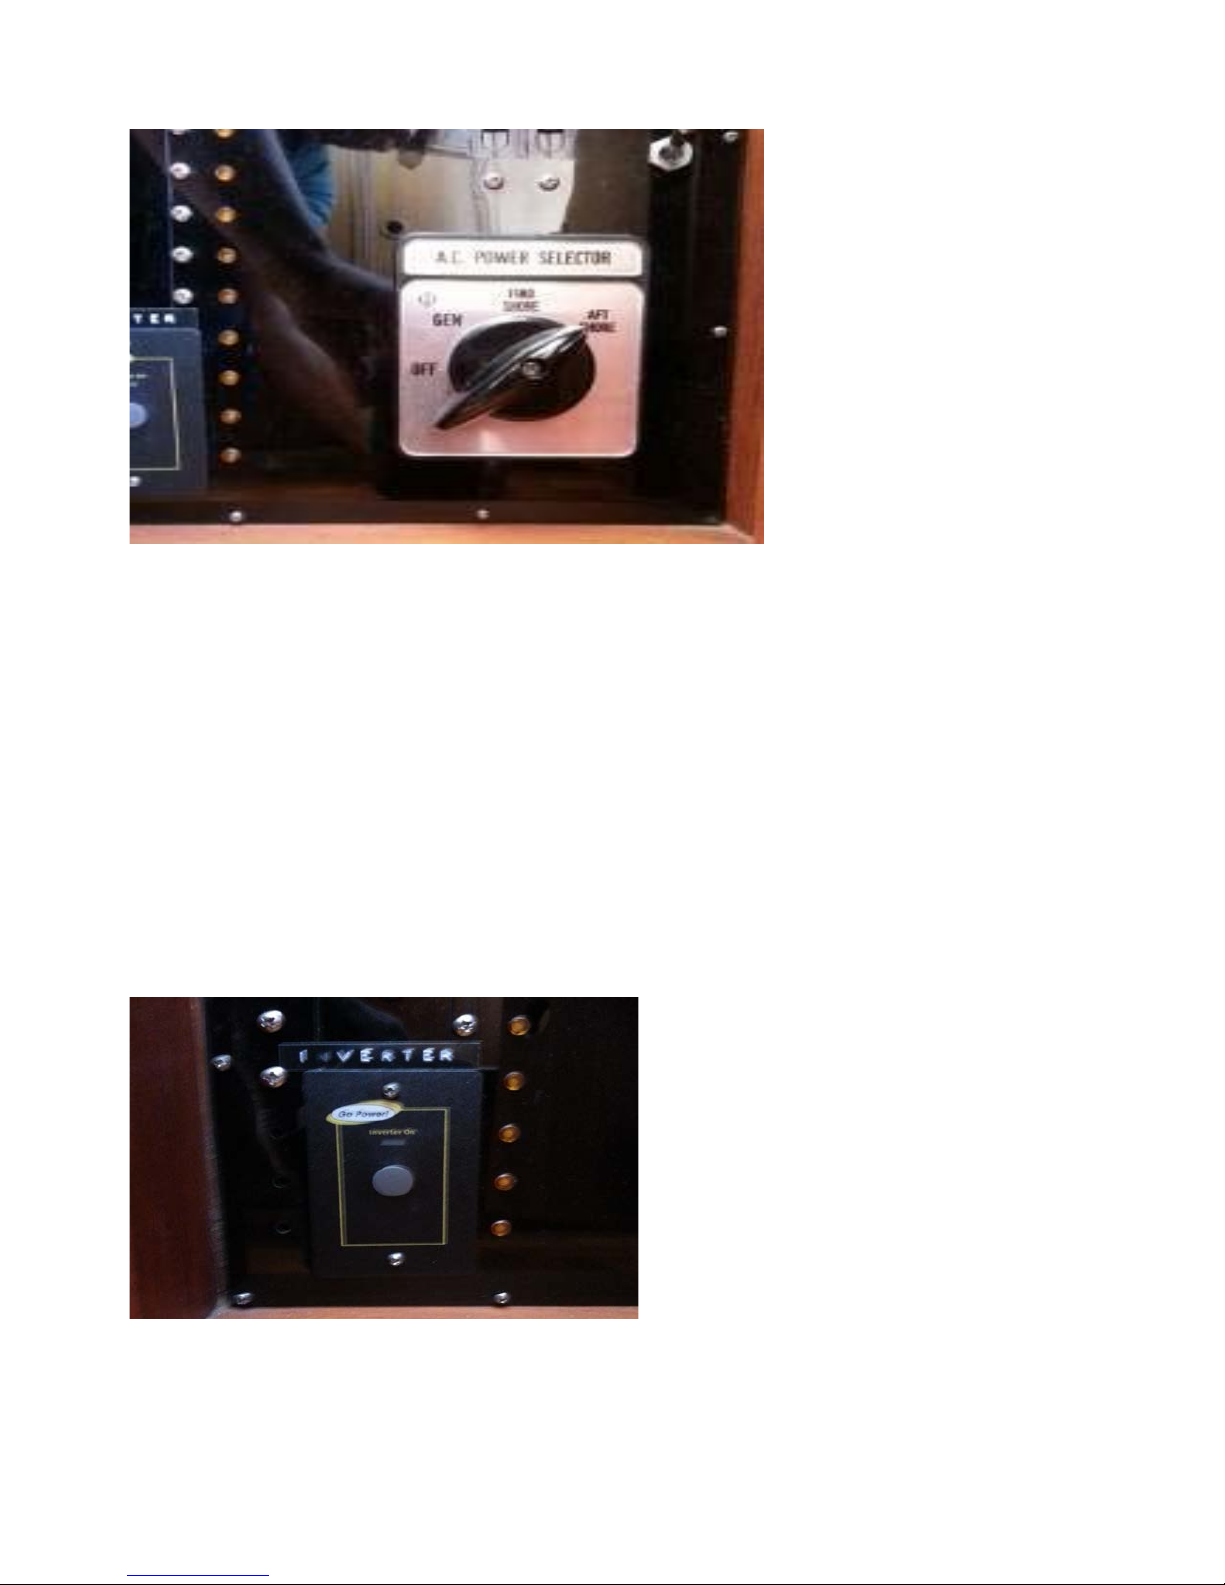
At the AC ELECTRICAL PANEL, turn the selector switch to either the aft or forward position
corresponding to where you have attached the power cord. Watch the 110v ammeter for load LOCATED
RIGHT OF THE HELM BOTTOM GUAGE. If the load exceeds 30 amps, you will pop the breaker on the
dock. If this occurs, wait to turn on one of your systems (i.e. water heater) until amps drop. The charger
will often start out with a high current draw which will decrease after 10 minutes or so. After it has
dropped, add other appliances as needed, keeping total current draw under 30 amps.
If 110 outlets fail to work, check the GFI switches on the outlets to make sure that they have not been
tripped. Also make sure you have switched on the port and starboard outlet circui t breakers located on the
AC Electrical panel.
Inverter Power
The INV ERTER provides AC power to the 110-volt receptacle plugs in the entertainment cabinet on the
port side rear area of the salon and powers the Webasto Heating system. The inverter panel is located on the
bottom left side of the AC power panel with an on/off push button switch. To operate the TV/DVD or t he
heating system, make certain that it is on. The inverter itself is located on the starboard side strapped t o the
top of the engine battery.
 Loading...