

Page 1
QUICK START
GUIDE
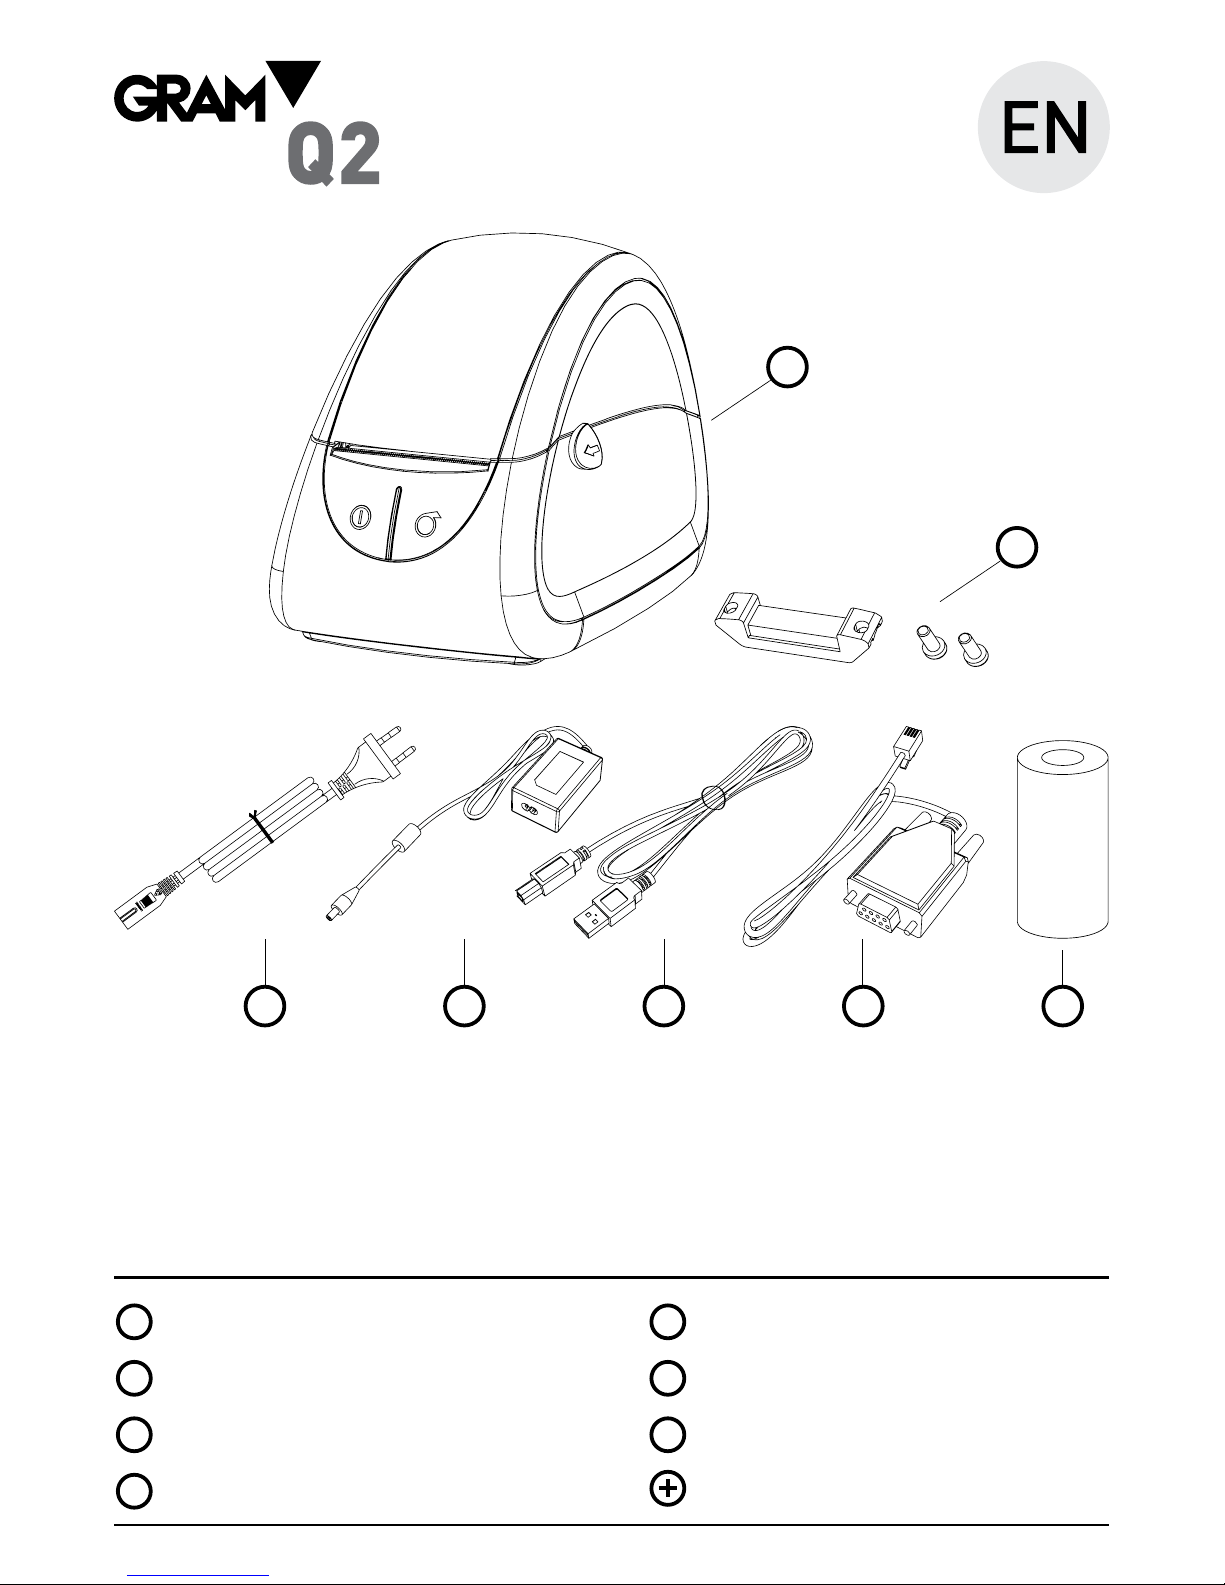
Printer.
Cables Fastener.
Power Cord.
Power Adapter.
USB Cable (Optional).
Serial Cable (Optional).
Paper Roll (Optional).
Accompanying documentation.
PACKAGING
1 5
3 7
2 6
4
1
2
3 4 5 6 7
Page 2
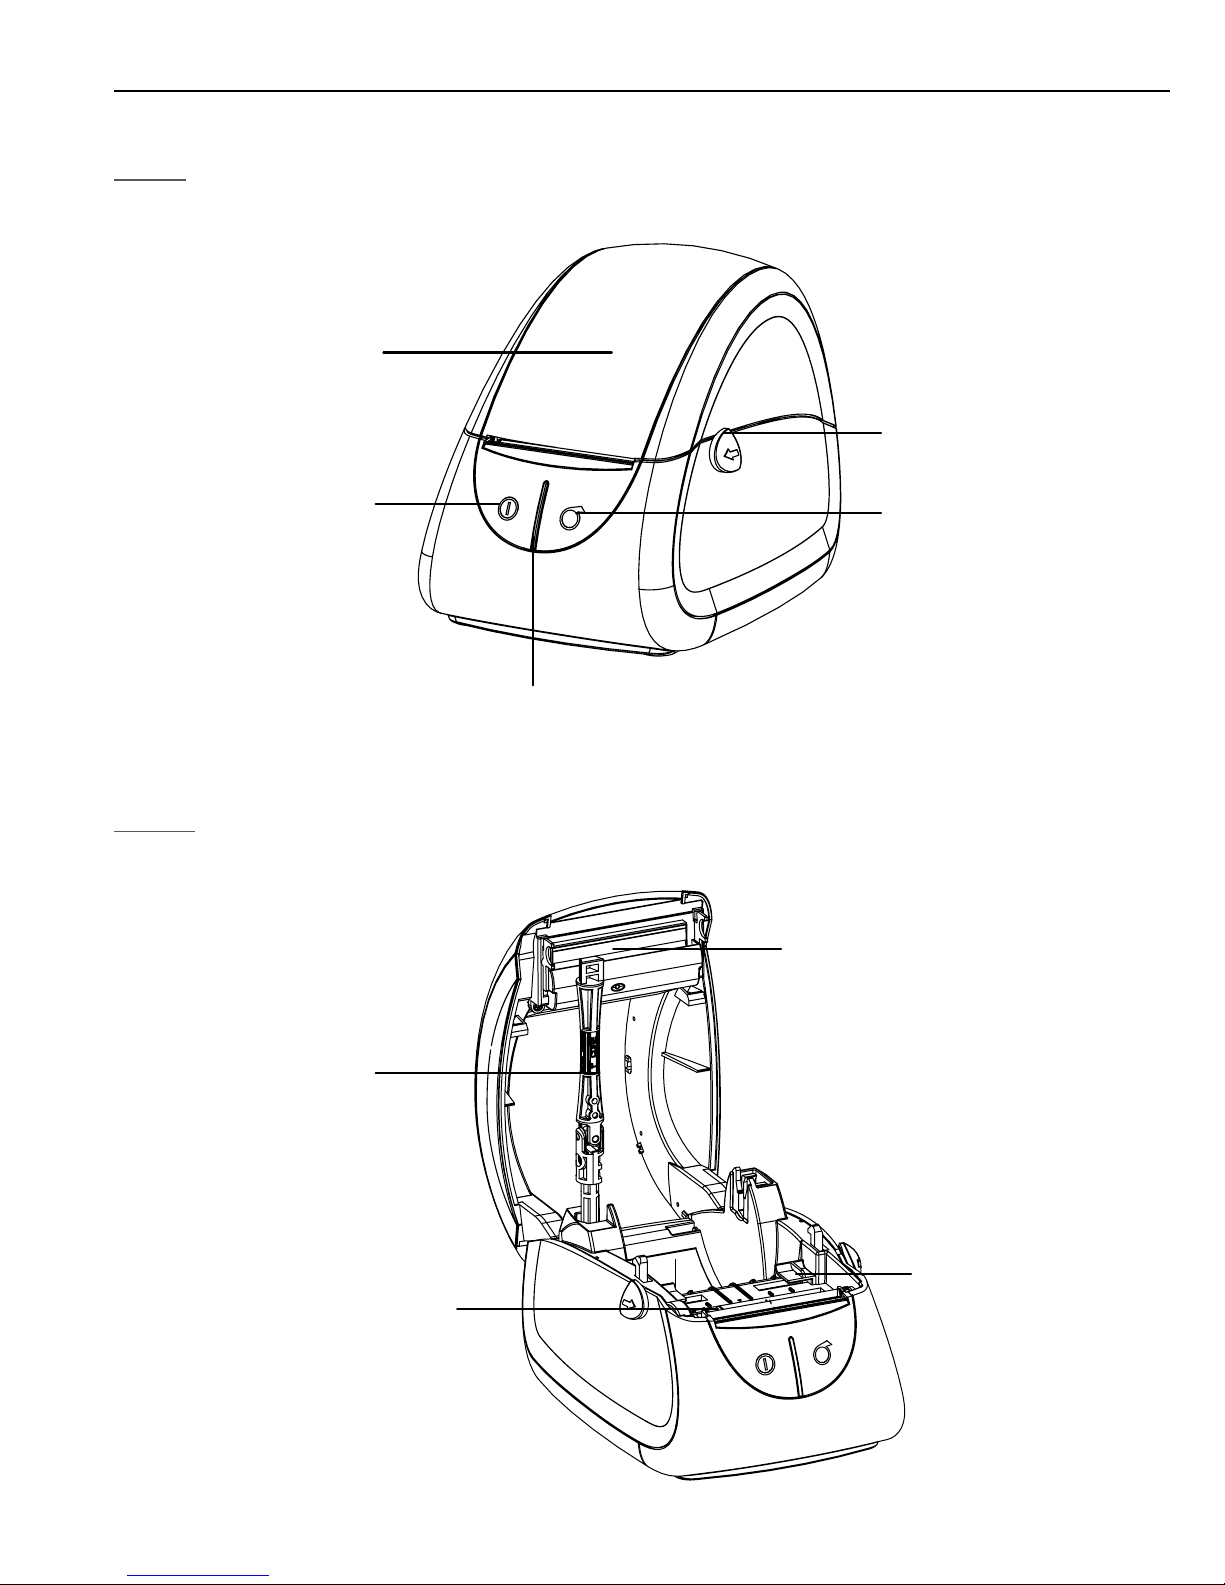
Front
Inside
APPEARANCE AND COMPONENTS
Printer Cover
Power Button
Cover Open Lever
LED Indicator
Feed Button
Thermal Printer Head
Paper Roll shaft
Paper Sensor (Movable)
Paper Guide
Page 3
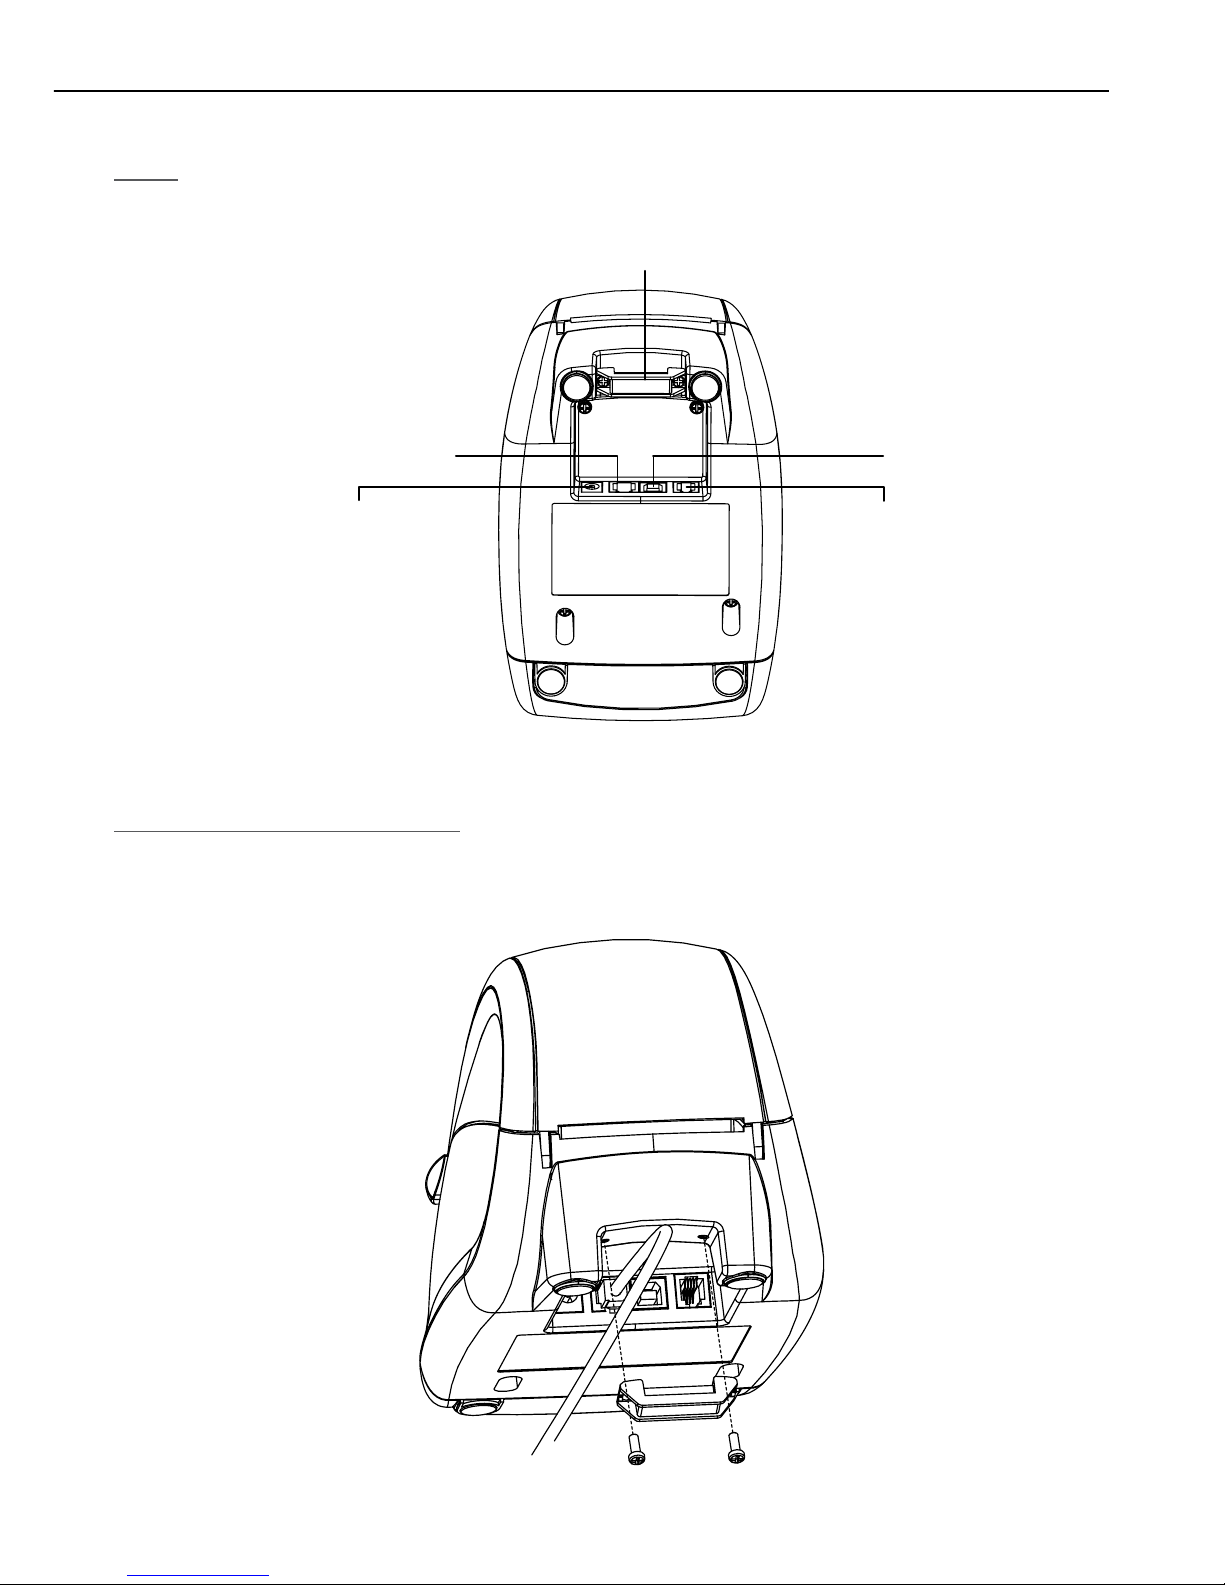
Rear
Install the cables fastener
Power Port
Cash Drawer Port
Cables Fastener
USB Port
Serial Port
Page 4
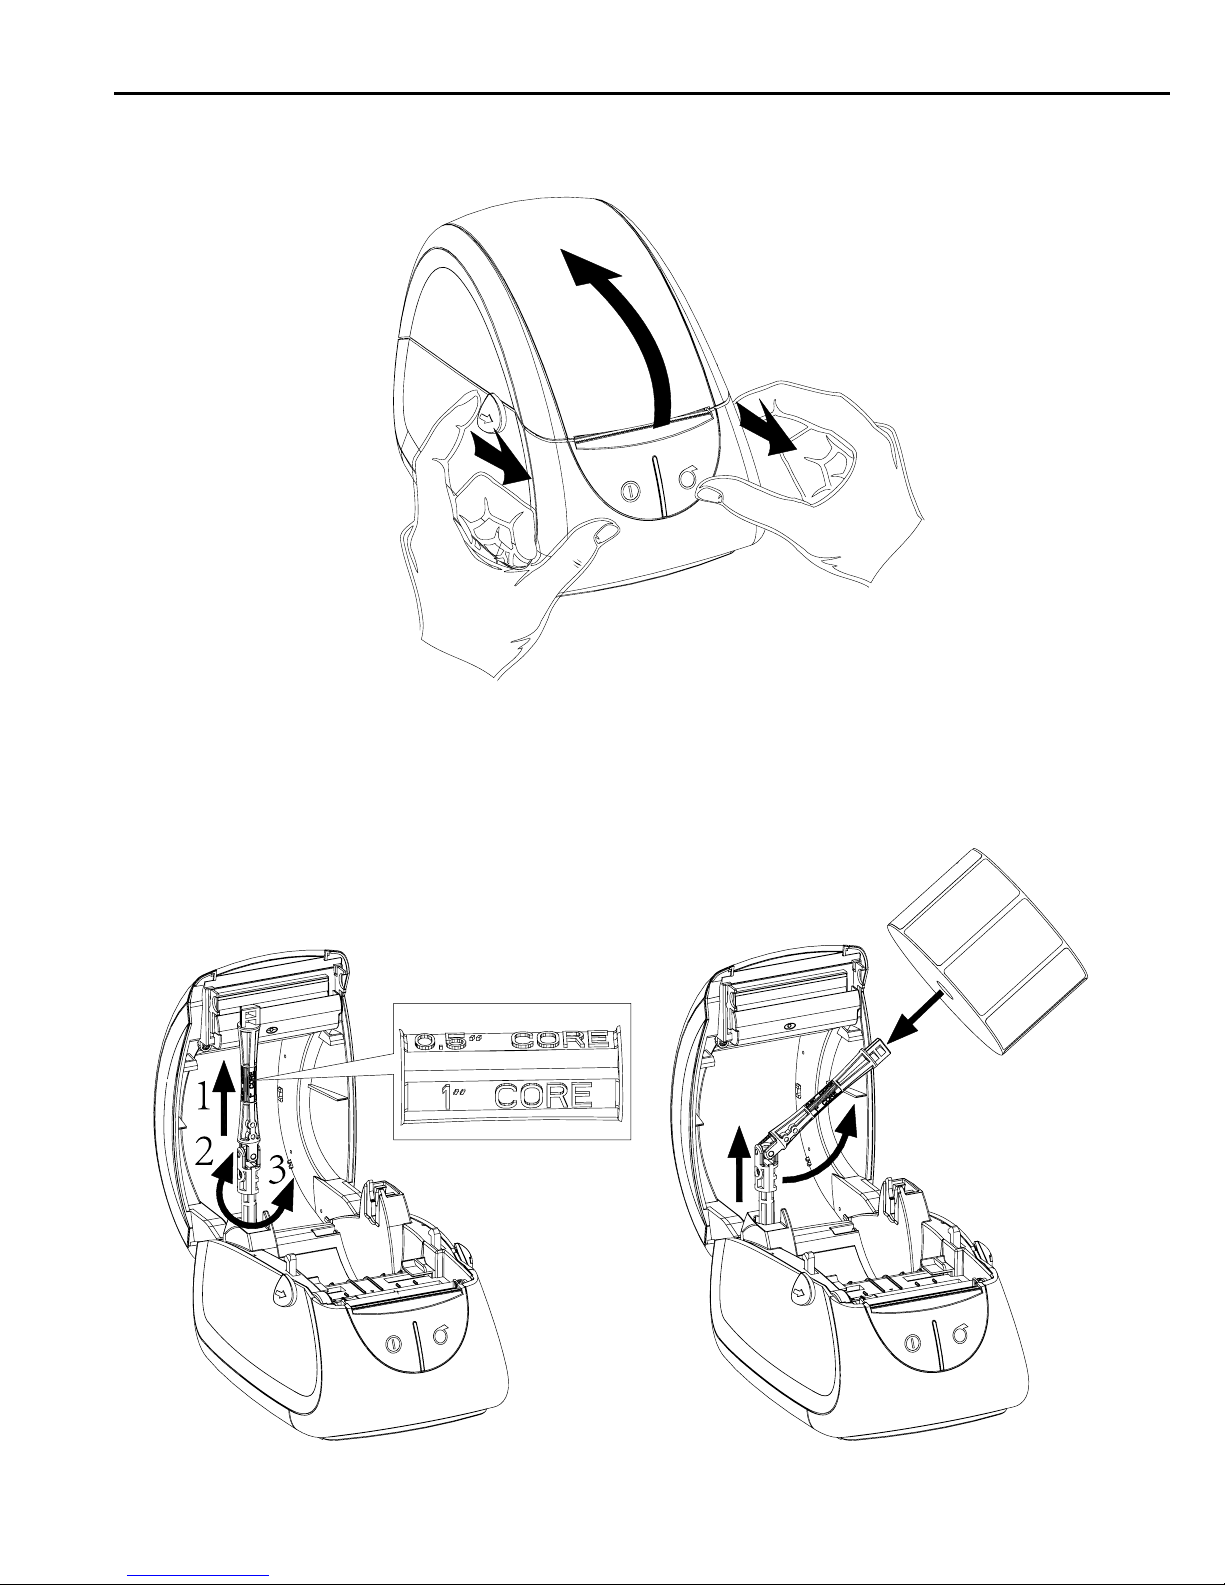
1. Pull the cover open lever towards you and lift the cover.
2. Firstly,pull up the paper roll shaft.Then adjust the shaft according to the internal
diameter of paper roll (There is detailed illustration which is about internal diameter
of paper roll on the shaft).Next,install the paper roll and fix the shaft.C counts).
Note: Please do center the sensor while not printing with black mark paper.
LOADING PAPER
Page 5

3. Pull out some paper roll,open the paper guides to the max width and pass the paper
through the paper guides , then adjust the paper guides to the paper width.
4. Press down the center of the printer cover to close the coverthen tear off the excess
paper.
Thermosensitive layer
Page 6

The movable paper sensor must be fixed as shown below to make sure that paper sensor
can detect the paper status and label location under label printing mode.
LOADING EXTERNAL PAPER ROLL
PREPARING FOR LABEL PRINTING
External paper roll entry slot
Page 7

1. Connect the AC adapter with power interface.
2. Connect the AC adapter with power cord.
3. Plug the other side of power cord into the socket outlet.
Note: Windows Driver Installatiion please see User Manual.
CONNECTING POWER
Cable connector
AC adapter
Inlet
Varies by local or region
AC power cord
1
2
3
Page 8

Gram Precision S.L.
Travesía Industrial, 11 · 08907
Hospitalet de Llobregat · Barcelona (Spain)
Tel. +34 902 208 000 · +34 93 300 33 32
Fax +34 93 300 66 98
comercial
@gram.es
www.gram-group.com
001/120617
 Loading...