

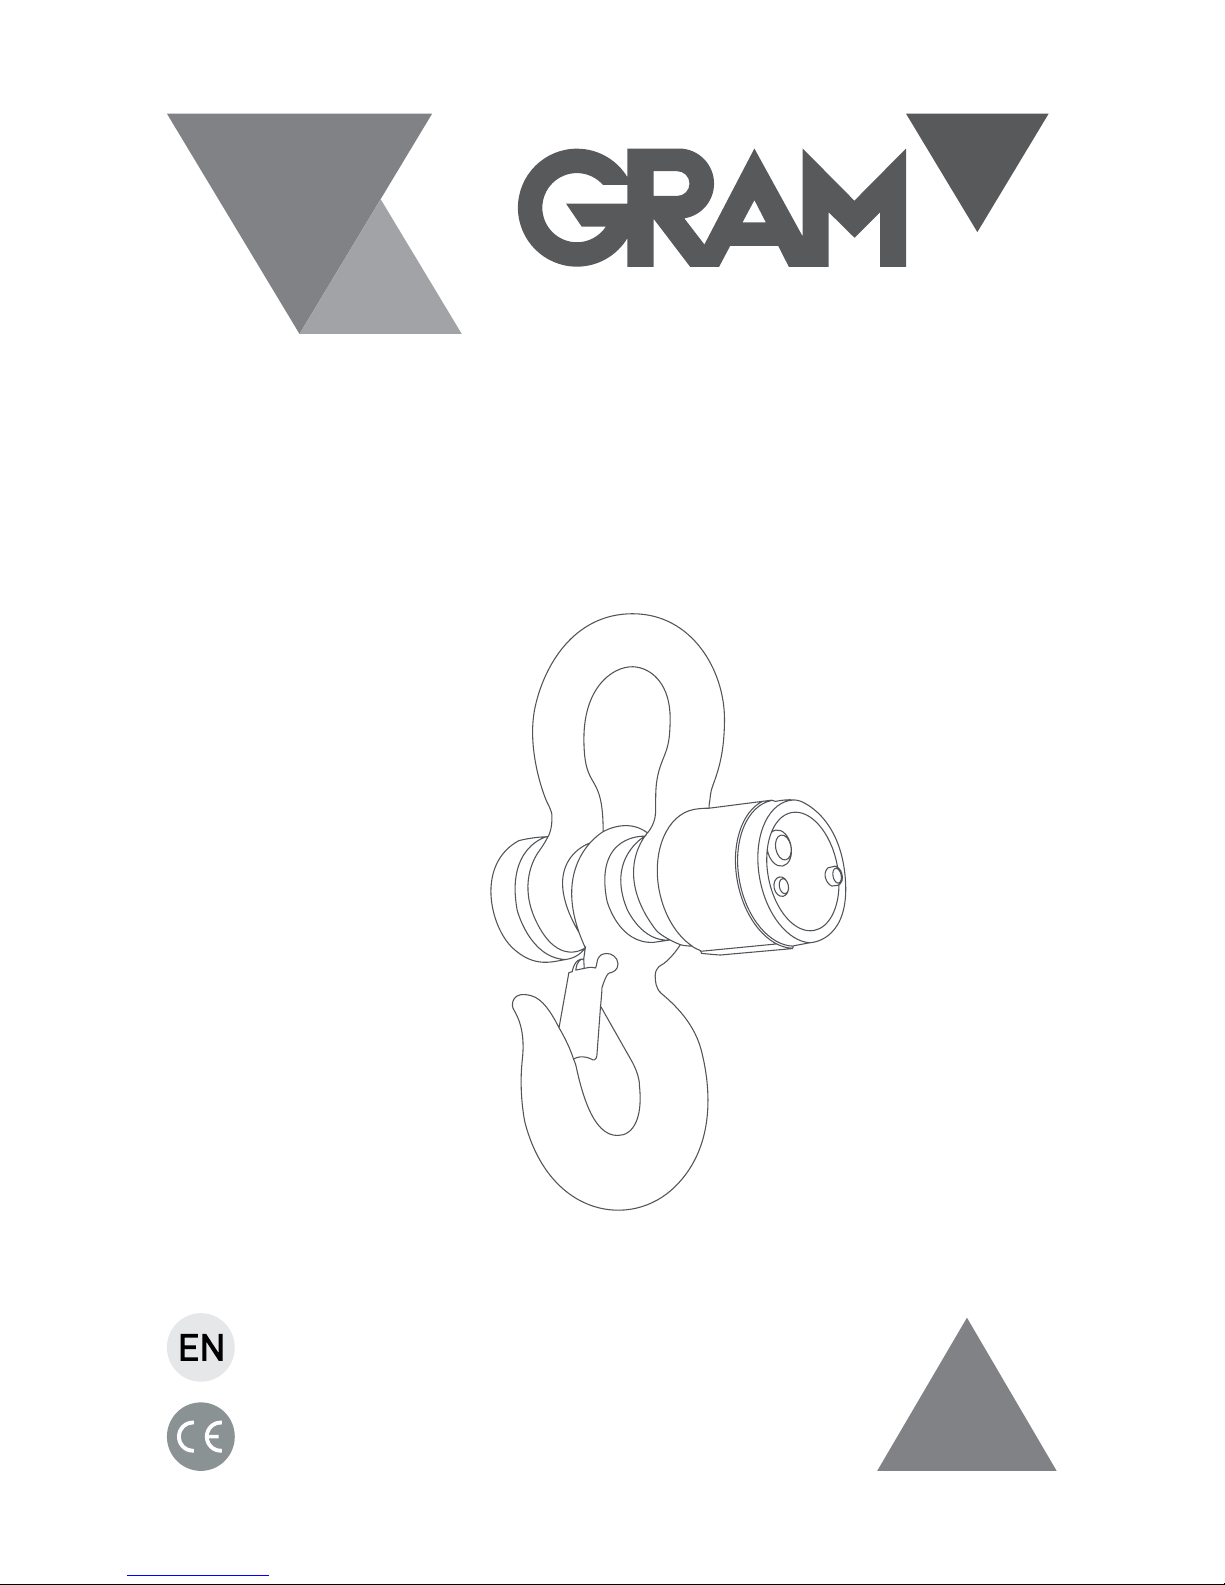
SERIES
C6
3T / 5T / 10T / 15T / 20T
OPERATION MANUAL
2
INDEX English
Main specification 3
Analog 3
Display 3
Ambient Environment 3
Front and back view of the indicator 4
Keys function 4
Operation 5
Turning on 5
Zero function 5
Tare 5
Manual accumulation 5
Check accumulation 6
Clear accumulation 6
Parameters setup 6
Calibration 8
Error indication 9
Rechargeable lithium battery 10
Maintenance 10
Guarantee 12

3
ENGLISH
MAIN SPECIFICATION
Analog
Accuracy: n=3000
Input Signal: 1.5~3mv/V
Converting Speed: 10 times/second
Display
Display: 0~999999
5 digits LCD/LED, 7 indicators
Division Value: 1/2/5/10/20/50 (optional)
Ambient Environment
Distance between scale and indicator: 150m
Power Supply: DC: 3.7V
Ambient Temperature: 0~40 ºC
Storing Temperature: -25 ºC ~55 ºC
Ambient Moisture: ≤ 85% RH
Warm-up Time: 10~15 分钟
4
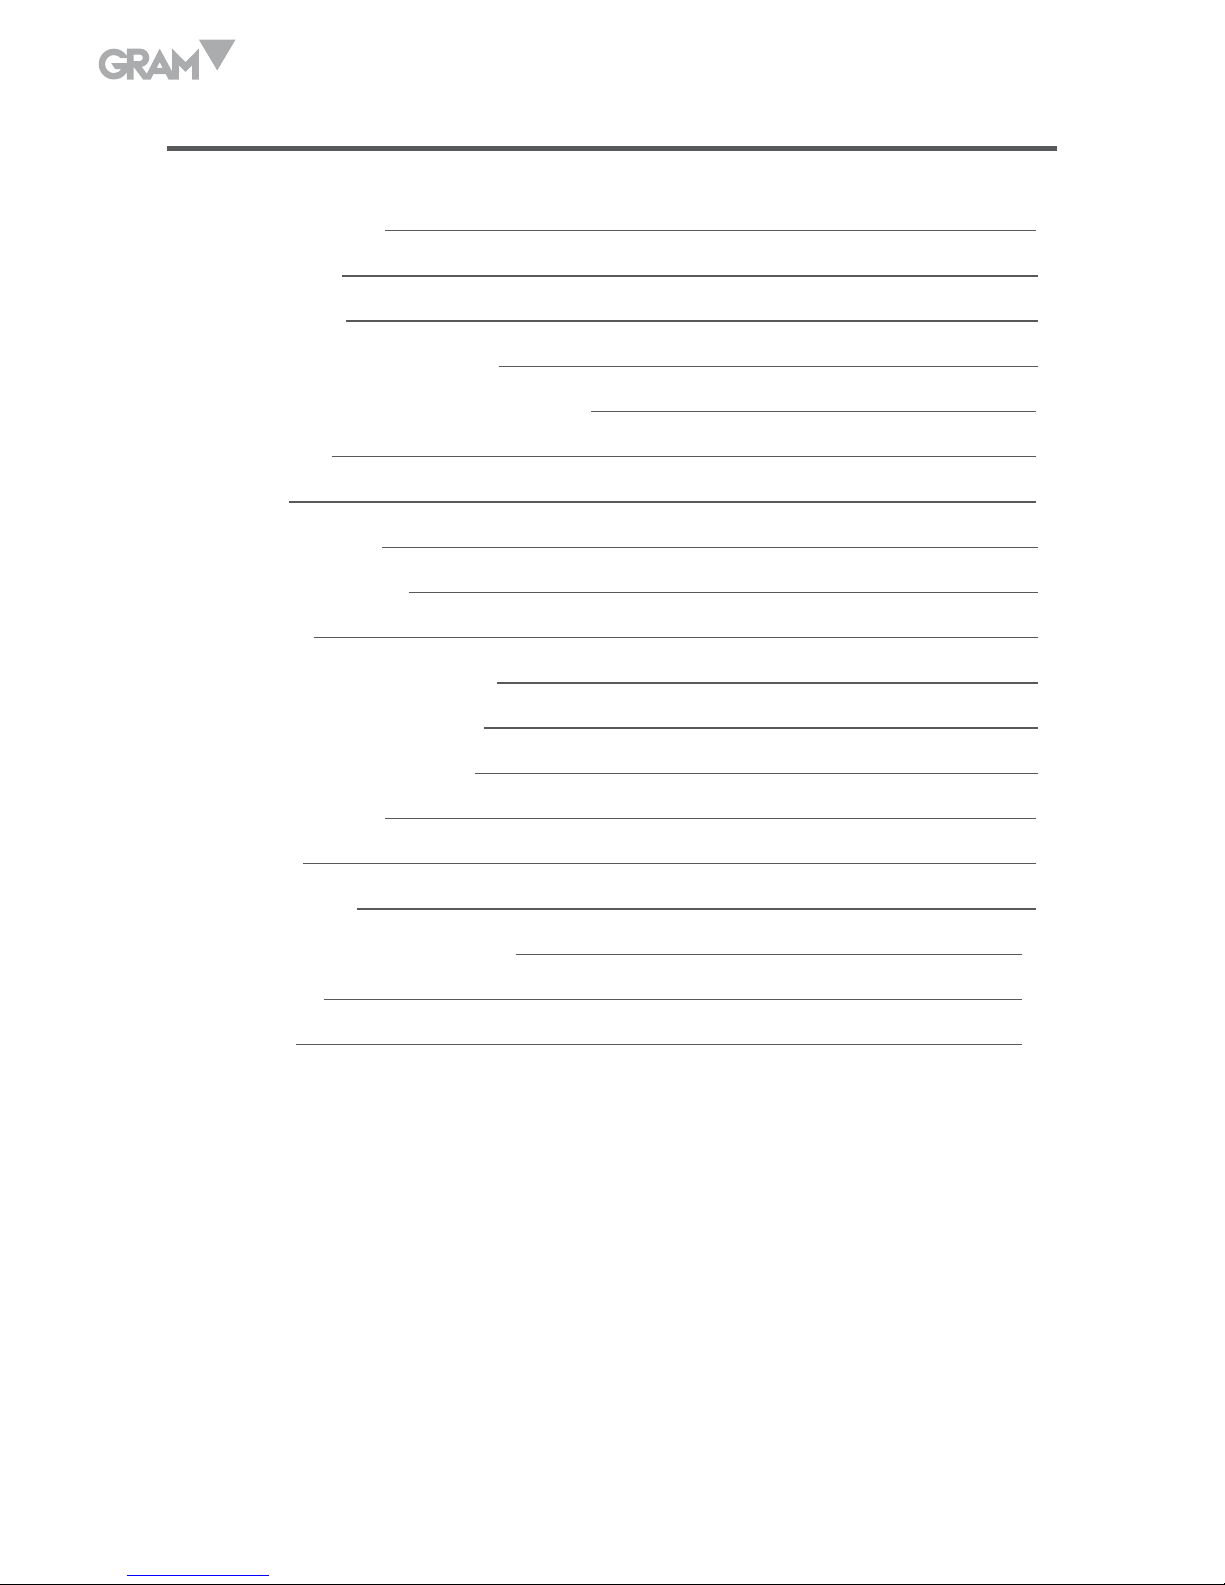
FRONT AND BACK VIEW OF THE INDICATOR
KEYS FUNCTION
In weighing status hold the key for more than 5s, it enters setup mode
(All the setting in this mode should be recorded with the calibration
header on; or the data will lose).
Tare function in weighing status.
Zero function in weighing status.
For selecting.
Weighing accumulation
Long press for 1sec to turn on. Long Press for 3sec to turn off.

5
OPERATION
Turning on
Turn on the power, the indicator performs self-checking and go into weighing mode.
Zero function
Press
for zero return, indicator returns to zero within the zero range 2%FS.
Please make sure the stabilization light is on when zero operation.
If obstruction occurs by more than 1 wireless indicator working at same time,
you can open both indicator and scale, change the number of transcoder
inside with same number and restart.
Tare
At weighing mode, press
to deduct displaying weight while it is positive
and stabilization light is on. At no-load status of the scale, press
to
deduct tare and then tare light is off.
Manual accumulation
At weighing mode, press , it displays “ADD-01”, “01” means times of
accumulation (the Max times is 99 and then it will return to 01). After then
it will display the value of accumulation for 3s and then back to normal
weighing mode by itself.

6
Check accumulation
At weighing mode, press , it will display the times and the value of current
accumulation, after then back to normal weighing mode automatically.
Clear accumulation
At weighing mode, press , it displays “ADD---” and back to weighing
mode which means clear the current accumulation.
PARAMETERS SETUP
In weighing status, hold
for more than 5s and entering setup mode. (P
mode, all the setting in this mode should be recorded with the calibration
header on; or the data will lose.)
P1~P13 parameters are available, press
to switch, and press
to
select parameter. Detail for parameter:
1. P1 x kg Lb shift
X=1: kg mode (default)
X=2: Lb mode
2. P2 x Not available for this model
3. P3 x Baud rate setup
X=1: 9600 (default)
X=2: 4800
X=2: 2400
X=2: 1200

7
4. P4 x Not available for this model
5. P5 x Not available for this model
6. P6 x Power saving mode
X=1: No power saving
X=2: Power saving available
X=3: None
7. P7 x Zero-tracking Scope
X=1: 0.5e
X=2: 1.0e
X=3: 1.5e (default)
X=4: 2.0e
X=5: 2.5e
X=6: 3.0e
X=7: 3.5e
8. P8 x Zero key Scope
X=1: 2%FS
X=2: 4%FS
X=3: 10%FS (default)
X=4: 20%FS
9. P9 x Zero scope upon start
X=1: 2%FS
X=2: 4%FS
X=3: 10%FS (default)
X=4: 20%FS

8
10. P10 x Digital filtering intensity
X=1: Fast (default)
X=2: Middle
X=3: Slow
11. P11 x Stabile time
X=1: Fast (default)
X=2: Middle
X=3: Slow
12. P12 x Stabile extent
X=1: Low
X=2: Middle
X=3: High (default)
13. P13 x Select division value
X is division value
Press to select division value, then press
to confirm.
CALIBRATION
Turn on the crane scale first, then hold key
and power on the indicator
secondly, it enters calibration mode.
Step Operation Display Explanation
1
Press
to choose
division value (several times)
[d *]
Division value: 1, 2, 5, 10, 20, 50
optional, press
to confirm
e.g.: 2
2
Press
to choose
decimal point position
(several times)
[P *]
Decimal point optional: “0”,
”0.0”, ”0.00”, ”0.000”, press
to confirm. e.g.: 0.00

9
3 Setup F.S. [FULL ]
Input F.S.:Press
to choose
the digit bit; press
to select
the digit; press
to confirm
the input F.S. e.g.: 30000
4
Zero point calibration:
Press
when the stable
light is on
[noLoAd] Assure there’s no loading
5 Load standard weights.
6
F.S. calibration: (Press
directly if the value to be
input is same as F.S. when
stable light is on)
[AdLoAd]
Input weight of standard weights
loaded: Press
to choose
the digit bit; press
to select
the digit. Until the input value is
same as the loaded weight and
the digit bit is at the highest bit,
press
to confirm when the
stable light is on.
7 Calibration finished.
ERROR INDICATION
1 Err 1 AD value is too small when calibration.
2 Err 2 Zero point is out of range when calibration.
3 Err 3 Zero point is out of range when power on
4 Err 5 Weight input is 0 when full scale calibration
5 bAt-Lo Indicator out of battery, please charge!
6 Err 8 Mistakes in inputting F.S.
7 Err 10 Resolving capability is too high

10
8 Err 11 Load-cell problem
9 Err 13 Resolving capability is too high
10 Err 14 Damaged inside indicator
11 Loch Overload and locked
RECHARGEABLE LITHIUM BATTERY
Battery inside of scale is Lithium battery. Please charge it after running
down for 7 hours the first three times. Please charge the battery for timing
if not use it often.
The battery is an easily exhausted product. And it is not granted free
guarantee.
MAINTENANCE
1. To guarantee indicator clarity and using life, the indicator shouldn’t be
placed directly under sunshine and should be set in the plain space.
2. The indicator can’t be placed into the place where the dust pollution and
vibration are serious.
3. Load cell should connect with indicator reliably, and the system should
be well connected into ground. The indicator must be protected from
high electrical field and high magnetic field.
In order to protect the operator, indicator and relevant device, you should
mount lightning rod in thunderstorm frequently happening area.
• Load cell and indicator are static sensitive device, you must adopt
anti-static measures.
4. It is strictly forbidden to clean the case of indicator with intensive solvents
(for example: benzene and nitro oils).

11
5. Liquid and conducting particle should not be poured into the indicator,
otherwise the electronic components will be damaged and electric shock
is likely to happen.
6. You should cut off power supply of indicator and relevant device before
you pull –in and out the connecting line of indicator and external device.
• You must cut off power supply of indicator, before pulling out
connecting line of load cell.
7. During operation, if trouble occurs, operator must pull off the power
supply plug immediately, and user should return this indicator to our
company for repair.
Non-weighing manufacturer should not repair it, or by your-self,
otherwise further destruction may happen.
8. The storage is not granted the free repair guarantee, because it is easily
exhausted products.
• In order to prolong using life, please charge the cell fully before using
it. If you don’t use the indicator for a long time, you must charge the
cell every two month and for eight hours/each charging time.
• Moving or installation must be carefully taken and must avoid strong
vibration, impact and bump in order to protect the storage cell from
being damaged.
9. From invoice date, the indicator has a one-year free repair period. If any
non-artificially obstacle about the indicator happens under correct using
conditions within this period. The user is allowed to send the product
with its guarantee card (of the correct number).
Back to our corporation for free repair. The indicator shouldn’t be taken
apart, otherwise free guarantee will be cancelled.

12
GUARANTEE
This balance is guaranteed for one year from the delivery date. The guarantee
covers any fabrication defect of the material.
During this period, GRAM PRECISION, SL, covers the manpower and the
spare parts necessary to repair the scale.
This guarantee does not cover the failures caused by an inappropriate use
or overload.
The guarantee does not cover the freight cost (transport) necessary to
repair the balance.

13
NOTES

14
NOTES

15
NOTES

Gram Precision S.L.
Travesía Industrial, 11 · 08907 Hospitalet de Llobregat · Barcelona (Spain)
Tel. +34 902 208 000 · +34 93 300 33 32
Fax +34 93 300 66 98
comercial
@gram.es
www.gram-group.com
003/19072018
 Loading...