

GRAMPIAN 34 Owner's Manual
GRAMPIAN 34 OWNER’S MANUAL

Table of Contents
Introduction 1
Launching and Commissioning 2
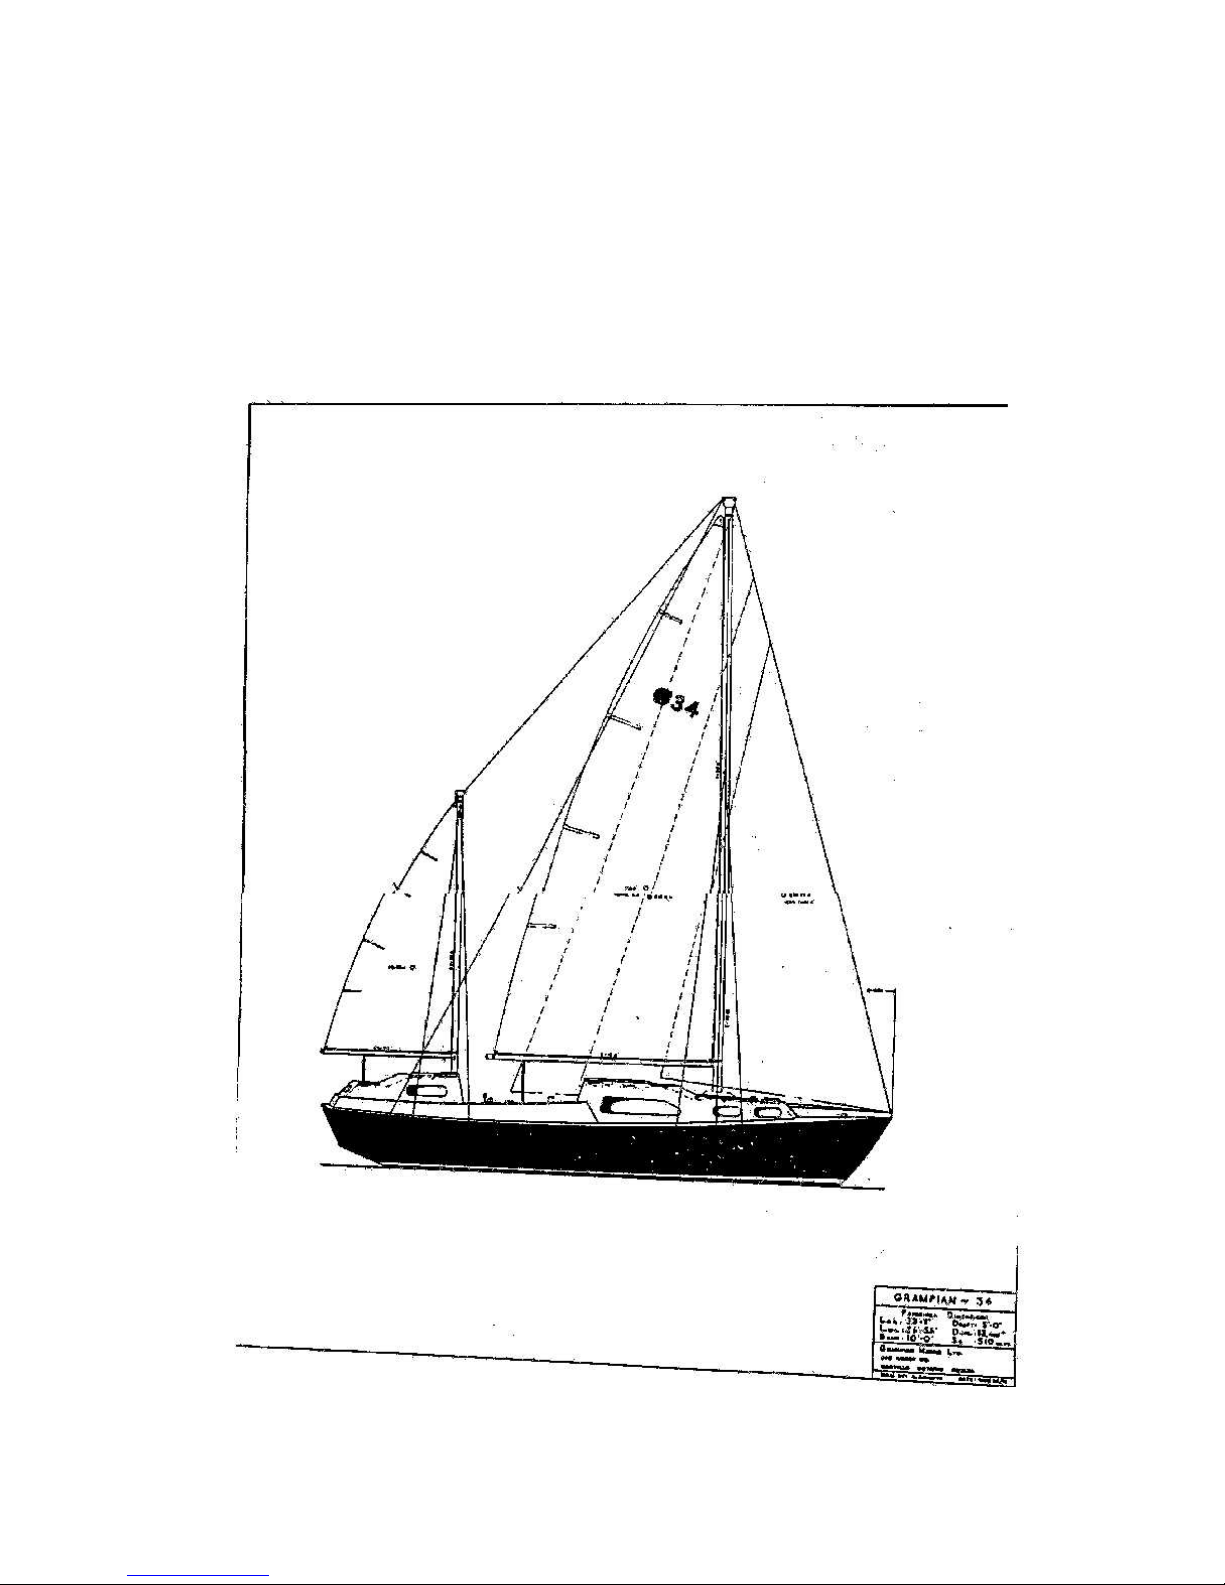
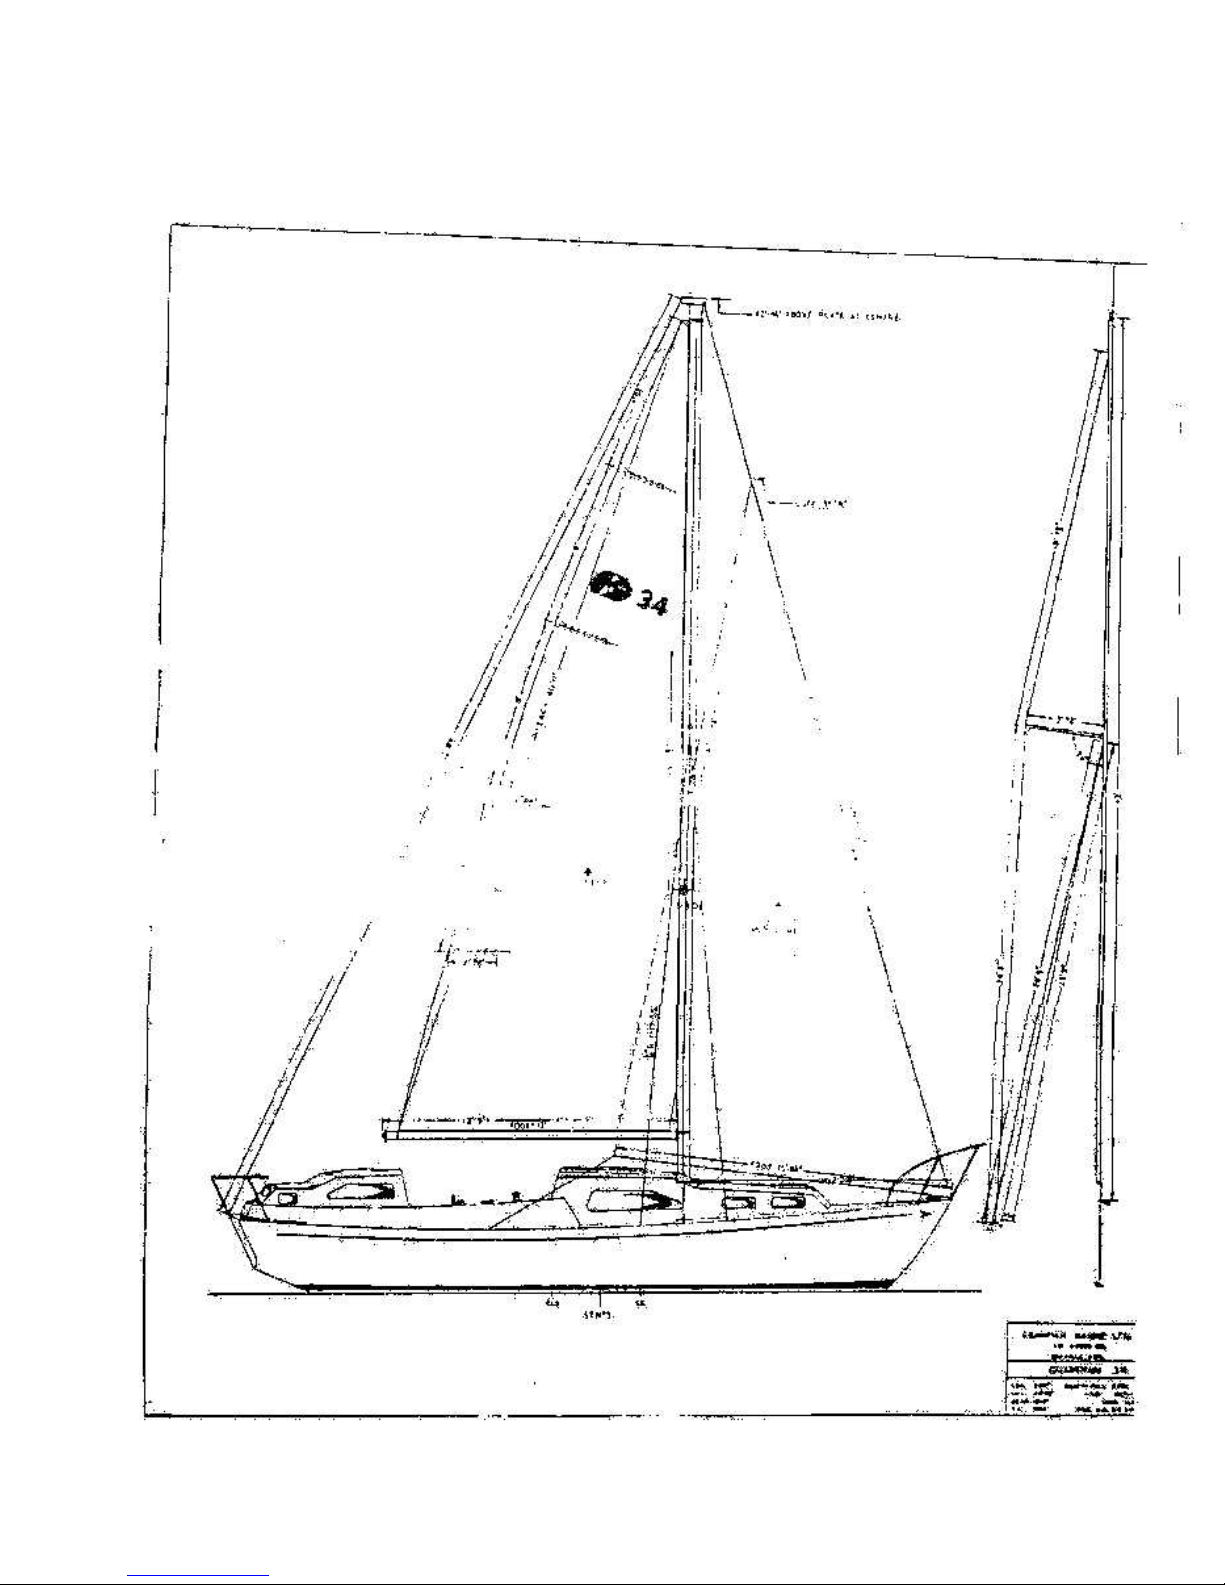
Rigging 3
Winter Storage and Commissioning 6
Sails 7
Storing Sails 11
Electrical 12
Plumbing 15
Steering & Centerboards 18
Care of Interior & Exterior Wood 20
Care & Maintenance of Fiberglass 21
Windows - Cleaning & Maintenance 22
Tuning 23

1.
INTRODUCTION
The purpose of this manual is to acquaint owners with some of the features of
their Grampian sailboat and to offer assistance and advice concerning the
upkeep and maintenance of their boat.
While all boats in the Grampian line are extremely well equipped and are ready
for sailing, they may require minor adjustments at different times. This booklet
should be of assistance in making these adjustments.
This manual covers the plumbing and electrical systems, gelcoat maintenance
and repair, the upkeep of woodwork and the nature of rigging and sails. It also
endeavours to describe, in simple terms, the procedures to be followed in the
launching and rigging of a Grampian.
Although much of this information may be common knowledge, there are many
"tips" which should be useful to the experienced sailor and the newcomer alike.
We hope you enjoy reading about your Grampian, and if there is something you
need to know concerning your boat that the manual does not cover, please feel
free to give us a call, (416) 221-1419.

2.
LAUNCHING and COMMISSIONING
The following procedure is recommended for launching either for the first time or
after winter storage.
1. Lifting straps should be placed in front of and behind the keel. Care should be
taken to ensure that the straps are not twisted. When the tension is taken up by
the crane, is should be done slowly to ensure that the strays do not bear against
any sharp edges or rub against the lifelines stanchions or other non-structural
parts of the boat. These items can easily be bent twisted or broken by the
stresses generated during the launch
Warning: Under no circumstances should the straps be allowed to rest on the
propeller, shaft or bearing.
2. Attach long mooring lines to deck cleats at the bow and the stern. These can
be used to steady the boat when it is in the air and of course, secure it to the
dock when it is in the water. Fenders should also be attached to the side at the
boat which will be resting against the dock when it is lowered into the water.
3. Care should be taken to ensure that all sea cocks and gate valves are closed.
This will prevent leakage when the boat is launched and they can be opened
shortly thereafter to ensure: that all hose clamps and plumbing connections are
tight.
4. Launching is a good time to touch up those spots which were missed during
bottom painting, especially those spots which were covered by the cradle pads.
5. Lift and launch the boat. When it is in the water, unhook each lifting strap from
one side and carefully hold them away from the boat while the crane lifts them
out of the water. (Be careful not to unhook both sides the lifting straps or you may
have a number of fellow boaters somewhat annoyed with you.)
6. If you intend to move the boat away under its own power, either inboard or
outboard, check the owner’s manual and see engine section of this manual.
Ensure that the procedure for start-up and operation are followed thoroughly.
7. At this point you are ready to rig your boat
3.
RIGGING

4.
RIGGING
Each piece of the standing and running rigging is carefully marked and packed
for each new boat. The following is the procedure for rigging your Grampian.
1. Place the mast on trestles or wooden boxes.
2. Feed the jib halyard over the sheaves at the top at the mast on the
same side of the mast as the jib halyard winch, with the rope tail on
the aft side of the mast. This is usually the port side.
3. Feed main halyard over the sheave on the other side of the mast, this
time with the rope tail on the forward side of the mast (usually the
starboard side of the mast).
4. Topping lift - the purpose of the topping lift is to support the boom
when the sails are lowered. There are three types of topping lifts in
use for Grampians. See drawing for type used in your boat and attach
as shown in drawing.
5. Fix lower shrouds to their respective tangs. The Grampian 30 has four
lower tangs - two forward, two aft. All others models have two.
6. Attach the main shrouds to the tangs at the top and side of spar.
7. The forestay is attached to the toggle on the forward side of the mast
head fitting.
8. The back stay is attached to the aft toggle.
9. Remove the locking pins/split rings from the turnbuckles and remove
the clevis pins. Keep the locking pins and clevis pins handy to
the mast when it is lifted in place. The turnbuckles should be opened
halfway and should all turn in the same direction when they are being
tightened.
10. Attach the spreaders to the mast and put the main (upper) shrouds in
the grooves in the spreaders. Tape and cover the spreaders at the
mast and at their outboard ends. This will reduce chafing and possible
tearing of the sails. Note: Although more expensive, we recommend
rigging tape. It adheres to itself and can be removed easily without
leaving any trace.
11. If a Wind indicator is required, install at this time.
12. Attach the backstay to the chainplate at the back of the boat
13. If a crane is being to used to step the mast a large rope or strap
should be placed under the spreaders around the mast. A line should
be attached to the strap which can be used to pull it clear when the
mast is stepped.
14. Lift the mast into place and secure in place with standing rigging.
15. Attach forestay first and then secure upper shrouds. Lower shrouds
can be secured as soon as mast lifting strap has been removed.
16. When all clevis pins have been secured with locking pins/split rings,
tape around pins to eliminate the possibility of tearing or chafing of
sails.
17. Tighten rigging (see section on "Mast Tuning").
18. Attach boom and main sail.
secure


6.
WINTER STORAGE AND SPRING COMMISSIONING:
Preparing your Grampian for winter storage is perhaps more important than
spring commissioning. The more time spent cleaning and preparing the boat for
the winter storage, the less time required for commissioning in the spring. In
addition the boat will winter better and not age as quickly, it is recommended that
these procedures be followed for winter storage:
1. The Grampian should stand on its cradle or rest on blocks under its
keel and braced fore and aft.
2. The engine should be winterized according to the engine manual and
stored in a dry location, if it is an outboard
3. All moisture in the boat should be removed. It should be sponged out
of the bilge if necessary. This is especially important because
fibreglass will over time absorb any water with which it comes in
contact
4. Clean all interior fibreglass & dirt, grease and other foreign subsubstances. This will help prevent the interior fibreglass from
becoming stained or marked.
5. Remove all batteries, re-charge and store in dry location.
6. Pump out and drain head and related plumbing.
7. Empty water tank and related plumbing.
8. Ensure that the boat is properly ventilated. Do not close all hatches
and restrict the circulation & air.
9. Cover the boat with a cover supported by a ridge pole. This can be a
frame system made of wood or PVC pipe and fittings or the mast. If
the mast is used, it must be supported and well covered in order to
prevent damage to the mast and to keep it dry.
10. Store the mast in dry place. Spreaders should be removed, but
standing and running rigging may be left attached to the mast.
In the Spring:
1. Clean deck and bull and thoroughly wax hull. The latter will help
prevent the ultra violet rays of the sun from chalking and discolouring
the hull.
2. Clean and oil all teak (see section on care of wood).
3. Touch up or re paint bottom as necessary (see section on bottom
painting).
4. Carefully examine rigging, stuffing box and all mechanical gear for
wear and replace if necessary. Much of this can be done after the
boat goes in the water with the exception of the stuffing bar.
 Loading...