

Page 1

SERIES / SERIE / SÉRIE
AHV
AH-300V / AH-600V
AH-1500V / AH-3000V
OPERATION MANUAL
MANUAL DE UTILIZACION
MANUEL D´UTILISATION
Page 2

INDEX English
Precautions before using the balance 8
Name and type of the instrument 9
Keys and display description 9
Keys function 10
Display 11
Function 11
Power-Up 12
Weighing mode 12
Display range 12
Zero-Setting 12
Semi-automatic zero-setting 12
Zero-tracking 12
Initial zero-setting 13
Tare 13
Semi-automatic tare 13
Units selection 14
Overload alarm 14
Counting mode 14
Percentage weighing mode 15
Parameters set-up 16
Span calibration 17
Initial unit 18
Available units 19
Auto-shut off time 19
Transmitting mode 20
Baud rate 21
Data bits 22
Stable range 23
2
Page 3

Zero display range 23
Unit weight re-computing in counting mode 24
Blacklight type 24
Auto simple calibration 25
Recovery of the default values from memory 25
Specification of output interface 25
Error messages 27
Technical data 27
Guarantee 28
3
Page 4
ÍNDICE Español
Precauciones antes de utilizar la balanza 29
Descripción del teclado y del display 30
Funciones de las teclas 30
Display 31
Alimentación 32
Puesta en marcha 32
Modo pesaje 32
Rango del display 32
Ajuste del cero 33
Configuración del cero Semi-automática 33
Seguimiento del cero 33
Configuración del cero inicial 33
Tara 34
Tara semi-automática 34
Selección de unidades de pesada 35
Aviso de sobrecarga 35
Función cuentapiezas 35
Función de porcentajes 36
Configuración de parámetros 37
Calibración span 38
Configurar la unidad de pesada principal 39
Activar / desactivar unidades de pesada 40
Configuración de la auto-desconexión 41
Configuración del modo de transmisión 41
Configuración de la velocidad de transmisión 42
Configuración Data Bits 43
Configuración del rango de estabilidad 44
Configuración del rango de cero 44
4
Page 5

Selección del peso unitario 45
Configuración iluminación del display 46
Calibración rápida 46
Recuperación de los valores por defecto 47
Especificaciones del interface 47
Mensajes de error 48
Datos técnicos 48
Garantía 50
5
Page 6
SOMMAIRE Français
Precautions avant d’utiliser la balance 51
Description du clavier et de l’affichage 52
Fonctions des touches 52
Affichage 53
Alimentation 54
Mise en marche 54
Mode pesage 54
Plage d’affichage 54
Réglage du zéro 55
Paramétrage du zéro Semi-automatique 55
Suivi du zéro 55
Paramétrage du zéro initial 55
Tare 56
Tare semi-automatique 56
Sélection des unités de pesée 56
Avis de surcharge 57
Fonction compte-pièces 57
Fonction de pourcentages 57
Configuration de paramètres 59
Calibracion span 59
Paramétrer l’unité de pesée principale 61
Activer / désactiver des unités de pesée 61
Paramétrage de l’auto deconnexion 62
Paramétrage du mode de transmission 63
Paramétrage de la vitesse de transmission 64
Paramétrage data bits 65
Paramétrage du rang de stabilité 66
Paramétrage du rang de zéro 66
6
Page 7

Sélection du poids unitaire (Pour fonction compte-pièces) 67
Calibrage rapide 68
Récupération des valeurs par défaut 68
Spécifications de l’interface 68
Messages d’erreur 70
Données techniques 70
Garantie 71
7
Page 8

ENGLISH
PRECAUTIONS BEFORE USING THE BALANCE
For safe and dependable operation of this balance, please comply with the
following safety precautions:
• Verify that the input voltage printed on the AC Adapter and the plug type
matches the local AC power supply.
• Make sure that the power cord does not pose a potential obstacle or
tripping hazard.
• Disconnect the scale from the power supply when cleaning the scale.
• Do not operate the scale in hazardous or unstable environments.
• Do not immerse the scale in water or other liquids.
• Do not drop loads on the platform.
• Use only approved accessories and peripherals, as available.
• Operate the scale only under ambient conditions specified in these
instructions.
• Service should be performed by authorized personnel only.
• It must not be bumped against by other items or overloaded with
excessively heavy weights (The load must not exceed the maximum
capacity of the balance).
• Give a warm-up for 30 mins before using the scale.
8
Page 9
NAME AND TYPE OF THE INSTRUMENT
The HT-NA model weighing balance is a self-indicating weighing scale of
Class II with single weighing range, an external AC mains adapter, and an
internal rechargeable battery.
The balance consists of analogue to digital conversion, microprocessor
control, power supply, keyboard, and a weight display contained within a
single enclosure.
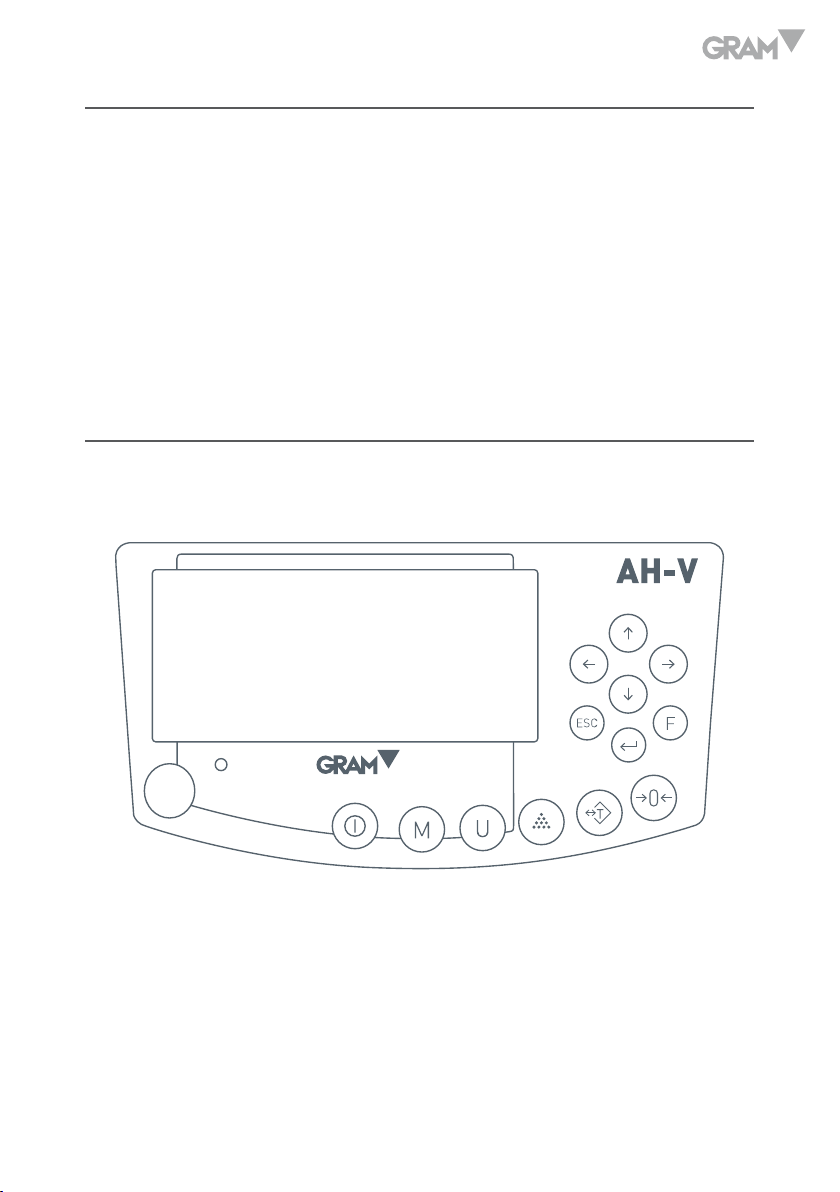
KEYS AND DISPLAY DESCRIPTION
The balance is equipped with 13 keys membrane keypad to control the
functions and also the ON/OFF of the balance.
9
Page 10
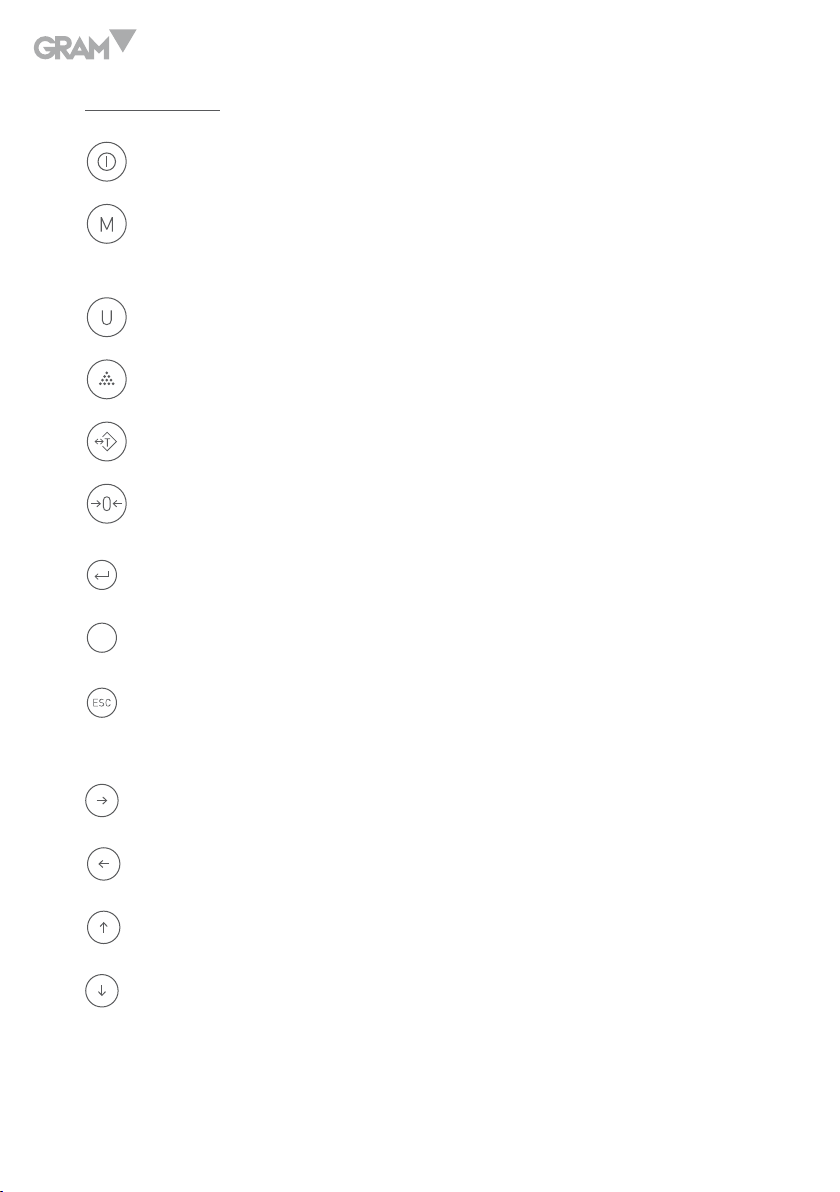
Keys function
ON/OFF switch.
Function key to choose weighing, parts counting and percentage
weighing.
Units selection (8 units are available).
To take samples in parts counting mode or percentage weighing mode.
To subtract the container’s weight.
To return the display to “0”.
Confirmation key and print key.
F
To enter into setup mode (User Programming Setting).
To return to last menu or exit Setup Mode; extend one more digit for
the current display for 5 seconds.
Move to left.
Move to right.
Page up (Increase value).
Page down (Decrease value).
10
Page 11
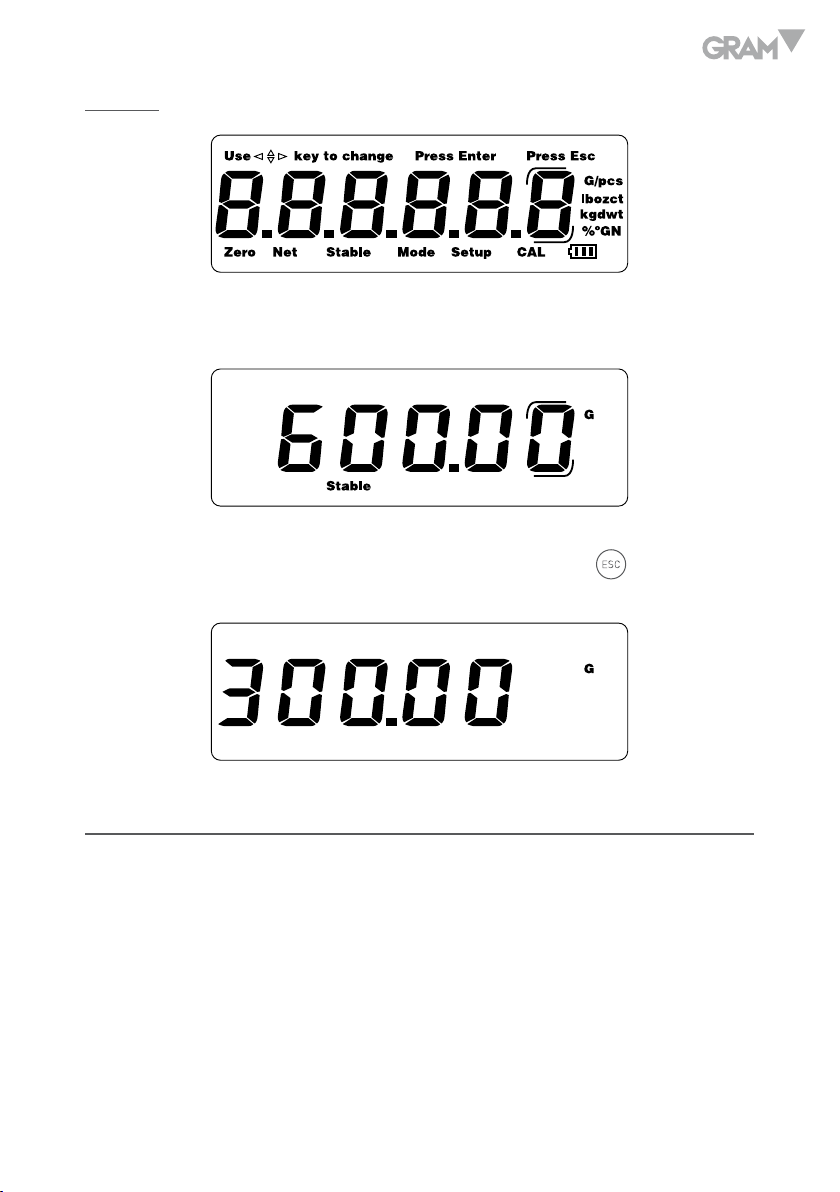
Display
When the Capacity of the balance is 600.0g, the last digit will be the auxiliary
display digit (a symbol indicating the digit):
When the Capacity of the balance is 150.00g, 300.00, 1500.0 and 3000.0g, the
last digit will be blank in normal weighing mode only if the key is pressed
to extend the display.
FUNCTION
The balance can be available for operation from mains at 110~240V (50/60Hz)
with an external AC/DC adapter with 12V output voltage and an optional
internal 6V rechargeable battery.
11
Page 12

POWER-UP
When power up the balance, the display will first show the software version
(Ver. 1.00) for 2 seconds and then perform a self display test. Then it will
show the Calibration counting times for about 1 second. After that it will
automatically establish the current weight as a new zero reference point.
WEIGHING MODE
Display range
The display can show weight from –Max (Tare weight) to Max+9e (Gross
weight).
Zero-Setting
Zero-setting range: ±2% of Max
Zero-setting is only available when the load receptor is not in motion (The
display is stable).
Semi-automatic zero-setting
When there is a minor weight displayed (without load on the pan), press
key to return to the display to zero, then the Zero symbol appears which
indicates that the display now is at the zero point.
Zero-tracking
The instrument is equipped with a zero-tracking feature which operates at a
12
Page 13
speed of ±0.25e/s and only when the indicator is at gross zero and there is no
motion in the weight display.
Initial zero-setting
Initial zero-setting range: ±10% of Max
When the initial zero-setting range is below -10% of Max, the display shows
“-------” and the buzzer sounds. To return the display to normal mode,
please adding more weights until the initial zero-setting range is between
±10% of Max.
When the initial zero-setting range is beyond +10% of Max, the display shows
“-------” and the buzzer sounds. To return the display to normal mode, please
take off weights until the initial zero-setting range is between ±10% of Max.
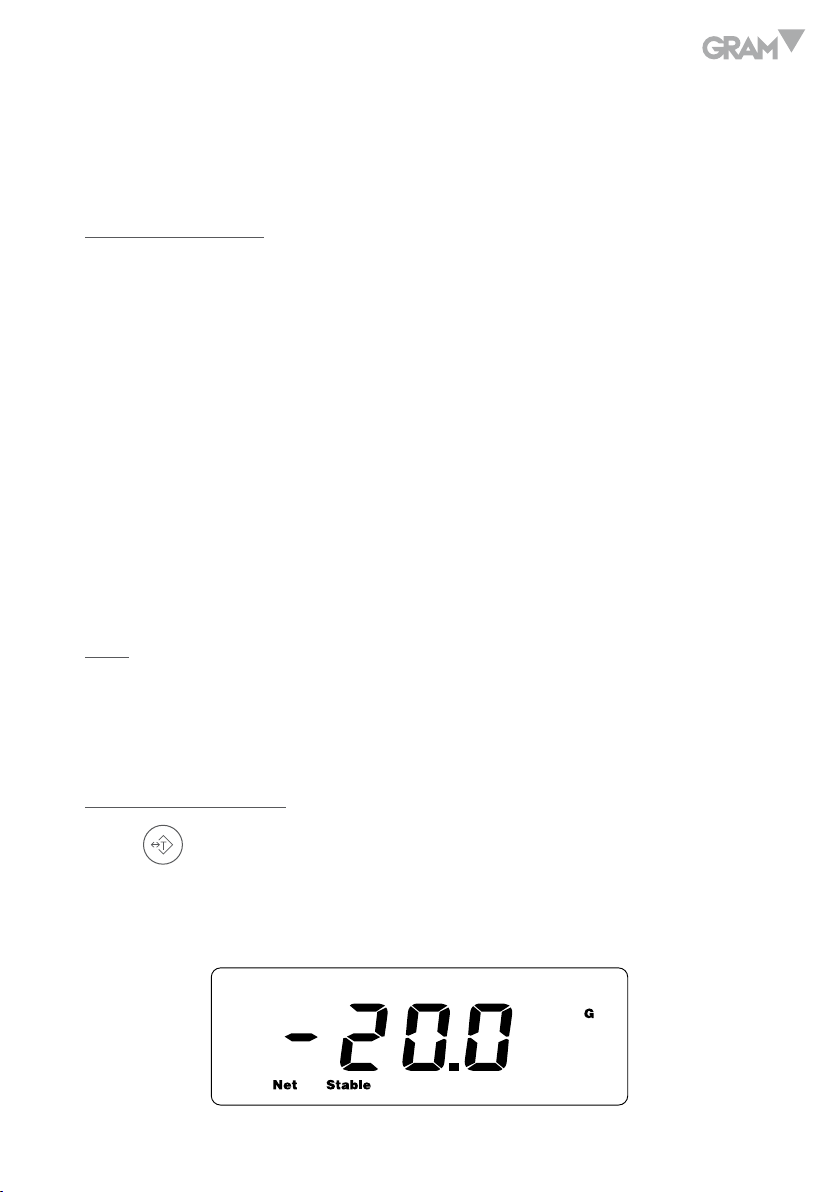
Tare
The instrument is provided with a semi-automatic subtractive tare.
Semi-automatic tare
Press
weight value (Consecutive tare operations are permitted). The NET symbol
appears and the display will show a net weight of the object to be weighted.
key to subtract the current displayed weight value as the tare
13
Page 14
To clear the tare value, please remove the container on the pan, then the
display will show a minus tare weight value and press
Note:
1. When performing the tare operation(s), make sure the instrument is in stable.
2. If consecutive tare operations have been performed, to clear the tare value,
please remove all the containers on the pan first and then press
3. Tare range is the full capacity of balance for all models.
key again.
key.
Units selection
Press the key to choose the weighing units and the display will be
changed to the new value with the units shown. There are up to 8 units of
weight that can be enabled.
Overload alarm
When the weight on the pan exceeds the Max. capacity, the display will show
“--OL--” at the same time the buzzer sound. Please take off the weight at
once. Otherwise the load cell will be easy to be damaged.
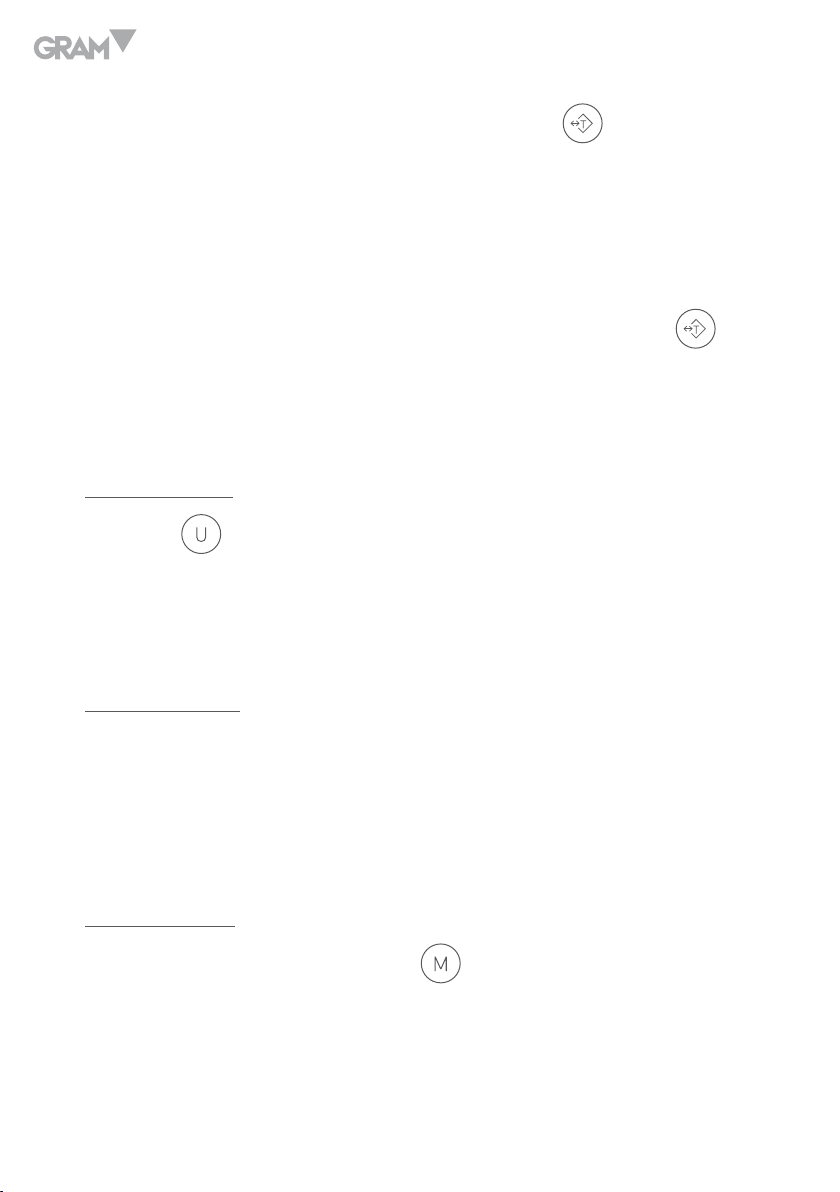
Counting mode
In normal weighing mode, press the
mode. The display shows as below:
14
key to enter into parts counting
Page 15
Press
key or key to choose the sample size (10, 20, 50, 100, 200,
500 and 1000 pcs).
After a desired sample size has been chosen, put the samples as the chosen
sample size on the pan and press the
key. Then the “Mode” symbol
starts flashing and the “C” disappears.
Then the sampling procedure is finished. And the balance can be used for
parts counting.
Note: If the unit weight is two small (less than 0.2 scale division), the display
will show “- -or- -pcs”.
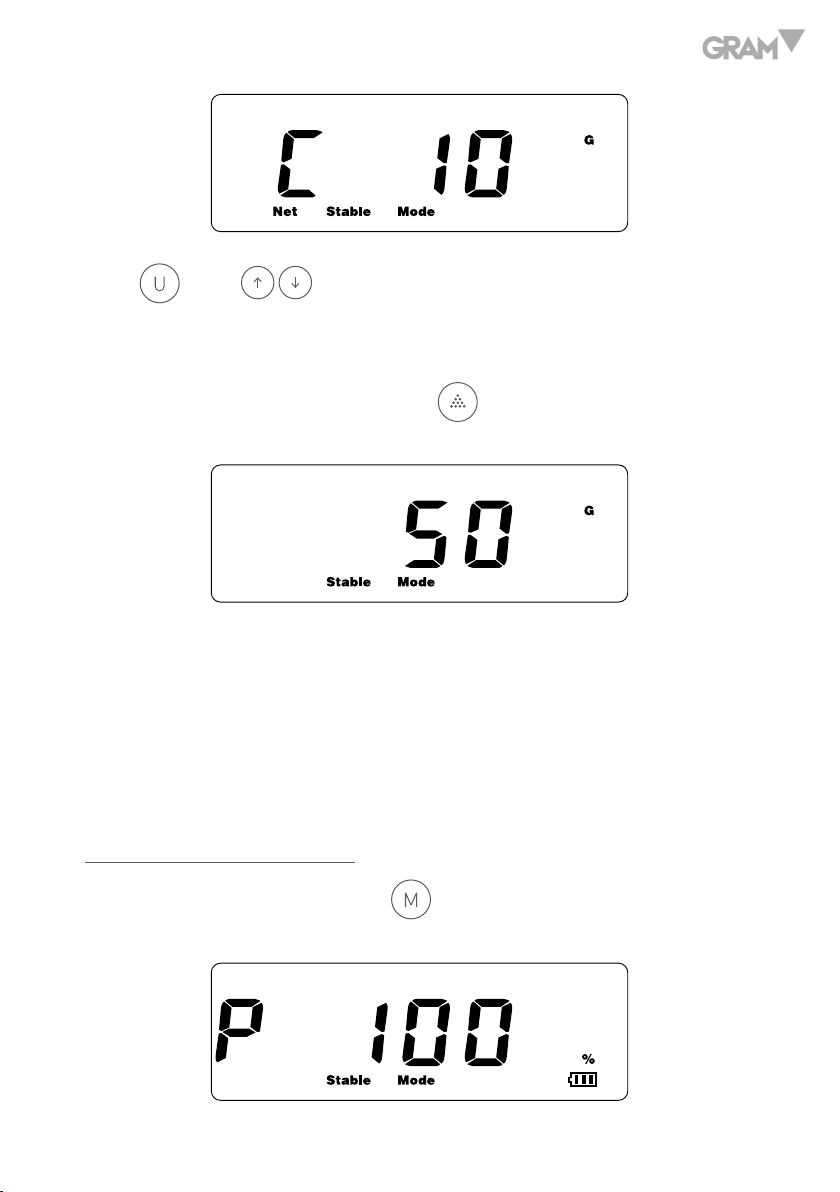
Percentage weighing mode
In normal weighing mode, press
weighing mode.
key twice to enter into percentage
15
Page 16
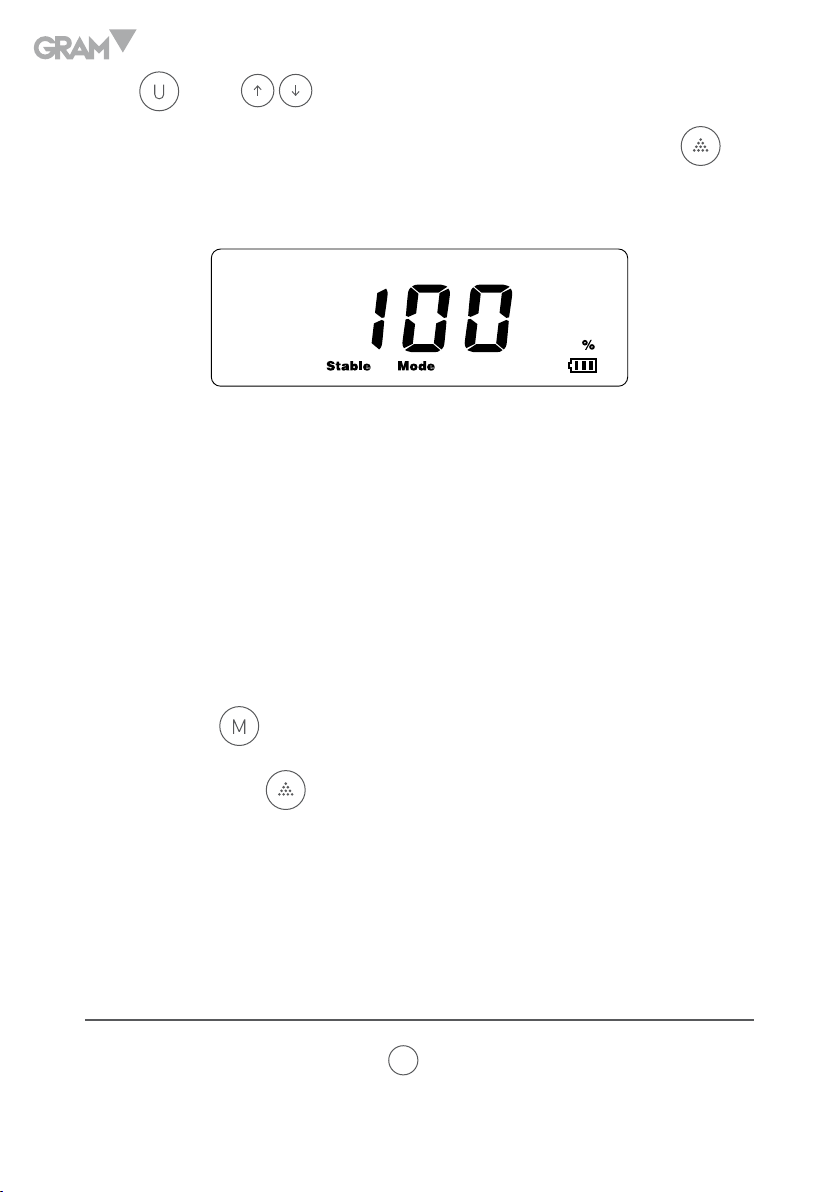
Press
key or key to switch between 100.0% or 100.00%.
Put the sample considered to be 100% on the pan, and then press the
key
to perform sampling process. Then the “Mode” symbol starts flashing and
several seconds later, the “Mode” symbol and “P” disappears.
Then the sampling procedure is finished. Take away the sample and put
other objects on, the display will show a percentage (the objects’ weight to
the 100% sample weight).
• The sample weight considered to be 100% should be larger than 0.2d,
or the display will show “- -or- -%”, which indicates that larger sample
weight should be put on.
Note:
1. Press the
key after the sampling procedure (parts counting or
percentage weighing) is finished, it will return to normal weighing mode.
Then press the
key, the balance will return to parts counting or
percentage weighing mode again; and the sampling data can also be used.
2. The sampling data will be cleared automatically when after switching
between counting mode and percentage weighing mode.
PARAMETERS SET-UP
In normal weighing mode, press
mode. The “Setup” message appears.
16
F
key to enter into parameters set-up
Page 17
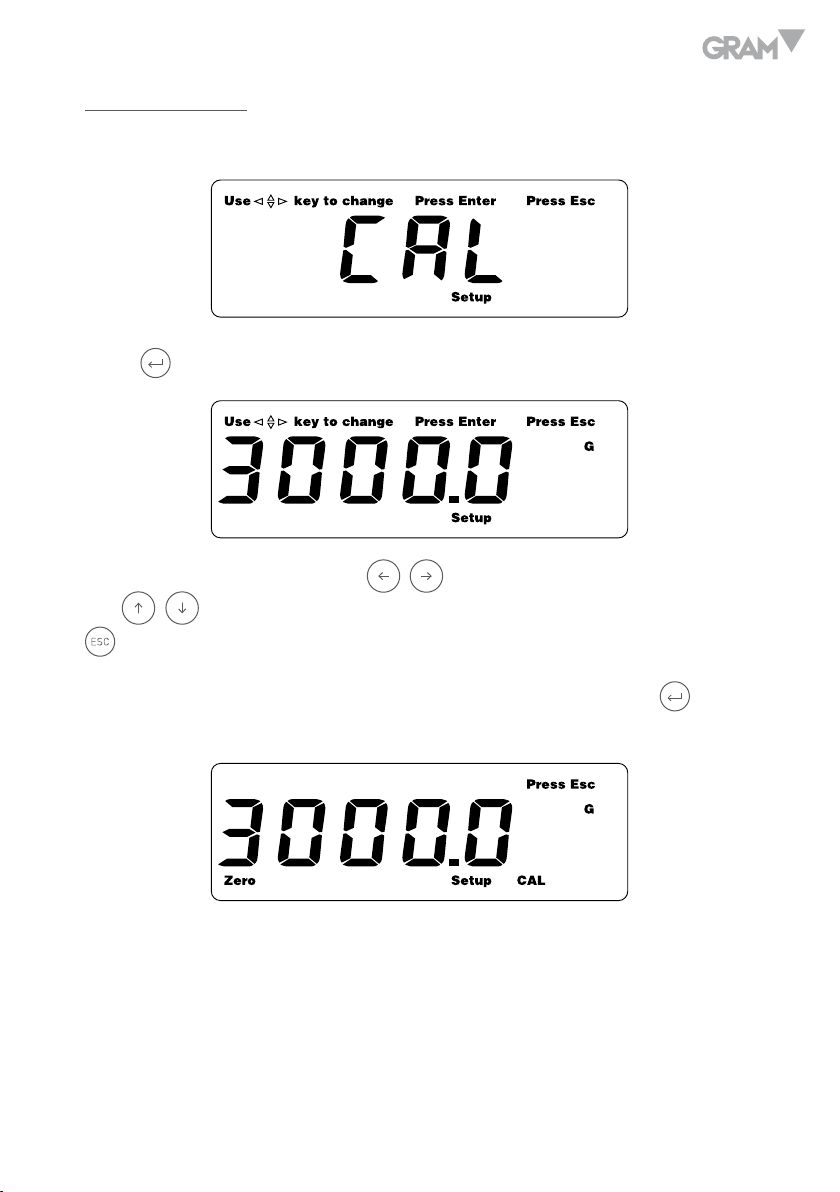
Span calibration
Display shows:
Press
To key the calibration value, use
key to enter into the parameter.
,
keys to move from digit to digit and
use , keys to increase or decrease the value of each digit. (Press the
key to return to last step).
After the desired calibration value has been keyed, press the
key to
confirm and enter into calibration procedure. The display will show:
Put the mass with weight the same as the display showing on the pan, when
the display is stable, the balance will return to normal weighing mode. The
calibration procedure is finished.
• Calibration weight value: Any weight over 10% full capacity can be keyed
in as calibration weight value. (Weight over half capacity is recommended
17
Page 18
to be calibration weight value for precise accuracy).
• During calibration procedure, press
key to return.
• After calibration procedure is finished, the balance will return to normal
F
weighing mode. Then press
key to enter into “Parameters setup”
mode again.
• Check “Section 5” for more information about calibration.
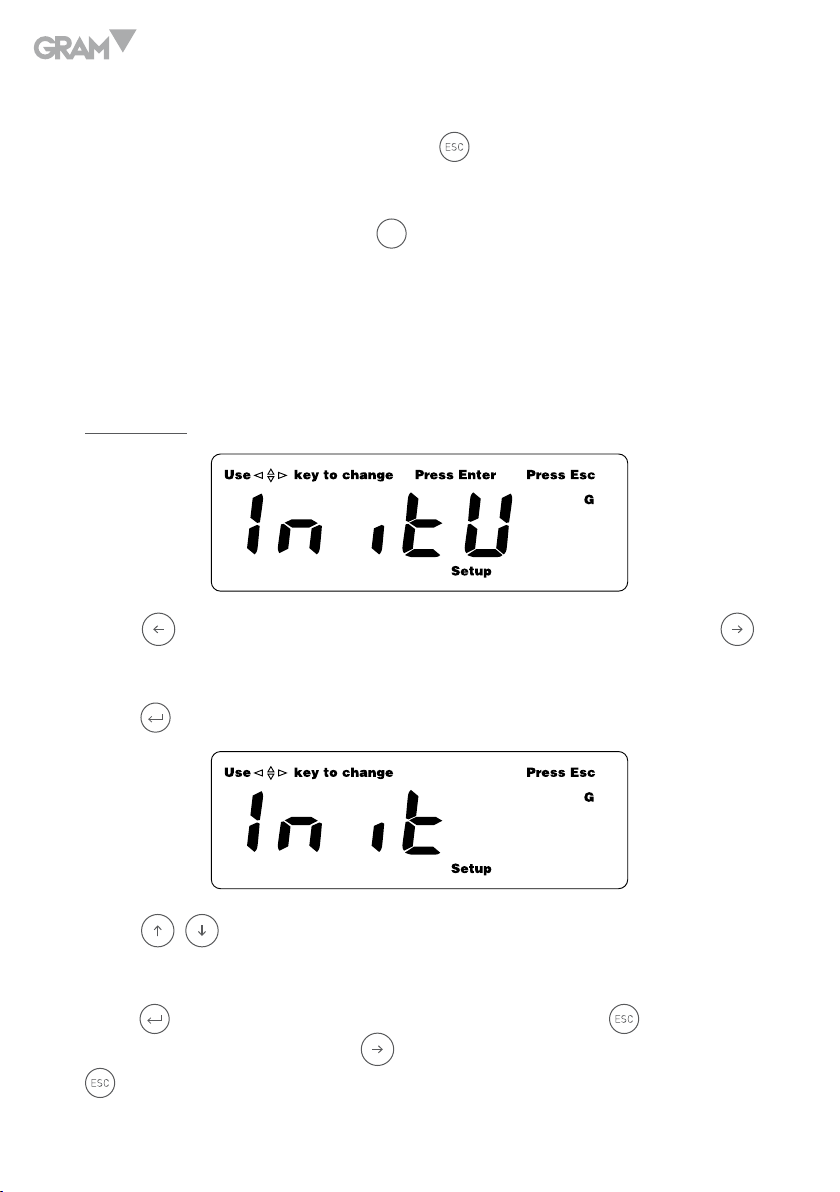
Initial unit
Press
key to move to parameter “InitU“ (Initial unit weight).
Press
key to move to parameter “CAL” (Span calibration) or press
key to enter into the parameter.
Press
, keys to choose the unit, which can be chosen from g, t, dwt,
oz t, GN, oz and ct. (Default: g).
Press
key to confirm the unit you have chosen and press key to return
to parameter menu. Press the key to move to next setting or press the
to return to normal weighing mode.
18
Page 19

Available units
Press key to move to parameter “InitU“ (Initial unit weight) or press the
key to move to parameter “Unit” (To choose available units).
Press
Press
key to enter into the parameter.
key or and keys to choose the unit; press or keys
to set it to be on or off. (Default: all units to be on).
Press
key to confirm your setting and press key to return to parameter
menu. To move to next setting press the key. To return to normal weighing
mode press the key.
Auto-shut off time
19
Page 20
Press key to move to parameter “Unit” (To choose available units) or press
key to move to parameter “A.OFF” (To choose auto-shut off time).
Press
Press
key to enter into the parameter.
,
keys to choose from 2m, 5m, 8m or No (auto. shut off is
unavailable). (Default: No).
Press
key to confirm your choice and press
key to return to
parameters menu. To move to next setting press the key. To return to
normal weighing mode press the key.
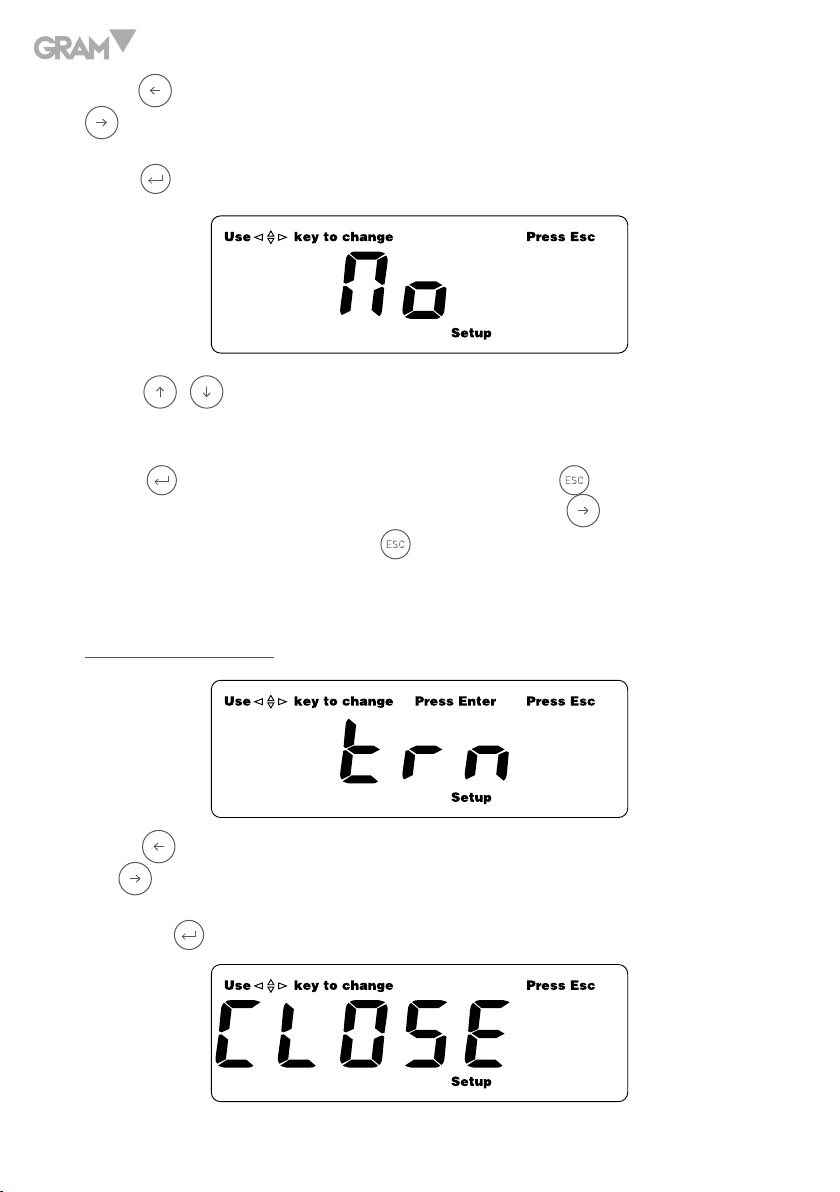
Transmitting mode
Press
key to move to parameter “A.OFF” (auto-shut off time) or press
the key to move to parameter “trn” (transmitting mode).
Press the
20
key to enter into the parameter.
Page 21

Press ,
keys to choose the transmitting mode from MA-LP, St-LP,
MA-Dt, St-Dt, MA-PC, St-PC, P-CONt, CLOSE, DISP. (Default: MA-LP).
CLOSE: Transmitting is unavailable.
P-CONt: The data will be transmitted continuously.
St-PC: When the display is stable, it will be transmitted to PC automatically.
MA-PC: When the display is stable, it can be transmitted to PC by pressing a key.
Press
key to confirm your choice and press
key to return to
parameters menu. Press the key to move to next setting. To return to
normal weighing mode press the key.
Baud rate
Press key to move to parameter “trn” (transmitting mode) or press the
key to move to parameter “rAtE” (to choose baud rate).
Press
key to enter into the parameter.
Press
, keys to choose the baud rate from 1200, 2400, 4800 and 9600.
(Default: 9600).
21
Page 22
Press key to confirm your choice and press key to return to parameters
menu. To move to next setting press the key. To return to normal weighing
mode press the key.
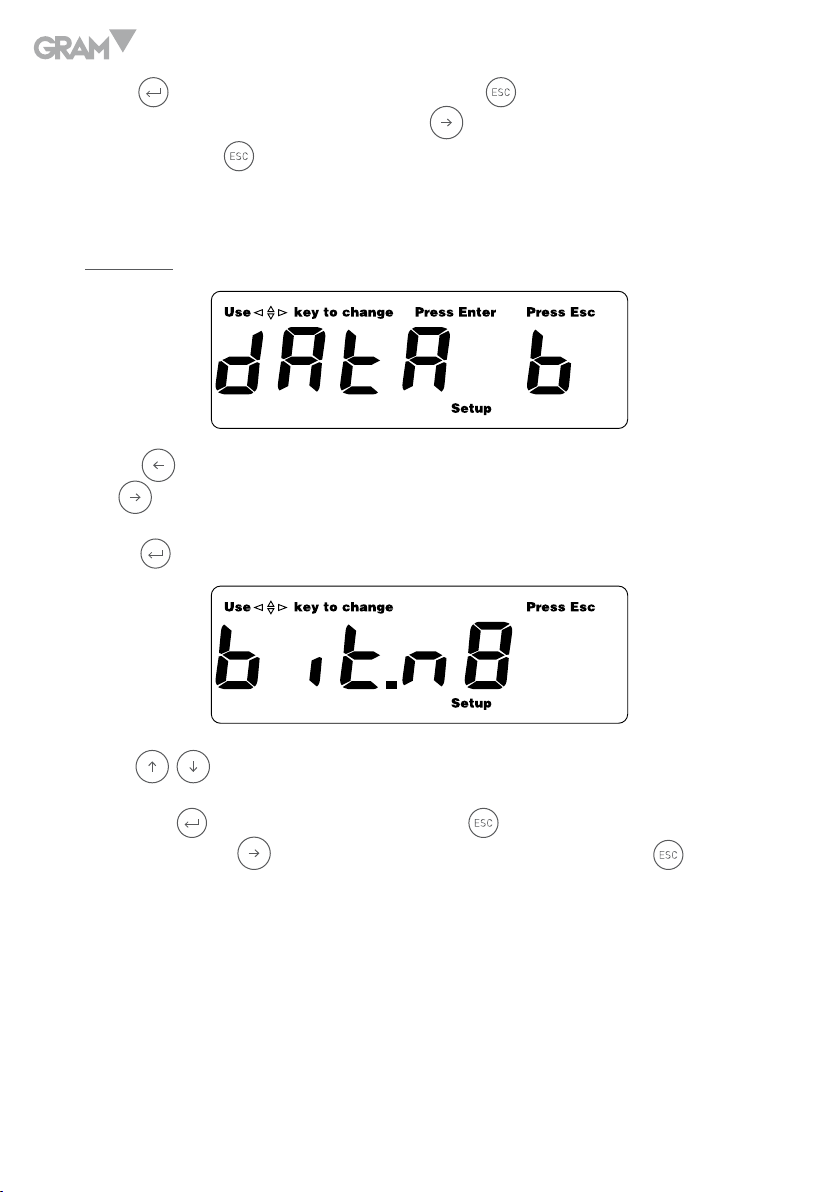
Data bits
Press
key to move to parameter “rAtE” (to choose baud rate) or press
the to move to parameter “dAta b” (To choose data bits).
Press
Press
Press the
key to enter into the parameter.
, keys to choose the data bits from bit. N8 or bit. E7. (Default: bit. N8).
key to confirm and then the key to return to parameters
menu. Press the to move to next setting or press again the to back
to normal weighing mode.
22
Page 23

Stable range
Press key to move to parameter “dAta b” (To choose data bits) or press
the to move to parameter “Fil05” (To choose stable range).
,
Press
(The larger the number you choose, the wider the range is).
keys to choose the stable range from 01 - 15. (Default: 05).
Press
key to confirm your choice and press
key to move to next
setting.
To return to normal weighing mode press the
key.
Zero display range
Press key to move to parameter “Fil05” (To choose stable range) or press
the key to move to parameter “Zero1” (To choose zero display range).
Press
(The larger the number you choose, the wider the range is).
, keys to choose the zero display range from 0-3 (d). (Default: 1 d).
Press key to confirm your choice and then press key to move to next setting.
To return to normal weighing mode press the key.
23
Page 24

Unit weight re-computing in counting mode
Press key to move to parameter “Zero1” (To choose zero display range)
or press the to move to “A.C Y” (to choose unit weight in counting mode).
Press
Press
, key to choose it from y or n (yes or no). (Default: y).
key to confirm your choice and then press key to move to next
setting; press key to exit.
Blacklight type
Press key to move to parameter “A.C Y” or press the key to move to
parameter “Bl.1” (to choose backlight type). Press ,
the backlight type from 1, 2 and 3. (Default: 1)
1. The backlight will be on automatically when a load exceeds 10e on
the pan or pressing a key.
2. The backlight will always be on.
3. The backlight will always be off.
keys to choose
Press
key to confirm your choice and then press key to move to next
setting; press key to exit.
24
Page 25

Auto simple calibration
Press key for about 3 seconds and the display will show a “calibration
weight value”.
Put the weight exactly the same with the display value on the pan. When the
“CAL” flashing at the lower right disappears, the Calibration procedure is
finished.
Recovery of the default values from memory
In normal weighing mode, hold down the
F
key for 3 seconds. Then the
balance will be recovered with a default calibration values.
SPECIFICATION OF OUTPUT INTERFACE
Mode: EIA-RS-232 C’s UART signal, or USB signal
Format:
Baud rate: 1200-9600 BPS
Data bits: 8 bits/ 7 bits
Parity bit: none/Even
Stop bit: 1 bit
Code: ACSII
RS232 connector is a 9-pin D-subminiature socket.
25
Page 26

Input Pin 2
Output Pin 3
Signal Ground Pin 5
Data Format:
H1 H1 , H2 H2 , D D D D D D D D U U U U CR CR
Head 1 Head 2 Data Unit CR LF
HEAD 1 (2 BYTES) HEAD 2 (2 BYTES)
OL – Over Load
ST – Stable NT – Net Weight
US – Unstable GS – Gross Weight
DATA (8 BYTES)
2D (HEX) = “-“ (LESS)
20 (HEX) = ” “ (SPACE)
2E (HEX) = ”.” (DECIMAL POINT)
g-20 ( HEX ) ; 20 ( HEX ) ; 20 ( HEX ) ; 67 ( HEX )
lb-20 ( HEX ) ; 20 ( HEX ) ; 6c ( HEX ) ; 62 ( HEX )
Ti.T-74 ( HEX ) ; 6C ( HEX ) ; 2E ( HEX ) ; 54 ( HEX )
Command (char) Keys
M, m Mode
C, c PCS
Z, z Zero
S, s Setup
8
4
26
UNIT (4 BYTES)
Command (char) Keys
U, u Units
T, t Tare
P, p Enter / Print
E, e ESC
2
6
Page 27

ERROR MESSAGES
When the balance powered up or during the operation, the display may show
some Error messages as below: E1, E2, E5 and OL.
The messages may also be shown if the pan is not installed correctly or the
operation environment is not suitable.
TECHNICAL DATA
Model AHV
Construction Stainless steel pan, plastic housing
Weighing Units g, t, dwt, oz t, GN, oz and ct
Application Modes
Display(s)
Keyboard 13 keys embossed membrane keyboard
Weighing, Simple Counting and Percent
Weighing
20 mm high, 6-digit, 7-segment LCD, blue
color LED backlight
Zero Range 4% (± 2%) of Full Scale Capacity
Tare Range Full Capacity by subtraction
Stabilization Time
Operating Temp. 5 ºC - 40 ºC
Humidity Range
Power
Battery Life
Safe Overload Capacity 120 % of capacity
Pan Size
Scale Dimension W*H*D 200 * 76 * 250 mm
≤ 2 seconds
≤ 90% relative humidity, non-condensing
AC/DC Adapter 12V/1000mA or 6V/1.2Ah
Internal rechargeable lead acid battery.
20 hours continuous use with 8 hour recharge
time.
Φ 116 mm (Round) / 124 * 144 mm (Square)
27
Page 28

GUARANTEE
This balance is guaranteed for one year from the delivery date. The guarantee
covers any fabrication defect of the material.
During this period, GRAM PRECISION, SL, covers the manpower and the
spare parts costs necessary for the reparation of the scale.
This guarantee does not cover the failures caused by an inappropriate use
or overload.
The guarantee does not cover the freight cost (transport) necessary to
repair the balance.
28
Page 29

ESPAÑOL
PRECAUCIONES ANTES DE UTILIZAR LA BALANZA
Para obtener el máximo rendimiento y los mejores resultados, recomendamos
instalar la balanza de acuerdo con los siguientes requisitos de seguridad:
• Verificar que el voltaje de entrada del adaptador coincided con el voltaje
de red local.
• Asegurarse que el cable del adaptador no represente un obstáculo o
peligro de tropiezo.
• Desconectar la balanza de la red cuando se limpie.
• No utilizar la balanza en ambientes peligrosos o inestables.
• No sumergir la balanza en agua u otros líquidos.
• No dejar caer objetos sobre el plato de pesada.
• Utilizar únicamente accesorios y periféricos aprobados.
• Utilizar la balanza bajo las condiciones ambientes descritas en este
manual de instrucciones.
• El servicio de asistencia técnica debe ser realizado por personal
autorizado.
• No sobrecargar la balanza (la carga no debe exceder la capacidad
maxima de la balanza).
• Antes de utilizar la balanza, se recomienda un precalentamiento de 30
minutos.
29
Page 30

DESCRIPCIÓN DEL TECLADO Y DEL DISPLAY
La balanza está equipada con 13 teclas (teclado membrane) para controlar
las funciones y para encender y apagar la balanza.
FUNCIONES DE LAS TECLAS
Para encender y apagar la balanza.
Para seleccionar el modo de pesaje, acceso a la unidad las funciones
de cuentapiezas y porcentajes.
Selección de la unidad de pesada (8 unidades disponibles).
Para introducir la muestra en la function cuentapiezas o porcentajes.
Para sustraer el peso de un recipiente (función Tara).
Para poner a cero la lectura del display.
30
Page 31

Tecla de confirmación e impresión.
Para acceder al modo configuración de parámetros.
F
Para volver al menu anterior o para salir del modo configuración de
parámetros; añade un dígito más la lectura del display durante 5
segundos.
Para desplazarse hacia la izquierda.
Para desplazarse hacia la derecha.
Para desplazarse hacia arriba (Incrementar valor).
Para desplazarse hacia abajo (Disminuir valor).
DISPLAY
Cuando la capacidad de la balanza es de 600.0g, el último dígito será el dígito
auxiliar del display (un símbolo indicará el dígito):
31
Page 32

Cuando la capacidad de la balanza es de 300.00, 1500.0 o 3000.0g, el ultimo
dígito estará en blanco, solo si se pulsa la tecla se extenderá la pantalla
con un decimal más.
ALIMENTACIÓN
La balanza se conecta a la toma de red (110~240V - 50/60Hz) con un adaptador
AC/DC con un voltaje de salida de 12V e incorpora una batería recargable de 6.8V.
PUESTA EN MARCHA
Cuando se conecta la balanza, el display mostrará durante 2 segundos el
número de versión del software (Ver. 1.00) y seguidamente efectuará un autotest. Una vez finalizado el auto-test la balanza establecerá automáticamente
el peso actual como un nuevo punto de referencia del cero.
MODO PESAJE
Rango del display
El display puede mostrar el peso desde: –Max (Peso neto) hasta: Max+9e
(Peso bruto).
32
Page 33

Ajuste del cero
Rango de configuración de cero: ±2% de la capacidad máxima.
La configuración del cero solo está disponible cuando el receptor de la carga
no está en movimiento (El display está estable).
Configuración del cero Semi-automática
Cuando la lectura del display no está a cero y no hay ningún objeto sobre el
plato de pesada, pulsar la tecla
cero, en este momento el símbolo de Cero aparece en el display indicando
que la balanza se encuentra en el punto de cero.
para que la lectura del display quede a
Seguimiento del cero
La balanza está equipada con una función del seguimiento del cero, que
funciona a una velocidad de ±0.25e/s. Esta función únicamente actúa si la
balanza se encuentra en estado de cero bruto y no hay ningún movimiento
sobre el plato de pesada.
Configuración del cero inicial
Rango inicial del ajuste del cero: ±10% of Max
Cuando el rango inicial del cero está por debajo del -10% de la capacidad
maxima, el display muestra “-------” y la balanza emite una señal acústica.
Para que el display vuelva al modo normal de pesaje, por favor, añadir más peso
hasta que rango del cero inicial esté entre el ±10% de la capacidad maxima.
Cuando el rango del cero inicial está por debajo del +10% de la capacidad
33
Page 34

maxima, el display muestra “-------” y la balanza emite una señal acústica.
Para que el display vuelva al modo normal de pesaje, retirar el peso hasta
que el rango esté entre el ±10% de la capacidad maxima.
Tara
Tara semi-automática
Pulsar la tecla
para sustraer el peso de un recipiente y obtener el peso
neto de un producto. (Se pueden realizar consecutivas operaciones de tara).
El símbolo NET aparecerá en el display indicando que el peso del objecto
situado sobre el plato es el peso neto.
Para borrar el valor de la tara, retirar el recipiente del plato de pesada, el
display mostrará su peso en negativo, pulsar de nuevo la tecla
.
Nota:
1. Antes de realizar una Tara, asegurarse de que la balanza está estable.
2. Si se han realizado consecutivas taras, para borrar el valor de la Tara, retirar
el recipiente del plato de pesada y seguidamente pulsar la tecla
.
3. El rango de Tara es la capacidad máxima de la balanza.
34
Page 35

Selección de unidades de pesada
Pulsar la tecla
unidades de pesada disponibles.
para seleccionar la unidad de pesada deseada. Hay 8
Aviso de sobrecarga
Cuando el peso situado sobre el plato de pesada excede la capacidad máxima
de la balanza, el display muestra el mensaje “--OL--” y al mismo tiempo se
emite una señal acústica. Por favor, retirar el peso del plato de la balanza,
de no ser así, la célula de carga puede ser dañada.
Función cuentapiezas
Dentro del modo normal de pesaje, pulsar la tecla
función de cuentapiezas. El display mostrará el siguiente mensaje:
para acceder a la
Pulsar la tecla
muestra inicial (10, 20, 50, 100, 200, 500 o 1000 piezas).
Una vez seleccionado el valor de la muestra, colocar las piezas sobre el plato
de pesada y pulsar la tecla
“C” desaparecerá.
o las teclas ,
. El símbolo “Mode” parpadeará y el símbolo
para seleccionar la cantidad de la
35
Page 36

El procedimiento de muestreo ha finalizado y la balanza está preparada para
realizar el contaje de piezas.
Nota: Si el peso unitario de la muestra es muy pequeño (menor al 0.2 de la
división de la balanza), el display mostrará “- -or- -pcs”.
Función de porcentajes
Dentro del modo normal de pesaje pulsar la tecla
para acceder a la
función de porcentajes.
Pulsar la tecla
o las teclas ,
para seleccionar uno de los dos
modos: 100.0% o 100.00%.
Situar el objeto considerado como el 100% sobre el plato de pesada y pulsar
la tecla
para empezar el proceso de muestreo. El símbolo “Mode”
parpadeará durante unos segundos, seguidamente los símbolos “Mode” y
“P” desaparecerán.
36
Page 37

El proceso de muestreo ha finalizado. Retirar la muestra del plato de pesada
y situar el objeto a pesar, el display mostrará el % respecto a la muestra
predeterminada.
• El peso de la muestra considerado como el 100% debe ser superior a
0.2d. Si es inferior, el display mostrará “- -or- -%” indicando que el peso
de la muestra debe ser mayor.
Nota:
1. Una vez finalizada una operación de porcentajes o cuentapiezas, pulsar
la tecla
para volver al modo normal de pesaje. Si se desea acceder
nuevamente a las funciones de cuentapiezas y porcentajes, pulsar la
tecla .
2. Los datos del muestreo se borrarán automáticamente una vez se pasa
del modo cuentapiezas al modo porcentajes, o viceversa.
CONFIGURACIÓN DE PARÁMETROS
Dentro del modo normal de pesaje, pulsar la tecla
configuración de parámetros. El símbolo “Setup” aparacerá en el display.
F
para acceder al modo
37
Page 38

Calibración span
Display:
Pulsar la tecla para acceder al parámetro.
Para introducir el valor de la pesa de calibración, utilizar las teclas
para desplazarse de dígito a dígito y utilizar las teclas ,
para
incrementar o decrementar el valor de cada dígito. (Pulsar la tecla para
volver al anterior paso).
Una vez el valor de la calibración está introducido, pulsar la tecla
para
confirmar y acceder al procedimiento de calibración.
El display mostrará:
Colocar la pesa de calibración sobre el plato de pesada (su valor debe coincidir
con el valor visualizado en el display). Cuando la lectura del display quede
estable, la balanza volverá al modo normal de pesaje. El procedimiento de
calibración ha finalizado.
,
38
Page 39

• Valor de la pesa de calibración: Se puede introducir cualquier valor
siempre y cuando su peso sea superior al 10% de la capacidad maxima
de la balanza. (Se recomienda un peso superior a la mitad de la capacidad
de la balanza)
• Si durante la calibración, se desea abortar la operación, pulsar la tecla
• Una vez la calibración ha finalizado, la balanza vuelve automáticamente
al modo normal de pesaje. Si se precisa configurar más parámetros,
F
pulsar la tecla
para acceder nuevamente en el menu de configuración
de parámetros.
Configurar la unidad de pesada principal
Pulsar la tecla para dirigirse al parámetro “CAL” o pulsar la tecla para
dirigirse al parámetro “InitU“ (configuración de la unidad de pesada principal).
Pulsar la tecla
para acceder al parámetro.
.
Pulsar las teclas
, para seleccionar la unidad de pesada deseada (g,
t, dwt, oz t, GN, oz y ct). (Valor por defecto: g)
Pulsar la tecla
para confirmar la unidad seleccionada. Pulsar la tecla
39
Page 40

para volver al menu de parámetros. Para pasar a la siguiente configuración
pulsar la tecla , para volver al modo normal de pesaje pulsar la tecla .
Activar / desactivar unidades de pesada
Pulsar la tecla para dirigirse al parámetro “InitU“ o pulsar la tecla
para dirigirse al parámetro “Unit” (Activar / desactivar unidades de pesada)
Pulsar la tecla
Pulsar la tecla
pesada que se desea configurar; con las teclas
para acceder al parámetro.
o las teclas ,
para seleccionar la unidad de
y
seleccionar la
opción “on” (activar) o la opción “off” (desactivar).
Valor por defecto: Todas las unidades de pesada están activadas.
Pulsar la tecla
para confirmar la selección. Pulsar la tecla para
volver al menu de parámetros, para pasar a la siguiente configuración pulsar
la tecla . Para volver al modo normal de pesaje pulsar la tecla .
40
Page 41

Configuración de la auto-desconexión
Pulsar la tecla para dirigirse al parámetro “Unit” o pulsar la tecla
para dirigirse al parámetro “A.OFF” (Configuración de la auto-desconexión).
Pulsar la tecla
Pulsar la teclas
para acceder al parámetro.
y
para seleccionar el tiempo de autodesconexión:
2m, 5m, 8m o No (No = autodesconexión desactivada. Valor por defecto: No).
Pulsar la tecla
para confirmar la selección. Pulsar la tecla para
volver al menu de parámetros, para pasar a la siguiente configuración pulsar
la tecla . Para volver al modo normal de pesaje pulsar la tecla .
Configuración del modo de transmisión
41
Page 42

Pulsar la tecla para dirigirse al parámetro “A.OFF” o pulsar la tecla
para dirigirse al parámetro “trn” (modo de transmisión).
Pulsar la tecla
Pulsar la teclas
para acceder al parámetro.
y para seleccionar el modo de transmisión deseado:
MA-LP, St-LP, MA-Dt, St-Dt, MA-PC, St-PC, P-CONt, CLOSE, DISP. (Valor
por defecto: MA-LP)
CLOSE: Transmisión no disponible.
P-CONt: Transmisión de datos contínua.
St-PC: Transmisión de datos automática al PC cuando el display queda
estable.
MA-PC: Transmisión de datos al PC cuando se pulsa una tecla.
Pulsar la tecla
para confirmar la selección. Pulsar la tecla para volver
al menu de parámetros, para pasar a la siguiente configuración pulsar la
tecla . Para volver al modo normal de pesaje pulsar la tecla .
Configuración de la velocidad de transmisión
42
Page 43

Pulsar la tecla para dirigirse al parámetro “trn” o pulsar la tecla para
dirigirse al parámetro “rAte” (velocidad de transmisión).
Pulsar la tecla
Pulsar las teclas
para acceder al parámetro.
y para seleccionar la opción deseada: 1200, 2400,
4800 y 9600. (Valor por defecto: 9600).
Pulsar la tecla
para confirmar la selección. Pulsar la tecla para volver
al menu de parámetros, para pasar a la siguiente configuración pulsar la
tecla . Para volver al modo normal de pesaje pulsar la tecla .
Configuración Data Bits
Pulsar la tecla para dirigirse al parámetro “rAtE” o pulsar la tecla
para dirigirse al parámetro “dAta b” (configuración data bits).
Pulsar la tecla
para acceder al parámetro.
43
Page 44

Pulsar las teclas y para seleccionar la opción deseada: bit. N8 o bit.
E7. (Valor por defecto: bit. N8).
Pulsar la tecla
para confirmar la selección. Pulsar la tecla para
volver al menu de parámetros, para pasar a la siguiente configuración pulsar
la tecla . Para volver al modo normal de pesaje pulsar la tecla .
Configuración del rango de estabilidad
Pulsar la tecla para dirigirse al parámetro “dAta b” o pulsar la tecla
para dirigirse al parámetro “Fil05” (rango de estabilidad).
Pulsar las teclas
por defecto: 05).
Pulsar la tecla
siguiente configuración. Para volver al modo normal de pesaje pulsar la
tecla .
y para seleccionar el rango deseado: 01 - 15. (Valor
para confirmar y pulsar la tecla
para pasar a la
Configuración del rango de cero
44
Page 45

Pulsar la tecla para dirigirse al parámetro “Fil05” o pulsar la tecla
para dirigirse al parámetro “Zero1” (rango de cero).
Pulsar las teclas
y para seleccionar el rango de cero: 0 - 3 (d). (Valor
por defecto: 1d).
Pulsar la tecla
para confirmar y pulsar la tecla
para pasar a la
siguiente configuración. Para volver al modo normal de pesaje pulsar la
tecla .
Selección del peso unitario (Para función cuentapiezas)
Pulsar la tecla para dirigirse al parámetro “Zero1” o pulsar la tecla
para dirigirse al parámetro “A.C Y” (peso unitario en función cuentapiezas).
y
Pulsar las teclas
defecto: “y” (Si).
para seleccionar “y” o “n” (Si o No). Valor por
Pulsar la tecla
para confirmar y pulsar la tecla
para pasar a la
siguiente configuración. Para volver al modo normal de pesaje pulsar la
tecla .
45
Page 46

Configuración iluminación del display
Pulsar la tecla para dirigirse al parámetro “A.C Y” o pulsar la tecla para
desplazarse al parámetro “Bl.1” (seleccionar tipo de iluminación del display).
Pulsar la teclas
y para seleccionar el modo deseado: 1, 2 y 3 (Valor
por defecto: 1).
1. La iluminación del display se activará cuando el peso exceda 10e o
al pulsar cualquier tecla.
2. Iluminación del display siempre activada.
3. Iluminación del display desactivada.
Pulsar la tecla
para confirmar la selección, para pasar al siguiente
parámetro pulsar la tecla , si se desea volver al modo normal de pesaje
pulsar la tecla .
Calibración rápida
Pulsar la tecla durante 3 segundos, el display mostrará un valor de pesa
de calibración:
46
Page 47

Colocar sobre el plato de pesada una pesa de calibración cuyo valor coincida
con el visualizado en el display. El proceso de calibración finalizará cuando
el mensaje parpadeante “CAL” desaparezca.
Recuperación de los valores por defecto
Dentro del modo normal de pesaje, pulsar la tecla
F
durante 3 seguntos.
La balanza recuperará automáticamente los valores de fábrica.
ESPECIFICACIONES DEL INTERFACE
Mode: EIA-RS-232 C’s UART signal, or USB signal
Format:
Baud rate: 1200-9600 BPS
Data bits: 8 bits/ 7 bits
Parity bit: none/Even
Stop bit: 1 bit
Code: ACSII
RS232 connector is a 9-pin D-subminiature socket.
Input Pin 2
Output Pin 3
Signal Ground Pin 5
Data Format:
H1 H1 , H2 H2 , D D D D D D D D U U U U CR CR
Head 1 Head 2 Data Unit CR LF
47
Page 48

HEAD 1 (2 BYTES) HEAD 2 (2 BYTES)
OL – Over Load
ST – Stable NT – Net Weight
US – Unstable GS – Gross Weight
DATA (8 BYTES)
2D (HEX) = “-“ (LESS)
20 (HEX) = ” “ (SPACE)
2E (HEX) = ”.” (DECIMAL POINT)
UNIT (4 BYTES)
g-20 ( HEX ) ; 20 ( HEX ) ; 20 ( HEX ) ; 67 ( HEX )
lb-20 ( HEX ) ; 20 ( HEX ) ; 6c ( HEX ) ; 62 ( HEX )
Ti.T-74 ( HEX ) ; 6C ( HEX ) ; 2E ( HEX ) ; 54 ( HEX )
MENSAJES DE ERROR
Cuando se enciende la balanza o durante la operación, el display puede
mostrar una serie de errores: E1, E2, E5 y OL.
Estos mensajes pueden también aparecer si el plato de pesada no está
instalado correctamente o si el ambiente no es el adecuado.
DATOS TÉCNICOS
Modelo AHV
Construcción Plato de acero inoxidable, carcasa de ABS
Unidades de pesada g, t, dwt, oz t, GN, oz y ct
Funciones Pesaje, cuentapiezas y porcentajes.
48
Page 49

Display(s)
20 mm altura, 6-dígitos, 7-segmentos LCD,
retroiluminación LED de color azul
Teclado 13 teclas teclado membrana
Rango del cero 4% (± 2%) de la capacidad maxima de la balanza
Rango de Tara Capacidad maxima de la balanza
Tiempo de estabilización
≤ 2 segundos
Temperatura de trabajo 5 ºC - 40 ºC
Rango de humedad
≤ 90% humedad relativa, sin condensación
Adaptador AC/DC 12V/1000mA y batería
Alimentación
recargable 6V / 1.2Ah
20 horas de uso continuo, tiempo de recarga
Vida de la batería
8 horas
Seguridad de sobrecarga 120% de la capacidad
Dimensión del plato
Φ 116 mm (circular) / 124 * 144 mm (cuadrado)
Dimensiones de la balanza
200 * 76 * 250 mm
W*H*D
49
Page 50

GARANTÍA
Esta balanza está garantizada contra todo defecto de fabricación y de
material, por un periodo de 1 año a partir de la fecha de entrega.
Durante este periodo, GRAM PRECISION, SL, se hará cargo de la reparación
de la balanza.
Esta garantía no incluye los daños ocasionados por uso indebido o
sobrecargas.
La garantía no cubre los gastos de envío (portes) necesarios para la
reparación de la balanza.
50
Page 51

FRANÇAIS
PRECAUTIONS AVANT D’UTILISER LA BALANCE
Pour obtenir les meilleures performances et résultats, nous vous
recommandons d’installer la balance en accord avec les spécifications de
sécurité suivantes:
• Vérifier que le voltage d’entrée de l’adaptateur correspond au voltage du
réseau local.
• S’assurer que le câble de l’adaptateur ne représente aucun obstacle ou
risque de chute.
• Déconnecter la balance du réseau pour la nettoyer.
• Ne pas utiliser la balance dans des environnements dangereux ou
instables.
• Ne pas immerger la balance dans l’eau ou d’autres liquides.
• Ne pas laisser tomber d’objets sur le plateau de pesée.
• Utiliser uniquement des accessoires et périphériques approuvés.
• Utiliser la balance dans les conditions environnementales décrites dans
ce manuel d’instructions.
• Le service d’assistance technique devra être accompli par du personnel
autorisé.
• Ne pas surcharger la balance (la charge ne doit pas excéder la capacité
maximum de la balance).
51
Page 52

• Avant d’utiliser la balance, un préchauffage de 30 minutes est
recommandé.
DESCRIPTION DU CLAVIER ET DE L’AFFICHAGE
La balance est équipée de 13 touches (clavier membrane) pour contrôler les
fonctions et pour allumer et éteindre la balance.
FONCTIONS DES TOUCHES
Pour allumer et éteindre la balance.
Pour sélectionner le mode de pesage, accès à l’unité les fonctions de
compte-pièces et pourcentages.
Sélection de l’unité de pesée (8 unités disponibles).
Pour introduire l’échantillon dans la fonction compte-pièces ou
pourcentages.
52
Page 53

Pour soustraire le poids d’un récipient (fonction Tare).
Pour mettre à zéro la lecture de l’affichage.
Touche de confirmation et impression.
Pour accéder au mode configuration des paramètres.
F
Pour revenir au menu antérieur ou pour sortir du mode configuration
de paramètres; ajoute un caractère à la lecture de l’affichage pendant
5 secondes.
Pour se déplacer vers la gauche.
Pour se déplacer vers la droite.
Pour se déplacer vers le haut (Augmenter valeur).
Pour se déplacer vers le bas (Diminuer valeur).
AFFICHAGE
Quand la capacité de la balance est de 600.0g, le dernier caractère sera le
caractère auxiliaire de l’affichage (un symbole indiquera le caractère):
53
Page 54

Quand la capacité de la balance est de 300.00, 1500.0 o 3000.0g, le dernier
caractère restera en blanc, et seulement si on appuie sur la touche
l’écran s’étendra avec un décimal supplémentaire.
ALIMENTATION
La balance doit se connecter à la prise de courant (110~240V - 50/60Hz) avec un
adaptateur AC/DC avec un voltage de sortie de 12V et comprend une batterie
rechargeable de 6.8V.
MISE EN MARCHE
Lorsque l’on connecte la balance, l’affichage montrera pendant 2 secondes
le numéro de version du logiciel (Ver. 1.00) et effectuera ensuite un autotest.
Une fois l’autotest terminé, la balance établira automatiquement le poids
actuel comme un nouveau point de référence du zéro.
MODE PESAGE
Plage d’affichage
L’affichage peut montrer le poids depuis: –Max (Poids net) jusque: Max+9e
(Poids brut).
54
Page 55

Réglage du zéro
Plage de paramétrage du zéro: ±2% de la capacité maximum.
Le paramétrage du zéro est uniquement disponible quand le récepteur de la
charge n’est pas en mouvement (l’affichage est stable).
Paramétrage du zéro Semi-automatique
Quand la lecture de l’affichage n’est pas à zéro et qu’il n’y a aucun objet
sur le plateau de pesée, appuyer sur la touche
l’affichage se mette à zéro, à ce moment le symbole du Zéro apparait sur
l’écran indiquant que la balance se trouve au point zéro.
pour que la lecture de
Suivi du zéro
La balance est équipée d’une fonction de suivi du zéro, qui fonctionne à une
vitesse de ±0.25e/s. Cette fonction agit uniquement si la balance se trouve
en état de zéro brut et qu’il n’y a aucun mouvement sur le plateau de pesée.
Paramétrage du zéro initial
Rang initial de réglage du zéro: ±10% du Max
Quand le rang initial du zéro est en dessous de -10% de la capacité maximum,
l’écran affiche “-------” et la balance émet un signal acoustique. Pour que
l’affichage retourne au mode normal de pesage, veuillez ajouter plus de poids
jusqu’à ce que le rang du zéro initial soit entre ±10% de la capacité maximum.
Quand le rang du zéro initial est en dessous de +10% de la capacité maximum,
l’écran affiche “-------” et la balance émet un signal acoustique. Pour que
l’affichage retourne au mode normal de pesage, retirer du poids jusqu’à ce que
le rang soit entre ±10% de la capacité maximum.
55
Page 56

Tare
Tare semi-automatique
Appuyer sur la touche
obtenir le poids net d’un produit. (On peut effectuer des opérations de tare
consécutives). Le symbole NET apparaitra sur l’écran indiquant que le poids
de l’objet situé sur le plateau est le poids net.
Pour effacer la valeur de la tare, retirer le récipient du plateau de pesée,
l’écran affichera son poids en négatif, appuyez à nouveau sur la touche
Note:
1. Avant d’effectuer une Tare, assurez-vous que la balance soit stable.
2. Si vous avez effectué des tares consécutives, pour effacer la valeur de la
Tare, retirer le récipient du plateau de pesée et ensuite appuyer sur la
touche
.
pour soustraire le poids d’un récipient et
.
3. Le rang de tare est la capacité maximum de la balance.
Sélection des unités de pesée
Appuyer sur la touche
a 8 unités de pesée disponibles.
56
pour sélectionner l’unité de pesée souhaitée. Il y
Page 57

Avis de surcharge
Quand le poids situé sur le plateau de pesée excède la capacité maximum
de la balance, l’écran affiche le message “--OL--” et au même moment un
signal acoustique est diffusé. Veuillez alors retirer le poids du plateau de la
balance, si vous ne le faites pas, la cellule de charge peut être endommagée.
Fonction compte-pièces
Dans le mode normal de pesage, appuyer sur la touche
la fonction de compte-pièces. L’écran affichera le message suivant:
Appuyer sur la touche
quantité de l’échantillon initial (10, 20, 50, 100, 200, 500 ou 1000 pièces).
pièces sur le plateau de pesée et appuyer sur la touche
“Mode” clignotera et le symbole “C” disparaîtra.
ou les touches ,
pour accéder à
pour sélectionner la
. Le symbole
Le processus d’échantillonnage est finalisé et la balance est préparée pour
effectuer le comptage des pièces.
Note: Si le poids unitaire de l’échantillon est très petit (inférieur à 0.2 de la
division de la balance), l’écran affichera “- -or- -pcs”.
57
Page 58

Fonction de pourcentages
Dans le mode normal de pesage appuyer sur la touche
pour accéder à
la fonction de pourcentages.
Appuyer sur la touche
deux modes: 100.0% ou 100.00%
ou les touches , pour sélectionner un des
.
Placer l’objet considéré comme le 100% sur le plateau de pesée et appuyer
sur la touche
pour commencer le processus d’échantillonnage.
Le symbole “Mode” clignotera pendant quelques secondes, ensuite les
symboles “Mode” et “P” disparaîtront.
Le processus d’échantillonnage est terminé. Retirer l’échantillon du
plateau de pesée et placer l’objet à peser, l’écran affiche le % par rapport à
l’échantillon prédéterminé.
• Le poids de l’échantillon considéré comme le 100% doit être supérieur à
0.2d. Si celui-ci est inférieur, l’écran affichera “- -or- -%” indiquant que
le poids de l’échantillon doit être plus grand.
58
Page 59

Note:
1. Une fois terminée une opération de pourcentages ou compte-pièces,
appuyer sur la touche
pour retourner au mode normal de pesage.
Si vous souhaitez accéder à nouveau aux fonctions pourcentages et
compte-pièce, appuyer sur la touche .
2. pour retourner au mode normal de pesage. Si vous souhaitez accéder
à nouveau aux fonctions pourcentages et compte-pièce, appuyer sur la
touche.
CONFIGURATION DE PARAMÈTRES
Dans le mode normal de pesage, appuyer sur la touche
F
pour accéder au
mode de configuration des paramètres. Le symbole “Setup” apparaîtra sur
l’écran.
Calibracion span
Affichage:
Appuyer sur la touche pour accéder au paramètre.
59
Page 60

Pour introduire la valeur du poids de calibrage, utiliser les touches ,
pour vous déplacer de caractère à caractère et utiliser les touches ,
pour augmenter ou diminuer la valeur de chaque caractère (Appuyer sur la
touche pour retourner à l’étape antérieure).
Une fois que la valeur de calibrage est introduite, appuyer sur la touche
pour confirmer et accéder au processus de calibrage.
L’écran affichera:
Placer le poids de calibrage sur le plateau de pesée (sa valeur doit
correspondre avec la valeur affichée sur l’écran). Quand la lecture de
l’affichage se stabilise, la balance retourne au mode normal de pesage. Le
processus de calibrage est terminé.
• Valeur du poids de calibrage: On peut introduire n’importe quelle valeur
à partir du moment où elle est supérieure à 10% de la capacité maximum
de la balance. (Nous recommandons un poids supérieur à la moitié de la
capacité de la balance).
• Si pendant le calibrage, vous souhaitez annuler l’opération, appuyez sur la
touche
.
• Une fois que le calibrage est terminé, la balance retourne
automatiquement au mode normal de pesage. Si vous devez configurer
F
plus de paramètres, appuyer sur la touche
pour accéder à nouveau
à la configuration des paramètres.
60
Page 61

Paramétrer l’unité de pesée principale
Appuyer sur la touche pour atteindre le paramètre “CAL” ou appuyer sur
la touche pour atteindre le paramètre “InitU“ (paramétrage de l’unité de
pesée principale.
Appuyer sur la touche
Appuyer sur les touches
pour accéder au paramètre.
, pour sélectionner l’unité de
pesée désirée (g, t, dwt, oz t, GN, oz et ct). (Valeur par défaut: g)
Appuyer sur la touche
pour confirmer l’unité sélectionnée. Appuyer
sur la touche pour retourner au menu des paramètres. Pour passer au
paramétrage suivant appuyer sur la touche , pour retourner au mode
normal de pesage, appuyer sur la touche .
Activer / désactiver des unités de pesée
61
Page 62

Appuyer sur la touche pour atteindre le paramètre “InitU“ ou appuyer
sur la touche pour atteindre le paramètre “Unit” (Activer / désactiver
unités de pesée).
Appuyer sur la touche
Appuyer sur la touche
pour accéder au paramètre.
ou sur les touches ,
pour sélectionner
l’unité de pesée que vous souhaitez paramétrer; avec les touches et
sélectionner l’option “on” (activer) ou l’option “off” (désactiver).
Valeur par défaut: Toutes les unités de pesée sont activées.
Appuyer sur la touche
pour retourner au menu des paramètres, pour passer à la configuration
pour confirmer la sélection. Appuyer sur la touche
suivante appuyer sur la touche . PPour retourner au mode normal de
pesage, appuyer sur la touche .
Paramétrage de l’auto deconnexion
Appuyer sur la touche pour atteindre le paramètre “Unit” ou appuyer sur
la touche pour atteindre le paramètre “A.OFF” (Paramétrage de l’auto
déconnexion).
62
Page 63

Appuyer sur la touche pour accéder au paramètre.
Appuyer sur les touches
et
pour sélectionner le temps d’auto
déconnexion: 2m, 5m, 8m ou No (No = auto déconnexion désactivée. Valeur
par défaut: No.
Appuyer sur le touche
pour retourner au menu des paramètres, pour passer à la configuration
pour confirmer la sélection. Appuyer sur la touche
suivante appuyer sur la touche . Pour retourner au mode normal de
pesage appuyer sur la touche .
Paramétrage du mode de transmission
Appuyer sur la touche pour atteindre le paramètre “A.OFF” ou appuyer
sur la touche ppour atteindre le paramètre “trn” (mode de transmission).
Apuyyer sur la touche
pour accéder au paramètre.
63
Page 64

Appuyer sur les touches et pour sélectionner le mode de transmission
souhaité: MA-LP, St-LP, MA-Dt, St-Dt, MA-PC, St-PC, P-CONt, CLOSE, DISP.
(Valeur par défaut: MA-LP)
CLOSE: Transmission non disponible.
P-CONt: Transmission de données continue.
St-PC: Transmission de données automatique au PC quand l’affichage est
stable.
MA-PC: Transmission de données au PC quand on appuie sur une touche.
Appuyer sur la touche
pour confirmer la sélection. Appuyer sur la touche
ppour retourner au menu de paramètres, pour passer à la configuration
suivante appuyer sur la touche . Pour retourner au mode normal de
pesage appuyer sur la touche .
Paramétrage de la vitesse de transmission
Appuyer sur la touche pour atteindre le paramètre “trn” ou appuyer sur
la touche pour atteindre le paramètre “rAte” (vitesse de transmission).
Apuyyer sur la touche
pour accéder au paramètre.
64
Page 65

Apuyyer sur la touche et pour sélectionner l’option souhaitée: 1200,
2400, 4800 et 9600. (Valeur par défaut: 9600).
Apuyyer sur la touche
pour confirmer la sélection. Appuyer sur la
touche pour pour retourner au menu de paramètres, pour passer à la
configuration suivante appuyer sur la touche . Pour retourner au mode
normal de pesage appuyer sur la touche .
Paramétrage data bits
Appuyer sur la touche
sur la touche pour atteindre le paramètre “dAta b” (paramétrage data
bits).
Appuyer sur la touche
pour atteindre le paramètre “rAtE” ou appuyer
pour accéder au paramètre.
Appuyer sur les touches
et pour sélectionner l’option souhaitée: bit.
N8 ou bit. E7. (Valeur par défaut: bit. N8).
Appuyer sur la touche
pour retourner au menu de paramètres, pour passer à la configuration
pour confirmer la sélection. Appuyer sur la touche
suivante appuyer sur la touche . Pour retourner au mode normal de
pesage appuyer sur la touche .
65
Page 66

Paramétrage du rang de stabilité
Appuyer sur la touche pour atteindre le paramètre “dAta b” ou appuyer
sur la touche pour atteindre le paramètre “Fil05” (rang de stabilité).
Appuyer sur les touches
et pour sélectionner le rang souhaité: 01 -
15. (Valeur par défaut: 05).
Appuyer sur la touche
pour confirmer et appuyer sur la touche
pour passer à la configuration suivante. Pour retourner au mode normal de
pesage appuyer sur la touche .
Paramétrage du rang de zéro
Appuyer sur la touche pour atteindre le paramètre “Fil05” ou appuyer
sur la touche pour atteindre le paramètre “Zero1” (rang de zéro).
Appuyer sur les touches
(d). (Valeur par défaut: 1d).
et pour sélectionner le rang de zéro: 0 - 3
Appuyer sur la touche
pour confirmer et appuyer sur la touche
pour passer à la configuration suivante. Pour retourner au mode normal de
pesage appuyer sur la touche .
66
Page 67

Sélection du poids unitaire (Pour fonction compte-pièces)
Appuyer sur la touche pour atteindre le paramètre “Zero1” ou appuyer
sur la touche pour atteindre le paramètre “A.C Y” (poids unitaire dans
fonction compte-pièces).
Appuyer sur les touches
et
pour sélectionner “y” ou “n” (Oui ou
Non). Valeur par défaut: “y” (Oui).
Appuyer sur la touche
pour confirmer et appuyer sur la touche
pour passer à la configuration suivante. Pour retourner au mode normal de
pesage appuyer sur la touche .
Appuyer sur la touche
pour atteindre le paramètre “A.C Y” ou appuyer sur
la touche pour atteindre le paramètre “Bl.1” (sélectionner type d’éclairage
de l’écran d’affichage).
Appuyer sur les touches
et pour sélectionner le mode souhaité: 1, 2
et 3 (Valeur par défaut: 1).
1. L’éclairage de l’affichage s’active quand le poids excède 10e ou en
appuyant sur n’importe quelle touche.
2. Éclairage de l’affichage toujours activé.
3. Éclairage de l’affichage désactivé.
67
Page 68

Appuyer sur la touche pour confirmer la sélection, pour passer au
paramètre suivant appuyer sur la touche , si vous souhaitez retourner au
mode normal de pesage, appuyer sur la touche .
Calibrage rapide
Appuyer sur la touche pendant 3 secondes, l’écran affichera une valeur
de poids de calibrage:
Placer sur le plateau de pesée un poids de calibrage dont la valeur
corresponde à celle visualisée sur l’écran d’affichage. Le processus de
calibrage se terminera lorsque le message clignotant “CAL” disparaîtra.
Récupération des valeurs par défaut
Dans le mode normal de pesage, appuyer sur la touche
secondes. La balance récupèrera automatiquement les valeurs d’usine.
SPÉCIFICATIONS DE L’INTERFACE
Mode: EIA-RS-232 C’s UART signal, or USB signal
Format:
Baud rate: 1200-9600 BPS
Data bits: 8 bits/ 7 bits
Parity bit: none/Even
Stop bit: 1 bit
Code: ACSII
68
F
pendant 3
Page 69

RS232 connector is a 9-pin D-subminiature socket.
Input Pin 2
Output Pin 3
Signal Ground Pin 5
Data Format:
H1 H1 , H2 H2 , D D D D D D D D U U U U CR CR
Head 1 Head 2 Data Unit CR LF
HEAD 1 (2 BYTES) HEAD 2 (2 BYTES)
OL – Over Load
ST – Stable NT – Net Weight
US – Unstable GS – Gross Weight
DATA (8 BYTES)
2D (HEX) = “-“ (LESS)
20 (HEX) = ” “ (SPACE)
2E (HEX) = ”.” (DECIMAL POINT)
UNIT (4 BYTES)
g-20 ( HEX ) ; 20 ( HEX ) ; 20 ( HEX ) ; 67 ( HEX )
lb-20 ( HEX ) ; 20 ( HEX ) ; 6c ( HEX ) ; 62 ( HEX )
Ti.T-74 ( HEX ) ; 6C ( HEX ) ; 2E ( HEX ) ; 54 ( HEX )
MESSAGES D’ERREUR
Lorsque l’on allume la balance ou pendant l’opération, l’écran peut afficher
une série d’erreurs: E1, E2, E5 et OL.
Ces messages peuvent également apparaitre si le plateau de pesée n’est pas
installé correctement ou si l’environnement n’est pas adéquat.
69
Page 70

DONNÉES TECHNIQUES
Modèle AHV
Construction Plateau d’acier inoxydable, carcasse ABS
Unités de pesée g, t, dwt, oz t, GN, oz y ct
Fonctions Pesage, compte-pièces et pourcentages.
Affichage(s)
Clavier 13 touches clavier membrane
Rang du zéro 4% (±2%) de la capacité maximum de la balance
Rang du zéro Capacidad maxima de la balanza
20mm hauteur, 6-caractères, 7-segments
LCD, rétro illumination LED de couleur bleue
Temps de stabilisation
Température de travail 5 ºC - 40 ºC
Rang d’humidité
Alimentation
Autonomie de la batterie
Sécurité de surcharge 120% de la capacité
Dimension du plateau
Dimensions de la balance W*H*D 200 * 76 * 250 mm
≤ 2 secondes
≤ 90% humidité relative, sans condensation
Adaptateur AC/ DC 12V/1000mA et batterie
rechargeable 6V/1.2Ah
20 heures d’utilisation continue, temps de
recharge 8 heures
Φ 116mm (circulaire) / 124*144mm (carré)
70
Page 71

GARANTIE
Cette balance est garantie contre tout défaut de fabrication et de matériel,
pour une période d’1 an à partir de la date de livraison.
Durant cette période, GRAM PRECISION, prendra en charge la réparation de
la balance.
Cette garantie ne couvre pas les dégâts occasionnés par un usage inapproprié
ou les surcharges.
La garantie ne couvre pas les frais d’envoi (port) nécessaires à la réparation
de la balance.
71
Page 72

001/08072016
Gram Precision S.L.
Travesía Industrial, 11 · 08907 Hospitalet de Llobregat · Barcelona (Spain)
Tel. +34 902 206 000 · +34 93 300 33 32
Fax +34 93 300 66 98
comercial
@gram.es
www.gram.es
 Loading...