

Instructions
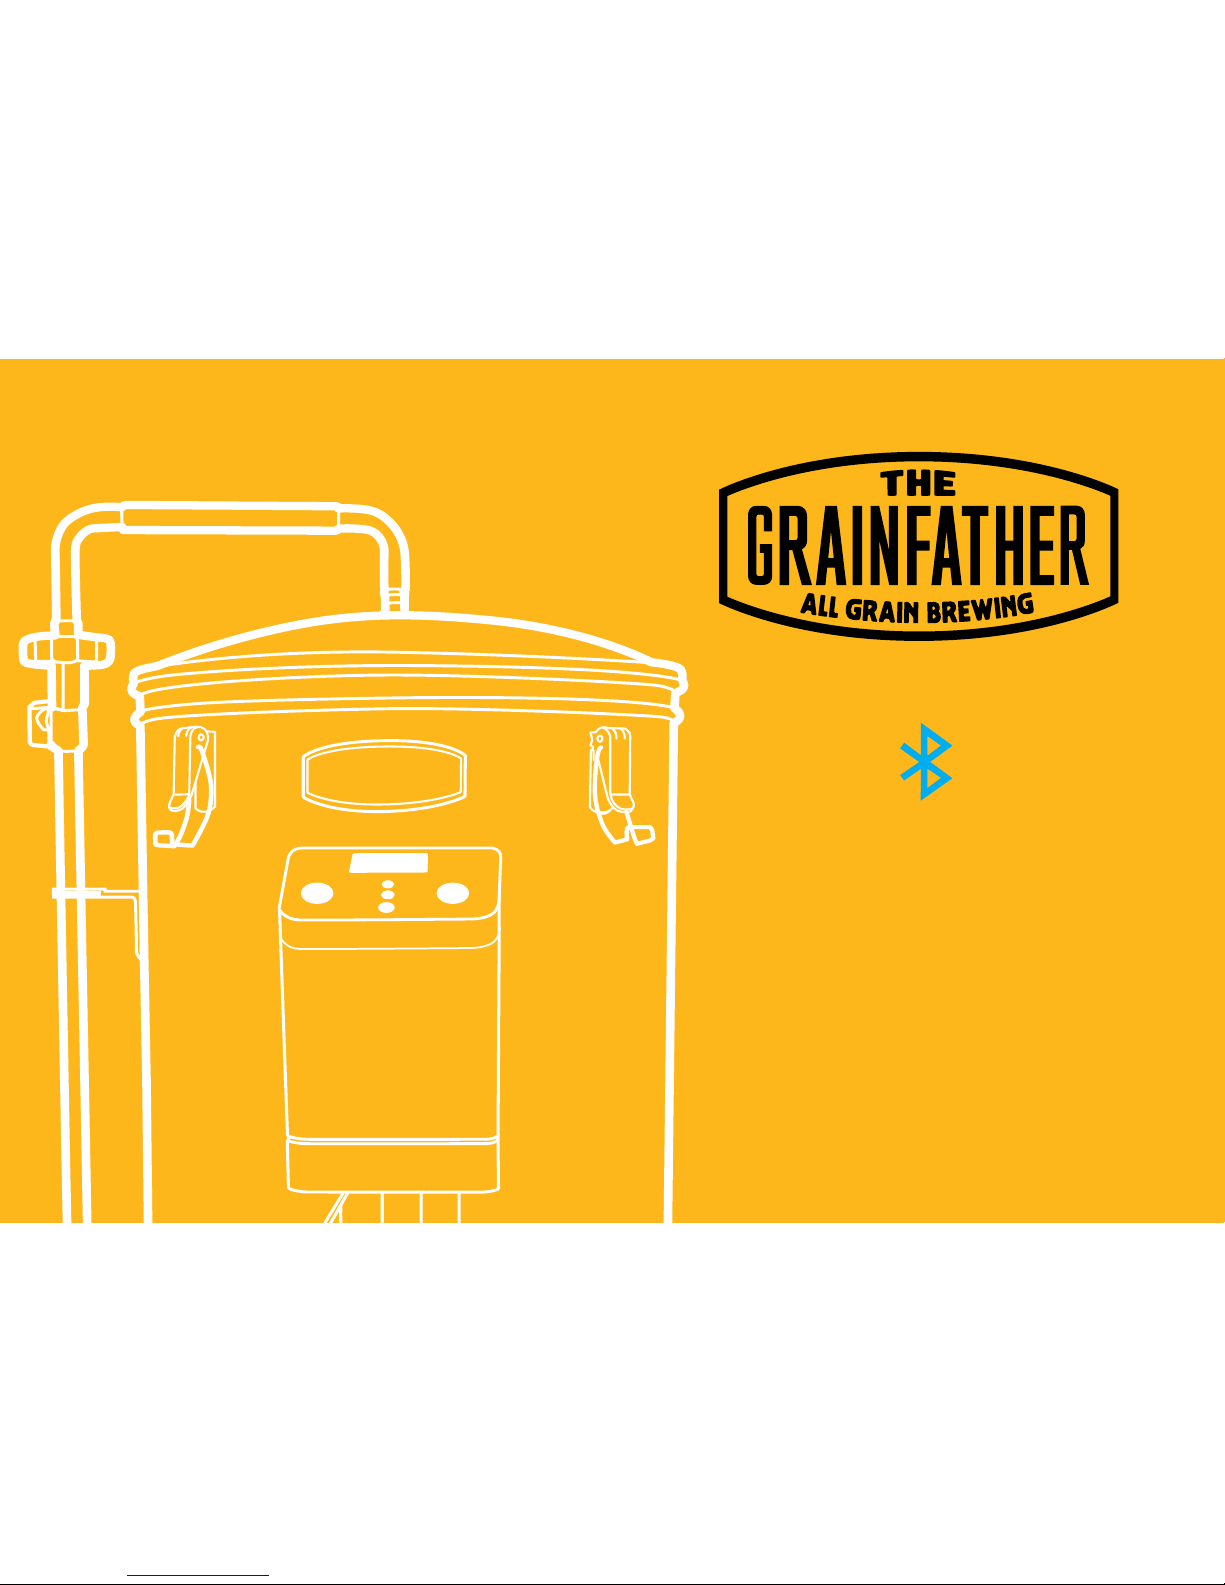
Grainfather
Connect
Control Box
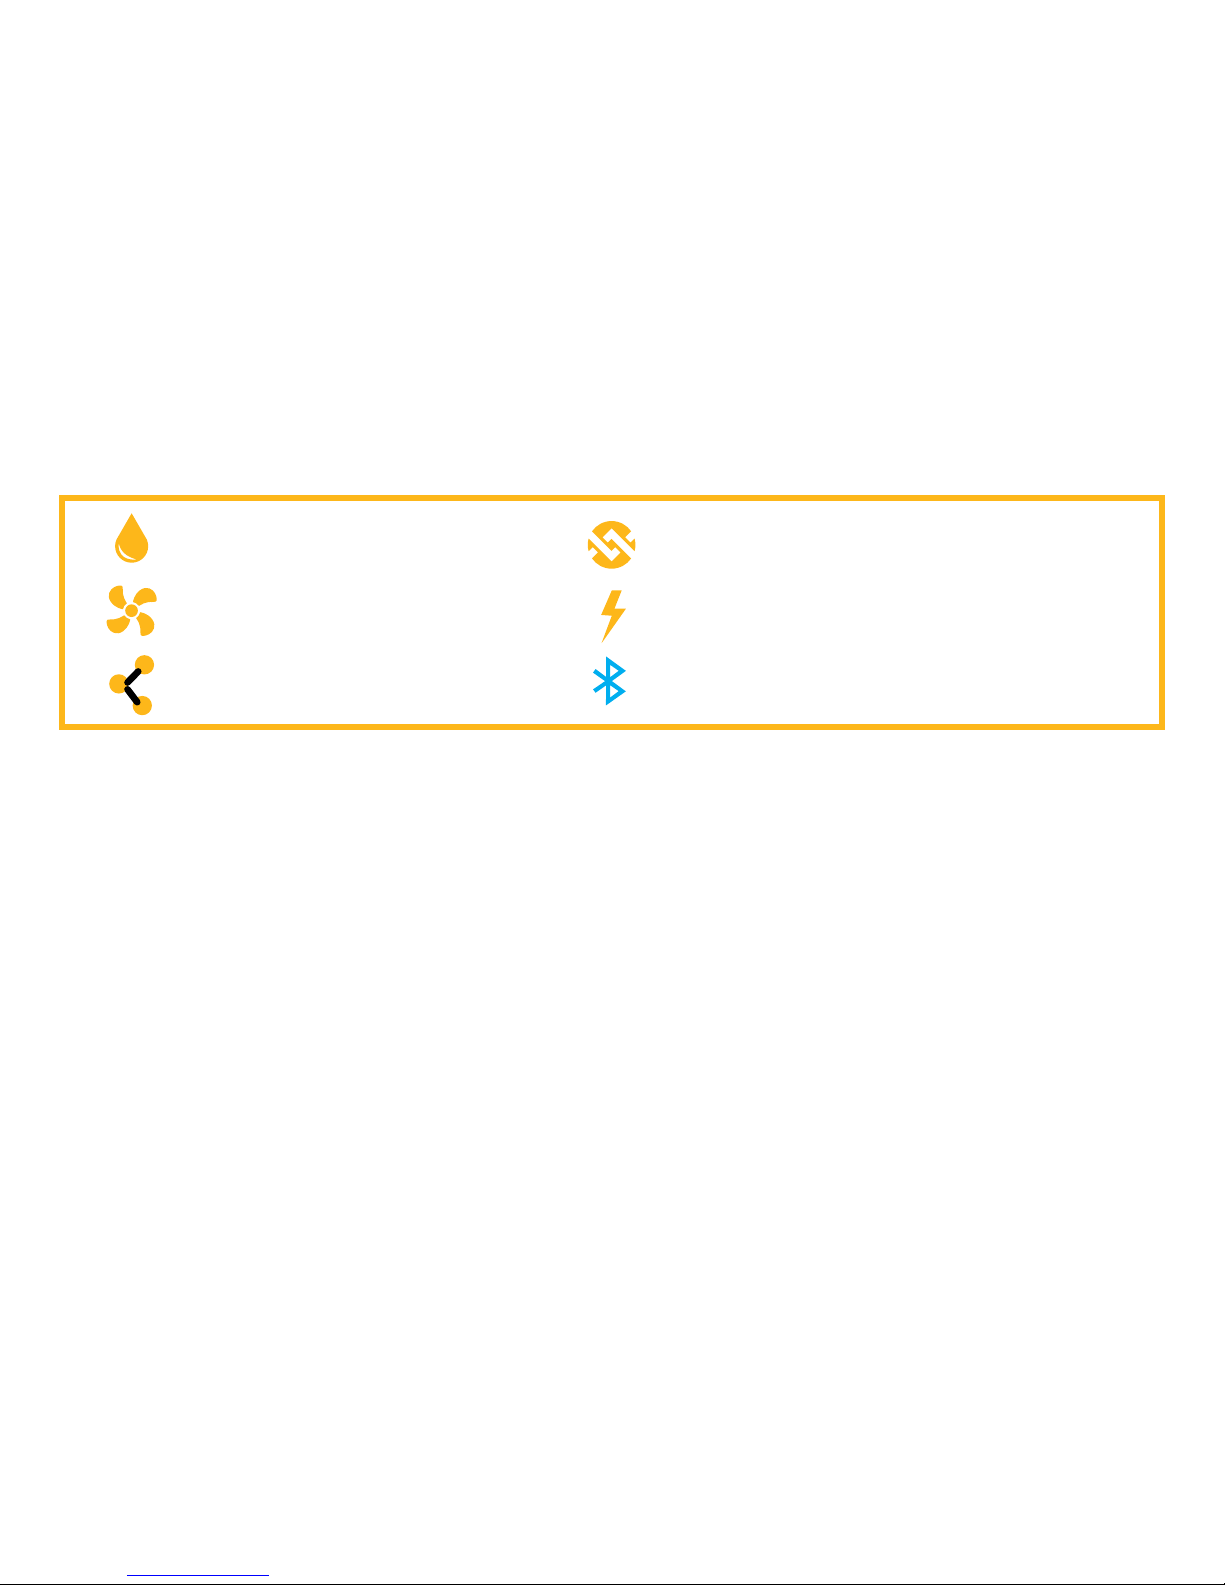
W
aterproof graphic display
Vents
Triac - for variable heat control
S
afety Information
1.This cont
roller is only to be used with the Grainfather brewing system, do not use with any other product.
2.
Only
use the product in the country that the control box is specified for.
3.Make sure to not splash any water into the air vents on the side of the control box or from the bottom of
t
he control box.
4.
Do not
submerge the control box in water or liquid.
5.
Do not
use this control box in an environment that has a lot of dust in the air.
6.
Alw
ays attach the control box to the Grainfather when in operation.
7.
Remove
the control box from the Grainfather when cleaning the Grainfather with a hose or water sprayer.
8.
Ensure that the main power supply to the controller contains overload protection
in accordance with the related national and/or local codes.
9. W
arning: Do not use the control box for longer than 2 hours at full capacity (100% heat on
and
pump running).
TE
CHNICAL SPECIFICATIONSTECHNICAL SPECIFICATIONS
30% gla
ss infused ABS plastic for extra strength
Power: 2000W Heating
Bluetooth: (v4.1)

Brewing with Others
One phone connects with one Grainfather.
Make sure you are the only one connecting to your Grainfather. If you are brewing with someone who also has a Grainfather,
one person must connect first. The other person should keep their control box turned off until the first person has connected
successfully, before turning it on to connect themselves.
Bluetooth Range
The Bluetooth connection will be limited to your surrounding structure (eg walls). If you move out of range, your Grainfather
will continue on the last updated schedule. The app will automatically reconnect once back in range and sync.
MOBILE APP MODE
Download the app to ensure you make use of all of the features
and benefits:
- Manual control straight from your mobile device like a remote control (default setting)
- Run your recipe on your device and the Grainfather will automatically move through the steps
- Alerts on your mobile device for the next step (even when you’re away from the Grainfather)
- Grainkid recipes preloaded and easy to follow
- Import BeerXML recipes and run through your brew
- Set a custom boil temperature (if you are at higher altitudes for example)
MOBILE SPECIFICATIONS NEEDED:
You will need to have downloaded the Grainfather Connect App from the Apple App Store or Google Play Store.
Android
Software: Android 4.3 (API Level 18) or higher
Hardware: Bluetooth Low Energy (LE)/Bluetooth Smart
iPhone/iPad
Software: iOS8 or higher
Hardware: iPhone 4S or higher
Bluetooth 4.0 or higher
Attaching to Grainfather
2. Feed cord through the cradle
and sit the control box on the
cradle. Fit the lugs at the rear
into the holes on the bracket
on the Grainfather.
3. Attach all plugs and temperature
probe connection. Plug the cord
from the pump into the pump
inlet underneath the control
box, do the same for the plug
coming from the boiler. The plug
exiting the pump is the pump
plug, the plug exiting the boiler
base is the heating element plug.
NOTE: You are likely to want to
lift the unit up to insert this, but
remember it is best to brew with
the Grainfather on the floor due to
heavy lifting later on.
1. Position your lugs on the rear
of the control box in the right
place to suit your Grainfather.
These are removable.
If you have an Element Variation Switch on your Grainfather - you
should now ensure this switch is always set to ‘Normal’ and leave your
control box to control the heating.
IMPORTANT TO NOTE:

MANUAL
Operation
&
Features
Button Press Once Hold for 3 Seconds Hold for 6 Seconds
Pump Pump On/Off (It will light up when on)
Heat Heat On/Off (It will light up when on) Go straight to boil /sets target temperature
to 100°C (212°F)
Set Turn Off Alarms Set timer (hold until timer unit flashes then
enter time using up and down arrows)
Switch between °C and °F
Up
Increase target Temperature/Time
Increase target by 2°C (3.6°F)/5 minutes
Down
Decrease target Temperature/Time
Decrease target by 2°C (3.6°F)/5 minutes
Menu
Press the up and down arrows
together to enter menu mode
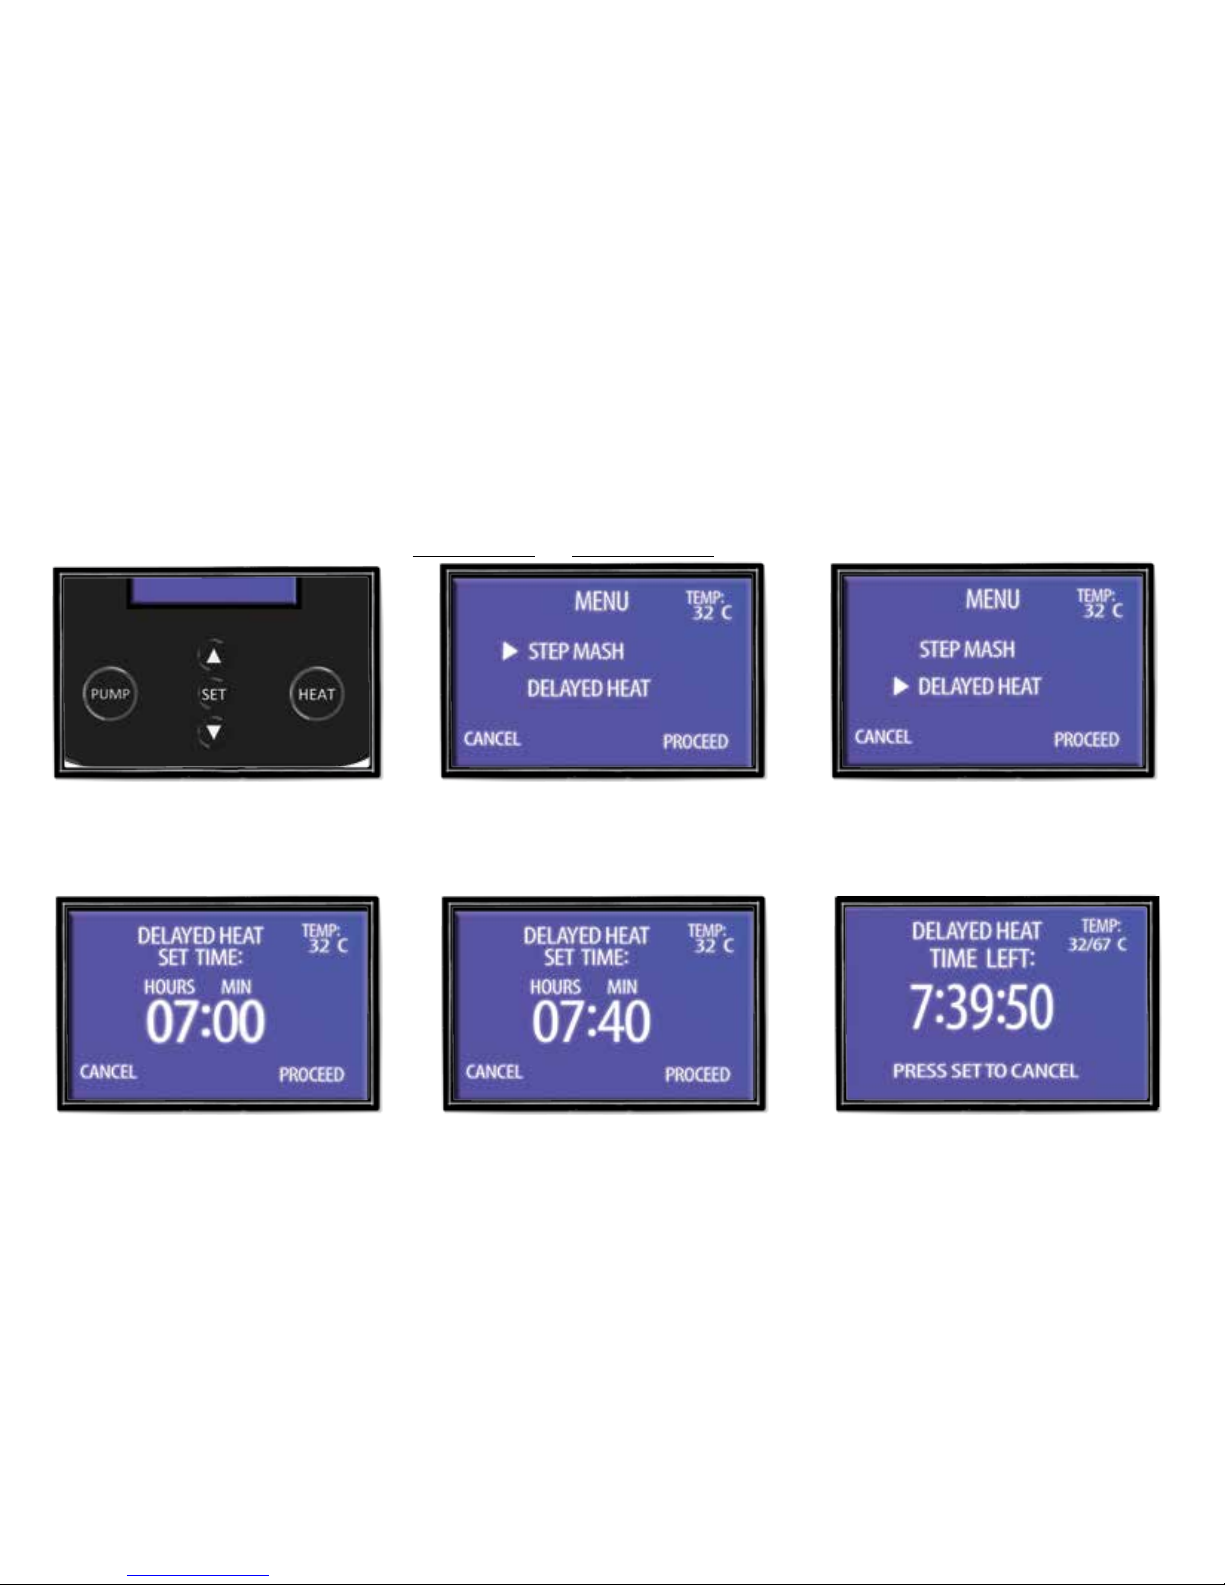
Menu
This is where you go to choose between step mashing and delayed heating.
AdvanceD Features
Without Mobile App
1. Press both the up and down arrows
together once to enter menu mode.
2. Press up or down arrows to choose
an option.
3. Press the “Heat” button to proceed
with selected option.
1. Press the up or down arrows to set
the time delay.
2. Press the “Set” button to toggle
between hours and minutes.
3. Press the “Heat” button to start. The
screen will display the countdown.
NOTE: Target temperature can be set before or after the timer starts for delayed heating.
Delayed Heating
This setting is so you can set the Grainfather to begin heating when you want to eg in 7 hours.
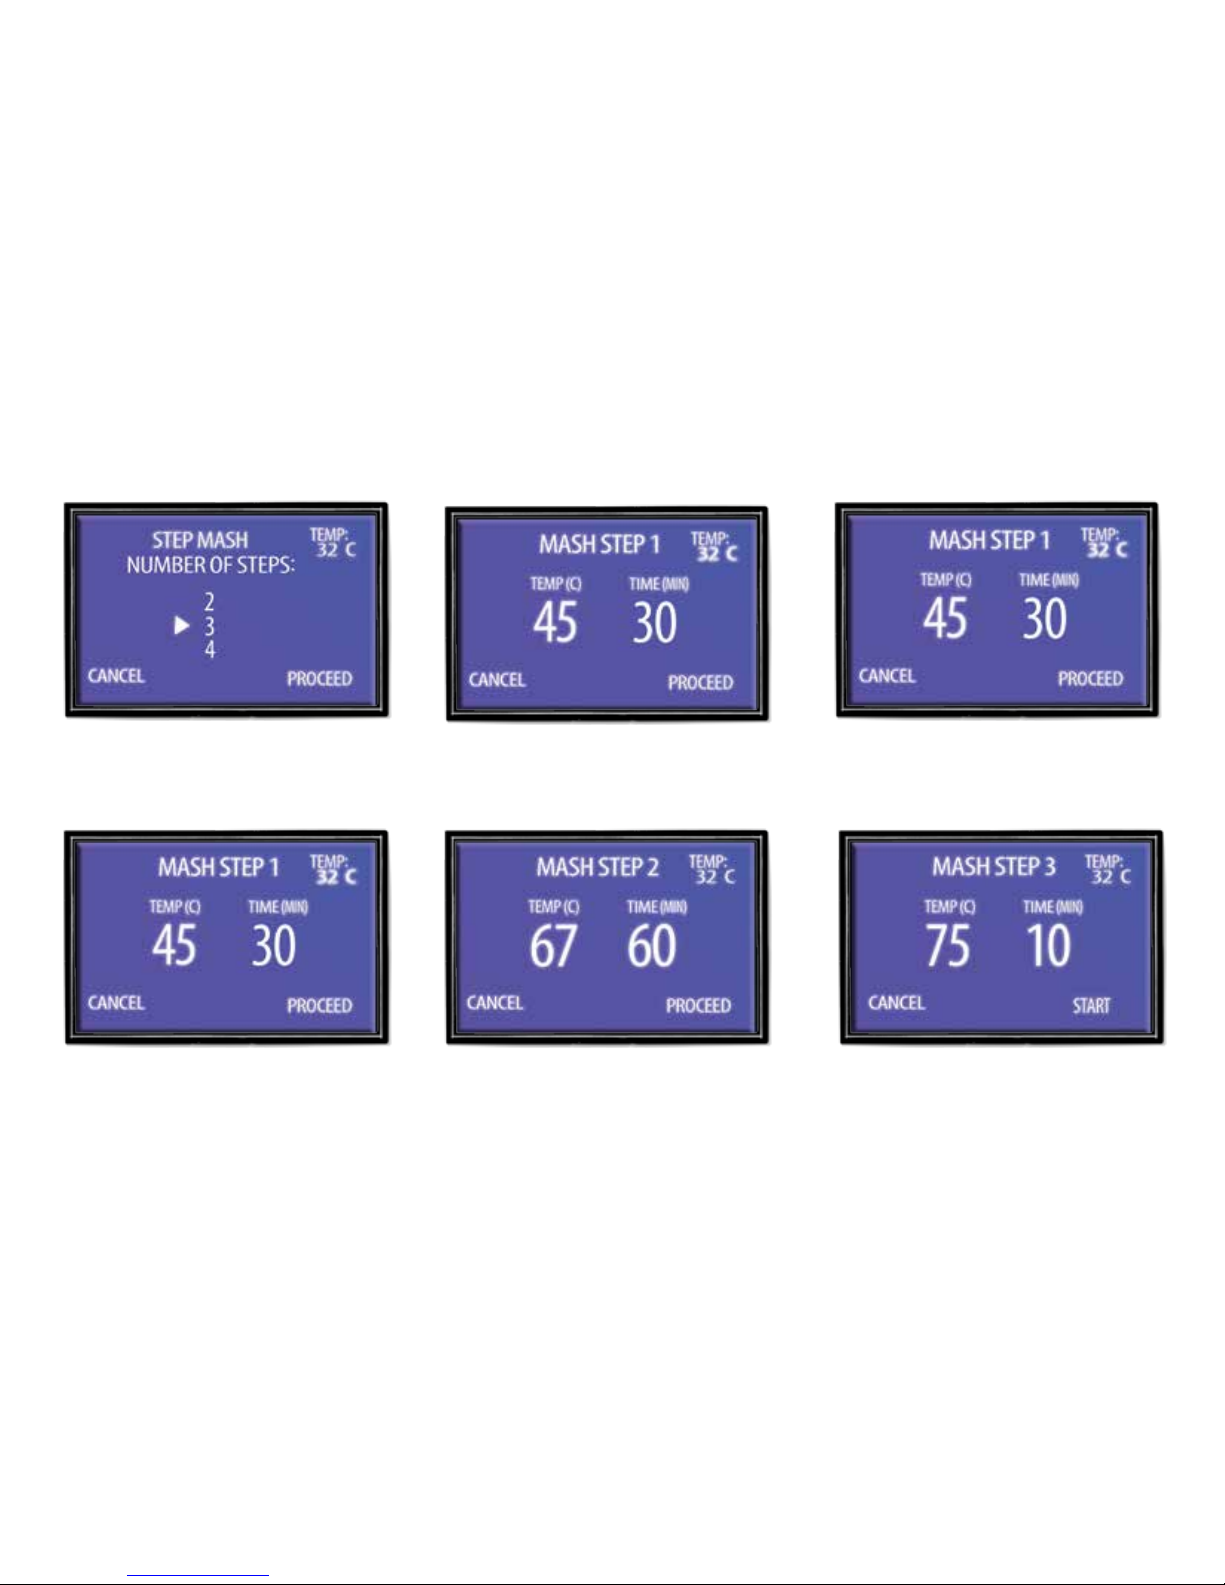
4. Press up or down to change time for
that step.
5. Press the “Heat” button to proceed
to the next step. Repeat, depending
on the amount of steps you have
selected.
6. On the last step press the “Heat”
button to start brewing.
Step Mashing
In this mode your can program up to four steps into the control box.
1. Choose how many steps you need
by pressing up arrow, then press
‘Heat’ to proceed.
2. Press up or down to change
temperature.
3. Press “Set” to switch to edit time.

This device complies with Part 15 of the FCC rules. Operation is subject to the
following two conditions: 1) this device may not cause harmful interference, and 2)
this device must accept any interference received, including interference that may
cause undesired operation.
Note: This equipment has been tested and found to comply with the limits for a Class
B digital device, pursuant to part 15 of the FCC Rules. These limits are designed to
provide reasonable protection against harmful interference in a residential installation.
This equipment generates uses and can radiate radio frequency energy and, if not
installed and used in accordance with the instructions, may cause harmful
interference to radio communications. However, there is no guarantee that
interference will not occur in particular installation. If this equipment does cause
harmful interference to radio or television reception, which can be determined by
turning the equipment off and on, the user is encouraged to try to correct the
interference by one or more of the following measures:
--Reorient or relocate the receiving antenna.
--Increase the separation between the equipment and receiver.
--Connect the equipment into an outlet on a circuit different from that to which the
receiver is connected.
--Consult the dealer or an experienced radio/TV technician for help.
Changes or modifications not expressly approved by the party responsible for
compliance could void the user’s authority to operate the equipment.
FCC Radiation Exposure Statement
This device complies with FCC RF radiation exposure limits set forth for an
uncontrolled environment. This transmitter must not be co-located or operating in
conjunction with any other antenna or transmitter.
FCC Statement

www.grainfather.com
Reorder: 800065
Version: 5
 Loading...