

Page 1
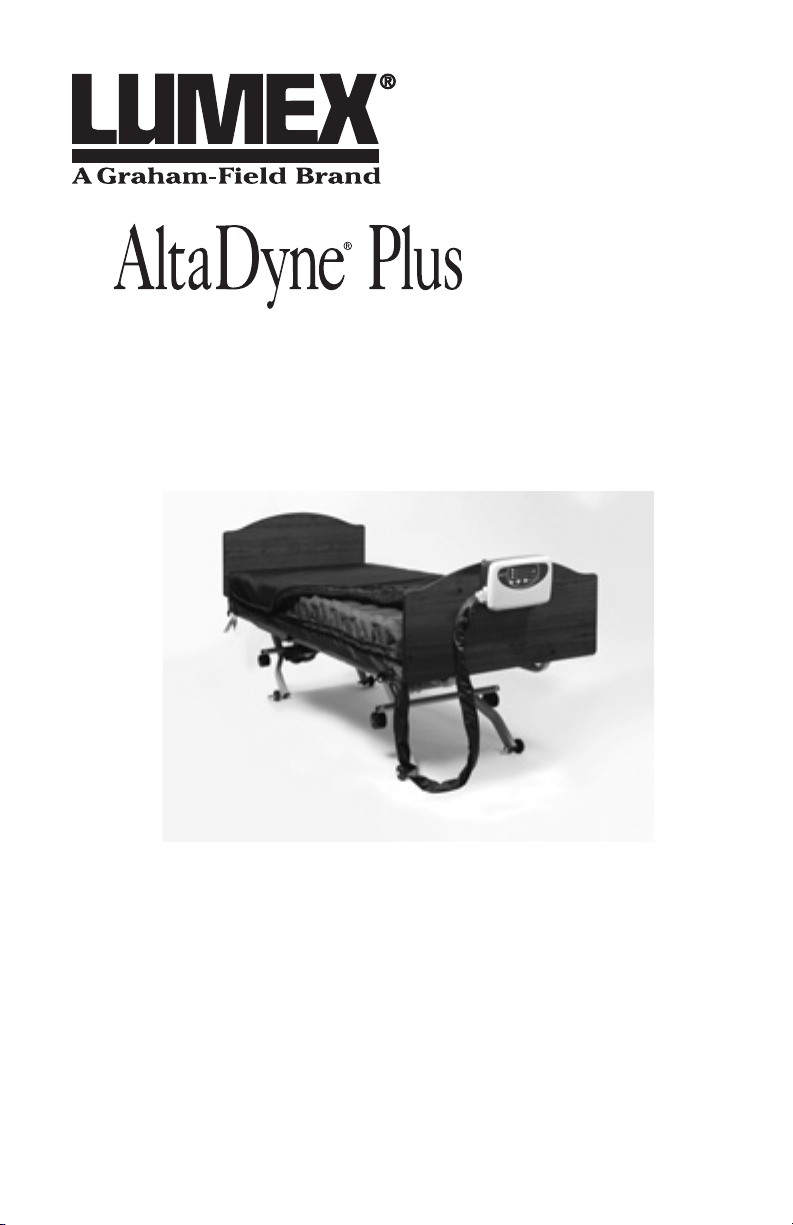
760000
ALTERNATING PRESSURE /
LOW AIR LOSS MATTRESS SYSTEM
USER MANUAL
Important: Do not operate the Mattress System
without rst reading and understanding this manual!
Save this manual for future use.
760000-INS-LAB-RevA08
Page 2

Contents
INTRODUCTION ..................................................................................... 3
INTENDED USE OF THIS DEVICE ........................................................ 3
IMPORTANT SAFETY PRECAUTIONS .................................................. 3
DANGER ................................................................................................. 4
WARNING ............................................................................................... 4
CAUTION ................................................................................................ 5
EQUIPMENT SYMBOLS ......................................................................... 5
PRODUCT DESCRIPTION ......................................................................6
PUMP AND MATTRESS SYSTEM ......................................................... 6
PUMP: FRONT ........................................................................................ 6
PUMP: REAR .......................................................................................... 7
PUMP: FRONT PANEL ........................................................................... 7
FRONT PANEL FIRST ROW (CYCLE TIME ADJUSTMENT) ......... 7
FRONT PANEL SECOND ROW (PRESSURE ADJUSTMENT) ...... 7
FRONT PANEL THIRD ROW (THERAPY MODE ADJUSTMENT) . 7
FRONT PANEL FOURTH ROW ....................................................... 8
INSTALLATION ........................................................................................ 9
UNPACKING ........................................................................................... 9
PUMP AND MATTRESS INSTALLATION .............................................. 9
OPERATION ...........................................................................................10
PRESSURE ADJUSTMENT ................................................................. 11
QUICK DISCONNECT .......................................................................... 11
TRANSPORT CAP ................................................................................ 12
CPR FUNCTION ................................................................................... 12
MAINTENANCE ..................................................................................... 12
CLEANING ............................................................................................ 12
GENERAL MAINTENANCE .................................................................. 13
FUSE REPLACEMENT .................................................................. 13
AIR FILTER REPLACEMENT ........................................................ 13
STORAGE ............................................................................................. 14
SPECIFICATIONS .................................................................................. 14
WARRANTY ........................................................................................... 15
GF, Graham-Field, Lumex and AltaDyne are registered trademarks of
GF Health Products, Inc.
GF Health Products, Inc. is not responsible for typographical errors.
Packaging, warranties, specifications and products are subject to change
without notice.
2 760000-INS-LAB-RevA08
Page 3

IntroduCtIon
Use this manual for set-up and operation of the Alternating
Pressure / Low Air Loss Mattress System. Read all instructions before using the mattress system. Save this manual
for future reference.
Intended use of thIs devICe
The intended use of the Alternating Pressure / Low Air
Loss Mattress System is:
• The treatment of pressure ulcers while optimizing user
comfort.
• Pain management as prescribed by a physician.
• As described above, in either a homecare or long-term
care setting.
Important safety preCautIons
The safety statements presented in this chapter refer to
the basic safety information that should be observed by
those using the Alternating Pressure / Low Air Loss Mattress System. There are additional safety statements in
other chapters or sections, which may be the same as or
similar to the following, or specic to the operations.
DANGER: Indicates an imminent hazard situation
that, if not avoided, will result in death or serious
injury.
WARNING: Indicates a potential hazard situation or
unsafe practice that, if not avoided, could result in
death or serious injury.
s
Caution: Indicates a potential hazard or unsafe practice that, if not avoided, could result in minor personal injury or product/property damage.
Note: Provides application recommendations or other
useful information to ensure that you get the most from your
product.
760000-INS-LAB-RevA08 3
Page 4

danger
To reduce the risk of electrocution:
DANGER: Always unplug this product immediately
after using.
DANGER: Do not use this product while bathing.
DANGER: Do not place or store this product where it
can fall or be pulled into a tub or sink.
DANGER: Do not place this product in or drop into
water or other liquid.
DANGER: Do not reach for a product that has fallen
into water. Unplug it immediately.
WarnIng
To reduce the risk of burns, electrocution, re, or
personal injury:
WARNING: Do not leave this product unattended
when plugged in.
WARNING: Always use close supervision when this
product is used by, on, or near children or those who
require close supervision.
WARNING: Use this product only as intended and
described in this manual. Do not use attachments or
accessories not recommended by Graham-Field.
WARNING: Never operate this product if
a) it has a damaged cord or plug
b) it is not working properly
c) it has been dropped or damaged
d) it has been dropped into water.
Return the product to your Graham-Field equipment
provider.
WARNING: Keep the cord away from heated surfaces.
4 760000-INS-LAB-RevA08
Page 5
WARNING: Never block the air openings of this
product or place it on a soft surface, such as a bed
or couch, where the openings may be blocked. Keep
the air opening free of lint, hair, and other similar
particles.
WARNING: Never drop or insert any object into any
opening or hose.
WARNING: Do not use this product in the presence
of ammable anesthesia, or where oxygen or nitrous
oxide is being administered.
WARNING: Connect this product only to a properly
grounded power outlet.
WARNING: Maximum patient weight capacity for this
product is 400 lb (189 kg).
CautIon
s
Caution: The pump can be used only with the accompanying mattress. Do not use it for any other purpose.
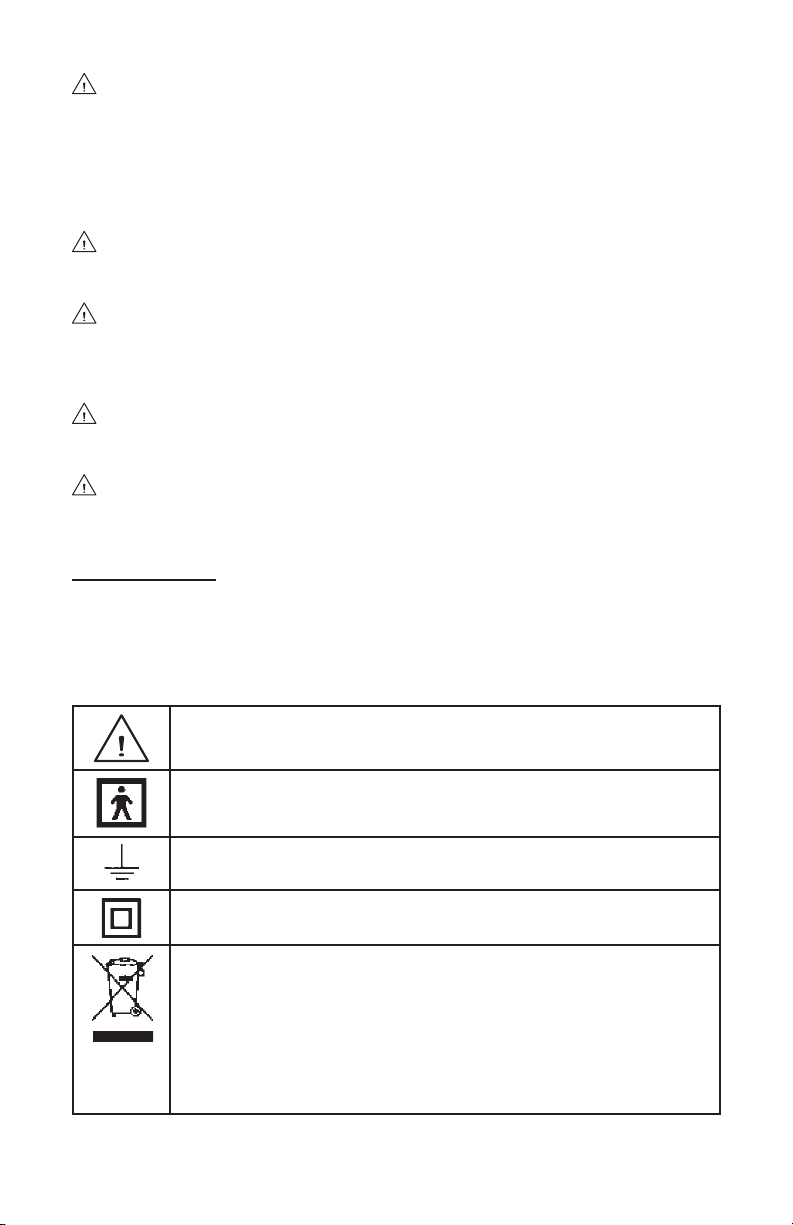
equIpment symbols
Attention! Consult accompanying documents (this manual)
Indicates that this product is according to the degree of
protection against electric shock for type BF equipment
Functional earth (for UL only)
Class II (for UL only)
Disposal of Electrical & Electronic Equipment (WEEE):
Do not treat this product as household waste. For more
detailed information with regard to returning and recycling
this product, please consult your local city ofce, household
waste disposal service, or Graham-Field Health Products
equipment provider.
760000-INS-LAB-RevA08 5
Page 6

For U.S. and Canada only
pump and mattress system
CPR valves
mattress-pump
connectors
mattress
foot end
symbol
pump
quick connector
E228589
53DG
Medical Equipment: Air Pump
with respect to electrical shock, re and
mechanical hazards only in accordance with
UL60601-1 and CAN/CSA C22.2 No. 601.1
produCt desCrIptIon
pump and mattress system
pump: front
6 760000-INS-LAB-RevA08
Page 7

pump: rear
main power
switch
power cord
receptacle
fuse
hanger
filter
cycle time adjust button; cycle time
indicators at right of button
decrease pressure button;
pressure level indicators
at right of button
panel lock button; panel lock
indicator at right of button
therapy adjust button;
therapy mode indicators
at right of button
power ON/OFF button; ON/OFF
indicator at right of button
low pressure indicator (upper)
power failure indicator (lower)
alarm mute button
service indicator
increase pressure button
pump: front panel
Front panel rst row (cycle time adjustment)
There are four cycle time settings. Press the cycle time
adjust button to cycle between the settings. The selected
cycle time setting's indicator will illuminate.
Front panel second row (pressure adjustment)
There are ten pressure (rmness) settings. Press the decrease pressure button at the left end of the row to decrease pressure (softer), and press the increase pressure
button at the right end of the row to increase pressure
(rmer). The selected pressure level setting's indicator will
illuminate.
Front panel third row (therapy mode adjustment)
There are four therapy mode settings: Autofirm (to ll
mattress quickly, or to fully inate mattress during patient
ingress/egress for better support), Alternating Pressure
(every other tube lls, then deates), Static (all tubes
remain full), and Seat Inflation (when the head is raised to
760000-INS-LAB-RevA08 7
Page 8

increase pressure under the buttocks). Press the therapy
adjust button at the left end of the row to cycle between
the settings. The selected therapy mode setting's indicator
will illuminate.
Front panel fourth row
Panel lock button: The panel lock protects the panel settings from accidental change. Press to lock; press for three
seconds to unlock. When the panel remains untouched for
three minutes, it locks automatically. When the panel is
locked, the panel lock indicator will illuminate.
Power button (ON/OFF): The power button turns power to
the mattress system ON or OFF. Press to turn ON; press to
turn OFF. When power is on, the power (ON/OFF) indicator
will illuminate. When power is turned OFF, mattress system
will slowly deate. Note: Main power switch on side of pump
must be ON in order for the panel power button to function.
Alarm mute button: The alarm mute button temporarily
suspends the LED indicator and buzzer when either the
low-pressure alarm or power failure alarm is activated.
Should the problem not be resolved within ve minutes,
the alarm will resume.
Low pressure indicator: The low pressure indicator illuminates, and the alarm sounds, when pressure level is lower
than the selected pressure. If the low pressure indicator
persistently illuminates inappropriately:
1. Check to ensure all connections are properly and se
-
curely connected per installation instructions.
2. Check for any leakage (tubes or connecting hoses). If
necessary, contact your Graham-Field equipment provider to replace any damaged tubes or hoses.
3. If problem persists, contact your Graham-Field equipment provider.
Power failure indicator: The power failure indicator illuminates, and the alarm sounds, when there is a power failure.
Depress the alarm mute button to disable both alarm and LED.
8 760000-INS-LAB-RevA08
Page 9

Service indicator: Mechanical failure, service required;
hanger
contact your Graham-eld equipment provider.
InstallatIon
unpaCkIng
1. Before unpacking, check for obvious damage to the carton or its contents. If damage is evident, please notify
the carrier and your Graham-Field equipment provider.
2. Remove all loose packing from the carton.
3. Carefully remove all components from the carton.
4. Inspect all components. If damage is evident, please
notify the carrier and your Graham-Field equipment
provider.
pump and mattress InstallatIon
1. Remove all sheets, blankets, and pillows from the bed.
2. Place the mattress on top of the
bed frame; ensure that the foot
end symbol faces up at foot end
as shown at right. Secure mattress to bed with straps.
3. Fold open the wire hangers on
the back of the pump as shown
at right.
4. Either hang the pump on the
bed's foot end, as shown at right,
or place the pump on a at surface easily accessible to the caregiver and/or doctor.
760000-INS-LAB-RevA08 9
Page 10

s
main
power
switch
power button
Caution: Place the device in a position where the caregiver and/or doctor can access it easily.
5. Connect the mattress-pump air
hose quick connector; ensure that
the connector has clicked securely
into place before continuing.
s
Caution: Ensure that the air hoses are not kinked or
tucked under the mattress.
WARNING: Locate all cords so that they will not be
stepped on, tripped over, or otherwise subjected to
damage or stress.
WARNING: Do not use a household extension cord if
the electrical cord does not reach the power outlet.
Use of an improper extension cord could result in
re and electric shock. If an extension cord must
be used, use a three conductor cord with ground,
properly wired, in good electrical condition, and keep
it as short as possible.
WARNING: Ensure that the local power voltage is
appropriate for the pump unit.
6. Plug the power cord into a properly grounded electrical
outlet.
operatIon
1. Turn the main power
switch to the ON position.
2. Press the front panel power
button. The power indicator will illuminate.
10 760000-INS-LAB-RevA08
Page 11

Note: The mattress system will automatically enter Autofirm
mode for the quickest inflation at set-up; initial inflation takes
approximately twenty minutes.
3. The pump will begin delivering air into the mattress.
4. When the selected pressure level is reached, the pump
will enter alternating mode. The mattress can then be
adjusted to the desired pressure.
5. Replace all sheets, blankets, and pillows on the bed.
pressure adjustment
Generally, a lighter patient will need a lower (softer) setting while a heavier patient will need a higher (rmer)
setting, but pressure adjustment must ultimately be based
on the patient's weight distribution. A short, stocky person
may be the same weight as a tall, thin person, but their
settings will not be the same. The mattress should be rm
enough to support the patient, yet soft enough so the
patient will sink down to eliminate pressure points. Initially
inate the mattress to maximum pressure. Then, when
patient lies on the mattress, test the pressure by placing
four ngers below the mattress under the patient's buttock area; your ngers should just t. If the t is too loose,
decrease the setting. If your ngers do not t well, increase
the setting two notches rmer. Wait ten minutes and then
check again. You should only have to adjust this setting
one time per patient. Please consult your physician for an
appropriate setting.
quICk dIsConneCt
Pull the power plug from the wall connector to disconnect
the device quickly.
760000-INS-LAB-RevA08 11
Page 12

transport Cap
quick connector
transport cap
In case of power failure or transport: Disconnect the quick connector and cap the mattress with the
transport cap to slow deation.
Cpr funCtIon
If CPR must be performed on the
patient while the mattress is in use,
to immediately deate the mattress, either:
1. Pull the CPR valves from the
mattress in the location of the
arrow shown at right, or
2. Disconnect the quick connector
from the pump in the location of
the arrow shown at right.
maIntenanCe
CleanIng
Perform the following cleaning procedures before use.
Pump: Wipe the pump with a clean, damp cloth and mild
detergent, and keep it away from dust. Air dry.
s
Caution: Do not use corrosive or powdered cleansers
to clean the pump.
s
Caution: Do not immerse or soak the pump.
s
Caution: Do not clean with phenolic products.
Mattress: Wipe the mattress unit with a clean, damp cloth
and mild detergent. The mattress may also be cleaned using a 10% solution of sodium hypochlorite (bleach) diluted
in water. Air dry all parts thoroughly before use.
s
Caution: Do not clean with phenolic products.
s
Caution: After cleaning, air dry the mattress without
direct exposure to sunlight.
12 760000-INS-LAB-RevA08
Page 13

general maIntenanCe
fuse
filter
1. Check main power cord for abrasion or excessive wear.
2. Check mattress cover for signs of wear or damage. Ensure mattress cover and tubes are connected correctly.
3. Check airow from the air hose connector. The airow
should alternate between each connector every halfcycle time if it’s in alternating mode.
4. Check the air hoses for any kink or break. For replacement, please contact your GF equipment provider.
Fuse replacement
tool needed: small screwdriver
1. If you suspect a blown fuse, disconnect the plug from the wall outlet
immediately.
2. Use a small screwdriver to remove
the cover of the fuse holder (fuse locations are shown
in picture at right).
3. Insert a new fuse of the correct rating (T1A/250V, VDE
approved).
4. Replace the fuse holder cover. Ensure that fuse holder
cover is securely installed.
Air lter replacement
tool needed: small screwdriver
1. Use a small screwdriver to remove
the air lter plate located at rear
of pump (lter location shown in
picture at right).
2. Remove the lter. The lter is reusable, if not torn, and
can be washed gently with a mild detergent and water.
Dry the lter before use.
3. Replace the lter and cover. Ensure that lter cover is
securely installed. Replace the air lter regularly if it is
gray, torn, or the environment is dirty.
760000-INS-LAB-RevA08 13
Page 14

storage
1. Lay the mattress out at and upside down.
2. Roll from the head end toward the foot end.
3. Stretch the foot-end strap around the rolled mattress to
prevent unrolling.
4. Store mattress and pump in a dust-free environment
with no exposure to direct sunlight.
s
Caution: Do not fold, crease or stack mattress.
speCIfICatIons
Pump Specication
Power Supply 120V System: AC 120V 60 Hz
Note: see rating label on product
Fuse Rating T1A, 250V
Cycle time 10, 15, 20 or 25 minutes
Air input >8 LPM
Dimensions (L x W x H) 11.4" x 7.9" x 4.6" (29.1 x 20 x 11.7 cm)
Weight 5 lb (2.2 kg)
Environment Temperature Operation: 50°F to 104°F (10°C to 40°C)
Storage: 5°F to 122°F ( -15°C to 50°C)
Shipping: 5°F to 158°F ( -15°C to 70°C)
Humidity Operation: 10% to 90% non-condensing
Storage: 10% to 90% non-condensing
Shipping: 10% to 90% non-condensing
Classication Class II, Type BF, IPX0
Applied Part: Air Mattress
Not suitable for use in the presence of a
ammable anesthetic mixture (No AP or
APG protection)
14 760000-INS-LAB-RevA08
Page 15

Mattress Specication
Model 8" mattress
Dimensions (L x W x H) 78.7" x 35.4" x 8" (200 x 90 x 20.3 cm)
Weight 16.5 lb (7.5 kg)
Warranty
GF Health Products, Inc. warrants the Lumex AltaDyne Plus
760000 Alternating Pressure / Low Air Loss Mattress System for a period of twelve months for defects in workmanship and materials. During the warranty period, defective
items will be repaired or replaced at GF Health Products'
option at no charge.
760000-INS-LAB-RevA08 15
Page 16

USA, Corporate Headquarters:
Graham-Field Health Products
2935 Northeast Parkway
Atlanta, Georgia 30360
telephone: 800-347-5678, 770-447-1609
fax: 800-726-0601, 678-291-3232
www.grahamfield.com
760000-INS-LAB-RevA08
© 2008 GF Health Products, Inc.
 Loading...