

Grafco 8375, 8376 Operating Instructions Manual

DRY HEAT STERILIZERS
Catalog Nos. 8375/8376
(Both Models are Equipped with Automatic Timer Switch, Thermostat and Thermometer)
OPERATING INSTRUCTIONS
Timer Switch
The timer switch serves as the ON/OFF switch for the sterilizer. To activate the timer
and turn the sterilizer on, turn the knob clockwise (right) past the number “10”. You can
then set the timer for the desired time as indicated on the calibrated scale dial.
To set the timer for continuous operation or “warm up”, turn the knob counter-clockwise
(left) to the “HOLD” position. CAUTION: the sterilizer will remain on until it has been
manually turned off or set for a timed sterilization cycle.
Thermostat & Thermometer
Before using the sterilizer for the FIRST time, it is necessary to establish a thermostat
setting that will maintain the selected temperature.
For 320ºF (160ºC) set the number “7” on the thermostat dial to match and line up with
the marking dot on the side of the sterilizer. Set the timer to “HOLD” position.
After approximately 30 minutes for the Model 200 or 45 minutes for the Model 300,
check the thermometer temperature. The thermometer temperature should be near
320ºF (160ºC). The smaller the number of the dial setting, the lower the temperature
setting. Temperatures may vary during the heat-up period.
Pilot Lights
The sterilizer has two (2) pilot lights. The left light will be on as long as the timer switch
is in the “ON” position. The right light is on only while the heating elements are
operating and heating the sterilization chamber.
Sterilization Procedures
Prepare all instruments for sterilization by using an Ultrasonic Cleaner, as
recommended by the Centers for Disease Control (CDC). Thoroughly rinse the
instruments and pat dry with a paper towel. The American Dental Association (ADA)
recommends bagging the instruments prior to sterilizing. Sterilization bags specific to
dry heat sterilization must be used. Instruments should be placed in a single layer and
distributed evenly on the sterilizer’s trays. Instruments should not touch each other.
DO NOT OVERLOAD THE STERILIZER.
Maximum Loading
Model 200 Sterilizer (Cat. No. 8375)–1.3 pounds per tray (includes the weight of the tray)
Model 300 Sterilizer (Cat. No. 8376)–1.4 pounds per tray (includes the weight of the tray)
Spore Test Strips
The Centers for Disease Control (CDC) recommends the sterilizer be tested weekly. For
Dry Heat Sterilizers, use Bacillus Atrophaeus spore test strips.
Power Source
Always check for correct voltage before operating sterilizer. Standard units operate on
115 VAC electrical power. Other voltages are available upon request. Voltage rating is
printed on nameplate (located near power cord).
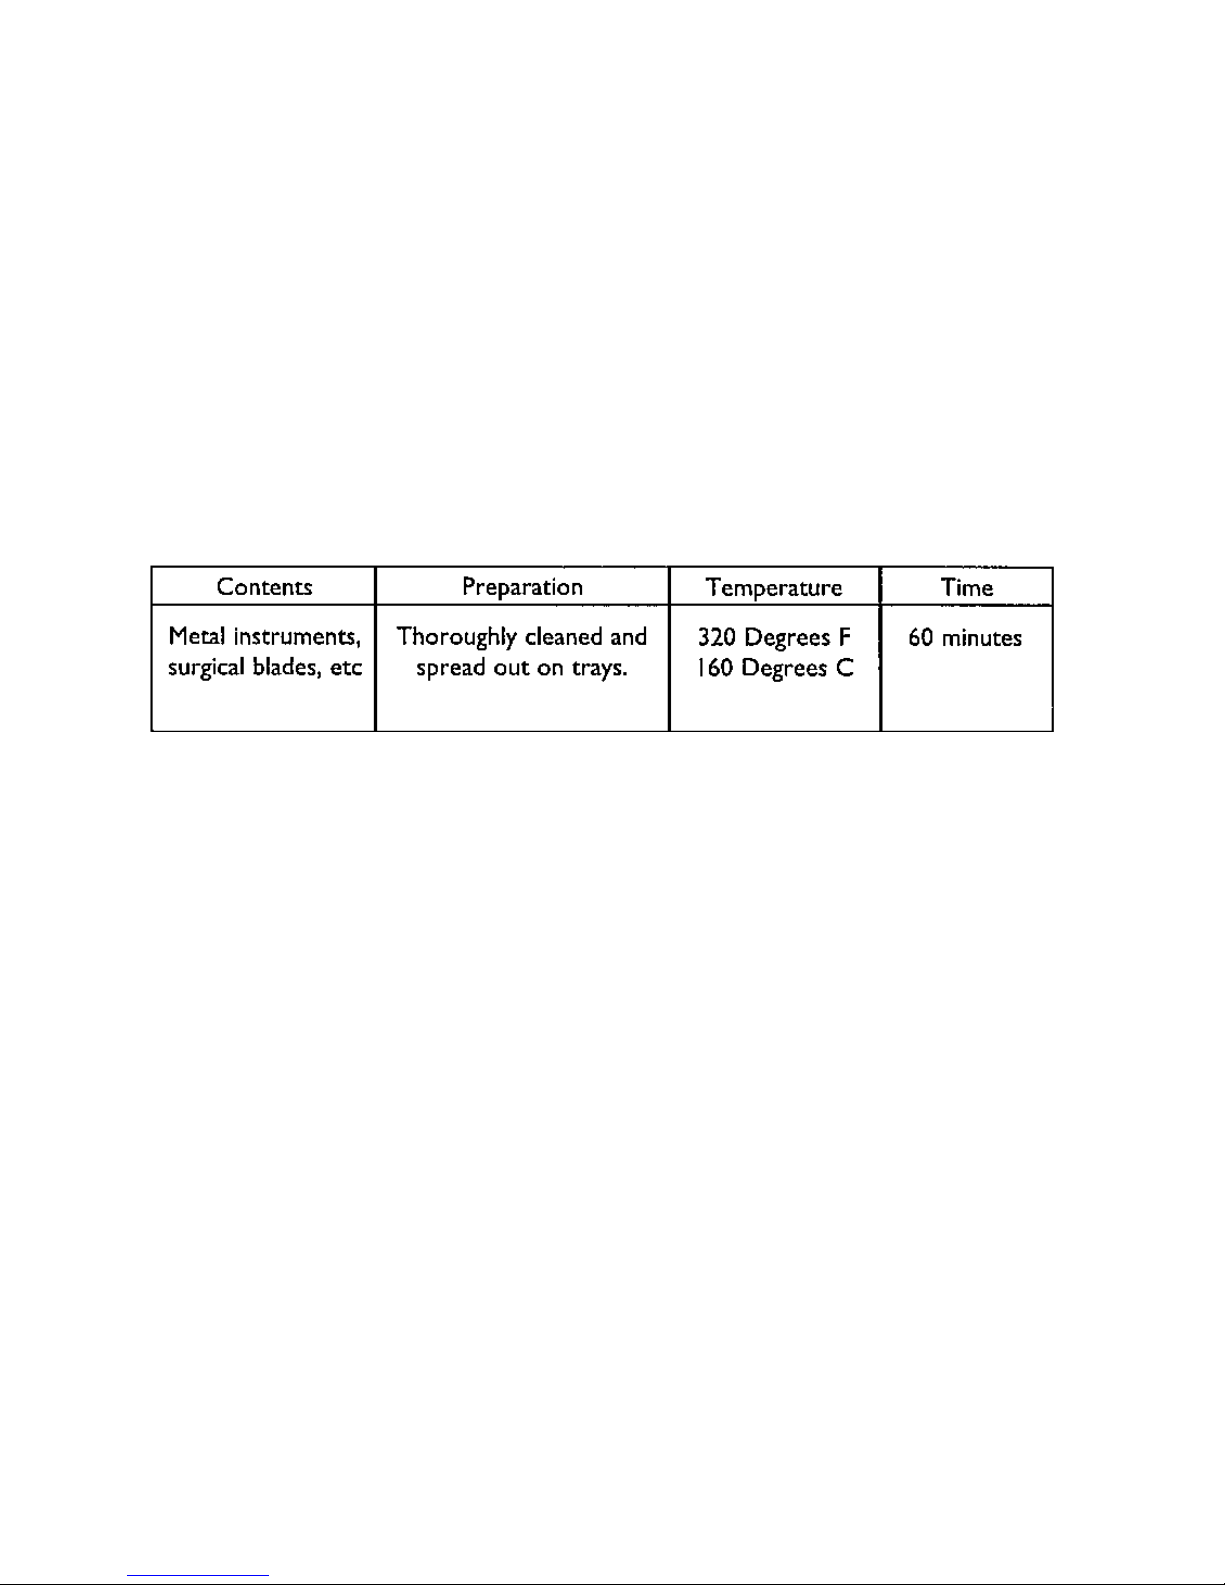
Time and Temperature Chart*
*Time cycle begins after sterilizer reaches operating temperature.
Note: Registration card accompanying your Dry Heat Sterilizer must be
completed and returned within two weeks.
Distributed By: GF Health Products, Inc.
Atlanta, GA 30360
Made in USA
www.grahamfield.com
Revised 11/08
 Loading...