

Page 1
Instructions - Parts
Compact Dyna-Star
Electric Pump 35 lb
®
3A6998C
(5 Gallon) Pail Kit
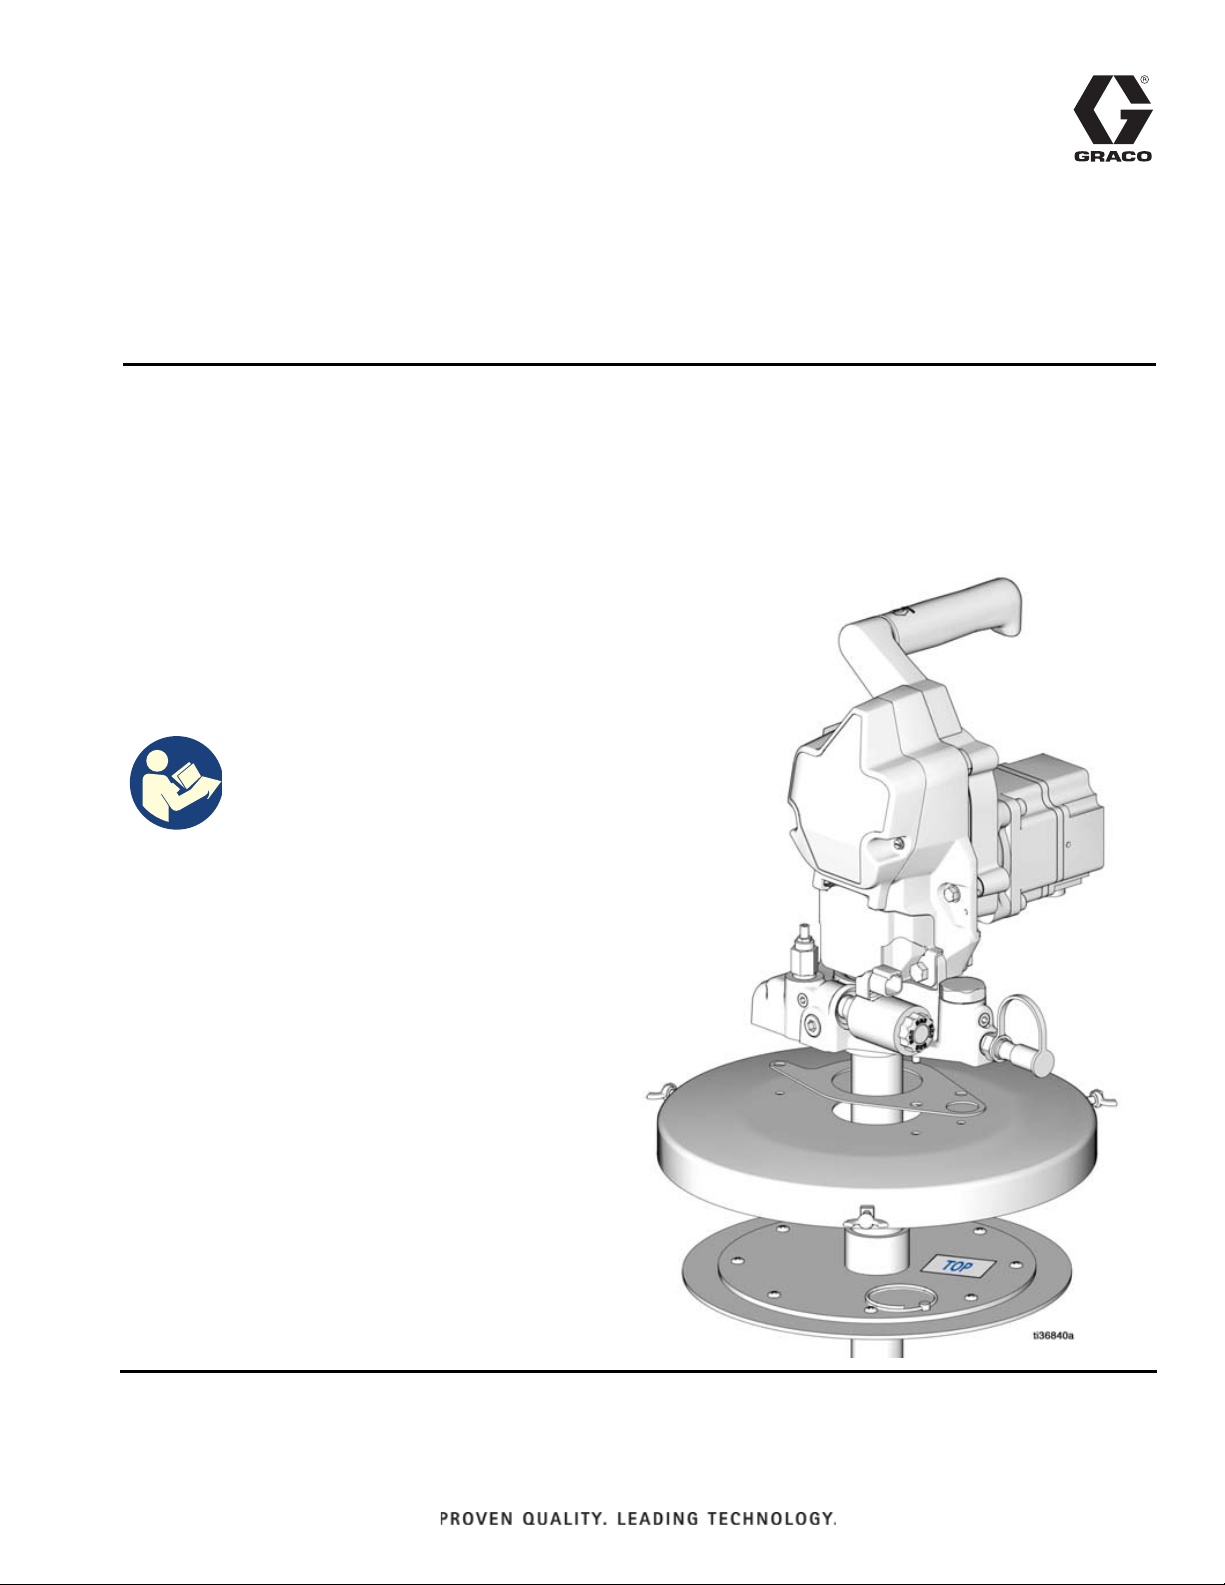
For adapting an Electric Compact Dyna-Star Pump for use with a 35 lb (5 gallon) bucket.
For professional use only.
Not approved for use in explosive atmospheres or hazardous (classified) locations.
Assembly and use of the 35 lb
(5 Gallon) pail option for models
CD1030, CD1031, CD1032, CD1130,
CD1131, CD1132, CD1231, CD1332
Important Safety Instructions
Read all warnings and instructions in
this manual and in the Compact
Dyna-Star Electric Pump instruction
manual before using the equipment.
Save all instructions.
EN
Related Manuals
3A6941 - Compact Dyna-Star Electric Pump Manual
3A6932 - Compact Dyna-Star Auto-Fill Shut Off Kit
3A7035 - Compact Dyna-Star Pump Cable
Page 2

Contents
Contents
Installation. . . . . . . . . . . . . . . . . . . . . . . . . . . . . . . . . 3
Grounding . . . . . . . . . . . . . . . . . . . . . . . . . . . . . . 3
Air Purge . . . . . . . . . . . . . . . . . . . . . . . . . . . . . . . 3
Initial Set-Up . . . . . . . . . . . . . . . . . . . . . . . . . . . . 5
Pressure Relief Procedure . . . . . . . . . . . . . . . . . . 8
Change the Grease Bucket . . . . . . . . . . . . . . . . . . . 9
When Grease Bucket is Empty....................... 9
Parts . . . . . . . . . . . . . . . . . . . . . . . . . . . . . . . . . . . . 10
Graco Information . . . . . . . . . . . . . . . . . . . . . . . . . 12
2 3A6998C
Page 3
Installation
Installation
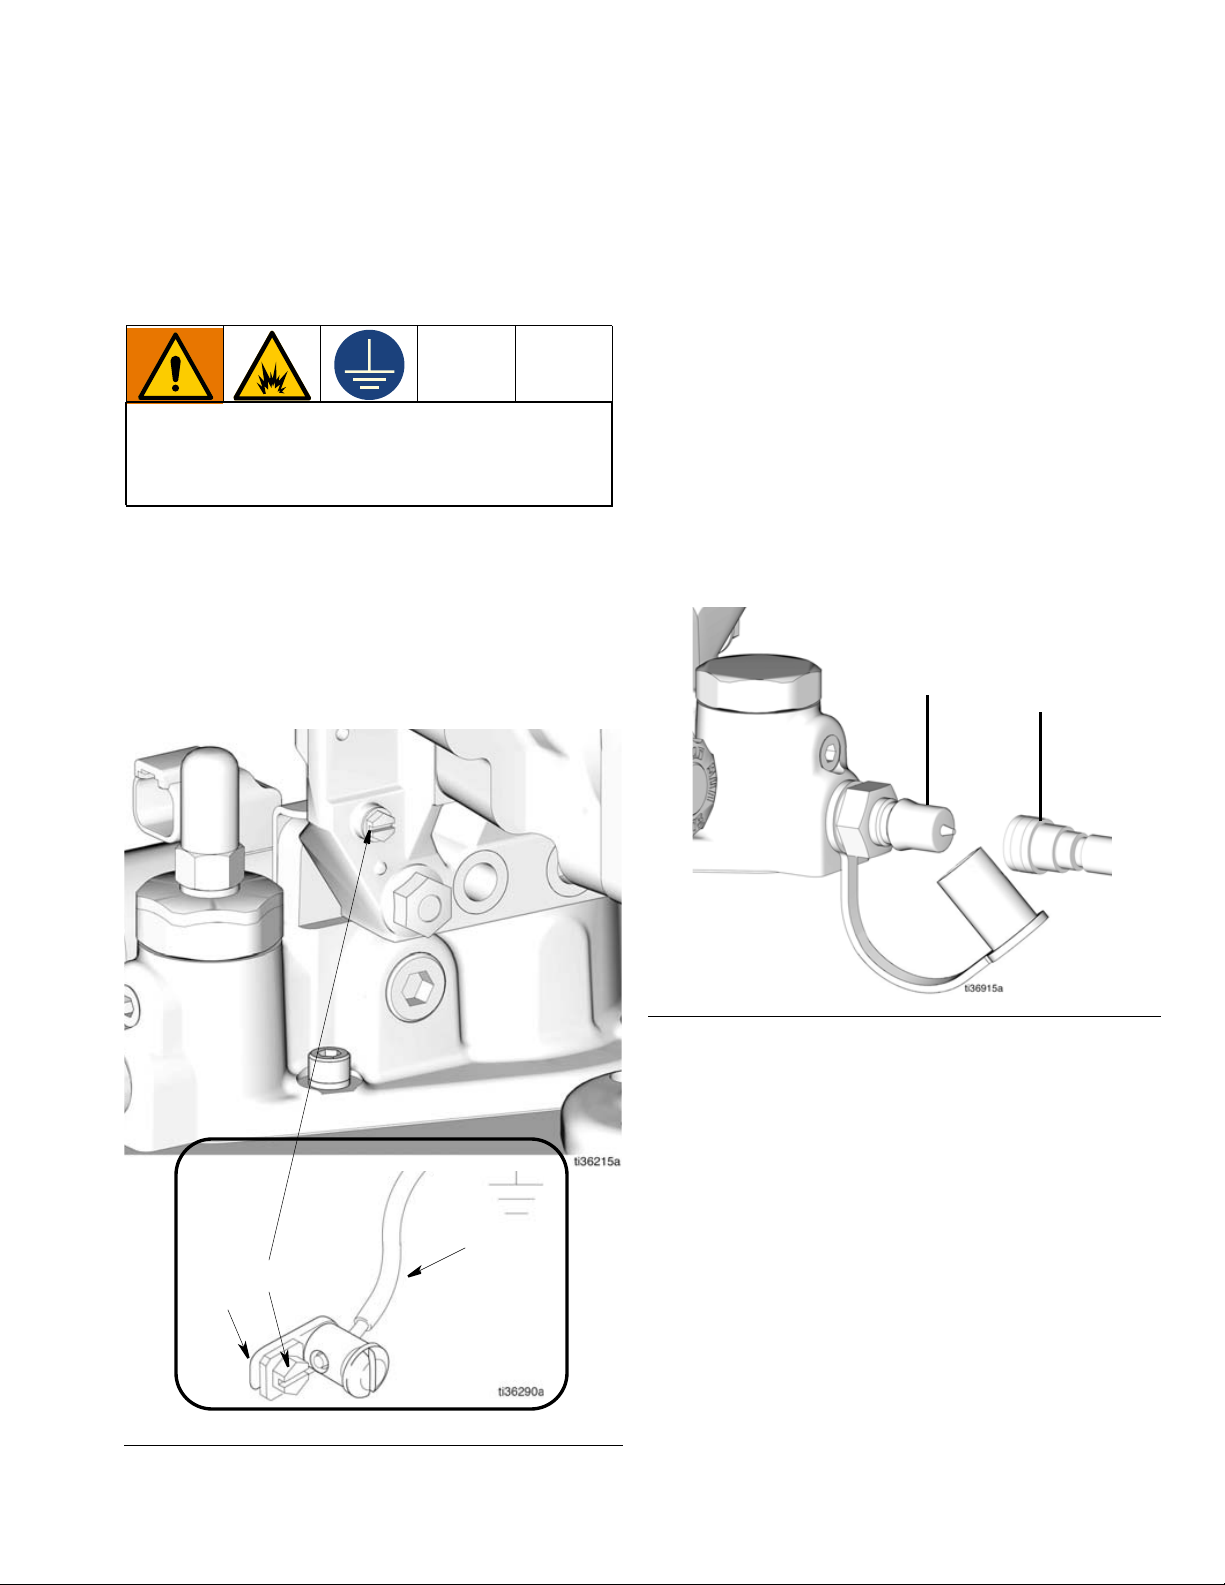
Grounding
The equipment must be grounded to reduce the risk
of static sparking. Static sparking can cause fumes
to ignite or explode. Grounding provides an escape
wire for the electric current.
To ground the pump: Remove the ground screw (Z)
located on the back of the gear box and insert it
through the eye of the ring terminal (W) at end of
ground wire (Y). Fasten the ground screw (Z) back onto
the pump and tighten securely. Connect the other end
of the ground wire (Y) to a true earth ground (FIG. 1). To
order a ground and wire clamp, order Part 222011.
Reference numbers used in the following instructions
correspond to the Parts illustration on page 10. Parts
identified with an alpha character are user provided or
already installed components.
Air Purge
There is air located between the pump tube and the
tube-in-tube. Remove this air by filling it with grease to
prime the pump. If this is not done, the pump may lose
priming during operation.
1. Connect the refill pump to the fill coupler (FIG. 2).
Fill Coupler
Refill Pump
FIG. 2
Y
Z
W
FIG. 1
3A6998C 3
Page 4
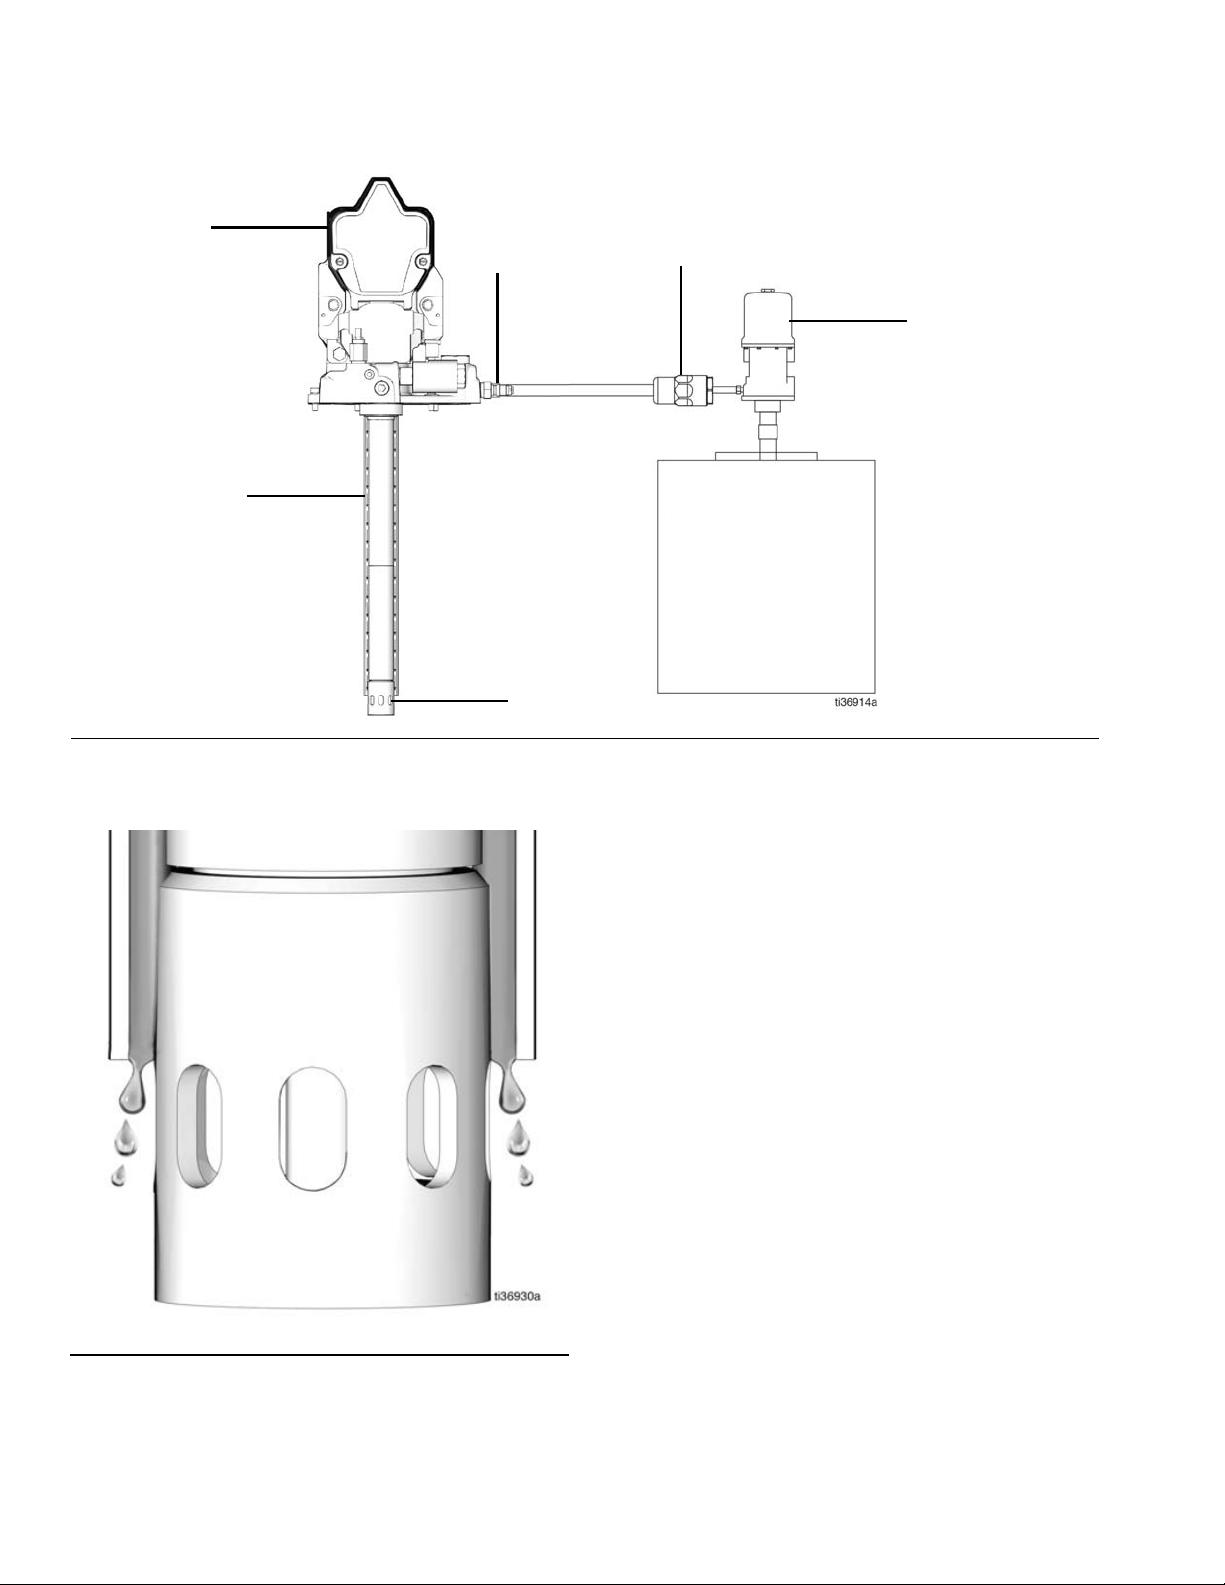
Installation
Tube-in-tube
Pump
Fill Coupler
Refill Filter
Refill Pump
Pump Tube
FIG. 3
2. Run the refill pump until grease comes out of the
bottom of the tube-in-tube (FIG. 3 and FIG. 4).
1
FIG. 4
4 3A6998C
Page 5

Installation
Initial Set-Up
1. Unpack the kit.
2. Remove and discard the cover from the grease
bucket (a) (user supplied).
3. Place the follower plate (5), top side up (label facing
upward), on top of the grease (FIG. 5).
4. Grease the o-ring at the center of the follower plate
(FIG. 5).
5. Firmly press the follower plate down into the grease
to remove all air pockets (FIG. 5).
o-ring
5
a
6. Place the drum cover (1) on top of the follower plate
(5) (FIG. 6).
1
5
FIG. 6
7. Place the gasket (2) over the center of the drum
cover (1) and align the holes (FIG. 7).
FIG. 5
2
1
FIG. 7
3A6998C 5
Page 6

Installation
8. Install the pump (7) on top of the cover, placing it
through the gasket and drum cover(1) (FIG. 8).
7
FIG. 8
9. Align the four washers (8) and four screws (3) with
the pump, gasket and cover (FIG. 9). Use a wrench
to tighten securely.
10. Install the thumb screws (4) into the cover (1) and
tighten securely (FIG. 10).
4
1
1
FIG. 10
11. Remove the bolts and cover from the pump (7) (FIG.
11).
FIG. 9
7
3
8
FIG. 11
6 3A6998C
Page 7

Installation
12. Align the slot in the handle with the key in the hole
on the back of the pump (7), then place the handle
(6) into the hole and key (FIG. 12).
6
7
FIG. 12
13. Secure the handle (6) using the screw (6) and
tighten securely (FIG. 13).
14. Replace the cover on the front of the pump (7), and
secure with the two bolts (FIG. 14).
7
FIG. 14
15. Connect the pump (7) to the main power source.
6
16. For additional information and instructions, refer to
the Compact Dyna-Star Electric Pump Instruction
Manual.
FIG. 13
3A6998C 7
Page 8

Installation
Pressure Relief Procedure
F
WARNING
PRESSURIZED FLUID HAZARD
This equipment stays pressurized until pressure is
manually relieved. To help prevent serious injury from
pressurized fluid, such as skin injection, splashing
fluid and moving parts, follow the Pressure Relief
Procedure when you stop pumping and before
cleaning, checking or servicing the equipment.
PERSONAL PROTECTIVE EQUIPMENT
Wear appropriate protective equipment when in the
work area to help prevent serious injury, including
eye injury, hearing loss, inhalation of toxic fumes, and
burns.
To relieve pressure in the system, use two wrenches
working in opposite directions on the pump outlet
fitting to slowly loosen the fitting only until the fitting is
loose and no more lubricant or air is leaking from the
fitting. (FIG. 15).
FIG. 15
8 3A6998C
Page 9

Change the Grease Bucket
Change the Grease Bucket
NOTE: The pump does not have to be removed from
the cover to change the empty grease bucket.
When Grease Bucket is Empty
Ensure that all power sources are disconnected
before removing the cover.
1. Disconnect the pump (7) from the main power
source. Do not disconnect grounding.
2. Relieve pressure following the Pressure Relief
Procedure, page 8.
3. Loosen the thumb screws (4).
4. Remove the drum cover (1), pump (7) assembly and
follower plate from the empty bucket and set aside.
5. Remove the empty bucket (a) and discard
according to local regulations.
8. Replace the drum cover (1) and pump assembly (7)
on the new bucket, and secure with the thumb
screws (4), and tighten securely (FIG. 17).
7
1
4
FIG. 17
6. Remove and discard the cover from the new grease
bucket (a) (user supplied).
7. Place the follower plate (5), top side up, into the
grease and firmly press on it to remove all air
pockets (FIG. 16).
5
9. Reconnect the pump (7) to the main power source.
FIG. 16
3A6998C 9
Page 10

Parts
Parts
6
7
3
8
2
4
Part No./Description
Ref. Part Description Qty.
1 ◆ Drum cover
2 ◆ Gasket
3 ◆ Screws
4 ◆ Thumb screws
5 25P496 Follower plate
6 287072 Handle with screw
7 Pump
8 ◆ Washers
1
5
1
1
4
3
1
1
1 See manual 3A6941 for pump parts.
4
◆Included in Drum Cover Kit 25R314
10 3A6998C
Page 11

California Proposition 65
California Proposition 65
WARNING: This product can expose you to chemicals known to the State of California to
cause cancer and birth defects or other reproductive harm. For more information, go to
www.P65warnings.ca.gov.
3A6998C 11
Page 12

Graco Information
For the latest information about Graco products, visit www.graco.com.
For patent information, see www.graco.com/patents.
TO PLACE AN ORDER, contact your Graco distributor or call to identify the nearest distributor.
Phone: 612-623-6928 or Toll Free: 1-800-533-9655, Fax: 612-378-3590
All written and visual data contained in this document reflects the latest product information available at the time of publication.
GRACO INC. AND SUBSIDIARIES • P.O. BOX 1441 • MINNEAPOLIS MN 55440-1441 • USA
Copyright 2019, Graco Inc. All Graco manufacturing locations are registered to ISO 9001.
Graco reserves the right to make changes at any time without notice.
Original instructions. This manual contains English. MM 3A6998
International Offices: Belgium, China, Japan, Korea
Graco Headquarters: Minneapolis
www.graco.com
Revision C,
February 2021
 Loading...