

Page 1
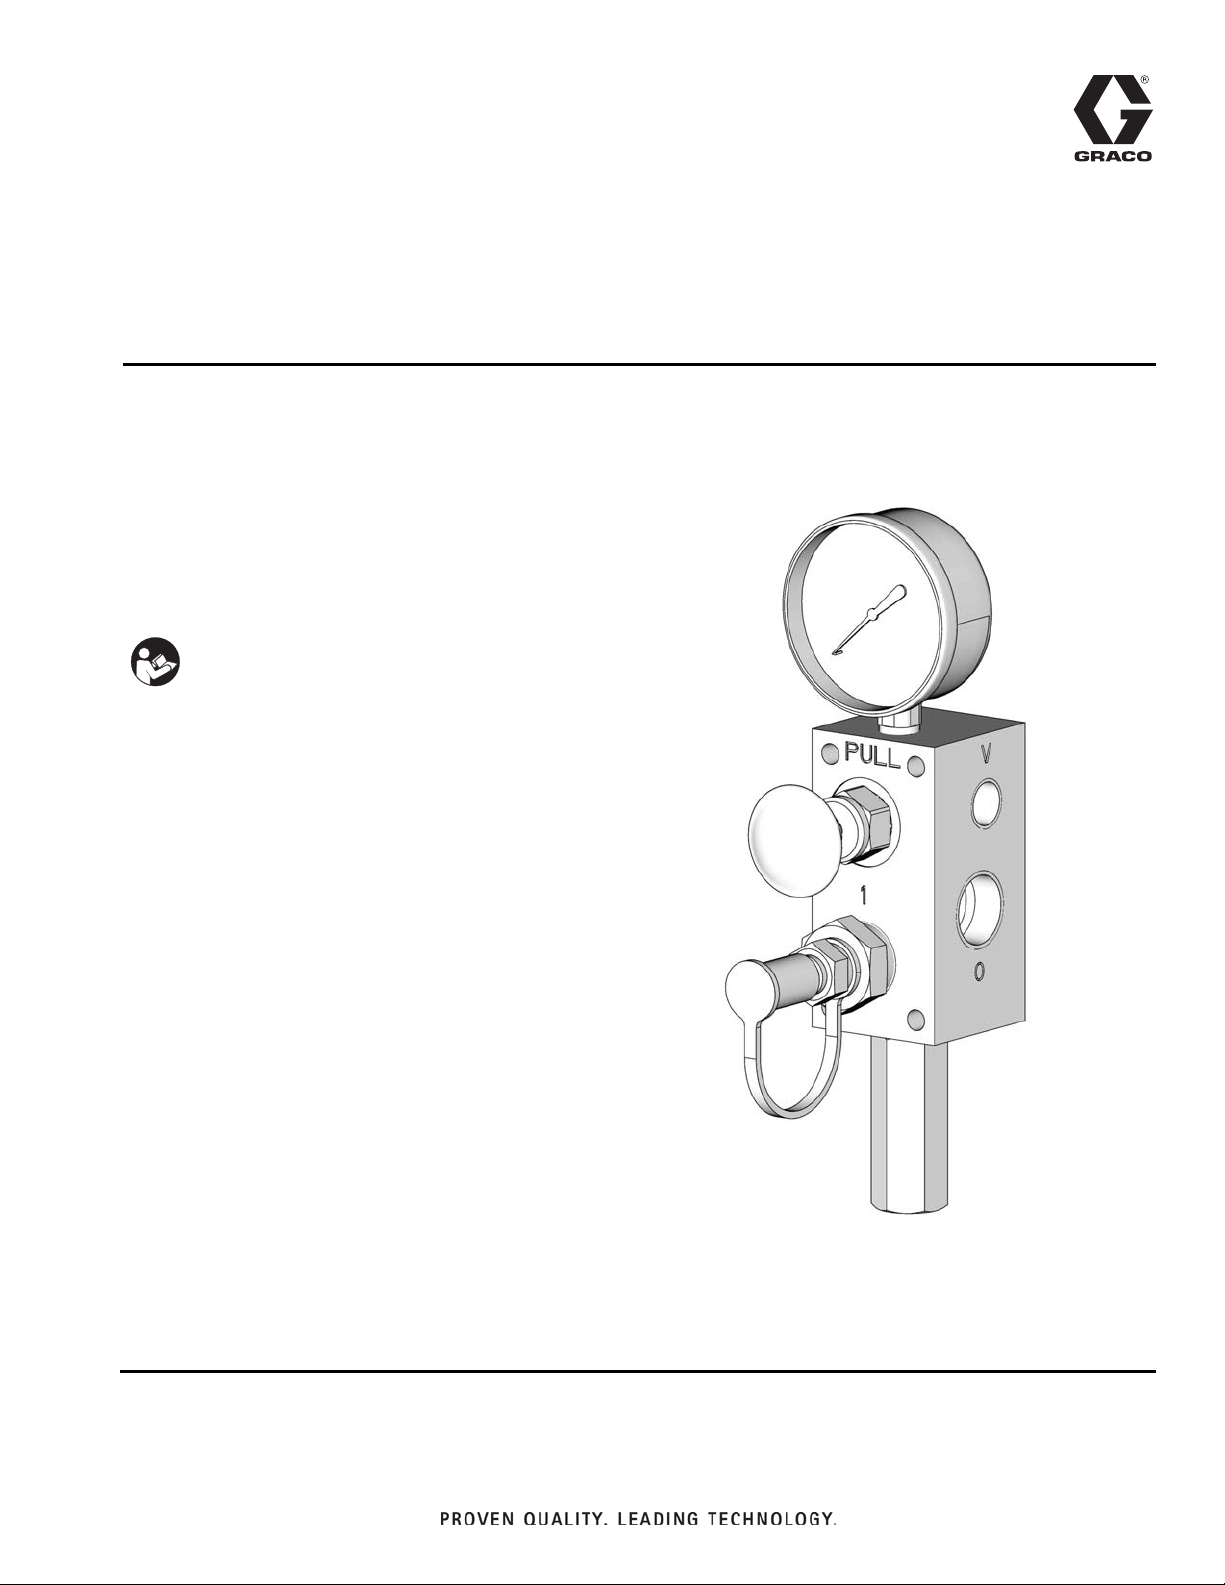
Instructions
333393B
Fill Valve
Refill manifold for use with Graco Auto-Fill Shut Off Valve only. For professional use only.
Part No.: 77X542
5000 psi (34.4 MPa, 344.7 bar) Maximum Working
Pressure
Important Safety Instructions
Read all warnings and instructions in this
manual and in Electric DynaStar and Auto-Fill
Shut Off Valve Instruction manuals. Save all
instructions.
EN
Page 2
Warnings
WARNINGWARNINGWARNING
WARNING
Warnings
The following warnings are for the setup, use, grounding, maintenance, and repair of this equipment. The exclamation point symbol alerts you to a general warning and the hazard symbols refer to procedure-specific risks. When
these symbols appear in the body of this manual or on warning labels, refer back to these Warnings. Product-specific
hazard symbols and warnings not covered in this section may appear throughout the body of this manual where
applicable.
SKIN INJECTION HAZARD
High-pressure fluid from dispensing device, hose leaks, or ruptured components will pierce skin. This may look like
just a cut, but it is a serious injury that can result in amputation. Get immediate surgical treatment.
• Do not point dispensing device at anyone or at any part of the body.
• Do not put your hand over the fluid outlet.
+
• Do not stop or deflect leaks with your hand, body, glove, or rag.
• Follow the Pressure Relief Procedure when you stop dispensing and before cleaning, checking, or servicing
equipment.
• Tighten all fluid connections before operating the equipment.
• Check hoses and couplings daily. Replace worn or damaged parts immediately.
EQUIPMENT MISUSE HAZARD
Misuse can cause death or serious injury.
• Do not operate the unit when fatigued or under the influence of drugs or alcohol.
• Do not exceed the maximum working pressure or temperature rating of the lowest rated system component.
See Technical Data in all equipment manuals.
• Use fluids and solvents that are compatible with equipment wetted parts. See Technical Data in all equipment
manuals. Read fluid and solvent manufacturer’s warnings. For complete information about your material,
request MSDS from distributor or retailer.
• Do not leave the work area while equipment is energized or under pressure.
• Turn off all equipment and follow the Pressure Relief Procedure when equipment is not in use.
• Check equipment daily. Repair or replace worn or damaged parts immediately with genuine manufacturer’s
replacement parts only.
• Do not alter or modify equipment. Alterations or modifications may void agency approvals and create safety
hazards.
• Make sure all equipment is rated and approved for the environment in which you are using it.
• Use equipment only for its intended purpose. Call your distributor for information.
• Route hoses and cables away from traffic areas, sharp edges, moving parts, and hot surfaces.
• Do not kink or over bend hoses or use hoses to pull equipment.
• Keep children and animals away from work area.
• Comply with all applicable safety regulations.
PERSONAL PROTECTIVE EQUIPMENT
Wear appropriate protective equipment when in the work area to help prevent serious injury, including eye injury,
hearing loss, inhalation of toxic fumes, and burns. This protective equipment includes but is not limited to:
• Protective eye wear, and hearing protection.
• Respirators, protective clothing, and gloves as recommended by the fluid and solvent manufacturers.
2 333393B
Page 3
Installation
A
B
C
D
E
F
G
H
J
L
K
P
Q
M
N
R
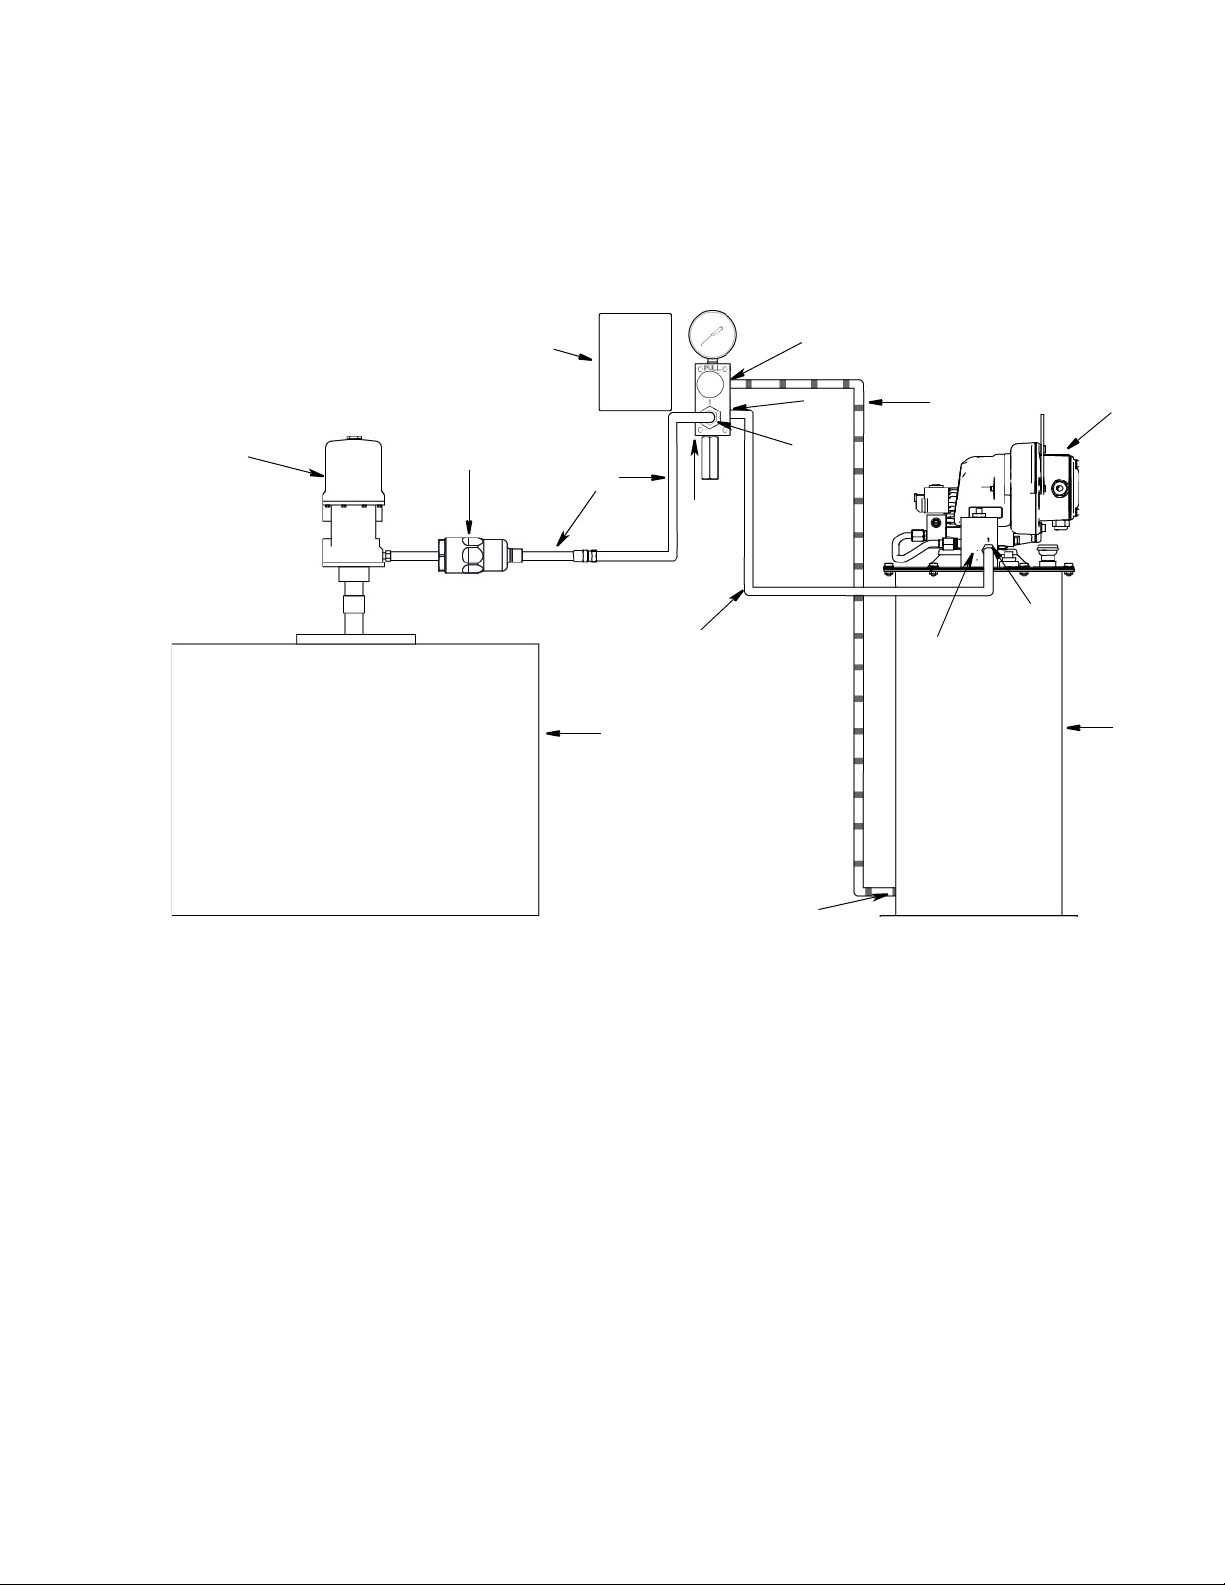
Typical Installation
Installation
A Fill Valve
B Dyna-Star Pump
C Auto-Fill Shut Off Valve
D Auto-Fill Inlet
E Reservoir
F Reservoir Port (vent line)
G Remote Filling Station Reservoir
H Remote Filling Station Pump (pneumatic)
J *Supply Hose (user supplied)
K *Supply Hose (user supplied)
L Drain Hose
M Fill Coupler / Inlet
N Operating Instructions Label
P Fill Valve Outlet
Q Fill Valve Vent Port
R Filter (recommended if grease/environment is
contaminated)
*Supply hoses must be rated for a minimum 5000 psi (34.4 MPa, 344.7 bar) pressure. See Operation, page 5 for
additional information.
333393B 3
Page 4

Installation
M
T
S
R
P
Q
A
U
Fill Valve Component Identification
Installation
The reference letters used in the following instructions refer to
the Typical Installation diagram provided on page 3 and the
Component Identification illustration (F
1. Select the installation location. Be sure the installation location chosen is clean, flat and easily accessible
2. Orient the Fill Valve (A) as shown in F
the Fill Valve is correctly oriented the Pressure
Gauge (S) will be located on the top of the Fill Valve
block and the Pressure Relief Valve (U) will be
located on the bottom of the block.
To reduce the risk of serious injury from skin injection,
the Fill Valve (A) must be installed with the pressure
gauge (S) located on the top of the Fill Valve and the
pressure relief valve (U) pointing down as shown in F
1.
IG. 1).
IG. 1. When
IG.
FIG. 1
A Fill Valve
M Fill Coupler / Inlet
N Instruction Label (not shown, see Typical Installation,
page 3)
P Fill Valve Outlet
Q Fill Valve Vent Port
R Pressure Relief Knob
S Pressure Gauge
T Dust Cover (Yellow)
U Pressure Relief Valve
3. Use mounting dimensions provided on page 7 of
this manual to drill 4 mounting holes in the installation surface
4. Secure Fill Valve (A) to installation surface using 4
1/4 inch bolts.
5. Select a convenient location close to the valve to
adhere the Operating Instructions label (N)
(included with your valve).
NOTE: Clean the surface prior to installing the label
to remove contaminants such as dust, dirt, grease
and oil residue which could weaken or prevent
adhesion.
6. Connect Supply Hose (K) between the Auto-Fill
Shut Off Valve (C) and Fill Valve Outlet (P) port
marked with an “O”.
7. Connect a Drain Hose (L) between the Fill Valve
Vent Outlet (Q) port marked with a “V” and the Reservoir Port (E/F).
4 333393B
Page 5

Installation
pin
down
pin
up
Operation
The remote filling station pump stalls (dead-heads)
when the reservoir is full, causing the supply system
pressure to rise to the maximum output pressure
of the filling station pump. To help prevent equipment
damage or serious injury caused by pressurized fluid,
such as skin injection or injury from splashing fluid,
always use a remote filling station pump with a maximum output pressure of 5000 psi (34.4 MPa,
344.7 bar) and use supply hoses with a minimum
pressure rating of 5000 psi (34.4 MPa, 344.7 bar).
The reference letters used in the following instructions
refer to the Typical Installation diagram provided on
page 3 and Component Identification on page 4.
1. Pull out and hold black Pressure Relief Knob (R)
long enough to relieve line pressure between Fill
Valve (A) and Auto-Fill Shut Off Valve (C).
2. Verify the Auto-Fill Shut Off pin is down, indicating it
is reset (F
tion manual.
IG. 2). See the Auto-Fill Shut Off instruc-
• the Auto-Fill Shut Off pin pops up as shown in
F
IG. 3,
• the gauge pressure rises to the fill pump’s set
pressure.
NOTE: If the pump does not stall (dead-head) there is a
leak in the system.
FIG. 3
NO
7. Turn off the Remote Filling Station Pump (H).
8. Pull out and hold black Pressure Relief Knob (R)
long enough to relieve line pressure between Fill
Valve (A) and Auto-Fill Shut Off Valve (C) and
between Remote Filling Station Pump (H) and Fill
Valve (A).
FIG. 2
3. Remove yellow Dust Cover (T) from Fill Coupler
(M).
4. Connect Supply Hose (J) between the Remote Filling Stations Pump (H) and Fill Coupler (M) port
marked with an “I”.
5. Start Remote Filling Station Pump (H).
6. When Reservoir (E) is filled:
• the Remote Filling Station Pump (H) stalls
(dead-heads),
NOTE: The length of time it takes to vent varies depending on the system design and installation. In some
installations it may be necessary to repeat Step 8 to
ensure pressure is relieved.
9. Disconnect Supply Hose (J) at Fill Coupler (M).
10. Replace yellow Dust Cover (T) over Fill Coupler (M).
333393B 5
Page 6

Troubleshooting
Troubleshooting
Pressure Relief
Follow the Pressure Relief Procedure whenever
you see this symbol.
This equipment stays pressurized until pressure is
manually relieved. To help prevent serious injury
from pressurized fluid, such as skin injection,
splashing fluid and moving parts, follow the Pressure
Relief Procedure when you stop dispensing and
before cleaning, checking, or servicing the
equipment.
To relieve pressure in the system, use two wrenches
working in opposite directions on valve outlet fitting to
slowly loosen fitting only until fitting is loose and no
more lubricant or air is leaking from fitting as shown in
F
IG. 4.
FIG. 4
Problem Cause Solution
Refill pump slows down or stalls
and no output at the fill valve.
Auto-Fill Shut Off Valve has not
reset
Be sure to relieve pressure by pulling the Pressure Relief Knob (R)
(see Component Identification,
page 4).
Make sure Auto-Fill Shut Off valve
pin is down. See F
and/or Auto-Fill Shut Off Valve manual.
IG. 2, page 5
6 333393B
Page 7

Troubleshooting
Technical Data
Fill Valve
US Metric
Maximum fluid working pressure 5000 psi 34.4 MPa, 344.7 bar
Relief value 5000 psi +
Maximum fluid flow 2 gpm 7.57 lpm
Outlet port size 3/4 inch npt
Vent port size 3/8 inch npt
Inlet ISO 7241-1, Series B standard hydraulic quick disconnect
1/4 inch coupling
Wetted parts
Dimensions See Dimensions and Mounting (below)
Weight 5.06 lbs 2.3 kgs
Recommended hose to reduce pressure drop: 3/4 inch ID, 20 feet (6.1 m) length for all lines.
zinc plated steel parts, seals: Buna-N
10% 34.4 MPa, 344.7 bar + 10%
Dimensions and Mounting
333393B 7
Page 8

Graco Information
For the latest information about Graco products, visit www.graco.com.
For patent information, see www.graco.com/patents.
TO PLACE AN ORDER, contact your Graco distributor or call to identify the nearest distributor.
Phone: 612-623-6928 or Toll Free: 1-800-533-9655, Fax: 612-378-3590
All written and visual data contained in this document reflects the latest product information available at the time of publication.
GRACO INC. AND SUBSIDIARIES • P.O. BOX 1441 • MINNEAPOLIS MN 55440-1441 • USA
Copyright 2014, Graco Inc. All Graco manufacturing locations are registered to ISO 9001.
Graco reserves the right to make changes at any time without notice.
Original instructions. This manual contains English. MM 333393
Graco Headquarters: Minneapolis
International Offices: Belgium, China, Japan, Korea
www.graco.com
June 2014
 Loading...