

Page 1

Instructions
Part No. 77X522
Part No. 77X530 or 77X531
Dyna-Star® HP or HF Pump
Low Level Indicator Kit; Dip
332515E
Stick Kit
Provides a visual reference of remaining fluid level in a tank / reservoir used with the
Dyna-Star HP or HF pump. Low Level Indicators equipped with a user supplied alarm will
also provide an audible and/or visual notification of a low fluid level. For professional use
only.
Low Level Indicator Part No: 77X522
Includes sight glass, electric low level switch and cable. Requires follower plate. Cannot be used with Auto-Fill® Shut Off.
Dip Stick Part No: 77X530 - 90#; 77X531 - 60#
Cannot be used with a follower plate or Auto-Fill Shut Off.
Important Safety Instructions
Read all warnings and instructions in this
manual and in the Dyna-Star HP or HF Pump
instruction manual. Save all instructions.
EN
Page 2
Installation
a
b
Installation
Warnings
See the Dyna-Star HP and HF Pump Instruction manual
for additional warnings.
SKIN INJECTION HAZARD
High-pressure fluid from dispense device, hose leaks,
or ruptured components will pierce skin. This may look
like just a cut, but it is a serious injury that can result in
amputation. Get immediate surgical treatment.
Follow Pressure Relief Procedure in this manual,
when you stop dispensing and before cleaning, checking, or servicing equipment.
Pressure Relief
Follow the Pressure Relief Procedure whenever
you see this symbol.
Installing Low Level Indicator
1. Disconnect Dyna-Star pump from main power
source.
2. If unit has already been in service, relieve pressure
(see Pressure Relief procedure, page 2).
3. Fill reservoir with grease to raise follower plate (if
installed) to an easily accessible level.
NOTE:
• Installing the follower plate and low level will be
easier if the reservoir has been filled with
grease first.
• If a follower plate is not pre-installed, fill tank at
least half full.
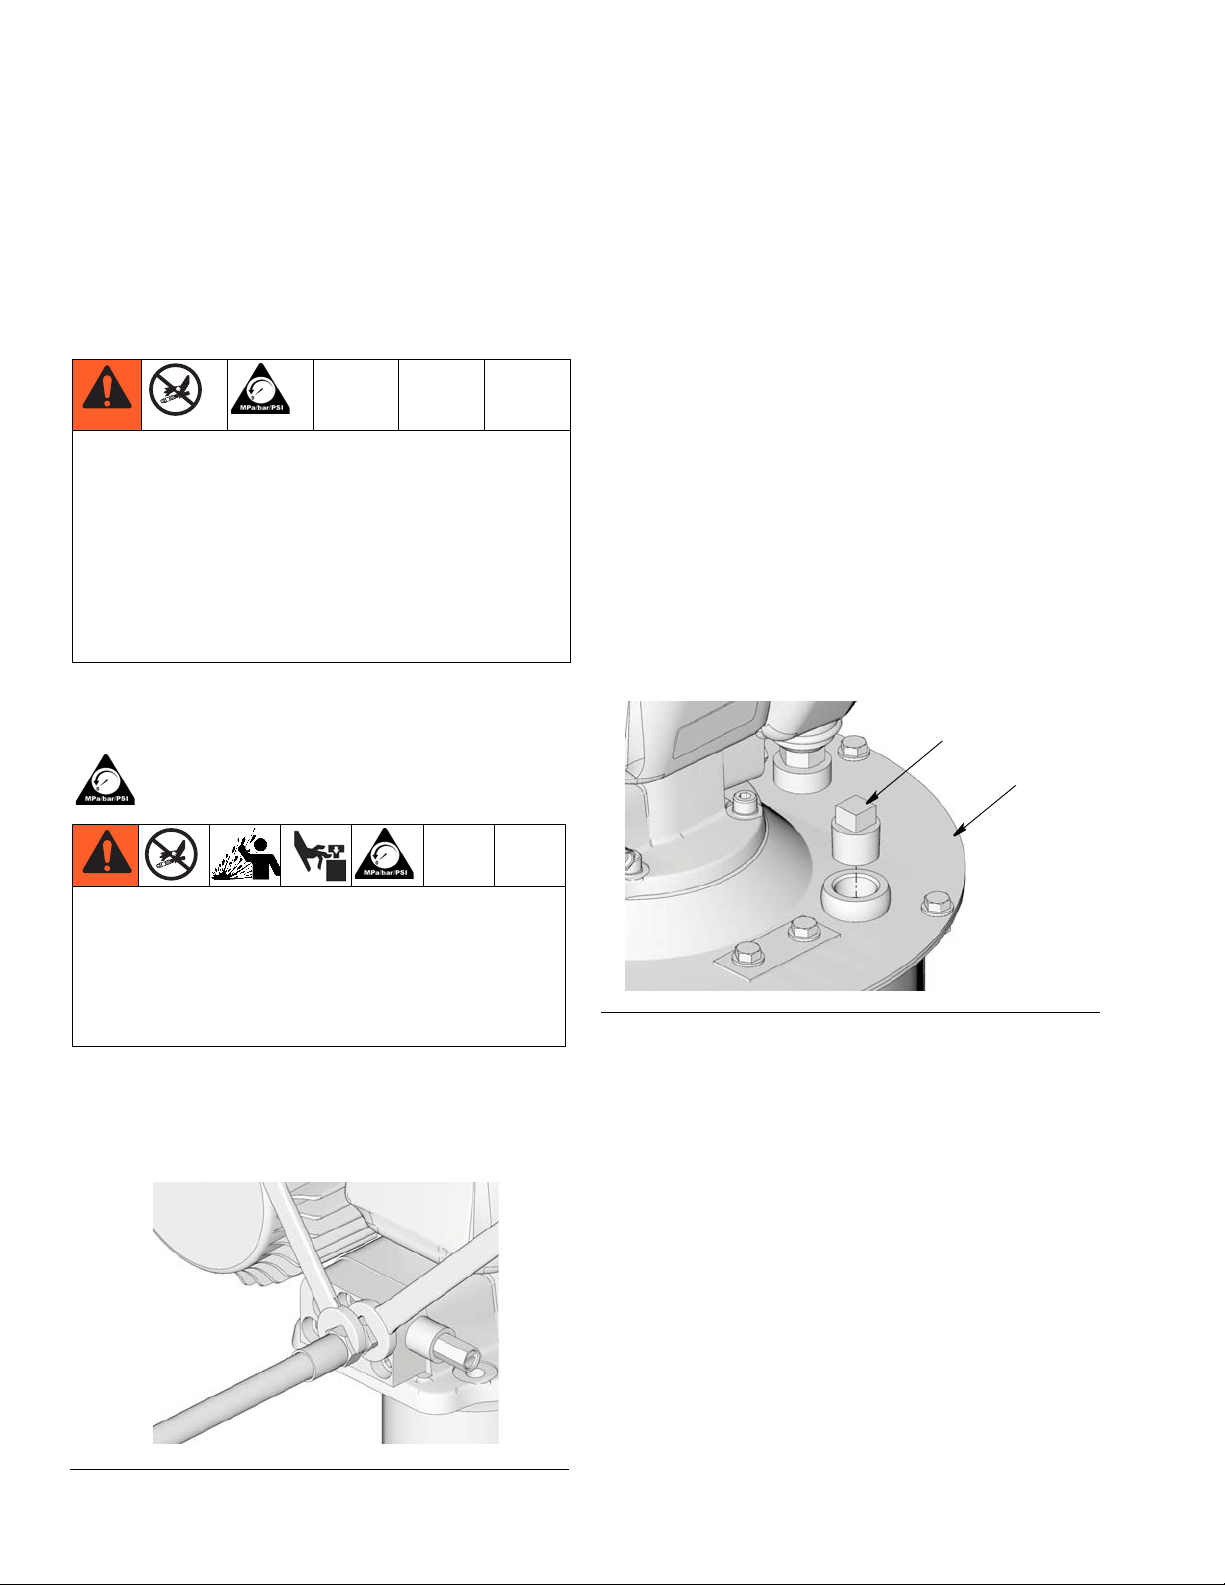
4. Remove plug (a) from cover (b). Discard plug, you
will not reuse it (F
IG. 2).
This equipment stays pressurized until pressure is
manually relieved. To help prevent serious injury from
pressurized fluid, such as skin injection, splashing
fluid and moving parts, follow the Pressure Relief
Procedure when you stop dispensing and before
cleaning, checking, or servicing the equipment.
To relieve pressure in the system, use two wrenches
working in opposite directions on pump outlet fitting to
slowly loosen fitting only until fitting is loose and no
more lubricant or air is leaking from fitting. See F
FIG. 1
IG. 1.
FIG. 2
5. Loosen bolts (c) and remove cover (d) from
Dyna-Star pump (F
IG. 3).
2 332515E
Page 3
FIG. 3
d
c
e
f
b
g
b
h
j
aa
b
6. Remove screws (e) and washers (f) holding
Dyna-Star Pump to reservoir cover (b) and remove
pump from cover (F
IG. 4).
Installation
FIG. 5
8. (If previously installed) remove follower plate from
inside reservoir.
FIG. 4
7. Remove the screws (g) (holding the reservoir cover
(b) to the reservoir (h) (F
IG. 5).
9. Determine the correct cable length to use for your
pump reservoir.
• Short cable is used with 60# reservoirs.
• Long cable is used with 90# reservoirs.
Remove and discard the cable you are not using and the
Notice label attached to the cables.
NOTICE
Failure to use the correct cable length could result in
inaccurate level indication and low level shutdown.
10. For easy wiring, make sure the DIN connector is
facing out (F
IG. 6). Feed the low level cable (j)
through accessory hole (aa) in the reservoir cover
(b). Wrench tighten low level in place.
FIG. 6
332515E 3
Page 4

Installation
k
j
p
n
r
m
m
h
b
j
g
11. Remove one of the screws (k) from the follower
plate (m) (F
IG. 7).
12. Install screw (k) through the hole (n) in the cable
bracket (p) located at the end of the low level cable
(j) and then through the screw hole (r) in the follower
plate (m) (F
IG. 7). Tighten screw securely.
NOTE: Cable bracket (p) is slightly bent. Be sure to
install so the bracket will sit flat against the surface
of the follower plate.
FIG. 8
F
IG. 7
13. Install follower plate (m) on top of grease inside reservoir (h) with the cone side facing up. Press follower plate firmly into grease to remove all air
pockets.
14. Place reservoir cover (b) on top of reservoir (h).
NOTE: When reservoir cover (b) is correctly
installed on reservoir (h), the low level cable (j)
(installed between the low level indicator and follower plate (m) will be aligned in a straight and vertical line as shown in F
IG. 8.
15. Replace and tighten screws (g) securely (F
FIG. 9
IG. 9).
4 332515E
Page 5

Installation
b
m
t
s
e
f
d
c
16. Slide pump down-tube through hole in the center of
the reservoir cover (b) and hole in the center of the
follower plate (m) as shown in F
IG. 10.
FIG. 10
NOTE: When pump is correctly installed, the breather (t)
will be below the control box (s) as shown in F
IG. 11.
17. Replace screws (e) and washers (f) and wrench
tighten securely (F
IG. 12).
FIG. 12
18. Reinstall cover (d) using bolts (c) (F
IG. 13). Use a
wrench to tighten bolts securely.
FIG. 11
FIG. 13
332515E 5
Page 6

Installation
External Alarm or Warning Light (Optional)
An external (user supplied) alarm or warning light can
be added to the Low Level Indicator to provide an audible or visual signal in a low level situation.
NOTICE
To avoid premature failure and the loss of fluid/low
level indication:
• Do not exceed the rating of the Low Level Sensor Switch by connecting excessive lights or
audible signals.
• Level Sensor Switch is rated for a maximum of
32 VDC and 10 Watts. Maximum switch current
is 0.4 AMPS.
1. Connect the DIN connector on the Low Level Indicator to the (user supplied) alarm device. Connection
is made to PINS 1 and 3 of the DIN, Form “A” Field
Wireable Adapter. See F
IG. 14.
FIG. 14
2. Connect Dyna-Star pump to main power source.
3. Start system following pump start up procedure
included in the Dyna-Star HP or HF Pump Manual
provided with your system.
6 332515E
Page 7

Low Level Visual Indication Sight Glass
sight
glass
Green (G)
sight
glass
Red (R)
Green (G)
sight
glass
Green (G)
Red (R)
Low Level Visual Indication Sight Glass
FIG. 15
Normal Level Mark (FIG. 15) - Red rod is completely
covered by the green tube (G) and no red is visible in
sight glass. This appearance indicates that the lubrication supply container has sufficient material. No additional lubricant needs to be added.
FIG. 17
Low Level Mark (F
visible with green tube (G) at lowest level. This appearance indicates that the main lubrication supply container
is low and needs to be refilled.
IG. 17) - Red rod (R) is completely
FIG. 16
Low Level Range (F
covered by the green tube (G). Some red is partially visible at the top of the sight glass. This appearance indicates that the lubrication supply container is
approaching the low level mark and needs to be refilled.
IG. 16) - Red rod (R) is partially
For models equipped with a (user provided) external
alarm, when the fluid has reached this low level mark,
the sensor switch closes, activating the alarm.
332515E 7
Page 8

Dip Stick Installation
a
aa
b
c
b
aa
1. Remove plug (a) from cover (b). Discard plug, you will not reuse it (FIG. 18).
FIG. 18
2. Slide dipstick through hole (aa) in cover (b) and into reservoir (F
IG. 18 and FIG. 19). Wrench tighten it in place.
FIG. 19
3. To determine the level of the fluid remaining in the reservoir, loosen and remove dip stick (c) from reservoir cover
(b).
All written and visual data contained in this document reflects the latest product information available at the time of publication.
GRACO INC. AND SUBSIDIARIES • P.O. BOX 1441 • MINNEAPOLIS MN 55440-1441 • USA
Copyright 2013, Graco Inc. All Graco manufacturing locations are registered to ISO 9001.
Graco reserves the right to make changes at any time without notice.
For patent information, see www.graco.com/patents.
Original instructions. This manual contains English. MM 332515
Graco Headquarters: Minneapolis
International Offices: Belgium, China, Japan, Korea
www.graco.com
Revised February 2014
Page 9

Dip Stick Installation
4. Use a clean rag to wipe oil/grease from end of dip
stick (c).
5. Insert dipstick (c) through hole (aa) in cover (b) as
far down as it will go and then remove it again. Visually inspect level of oil/grease remaining on dip stick.
332515E 9
Page 10

Low Level Indicator Technical Data
Low Level Indicator Technical Data
Low level sensor switch Normally open sensor switch, closes upon low level
Operating temperature range -50°F to 150°F (-45°C - 65°C)
Electrical Ratings
Switching Power 10 Watt Max.
Switching Current 0.4A-Max.
Switching Voltage 5 - 32 VDC
Contact Resistance 0.150 Initial Ohms - Max.
Body Thread 3/4 inch npt(m)
Wetted Parts
Cable Nylon coated stainless steel
Crimp Tab Stainless steel
Dip Stick Technical Data
Body Thread 3/4 inch npt(m)
Wetted Parts Zinc plated steel
Graco Information
For the latest information about Graco products, visit www.graco.com.
TO PLACE AN ORDER, contact your Graco distributor or call to identify the nearest distributor.
Phone: 612-623-6928 or Toll Free: 1-800-533-9655, Fax: 612-378-3590
10 332515E
 Loading...