

Page 1
EPL1127OB
IMPORTANT SAFETY INSTRUCTIONS:
.
.
This product must be installed in accordance with installation instructions
and all safety and building codes. It is strongly suggested that all direct
wired fixtures be installed by a licensed electrician
Be sure the electricity to the wires you are working on is shut off; either the
fuse is removed or the circuit breaker is turned off. Turning the power off
using the light switch is not sufficient to prevent electrical shock
.
Please read through all the instructions carefully and completely before
beginning assembly and installation
MOUNTING AND WIRING
WARNING:
Improper installation may cause electrical shock, fire, or equipment damage.
The person performing the installation must be familiar with the construction
and operation of the product and associated hazards
Please proceed in an alphabetical order:
.
.
.
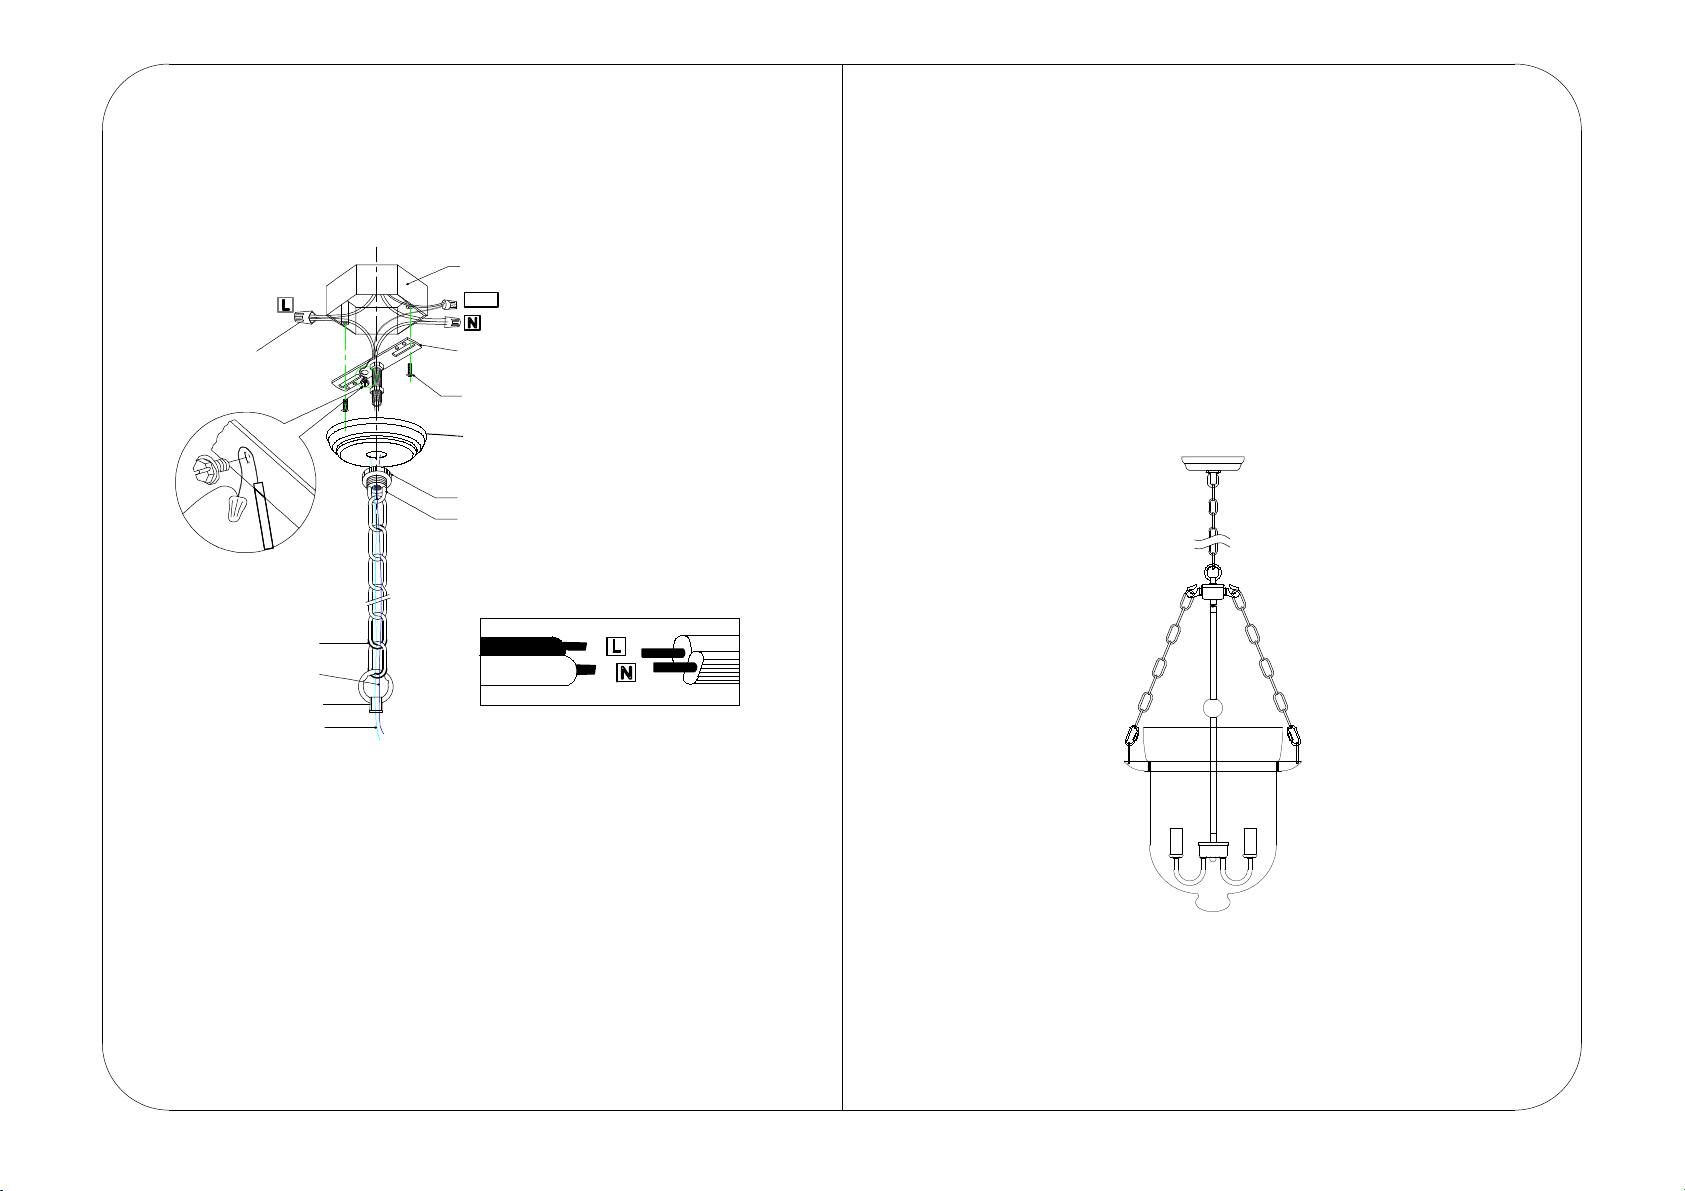
Attach the Crossbar(B) to the existing electrical box(A) using the two crossbar
screws(C), which are not supplied and should already be in your electrical box.
Slide the canopy loop nut lock(F) back up over the canopy loop(D), pass the
canopy loop(D) through canopy(E), connect with the threaded pipe underside
of the crossbar.
Pass the main wire(J) and ground wire(H) through the loop(I), the chain(G),
the canopy loop nut
lock(F),
the
canopy(E),
the canopy
loop(D)
and the
crossbar(B) until the end o f the main wire(J) reaches the electrical box(A)
where you can make the appropriate connections. Be sure when connecting
the wire use electrician approved junction caps(K). Stow the excess wire in the
electrical box(A). Raise the canopy(E) and canopy loop nut lock(F), attach
canopy(E) to ceiling, slide canopy loop nut lock(F) over canopy loop(D) and
hold the canopy(E).
Wire Connection Diagram:
GND
A - Existing Electrical Box
B - Crossbar
C - Crossbar Screws
E - Canopy
F - Canopy Loop Nut Lock
D - Canopy Loop
H -Neutral Wire
I-Loop
J - Line Wire
K -Junction Cap
G-Chain
( Rated 110-120V/60Hz, bulb E12/60W maximum)
Chandelier lnstallation lnstructions
Page 2
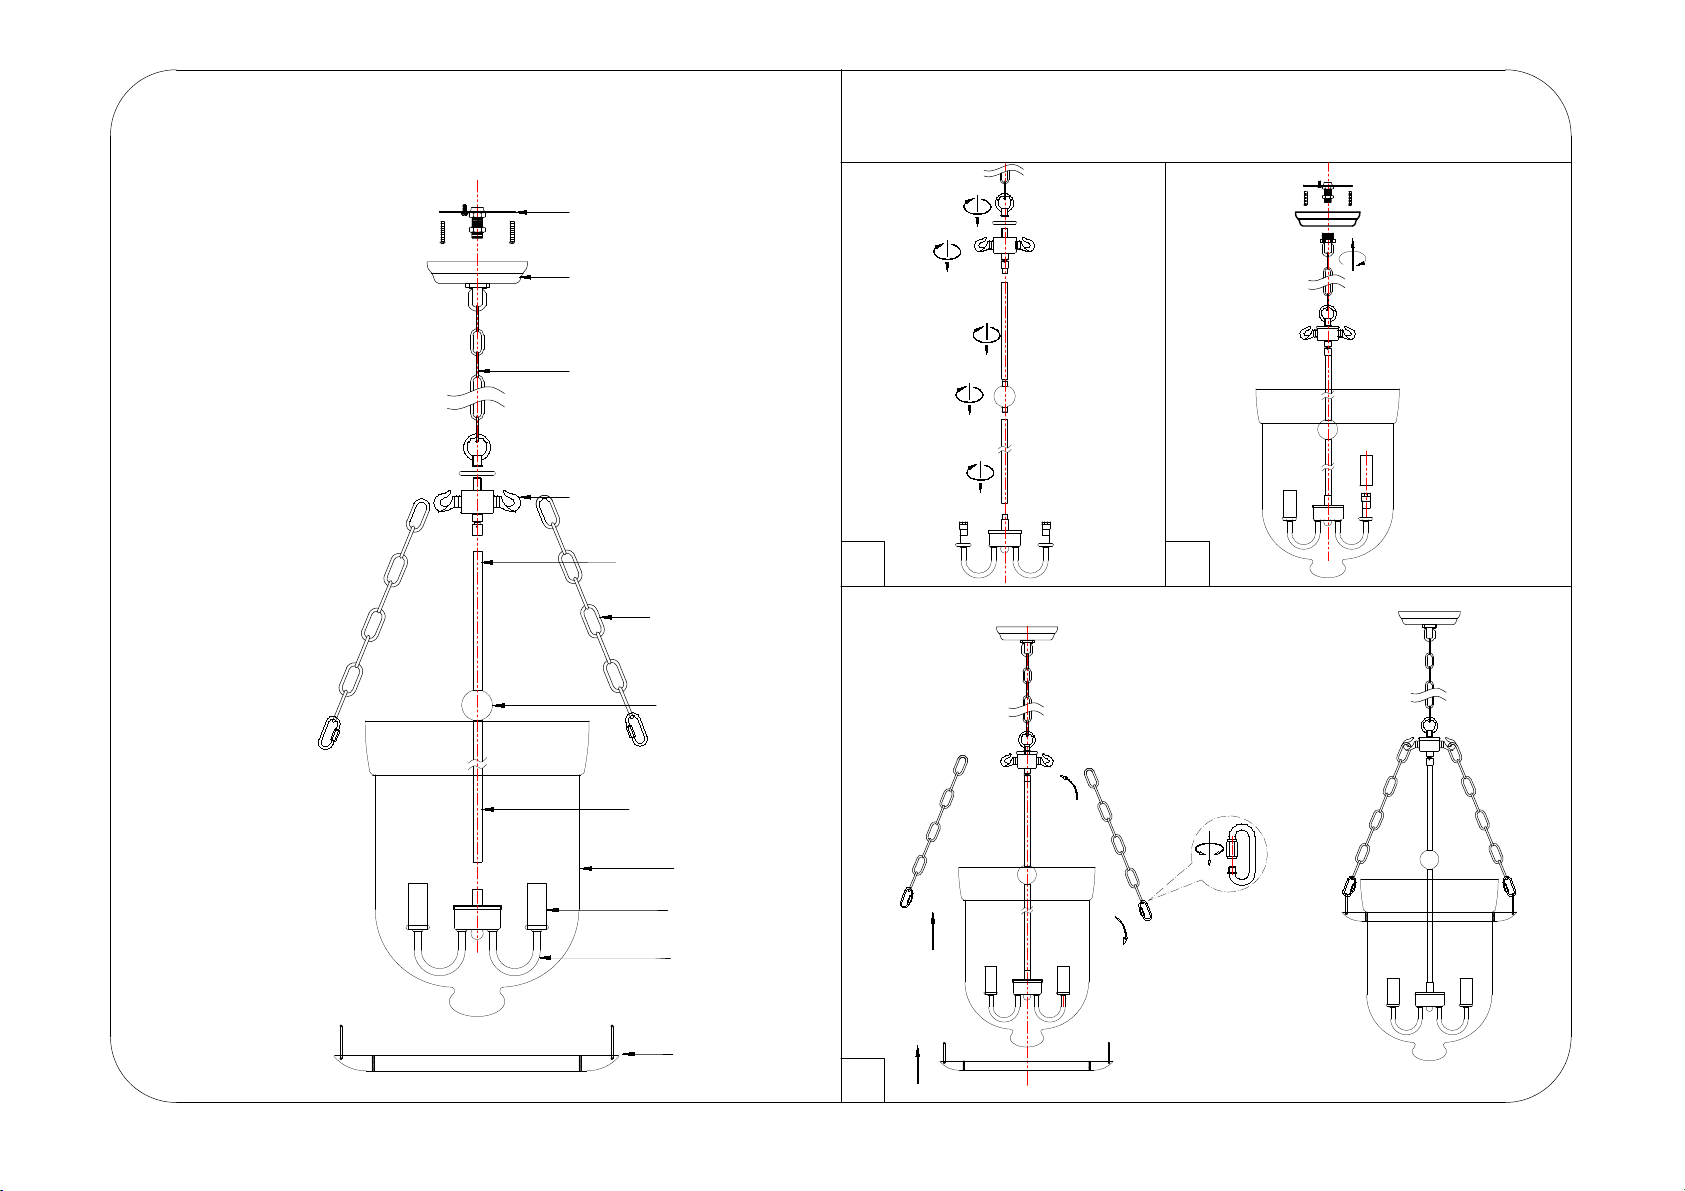
PART LIST AND ASSEMBLY ILLUSTRATION
Note: Some parts may be pre-installed or pre-assembled.
ASSEMBLING, INSTALLATION, AND MOUNTING
(1)*1PC
(2)*1PC
(3)*1PC
(4)*1PC
(5)*1PC
(6)*3PCS
(9)*1PC
(11)*1PC
(12)*1PC
(7)*1PC
(8)*1PC
(10)*3PCS
1 2
3
 Loading...