

Page 1

Warnings
WARNING: Changes or modications to this unit not
expressly approved by the party responsible for compliance
could void the user’s authority to operate the equipment.
NOTE: This equipment has been tested and found to comply
with the limits for a Class B digital device, pursuant to Part
15 of the FCC Rules. These limits are designed to provide
reasonable protection against harmful interference in a
residential installation. This equipment generates, uses, and
can radiate radio frequency energy and, if not installed and
used in accordance with the instructions, may cause harmful
interference to radio communications. However, there is
no guarantee that interference will not occur in a particular
installation. If this equipment does cause harmful interference
to radio or television reception, which can be determined by
turning the equipment off and on, the user is encouraged to
try to correct the interference by one or more of the following
measures:
• Reorient or relocate the receiving antenna.
• Increase the separation between the equipment and
receiver.
• Connect the equipment into an outlet on a circuit different
from that to which the receiver is connected.
• Consult the dealer or an experienced radio/TV technician
for help.
Page 2

Warranty
For Warranty Information and the most
up-to-date version of this User’s Guide, go to
www.gpx.com.
Page 3

• Digital audio: MP3, WMA (non-DRM),
WAV
• Digital video: AMV
• Digital photos: JPEG, BMP
• 2.8” full color touch TFT display
• Built-in microphone
• Voice recording
• Digital FM radio (PLL)
• Preset EQ
• Digital volume control
• Micro-USB port for battery recharge
• Stereo headphone jack
• Stopwatch
• DC battery power: built-in rechargeable
lithium polymer battery
• Battery life: ~6 hours audio, ~2 hours
video
Touchscreen media player
Features & Included
Page 4

• Windows XP, Windows Vista, Windows 7,8
and Mac in USB mode
• USB Port
• Intel® Pentium® II 233MHz (or AMD
equivalent) or higher
• 64MB minimum RAM
• 10MB minimum free space on hard drive
DC battery power: built-in rechargeable
lithium polymer battery
To charge the built-in rechargeable battery
use the included USB cable to connect the
touchscreen media player to a computer
that’s powered on and attached to an AC
power source.
Initial Charging time ~6 hrs.
System Requirements
Power
Page 5
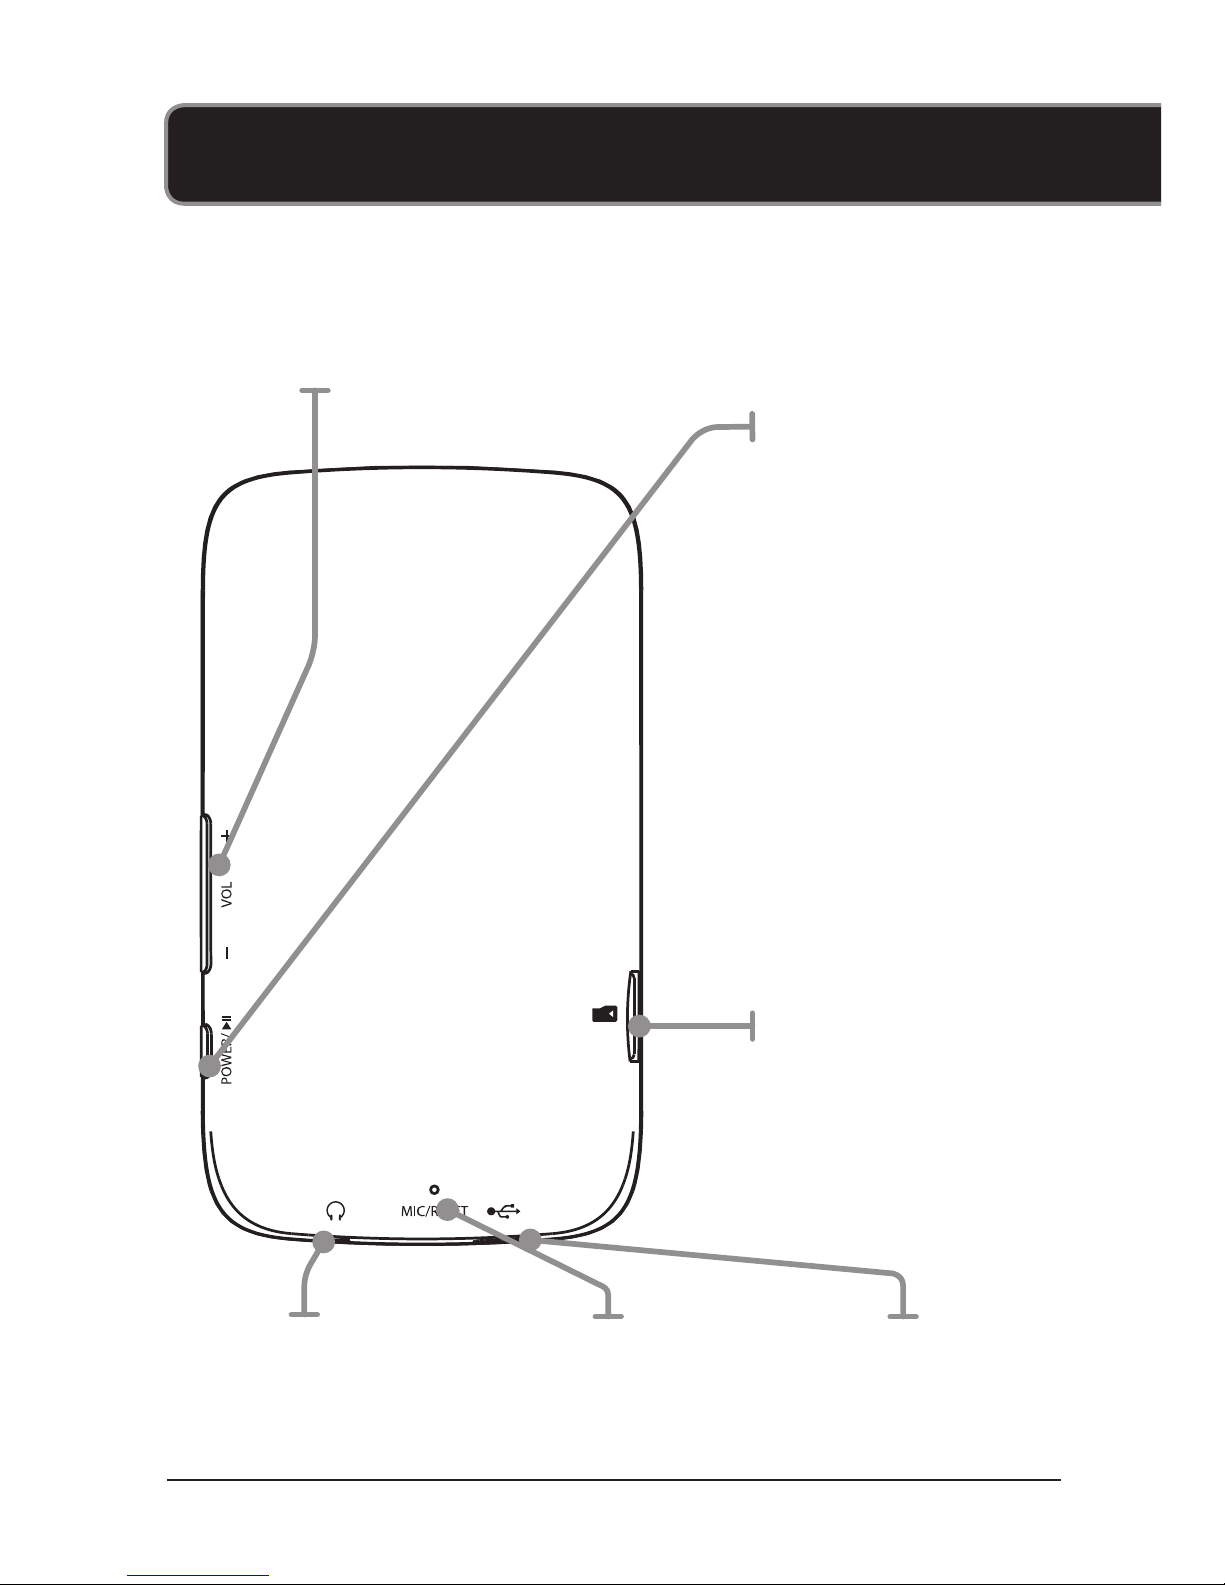
Introduction
Stereo
Headphone
Jack
Micro-SD
Card Slot
Volume
Microphone/
Reset
Micro-USB
Port
Power/Play/
Pause
Press and
hold to power
the unit on or
o. Press to
play or pause.
Page 6
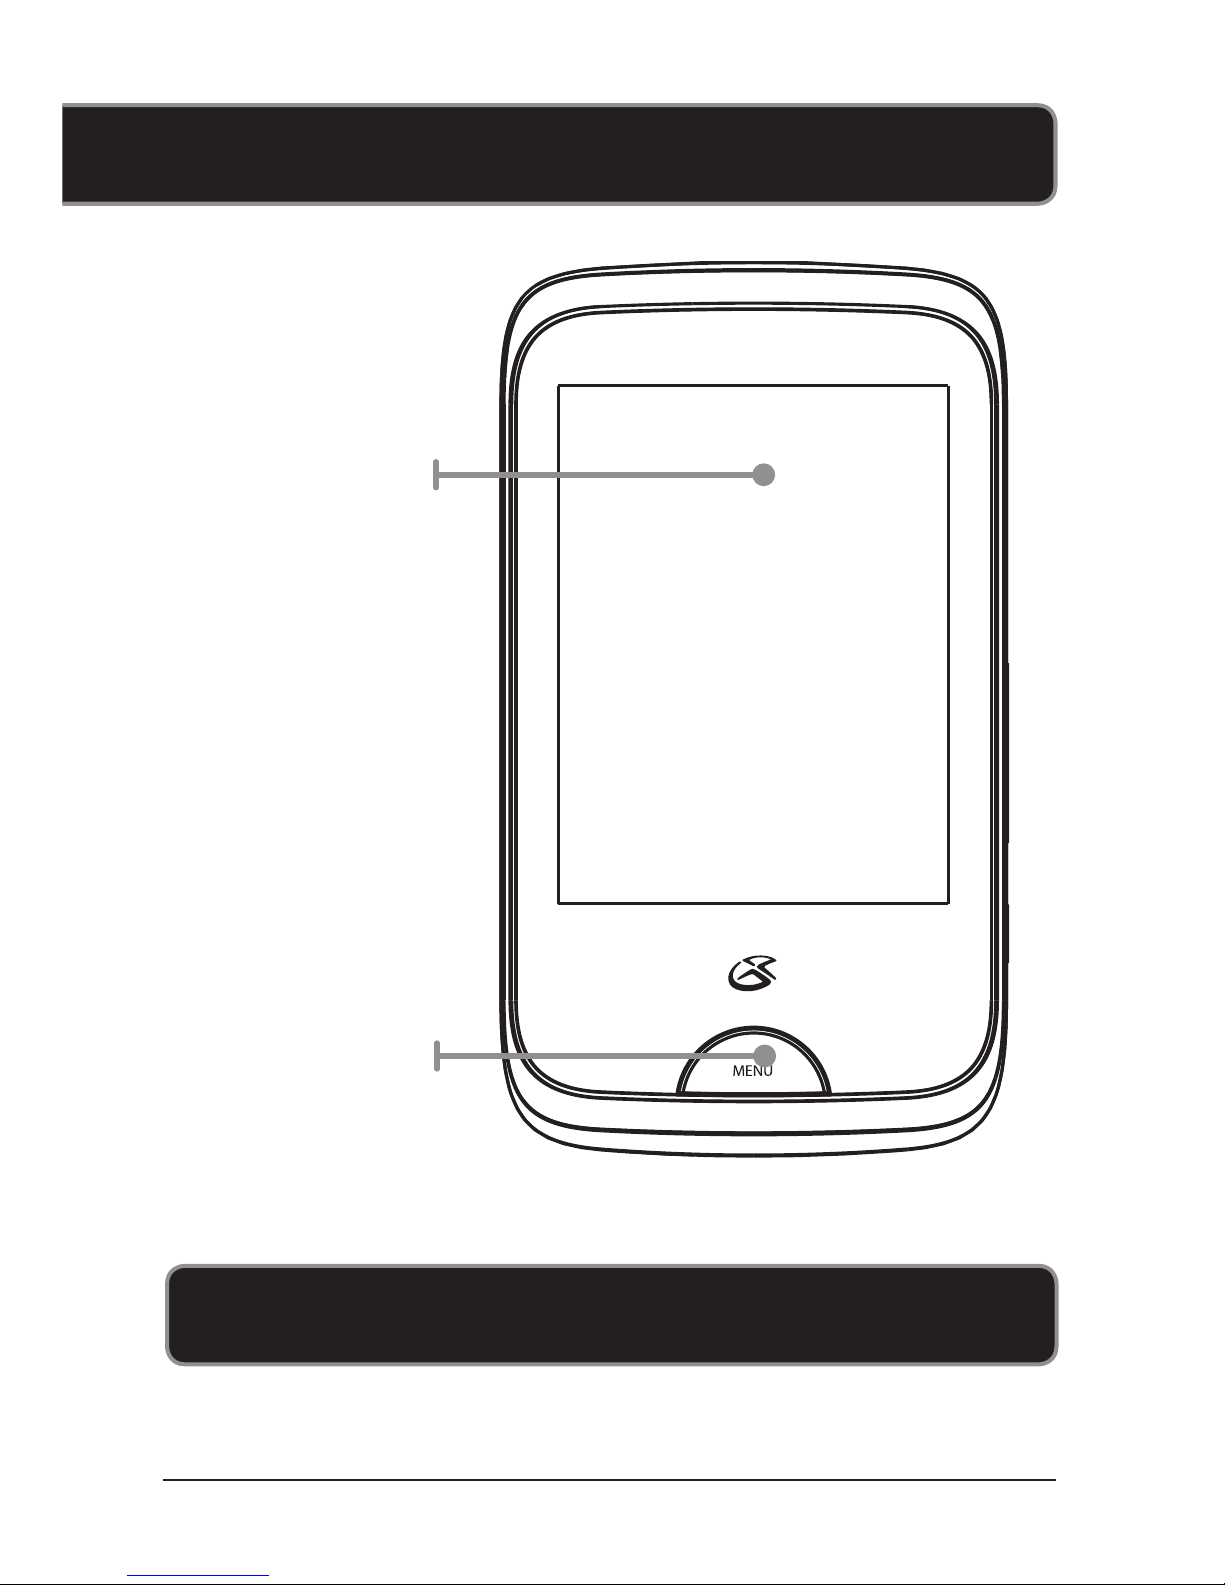
1. Press and hold the Power button.
Powering On
Menu
Press to
access the
main menu.
Display
Page 7

1. Connect the touchscreen media
player to a computer using the
Micro-USB Port connection
and a USB cable (included).
2. Once connected, the unit will show
up on the connected computer as if it
were a connected USB thumb drive,
external hard drive, or memory card.
3. Drag and drop the desired les
into the unit’s drive location on
the connected computer.
4. After the les are loaded onto the
unit, right-click on the drive and
eject it from the computer, then
disconnect the USB cable.
File Compatibility:
Digital audio: MP3, WMA (non-DRM)
Digital video: AMV
Loading Files
Page 8
1. Follow the instructions
for Loading Files.
2. Press the Music or Video icon
on the touchscreen to open the
music or movies application.
3. Use the on-screen play controls
to begin playing music.
4. In Play mode, press the sub-
menu icon to access the play
mode settings. Press the Menu
button once to exit, or press and
hold to return to Main Menu.
5. In Pause mode, press the sub-menu
icon to access the le settings.
Press Menu button once to return, or
press & hold to return to Main Menu
6. Press the sub-menu icon to
access the other settings. Press the
Menu button once to return, and
press and hold to return to Main
Menu.
Music and Movies
Page 9
1. Follow the instructions
for Loading Files.
2. Press the on-screen Photo icon.
3. Use the on-screen controls
to view loaded photos.
4. Press the sub-menu icon to
access the other settings. Press the
Menu button once to return, and
press and hold to return to Main
Menu.
Pictures
Page 10

Copyright © 2012 Digital Products International (DPI, Inc.) |
All other trademarks appearing herein are the property of their
respective owners. Specications are subject to change without
notice.
To download this User’s Guide in English, Spanish,
or French, or to get answers to frequently asked
questions, visit the support section at www.gpx.com.
Para descargar este Manual del Usuario en inglés,
español y francés, o para obtener respuestas a
preguntas frecuentes, visite la sección de apoyo en
www.gpx.com.
Pour télécharger ce guide de l’utilisateur en anglais,
espagnol ou français, ou pour obtenir des réponses
à des questions fréquemment posées, consultez la
rubrique d’assistance sur www.gpx.com.
Company Information
International Support
Contact Information
Email Support: [email protected]
Email Parts: [email protected]
Phone Support: 1-888-999-4215
Website: www.gpx.com
Page 11
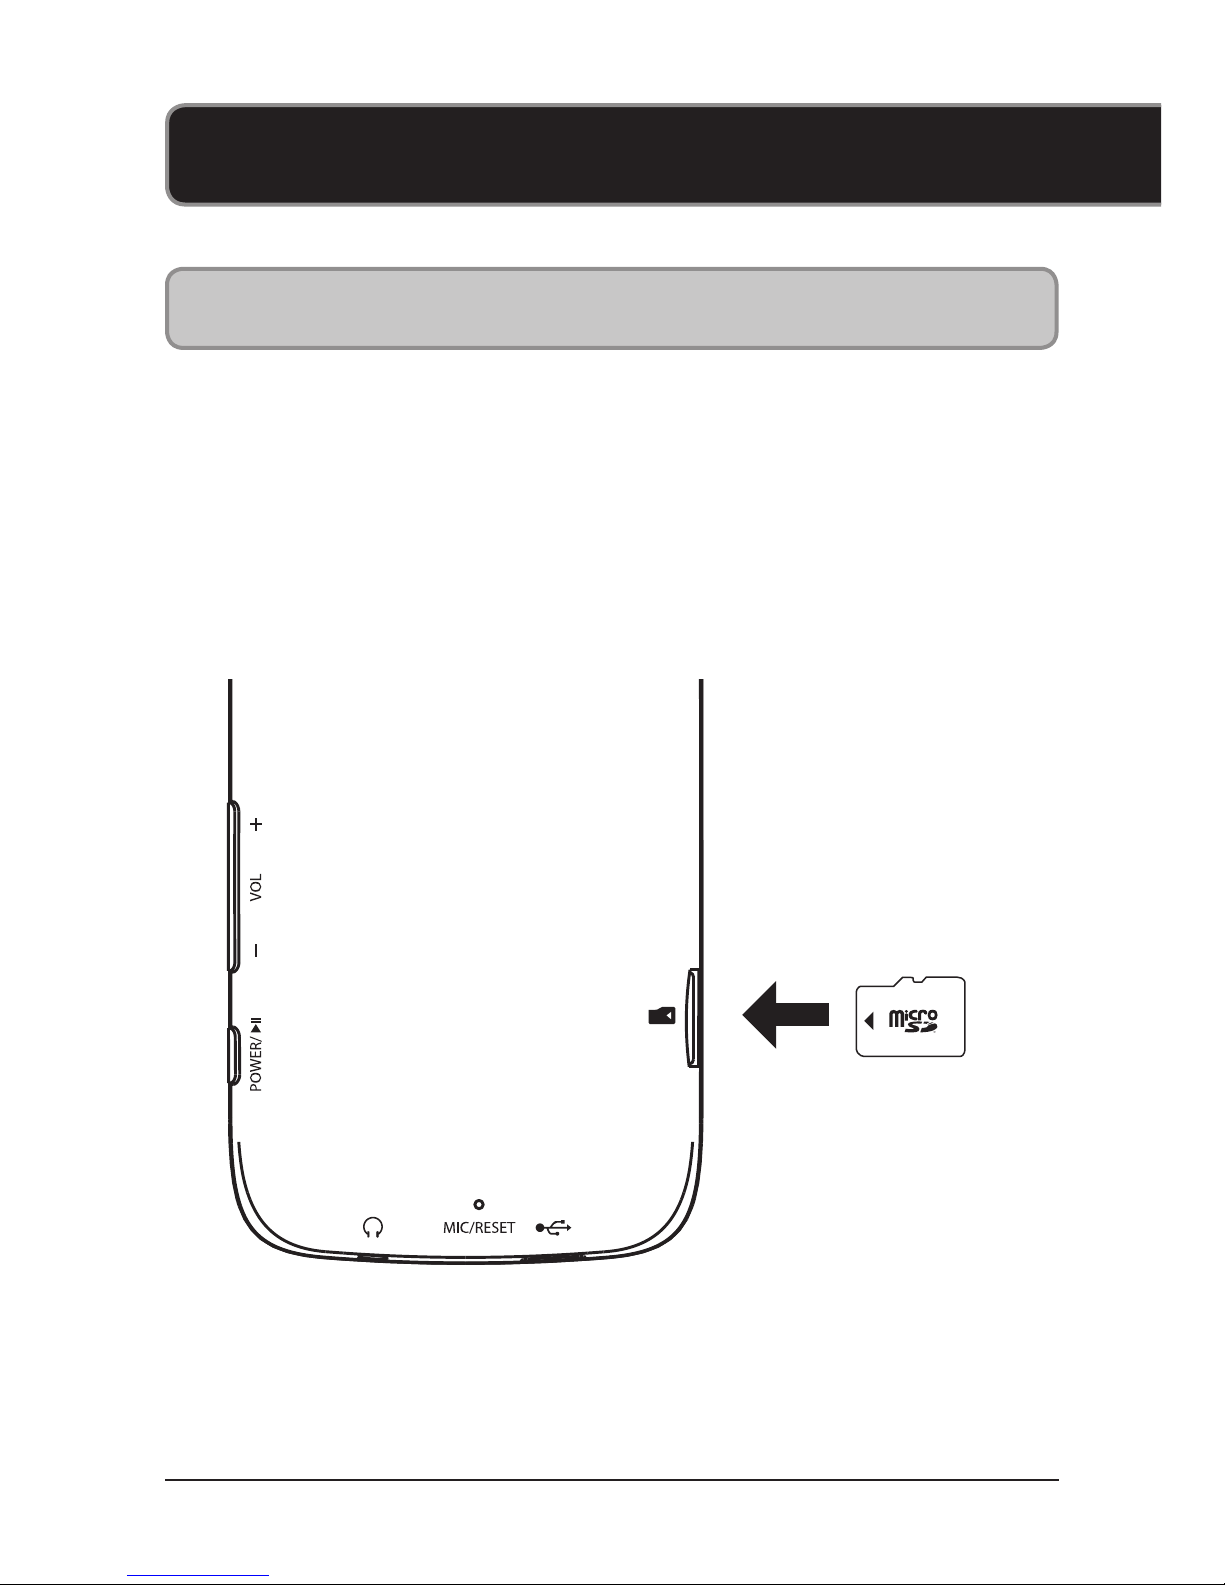
1. Insert a Micro SD Card into the
Memory Card Expansion Slot.
The Memory Card Expansion Slot supports
Micro SD Cards up to 64GB in capacity.
Loading a Micro SD Card
Micro SD Memory Expansion Slot
Page 12
1. Follow the instructions for
Loading a Micro SD Card.
2. Press the MUSIC icon on
the touchscreen to open
the music application.
3. In Pause mode, press the sub-menu
icon to access the le settings.
4. Select Card Folder.
5. Select the desired music from
the card directory and use the
on-screen play controls to begin
playing the selected music.
Playing from the Micro SD Card
Page 13
1. Press the Radio icon on the
touchscreen to open the
recorder application.
2. Press the sub-menu icon
to access the other settings.
Select auto search to start
saving all available stations.
3. Once nished, press Play/
Pause button once.
CH1 will be displayed on the screen
Use the Arrow buttons to select the saved
stations.
4. Press Play/Pause button
again to cancel Presets.
CH info will not be displayed on the
screen.
Use the Arrow buttons to manually tune
the radio.
Radio
Page 14
1. Press the Recorder icon on
the touchscreen to open the
recorder application.
2. Press the on-screen Play/Stop
button to start and pause recording.
3. Press and hold the Menu button
to save the recording to the
player’s internal memory.
4. Press the sub-menu icon to
access the other settings. Press the
Menu button once to return, and
press and hold to return to Main
Menu.
Recording Audio
Page 15
1. Press the Music icon on
the touchscreen to open
the music application.
2. In Pause mode, press the sub-menu
icon to access the le settings.
3. Select the Record List and
then select Voice.
4. Select the desired recording
using the touchscreen.
5. Use the on-screen play controls to
begin playing the selected recording.
Playing Recorded Audio
Page 16

1. Press the Stopwatch icon
on the touchscreen to open
the recorder application.
2. Press the on-screen Start
button to start the timer.
Stopwatch
Page 17

1. Connect the media player to a
computer using the included USB
cable.
2. Once connected, the video conversion
software will open automatically.
3. Use the conversion software to select a
video on your computer and convert it
to the AMV format so it will be playable
on the media player.
4. After converting, follow the instructions
for Loading Files to load the newly
created AMV le to the media player.
Video Conversion Software
Page 18
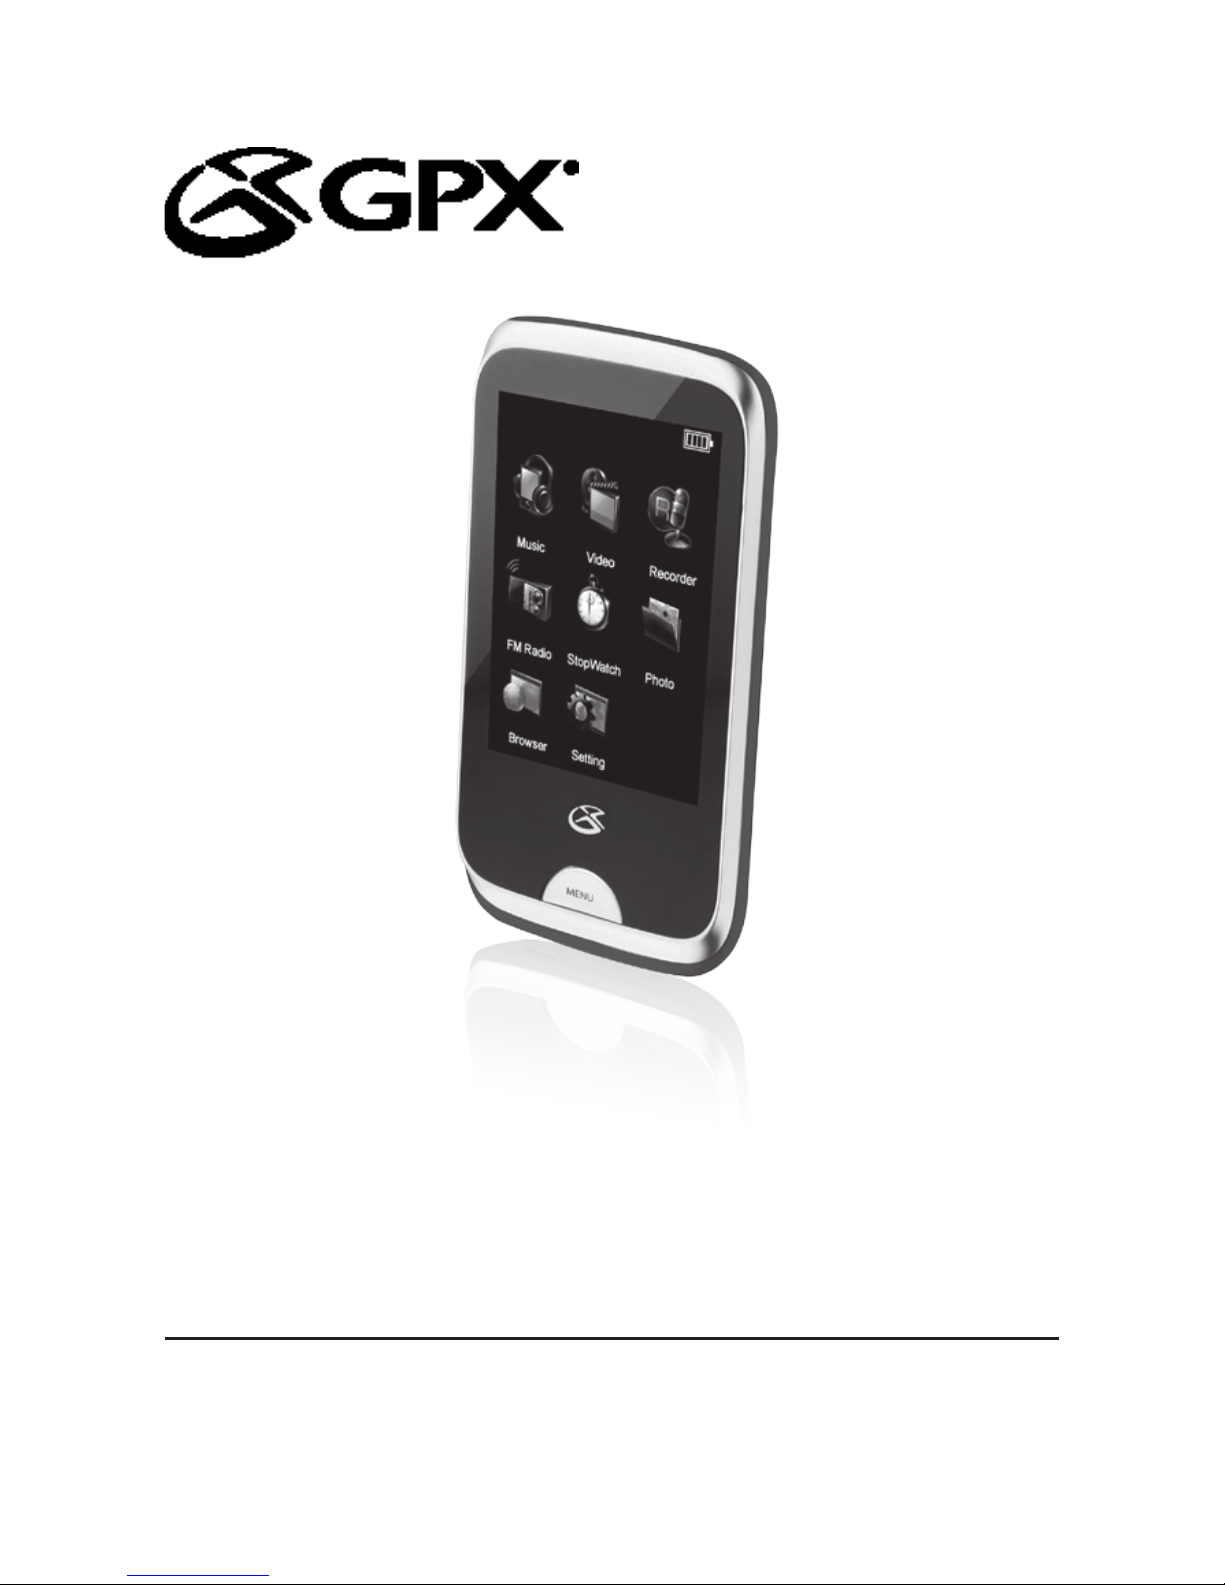
USER’S GUIDE
V:810-01
For the most up-to-date version of this
User’s Guide, go to www.gpx.com
MT863S
Touchscreen
Media Player
 Loading...