

GPRINTER GP-7635 series, GP-7645 series, GP-76NI, Pro5 User Manual
-----------------IMPACT DOT-MATRIX RECEIPT PRINTER------------------
--
1
-
User’s manual
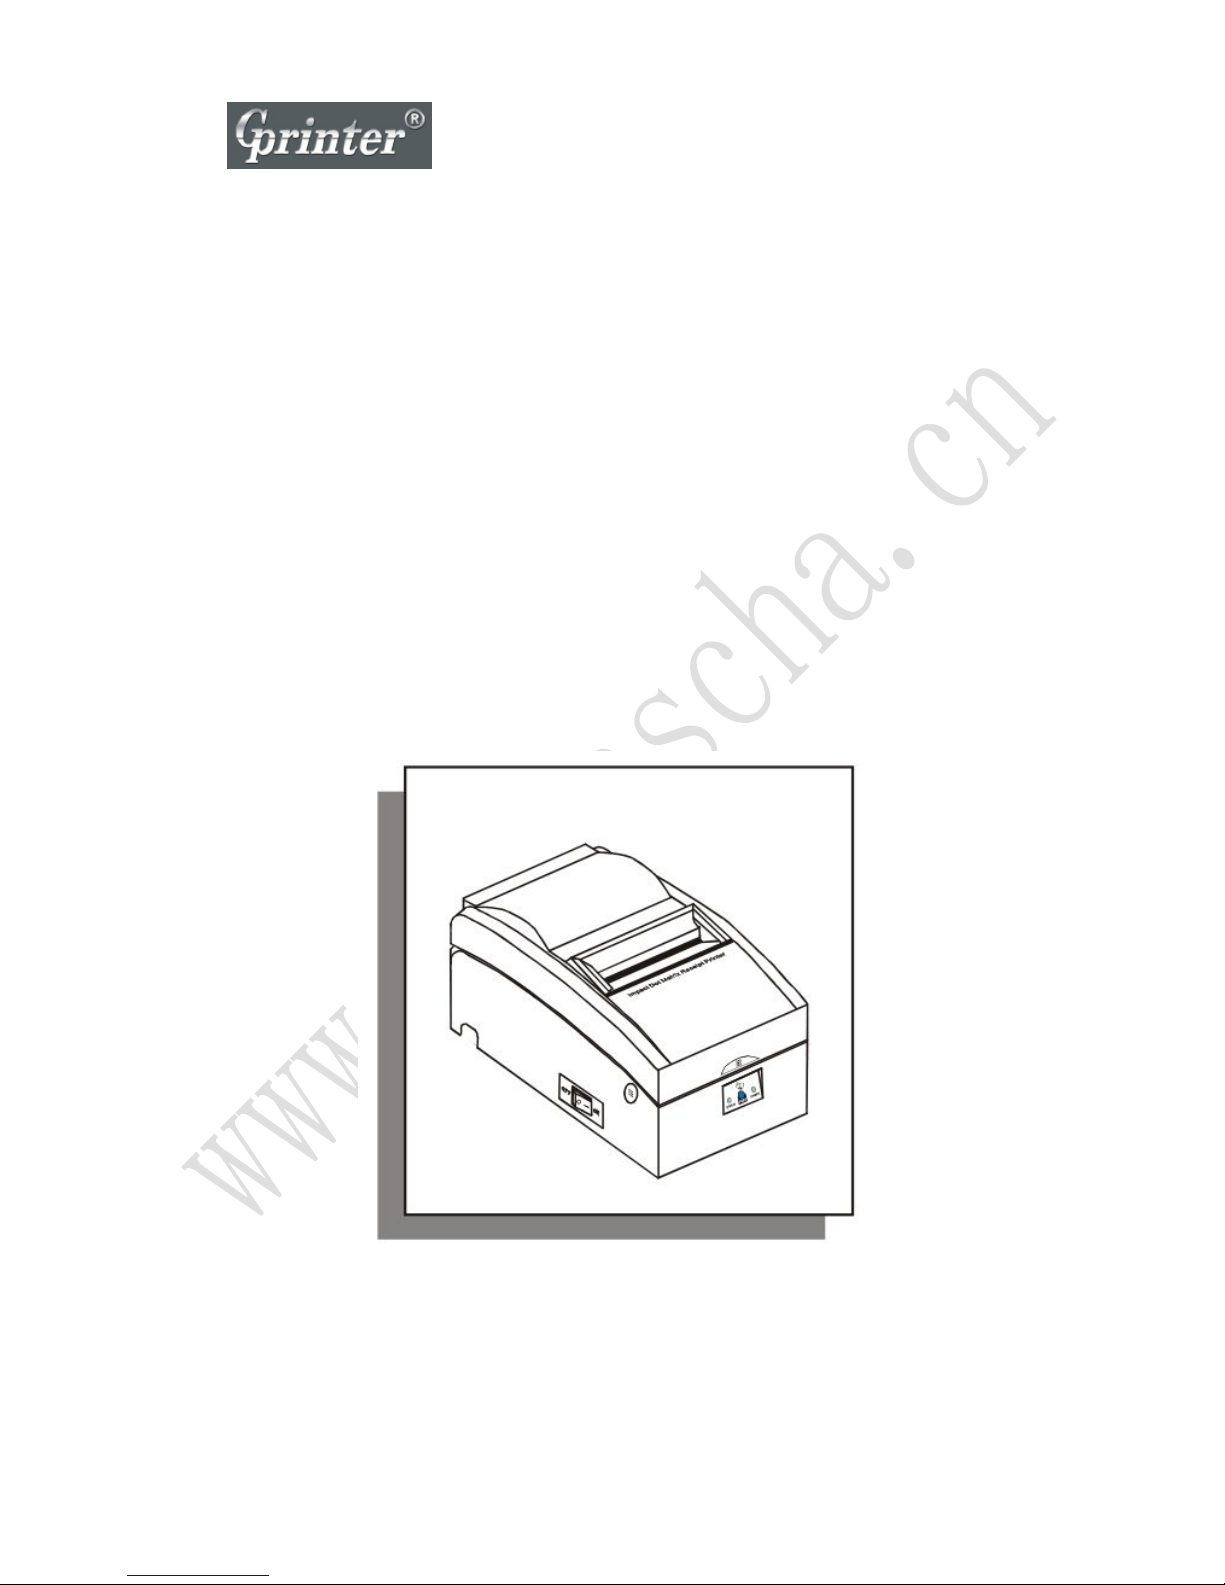
IMPACT DOT-MATRIX PRINTER
GP-7635XX
GP-7645XX
GP-76NI
Pro5
Proficient in Commercial POS Receipt Printers

-----------------IMPACT DOT-MATRIX RECEIPT PRINTER------------------
--
2
-
Safety Notice:
*Don’t touch the head of printer with anything.
*Don’t touch the cutter blade.
*Don’t bend the power cord excessively or place any heavy objects onto it.
*Don’t use the printer when it is out of order. This can cause a fire or and electrocution.
*Only use the power cord excessively or place any heavy objects onto it.
*When connecting or disconnecting the plug, always hold the plug-not the cord.
*Keep the desiccant out of children’s reach.
*Use only approved accessories and do not try to disassemble, repair or remodel it for yourself.
*Install the printer on stable surface, choose firm, level surface where avoid vibration.
*Don’t let water or other foreign objects in the printer.
*Don’t connect a telephone line into the peripheral drive connector.
*We recommend that you unplug the printer from the power outlet if no use it for long period.
Available fields:
*Print POS system Receipts
*Print EFT POS system Receipts
*Print Gym, Post, hospital, civil aviation system Receipts
*Print Inquiry, Service system Receipts
*Print Instrument test Receipts
*Print Tax, Tab Receipts
Main Features:
*Command protocol is based on ESC/POS standard.
*Support black mark anchor testing print.
*High speed and Low-noise dot printing.
*Various Layouts are possible by using page mode
*High reliability due to a stable mechanism
*Repeated operation and copy printing are possible.
*Easy paper jam clearance.
*Easy maintenance for tasks such as head cleaning.
*Built-in interface provides control capability for cash drawer.
Technique Spec.
-----------------IMPACT DOT-MATRIX RECEIPT PRINTER------------------
--
3
-
Print method
Impact dot-matrix printing
Print speed
3.5line/sec. (available for 7635XX)
4.5line/sec. (available for 7645XX)
5 line/sec. (available for Pro5)
Paper width
76±0.5mm
Print columns
400dots/line
Character
ANK Character, Font A: 9*9 dots
Font B: 7*9 dots
Simplify/Traditional: 16*16 dots
Print command
Compatible with ESC/POS
Interface
Parallel, Serial, USB, Ethernet, Bluetooth
Cutter
full or partial cut
Reliability print
10 million lines (available for 76XX)
15 million lines (available for Pro5)
Copy capability
One original and two copies
Paper thickness
0.05~0.08mm (total thickness≤0.20)
Adaptor power input
AC 110V/220V, 50~60Hz
Adaptor power output
DC24V/2A
Printer power input
DC 24V/2A
Cash Drawer
DC 24V/1A
Work Temperature
5~45ºC, Dampness: 10~80%
Storage temperature
-10~50ºC, Dampness: 10~90%
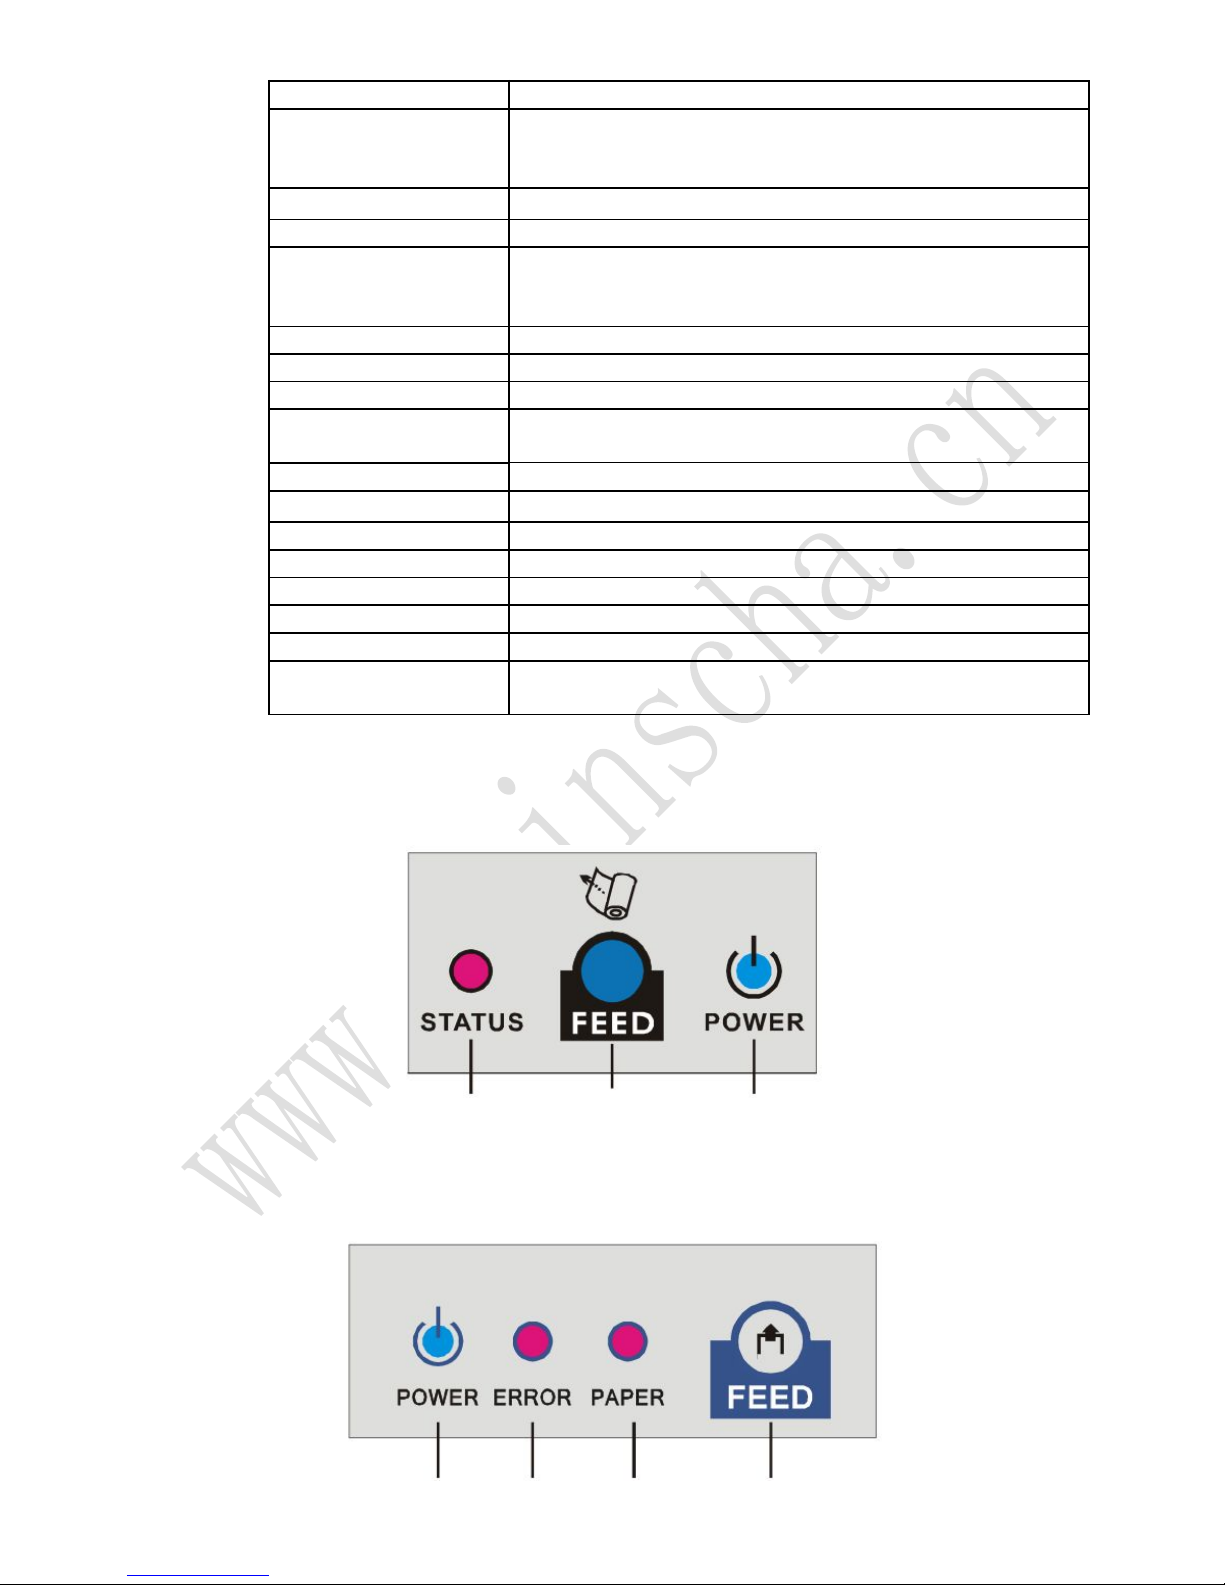
Buttons and Indicator
Available for GP-7635XX
STATUS Indicator FEED button POWER Indicator
Available for GP-7645XX, GP-76NI, Pro5
POWER Indicator ERROR Indicator PAPER Indicator FEED button
-----------------IMPACT DOT-MATRIX RECEIPT PRINTER------------------
--
4
-
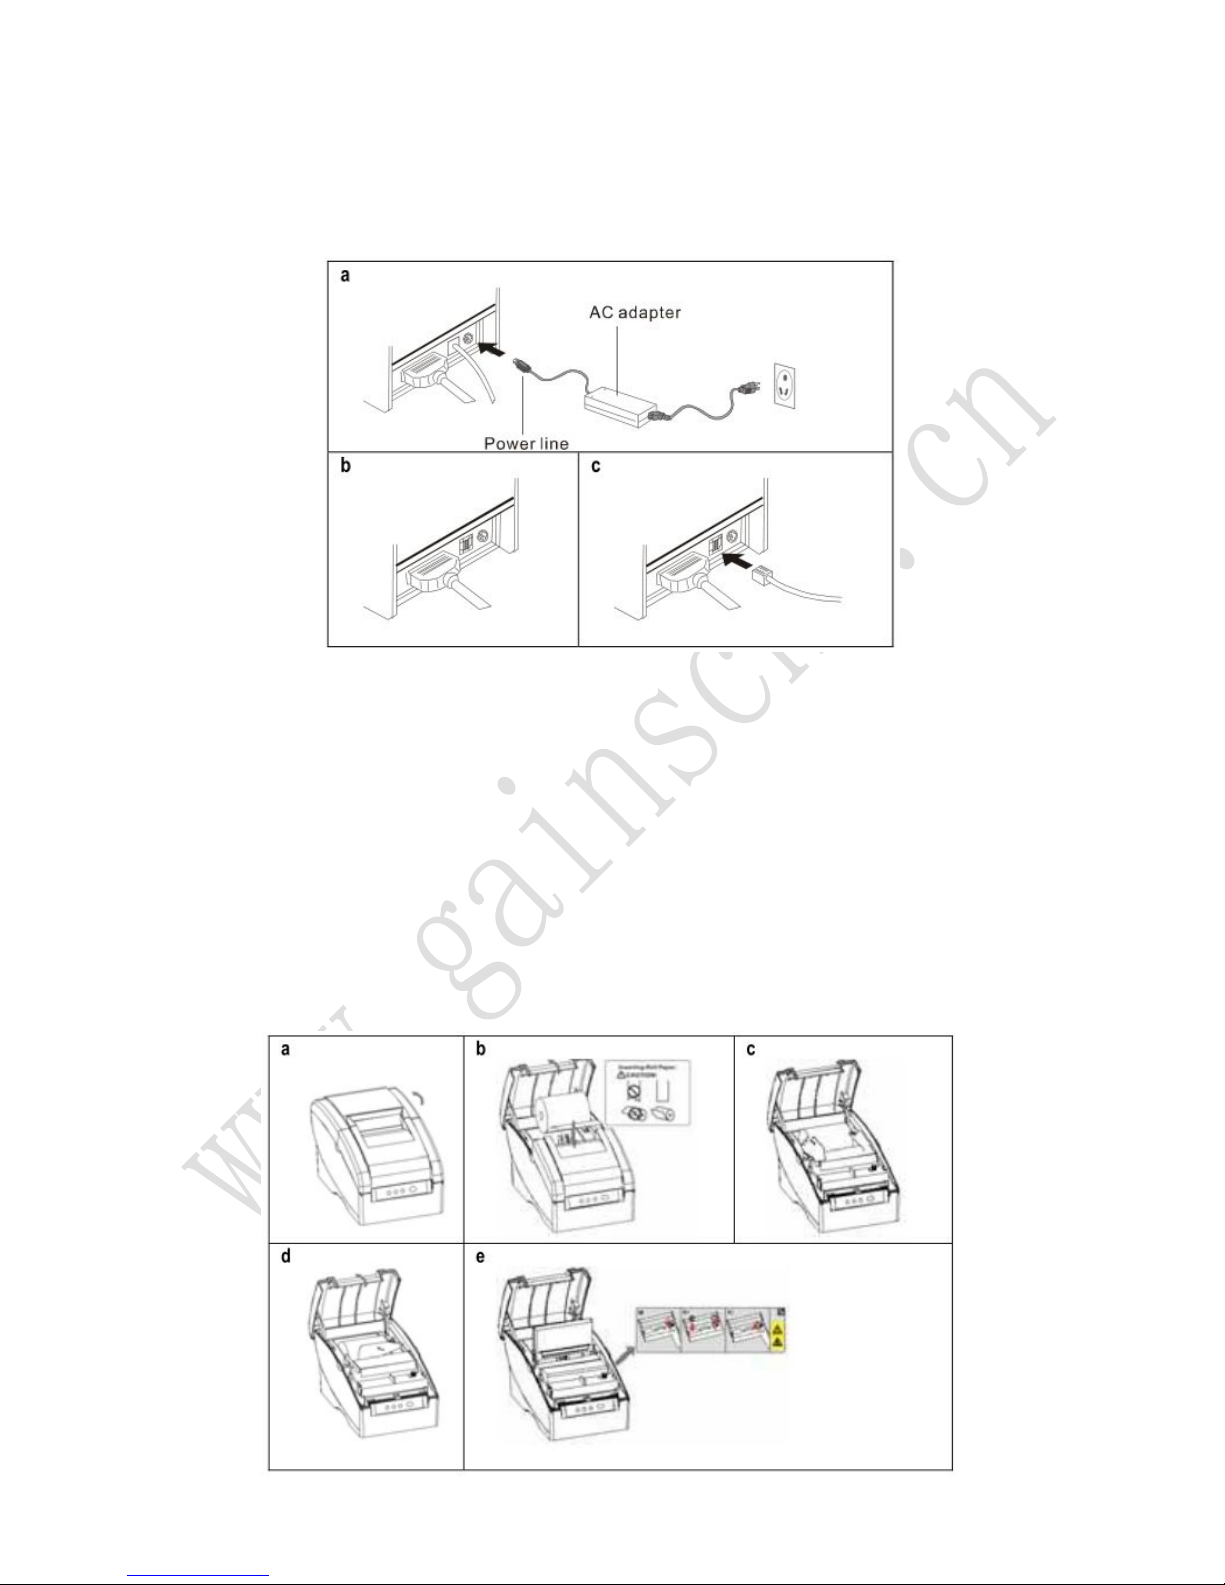
Connection
Note: take 76NI with auto cutter for example, other models are similar.
a. Connect the adapter cable to power connector of the printer.
b. Connect the date cable to the connector on the rear panel of the printer.
c. Connect the cash drawer’s RJ-11 phone jack to the connector on the rear panel.
Installation of Paper Roll and Ink Ribbon
Please install after turn on the printer with indicators on.
a) Open the top cover.
b) Install the paper roll as the picture showing direction.
c) Insert the end of the bottom paper into the paper take-up spool, be sure that the
paper is aligned with the spool’s flange so that the paper is taken up by the spool.
d) Cut redundant paper by the cutter.
e) Open the printer’s cover, turn the knob five or six times in the direction of the arrow,
insert the ink ribbon, and push the ribbon cassette down until it clicks.
-----------------IMPACT DOT-MATRIX RECEIPT PRINTER------------------
--
5
-
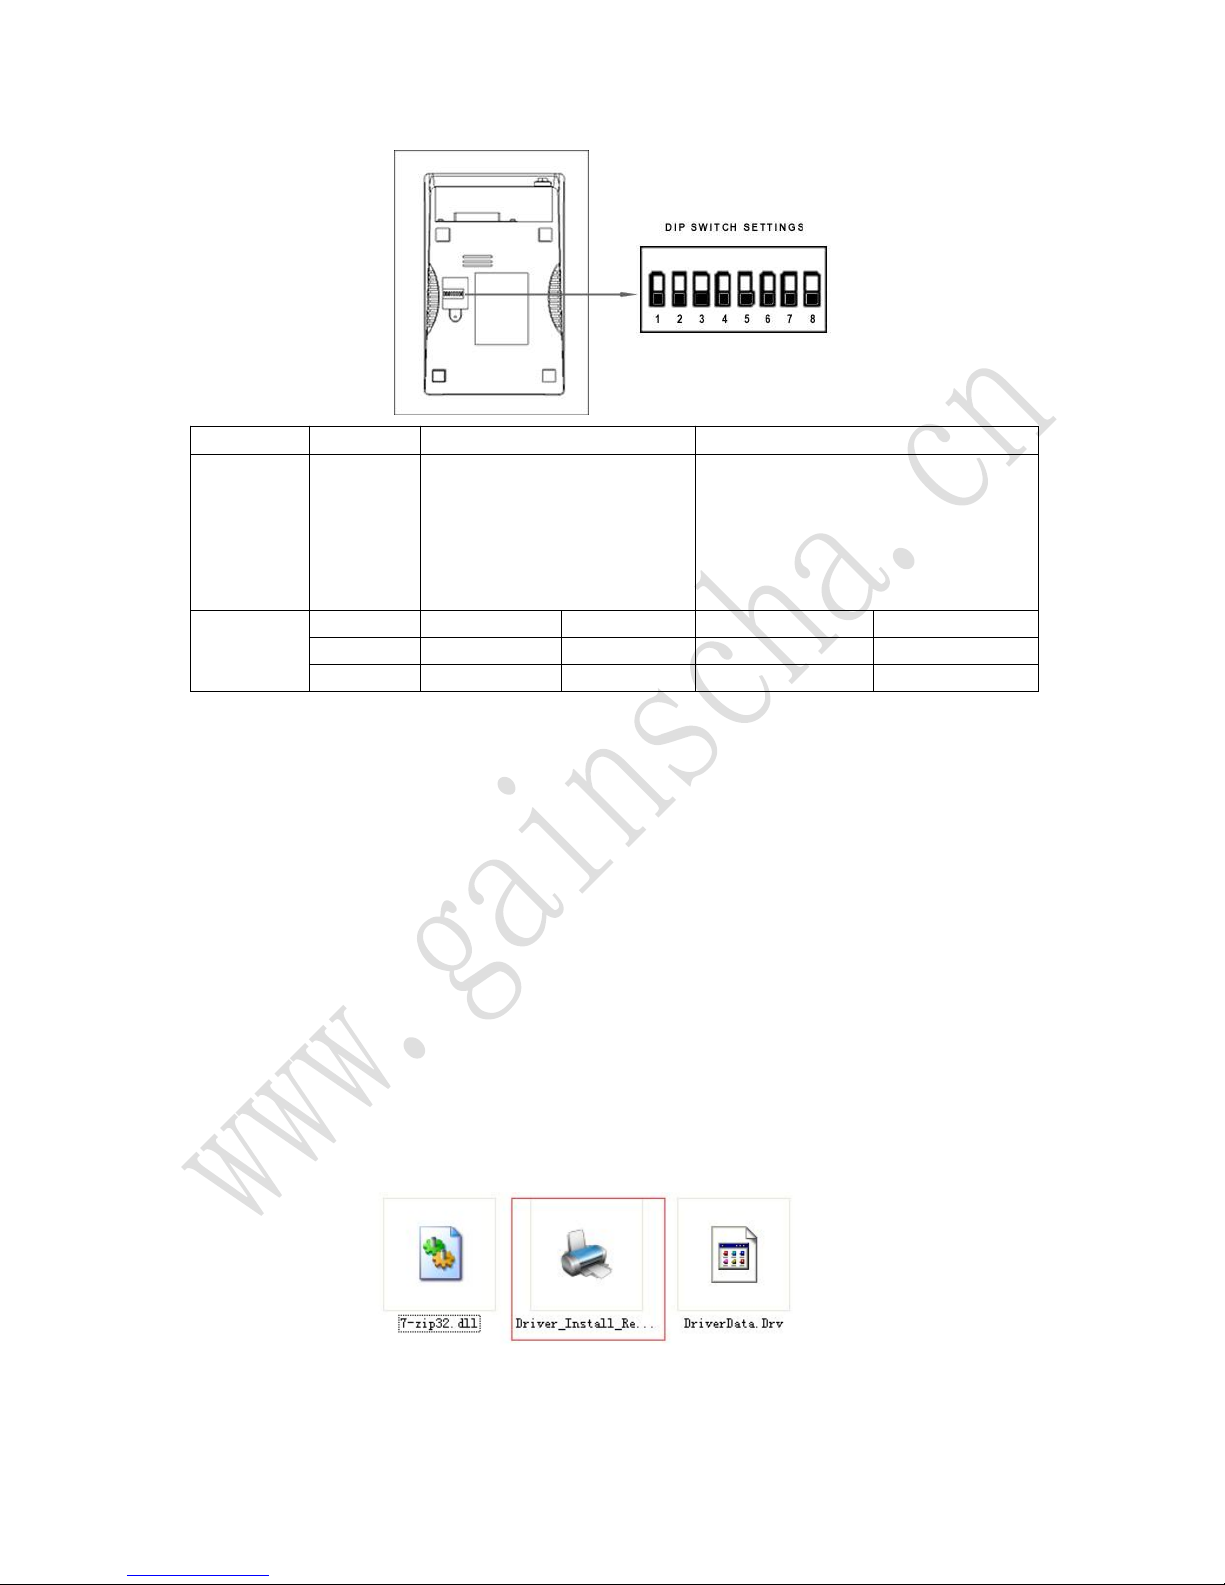
Set Print Mode(DIP Switch)
Set print mode by the DIP Switch, such as Black mark, Cutter, Language, Beep, Density,
Speed mode…
Print self-test page
Self-test page can be showed the printer itself information including software version,
interface type, DIP setting ect, for inspecting the printer if work normally or not.
To start the printer self-test, please follow the below steps:
1. Turn off the printer power.
2. Make sure the paper roll is installed correctly and the printer top cover is closed.
3. Press and hold on the FEED button and turning on the printer power simultaneously,
hold on the FEED button till hearing a beep, then release the FEED button, self-test page
prints out.
The printer will print the content as below after test-self done.
** Completed **
Driver Installation (WinXP in 32bit systems as an example)
a. Insert the bundled CD disk into the CD-ROM drive, in the CD-ROM menu, double-click the
Windows driver Installation file (Driver_Install_Receipt_Label_GBEN.exe) to begin driver
installation.
b. Select the current printer model and port type to be used and click the “Install” button.
To know about the printer model and port type, please refer to the product information
which labeling at the bottom of the printer. NOTE: Take 76NI with auto cutter for
example, other models are similar.
Interface
DIP-8
Function
ON OFF
SW-1
SW-2
SW-3
SW-4
SW-5
SW-6
Black mark
Auto cutter
Color switch
Character per line
Unidirection or Bidirection print
Two-bye character code
Yes No
Yes No
Yes No
42CPL/35CPL 40CPL/33CPL
Unidirection Bidirection
International mode Kanji mode
Serial
SW-7ONOFFONOFF
SW-8ONON
OFF
OFF
Baud rate
38400
4800
9600
19200
 Loading...