

WiFi Setup Guide in Web Page
__________________________________________
GP-H80300IIN, GP-1124D and GP-1124T Wi-Fi Printer
Firstly thank you for choosing our Wi-Fi thermal printer, please follow this manual to use your Wi-Fi
printer.
1. Turn on the printer, use your PC or laptop to search the
Wi-Fi printer and connect it.
Remark: Default mode of Wi-Fi printer is Access Point mode(SSID: Printer AP); other devices could connect it
and use its Wi-Fi network.
2. Open IE browser and input 192.168.0.1, log in.
Account: admin
Password: admin
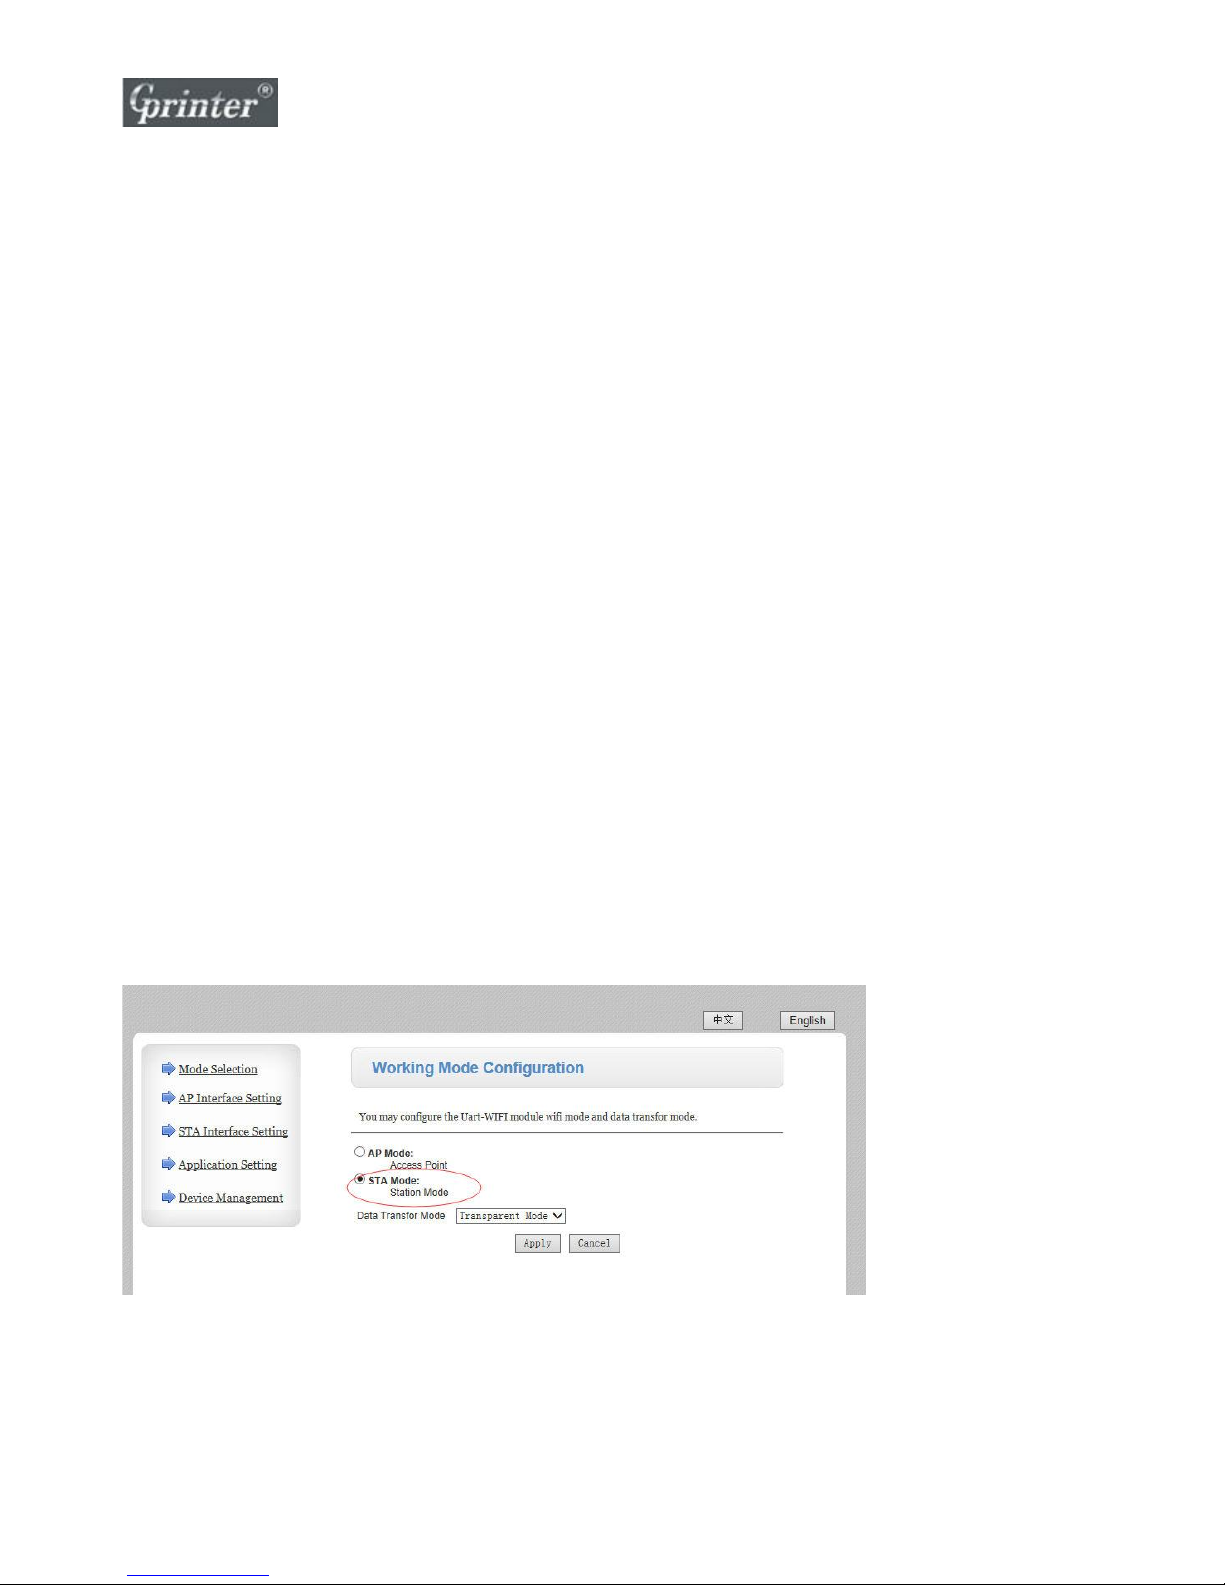
Then click STA Mode.
Remark: IP address in STA mode and AP mode could not be in same network segment.
For example, if your router network segment is same 192.168.0, then you’re suggested to change printer
AP mode’s IP network segment. Click AP Mode in above picture showing page and set printer IP
address to be 192.168.123.XXX or 192.168.100.XXX or others.
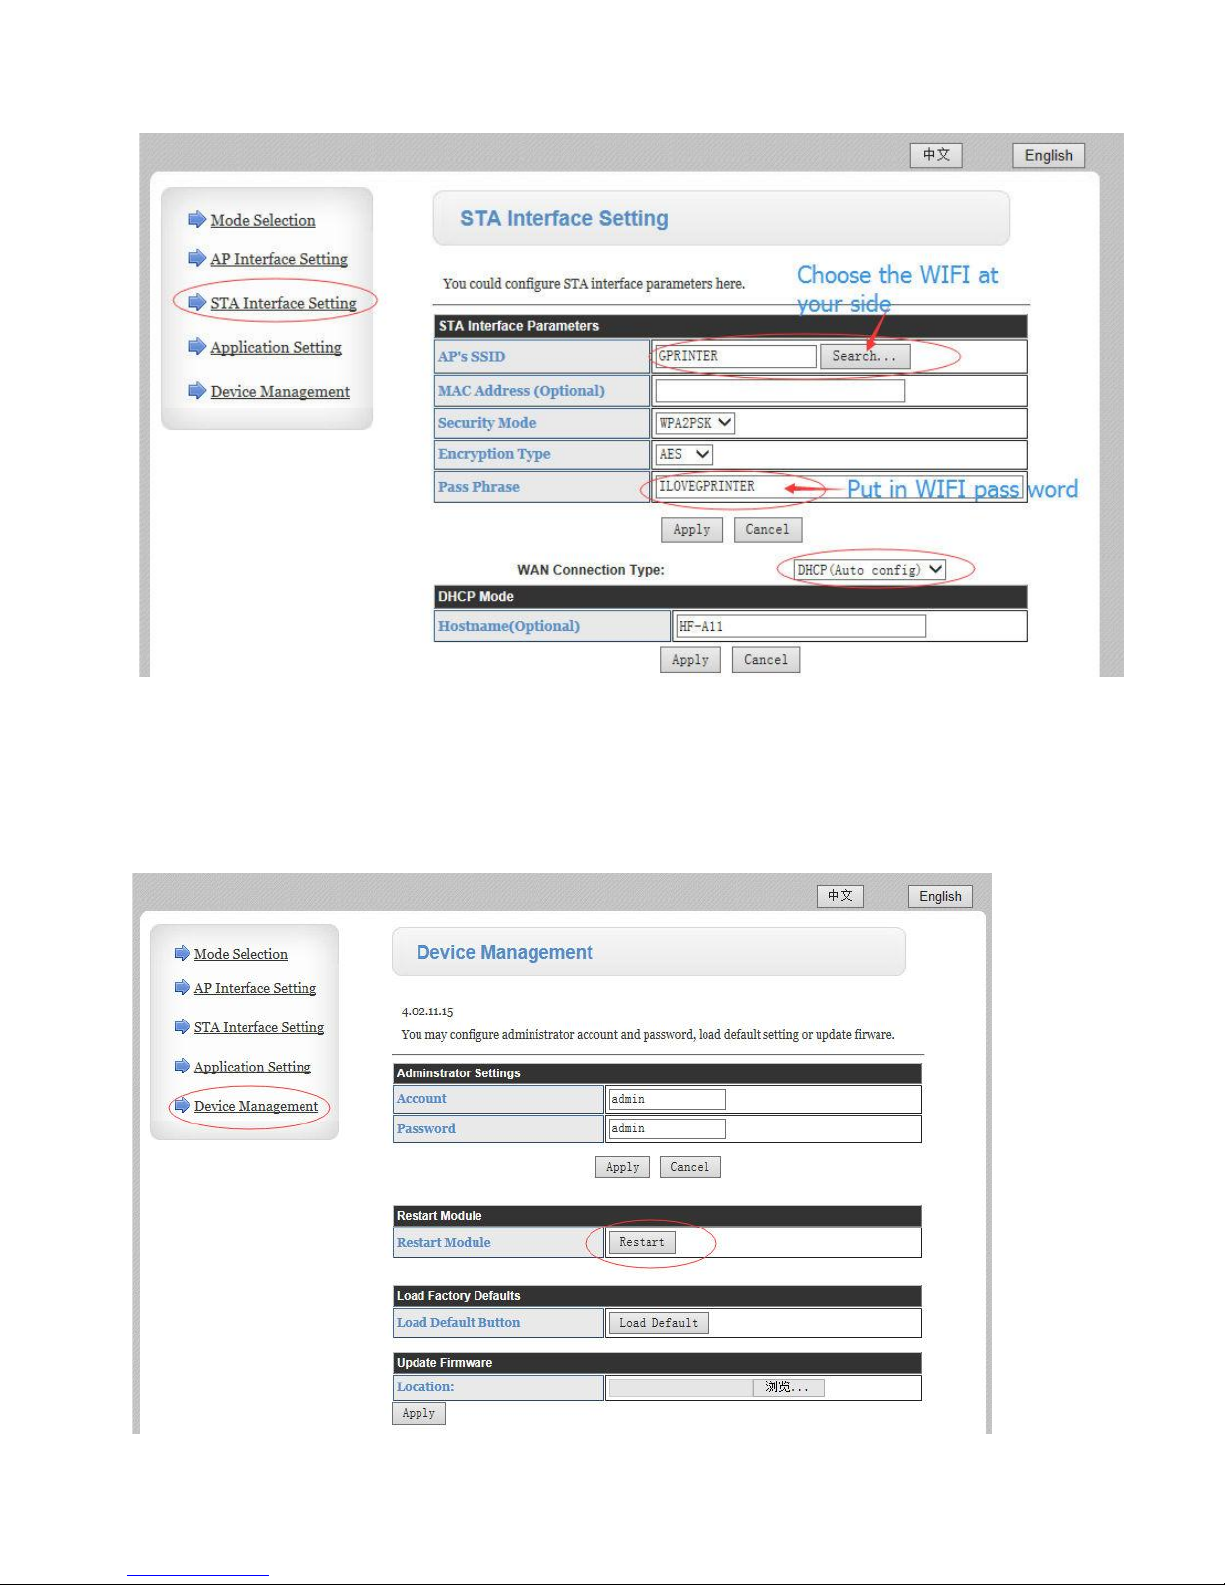
3. Choose STA Interface Setting and set up as per below.
4. Click Device Management and click Restart, wait for your
printer to take effect the new settings.

5. Print the Self test page, you will find the details of Wi-Fi
printer IP address etc.
(1) Wi-Fi mode: STA
If not showing STA, then please repeat the setup procedures and make sure you wait for enough time
for printer to restart, and take effect the new settings, until you see STA showing on the page.
(2) Wi-Fi STA IP: DHCP, 192.168.123.170
You’ll find it is different network segment from printer IP in AP mode 192.168.0.1.
(3) Be noted that subnet mask 255.255.255.0 cannot be changed at any time; otherwise the printer will be
damaged.
6. Install printer driver in your PC/laptop.

Input the IP showed on
the selftest page

7. Take a windows test page in driver property; if test page is
printed out, congrats, your Wi-Fi printer is connected
successfully.
Choose the port
You just added
 Loading...