

GPO Display Panoramic Display User Manual
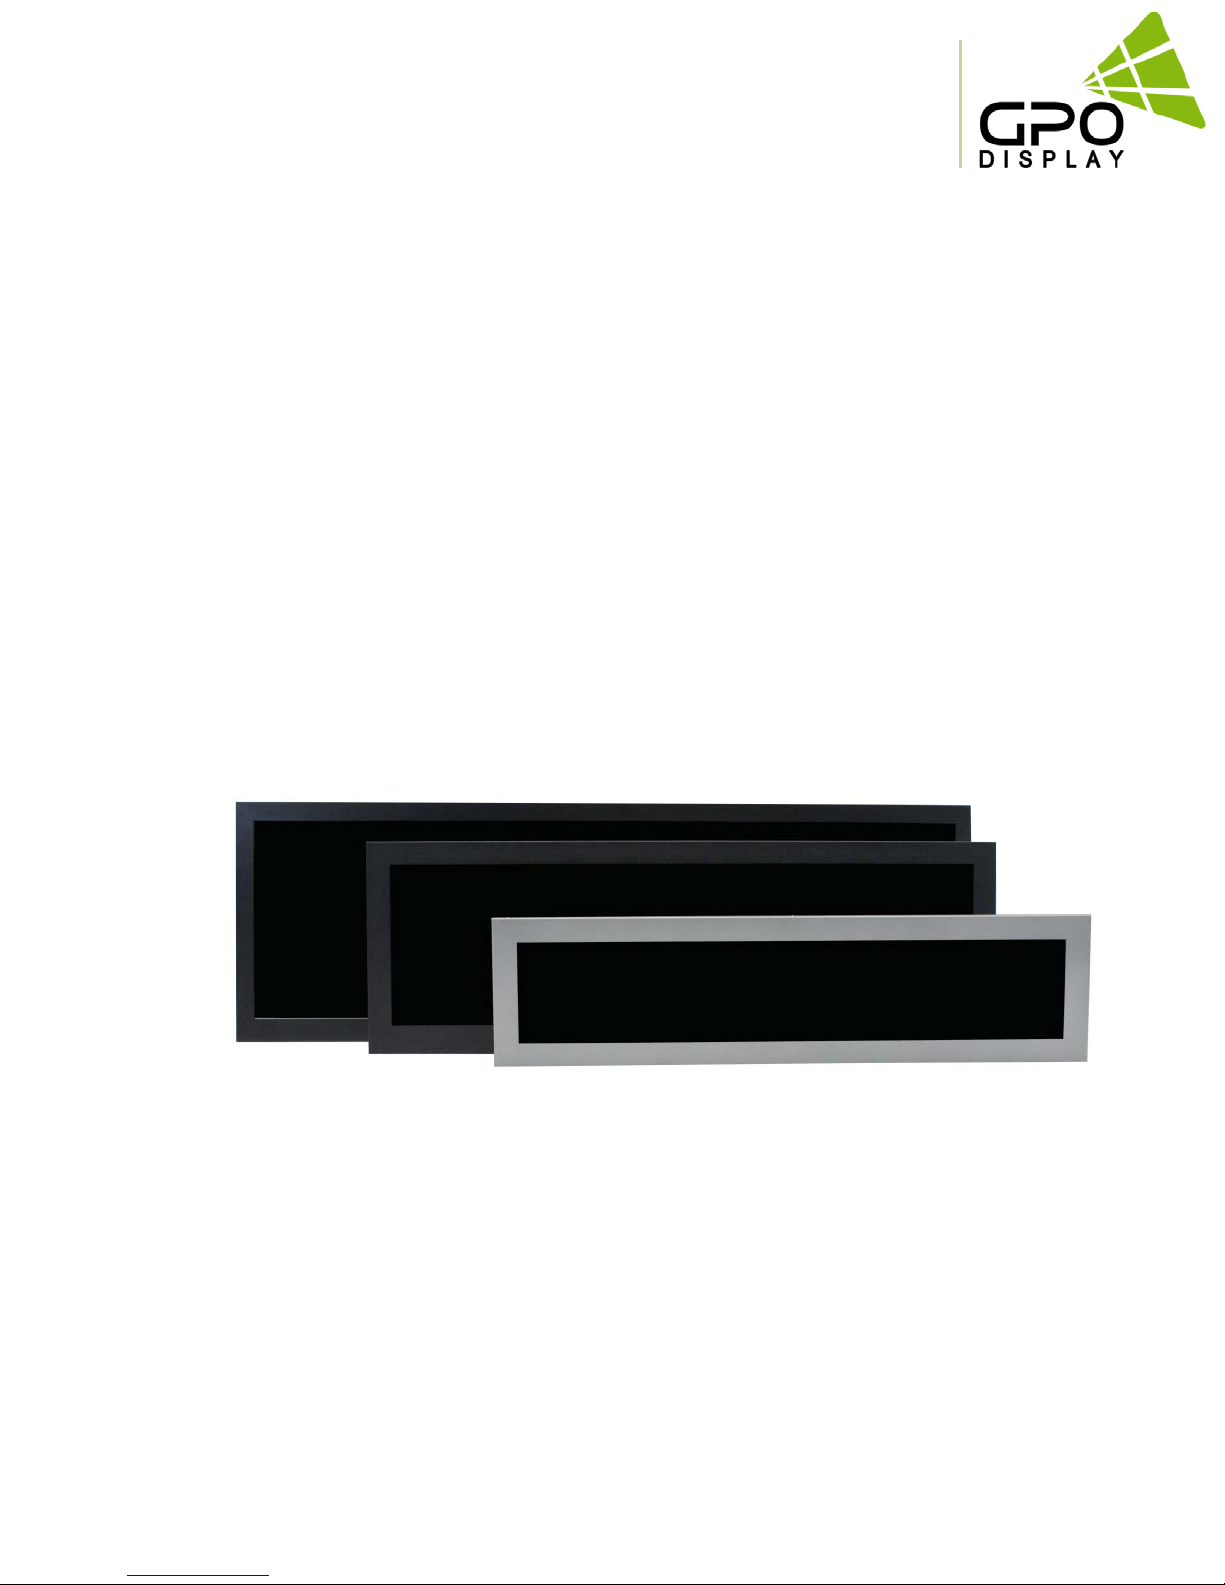
Panoramic Display
User Guide
Before operating the unit, please read this manual thoroughly, and retain it for future reference
User manual
Notice
1. When disconnecting the display from an electrical outlet, the plug must be pulled out from the
socket. Do not remove power cord from outlet by pulling from the cord. Pull from the plug head.
2. WARNING – To reduce the risk of fire or electric shock, do not expose this appliance to rain or other
forms of moisture.
3. Display must not be exposed to liquids via dripping or splashing. Please do not place liquid –filled
items such as vases near the display.
4. Use only a properly grounded plug and receptacle.
5. CAUTION – These instructions are for use by qualified service personnel only. To reduce the risk of
electric shock, do not perform any service other than that contained in the operating instructions
unless you are qualified to do so.
CAUTION
RISK OF ELECTRIC SHOCK
DO NOT OPEN
CAUTION : TO REDUCE THE RISK OF ELECTRIC SHOCK,
DO NOT REMOVE COVER (OR BACK).
NO USER-SERVICEABLE PARTS INSIDE.
REFER SERVICING TO QUALIFIED SERVICE PERSONNEL.
This symbol is intended to alert the user to the presence of insulated
“dangerous voltage” within the product’s enclosure that may be of sufficient
magnitude to constitute a risk of electric shock to persons.
This symbol is intended to alert the user to the presence of important
operating and maintenance (servicing) instructions in the literature
accompanying the product.
www.gpodisplay.com Panoramic Display
2

User manual
Important Safety Instructions
1. Read these instructions.
2. Keep these instructions.
3. Heed all warnings.
4. Follow all instructions.
5. Do not use this product near water.
6. Clean only with dry microfiber cloth.
7. Do not block any ventilation openings. Install in accordance with the manufacturer’s instructions.
8. Do not install near any heat sources such as radiators, heat registers, stoves, or other display
(including amplifiers) that produce heat.
9. Do not remove ground prong from three-pronged plugs. If your outlet will not accept three-
pronged plugs, consult an electrician for replacement.
10. Protect the power cord from being walked on or pinched, particularly at plugs, convenience
receptacles, and the point where they exit from the display.
11. Only use attachments/accessories specified by the manufacturer.
12. Use only with the cart, stand, tripod, bracket, or table specified by the manufacturer, or sold with
the display. When a cart is used, exercise caution when moving the cart/display combination to
avoid injury from tip-ov er.
13. Unplug this display during lightning storms or when unused for long periods of time.
14. Refer all servicing to qualified service personnel. Servicing is required when the display has been
damaged in any way, such as power-supply cord or plug is damaged, liquid has been spilled or
objects have fallen into the display, the display has been exposed to rain or moisture, does not
operate normally, or has been dropped.
15. Do not expose this display to dripping or splashing and ensure that no objects filled with liquids,
such as vases, are placed on the display.
16. To completely disconnect this display from the wall outlet, disconnect the power supply cord plug
from the AC receptacle./wall socket
17. The mains plug of the power supply cord shall remain readily operable.
18. An display with CLASS I construction shall be connected to a wall socket outlet with a protective
grounding connection.
19. Note: Prolonged use of headphones at a high volume may cause damage your ears.
20. Notice to users : This is a Class A digital device
21. This device is designed for commercial use and features safety certificates for electromagnetic
interference (EMI). Users should be mindful of EMI issues.
www.gpodisplay.com Panoramic Display
3

User manual
Cautions for consisting product system
•Environmental condition for installation
As the LCD panel is very sensitive to physical impact, installation requires considerable caution.
Minimum clearance (20cm) must be secured for smooth ventilation. Installation must avoid air tight or near air tight places.
Improper ventilation causes malfunction and shortens product lifetime by rapid internal temperature rise. If Product has to
installed at the improper ventilation, additional ventilation openings or fans must be provided to keep the internal temperature
between 0~35℃.
•For ground of Product and application devices, it should be connected as frame ground.
•Please refer to the special installation instruction guide carefully if the display monitor shall install on not enough solid and/or
unevenness surface wall and build into wall.
Ensure that electrical outlet(s) are capable of supporting this product’s power consumption
•
•Clearance for Ventilation
When installing the product, make sure there is at least 20cm clearance on all sides for effective ventilation and do not seal the
product in an enclosed space.
If the product is installed in a location with poor ventilation, the internal temperature can be raised rapidly and it can cause
frequent malfunctions and rapid reduction of the product life
Embedded Product
In case of no space of 20cm from each side of the SET,
make sure adding cooling fans at the upper part of the set to
reduce inner temperature.
Mounting on a wall surface
Please secure minimum clearance as shown in the picture for
adequate ventilation and technical service.
•Ventilation space in front of Product must be furnished for heat
dispersion. If the front space of Product has to be sealed, there
must be consideration for the heat dispersion in the rear side of
Product.
20cm
20cm
20cm
20cm
www.gpodisplay.com Panoramic Display
4
User manual
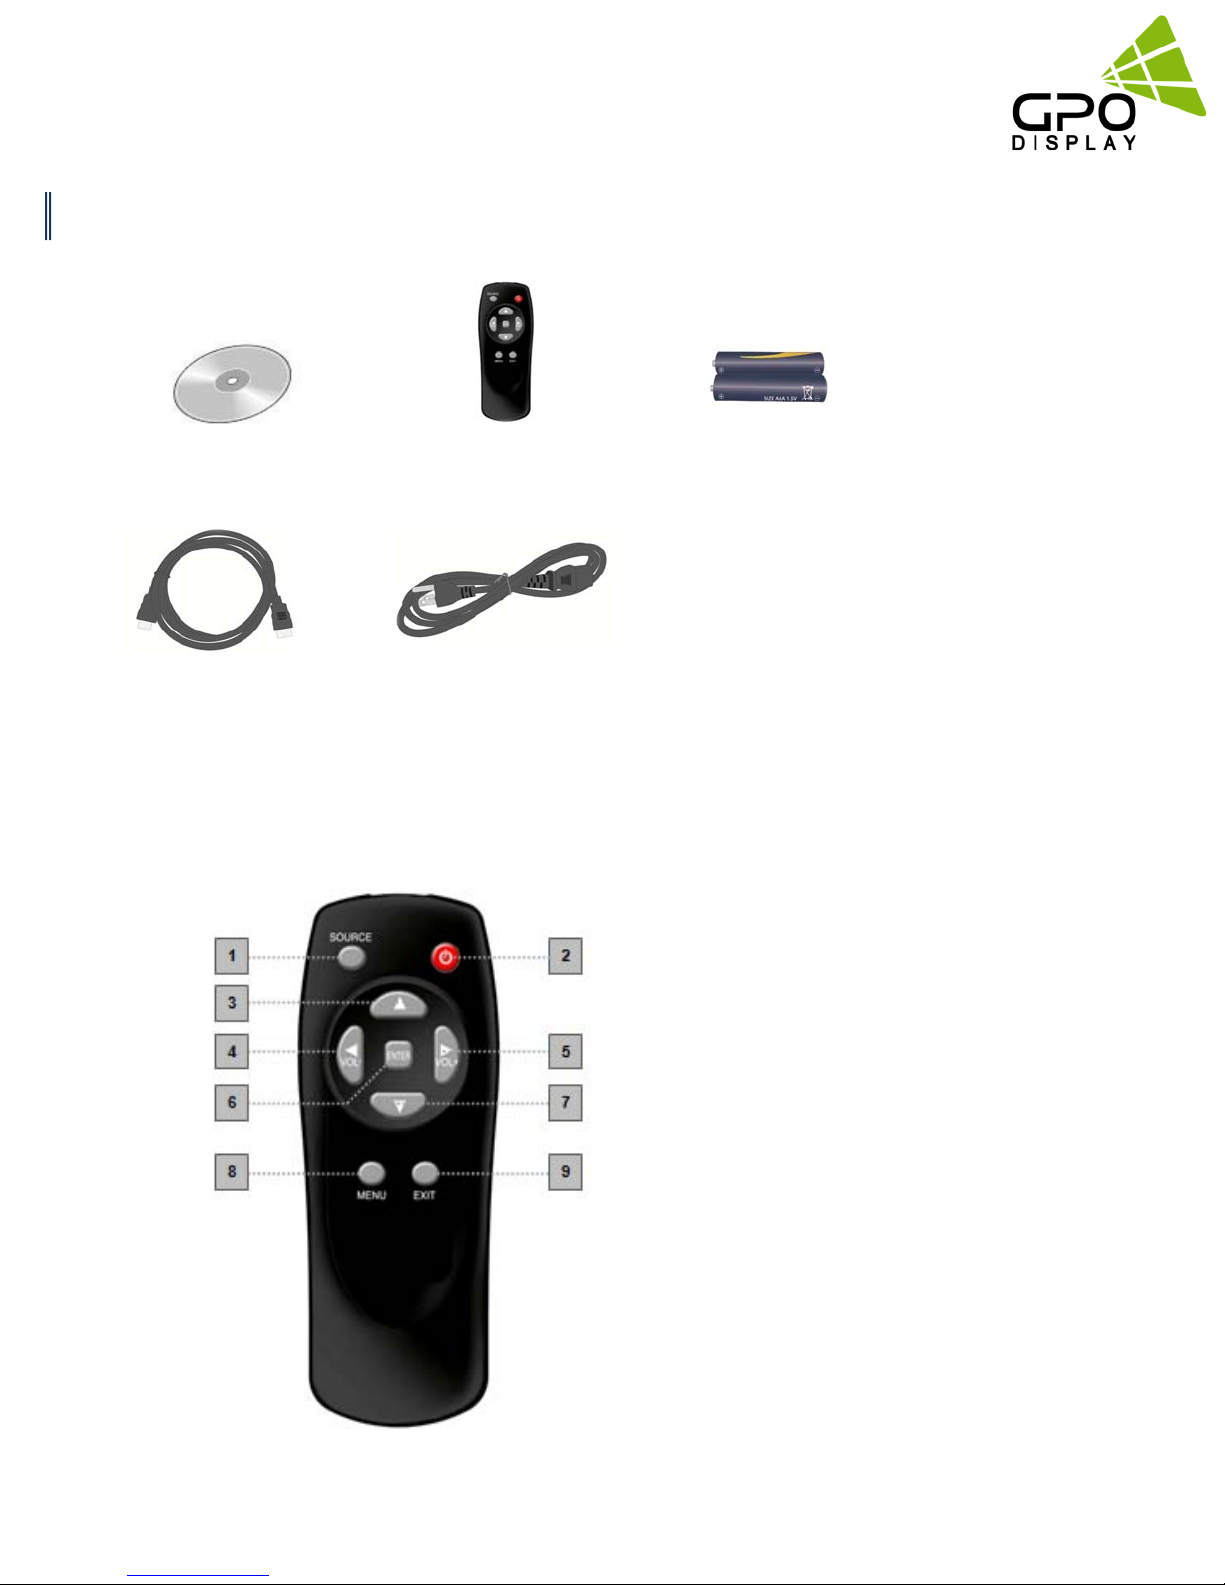
Accessories
CD Remote Control
HDMI Cable Power Cable
Batteries (AAA x 2)
1. SOURCE : Selects Input Source
2. POWER : Turns the LCD Display On and Off
3. UP : Controls the UP cursor in the menu
4, LEFT : Controls the LEFT cursor in the menu
5. RIGHT : Controls the RIGHT cursor in the menu
6. DOWN : Controls the DOWN cursor in the menu
7. ENTER : Controls the ENTER cursor in the menu
8. MENU : Displays the main On-Screen menu
9. EXIT : Exits the On-Screen menu
www.gpodisplay.com Panoramic Display
5
User manual
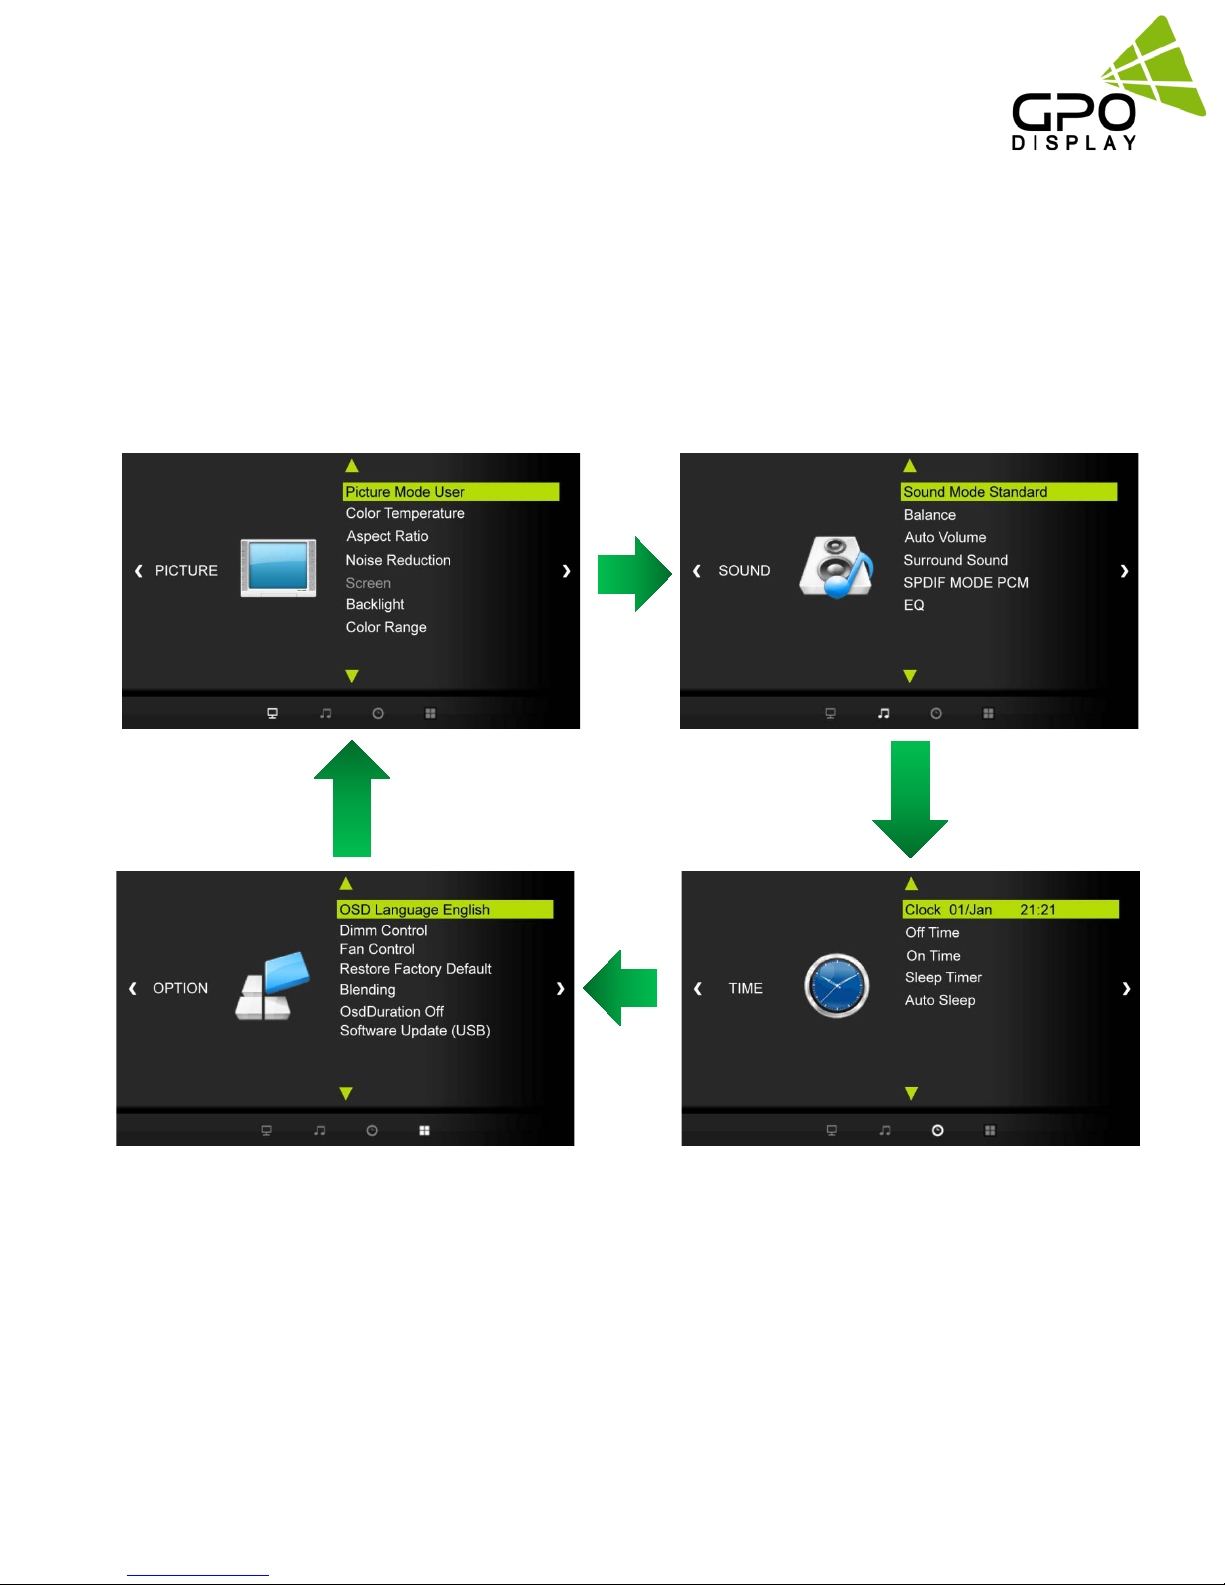
1. MENU OVERVIEW
In this menu system, there are several ways to customize the menu settings provided.
Most menus consist of three levels to set up the options, but some require greater depth for the variety of settings.
If you press the MENU button, only the first and second level of the menu system will appear on the monitor screen.
The third level can be displayed by pressing SELECT. If a menu has more than three levels, the pop-up dialogue box
will be displayed as the fourth or fifth level.
1) To show and remove the Menu:
Press the MENU button on the Remote Control to display the menu. A second press of the MENU button or a press of the EXIT
button will take you back to monitor viewing.
2) To go to the next level:
Press ENTER on the Remote Control.
3) To go back to the previous level:
Press MENU (or EXIT) on the Remote Control.
4) Typical Menu Operation
a. Press MENU button: The main menu will appear.
b. Use ▲/▼ buttons to select the desired menu option (icon).
c. While the desired menu option is selected, press ENTER to move to the second level.
d. Press ENTER to move to the third level: Some menu options require additional steps.
e. Press MENU to return to the previous menu or press EXIT on the Remote Control to return to monitor viewing.
www.gpodisplay.com Panoramic Display
6
User manual
2. Basic Operation
1) Turning On the Monitor
a. First, connect power cord and ensure the plug head is fully inserted. Flip the power switch located adjacent to
the AC inlet. The monitor will then switch to standby or “power on” mode. In standby mode, in order to turn monitor on,
press the POWER button on the remote control or power button in the OSD KEY located on the side of the monitor .
b. Select the input source by using SOURCE button on the remote control.
2) Volume Adjustment (A/V extension option)
a. Press the VOL+/- ◀/▶ button to adjust the volume.
b. If you wish to switch the sound off, press the MUTE button on the remote control.
c. You can cancel this function by pressing the MUTE or VOL+/- ◀/▶ button.
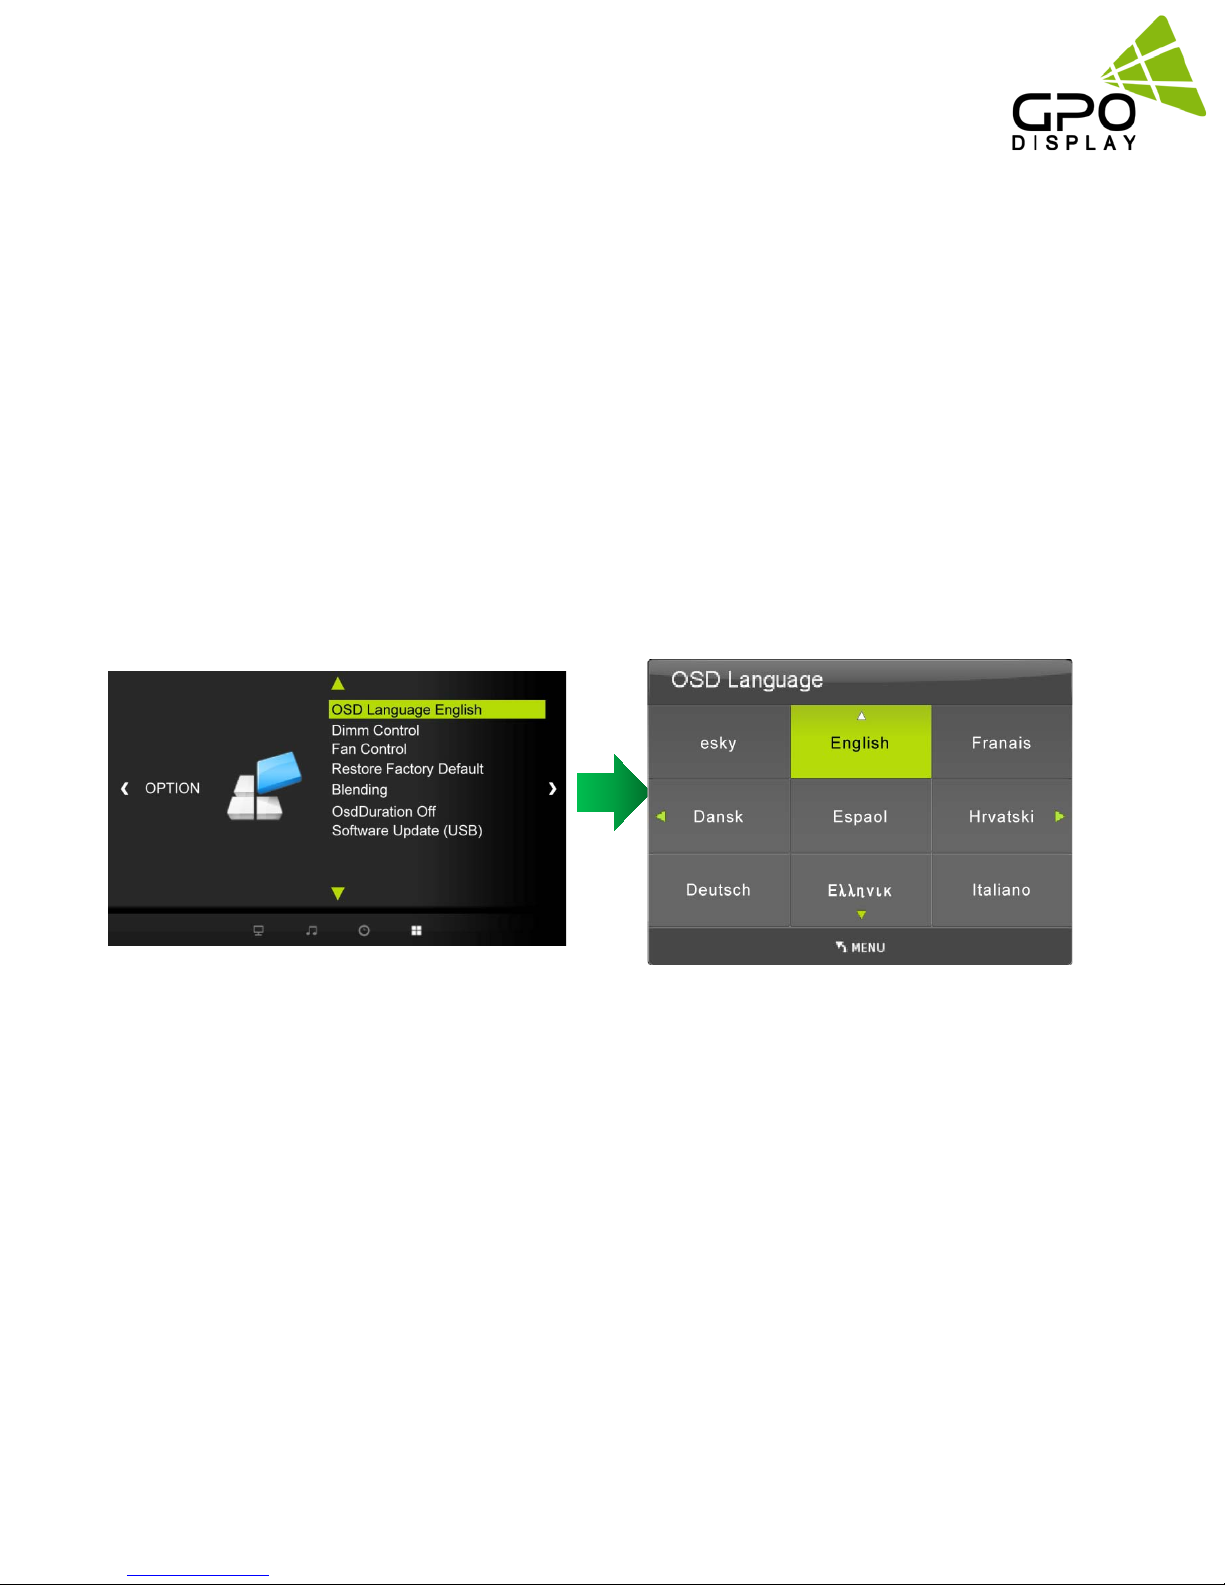
3) On Screen Menus Language Selection
There are several languages in which the menus can be displayed. Select your desired language by following these steps:
a. Press the MENU button and then use ▲/▼ button to select the OPTION icon.
b. Press the ▲/▼ button to select Menu Language menu.
c. Press the ENTER button and then use ▲/▼,◀/▶ button to select your desired language:
From this point on, the on-screen menus will be shown in the selected language.
d. Press EXIT button to return to monitor viewing or press MENU button to return to the previous menu.
Supported Languages :
English, French, Italian, Portuguese, Russian, Chinese, etc.
www.gpodisplay.com Panoramic Display
7
User manual
3. On Screen Menus Selection and Adjustment
1) How to adjust the OSD screen
a. Press the MENU button and then ◀/▶button to select each menu.
b. Press the ENTER button and then use ▲/▼ button to display the available menus.
• Your monitor's OSD (On Screen Display) may differ slightly from what is shown in this manual.
www.gpodisplay.com Panoramic Display
8
User manual
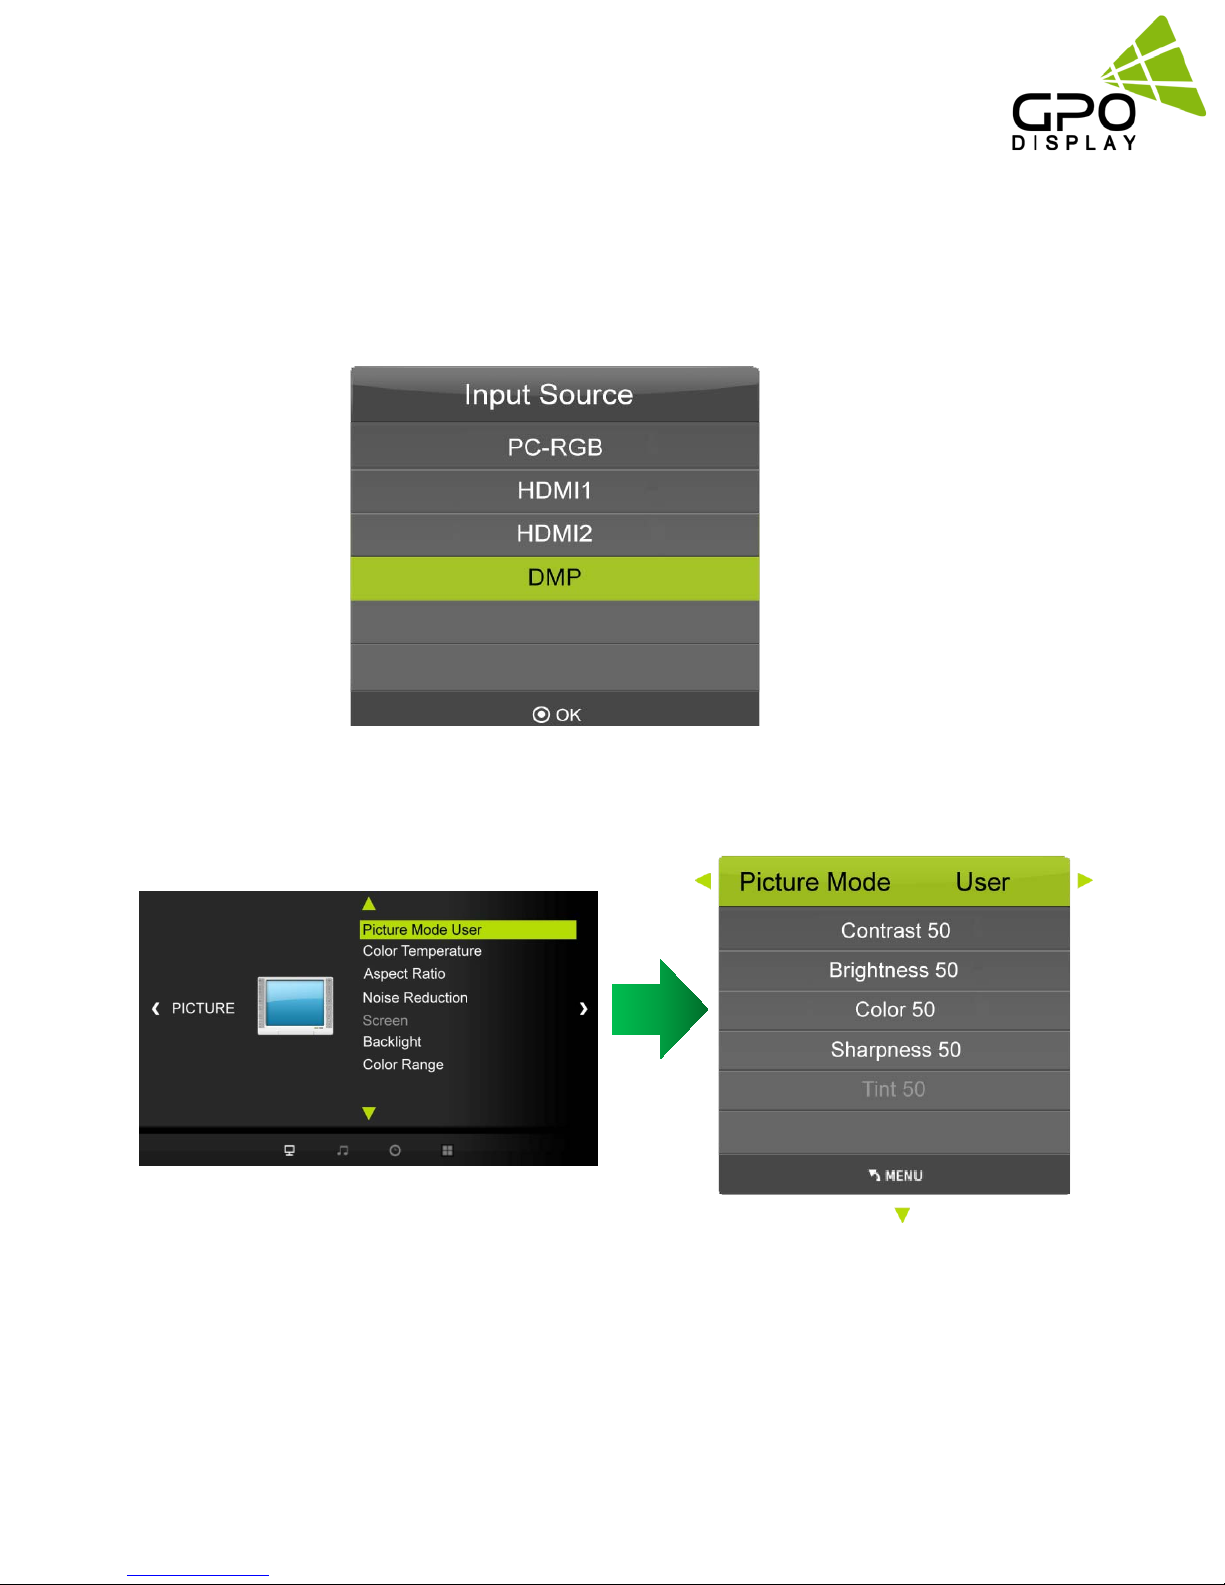
4. Select Video Input
1) How to Select USB Source by OSD [PC-RGB, HDMI1, HDMI2, DMP]
a. Press the SOURCE button and then ▲/▼ button to select each video source.
b. Press the ENTER button to go to desired video source
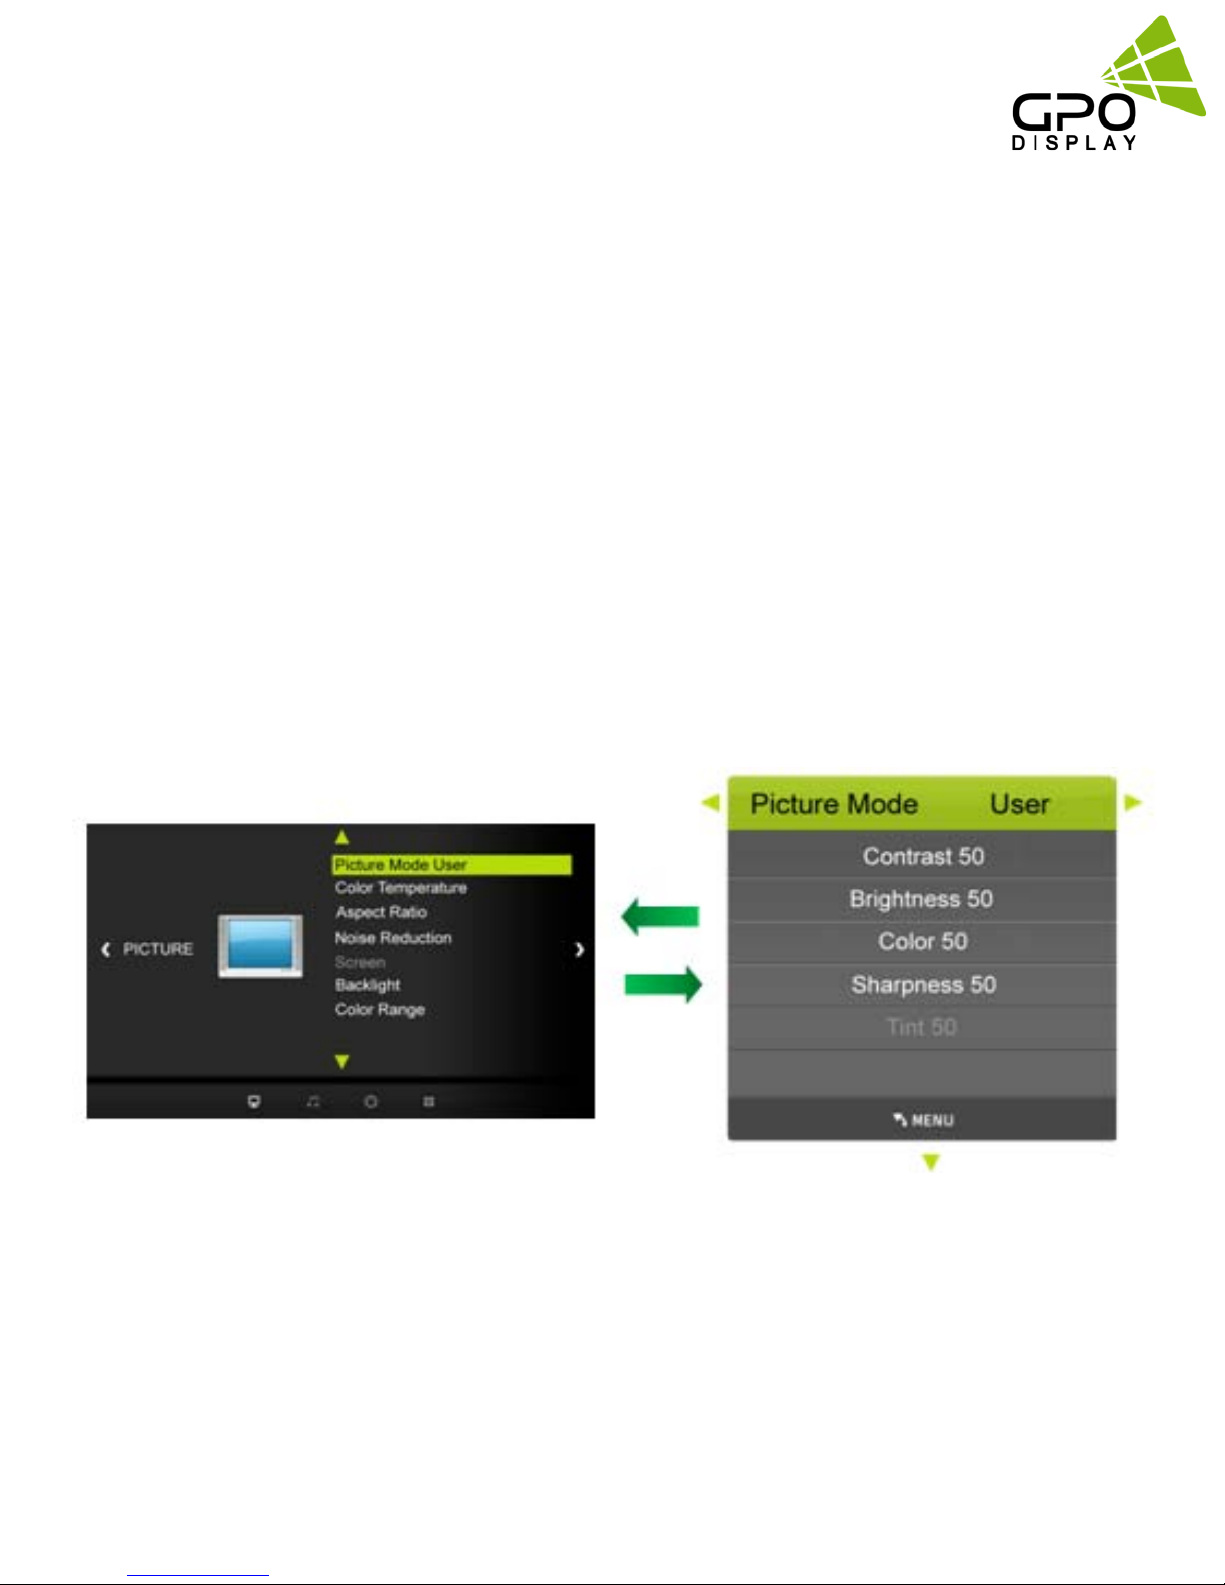
5. Picture Menu Options
1) Picture Mode
Adjust the picture appearance to suit your preference and viewing situations.
a. Press the MENU ◀/▶ buttons and then button to select the PICTURE mode.
b. Press the ◀/▶ buttons and then use ENTER button to select Picture Mode menu.
Standard, Dynamic, Mild, User
c. Press the ▲/▼ button to select Picture Mode - User menu
Contrast, Brightness, Color, Sharpness, Tint.
d. Press ENTER button and then use ◀/▶ buttons to make appropriate adjustments.
e. Press EXIT button to return to monitor viewing or press MENU button to return to the previous menu.
www.gpodisplay.com Panoramic Display
9
 Loading...