

Page 1

GP810 Phone
User Manual
Page 2

About this manual
Welcome to the GP810 Phone. This Phone comes with two parts.
‘Before you start’
‘Operation Instruction’
Before using your GP810 Phone, read ‘Before you start’ for overview of features, basic setup, and
other important details.
After you have become familiarized with its basic functionality, refer to the operation Instruction for
detailed features, less common tasks, and for maintaining your GP810 Phone.
These manuals can also serve as a source of information if you have problems operating your GP810
Phone.
2
Page 3

FCC Warning Statement for Mobile Phone
z This mobile phone complies with part 15 of the FCC Rules. Operation is subject to the following
two conditions: (1) This device may not cause harmful interference, and (2) this device must
accept any interference received, including interference that may cause undesired operation.
z This mobile phone has been tested and found to comply with the limits for a Class B digital
device, pursuant to Part 15 of the FCC Rules. These limits are designed to provide reasonable
protection against harmful interference in a residential installation. This equipment generates,
uses and can radiated radio frequency energy and, if not installed and used in accordance with
the instructions, may cause harmful interference to radio communications. However, there is no
guarantee that interference will not occur in a particular installation. If this equipment does cause
harmful interference to radio or television reception, which can be determined by turning the
equipment off and on, the user is encouraged to try to correct the interference by one or more of
the following measures:
Reorient or relocate the receiving antenna.
Increase the separation between the equipment and receiver.
Connect the equipment into an outlet on a circuit different from that to which the receiver is
connected.
Consult the dealer or an experienced radio/TV technician for help.
Changes or modifications not expressly approved by the party responsible for compliance could void t
he user‘s authority to operate the equipment.
For body worn operation, this phone has been tested and meets the FCC RF exposure guidelines for
use with an accessory that contains no metal and the positions the handset a minimum of 1.5 cm from
the body. Use of other enhancements may not ensure compliance with FCC RF exposure guidelines.
If you do no t use a body-worn accessory and are not holding the phone at the ear, position the
handset a minimum of 1.5 cm from your body when the phone is switched on.
3
Page 4

I. Before you start
A. FEATURES
1. Unpacking
2. Phone Layout
3. Display Layout
B. Basic usages
1. Power On/Off
2. Call Function
3. Multimedia Function
4. Text Input mode
5. Phonebook
II. Operation Instruction
A. Menu Operation
1. Messages
2. Phone Book
3. Call History
4. Settings
5. Multimedia
4
Page 5

6. Fun & Games
7. Organizer
8. File Manager
9. WAP
B. Safety Information
5
Page 6
I. Before you start
GP810 Phone
A. Features
1. Unpacking
Your package list is as shown below
Handset User Manual Travel Adaptor Earphone
USB Cable
(Optional)
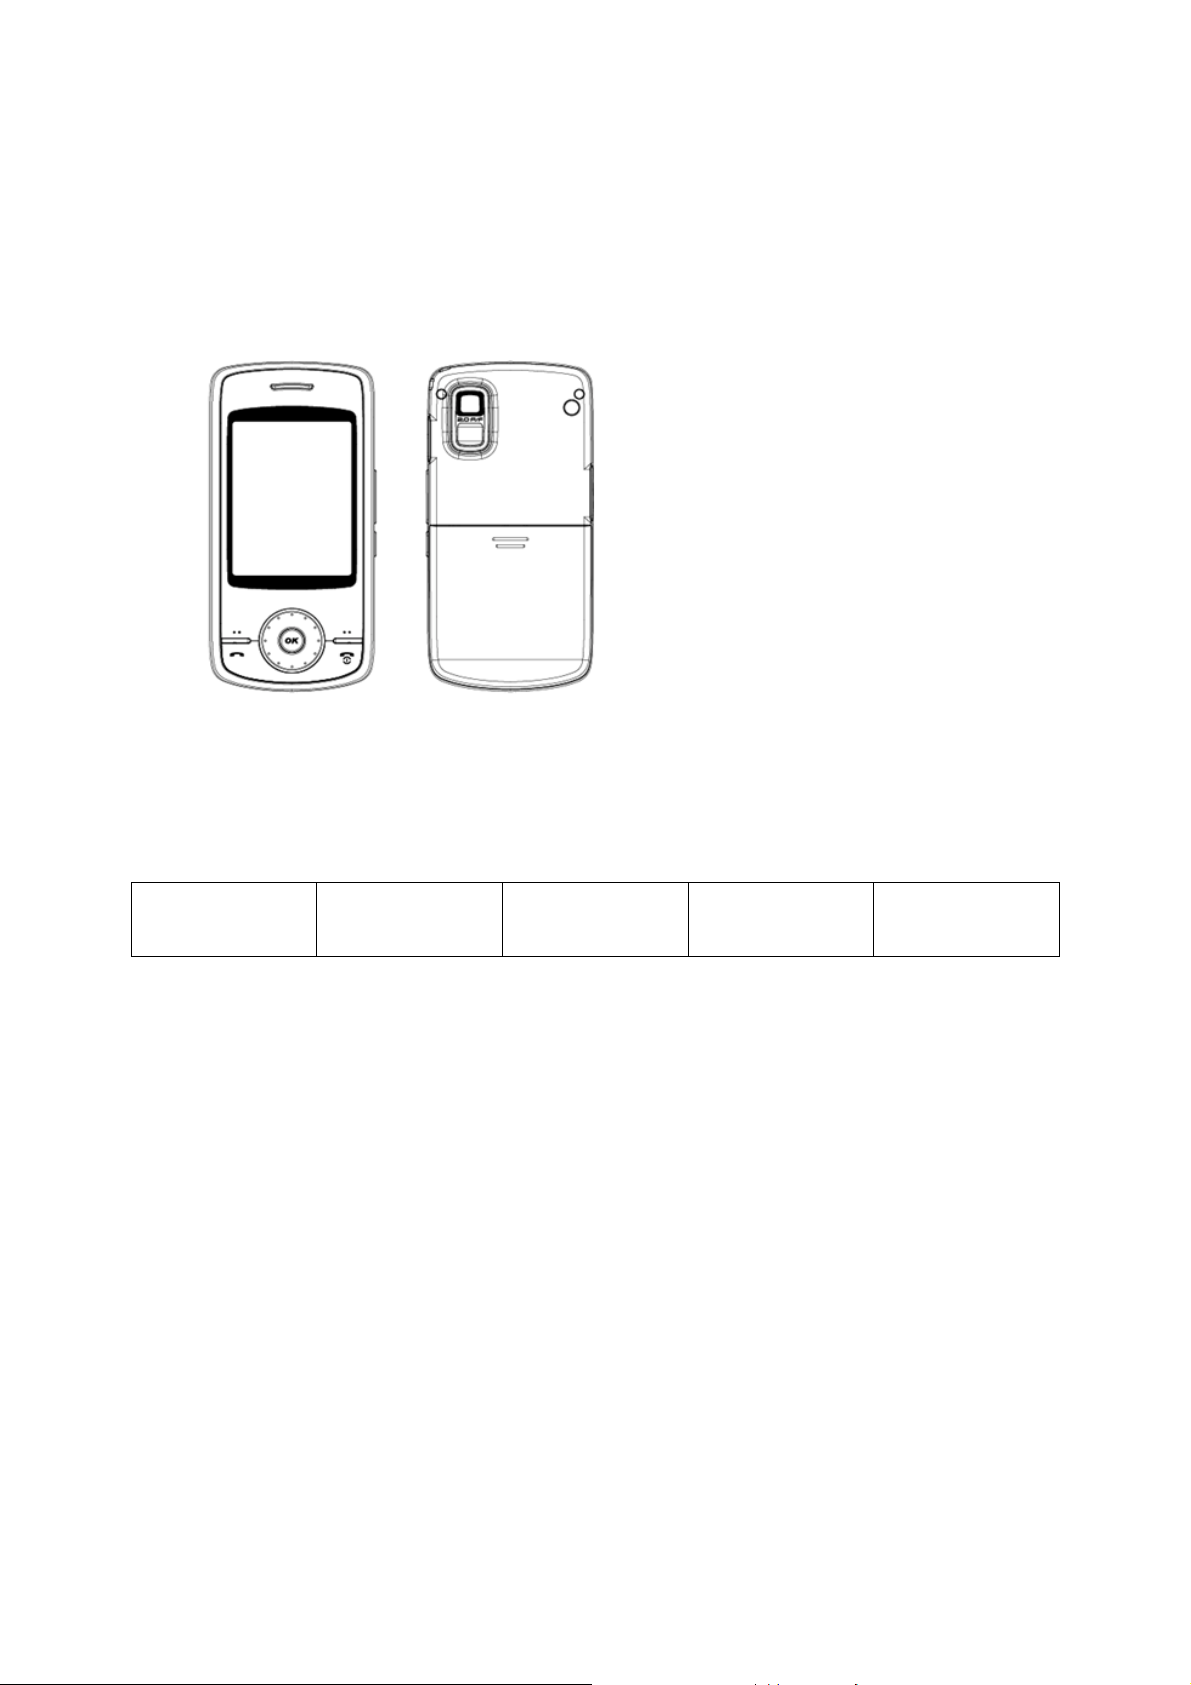
2. Phone Layout
The following illustration shows the main elements of your phone.
2.1 LCD
The LCD is TFT QVGA LCD and has 262K colors.
You can be enjoy the more clear LCD color with your GP810 phone
2.2 Camera
You can take a photo with GP810’s embedded digital camera. GP810 has 3.0 Mega pixels camera
module, you can enjoy highly qualify digital photo with your GP810 phone.
2.3 Slide Type
GP810 is slide type. You can open the slider as follows;
You can easily use your GP810 Phone by its smart wheel key.
6
Page 7
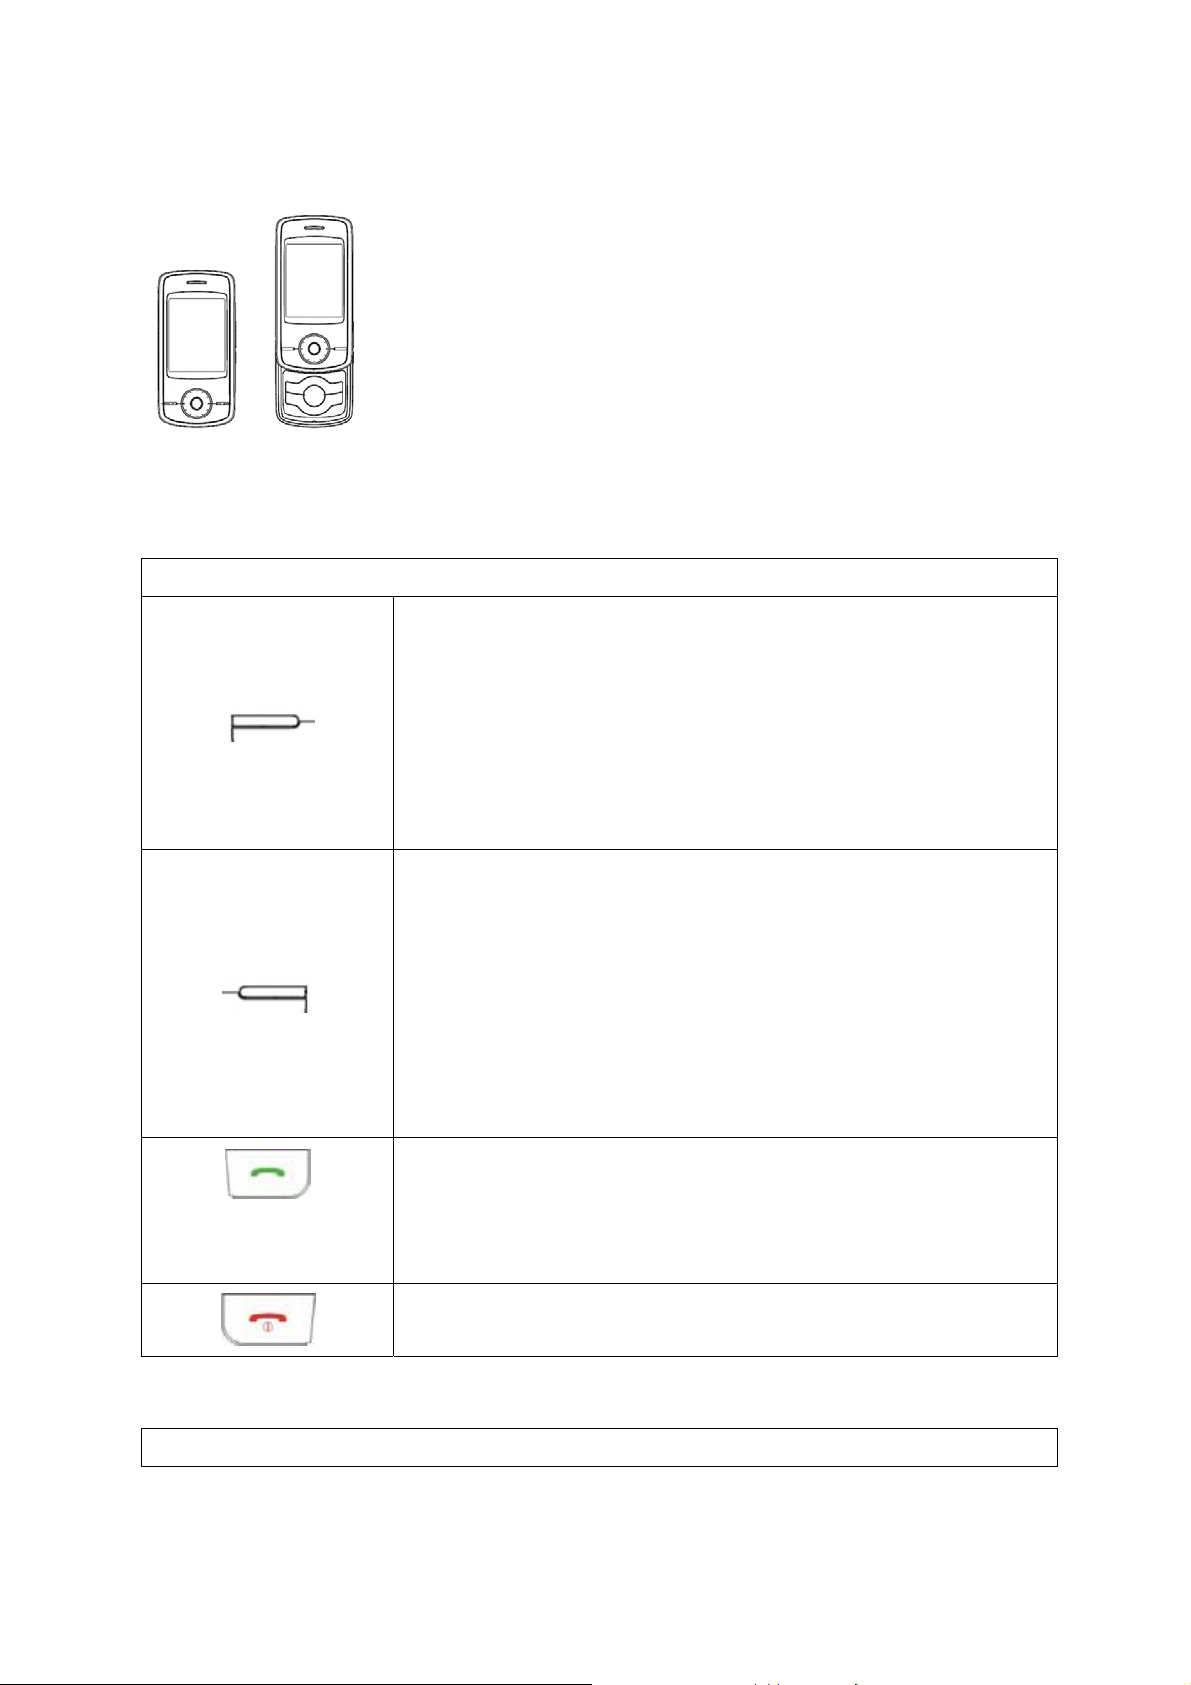
2.4 Keys Description
Function Keys
[Basic Function]
Performs the functions indicated by the text in the left-
bottom line of the display screen. Usually works as ‘ok’ key.
[Idle Mode]
Enter main menu
[MPEG4 Mode]
Play & Pause MPEG4 file
[Basic Function]
Performs the functions indicated by the text in the right-
bottom line of the display screen. Usually works as ‘backward’ key and
‘clear’ key.
[Idle Mode]
Enter Phonebook list menu
[MPEG4 Mode]
Stop playing MPEG4 file
[Basic Function]
Makes or answers a call. In the idle mode, launches the Dialed calls list
[MPEG4 Mode]
Playing with full screen.
Ends a call. Also switches the phone on or off when pressed and held. In
Navigation Keys
the menu, returns to the idle mode or cancels your input.
7
Page 8
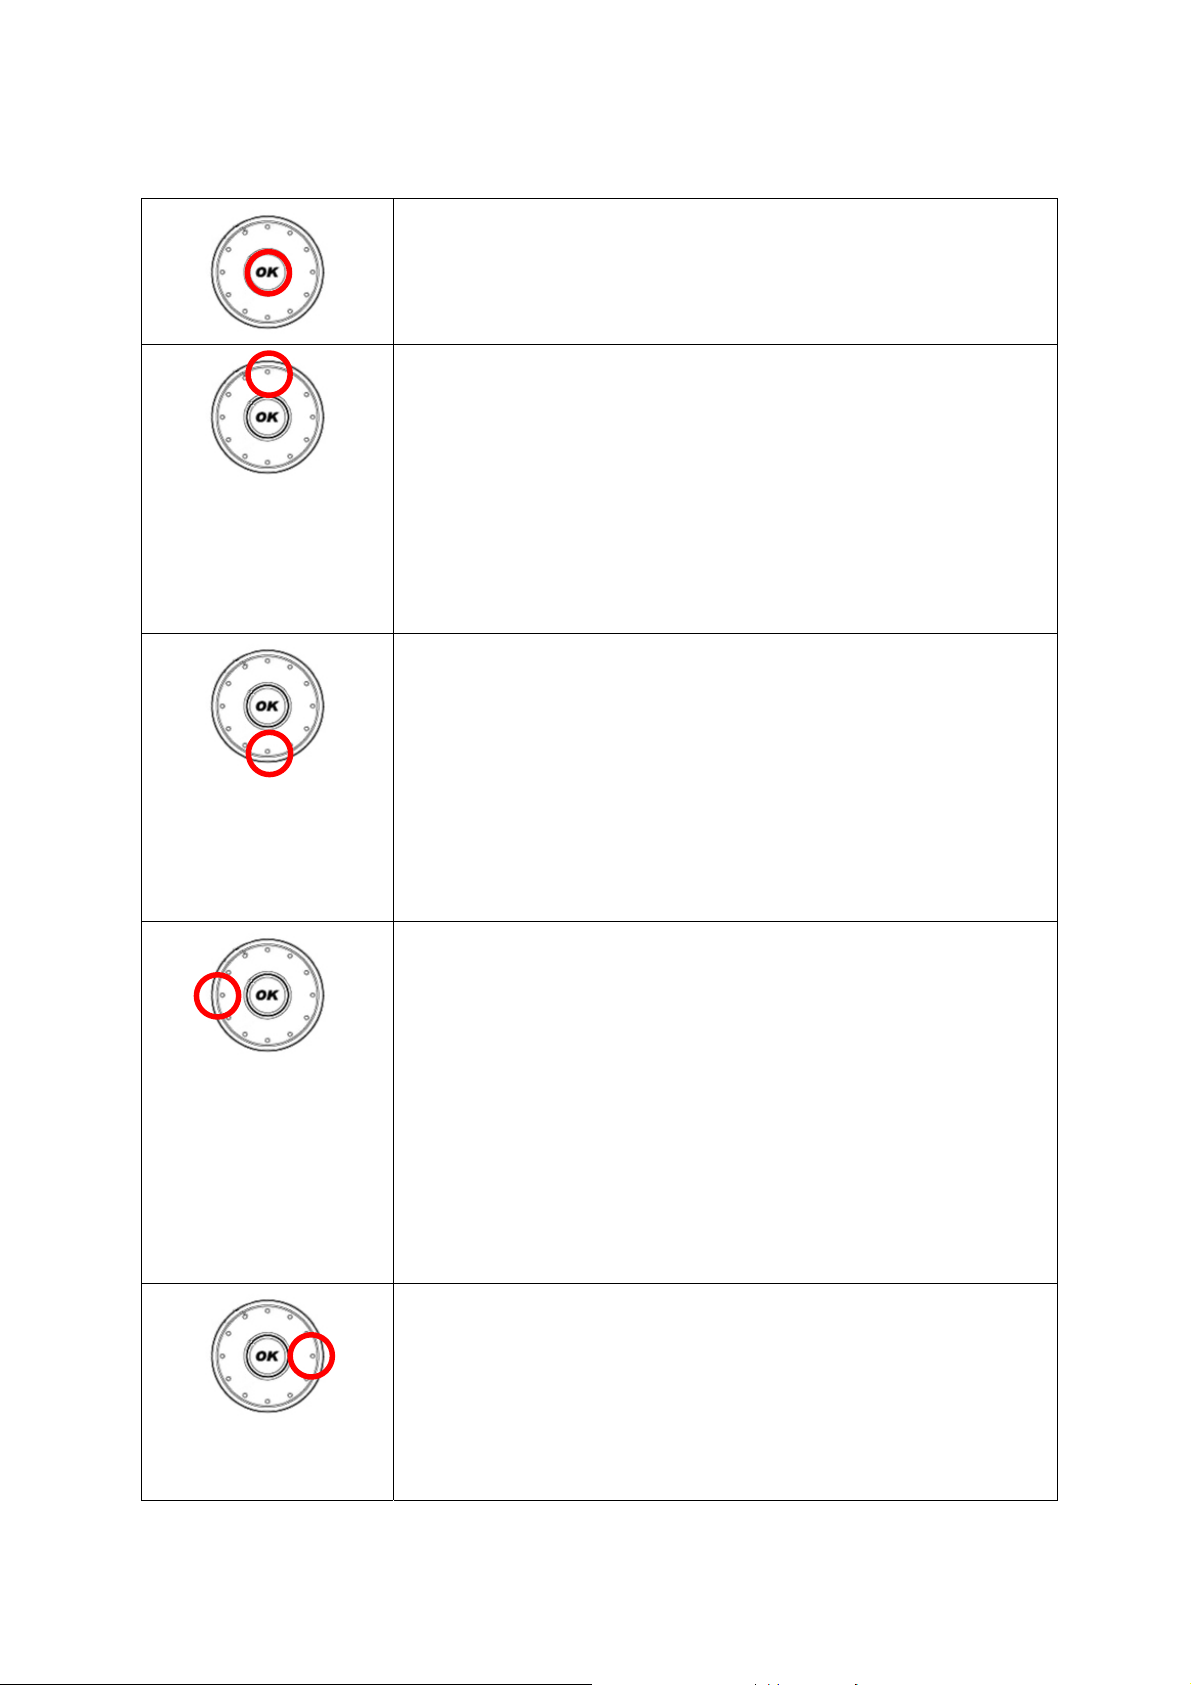
[Basic Function]
Performs the functions indicated by the text in the left-bottom line of the
display screen. Usually works as ‘ok’ key.
[Basic Function]
move the cursor or selection bar up (Text edit mode or menu mode)
[Idle Mode]
Launch audio player
[Camera Mode]
Magnify the image (Digital Zoom Function)
[MP3 Mode]
Play & Pause MP3 file
[Basic Function]
move the cursor or selection down (Text edit mode or menu mode)
[Idle Mode]
Launch Shortcuts
[Camera Mode]
Reduce the image (Digital Zoom Function)
[MP3 Mode]
Stop playing MP3 file
[Basic Function]
move the cursor or selection left (Text edit mode or menu mode)
[Idle Mode]
Launch Writing message
[Camera Mode]
Adjust EV Level
[MP3 Mode]
Go to previous MP3 file
[MPEG4 Mode]
Speed Rearward
[Basic Function]
move the cursor or selection right (Text edit mode or menu mode)
[Idle Mode]
Launch message inbox
[Camera Mode]
Adjust EV Level
8
Page 9
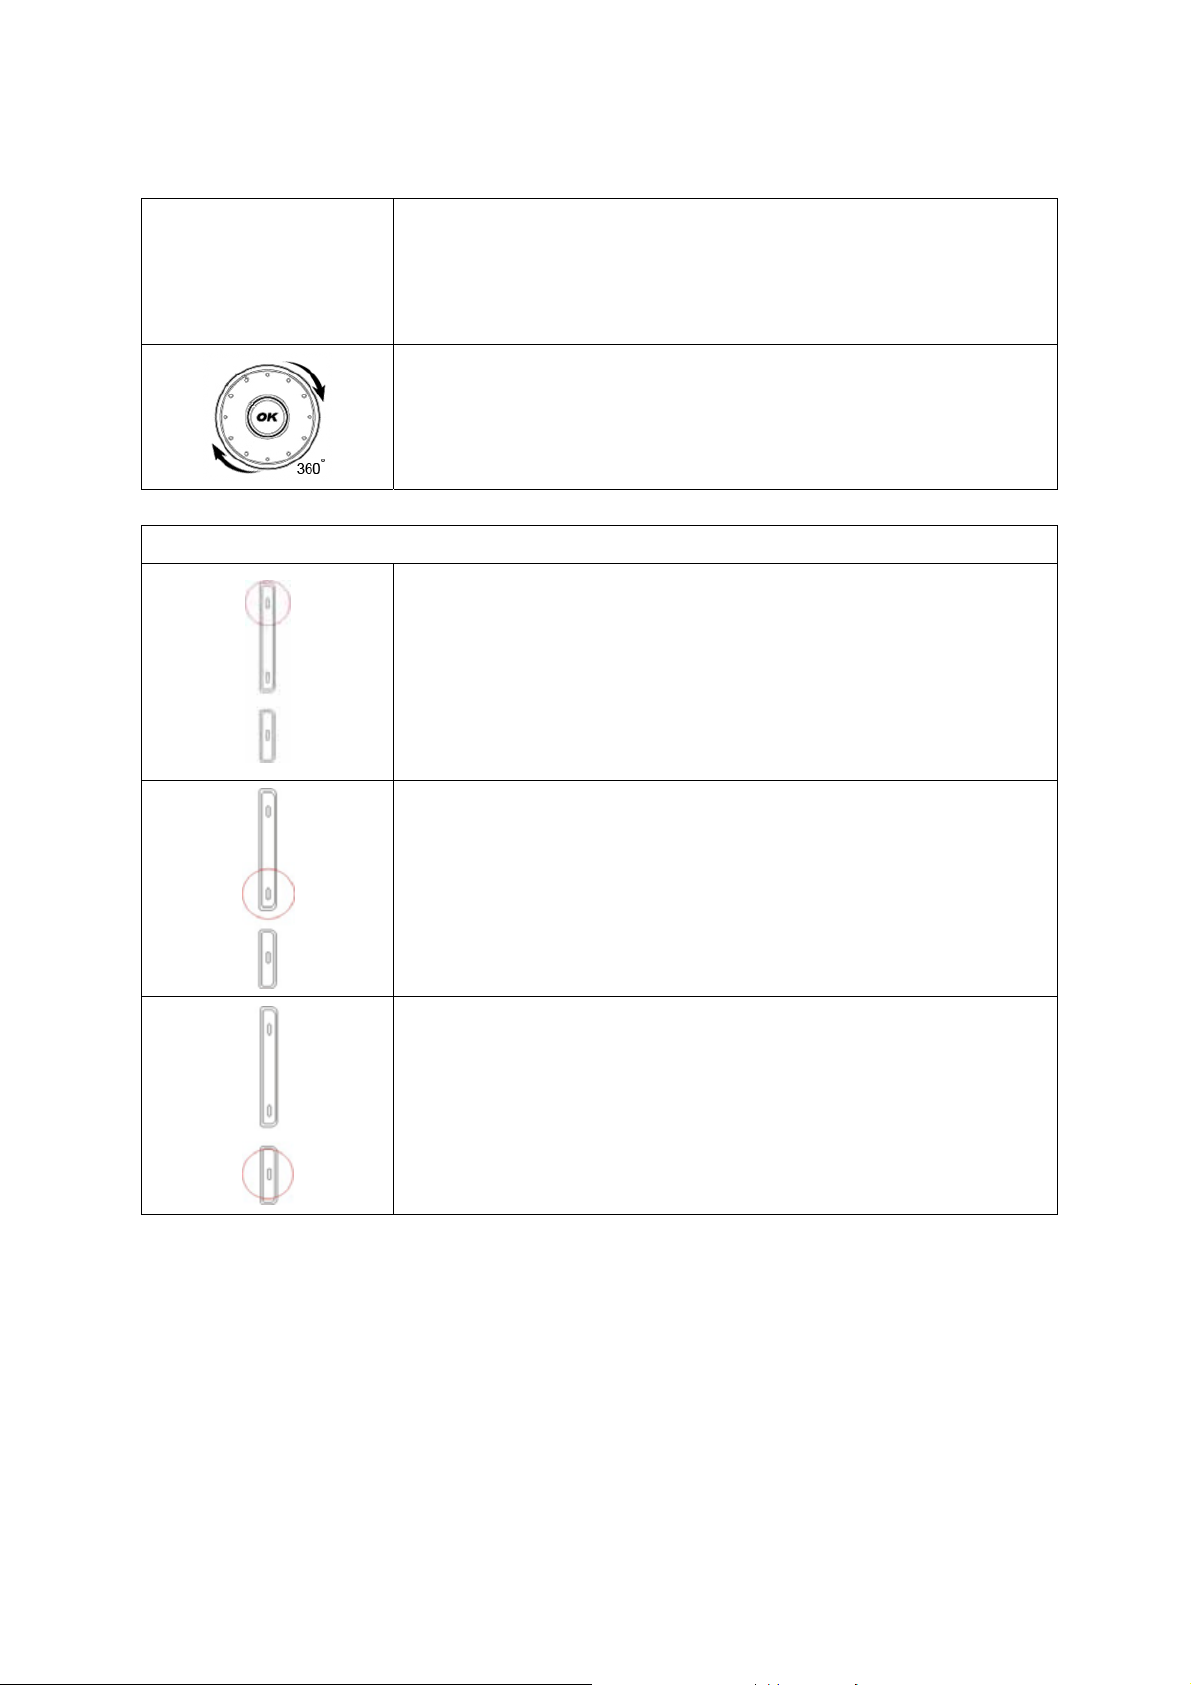
Side Keys
[MP3 Mode]
Go to next MP3 file
[MPEG4 Mode]
Speed Forward
[Basic Function]
Rolling the smart wheel key can move the cursor easily and quickly,
especially under the circular main menu.
[Basic Function]
move the cursor or selection bar up (Text edit mode or menu mode)
[Idle Mode]
Increase the key-tone volume
[MP3 Mode & MPEG4 Mode]
Increase the volume
3. Display Layout
3.1 Display Screen
[Basic Function]
move the cursor or selection down (Text edit mode or menu mode)
[Idle Mode]
Decrease the key-tone volume
[MP3 Mode & MPEG4 Mode]
Decrease the volume
[Basic Function]
Enter the Camera Mode
[MPEG4 Mode]
Enter the Video Recorder
9
Page 10
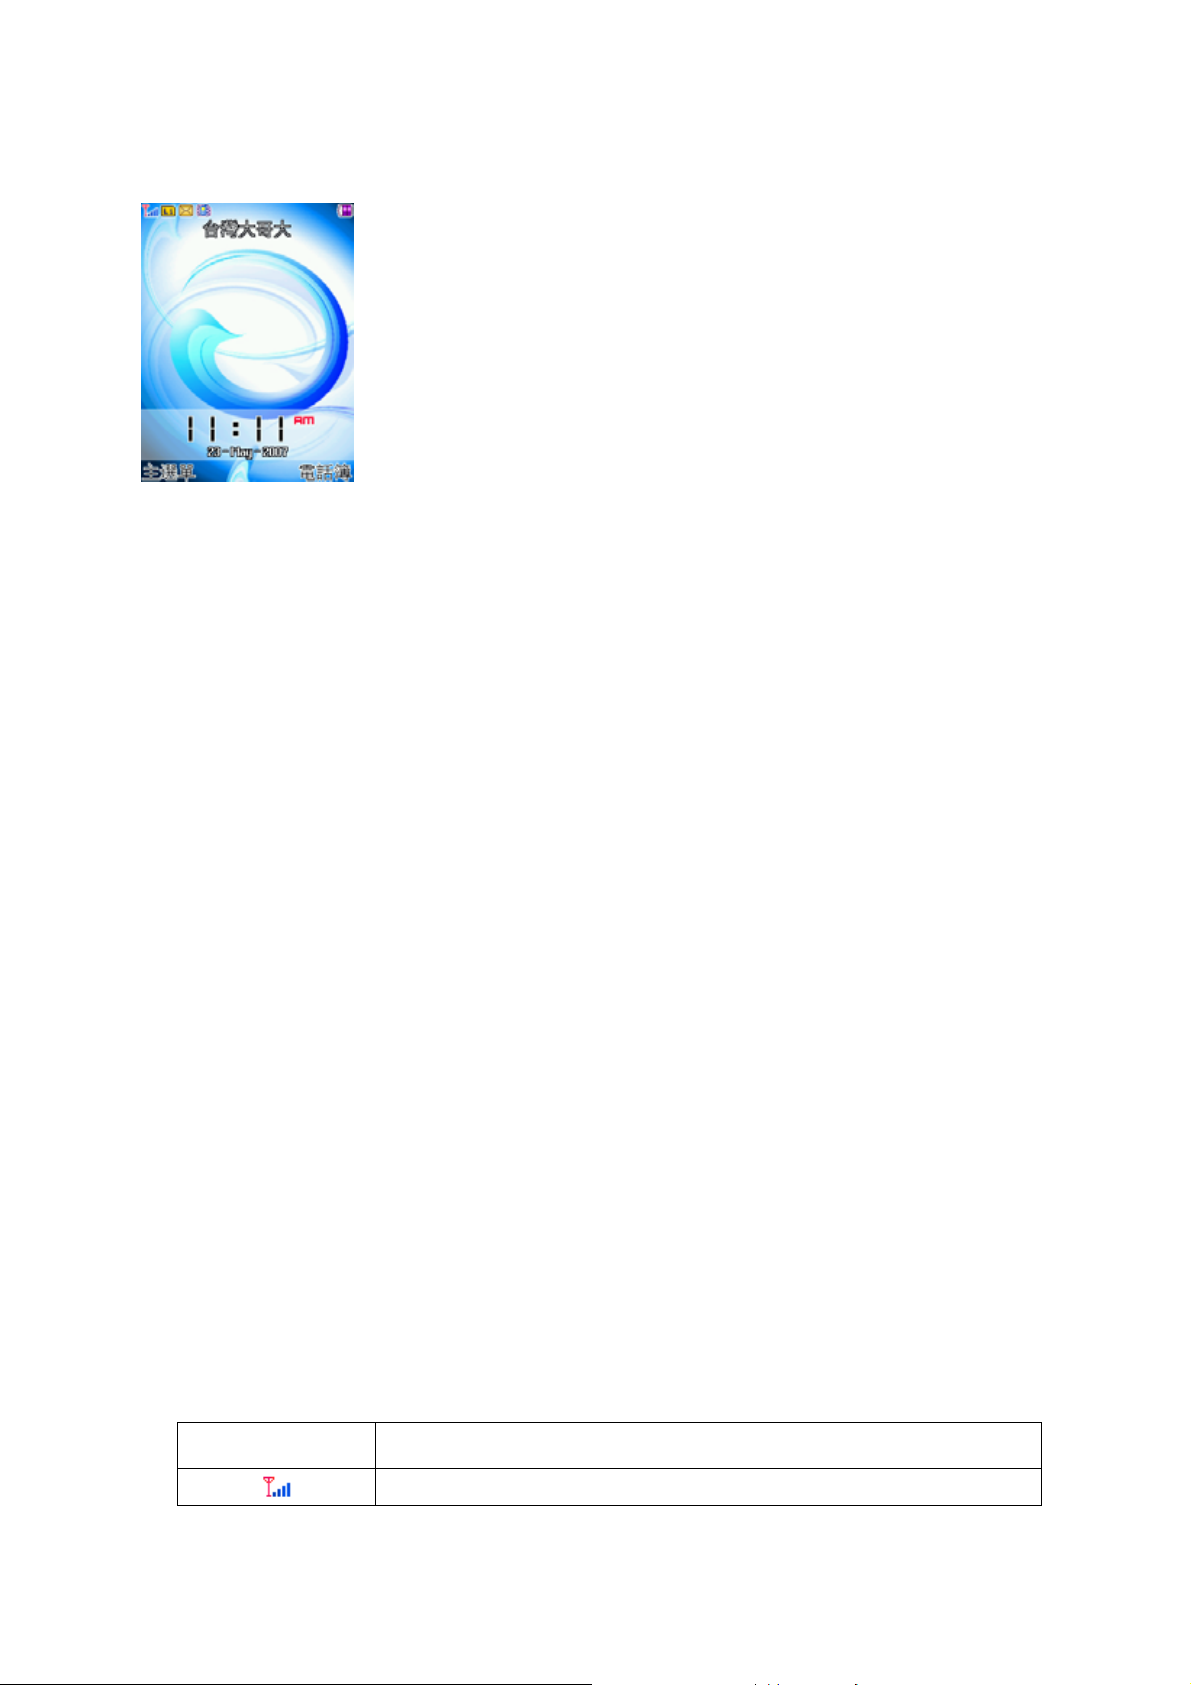
Å Fixed Icon Area
Å Network Status Area
Å User Setting Screen Area
Å Time & Date Area
Å Soft Key Area
3.1.1 Fixed Icon Area:
8 fixed icons are displayed indicating the phone status.
3.1.2 Network Status Area:
Network name registered is displayed.
If there is no GSM network coverage, No Service is displayed.
If you are in the coverage area of a GSM network but you are not allowed to register to the
network, Emergency is displayed.
3.1.3 User Setting Screen Area:
Digital Clock, Analog Clock, Images or User Text is displayed according to the setting of screen
setting menu.
If you set to get the broadcast message from the network, you can see it on the idle screen. For d
etails of how to activate and deactivate it, please see Cell Broadcast menu. In this case, the User
setting screen Area updates the received broadcast messages. If you want to go back to default s
creen, press [END].
! Note: The broadcast message service may not be available on all networks.
3.1.4 Time & Date Area
Current time and date is displayed in the Time & Date Area.
3.1.5 Soft Key Area:
The functions assigned to the right and left soft keys.
3.1.6 Icons Descriptions
Icon Description
Shows the received signal strength. The greater the number of bars, the
10
Page 11
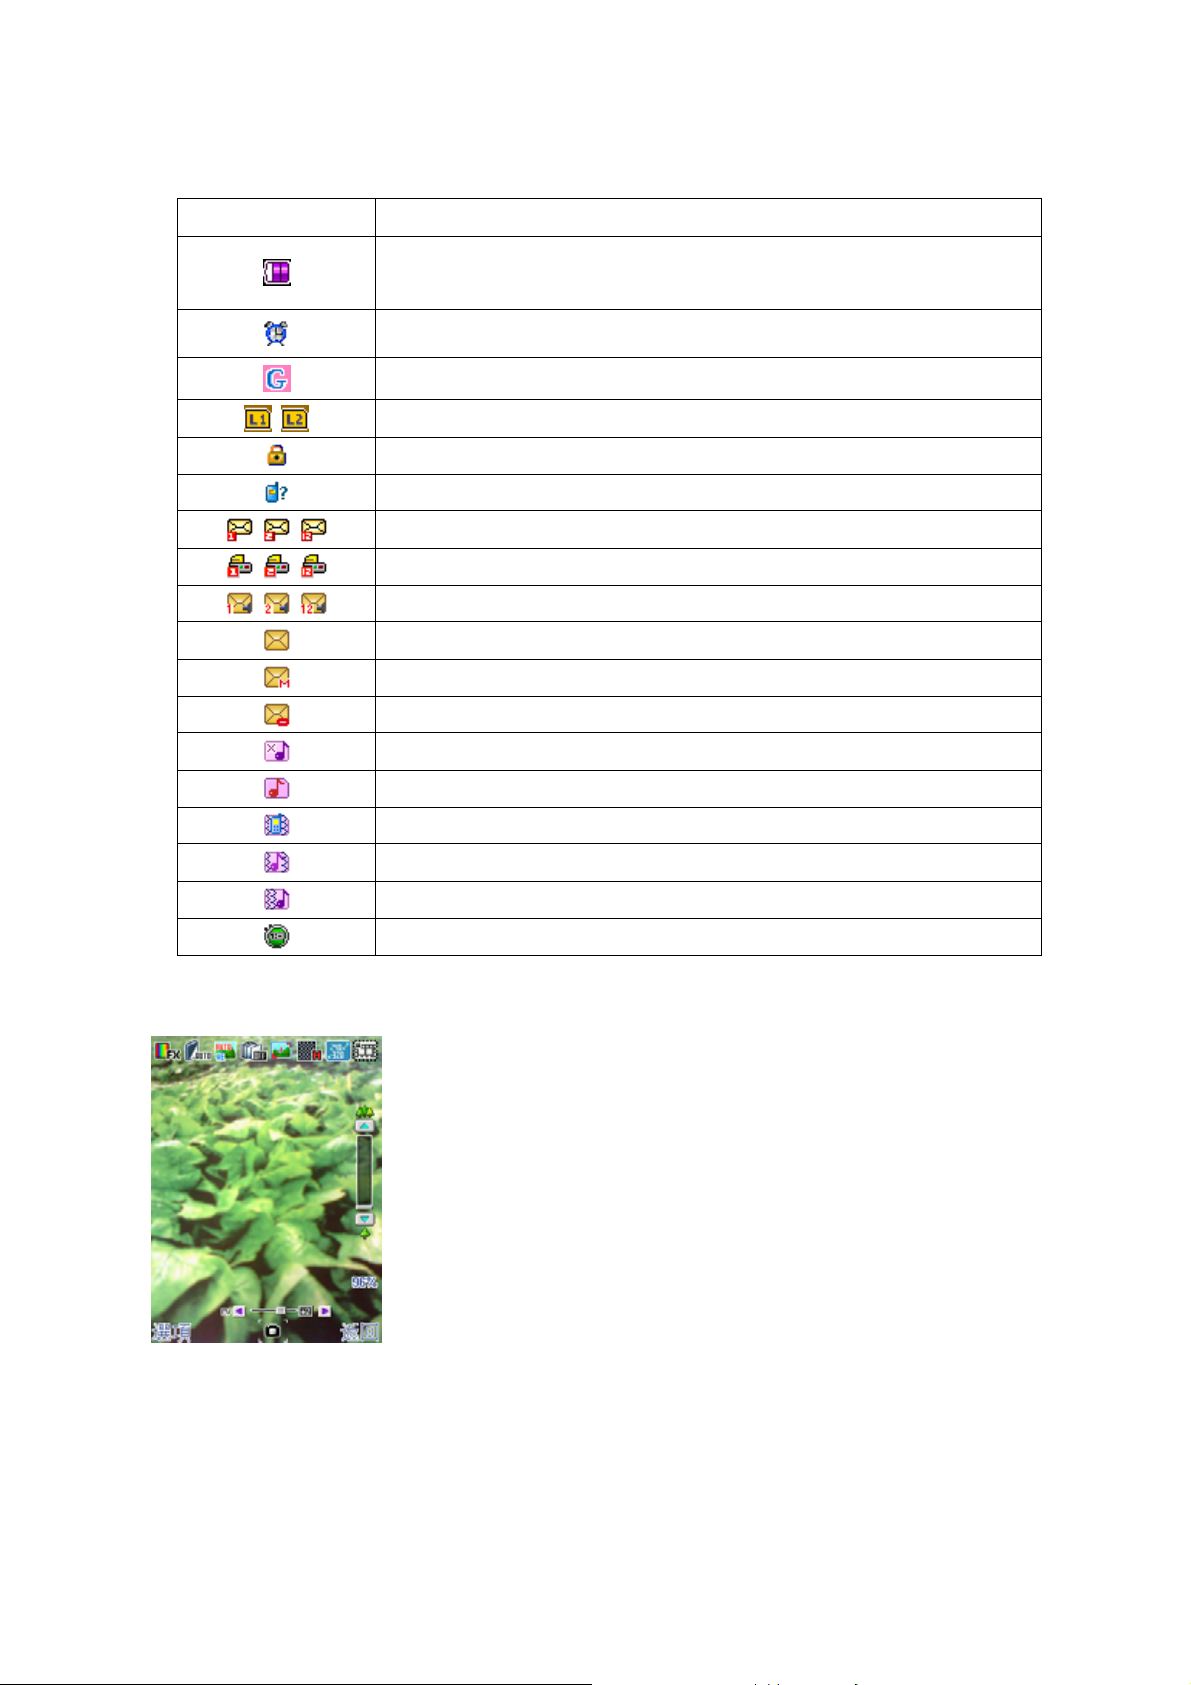
better the signal strength.
Shows the current battery charge level. The green area shows charge
level of battery.
Appears when the alarm clock is set.
Appears GPRS Mode is on
Indicate the phone number line you select
Show Phone Lock mode
Appears when you miss call
Appear when e-mail has been received
Appear when FAX has been received
Appears when Voice mail has been received
Appears when SMS has been received
Appears when MMS has been received
Appears when MMS client is busy
Appears when phone is mute mode
Appears when alert mode is selected as ring
Appears when alert mode is selected as Vibrator
Appears when alert mode is selected as Vibration and Ring
Appears when alert mode is selected as Vibration then Ring
Appears when stopwatch application is undergoing
3.2 Photo Mode Screen
Å Menu & Control Area
Å Preview Area
Å Soft Key Area
3.2.1 Preview Area:
You can see a preview shot before you take a photo.
3.2.2 Control Area:
11
Page 12
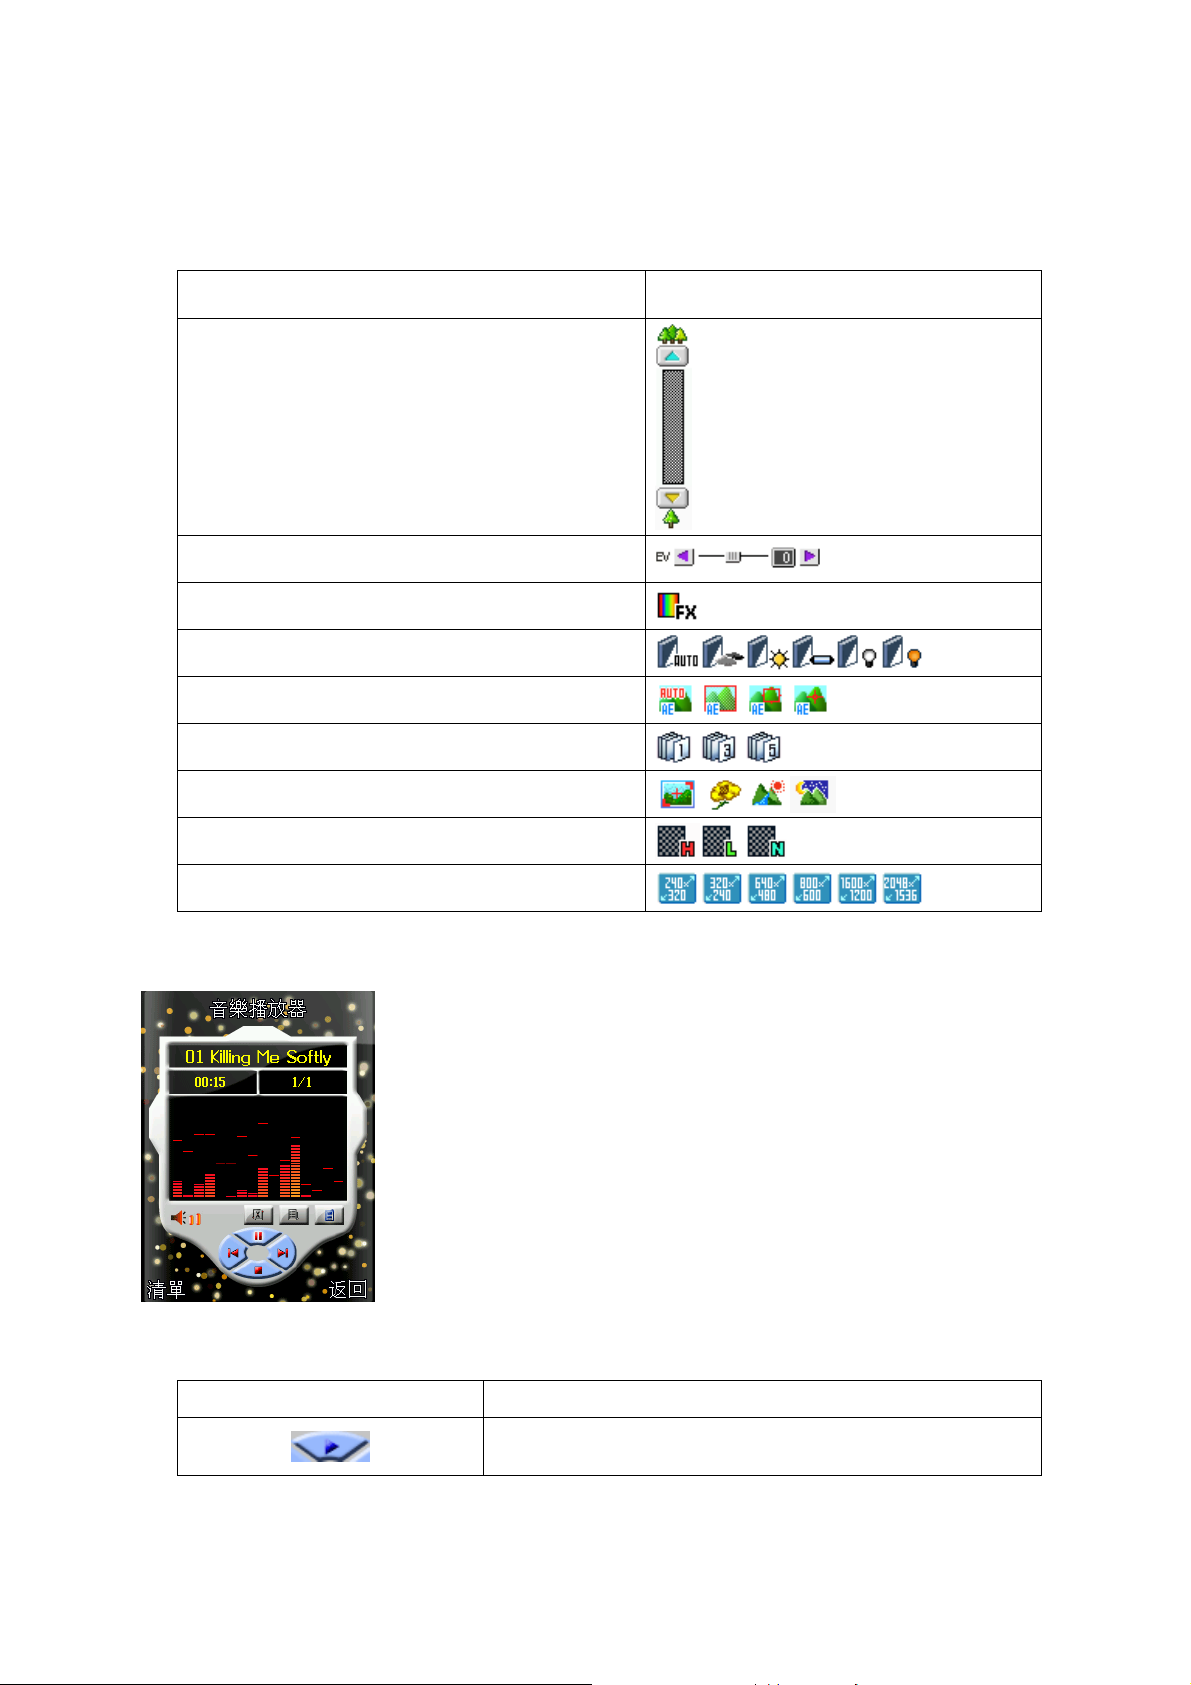
You can see the status of photo mode setting with this control area. Each icon of control area has
specific functions. The following table describes what the icons mean.
Functions Icons
Zoom
Exposure Value
Effect Setting
White Balance
AE Meter
Continuous Shot
Scene Mode
Image Quality
Image Size
3.3 MP3 Mode Screen
Å MP3 File Info Area
3.3.1 Icon Description
Å MP3 Control Area
Å Soft Key Area
Icons Description
Play MP3 file
12
Page 13
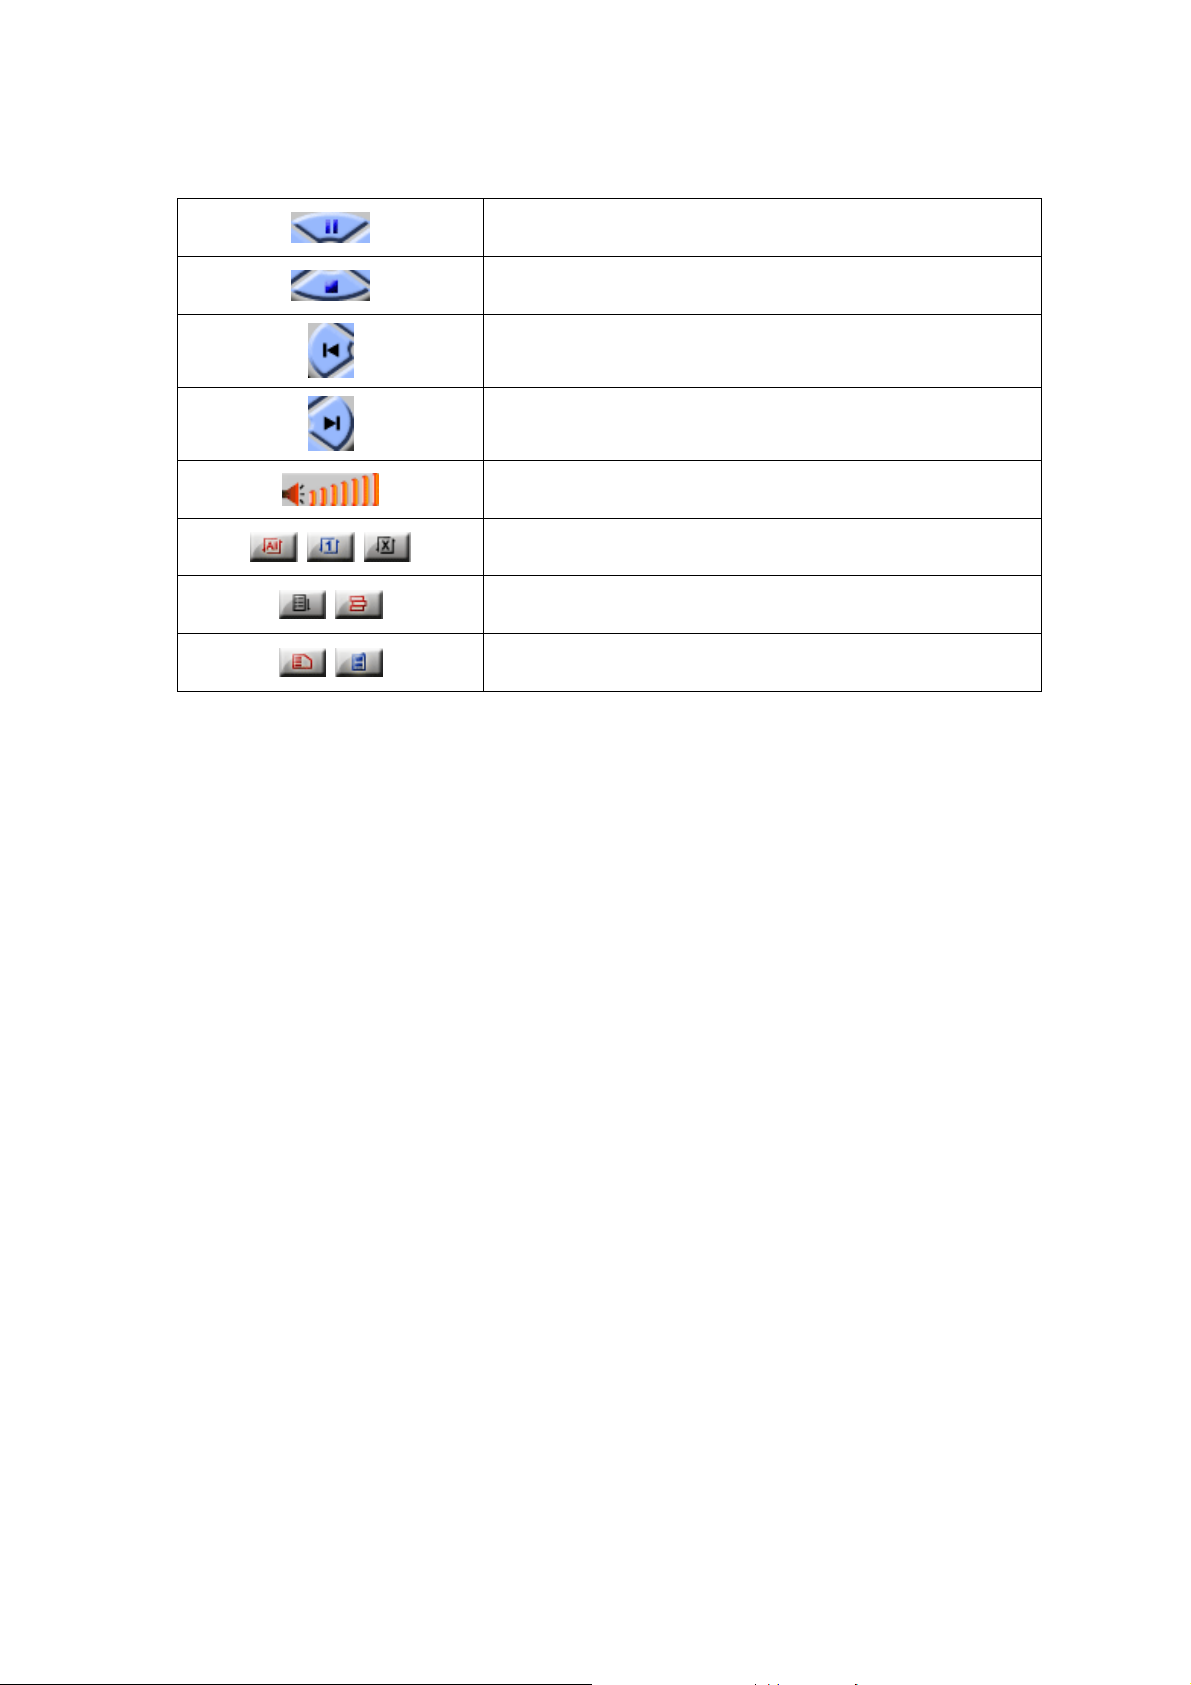
Pause MP3 file
Stop playing MP3 file
Go to Previous MP3 file
Go to Next MP3 file
Show volume strength level
Repeat all / once / no repeat
Shuffle on / off
when MP3 file from T-Flash card / from phone
B. Basic Operation
1. Power On/Off
To switch your phone On and Off, make sure that the battery is inserted.
z Open the slider.
z To switch your phone on, press and hold down [END] until you hear the power-on melody.
z To switch your phone off, press and hold down [END] until you hear the power-off melody.
! Note : Some SIM card may be protected with PIN. If Enter PIN is prompted, enter your PIN and then
press [Ok soft key]. For more details, please see Security Setting in ‘Operation – Menu’.
2. Call Function
2.1 Making a Call
To make a call with your phone, insure that phone screen is idle mode, then key in the area code and
phone number using the numeric keys and press the Dial & Menu confirmation key.
You can hear the connect tone when the call is answered by the called person, if you set the Connect
tone to ON.
2.2 Making International Calls
Press and hold the ‘’*‘’ key twice to display “+” character.
Please Key in the country code, area code (without the leading zero) and the phone number. And then
press the Dial & Menu confirmation key. The ‘+’ tells the network that the call is international.
13
Page 14
2.3 Edit Phone Number
Key Description
[Press]
Delete a digit on the left side of cursor
[Press and Hole]
Delete the whole digit
Move cursor to the digit you want to edit
2.4 Using Phonebook
You can store the names and phone numbers dialed regularly in the SIM card and phone memory.
z See Phonebook List : If you want to go to the phonebook list, push right soft key, and then
choose the name what you want to find using Navi-Up & Down keys. Push Dial key when you
want to make a call or push left soft key to go to option menu.
z Search Phonebook : If you want to search phonebook list with special name, push navi-down
key, and then enter the name what you want to find. Input full name or even a start letter and
select “OK” menu. If there is the name you want to call, choose the name by moving navi-up &
down key. Push Dial key when you want to make a call or push left soft key to go to option
menu.
2.5 Making a Call from Message
You can make a call from message by pushing Dial & Menu Confirmation key when the message you
want to call back is highlighted. And you can also make by choosing “Call Back” Menu in the option of
“Inbox” after you read a message.
2.6 Redialing the last Number
The phone stores the last 10 numbers dialed. To recall any of these numbers, proceed as follows.
z Press the Dial key to display a list of the last numbers.
z Use Up & Down navigation keys to scroll through the numbers until the required number is
highlighted.
z Dial the number highlighted
2.7 Ending a Call
When you have finished your call, briefly press the Menu exit key, or close the slide.
14
Page 15

2.8 Answering a Call
When you answer a call, the phone rings or vibrates according to the setting with the incoming call
animation.
When the caller can be identified, the caller’s phone number and name, if stored in phonebook, will be
displayed. If the caller cannot be identified, only the caller’s phone number will be displayed.
z If necessary, open the slide. Press the Dial & Menu confirmation key. If the Any key Answ er
option is set to ON, you can press any key to answer a call except for the power on/off key
when the slide is open.
To reject an incoming call, press and hold the volume keys on the right side of the phone
without opening the slide.
If the Open Slide option is set to ON, you do not need to press any key. You can answer
the call simply by opening the slide when the slide is closed.
z End the call by closing the phone or pressing the Menu exit key.
2.9 Emergency Call
Ensure that the phone is switched on and in service.
Enter the emergency number (Official emergency number or another official emergency number) and
press the Dial & Menu confirmation key. Give your location. Do not end the call until given permission
to do so.
End the call by closing the slide or pressing the Menu exit key.
! Note : In the situation such as power-on that Enter Lock Code or Enter PIN is prompted, Some
network may not allow the emergency call and may request to insert SIM card.
2.10 Entering a “Pause” Character in a Dial String
A pause (“P”) character may be entered into a dial string by pressing the left special function key
( “*” ) three times.
2.11 Adjusting Earpiece Volume
During a call, you can adjust the earpiece volume by pressing up side or down side of slide key on the
right side of this phone. If you want to change keypad tone, press up side or down side of slide volume
key in idling mode.
2.12 Using the Earphone
If you insert the earphone to the jack of your phone, you can use it in the same way as your phone’s
earpiece and microphone.
15
Page 16

You can answer or end a call by pressing the hook button on the earphone.
To answer another call while you are on the phone, you can answer the waiting call by pressing the
hook button on the earphone.
3. Multimedia Function
3.1 Camera
If you want to take a photo, please follow the procedure as below
z Open the slider.
z Press ‘
z Press ‘OK’ key to take a photo
z If you want to save the image, press save button and write the title, otherwise press back
button.
3.2 Video Recorder
If you want to take a video in your phone, choose the [Video Recorder] menu in [Multimedia] menu.
z Open the slider.
z Choose the [Video Recorder] menu in [Multimedia] menu.
z Press the ‘OK’ key to take a video.
3.3 Video player
If you want to play MPEG4 file, please follow the procedure as below
z Open the slide
z Choose the [Video Player] menu in [Multimedia] menu.
z Press ‘OK’ key to play MPEG4 file.
’ key to enter camera mode
3.4 MP3 player
If you want to play MP3 file, please follow the procedure as below
z Open the slide
z Short Press ‘
z Press play button to play MP3 file or press left soft key (List) to enter MP3 file list
’ key to enter Audio player mode.
16
Page 17
4. Text Input Mode
4.1 Text Input mode general
You can input and edit text by this phone.
z Write and edit a message (SMS/MMS)
z Enter Name (Phonebook)
z Search mode
z Write and edit the name of photo (Camera)
z Write and edit the name of bookmark and WAP profile (WAP)
4.2 MultiTap English mode (ABC, abc)
Key Description
[Option Soft Key] Go to option menu screen
[Press] Clear a character
[Press and Hold] Clear the entire entry
[Back Soft Key] Go back to the previous mode.
[Press] Move the cursor to the left direction by a character
[Press and Hold] Scroll the cursor leftward.
[Press] Move the cursor to the right direction by a character
[Press and Hold] Scroll the cursor rightward.
[Press] Move the cursor one line up
[Press and Hold] Scroll the cursor upward
[Press] Move the cursor one line down
[Press and Hold] Scroll the cursor downward
Go back to the idle screen
Insert a blank
17
Page 18
~
Insert symbols ( . , - ? ! ’ @ : # $ / _ )
Select English characters. Switch the character until the desired
character is highlighted by pressing the alphanumeric key from 2 to 9.
Select Symbols.
4.3 Smart English mode (eZi ABC, abc)
Key Description
[Option Soft Key] Go to option menu screen
[Press] Clear a character
[Press and Hold] Clear the entire entry
[Back Soft Key] Go back to the previous mode.
[Press] Move the cursor to the left direction by a character
[Press and Hold] Scroll the cursor leftward.
[Press] Move the cursor to the right direction by a character
[Press and Hold] Scroll the cursor rightward.
[Press] Move the cursor one line up
[Press and Hold] Scroll the cursor upward
* When entering a word and highlighted, swap words in database.
[Press] Move the cursor one line down
[Press and Hold] Scroll the cursor downward
* When entering a word and highlighted, swap words in database.
Switch the input methods.
18
Page 19
Go back to the idle screen
Insert a blank
Insert stroke ‘.’ , ‘: )’ , ‘: - )’
Select English characters. Switch the character until the desired
~
character is highlighted by pressing the alphanumeric key from 2 to 9.
Select Symbols.
4.4 Multitatp & Smart BoPoMoFo mode
Key Description
[Select Soft Key] Accept the string entered on the edit screen
[Option Soft Key] Go to option menu screen
[Press] Clear a character
[Press and Hold] Clear the entire entry
[Back Soft Key] Go back to the previous mode.
[Press] Move the cursor to the left direction by a character
[Press and Hold] Scroll the cursor leftward.
[Press] Move the cursor to the right direction by a character
[Press and Hold] Scroll the cursor rightward.
[Press] Move the cursor one line up
[Press and Hold] Scroll the cursor upward
[Press] Move the cursor one line down
[Press and Hold] Scroll the cursor downward
19
Page 20
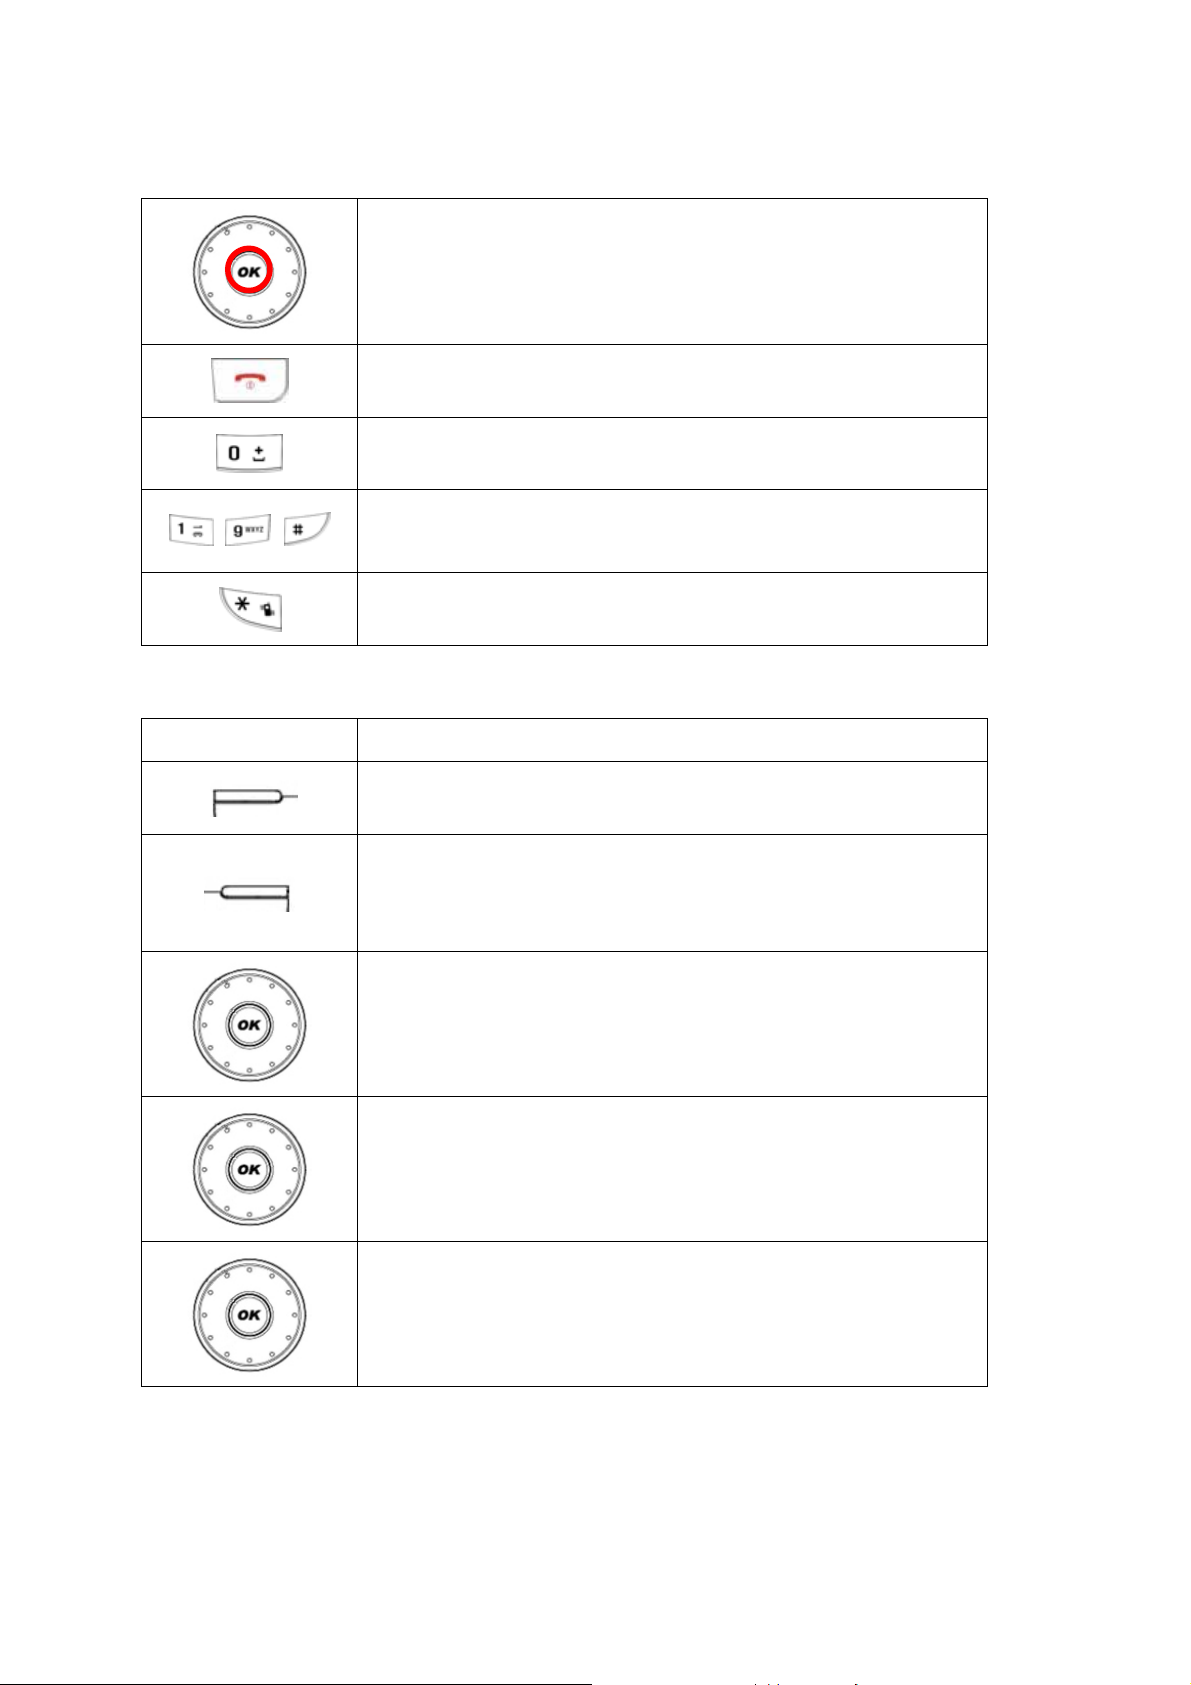
Switch the input methods.
~ ,
4.5 Numeric mode
Key Description
Go back to the idle screen
Enter tone mark selection mode on string select mode
Select Chinese characters.
[Press and Hold] Select Symbols
[Select Soft Key] Accept the string entered on the edit screen
[Option Soft Key] Go to option menu screen
[Press] Clear a character
[Press and Hold] Clear the entire entry
[Back Soft Key] Go back to the previous mode.
[Press] Move the cursor to the left direction by a character
[Press and Hold] Scroll the cursor leftward.
[Press] Move the cursor to the right direction by a character
[Press and Hold] Scroll the cursor rightward.
[Press] Move the cursor one line up
[Press and Hold] Scroll the cursor upward
20
Page 21
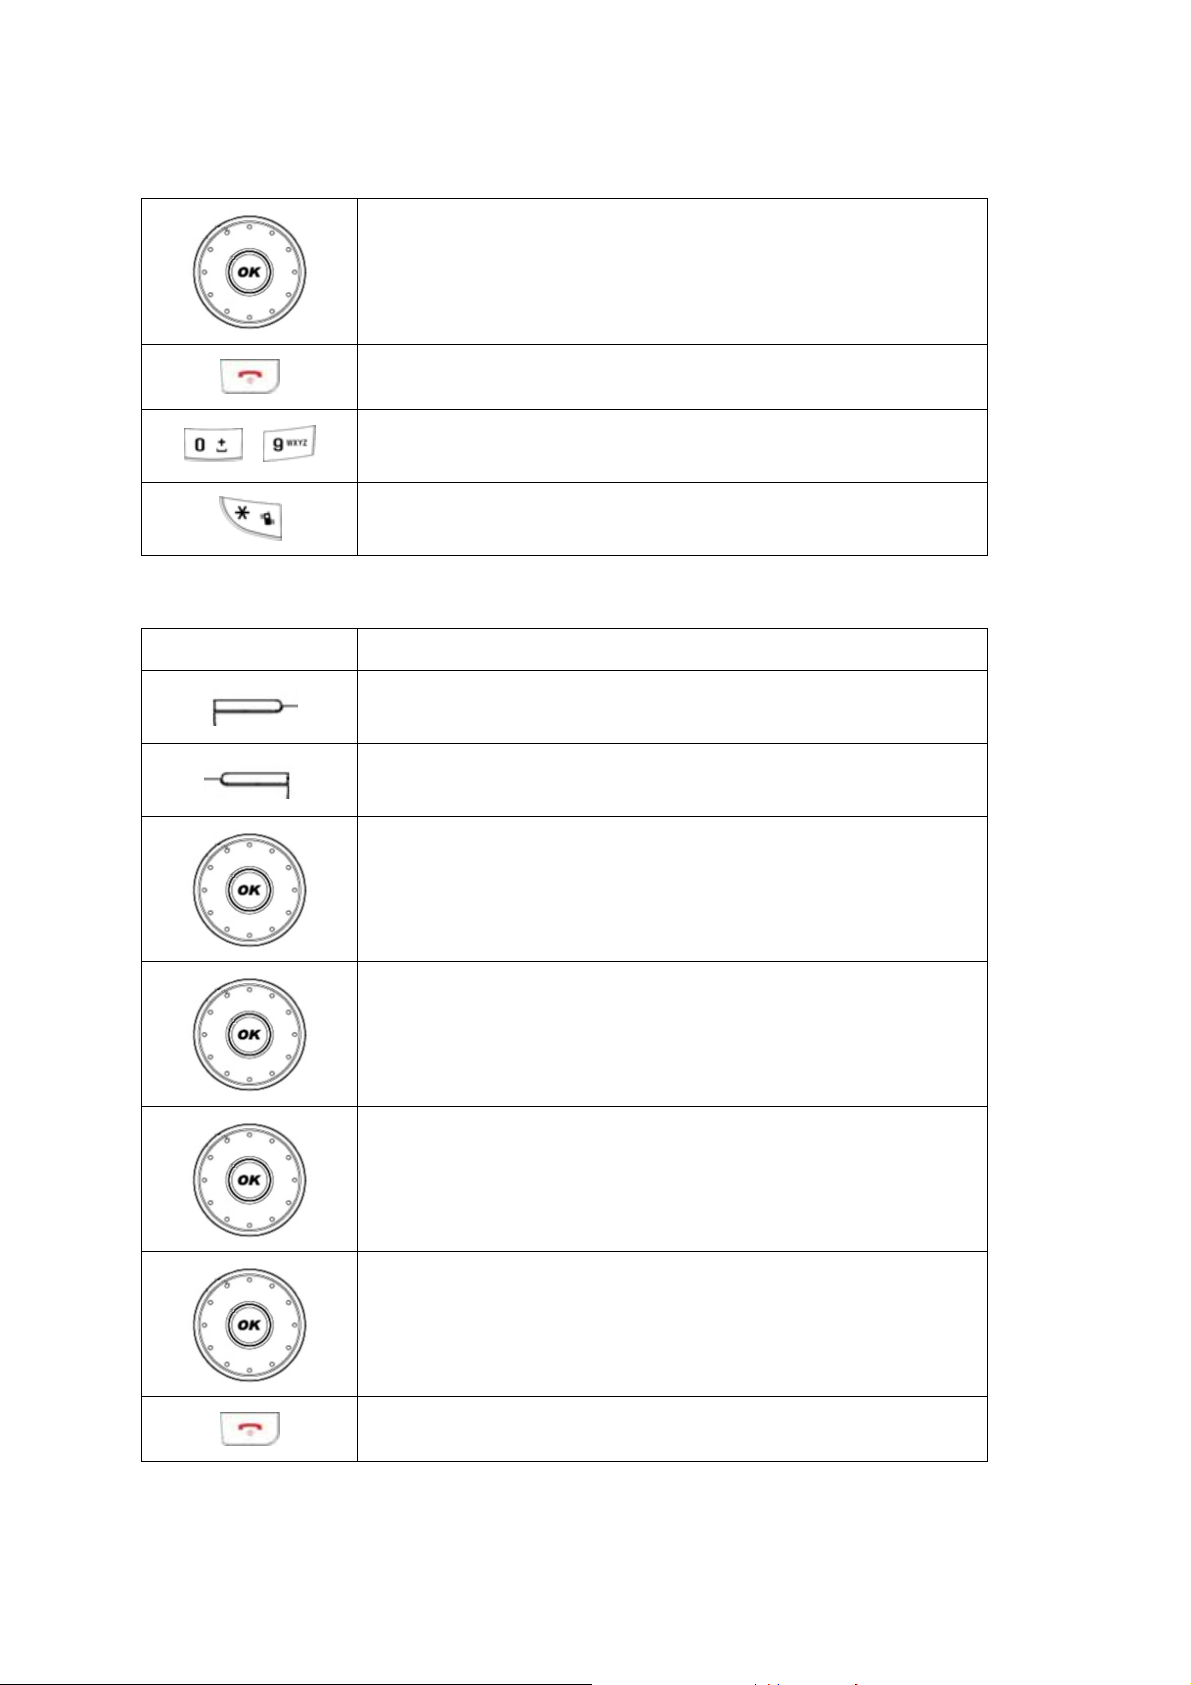
[Press] Move the cursor one line down
[Press and Hold] Scroll the cursor downward
~
4.6 Insert Symbols mode
Key Description
Go back to the idle screen
Input numbers
Select Symbols
Accept the symbol selected on the symbols screen, and then turns
to the edit screen.
Back to the previous mode.
[Press] Move the cursor to the left direction by a character
[Press and Hold] Scroll the cursor leftward.
[Press] Move the cursor to the right direction by a character
[Press and Hold] Scroll the cursor rightward.
[Press] Move the cursor one line up
[Press and Hold] Scroll the cursor upward
[Press] Move the cursor one line down
[Press and Hold] Scroll the cursor downward
Go back to the idle screen
21
Page 22

5. Phonebook
You can store phone numbers and its corresponding names in the memory of your phone and SIM car
d. The SIM card and phone memories, although physically separate, are used as if they were a single
entity, called phonebook.
5.1 Storing a Phone Number with a Name and an Image
As soon as you start to enter a number, press left soft key (Save) to store the number in the
phonebook.
5.1.1 Key in the number to be stored. You can input the number up to 40 digits.
5.1.2 Select the storage from “To SIM” or “To Phone.” You can also check how many you saved
and total entries you can store in the storage.
5.1.3 Select a category to edit. To select the category, scroll to the category and press the [Edit]
soft key (left).Ten categories are available;
z Name : Max. 30 English characters. Press [Edit] to input the characters.
z Number : Max. 40 digits. Enter digits by pressing alphanumeric keys.
z Home Number : Max. 40 digits. Enter digits by pressing alphanumeric keys.
z Company Name : Max. 30 English characters. Press [Edit] to input the characters.
z Email Address : Max. 60 English characters. Press [Edit] to input the characters.
z Office Number : Max. 40 digits. Enter digits by pressing alphanumeric keys.
z Fax Number : Max. 40 digits. Enter digits by pressing alphanumeric keys.
z Birthday : Enter digits by pressing alphanumeric keys.
z Associate Picture : allow you to set an associate picture as a Photo Caller ID; the phone will
display the selected image when you have an incoming call. Select by pressing the
navigation key to the right or left from file manager.
z Associate Sound : Select by pressing the navigation key to the right or left.
z Caller Group : 5 groups (Friends, Family, VIP, Business and Others) or none. Select a caller
group by moving the navigation key. If you choose no group, the number is saved and
displayed “None.”
5.2 Storing a Phone Number using the Phonebook Menu
5.2.1 Enter Phonebook menu on main menu screen.
5.2.2 Scroll to ‘Add New Entry’ and select it
22
Page 23

5.2.3 Select the storage between “To SIM” and “To Phone.”
5.3 Searching the phonebook list
5.3.1 From Idle Screen: Press the right soft key (name) on the idle mode
5.3.2 From Phonebook Menu : Scroll and select the following menus
z Quick Search : This menu shows the existing list and search window
z Search Entry : This menu only shows search window
II. Operation Instruction
A. Menu Operation
1. Messages
With this menu, you can use SMS, MMS, Voice Mail Server, and Broadcast Message. These functions
are available depending on network services that your service provider supports.
1.1 Messages
When the
message.
1.1.1 Write Message
With this menu, you can write a message.
1.1.1.1 SMS
Select [Write Message] menu in the [SMS] menu.
You have Use Template, Insert Emoticon, Insert Object, Format text and Input method options.
After you complete the message, press the [Option] soft key (left) and then select “Done.” Choose
one of following options.
z Send Only: Sends the message to the recipient phone number. It will not save the message.
z Save and Send: Saves the message, and send it to the required recipient.
z Save: Saves the message so that you can send it later.
z Send to Many: Send the message to multiple recipients. Select Edit List to add up to 10
icon appears on the status indicators area, it indicates that you have received a new
recipient(s).
z Send By Group: Send the message to the Caller Group. Select a Caller Group from the list.
You can input the number directly or get from the phonebook by pressing the [Search] soft key
23
Page 24

(left).
The phone will display the Message sending Success or Fail message on the screen for all
recipients.
! Note: If you receive a call while you are writing a message, the message will be backup and
after hanging up the call, the phone will display [write message] mode. You can finish the message
without losing the data.
1.1.1.2 MMS
The MMS (multimedia messaging service), also called Photo Message, allows end-users to send
and receive messages containing multimedia content (including images, video, sound and text). It
provides a rich media of personal multimedia messages from between mobile to mobile, and
mobile to e-mail.
With this menu, you can write a message and insert Image, Sound, and Attachment.
Select [Write Message] menu in the [MMS] menu.
Make a message. You can edit To, CC, BCC, Subject, and Content.
You can input the number directly or get from the phonebook by pressing the [Search] soft key.
After you complete the message, press the [Option] soft key (left) and then select “Done.” Choose
one of following options.
z Send Only: Sends the message. It will not save the message.
z Save and Send: Saves the message, and send it to required recipient(s).
z Save to Drafts: Saves the message to Drafts. You may send it later.
z Send Options: Validity Period, Delivery Report, Read Report, Priority
z Exit: Exits the Write Message, the phone will ask if you want to save the message.
The phone will display the Message sending Success or Fail message on the screen for all
recipients.
! Note: If you receive a call while you are writing a message, the message will be backup and
after hanging up the call, the phone will display [write message] mode. You can finish the message
without losing the data.
1.1.2 Inbox
With this menu, you can view the new text messages or the read messages.
It will display the sender’s phone number or name (if stored in the Phonebook) on the list.
If you choose the [Ok] soft key, you can view the message contents.
Press [Option] soft key for the following options:
z Reply: Allows you to reply to the sender.
z Forward: Allows you to forward the message.
24
Page 25

z Edit: Allows you to edit the message, and send or save the edited message.
z Delete: Allows you to delete the viewed message
z Delete All: Allows you to delete all messages in the Inbox.
z Use Number: Allows you to call the sender back or save the number to the phonebook.
1.1.3 Outbox
With this menu, you can view the sent or unsent messages you have saved.
Send, Edit, Delete, Delete All and Use Number options are available.
1.1.4 Sent
The Sent option displays the list of sent messages.
z View: to view the selected message.
z Properties: to display the properties of the selected message.
z Send to other: to send the selected message to others. The user could select this item andedit
the recipient’s address and subject before sending.
z Delete: to delete the selected message.
z Delete all: to delete all messages in Inbox.
z Use number: to extract all numbers from the selected message.
1.1.5 Draft
You can save your unsent message to Draft menu. You can send the message in Draft menu after
finishing SMS/MMS writing.
Options on saved messages are as following:
z View: plays the message.
z Properties: shows properties of the message (From, Cc. Subject, Date, and Memory)
z Send: Send the saved message to the recipient(s).
z Edit Message
z Delete: Delete the message.
z Delete All: Delete all messages in the box.
z Use Number: Dial or Save to Phonebook.
1.1.6 Delete Messages
Delete the messages of Inbox, Outbox, Sent and Draft.
1.1.7 Templates
You can edit and delete message templates in this menu. You can store your frequently using
25
Page 26

messages up to 10. For example, “Call Me Now,” “How about lunch,” “How are you,” and so forth.
You can store up to 40 English letters in each template. You can use the Template by selecting
[2.Use Template] option, when you write a message.
1.1.8 Message Settings
You can setup default Message Information: Profile Setting, Common Settings, Memory Status,
Preferred Storage, and Preferred Bearer.
1.1.8.1 SMS
z Profile Setting
Depending on your service provider and service plan, you can set the message profile setting.
You can edit the profile as following:
Profile Name: edit the profile name.
SC Address: you have to get the number from your service provider.
Valid Period: choose from Maximum, 1 hour, 12 hours, 1 day, 1 week
Message Type: choose from Fax, Page, E-mail, Text
z Common Setting
You can set on or off the following common settings for SMS.
Delivery Report : This allows you to set delivery report on or off. When this function is set
to on, the network informs you whether or not your message has been delivered.
Reply Path : This menu allows the recipient of your Message to send you a reply via your
message centre, if the network provides Message service. Press the [On] or [Off] soft
key (left) to turn this option on and off.
z Memory Status
This shows memory status of SMS in your SIM card or Phone.
z Preferred Storage
You can set your preferred storage for the SMS messages: to SIM or Phone.
z Preferred Bearer
You can set your preferred Bearer for SMS.
Bearer options are “Prefer GPRS, Prefer GSM, GPRS Only and GSM Only.”
1.1.8.2 MMS
Within the MMS sub-menu, you can define default values on common parameters for mobile-
originated messages. By setting default values for MMS messages, you can experience a more
comfortable service. You can set up the MMS related parameters for sending and retrieving the
MMS messages.
26
Page 27

z Compose
This sets up parameters when you compose MMS messages.
Creation Mode: You can set the creation mode as Free or Restricted.
Image Resizing: You can set the image resizing: 160X120, 320X240, 640X480.
Auto Signature: You can set the auto signature.
z Sending
This sets up parameters when you send MMS messages.
Validity Period : You can select the period in which the service center try to deliver messa
ge. When the message expires, message center will not try to deliver the message.
Maximum period is what service provider permits.
Read Report : You can set whether to receive a read report from every recipient.
Delivery Report : This allows you to set delivery report on or off. When this function is set
to on, the network informs you whether or not your message has been delivered.
Priority : You can set the priority (High, Normal or Low) of MMS message.
Sliding Timing : You can set how long you want the message to play. Input number(s) in
seconds.
Delivery Time : You can set how soon the phone will send your message. (Immediate,
In One Hour, In 12 Hours or In 24 Hours)
z Retrieval
This sets up parameters when you retrieve MMS messages.
Home Network (Immediate/Delayed/Rejected).
Roaming (As Home/Delayed/Rejected).
Read Report (On Request/Send/Never Send).
Delivery Report: This allows you to set delivery report on or off. When this function is
set to on, the network informs you whether or not your message has been delivered.
z Filters
You can filter MMS Messages by three categories as following.
Anonymous (Allow/Reject)
Max Size (KB) : Input number(s) in Kilobytes.
Advertisement (Allow/Reject)
z Edit Profile
Select from profile list. You can activate the profile or edit the profile.
Rename profile : edit the profile name.
Homepage: Enter URL
Data Account: Select data account from the list.
Connection Type:
27
Page 28

Connection Oriented: When you select Connection Oriented, you can edit the IP
Address.
Connectionless: When you select Connectionless, you can edit the IP Address.
HTTP: when you s elect HTTP, you can edit the Proxy Address and Proxy Port.
User ID: Enter your ID
Password : Enter your password
z Memory Status
This shows usage count, total memory used, and remaining memory.
1.2 Chat
With this menu, you can start a new chat room in your phone. Key-in your nickname and re
mote number, then press ‘Start New‘ to start chatting with your friends by sending SMS.
1.3 Voice Mail Server
Your phone is capable of dialing with voicemail server number (if provided by your network). If the
voicemail has arrived, your phone displays new message in the idle screen and sets to inform you of
the arrival. Select the Voice Mail from the list and press [Option] soft key (left). By Selecting the Edit
option for editing the Voice Mail server number. By selecting the Connect to Voice option, your phone
will dial to the configured number that has been stored in Voice Mail list. You can then listen to the
voicemail.
! Note: Voice mail is a network feature. Please contact your service provider for more information.
1.4 Broadcast Message
This network service allows you to receive the broadcast messages on various topics such as weather,
traffic, local district code, local hospitals, taxis or pharmacy in the area where you are. You can even
receive the message to be in a particular language (For example, when you are abroad) by changing
language selection.
! Note: For more information about broadcast message topics, please contact your service provider.
The following options are available.
z Receive Mode : You can turn the receive mode on and off by pressing the soft key (left).
Allows you to enable or disable the reception of the broadcasted text messages.
z Read Message : With this menu, you can read all the broadcasted text messages received.
The title area of the screen will display the name of the message subject item. Whenever the
phone receives new contents, the phone will update the contents of the message subject.
z Languages : Allows you to select your preferred language for displaying cell broadcast
messages. The number of languages you can select depends on your SIM card.
28
Page 29

z Channel Setting : Allows you to indicate the channels from which you wish to receive
broadcast messages. This menu allows you to read, add and delete the list by using Select,
Add, Edit and Delete option. The number of items in the list depends on your SIM card. It will
display all items you selected.
! Note: For more information about the available subjects, please contact your network service
provider.
2. Phonebook
Phonebook offers phonebook storage, management and services. You can access to the phonebook
from idle screen, phonebook menu, and message writing modes.
From Idle screen, press the [Name] soft key (right), it will display the phonebook data sorted by name
in your SIM Card and phone memory.
From the Phonebook menu, you will have 8 sub menus as following.
2.1 Quick Search
When you select the Quick Search in the Phonebook menu, you will see all entries saved in the
phonebook. This function allows you to search the phonebook data by name; simply type in
alphabet(s), the phone will show you the search result dynamically.
From the phonebook list, you can also View, Edit, Delete, Copy, Move, and Duplicate the entry.
z View: allows you to view the entry’s contents such as name, number and so on.
z Edit: allows you to edit the entry items.
z Delete: allows you to delete the entry.
z Copy: allows you to copy the entry from SIM to Phone or Phone to SIM. You will have the
same entry in a different storage. (SIM + Phone)
z Move: allows you to move the entry from SIM to Phone or Phone to SIM. The entry will be
stored in the original storage. (SIM Æ Phone, Phone Æ SIM)
z Duplicate: allows you to duplicate the entry in the same storage. You will have the same data
in the same storage. (SIM+SIM, Phone+Phone)
2.2 Search Entry
When you select the Search Entry, after storing numbers to the phonebook, you can search them by
Name.
2.2.1 Enter a name you want to search in the text input box. Input full name or even a start letter
and press the [Option] soft key (left).
29
Page 30

2.2.2 If there is a name, you want to call, choose the name by moving up & down the navigation
key.
2.2.3 Press the Dial key to make a call. However, if there is more than one entry in the selected
name, it will display a list. Then you may simply select one entry and press the Dial key to make a
call.
The following options are available.
z View: allows you to view the entry’s contents such as name, number and so on.
z Edit: allows you to edit the entry items.
z Delete: allows you to delete the entry.
z Copy: allows you to copy the entry from SIM to Phone or Phone to SIM. You will have the
same entry in a different storage. (SIM + Phone)
z Move: allows you to move the entry from SIM to Phone or Phone to SIM. The entry will be
stored in the original storage. (SIM Æ Phone, Phone Æ SIM)
z Duplicate: allows you to duplicate the entry in the same storage. You will have the same data
in the same storage. (SIM+SIM, Phone+Phone)
2.3 Add New Entry
You can add the new entry to SIM or Phone memory.
Please see [Storing a Number using the Phonebook Menu].
2.4 Copy All
You can copy all phonebook data from SIM card to Phone or from Phone to SIM. It is a useful function
if you want to back up your phonebook data from a SIM card to your phone and vice versa.
2.5 Delete
You can delete all phonebook data in SIM card or Phone. In addition, you can delete the phonebook d
ata one by one.
2.6 Caller Group
You can setup and edit Caller Group profiles as following.
z Group Name: Edit the group name and press the [Option] soft key (left) and select “Done” to
save the changes.
z MIDI : Allows you to select the ring tone to be used when you receive a call from a person in
the group. Scroll left and right with the navigation keys.
z Picture: Allows you to select incoming call picture when you receive a call from a person in
30
Page 31

the group. Scroll with the navigation keys to change the picture and go to the next line to
select. Or if you want to view and select, select the [View] soft key and scroll with the left and
right navigation keys. To select the picture, press the [OK] soft key (left).
z Video: Allows you to select the video to be used when you receive a call from a person in the
group. Scroll left and right with the navigation keys.
z Member List: After storing numbers in the phonebook, you can search them by Group. You
can add or delete member(s) to the group member list. Press [Option] soft key then select
“Add,” it will display a phonebook list excluding the members already in the group. It is
possible to set a member in multiple groups.
2.7 Speed Dial
You can enable, disable and edit the speed dial from the number 2 ~ 9 keys.
z Enable Speed Dial (On/Off) : You can choose to enable or disable the speed dial
z Set Number : You can set the speed dial from the number 2 ~ 9 keys. Press [Option] soft key,
and select “Edit” and select the entry from the phonebook list.
2.8 Extra Number
You can view and edit Service Dial number and SOS number.
z Service Dial Number: lists up the SIM SDN (Service Dial Number) and allows you to access
to the number by pressing the left soft key.
z SOS Number – lists up the SOS Number.
2.9 Settings
You can view and edit the management for the Phonebook as following.
2.9.1 Memory Status
You can check how many names and numbers are stored in the phone book (SIM card and phone
memories) or how much free space is remained.
2.9.2 Preferred Storage
You can set your preferred storage either to SIM or to Phone as default storage in the phonebook.
2.9.3 Fields
There are eight fields that you can set on or off in your phonebook entry.
Press the left soft key to turn on or off the field.
z Home Number
31
Page 32

z Company Name
z Email Address
z Office Number
z Fax Number
z Birthday
z Associate Picture
z Associate Video
z Associate Sound
z Caller Group
2.9.4 My vCard
You can edit or send your vCard.
2.9.5 Human Voice Prompt
You can do on or off the Human Voice Prompt.
2.10 Caller Picture
You can setup and edit the caller picture in the phone book.
Press the left soft key to entry option menu.
- To New Entry: allow you to new entry.
- To Selected Entry: allow you to selected entry.
- To Caller Group: allow you to caller group.
2.11 Caller Ring Tone
You can setup and edit the caller ring tone in the phone book.
Press the left soft key to entry option menu.
- To New Entry: allow you to new entry.
- To Selected Entry: allow you to selected entry.
- To Caller Group: allow you to caller group.
2.12 Caller Video
You can setup and edit the caller video in the phone book.
Press the left soft key to entry option menu.
- To New Entry: allow you to new entry.
- To Selected Entry: allow you to selected entry.
- To Caller Group: allow you to caller group.
32
Page 33

3. Call History
With this menu, you can identify all call records that you have dialed, received or missed.
It will display the number and name (if available), together with the date and time at which the call was
made or received.
3.1 Dialed Calls
This menu lets you view the last dialed calls.
In the dialed calls list, you can view the details of the record by pressing the [Ok] soft key (left). In the
view screen, you can make a call to the number by pressing the Dial key.
There are 6 options in [Option] menu as following;
z Send SMS: Allows you to send SMS
z Send MMS: Allows you to send MMS
z Delete: Allows you to delete the record
z Save to Phone: Allows you to save the record to the phonebook
z Dial : Allows you to call back to the recorded number
z Edit : Allows you to edit the number and save to the phonebook
3.2 Received Calls
This menu lets you see the last 10 received calls.
In the list of received calls, you can view the details of the record by pressing the [Ok] soft key (left). In
the view screen, you can make a call to the number by pressing the Dial key.
There are 6 options in [Option] menu as following;
z Send SMS: Allows you to send SMS
z Send MMS: Allows you to send MMS
z Delete: Allows you to delete the record
z Save to Phone: Allows you to save the record to the phonebook
z Dial : Allows you to call back to the recorded number
z Edit : Allows you to edit the number and save to the phonebook
3.3 Missed Calls
This menu lets you view the last 10 missed calls.
In the missed calls list, you can view the details of the record by pressing the [Ok] soft key (left). In the
view screen, you can make a call to the number by pressing the Dial key.
There are 6 options in [Option] menu as following;
z Send SMS: Allows you to send SMS
33
Page 34

z Send MMS: Allows you to send MMS
z Delete: Allows you to delete the record
z Save to Phone: Allows you to save the record to the phonebook
z Dial : Allows you to call back to the recorded number
z Edit : Allows you to edit the number and save to the phonebook
3.4 Delete Call Log
This menu lets you delete all call data of each category at once.
There are 4 categories of call as following.
z All Calls : Allows you to delete all calls data
z Dialed Calls : Allows you to delete all dialed call data
z Received Calls: Allows you to delete all received call data
z Missed Calls : Allows you to delete all missed call data
3.5 Call Time
This menu lets you view the timers for calls made and received. The following timers are available.
z Last Call Time: length of the last call
z Total Sent: total length of all calls made since the last reset
z Total Received: total length of all calls received since the last reset.
z Reset All Time: Allows you to reset the call timers
! Note: The actual time invoiced for calls by your service provider may vary, depending on network
features, rounding-off for billing purposes and so forth.
3.6 Call Cost
You can view the cost of the last call, or of all calls. Costs are shown only if your network operator
supports this service. The following 5 options are available.
z Last Call Cost: Allows you to check the cost of the last call.
z Total Cost: Allows you to check the cost of all calls.
z Max Cost: Enter PIN2 and input a limitation of the Max Cost.
z Reset Cost: Allows you to reset the call cost.
z Price Per Unit: Enter PIN2 and input a limitation of the price per unit.
! Note: Not all SIM cards support this feature. The number of items in these lists depends on the
contents of your SIM card.
3.7 SMS Counter
You can view the numbers of sent and received SMS.
34
Page 35

3.8 GPRS Counter
You can view how many GPRS message has been sent and received, and reset the counter.
z Last Sent: Allows you to view the last send GPRS Messages.
z Last Received: Allows you to view the last received GPRS Messages.
z All Sent: Allows you to check the numbers of All GPRS messages sent.
z All Received: Allows you to check the numbers of All GPRS messages received.
z Reset Counter: Allows you to reset the GPRS Counter.
4. Settings
You can change settings for your phone using this menu. There are Phone Setup, Call Setup, Network
Setup, Security Setup, and Restore Factory Settings sub menu.
4.1 Display Characteristic
This menu allows you to customize how you want your phone display items below.
4.1.1 Wallpaper: You can select a wallpaper image as following.
System: Select wallpaper image from 11 images including the Analog Clock, Digital
Clock and Calendar.
User Define: You can search for images and photos in the File Manager. However,
there is a size limitation to use an image as wallpaper image.
4.1.2 Screen Saver : This menu allows you to set the screen saver setting. The phone will display
the selected image in a full screen, when there is no key input on the phone.
z Setting:
On/Off
Waiting : 5sec, 15sec, 30sec, 1min
z Select
System: Select screen saver image from 12 images including Analog Clock and Digital
Clock
User Define: You can search for images and photos in the File Manager. However,
there is a size limitation to use an image as wallpaper image.
4.1.3 Power On Display
z System: Select power on display image from 9 images.
z User Define: You can search for display images in the File Manager. However, there is a siz
35
Page 36
e limitation to use an image as display image.
4.1.4 Power Off Display
z System: Select power off display image from 9 images.
z User Define: You can search for display images in the File Manager. However, there is a size
limitation to use an image as display image.
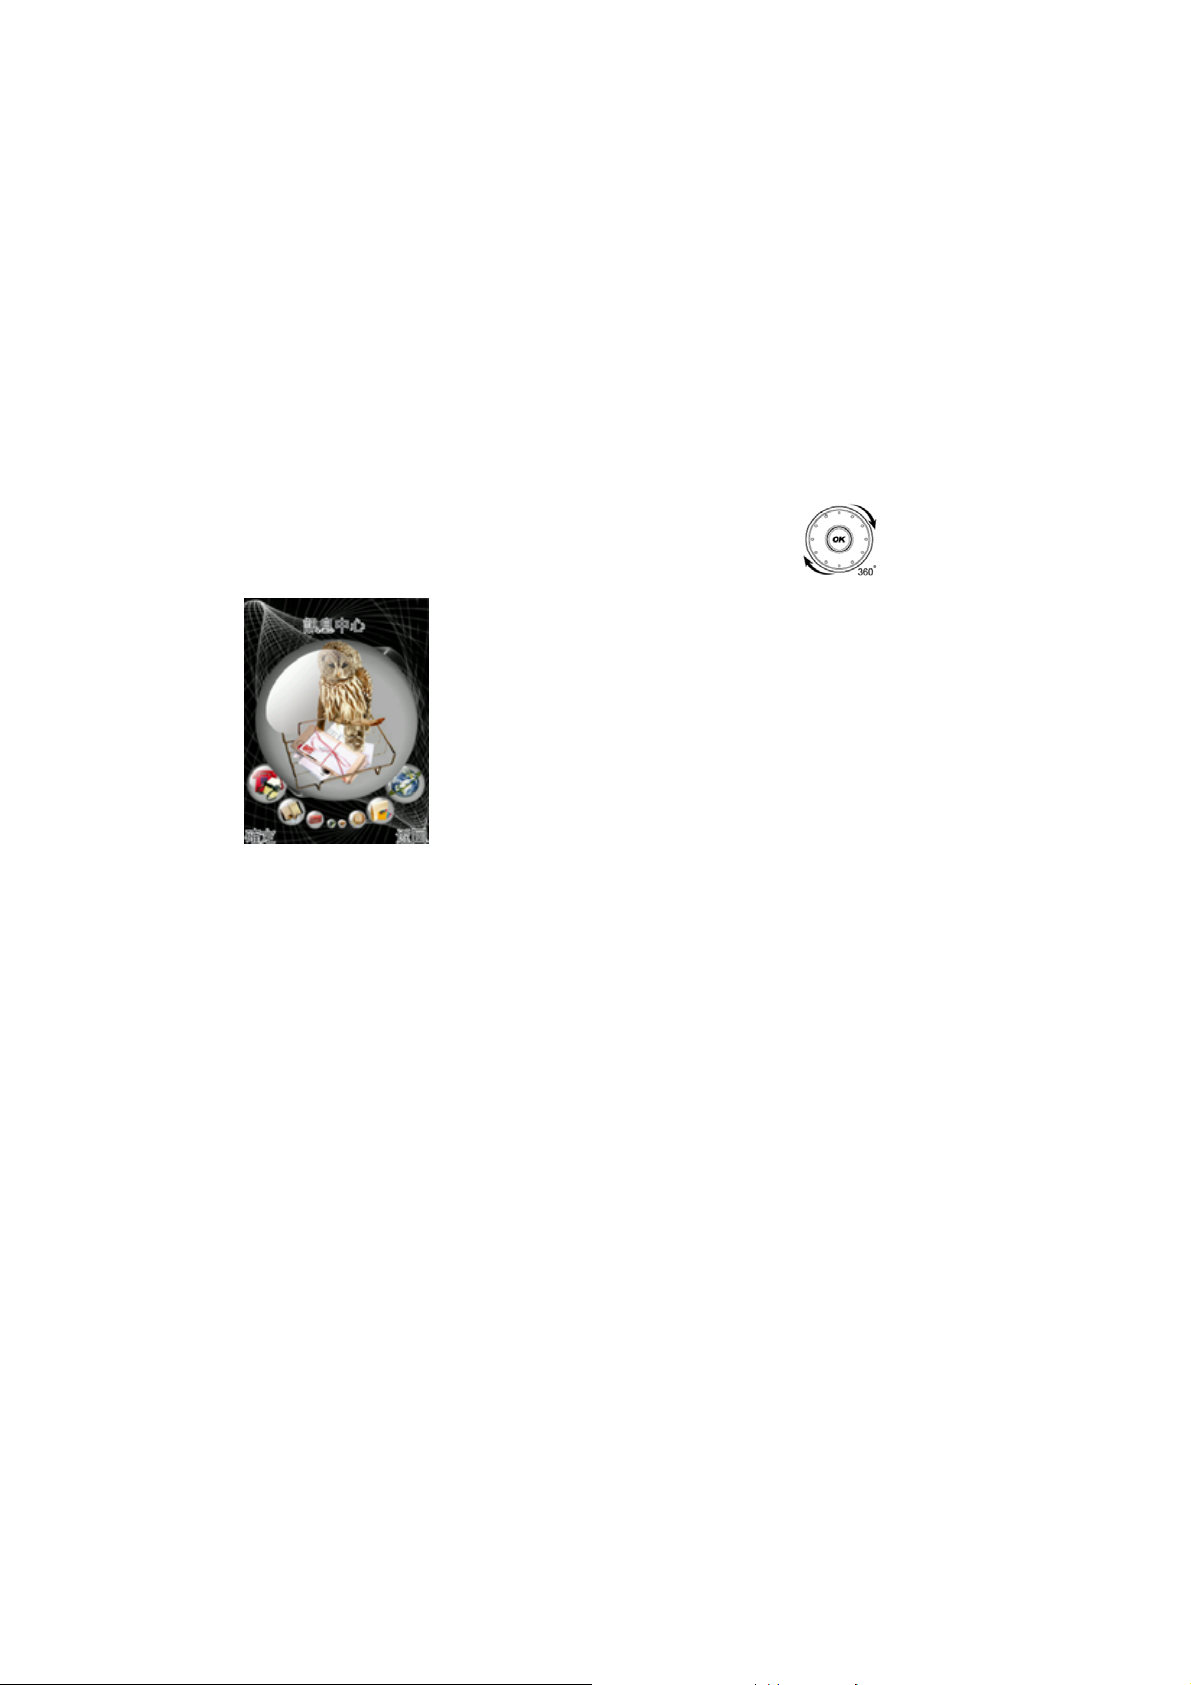
4.1.5 MainMenu Style: You can select the MainMenu style between circular, matrix and page style.
z Circular Style: You can use it well with the smart wheel key[
].
Å Menu Area
Å Circular Style
Å Soft Key Area
z Matrix Style: List 9 function icons in one page.
z Page Style: You need to press the left and right navigation keys to turn the next page.
4.1.6 Themes
Theme1 to Theme 4 (Black/Blue/Pink/Gray)
4.1.7 Clock Type
Show Date and Time: You can set the phone to display or hide the Date and Time on the idle
screen.
4.1.8 Owner Number
Show Owner Number: You can set if you want to display the owner number or not.
4.1.9 Show Operator Name (On/Off)
4.2 Phone Setup
With this menu, you can setup settings regarding display and operations of the phone: Language, Gre
eting Text, Shortcut, Dedicated Key, Schedule Power On/Off, Auto Keypad Lock, Preferred Input Meth
36
Page 37

ods and Default Encoding Type.
4.2.1 Time and Date
You can set time and date for your phone.
z Set Home City: This menu allows you to set a city as your home city from 57 cities list.
Please select the closest city in the list.
z Set Time/Date: This menu allows you to set the current time and date displayed in the idle sc
reen.
HH:MM : Input hour in 24 hour format and minute. Press [Ok] soft key (left) to save.
YYYY/MM/DD : Input year, month and day. Press [Ok] soft key (left) to save the time an
d date.
Daylight Saving (On / Off) : Allows you to select the daylight saving.
z Set Format: Allows you to select a time display type between12 Hour AM/PM type and 24 Ho
ur type. When the time format is in 12 Hour type, you can change AM and PM by Navigation
key.
Date Format:
YYYY/MM/DD (ex. 2007/12/25)
YYYY-MM-DD (ex. 2007-12-25)
”MMM DD,YYYY” (ex. “Dec 25, 2007“)
DD-MMM-YYYY (ex. 25-Dec-2007)
DD/MM/YYYY (ex. 25/12/2007)
MM/DD/YYYY (ex. 12/25/2007)
z Auto update of Date and Time:
This menu allows the phone to update the current date and time automatically. You can turn on or
off this function by pressing the [On] or [Off] left soft key.
4.2.2 Schedule Power On/Off
You can set a schedule for powering on and off your mobile phone. When you schedule the power
on or off, the phone will power on or off at every scheduled time. When the phone powers on, it
will alarm with alarm tone. It is useful when you want to turn off your phone while you are sleeping,
and let the phone power on in the morning so that you would not miss any call or alarm.
To set this option, press [Edit] soft key (left) and edit the following options.
z Status (Disable/ Enable)
z Power On/Off: Choose on or off by pressing the left or right navigations keys.
z Time: Input time in 24-hour scale.
37
Page 38

4.2.3 Language
This menu allows you to set the display language. Select your preferred language and press [Ok]
soft key (left) to save the setting. When you change the language setting, the phone will display in
the corresponding language mode.
The following options are available.
z English
z Simplified Chinese
z Traditional Chinese
z Thai
4.2.4 Preferred Input Methods
This menu allows you to define your preferred input method. Once you set the preferred input met
hod, next time you edit in text input mode, it will reflect the setting until you change to another.
4.2.5 Default Encoding Type
This menu allows you to set a default encoding type from BIG5 and GB2312.
4.2.6 Greeting Text
The Greeting Text menu allows you to display a greeting text on the idle screen.
You can edit and set the Greeting Text. After you edit the Greeting Text, press the [Done] soft key (
right) to save.
4.2.7 Dialing Font
Dialing Font allows you to set font type, font size and color number on the idle screen.
4.2.8 Dedicated Key
This menu allows you to set the dedicated function for the navigation key in the idle mode.
You can dedicate the Up/Down/Left/Right navigation keys to menus. Select from the menu lists,
and press [Ok] key to change the dedicated menu.
! Note : Refer to the menu ‘Shortcuts’ regarding make up the menu list.
4.2.9 Flight mode
This menu allows using the phone on flight. You can use the Phone Book, Multi Media, File
Manager, Fun & Game, User Profiles and Organizer on flight.
z Normal Mode
z Flight Mode
38
Page 39

z Query When Power On
! Note : You can not make a call and incoming call on this menu.
4.2.10 Shortcuts
This allows you can register menu item to dedicate menu list.
You have 49 menu items and can register shortcut menu up to 10 items.
! Note : refer to the menu ‘Phone setup
Dedicated key’ regarding assign menu item to navigation keys.
4.2.11 User Profiles
You can use the sound setting features to customize various settings depending on environments.
z General
z Meeting
z Outdoor
z Indoor
z Headset
z Bluetooth
! Note : Headset mode has no ‘activate’ menu because the activation of Headset mode is
automatically on when you plug the headset to your phone in.
Select each environment and select “Activate” to activate the setting or elect “Customize” to
customize the sound and light settings on each environment.
This menu customizes the tones in the following setups.
z Tone Setup
Incoming Call
This option allows you to select the required ring tone. You can set the ring tone from sound
files downloaded from WAP download, MMS and EMS. You can also forward files from
Phone Memory to this sound setting. Each time you select a tone, the phone will play it for a
few seconds.
Power On
You can select power on sound from 2 tones or silent.
The phone will play the power on tone, when you power on the phone by pressing the
End/Power key.
Power Off
You can select power on sound from 2 tones or silent. The phone will play the Power Off
tone, when you turn off the phone by pressing the End/Power key.
39
Page 40

Cover Open
You can select cover open sound from 3 tones or silent.
Cover Close
You can select cover close sound from 3 tones or silent.
Message Tone
You can select message sound from 5 tones or silent. The phone will play the Message
Tone you selected, when you receive a message.
Keypad Tone
You can select the tone that the keypad generates when you press a key by this menu
Silent: the keys do not make any sound
Click: the keys will make “click” sound.
Tone: the keys will make “tone” sound. (DMTF Tone)
Human Voice Tone: the keys will make “human voice tone” sound.
z Volume
This option allows you to adjust the ringing volumes of keypad, call alert, alarm and message alert.
You can set different volume levels for the Ring Tone and Key Tone.
z Alert Type
This option allows you to customize the alert type. This setup will control the alerts your phone mi
ght play. You can customize the alert types as following.
Ring: the phone rings the ring tone selected with the [Tone Setup] option..
Vibration Only: the phone vibrates without ringing.
Vibra and Ring: the phone vibrates and rings simultaneously.
Vibra then Ring: the phone vibrates first then rings
Light Only: the phone lights indicator LED only.
z Intelligent Call Alert
Once this function is on, the phone number of other person who is calling to you is read in voice t
one when you receive a call.
z Ring Type
You can set the ring type for playing the ring tones.
Single: plays the ring tone once.
Repeat: plays the ring tone in repeated matter.
Ascending: plays the ring tone with ascending volume.
z Extra Tone
You can turn on or off the tone of following alerts.
Warning
Error
40
Page 41

Camp On
Connect
z Answer Mode
You can select the way when you answering an incoming call
Cover Answer : To answer a call, you have to cover open
Any Key : To answer a call, you have to click any key of your phone
Dial Key: To answer a call, you have to click the dial key
z Menu Voice
You can turn on or off the menu voice.
4.2.12 Misc Setting
z LCD Backlight
You can customize the LCD Backlight settings in this menu.
The LCD backlight is automatically off after no key input to save the battery life.
You can set the brightness and time by this menu. The backlight will be off after the time you set.
Brightness : 1 to 5 Levels
Time : 5 Sec to 60 Sec
4.3 Call Setup
The following Call Setup features are network services. Please contact your network service provider
to check availability and subscribe to the feature if you wish.
4.3.1 Caller ID
This network service informs your Caller ID to the recipient when you call out.
You can set the following options for the Caller ID function as following.
z Set By Network: The network will decide whether to send or hide the Caller ID.
z Hide ID: If you do not want to send your phone number, select [Hide ID] menu.
z Send ID: It will send the Caller ID when you call out.
! Note: Some networks do not allow the user to change this setting.
4.3.2 Call Waiting
This network service informs when someone is trying to reach you during another call. You can
specify the call waiting option for voice calls only.
The following options for each service are available:
z Activate: activates the call waiting service.
z Deactivate: deactivates the call waiting service.
41
Page 42

z Query Status: displays the status of the call waiting service.
4.3.3 Call Divert
This network service reroutes incoming calls to the number that you specify.
Example: you may wish to divert your business calls to a colleague while you are busy. Call
diverting can be set up in the following ways.
You must enter a forward number when you have incoming call(s).
z All Voice Calls: diverts all voice calls.
z If Unreachable: diverts calls, if you are not in a coverage area of your service provider.
z If No Answer: diverts calls, if you do not answer the phone.
z If Busy: diverts calls, if you are already making another call.
z All Data Calls: diverts all data calls.
z Cancel All Divert: cancels all call diverting options.
4.3.4 Call Barring
This network service allows you to restrict your calls. Call barring can be set up in the following
ways
z Outgoing Calls
All Calls: prohibits outgoing calls.
International Calls: prohibits outgoing International calls.
International Except Home: When abroad, you can only make a call to numbers within
the current country and to your home country that is the country where your home
network provider is located.
z Incoming Calls
All Calls: prohibits receiving all incoming calls.
When Roaming: prohibits receiving calls when you are using your phone outside of your
home service area.
Cancel All : Deactivated all call barring settings. You will be able to make and receive
calls normally.
Change Barring PW : You can set and change the call barring password obtained from
your service provider using this option. You must enter the current password before you
can specify a new one.
4.3.5 Line Switching
You can select line1 or line2.
42
Page 43

4.3.6 Call Time Reminder
You can set the call time reminder as the following options
z Off
z Single
z Periodic
4.3.7 Call Time Display
You can set if you want the phone to display the call time or not.
4.3.8 Auto Redial
This option allows you to set redial automatically when the call receiver is busy. If you set [Auto
Redial] on, it will redial 10 times to make a call. To redial proceed as following.
When the other party does not answer, the phone automatically hangs up the phone and redials
the phone number.
Press the Dial key or hook button on your ear/microphone when you are using ear/microphone
The phone will redial 10 times to make a call
4.3.9 Closed User Group
This menu allows you to fill out a closed user group, and send it to the network. However, this
feature is depending on the network’s availability.
4.3.10 IP Number
This menu allows you to set up 3 IP numbers.
4.3.11 Blacklist
This menu allows you to set up 10 Blacklist numbers to reject their calling.
4.3.12 Access Code
This menu provides 3 paths to select.
4.4 Network Setup
These menu functions are network services. Please contact your service provider to check their
availability and subscribe to them, if you wish. These settings might affect your monthly bill and your
phone’s network performances.
4.4.1 Network Selection
43
Page 44

The Network Selection feature enables you to select automatically or manually the network used
when roaming outside your home area.
z Automatic: You will be connected to the first available network when roaming
z Manual: The phone scans for the available network, and you can select the network manuall
y,
4.4.2 Preferred Networks
You can set your preferred networks. The phone will list up PLMN list. The following options are
available:
z Add From List
Select from PLMN list and press [Ok] key and select priority. The priority is for among your
preferred networks.
z Create New:
MCC/MNC: input 5 digit numbers.
Priority: select from Set the priority by pressing navigation keys to the right or left.
z Change Priority
Set the priority by pressing navigation keys to the right or left.
z Delete
Delete the selected preferred network from the list.
4.4.3 GPRS Connection
Press [Change] soft key (left) to change the setting for the GPRS connection. It will switch and
save the GPRS connection to set on:
Always
When Needed.
4.4.4 Data Account
This menu allows you to change the settings for the GSM and GPRS network services. For further
details, contact your service provider.
z GSM Data
This setting allows you to change the settings for the GSM Data network as following.
Account Name: Edit the account name.
Number: Enter the server phone number.
User Name: Enter the user name required to connect to GSM Data network.
Password: Enter the password required to connect to GSM Data network.
Line Type: Choose a network connection type between Analogue and ISDN.
44
Page 45

Speed: Select the desired speed from 9.6 Kbps, 14.4 Kbps and 4.8Kbps.
DNS : Enter the DNS IP address
z GPRS
This setting allows you to change the settings for the GPRS Data network as following.
Account Name: Edit the account name.
APN: Enter the access point name used for the address of the GPRS network gateway.
User Name: Enter the User Name required to connect to GPRS network.
Password: Enter the password required to connect to GPRS network
Auth. Type: Select the authorization type from Normal and Secure.
4.5 Security Setup
There are six types of security setting categories, and you can optimize security mode by choosing
sub menus in “Security Setup” in “Settings” menu. These security settings will help you to keep privacy
and to prevent other people from using the phone without your permission.
4.5.1 SIM Lock
When the SIM Lock feature is on, the phone only works with the current SIM. If you turn on the
phone with uncertified SIM, the phone will ask the password. Once the correct password has
entered, the phone shall work with uncertified SIM.
4.5.2 Phone Lock
When the Phone Lock feature is on, user must enter the password each time you turn on the
phone. Making a call or operating the phone is not available without the password.
4.5.3 Fixed Dial
When the Fixed Dial mode is enabled, the person using this phone can call to the phone numbers
stored in the Fixed Dial List only. To make a call to the number not starting the numbers stored in F
ixed Dial List, you must enter the PIN2 to disable Fixed Dial mode. If the SIM card does not have
PIN2, this feature is not supported.
In the Fixed Dial Mode, you can use several useful functions as following.
z View and Edit: you can see and edit FDN entry after input PIN2.
z Add: you can add FDN entry after input PIN2.
z Delete: you can delete FDN entry after input PIN2.
z SMS: you can send SMS to the phone numbers starting with the numbers stored in FDN.
z Short Type: you can choose short type among Number / Name / Sequence.
45
Page 46
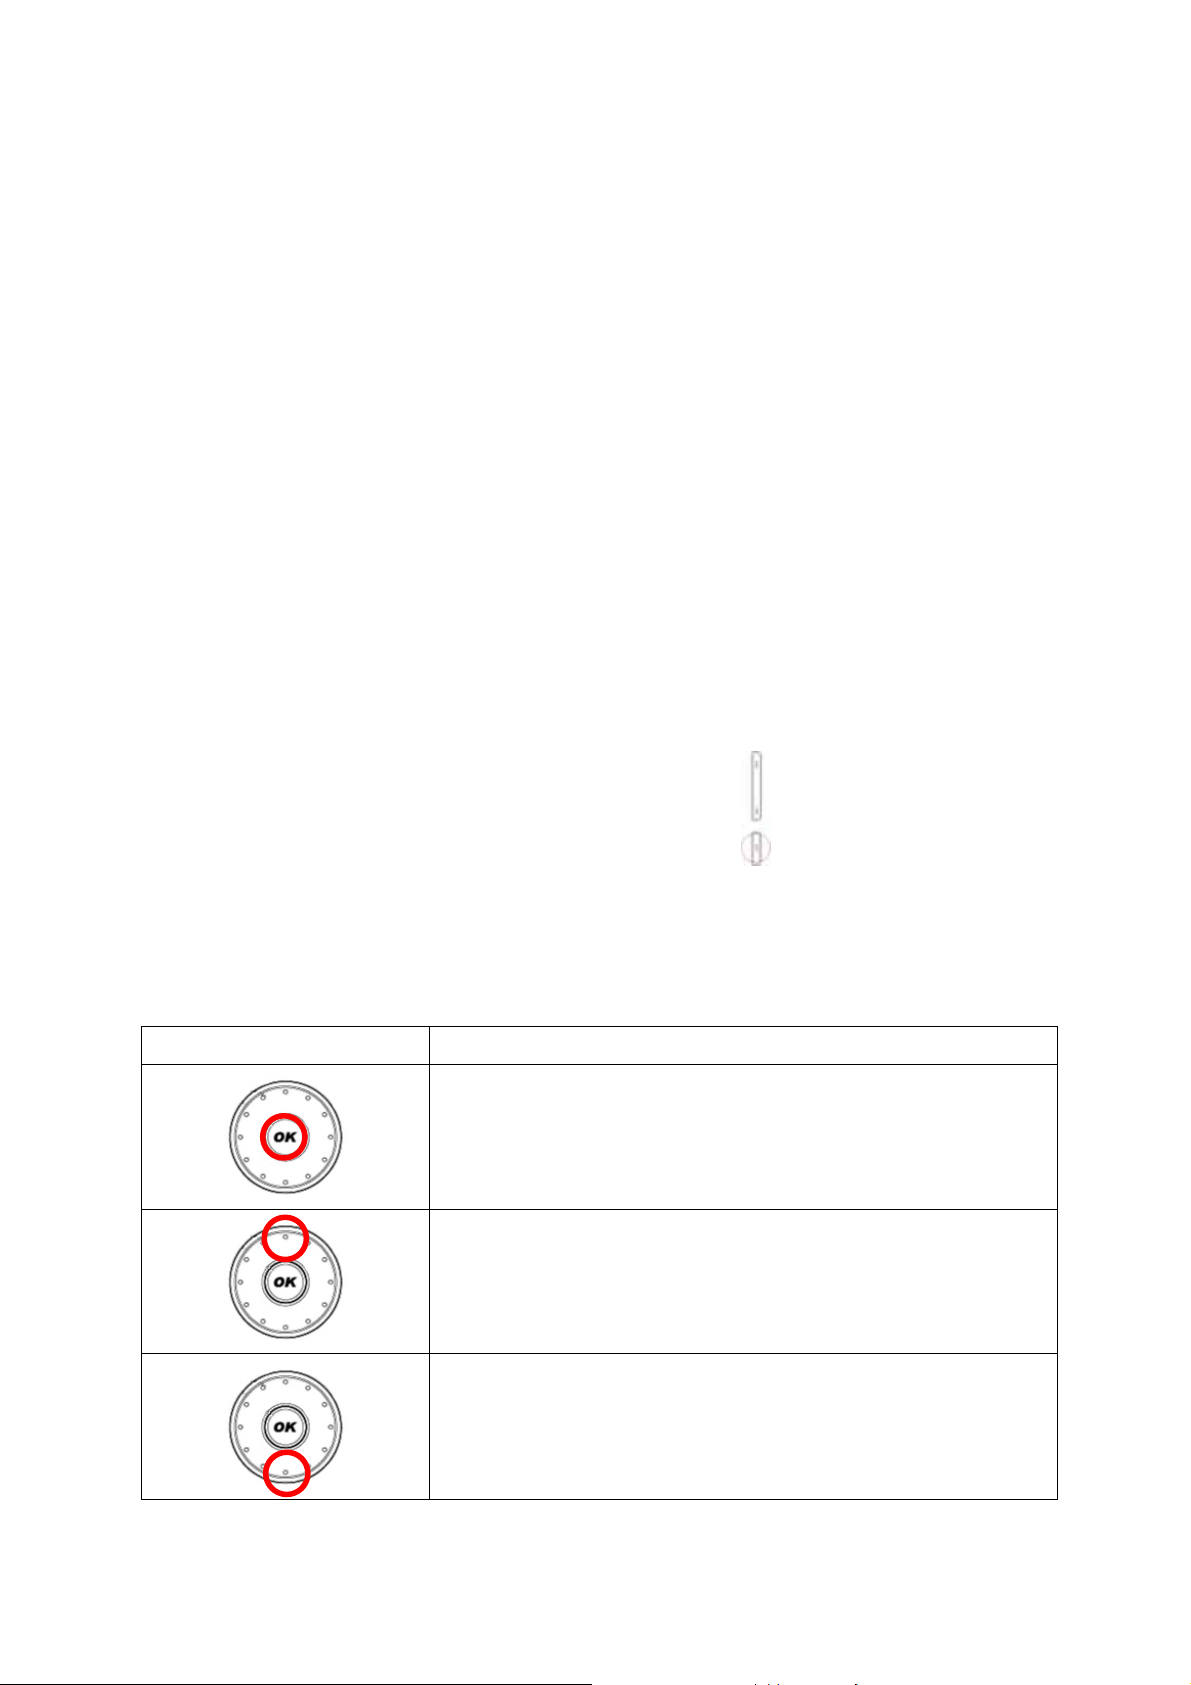
4.5.4 Change Password
To change the password, input the current password, and then enter the new password.
4.6 Restore Factory Settings
This feature would reset the telephone to the same settings as those configured at the factory. You will
need to input password to restore factory settings.
5. Multimedia
The Multimedia menu provides you several multimedia functions. You can enjoy your phone as
multimedia device.
5.1 Camera
This phone has a 3.0M Pixel Camera sensor. You can enjoy taking photos and see the saved photos
or images.
Two ways to access to the Camera Viewer:
z You can access to Camera preview mode by pressing the ‘
z You can also use [Camera] menu after pressing the [Menu] soft key (left) to open the main
menus and choosing the third menu [Multimedia] then [Camera] menu.
You can control camera options by direct control keys as follows
Key Description
Take a picture
Digital Zoom-up
Digital Zoon-down
' key in the idle mode.
46
Page 47
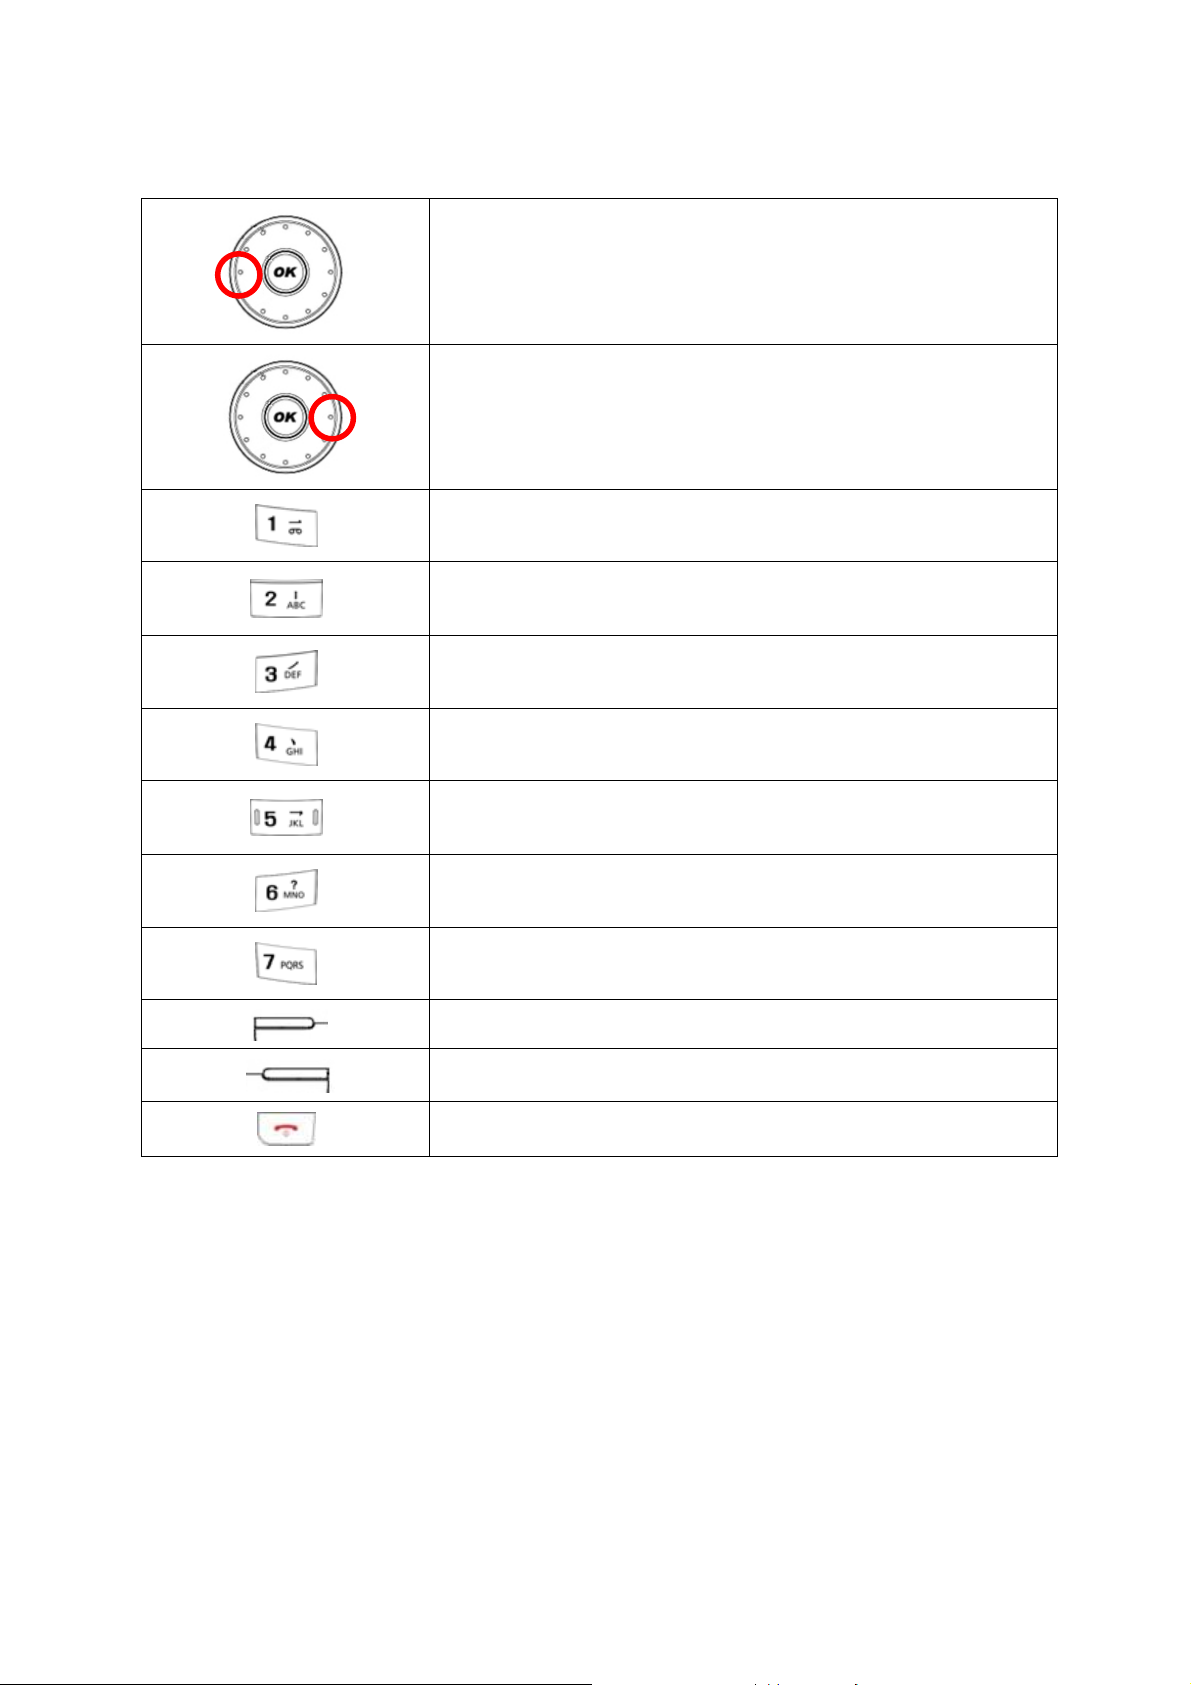
EV level down
EV level up
Effect Setting
White Balance
AE Meter
Cont Shot
Scene Mode
Image Quality
Image Size
Enter Camera Option menu
Back to previous menu
Back to idle mode
5.1.1 Camera Options
From the camera preview mode, you can access to the Camera Options by pressing the [Option]
soft key (left) for the following options and settings for the Camera.
z To Image Viewer: By selecting this menu, there are 10 options as following:
View: allows you to view the image in full screen. Press the navigation key left and right
to view other images.
Slide Show
Image Info
Browse Style (List/Matrix)
47
Page 48

Forward: allows you to forward the image to Wallpaper, Screen Saver, Phonebook,
MMS and Bluetooth.
Rename: allows you to edit the image name.
Delete: allows you to delete the selected image.
Delete All Files: allows you to delete all images.
Sort: allows you to sort the image by Name, Type, Time and Size.
Storage: allows you to storage to Phone or Memory card.
z Camera Settings
Shutter Sound (Sound1/2/3/Off) : Allows you to select a shutter sound among three kinds
of shutter sounds or turn off the shutter sound. The sound makes you feel the sense of
taking a picture.
EV (-4/-3/-2/-1/0/+1/+2/+3/+4): You can set the EV (Exposure Value) and the preview will
look darker in lower EV and brighter in higher EV.
AE Meter (Auto/Spot/Weight/Average)
Banding (60Hz/50Hz): You can select the sampling bandwidth of the camera sensor.
When bandwidth increases, the memory size and the picture quality will increase.
Delay Timer: It allows you to take a picture with delayed timer. If you set the delay timer
at 5 sec, and press the camera key (center navigation key), it will take a picture 5
seconds later.
Cont. Shot: It allows you to take multiple continuous shots by pressing the camera key.
You can set this function off or take 1, 3, or 5 continuous shots.
z Image Setting: You can set image size and quality of your photo as following.
Image Size: 240x320, 320x240, 640x480, 800x600, 1600x1200 and 2048x1536 are
available.
Image Quality (Normal//High/Fine/Low): allows you to choose the JPEG quality. The
captured image memory size will increase if you choose higher quality.
z White Balance (Auto/Daylight/Tungsten/Fluorescent/Cloud/Incandescence)
z Scene Mode (Auto/Close-Up/Night Mode)
z Effect Setting : Allows you to set Image effect among 15 options
z Add Frame: It allows you to off or add the flame 1 to 10.
z Storage: This menu allows you to storage to Phone or Memory card.
z Restore Default: This menu allows you to restore to the camera’s default settings.
! Note : Except ‘Restore default’, all of above functions are available on the camera preview mode
by using shortcut keys.
5.2 Image Viewer
48
Page 49

You can see your photos in your phone by choosing [Image Viewer] menu in [Multimedia] menu. It will
display the photos with thumbnail, image name, and image size.
5.3 Video Recorder
This phone has a Camcorder function. You can enjoy recording video and see the saved videos (or
Movies).
z To player: By selecting this menu, you can view the saved files in the Video Player.
z Camcorder Setting
White Balance (Auto/Incandescence/Cloud/Fluorescent/Tungsten/Daylight)
EV (-4/-3/-2/-1/0/+1/+2/+3/+4): You can set the EV (Exposure Value) and the preview will
look darker in lower EV and brighter in higher EV.
Night Mode : Turn on this function in the dark place.
Banding (60Hz/50Hz): You can select the sampling bandwidth of the camcorder sensor.
When bandwidth increases, the memory size and the camcorder quality will increase.
Video Setting : You can set video size and quality of your video as following.
Video Quality (Low/Normal/High/Fine): allows you to choose the MPEG4 quality. The
recorded video memory size will increase if you choose higher quality.
File Size Limit: 95K, 195K, 295K and No Limit are available.
Recording Time Limit : 15 sec, 30 sec, 60 sec and No Limit are available.
Recording Audio : On and Off are available.
Encode Format : 3GP and Mpeg4 are available.
z Effect Setting : Allows you to set video effect among 14 options
z Storage : allows you to storage to Phone or Memory card.
z Restore Default : This menu allows you to restore to the camcorder’s default settings.
! Note : Except ‘Restore default’, all of above functions are available on the camera preview mode by
using shortcut keys.
5.4 Video Player
You can see your recording video in your phone by choosing [Video Player] menu in [Multimedia]
menu. It will display the videos with thumbnail, video name, and video size.
There are 7 options as following:
z Play: allows you to view the video in full screen.
z Forward: allows you to forward the image to Wallpaper, Screen Saver, MMS and Bluetooth.
z Rename: allows you to edit the file name.
z Delete: allows you to delete the selected file.
z Delete All Files: allows you to delete all files.
49
Page 50

z Sort: allows you to sort the file by Name, Type, Time and Size.
z Storage: allows you to storage to Phone or Memory card.
5.5 Photo Artist
You can edit the phone with this menu (Photo Artist/Image Tile/Slide Show)
5.6 Audio Player
You can listen to MP3 music files with the Audio Player.
Three ways to access to the Audio Player:
z By pressing and holding the ‘
‘ key when slider opened.
z By pressing the [Menu] soft key and select ‘Multimedia’ menu and ‘Audio Player’ sub menu.
z By pressing the [Menu] soft key and select ‘File Manager’ menu and select the ‘D:\’ drive, and
press [Option] and select “Open” to play one file at a time.
To view the music list, press [List] soft key. It will display available music list from the Phone depending
on Play List setting. To play the music, press the left or right navigation key, or press [Option] soft key
and select “Play.”
The following Options are available:
z Player Settings:
Play List (from phone/card): You can search the play list from phone or card.
List Auto Generation (On/Off): you can select whether to generate the music list automatical
ly or manually.
Repeat (One/All/Off): Set repeat option. When you select one or all, it will repeat the selecte
d file or all music files. When you select this option to off, it will play the music file one time
and stop.
Shuffle (On/Off): Set the shuffle feature on or off. This function is useful if you want to listen
to the music in random order rather than from first file to the last.
Background Play (On/Off): Set the Audio Player to play the music while you are using the p
hone other than audio player, such as menu navigation.
z Display Settings:
Skin (Skin 1/2/3): you can select the Audio Player skin depending on your taste.
Spectrum Display (Style 1/2/3): you can select the Spectrum Display style on your taste.
Lyrics Display (on/off)
z Sound Effects:
50
Page 51

Equalizer (Normal / Bass / Dance / Classical / Treble / Party / Pop / Rock): Set the Equalizer.
z Bluetooth Settings:
BT Stereo Output (on/off)
BT Stereo Headset (on/off)
5.7 Sound Recorder
With this menu, you can record sound in AMR and WAV format and use it as voice memo, ring tone,
MMS and EMS attachment.
z When there is no record file in the Sound Recorder, there are two options:
Record : Start recording
Settings : Select recording the sound in AMR and WAV format.
z If you have more than one record file, there are 8 options:
Record : Start recording
Play: when there is a file in the list, it will play the recorded sound file.
Append: Record right after the selected sound file.
Rename: Change the file name.
Delete: Delete the selected file.
Delete All: Delete all files in the sound record list.
Settings: Select recording the sound in AMR and WAV format.
Forward
To User Profile: allows you to use the sound file as a Ring Tone.
To MMS: allows you to write an MMS message with the selected sound file.
To Bluetooth: allows you to send he selected sound file by Bluetooth.
5.8 FM Radio
Listen to the FM radio. Connect the handsfree to the phone as it works as the antenna.
5.9 Schedule FM Record
You can set up the schedule to record FM radio channel automatically.
5.10 Melody Compose
With this menu, you can create an iMelody file.
5.10.1 Compose a melody
When you first use the Melody Compose, press the [Add] soft key (left)
Start composing a melody pressing the numeric keys. The following are the descriptions.
51
Page 52
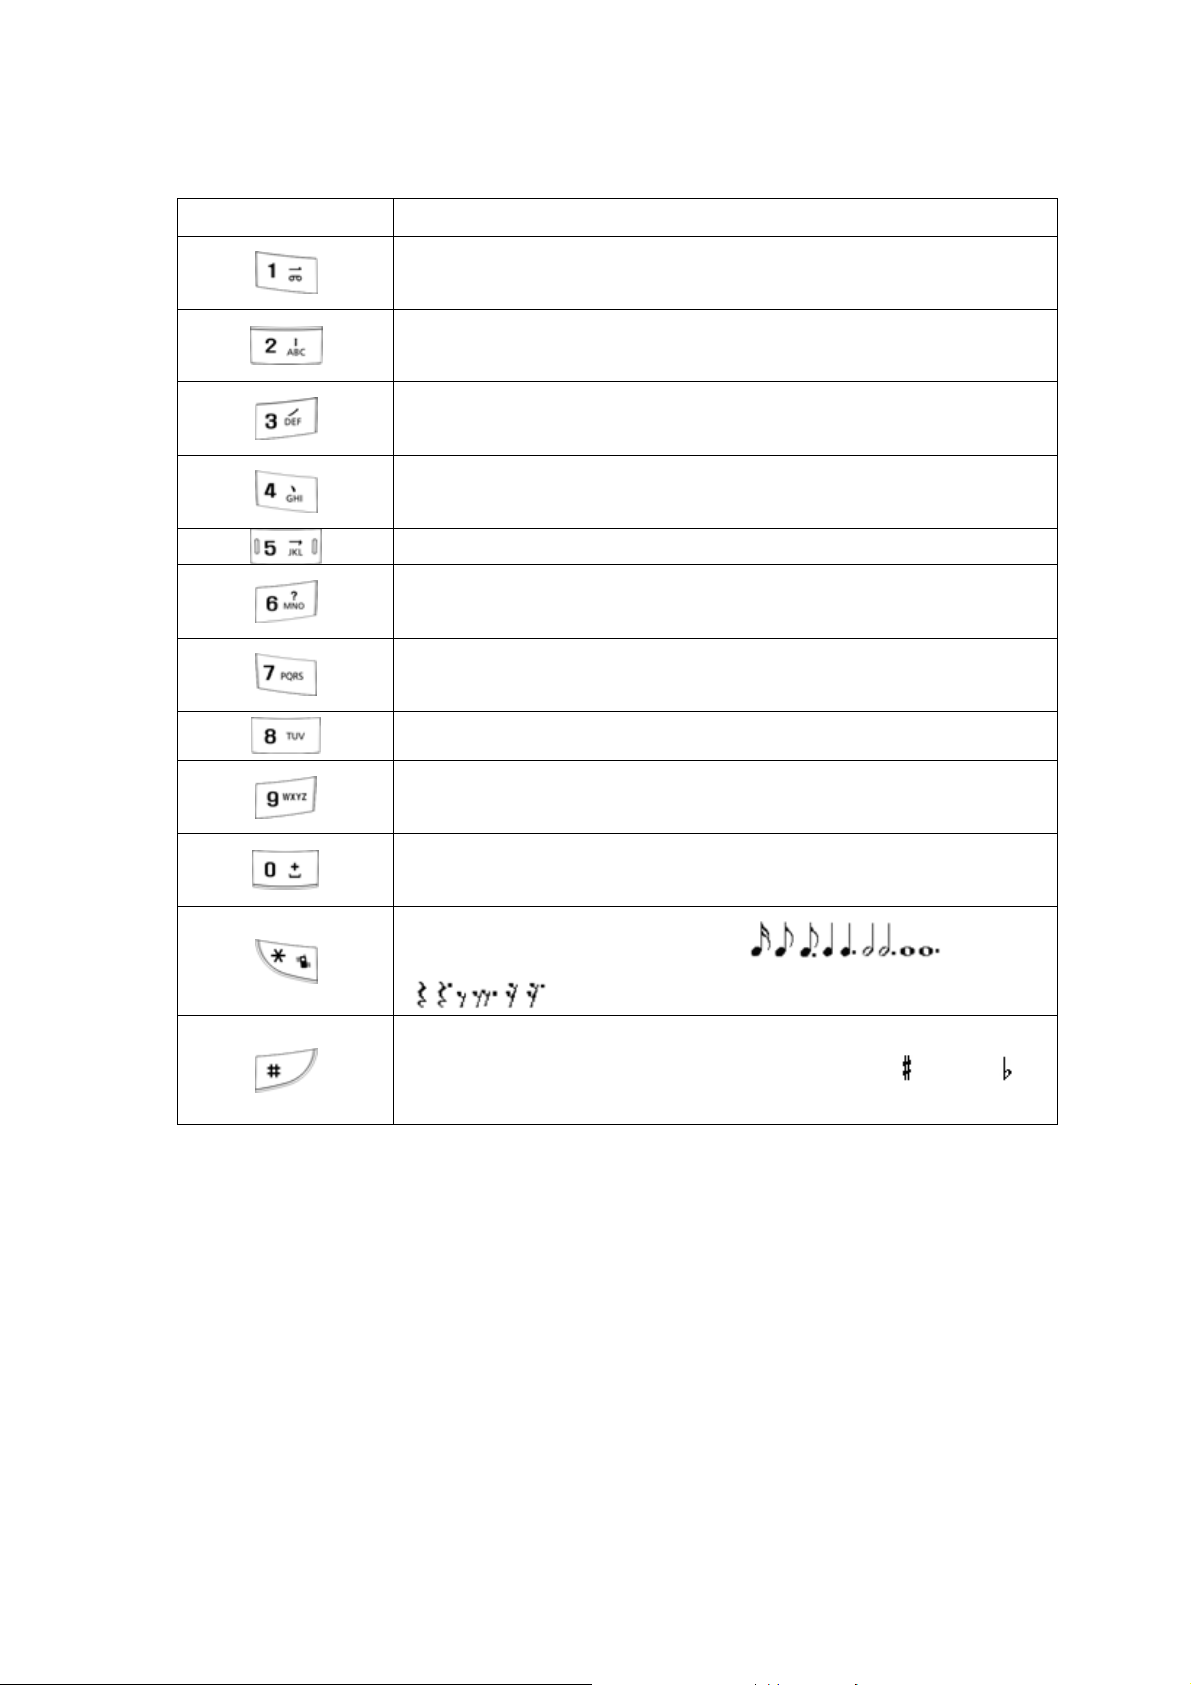
Key Description
Insert ‘Do’
Insert ‘Re’
Insert ‘Mi’
Insert ‘Fa’
Insert ‘Sol’
Insert ‘La’
Insert ‘Si’
Insert Vibration – allows the phone vibrates.
Insert Light – allows the LED lit.
Insert Rest – indicates the rest place.
Increases or decreases the note (
) and rest
(
).
Changes the accidentals. Press 1~7 and then press the sharp key; the
musical scale will be switched with between Sharp (
) / Flat ( ), if
applicable.
5.10.2 Options
There are four options while you are editing
Play: Play the composed file before you save the file.
Play Speed : Set the melody speed (Fast / Normal / Slow)
Select Instrument : Choose the instrument (Piano / Guitar / Violin / Saxophone / Steel Drums
/ Flute / Harmonica / Trumpet / Music Box / Xylophone)
Save: Save the melody
Press the [Option] soft key and select “Save.” Edit and save a file name by pressing the [Option]
52
Page 53
soft key (left) and select “Done.”
If you have more than a record file, press the [Option] soft key (left), and select ‘Add’ to start
composing a melody.
There are 7 options:
z Play: Play the selected file.
z Edit: Edit the composed music.
z Add: Compose a new music file.
z Rename: Rename the selected file.
z Delete: Delete the selected file.
z Delete All Files: Delete all files in the list.
z Forward: Forward the composed file to the following usages.
To User Profile: allows you to forward the sound file to User Profile as a Ring Tone.
To MMS: allows you to write an MMS message with the selected sound file.
To Bluetooth: allows you to send he selected sound file by Bluetooth.
6. Fun & Games
6.1 Games
This phone has 3 games for your enjoyment.
6.1.1 Puzzle
This game is puzzle game.
There are scattered images at the beginning of the game. You have to make them the original
image.
Menu Screen Game Screen
* Key Description
Key Actions
53
Page 54
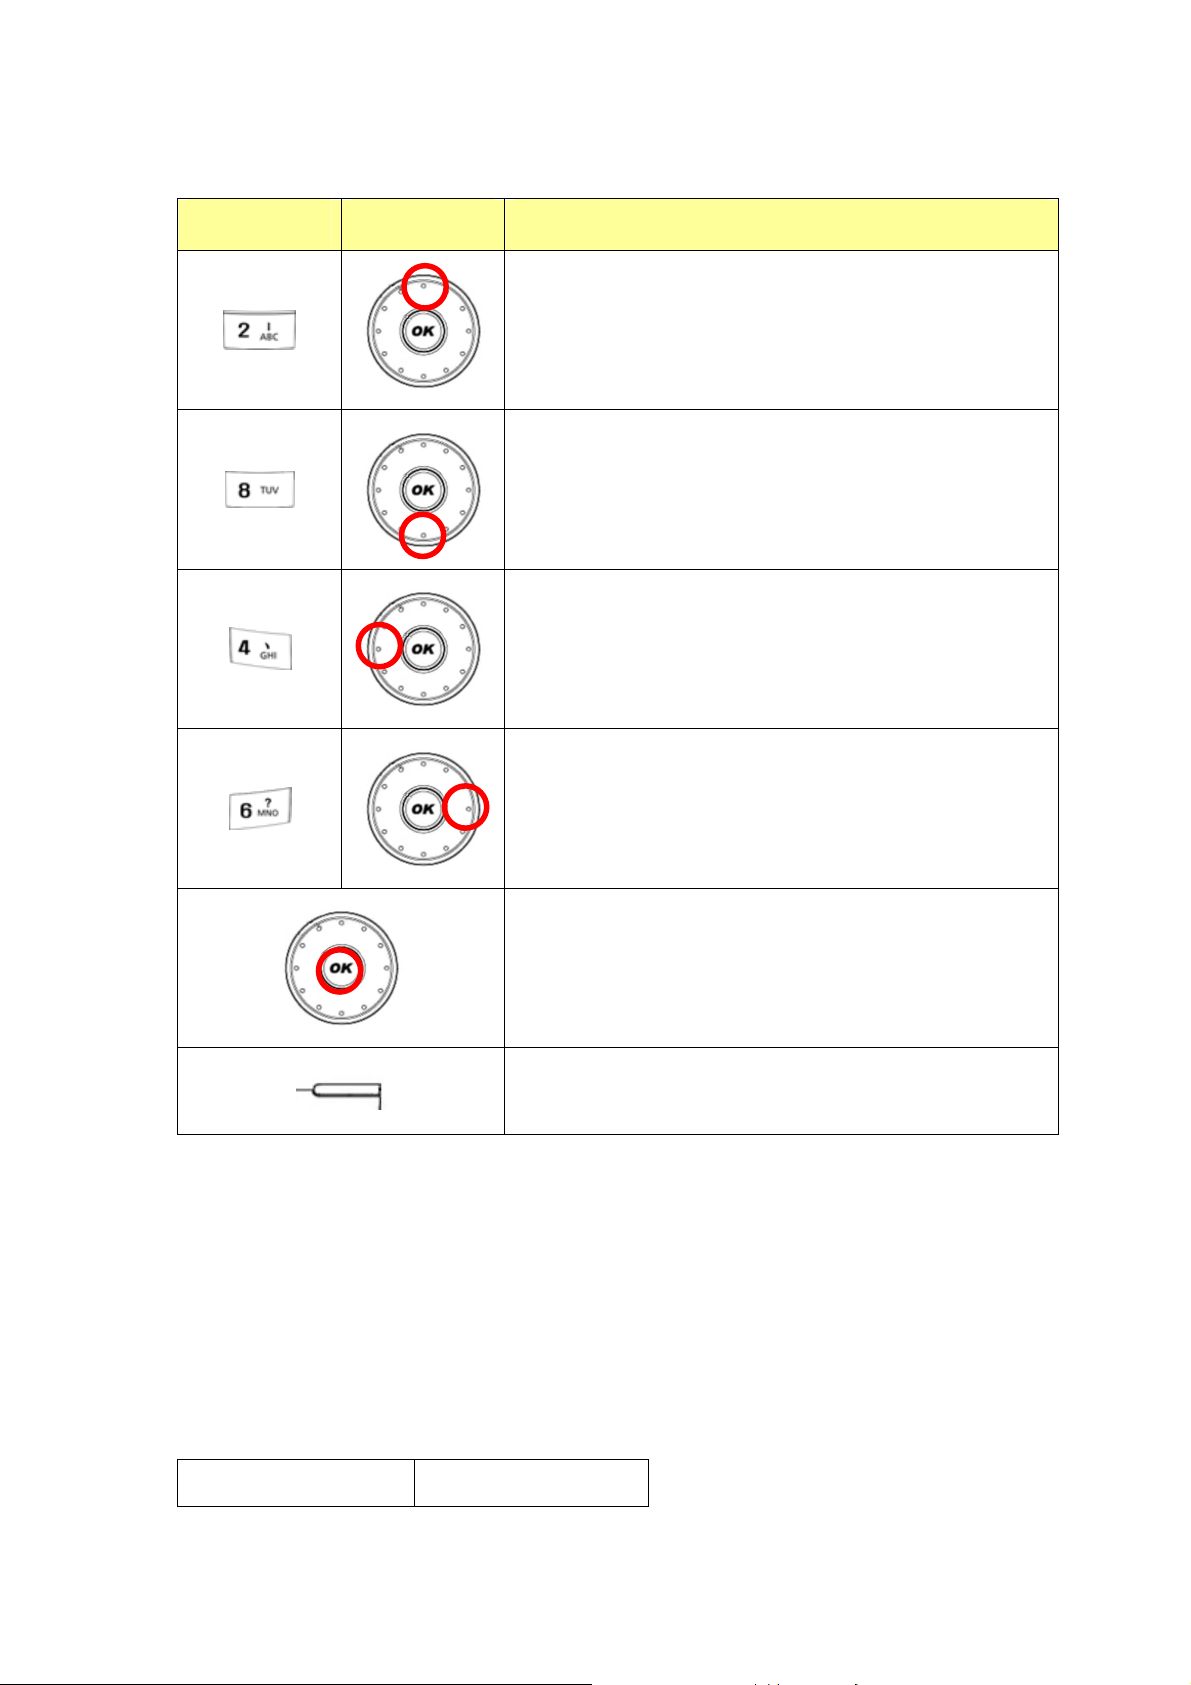
Numeric keys Navi-keys
Make a picture go upward
Make a picture go downward
Make a picture go leftward
Make a picture go rightward
Pause the game
Quit the game and back to game menu
6.1.2 Magicsushi
Remove sushi before time runs out by the following ways:
z Make three or more sushi with the same pattern align together vertically or horizontally by
swapping one sushi with any neighboring one.
z Click on the following three special blocks:
Star blocks: Randomly remove sushi with a certain pattern.
Cross block: Remove the whole row and whole column it resides.
Ball block: Remove 8 sushi surrounding it.
Menu Screen Game Screen
54
Page 55
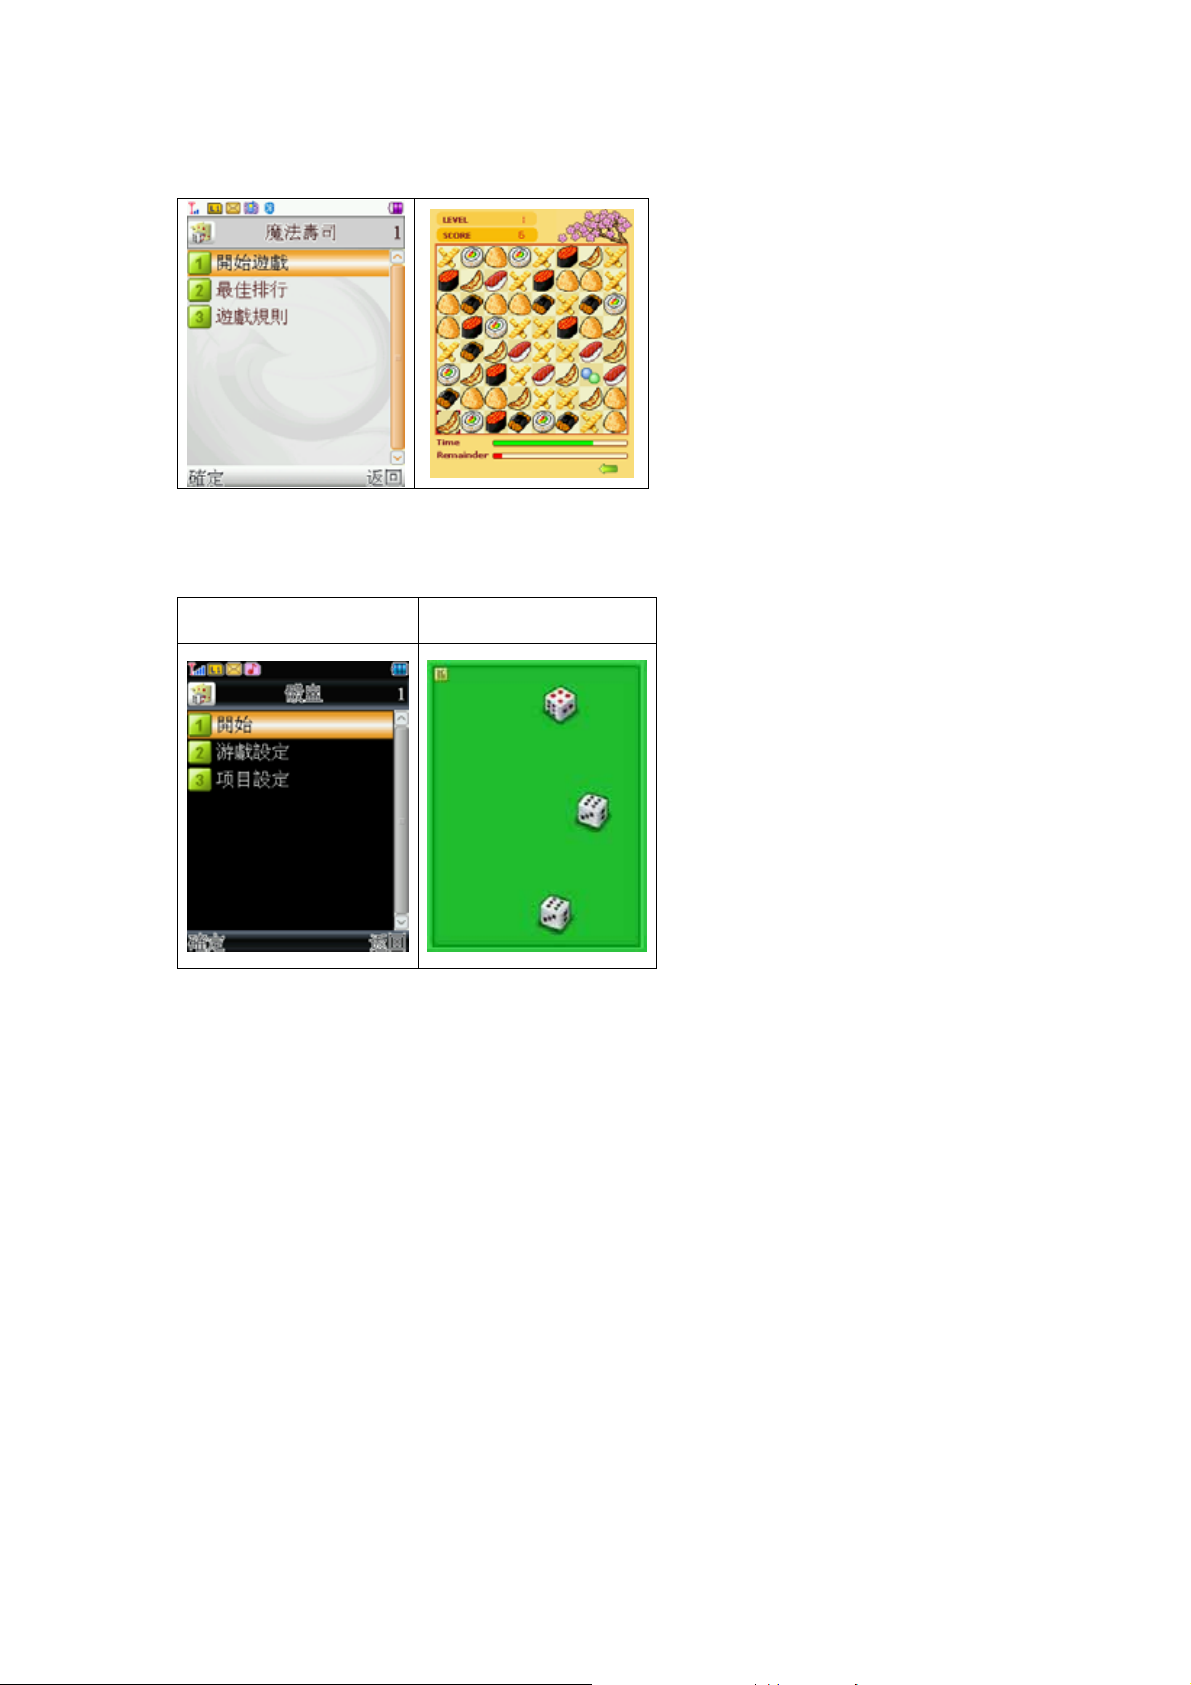
6.1.3 Dice
You can play the dice with your friends to compare small or large.
Menu Screen Display Screen
6.1.4 Game Setting
You can select the game setting. This will be applied to the game plays.
Press the left or right navigation key to select the setting and press the [Ok] soft key to save the
setting.
z Game Audio (On/Off): allows you to set the audio sound on or off while you are playing a
game.
z Game Vibration (On/Off): allows you to set the vibration on or off while you are playing a
game.
6.2 Bluetooth
The Bluetooth function makes wireless connection to other Bluetooth devices possible.
6.2.1 Power
Turn on the Bluetooth function to communicate with other devices.
55
Page 56

6.2.2 Inquiry Audio Device
Search for available devices, and add Bluetooth devices to your phone to communicate with.
6.2.3 My Device
You can select a device from the visible list, and also can research, delete and rename it.
6.2.4 Active Device
6.2.5 Settings
z Visibility:Choose to make your phone visible to other Bluetooth devices or not.
z Change Device Name:Enter a name for your phone to be shown as when other devi
ces find it.
z Authentication:Enter a passcode to set up a secure link between your phone and the
device. Enter the same passcode on the device when prompted.
z Audio Path:You can transfer the sound for calls when using a Bluetooth handsfree.
z FTP Setting:You can set up the Shared Folder and Access Right.
6.2.6 About
Show the detail about Bluetooth Service List.
7. Organizer
You can use the Tools menu as your alarm, calendar, to do list, world clock, calculator, unit converter,
and currency converter.
7.1 Calendar
The calendar helps you to keep track of memos, calls that you need to make, anniversaries, and To-
Do.
First, choose the date you want to view by moving the navigation keys. Move to the previous or the
next month by pressing the side volume keys located on the right side of the phone, and then press
the [Option] soft key (left).
There are two Options as following:
56
Page 57

7.1.1 View Tasks
Allows you to view the task list and add task(s) on the selected date.
From the Task List, there are five Options available:
z View: allows you to view the details of the selected task.
z Add: allows you to add a task.
z Edit Task: allows you to edit the selected task.
z Delete Task: allows you to delete the selected task.
z Delete All: allows you to delete all tasks listed on the selected date.
7.1.2 Jump To Date
Allows you to jump to the date you input in the date box (YYYY / MM / DD).
7.2 To-Do List
You can view all saved tasks. It displays a task or tasks saved in the Organizer. To-Do List shows the
notes of the tasks from the oldest task to the latest task.
z View: allows you to view the details of the selected task.
z Add: allows you to add a task.
z Edit Task: allows you to edit the selected task.
z Delete Task: allows you to delete the selected task.
z Delete All: allows you to delete all tasks listed on the selected date.
7.3 Alarm
This menu allows you to set the alarm to ring at a specific time. You can save up to 3 alarms.
The following Edit Alarm options are available.
z Alarm (On/Off)
z Time (HH:MM): input the hour in 24 hour scale and minute.
z Alarm melody (None/MIDI 1 to 15): select the alarm melody.
z Repeat (Once / Everyday / Days (S, M, T, W, T, F, S) ): select the repeat characteristics of the tas
k.
After you completed editing the options, press the [Done] soft key (right) to save the changes.
To stop the alarm when it rings, press the [Stop] soft key (left) to stop the alarm or press the [Snooze]
soft key (right) to snooze the alarm so that it will remind you again in four minutes.
7.4 World Clock
57
Page 58
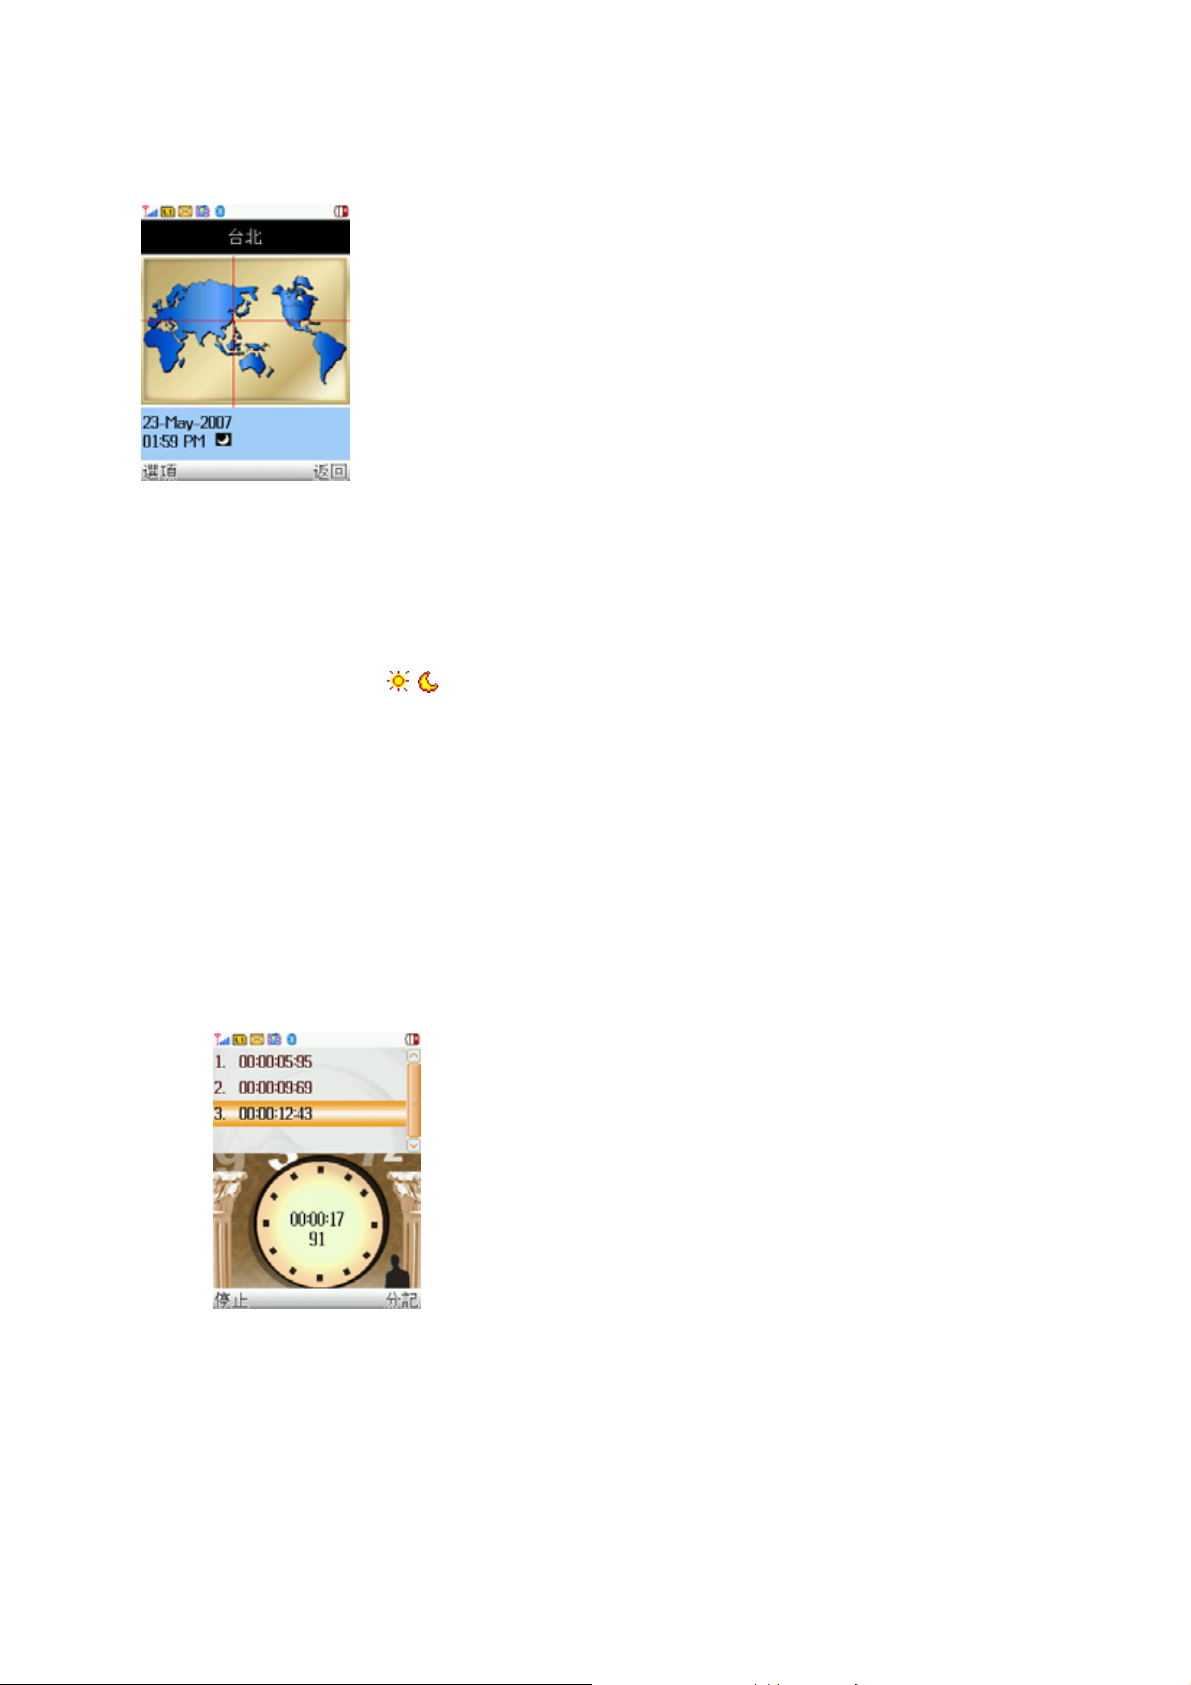
This feature allows you to check the current time for Greenwich Mean Time (GMT) and major cities
around the world, using the right and left navigation keys.
The screen shows the;
z City name
z Current date and time
z Day or Night icon (
)
To set the time zone of your location, select the city corresponding to your time zone by pressing the
left and right navigation keys. The phone will display the local date and time.
7.5 Stopwatch
This is a tool to measure time for various sports, running, swimming races, or car races.
7.5.1 Typical Stopwatch
There are Split Timing and Lap Timing stopwatch functions in this typical stopwatch menu.
z Split Timing
Split Timing is useful for measuring each player’s record from start. The timing will be recorded
earliest to latest.
Press [Split] to measure the timing and press again for next timing, and so on.
Press [Stop] when you are done measuring the timing. If you want continue, press the
[Resume] soft key. You can record up to 20 measurements per a record.
58
Page 59

It will ask if you want to save. Press [Yes] to save.
Edit the name for the record. Press [Option] and select “Done” to save.
You can view the record by selecting View Record and press the [Option] soft key (left)
and select “View.”
z Lap Timing
You can use the Lap Timing function to measure each lap record.
Press [Lap] to measure the timing and press again for next lap timing, and so on.
Press [Stop] when you are done measuring the timing. If you want continue, press the
[Resume] soft key. Repeat this step for the other stopwatches. You can record up to 20
measurements per a record.
It will ask if you want to save. Press [Yes] to save.
Edit the name for the record. Press [Option] and select “Done” to save.
You can view the record by selecting 11.5.1.3 View Record and press the [Option] soft
key (left) and select “View.”
z View Record
When you save the timing records from the Split Timing and the Lap Timing, it will be saved
and listed in this menu.
Press the [Option] soft key and select from the following options:
View: allows you to view the timing record.
Press the up and down navigation keys to scroll among the records.
Delete: allows you to delete the selected record.
Delete All: allows you to delete all records.
7.5.2 nWay Stopwatch
59
Page 60
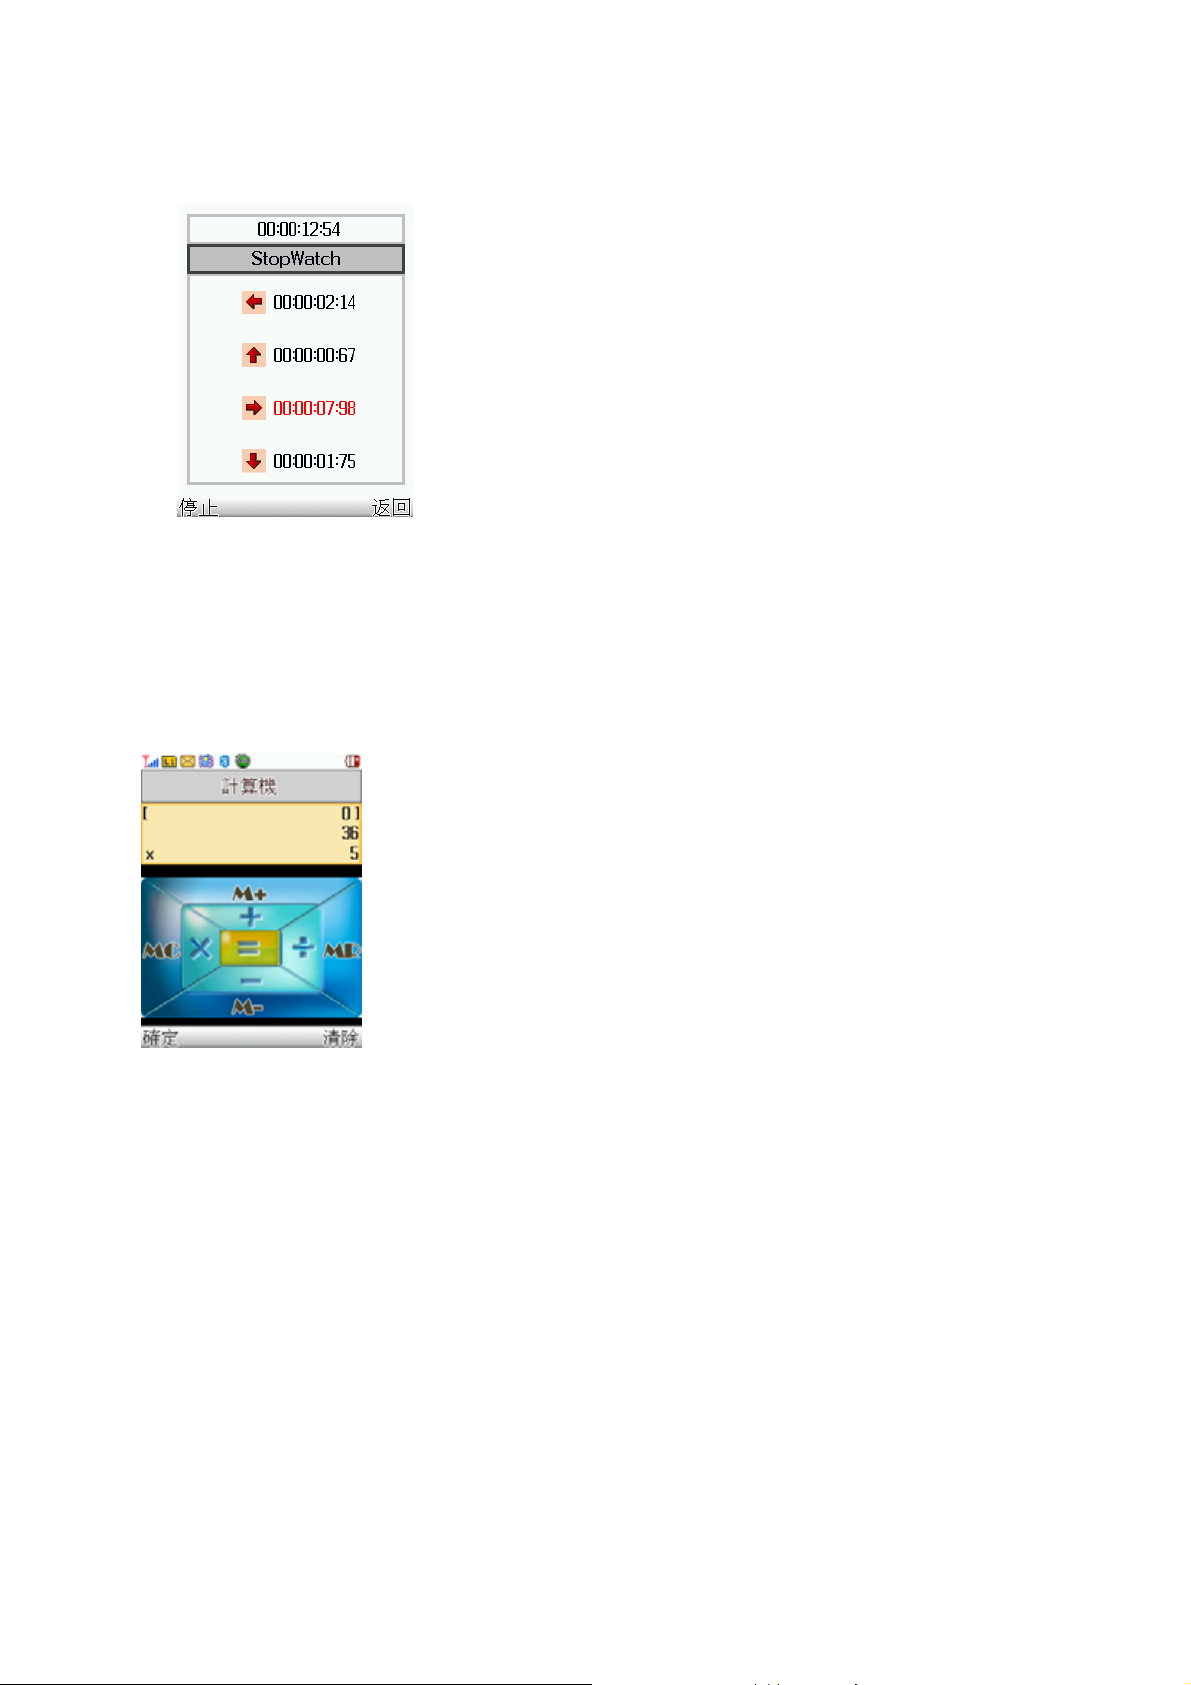
You can use 4-way navigation keys for measuring times for each direction.
When you press a navigation key, the direction stopwatch will start timing, and other direction
stopwatch will pause the timing. When you press the paused direction’s navigation key, the
stopwatch will resume timing.
7.6 Calculator
Using this feature, you can use the phone as a calculator. The calculator performs the basic arithmetic
functions and memory functions; Addition, Subtraction, Multiplication and Division; Add to Memory,
Subtract to Memory, Memory Clear and Memory Read.
To perform a calculation:
z Enter the first number using the numeric keys.
z Press the up navigation key once to use [ + ] (add), and twice to use [M+] (add to the
previous result).
z Press the navigation key down to use [ - ] (subtract), and twice to use [M-] (subtract to the
previous result).
z Press the right navigation key once to use [ x ] (multiply), and twice to use [MC] (erase the
previous result)
60
Page 61
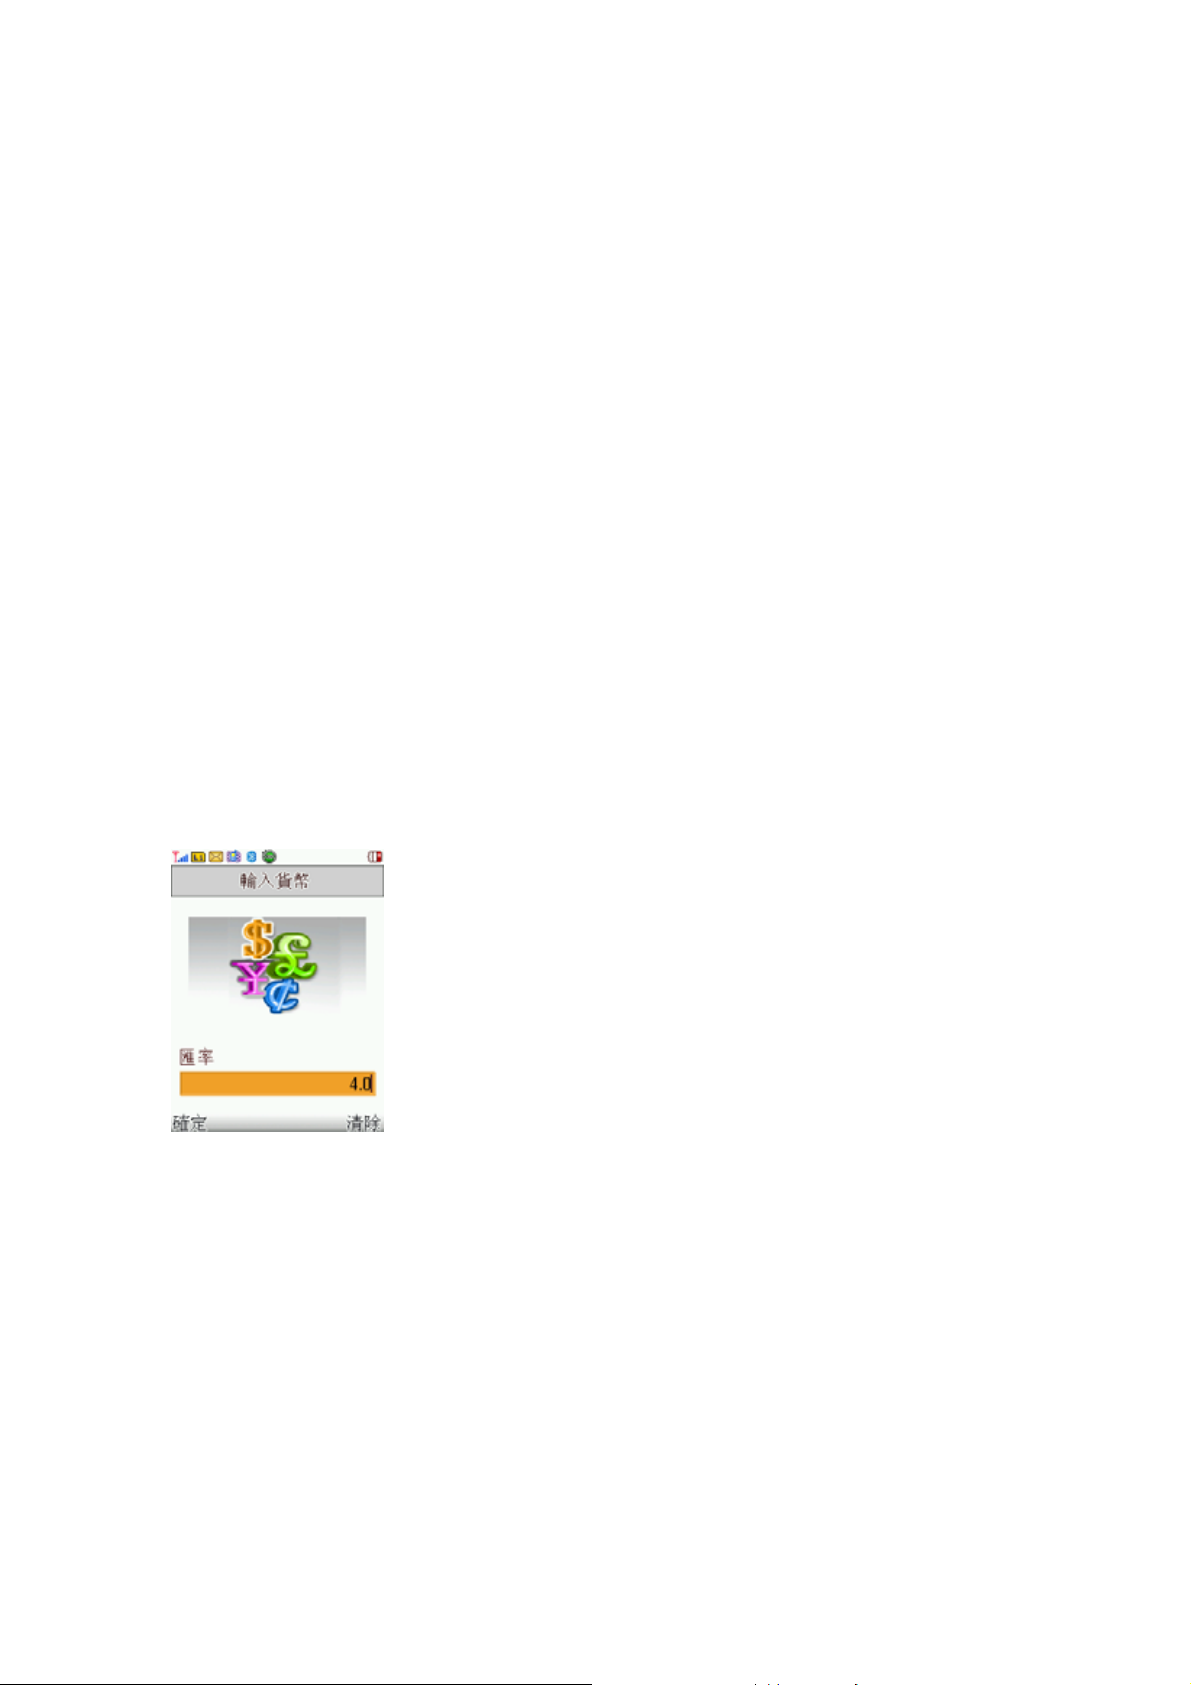
z Press the left navigation key once to use [ / ] (divide), and twice to use [MR] (memory read).
z Press the sharp key (#) to enter a [ . ] (Decimal point).
z Enter the next number.
Repeat Steps 2 to 3 as many times as required.
To calculate the result, enter the [Ok] soft key.
When you have finished, press the [Back] soft key (right) or the End key to exit.
7.7 Unit Converter
You can convert from one type of unit to another with this function.
To convert a value:
z Select the weight or length options.
z Press the left or right navigation keys and select the type of conversion to be performed.
(Example: Kg <-> Pound)
z Using the up and down navigation keys, place the cursor on the desired unit
z Input the value to be converted, and then press [Ok] to get the result.
z You can enter a decimal point (.) using the # key.
7.8 Currency Converter
You can convert currency if you know the exchange rate.
To convert currency:
z Input a currency rate.
z Press the [Ok] soft key (left).
z Press the left or right navigation keys to choose how you want the currency to be calculated.
( xxx:1 or 1: xxx)
z Press down the navigation key and input the local currency value.
z Press the [Ok] soft key (left) to get the result.
If you want to convert other local amount, press the up navigation key and select the currency convert
type ( xxx:1 or 1: xxx), and repeat the 4) and 5). If you want to convert with other currency rate, press
61
Page 62
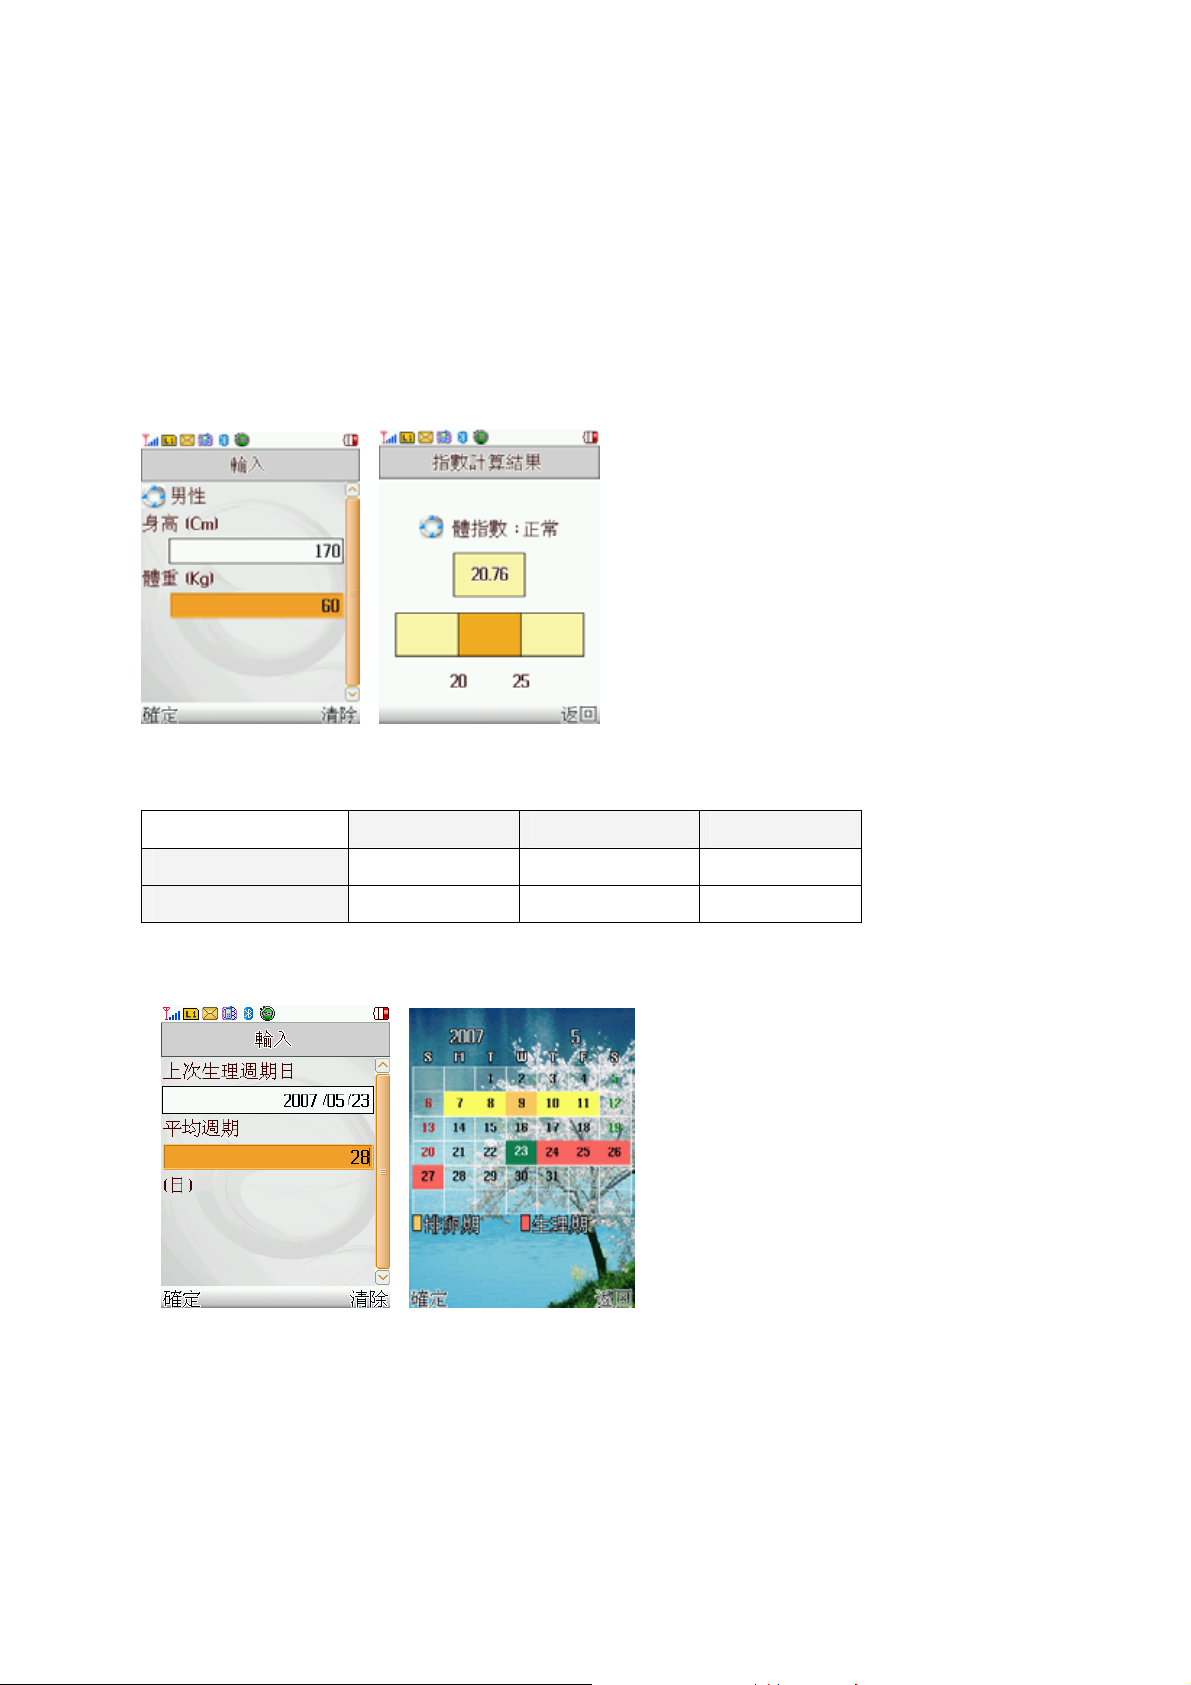
the [Back] soft key.
7.9 Health
With the Health menu, you can check your health.
7.9.1 BMI
BMI is the Body Mass Index. BMI is an index for your health, keeping in the Normal range is
recommended for your health. Low BMI and high BMI both are critical for the health.
Thin Normal Fat
Female ~ 18 18 ~ 23 23 ~
Male ~ 20 20 ~ 25 25 ~
7.9.2 Menstrual
Input the information as following:
z Last Mens Date
z Average Period
Press the [Ok] soft key to get the menstrual calendar.
The calendar will display P.P and Menses periods as following.
62
Page 63
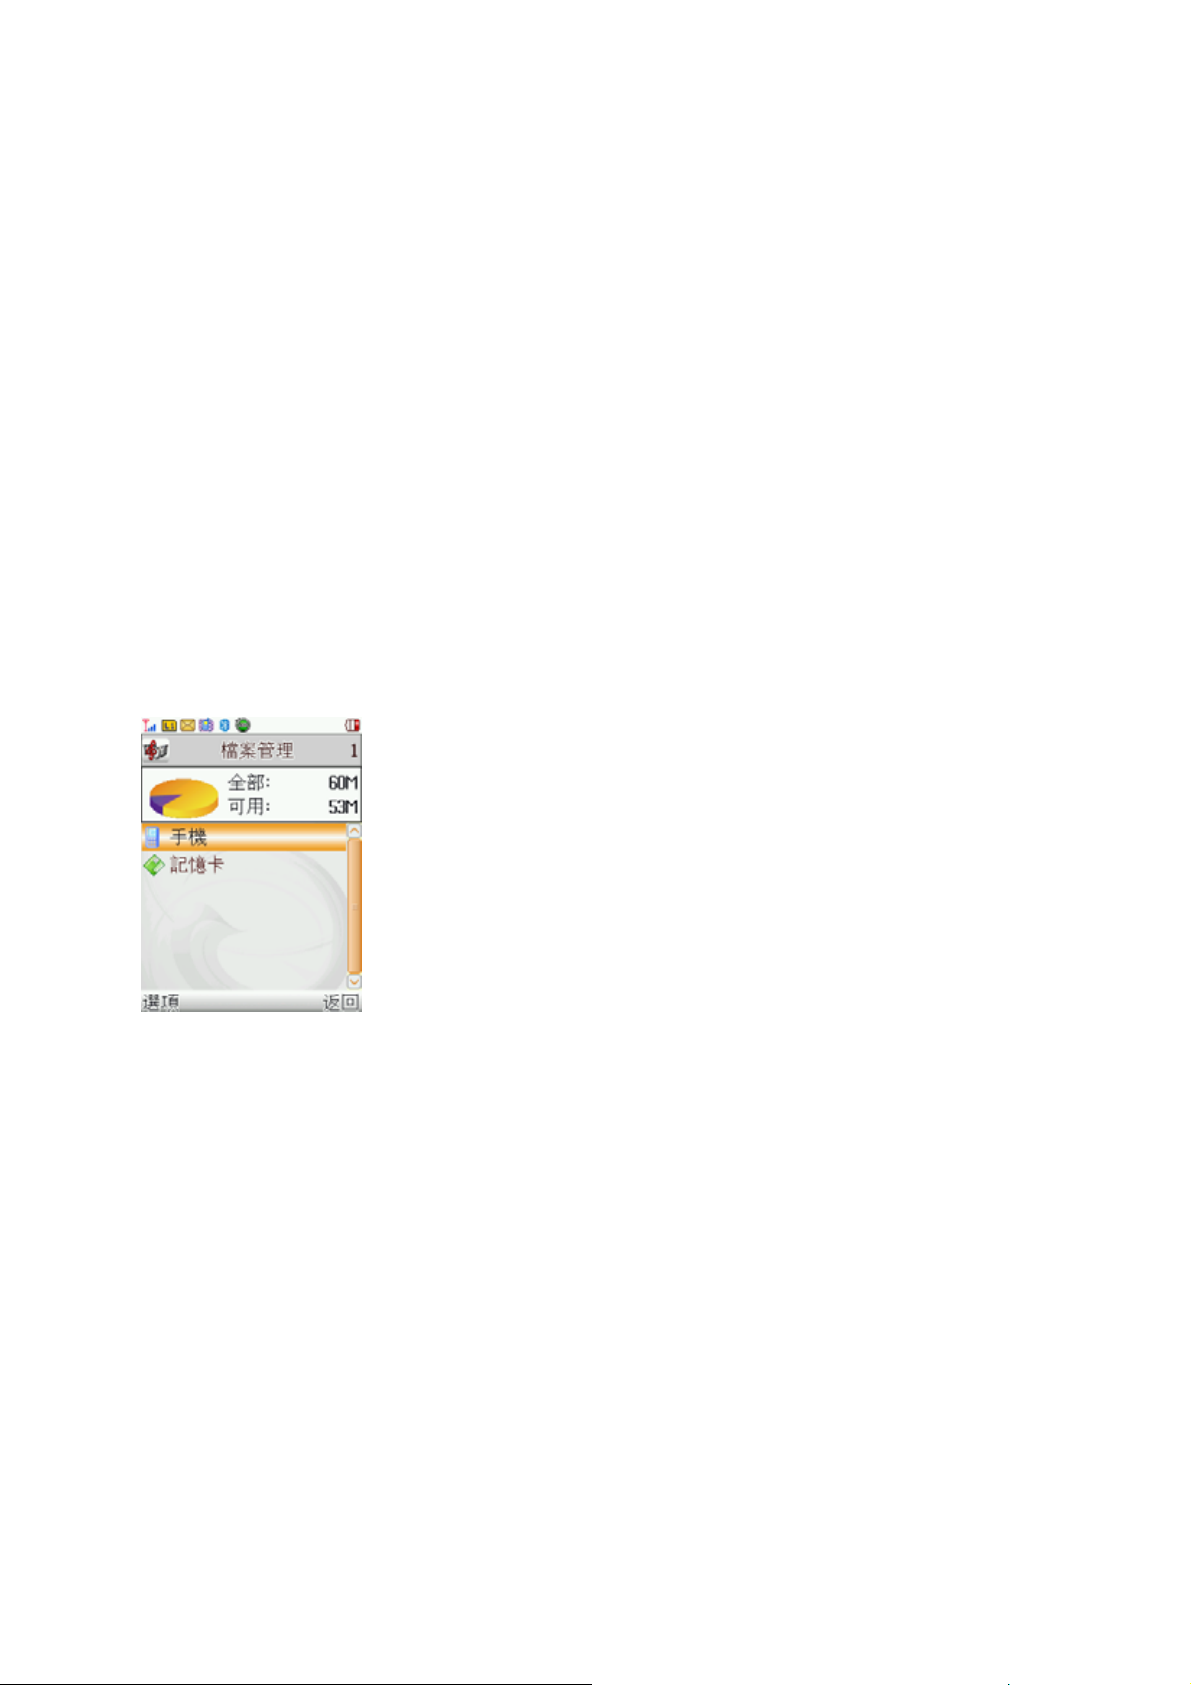
P.P (yellow color): indicates for the possible periods to get pregnant.
Menses (orange color): indicates your menstrual periods.
Press the side volume keys to scroll through months, and press the navigation keys to
navigate through dates.
When you press the [Ok] soft key on the selected date, it will calculate the possibility of pregnancy.
7.10 E-Book Reader
This menu allows you read E-Book on your mobile phone. Txt and pdb file in [Ebook] folder can
be read with E-Book Reader.
8. File Manager
This menu allows you to see the total memory used and free space in the storage. Put
8.1 Drive
←Total Memory Status Graphic
←Drive Selection List
There are options as following
z Open : Open the drive to see the folder or files in the drive.
z Create Folder : Create a folder in the drive.
z Format : Format the drive.
! Note : All of data in the drive will not be recovered after you format the drive.
8.2 Folder
63
Page 64
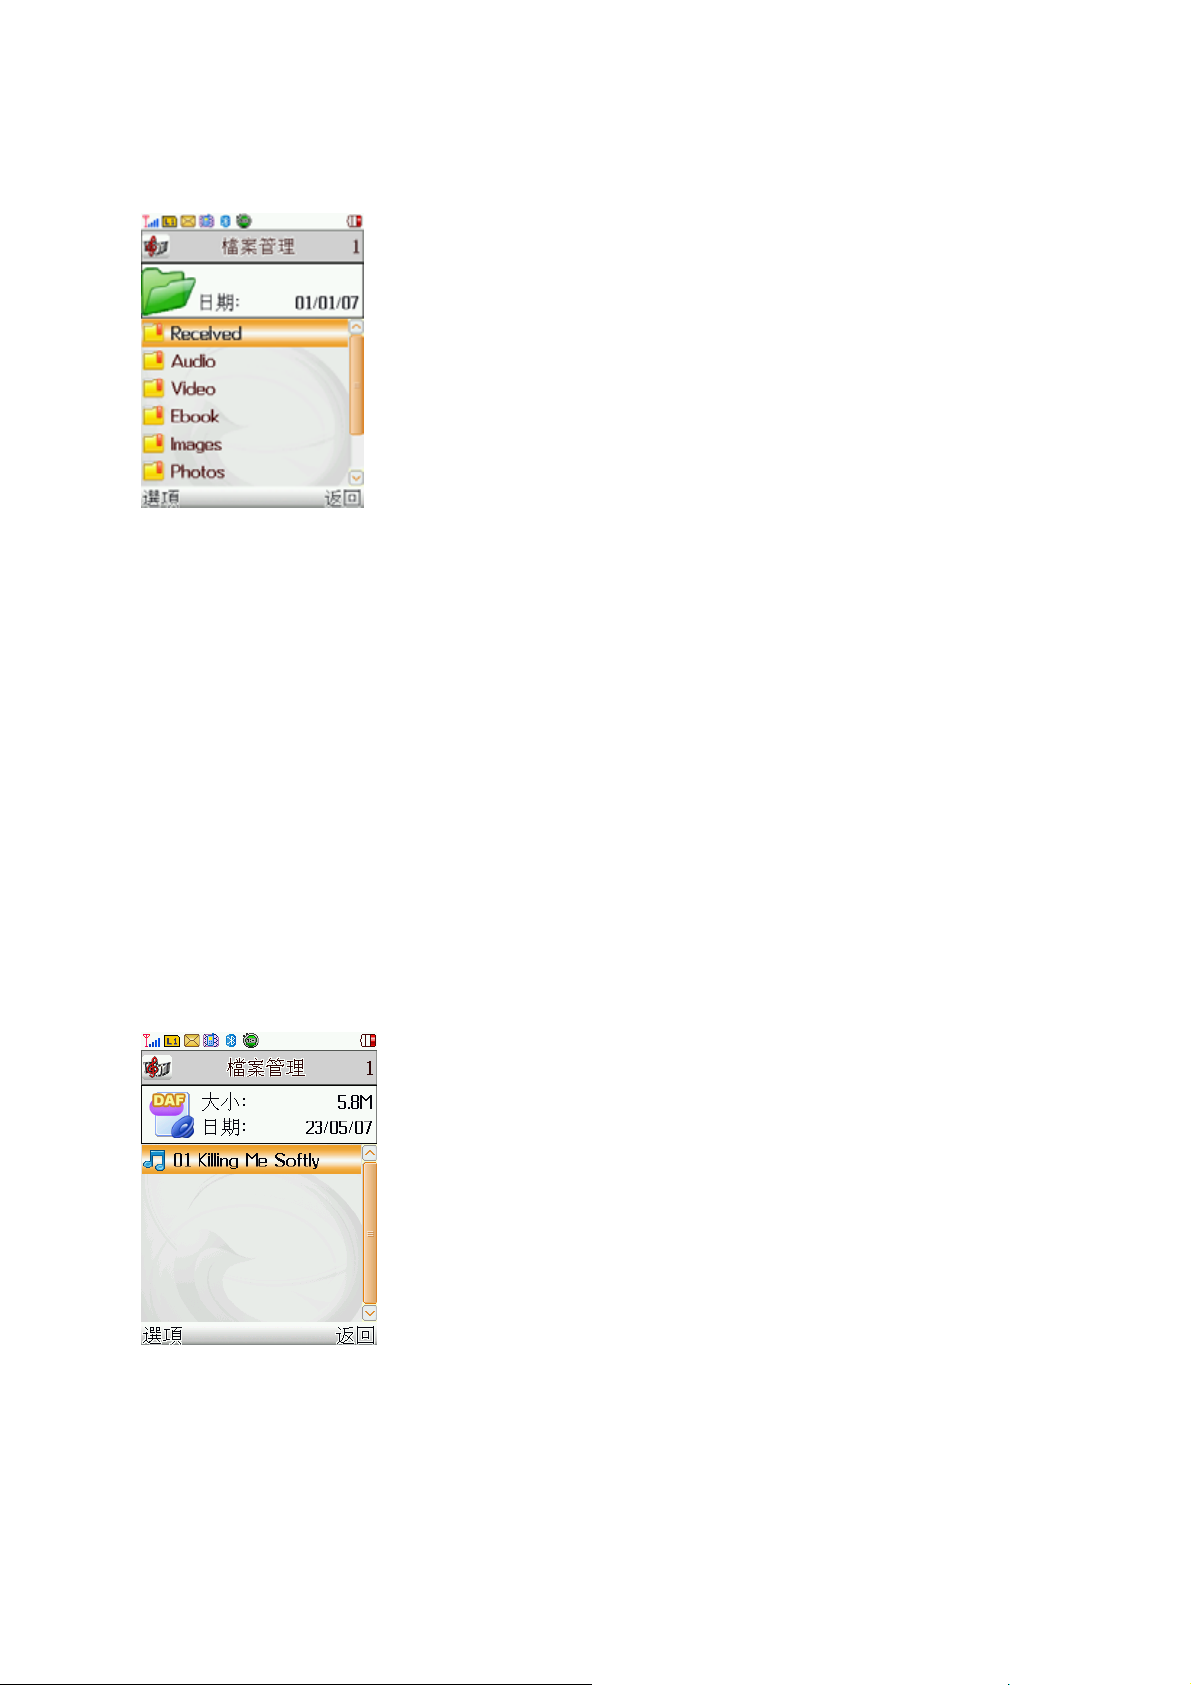
←Current Folder Information (Date)
←Folder Selection List
There are options as following
z Open : Open the folder to see the files in the folder
z Create Folder : Create a sub-folder in the folder
z Rename : Rename the selected file.
z Delete : Delete the folder
z Sort : There are five sorting ways as follows
By Name
By Type
By Time
By Size
None
8.3 File
←Current File Information (Date & Size)
←File Selection List
There are options as following
z Play or View : Play a sound file or view an image or photo file.
z Edit : Edit image or photo file. (Just Photo file has edit option)
64
Page 65

Auto Resize
Main LCD Clip
z Forward
Sound File Image or Photo File
To User Profile: allows you to use the
sound file as a Ring Tone=> In case of
Sound File
To MMS: allows you to write an MMS
message with the file.
To Bluetooth: allows you to send he
selected sound file by Bluetooth.
z Detail : See the detail information (Data & Size)
z Rename : Rename the selected file.
z Copy : Copy the file to the other folder
z Move : Move the file to the other folder
z Delete : Delete the selected file.
z Delete All Files : Delete all files in the list.
z Sort : There are five sorting ways as follows
By Name
To Wallpaper : Set the image as an wallpaper
To Screen Saver : Set the image as a screen
To Phonebook : Set the image (In case of
To MMS: allows you to write an MMS
To Bluetooth: allows you to send he selected
saver
under 20Kilobytes)
message with the file.
sound file by Bluetooth.
By Type
By Time
By Size
None
9. Services
This menu allows you to access WAP service and Data Account set-up.
You can connect to WAP site by this phone, and use the services provided by the sites. The WAP
browser works as Internet browser of PC.
! Note : If you use a SIM card that provides additional services, the GSM Access menu displays. For d
etails, please see your SIM card instructions.
9.1 Homepage
When you choose [Homepage] menu, WAP browser opens the main page of home site that you had
activated among the sites in [Profile].
65
Page 66

9.2 Bookmarks
You can make bookmark data in your phone. And, you can connect to the site directly.
There are 5 options as following.
z Connect : Connect to the bookmarked WAP page
z Edit: Edit the name and URL of the selected entry
z Delete: Delete the selected entry
z Delete All: Delete all entry
z Add Bookmark: Add new entry
9.3 Recent Pages
When you choose [Recent Pages] menu, WAP browser opens the latest WAP page.
9.4 Enter Address
If you know the URL of the site, you can go to the site directly by inputting the URL.
9.5 Settings
This option allows you to set the WAP settings. There are five profiles of sites in this phone. You can
activate one of them as a home site and change or set each profile.
! Note : The available number of profiles are varies on your country)
There are 6 options as following.
z Edit Profile: Shows the name of selected profile and you can edit the profile(s).
z Browser Options: Time out, Show Image
z Service Message: On/Off
z Clear Cache: clears the most recent site files that you have downloaded in the temporary
memory.
z Clear Cookie: deletes cookies in the memory.
z Trusted Certificates
B. Safety Information
For the efficient and safe operation of your phone, observe these manual-lines.
1. Everyday Use of Your Phone
For normal operating position, hold your phone as you would any other telephone, with the antenna
pointed up and over your shoulder.
66
Page 67

Do not touch the antenna unnecessarily when your phone is in use, as this will affect call quality and
may cause the phone to operate at a higher power level than otherwise needed.
As with any other radio transmitting equipment, you are advised that for the satisfactory operation of
your phone and for your own safety, you should use your phone only in the normal operating position.
2. Using Your Phone in a Vehicle
Safety comes first, and is the ultimate responsibility of the driver. Please:
Give full attention to driving – driving safely is your first responsibility.
Use Hands-free Kit, if available.
If you have those kits make sure it is done pre-programmed numbers where possible, and keeping
calls brief and to a minimum.
If you don’t have a Hands-free Kit, pull off the road and park your vehicle before making or answering
a call in driving conditions so require.
3. Non-ionizing Radiation (exposure to Radio Frequency Signals)
Your phone is a low power radio transmitter and receiver. When it is on, it receives and also sends the
radio frequency (RF) signals. Most modern electronic equipment is shielded from RF signals. However,
certain electronic equipment may not be shielded against the RF signals from your mobile phone. RF
signals may affect improperly installed or inadequately shielded electronic systems in motor vehicles.
Consult your vehicle manufacturer and the manufacturer of any equipment that has been added to the
vehicle.
4. Pacemakers
The Health industry Manufacturers Association recommends that a minimum separation of six inches
be maintained between a mobile phone and a pacemaker to avoid potential interference with the
pacemaker. Users with pacemakers:
Always keep your phone at least 20 cm (6inches) from your pacemakers when the phone is switched
on.
Do not carry your phone in your breast pocket.
Use the ear opposite the pacemakers to minimize the potential for interference.
Switch off your phone immediately if you suspect that interference is being caused.
5. Hearing Aids
Some mobile phones, including your mobile phone, may interfere with certain hearing aids. In the
event of such interference you may consult the hearing manufacturer to discuss alternatives.
67
Page 68

6. Other Medical Devices
If you use any other medical devices, please consult a physician or the manufacturer of the medical
devices to determine if they are adequately shielded from external RF energy. Your physician may be
able to assist you in obtaining this information. Always check the regulations of the healthcare facilities,
which generally request that all mobiles are switched off on entry.
7. Operating Environment
Remember to follow any special regulations in force in any area, and always turn off your phone
wherever it is forbidden to use it, or when it may cause interference or danger.
8. Aircraft Safety
FCC regulations prohibit using your phone while in the air. Switch off your phone before boarding an
aircraft.
9. Explosive Atmospheres and Materials
Turn your phone off and do not remove the battery when in any area with a potential explosive
atmosphere and obey all signs and instructions. You must observe restrictions on the use of radio
equipment in fuel depots; below deck on boats; fuel or chemical transfer or storage facilities; areas
where the air contains chemicals or particles, such as grain, dust, or metal powders; areas with signs
about explosive atmospheres or where blasting operations are in progress; any other areas where you
would normally be advised to turn off your vehicle engines.
10. For Vehicle Equipped with an Air Bag
Al air bag inflates with great force. Do not place objects, including both installed and portable wireless
equipment, in the area over the air bag or in the air bag development area. If in-vehicle wireless
equipment is improperly installed and the air bag inflates, serious injury could result.
11. Battery Charging
Do not charge the phone without the battery in place.
68
 Loading...