

UNIVERSAL
PocketPCPocketPCPocketPC
USER GUIDE
Energy Saver Windows PC Stick with IPTV add-on

Table of Content:
Ø Product Overview ……………………………………………………………………………… I
Ø Product Descripon…………………………………………………………………………….II
Ø How to Connect using HDMI Cable……………………………………………………..III
o How to Connect to a Monitor……………………………………………………(a)
o How to Connect to any Branded TV…………………………………………..(b)
o How to Connect to a PROJECTOR……………………………………………… (c)
Ø Powering the Device…………………………………………………………………………..IV
o Starng the Device for the first me…........................................(a)
o Connect to a Wireless Network…………………………………………………(b)
Ø Connect a Keyboard and Mouse………………………………………………………….V
Ø USB 2.0 Port………………………………………………………………………………………..VI
Ø MicroSD Card Slot……………………………………………………………………………….VII
Ø Security and Anthe Lock…………………………………………………………………VIII
o Hardware Lock…………………………………………………………………………..(a)
o Operang System Recovery……………………………………………………….(b)
o Bios Update and Drivers…………………………………………………………….(c)
Ø FAQ
UNIVERSAL POCKETPC USER GUIDE {GPELECTRONIC INC©2016}
02
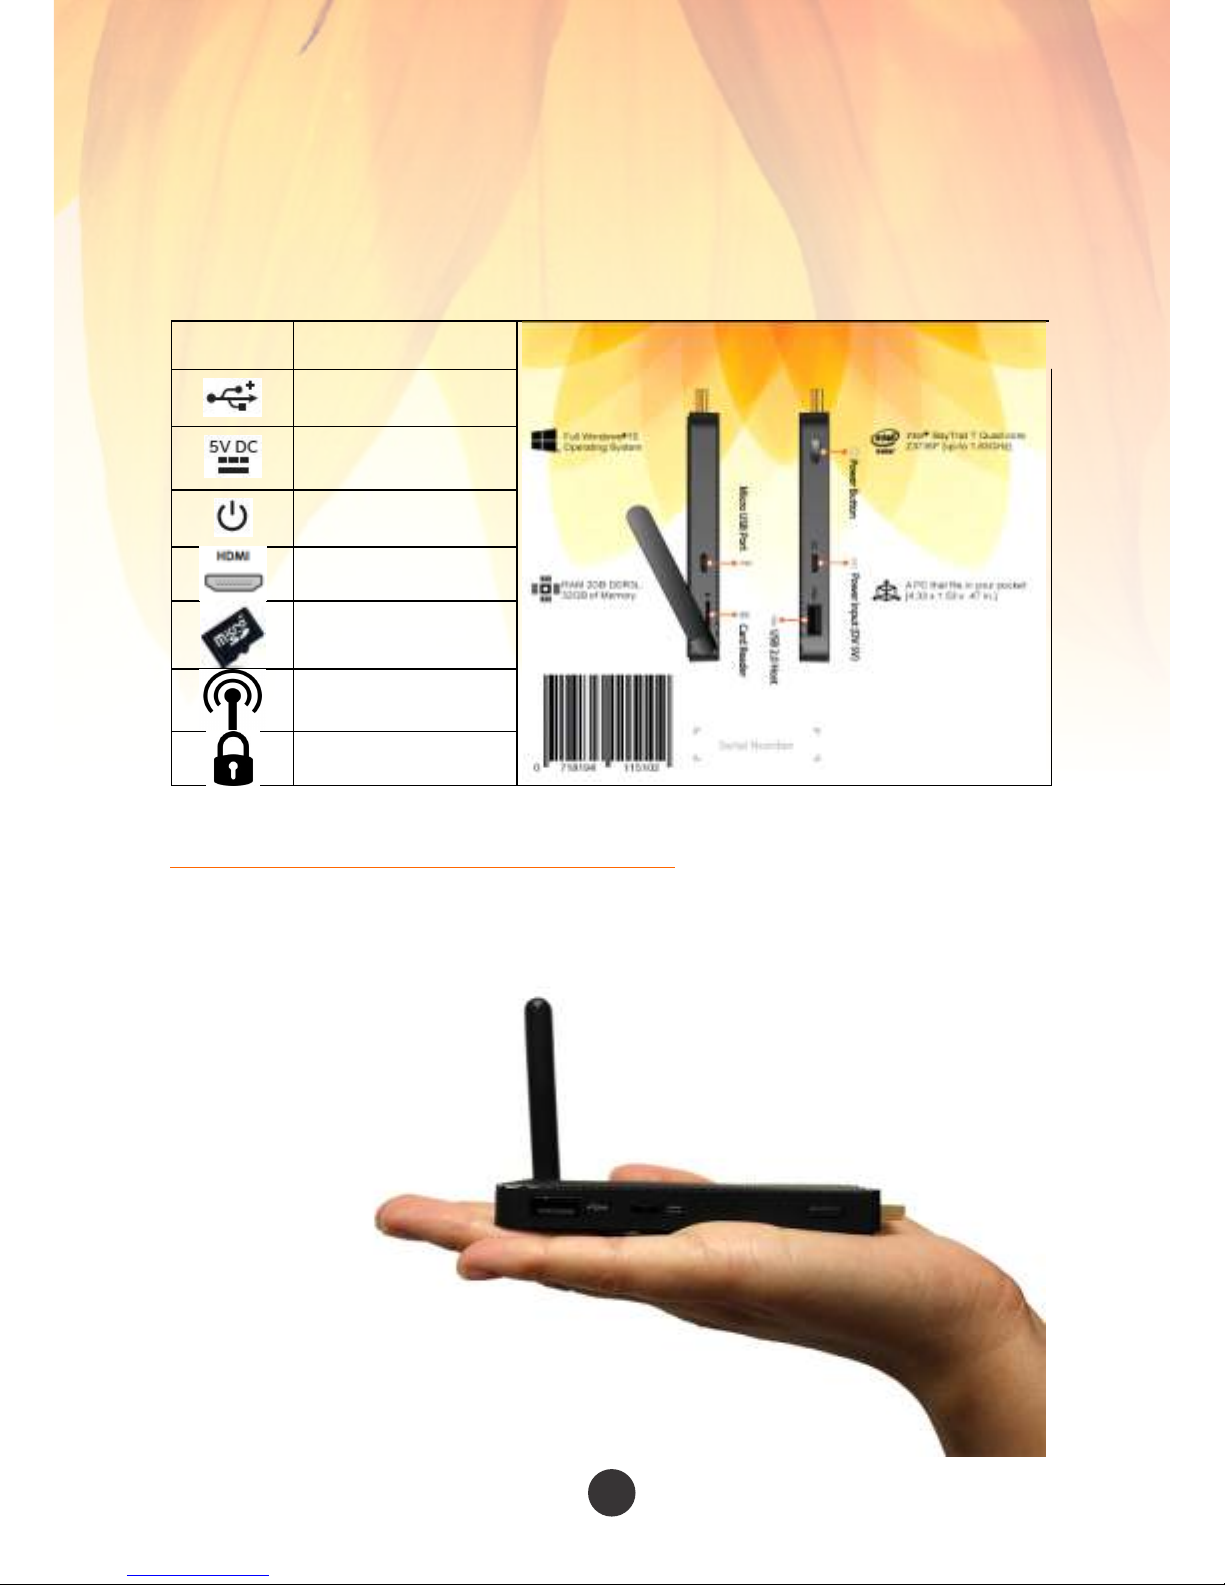
Symbol Description
Micro USB 2.0 Port
Power Connector
Power Button Key
HDMI Connector to
Display Unit
Micro SD Memory Card
Slot
Wireless Network
Antenna
Device Lock Port
HDMI
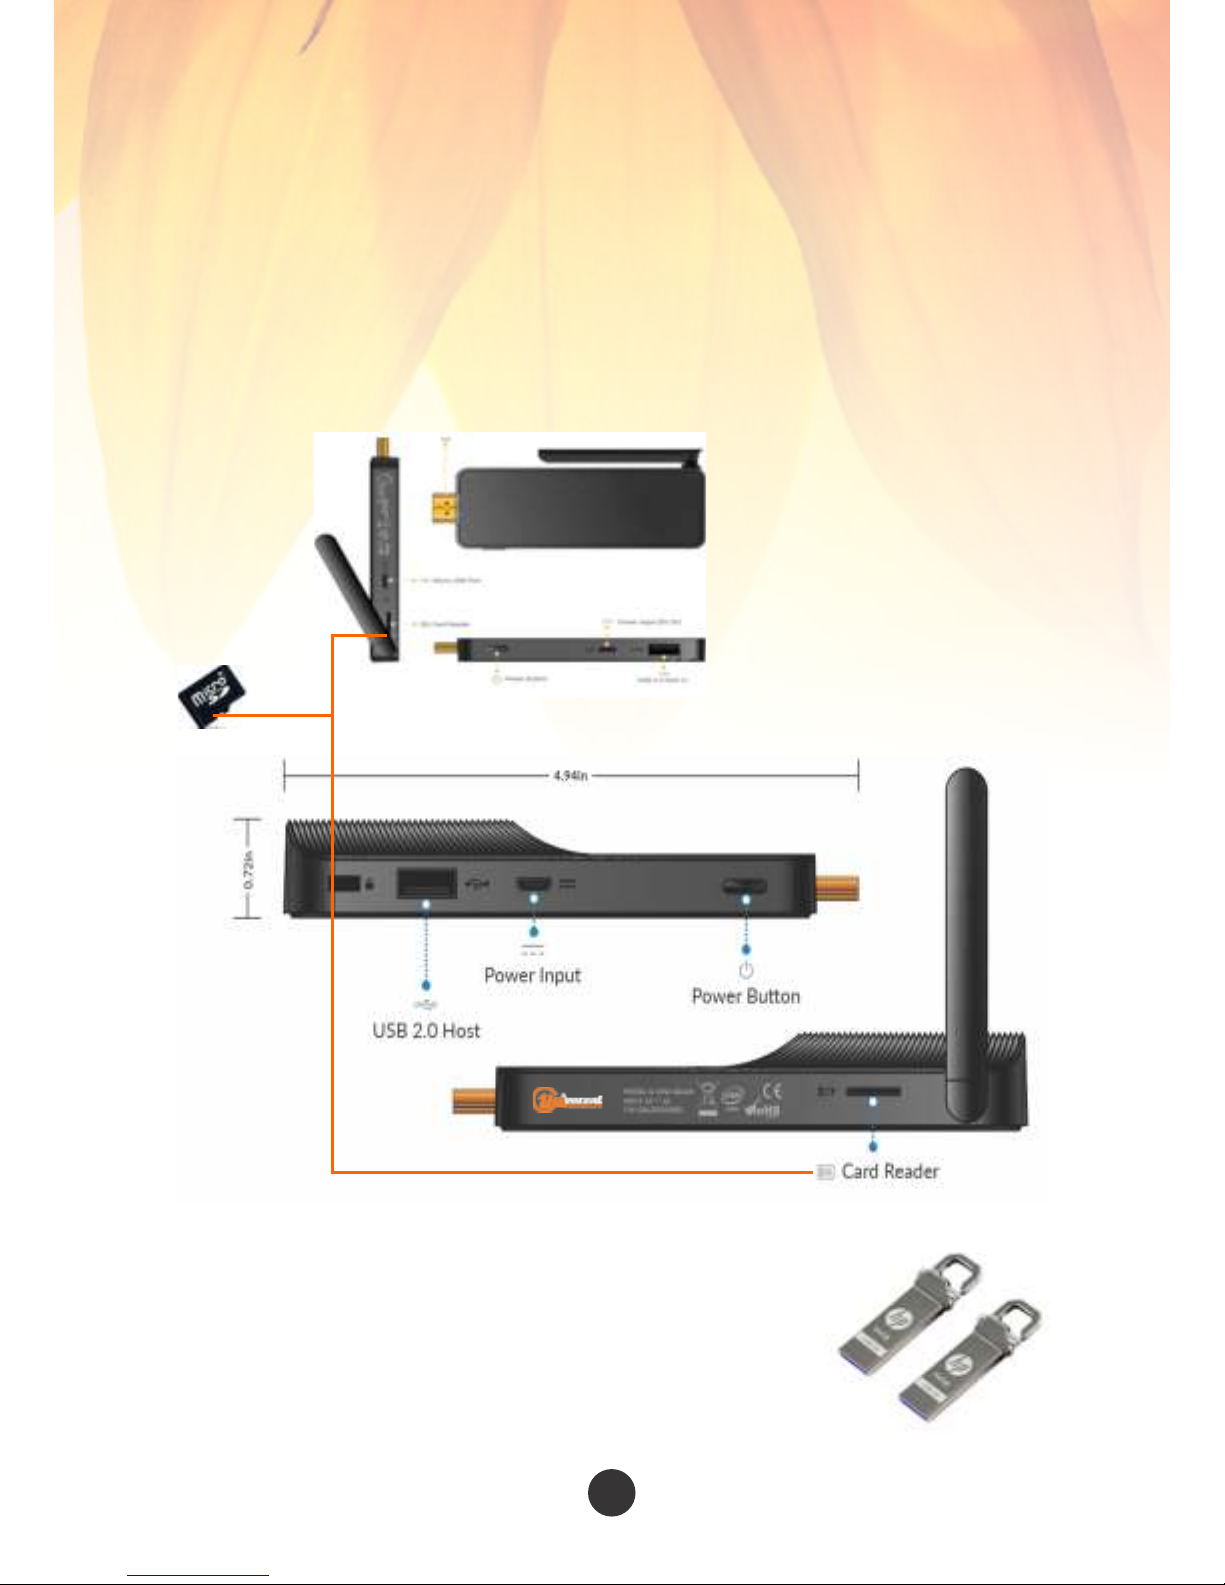
General Overview Display of PocketPC
Measuring 4.33 x 1.53 x 0.47
inches (or 11 x 3.88 x 1.2
cm), fits very comfortably in
the palm of your hand.
Product Schemac
Product Overview (I)
UNIVERSAL POCKETPC USER GUIDE {GPELECTRONIC INC©2016}
03
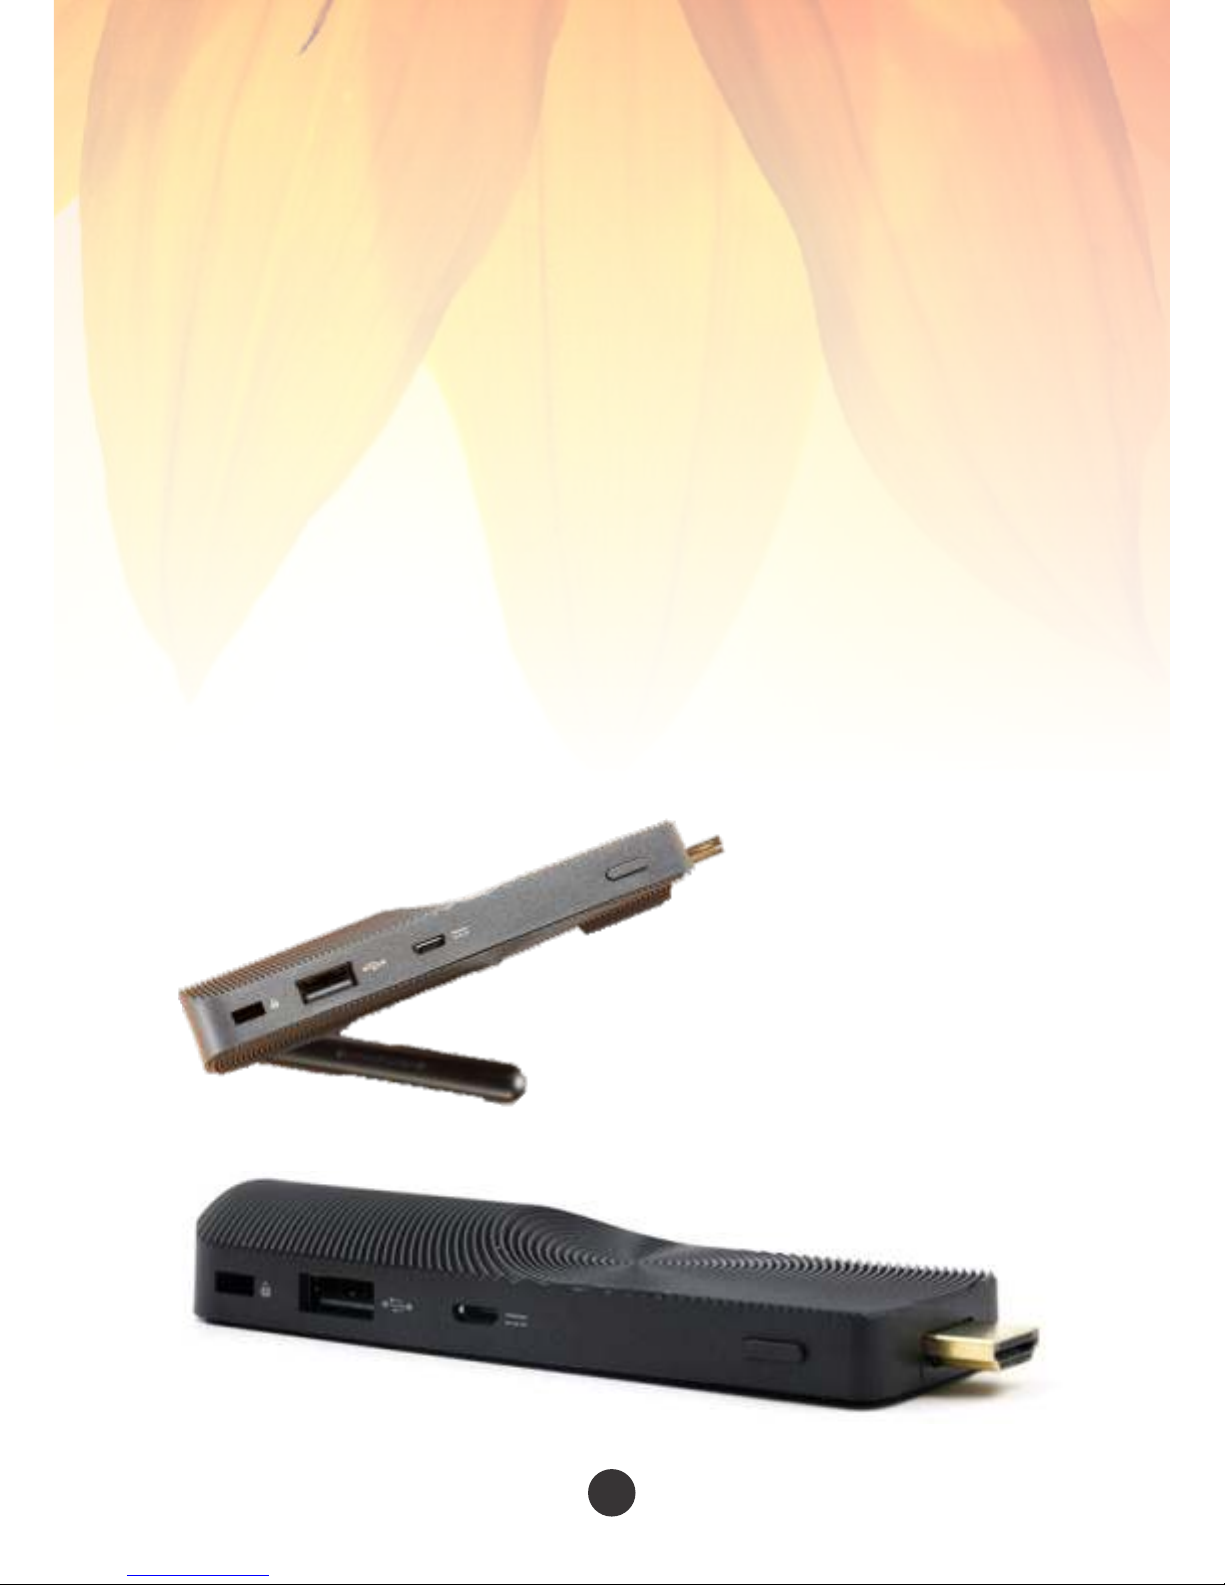
Product Overview (II)
Universal PocketPC is an Intel built in Compute Sck, in its smaller size to funcon as
a regular computer -on-a-Sck device that can be plugged into an HDMIcompable TV or monitor or projector to provide a complete personal compung
(PC) experience.
This product is designed to meet all daily and business needs. It's portability and
funconality cut across all business facet. Universal PocketPC is a fanless PC device
that is energy efficient and able to reduce the cost of energy consumpon and sll
perform the same funcons as that of a regular PC.
This product is very low in heat emission and powered by a quad-core Intel Atom
system-on-a-chip (SoC) processor. Also, it has in built Wi-Fi and Bluetooth, with a
USB port, and a micro SD card slot for addional storage beyond the 32 GB of onboard storage in the Windows-based Intel PocketPC Sck
While PC-on-a-Sck devices
la ck th e po wer a nd f ul l
funconality of tradional
desktop and laptop PCs, their
po r ta b i li t y, in ex p e ns i ve
pricing and low energy usage
make them aracve and
versale for a wide variety of
use cases, parcularly on the
consumer end.
UNIVERSAL POCKETPC USER GUIDE {GPELECTRONIC INC©2016}
04

How to Connect using HDMI Cable (III)
To Connect Directly to a Display Monitor (a):
Locate the HDMI port at the back panel of your monitor and plug the Universal
PocketPC Sck directly into a standard HDMI port on your computer monitor. The
PocketPC Sck extends about 4 inches (102 mm) out from the HDMI port.
Locate the HDMI on the Rear Panel
Other Converter Devices:
VGA to HDMI / DVI to HDMI
To Connect Directly to your TV (Any Model with HDMI) (b):
Follow the same procedure as that of the regular monitor screen.
If too close to the Wall, Please use:
UNIVERSAL POCKETPC USER GUIDE {GPELECTRONIC INC©2016}
05

To Connect Directly to a PROJECTOR (Any Model with HDMI) (c):
Follow this quick step in other to connect to a projector - :
i. Locate the Projector input source (Either at the rear panel or an external
source input)
ii. Ensure a wireless keyboard dongle is connected to USB 2.0 Port before
connecng device to the projector
iii. Power the device using the USB 2.0 Port from the Projector to the power
connector of the PocketPC (refer to page 6 and 7)
iv. Or use the power adapter that came with your device to power up
v. Change the source input of the Projector to HDMI (If Projector is not
programmed on Auto-Select)
vi. Once the projector screen displayed Windows*10, You are good-to-go
vii. Finish
Note: PocketPC does not come with Projector. It can be purchased separately
UNIVERSAL POCKETPC USER GUIDE {GPELECTRONIC INC©2016}
06

Aer you have successfully connected your PocketPC, the next step is to:
Starng the Device for the first me; Remember to use the appropriate
recommended AC Adaptor to power the device as shown in the picture below.
Using the AC Adapter -: Connect the power adapter to the PocketPC Sck as shown
below
Powering the Device (IV)
Note:
The device (PocketPC) Computer Sck
starts automacally when power is
applied.
Shut down the device using the normal
shutdown process for Windows*10.
Follow these quick Steps to Power Device:
A: Connect Part “A” into the Power Input (5V DC)
B: Connect Part “B” into the AC Power Adapter
C: Plug part “C” into the Power socket.
On compleng previous step, subsequent power-ups are done by pressing the
power buon on the side of the device itself.
If a television or monitor has an HDMI port and a USB port, you can try using the USB port to
power the Intel Compute Sck.
The PocketPC-Sck is designed to use up to 10 W of power. If the television's USB port can
supply enough power, you can use it to power the PocketPC-Sck. A USB 2.0 port normally
supplies 2.5 W of power.
Using USB Port
UNIVERSAL POCKETPC USER GUIDE {GPELECTRONIC INC©2016}
07

Connect a Keyboard and Mouse:
v The PocketPC Device supports the following:USB wireless keyboard and
mouse, using a USB dongle.
v USB wired keyboard and mouse, using a USB hub.
v Bluetooth* keyboard and mouse.
Follow the instrucons that came with the keyboard and mouse to pair them with
the PocketPC-Device.
Note:
You might need to temporarily connect a wired mouse and keyboard to the
PocketPC Sck to pair Bluetooth devices.
Bluetooth devices that pair directly to the onboard Bluetooth do not work during
POST or in BIOS.
Wireless keyboard and mouse connecon example:
Insert the USB Dongle into the USB 2.0 Port
Bluetooth keyboard and mouse connecon example: Use the USB 2.0 Port
Use the USB 2.0 port to:
Ÿ Install soware from a CD or DVD in a USB opcal drive.
Ÿ Back up or access media files (such as music and photos) on an external
USB drive.
UNIVERSAL POCKETPC USER GUIDE {GPELECTRONIC INC©2016}
08

Start the Device the First Time:
The first me you start the device, the Windows* 10 will guide you through the
following steps:
1. Select your region and language.
2. Accept the Windows license terms.
3. Personalize Windows and assign a PC Name.
4. "Get Online" dialog to pick a wireless network (this step is oponal).
5. Choose Express Sengs or Customize.
6. Assign a user name and password.
7. Finished.
UNIVERSAL POCKETPC USER GUIDE {GPELECTRONIC INC©2016}
09
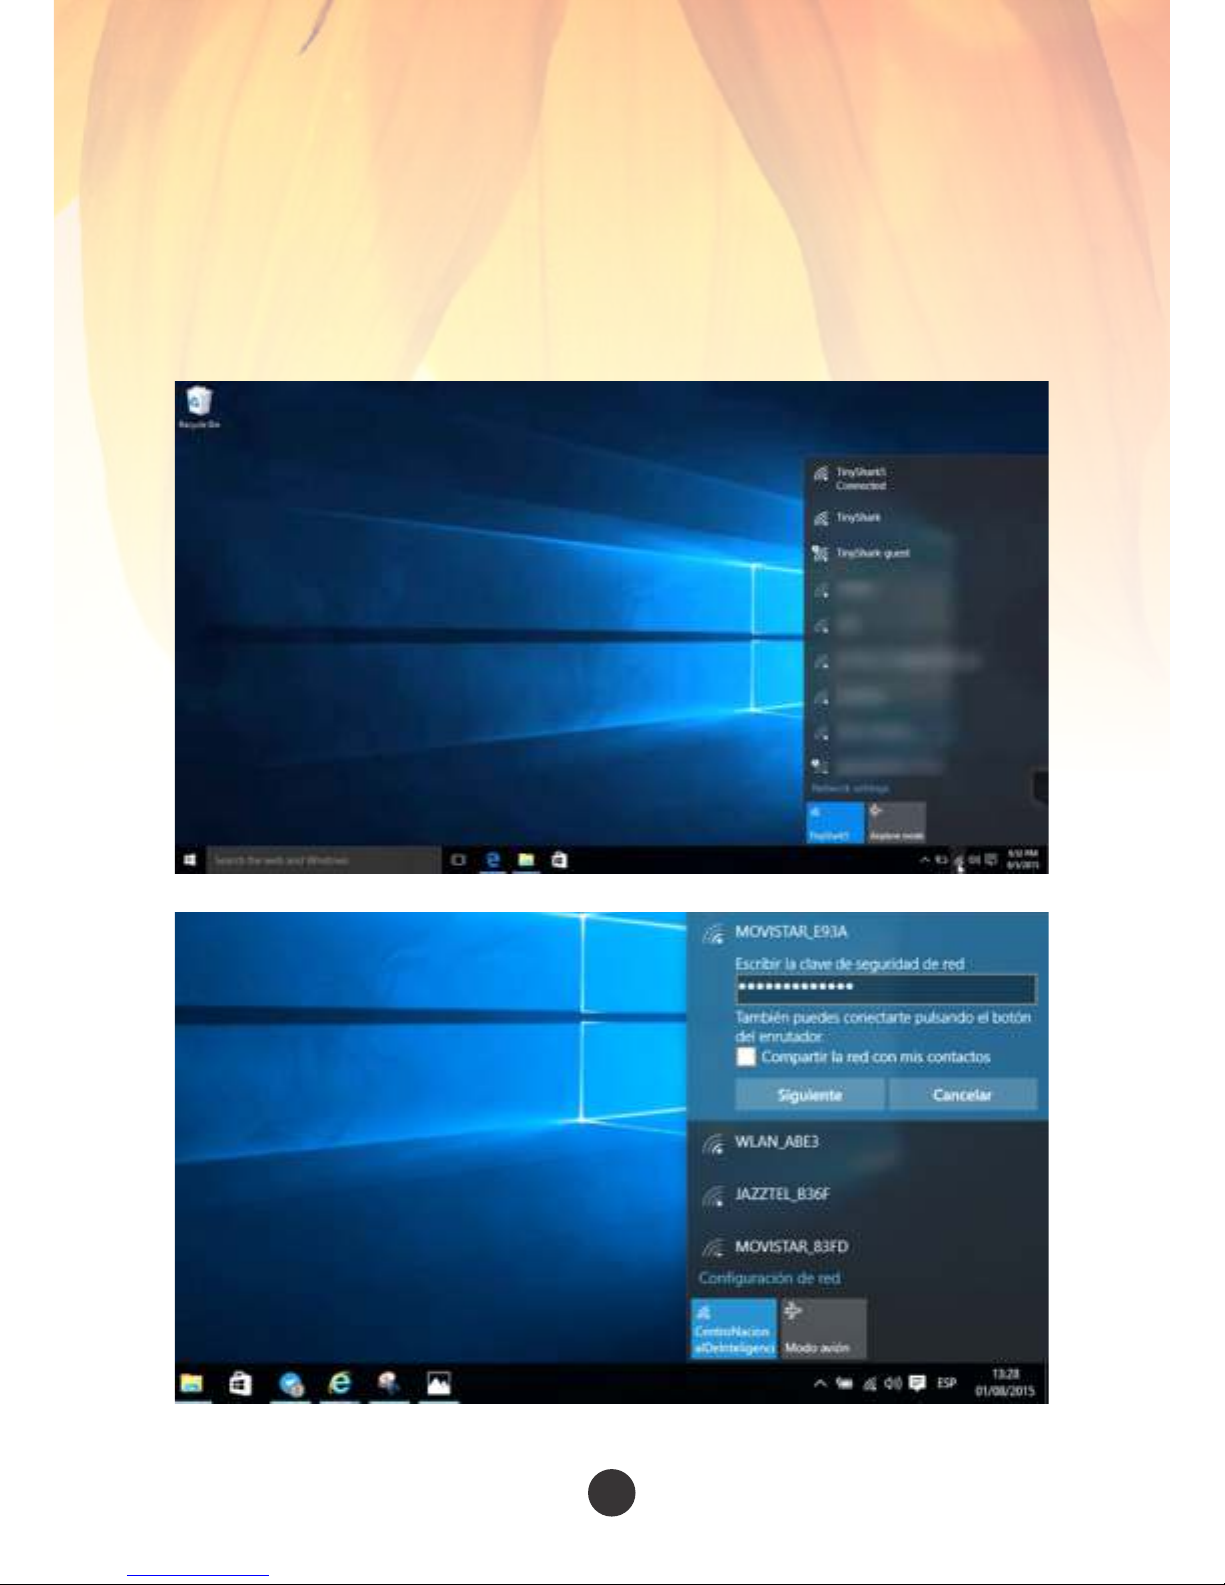
CONNECT TO A WIRELESS NETWORK:
To connect to a wireless network:
v Click the wireless network icon in the noficaon area of the taskbar.
v Click your network, and then click Connect.
v Type the security key or passphrase.
Click your network, and then click Connect.
Enter the Network Security Key and Click Next (Siguiente)…Finish!
UNIVERSAL POCKETPC USER GUIDE {GPELECTRONIC INC©2016}
10

The USB 2.0 Port can be used as or in replacement of the follow:
Use the USB 2.0 port to:
v Install soware from a CD or DVD in a USB opcal drive.
v Back up or access media files (such as music and photos) on an external
USB drive.
v Connect a USB Hub to the USB 2.0 Port: Connecng a USB hub to the
PocketPC Sck provides more USB ports.
Note USB Hub and USB cable are not included.
USB 2.0 Port (VI)
For a list of tested USB hubs, go to the Tested Peripherals or visit our website.
External USB Hub can be purchased separately with other accessories.
UNIVERSAL POCKETPC USER GUIDE {GPELECTRONIC INC©2016}
11
Universal PocketPC Sck supports MicroSD card sizes from 8 GB to 128 GB.
This allows more storage on the device.
Note MicroSD card is not included.
How to install MicroSD card: Sck the SD Card into the memory slot on the side
of the PocketPC Sck.
MicroSD Card Slot (VII)
Check our website for a list of SD Memory Card and USB Memory Sck available
8GB, 16GB, 32GB, 64GB and 128GB
Available in 2.0 and 3.0 Speed
UNIVERSAL POCKETPC USER GUIDE {GPELECTRONIC INC©2016}
12
 Loading...