

Page 1
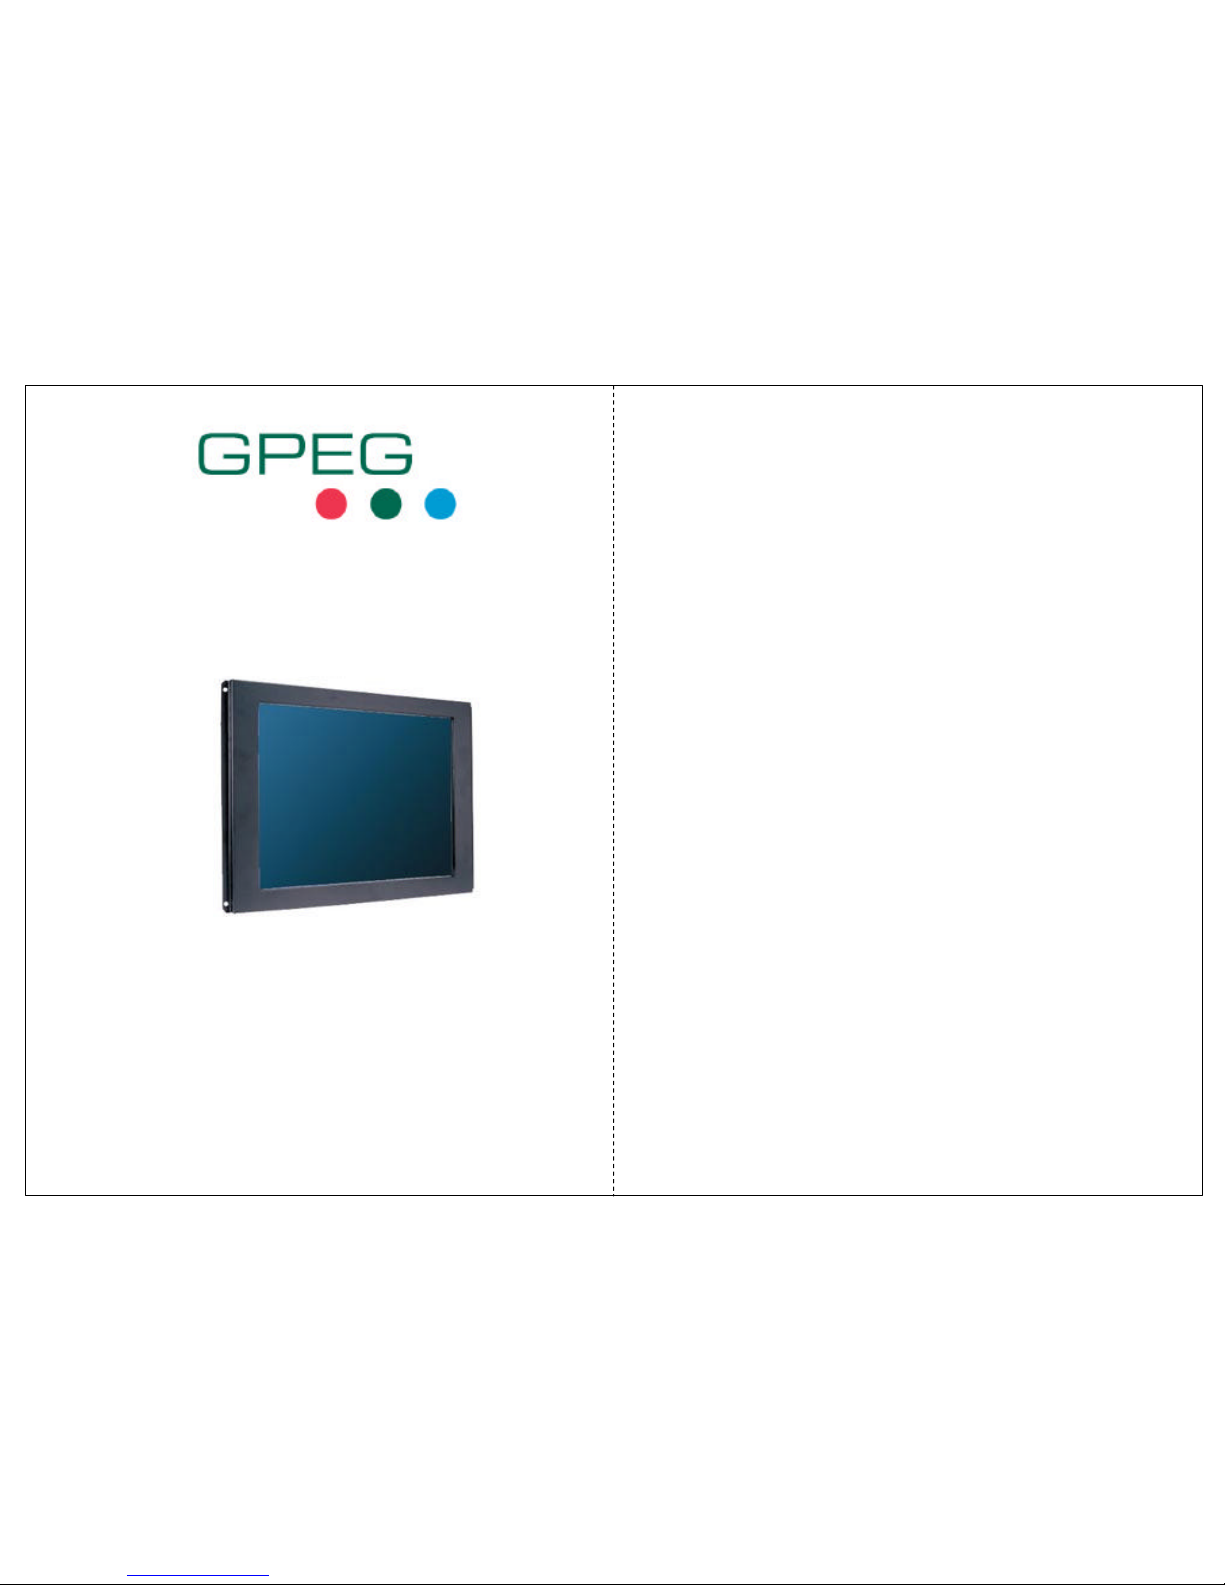
AOD 150 OPEN FRAME
USER’S MANUAL
0. Connection To the Monitor
1. Installation
2. Features
3. Plug and Play Function
4. Safety Precaution
5. OSD (On-Screen-Menu)
6. OSD Menu
7. Specifications
8. Contents Of the Retail Package
9. Troubleshooting
10. Drawing
11. Resistive touch (Option)
12. SAW touch (Option)
13. Capacitive touch (Option)
TABLE OF CONTENTS
9 Gunnery Terrace, Duke of Wellington Avenue
Royal Arsenal, Woolwich, London. SE18 6SW
United Kingdom
Tel : +44 208 325 1062 Fax: +44208 181 6751
www.gpegint.com [email protected]
Page 2
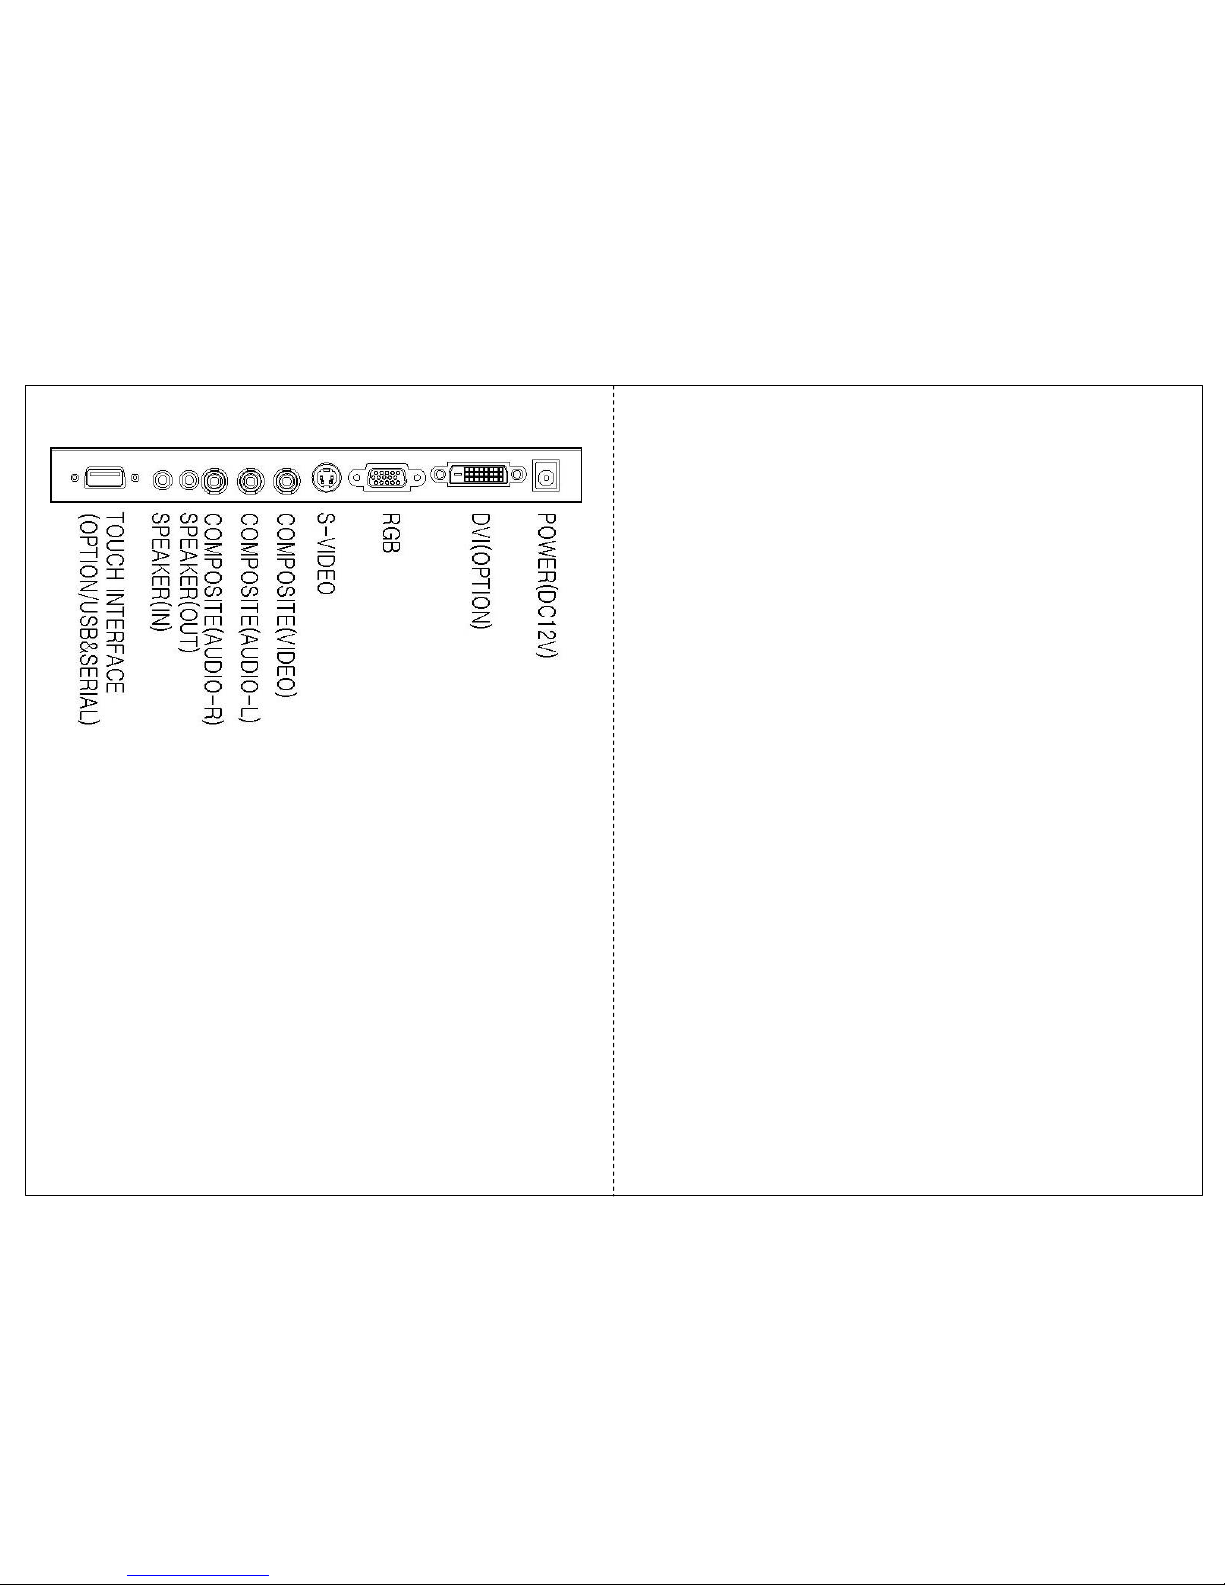
0. Connection To the Monitor
• Connect the signal(VGA) cable to the VGA port of computer. Tighten the
two thumbscrews by turning clockwise.
• You can adjust the connection for your PC environment.
• Plug the DC cord of the AC adapter to the power connector and the plug
the end of AC adapter to and electrical outlet socket(110V/220V)
• Connect DC cord of adapter (12V DC) to the monitor..
• AOD150 is 15” XGA LCD monitor and support up to 75Hz.
• You can adjust brightness, contrast, horizontal & vertical positions by OSD
menus and use auto adjust function for instant adjustment.
• High-qualified LCD Controller inside
• Compact space saving design and power saving mode
• 100% compatible with Windows PC environment without the installation of
driver CD or software program.
1. Installation
2. Features
3. Plug and Play Function
AOD150 can be installed and connected automatically to any computer systems without
driver CD or software programs. Monitor will recognize the optimized value of video mode
by DDC(Display Data Channel) method that makes the graphic card of computer to
communicate with the monitor.
AOD150 supports VESA DDC 1/2B.
4. Safety Precaution
We strongly recommend that you carefully read this User’s Manual before operating
your LCD monitor. FOLLOW INSTRUCTIONS in this manual.
Please read and comprehend all using directives before use this machine.
? Power
— Use the type of power indicated on the marking label.
? Adapter
— Only use an adapter designed of the LCD monitor.
? Plug
— Do not remove any of the prongs of the monitor's three-pronged power plug.
— Disconnect the power plug from the AC outlet if you will not use it for an indefinite
period of time.
? Power and extension cord
— Use the proper power cord with ground conductor
— Do not overload wall outlets or power cords. Ensure that the total of all units plugged
into the wall outlet does not exceed 7 amperes.
— Do not allow anything to rest on the power cord. Do not locate this product where
persons will walk on the cord.
? Care and maintenance
— Slots and openings in the cabinet are provided for ventilation. Do not block or cover
these openings.
— Do not push objects of any kind into cabinet slots or openings. The screen surface
is easily scratched.
— Do not use paper towels to clean the display. Avoid touching it with your fingers,
pens, or pencils.
— Turn off the AC adapter and the monitor over long periods when not in use.
Page 3
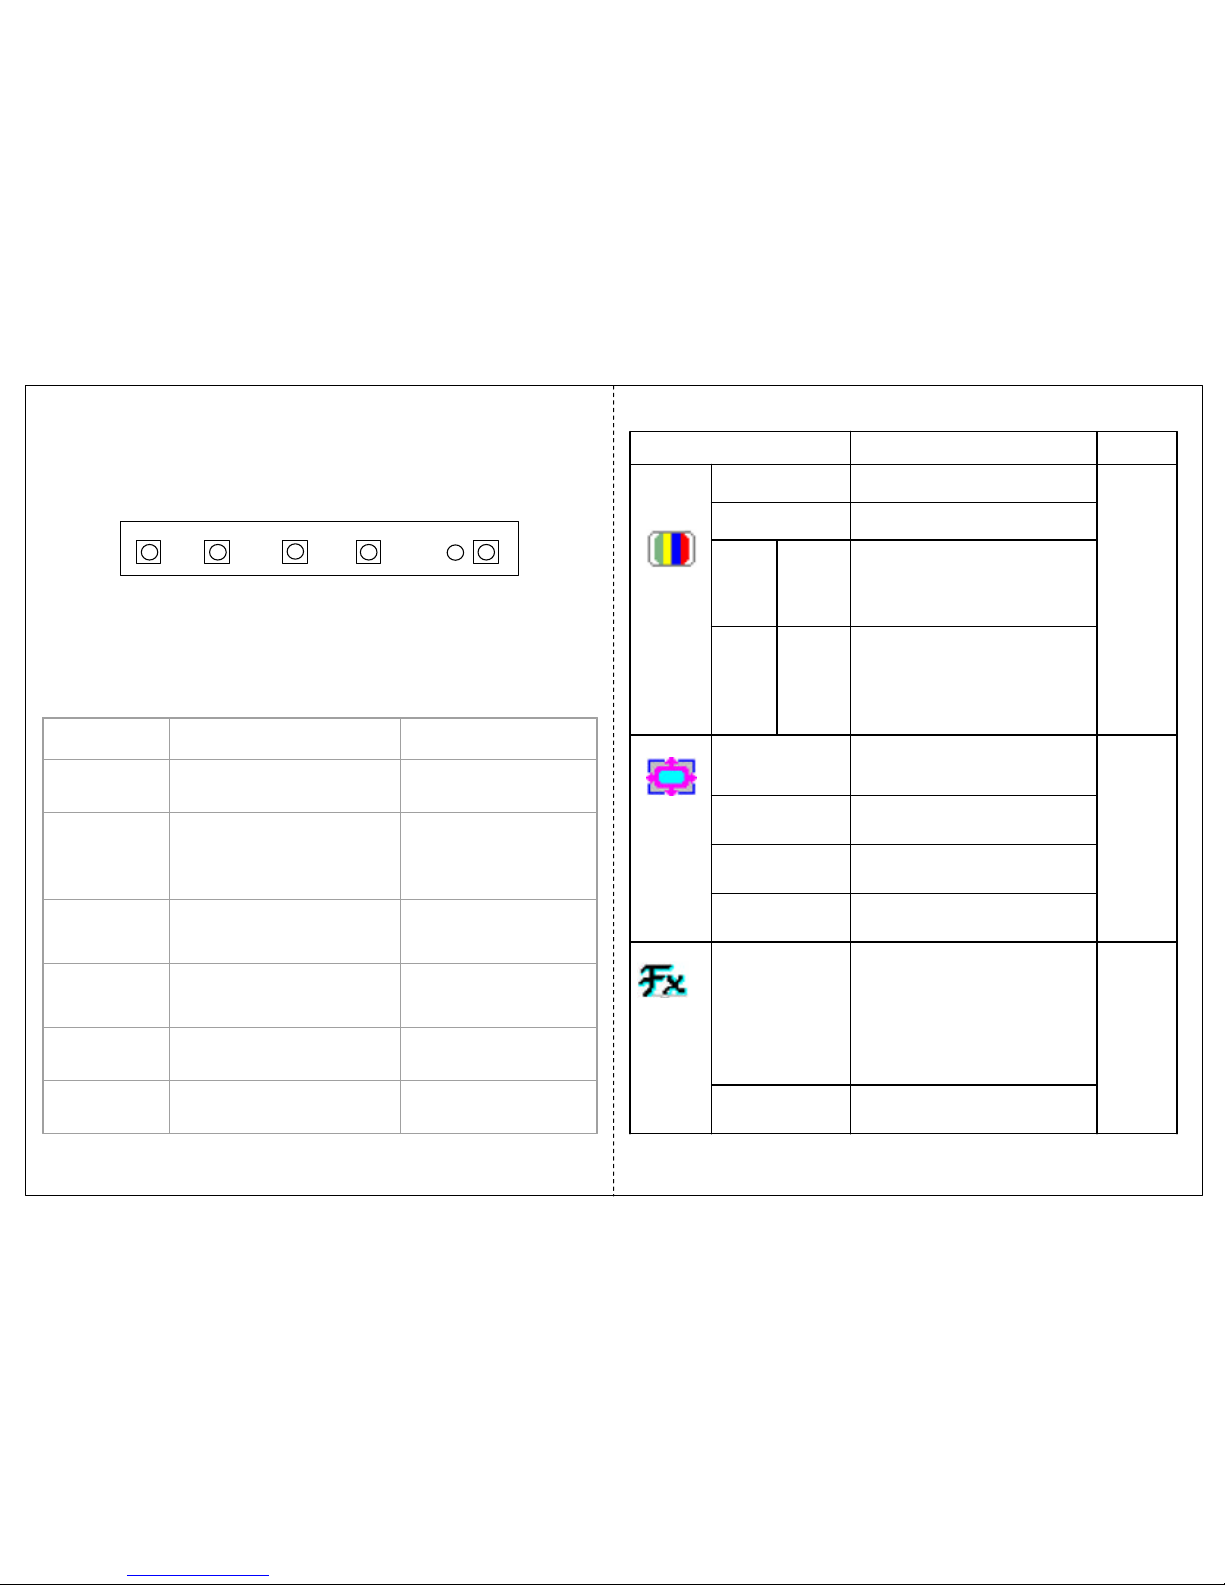
5. OSD (On-Screen-Menu)
menu select down up power
Button Function Status
POWER Power ON or OFF
ON/OFF
LED Indicate working status
Green : On
Red : Stand-by
Orange : No signal
UP
Launch OSD Menu or
Add Value
Move to OSD Menu
DOWN
Launch OSD Menu or
Down value
Move to OSD Menu
SELECT Select OSD Menu
MENU On / Off OSD Menu
6. OSD Menu
Adjust the color balance of the
screen
Auto Color
Only
usable
on
Analog
Mode
Automatically adjust the Horizontal
position, Vertical position,
Horizontal size, and Phase
Window's background or
characters should be displayed on
your Full screen prior to proceed
this function
Auto Adjust
Function
Adjust the horizontal size of the
screen's image
Clock
Adjust the focus of the screen's
image
Phase
Adjust the vertical position of the
screen's image
V.Position
Only
usable
on
Analog
Mode
Adjust the horizontal position of the
screen's image
H.Position
Picture
Control the temperature of the
color
9300
6500
5800
USER
Color
Temp
Control the intensity of the color of
the screen’s image
(Usable when Color temperature is
USER mode.)
Red
Green
Blue
Color
Adjust
Adjust the brightness of the screenBrightness
Usable
on
Analog/
Digital
Mode
Adjust the contrast of the screenContrast
Color
RemarksDescriptionOSD Menu
Page 4
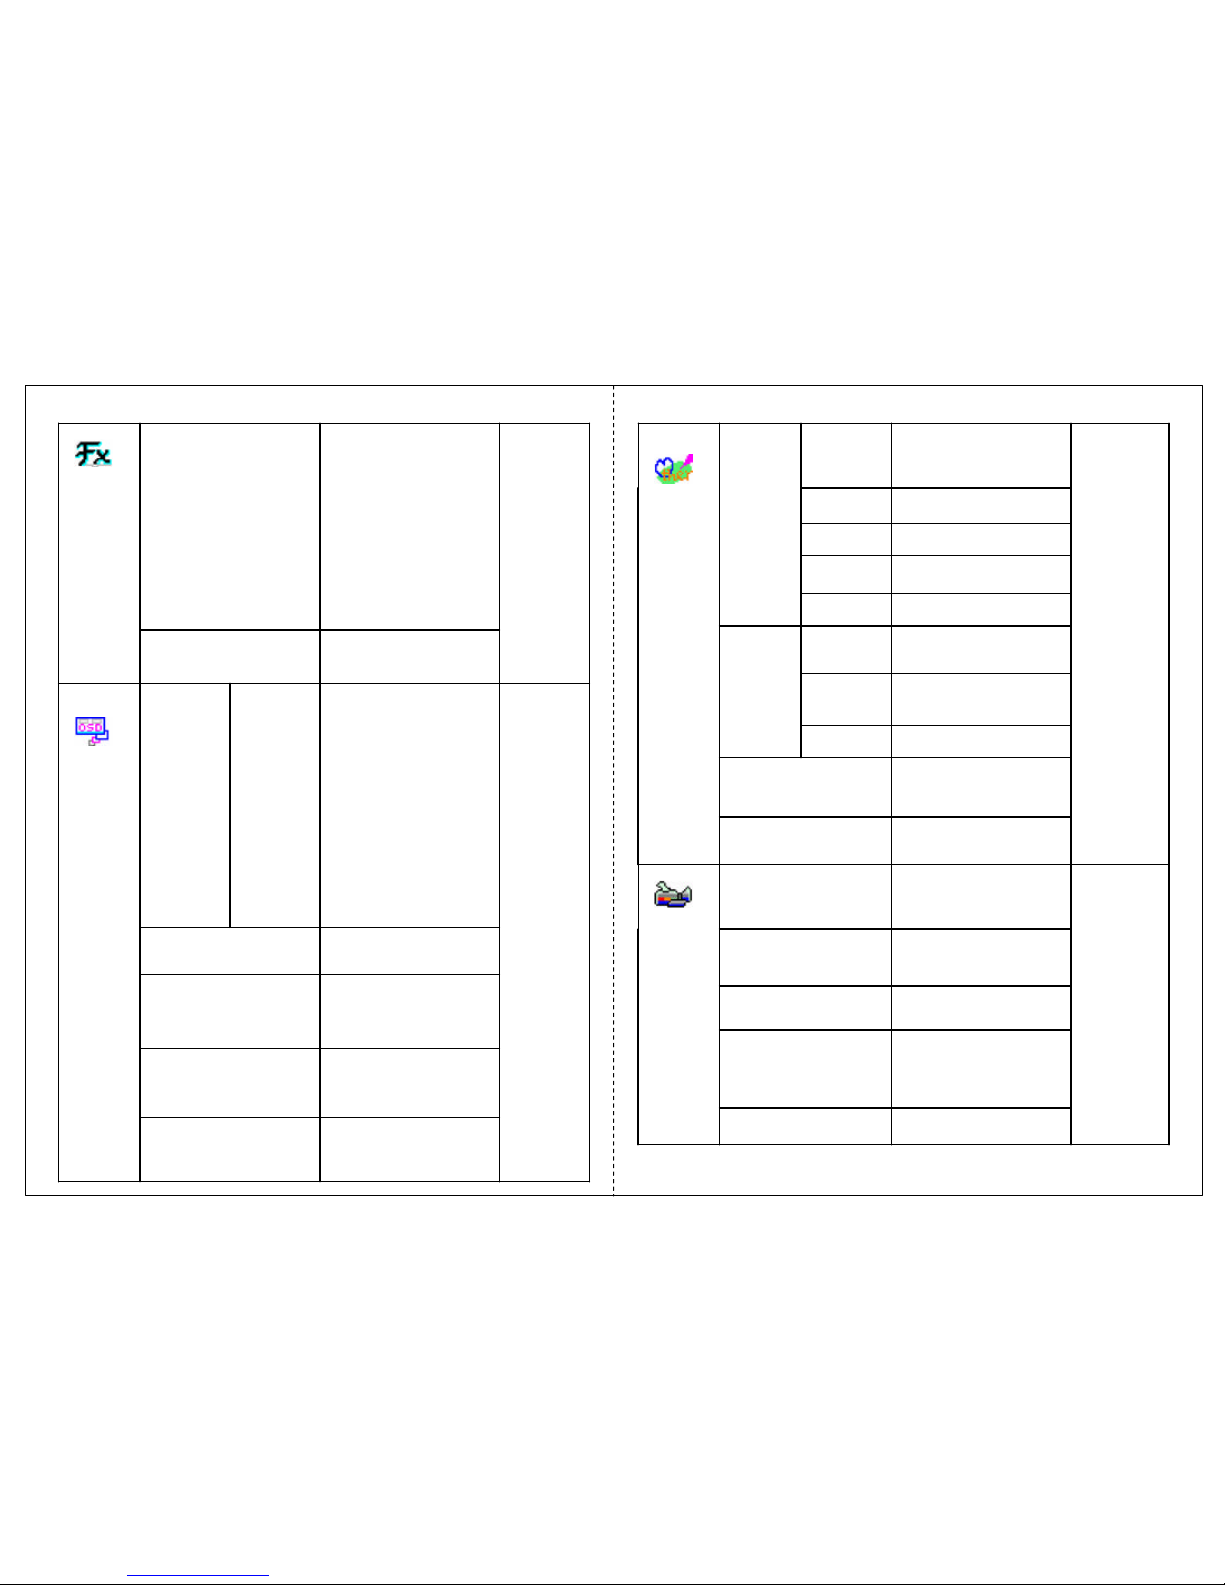
Adjust the transparency
of the OSD menu
Translucent
OSD MENU disappear
from over the screen
after setting time
OSD Timer
Select OSD MENU
vertical position
OSD V.Pos.
Select OSD MENU
horizontal position
OSD H.Pos.
Polish
Korean
Italian
Spanish
German
French
OSD
Usable on
all Mode.
Select one of the seven
language
EnglishLanguage
Adjust the color balance
of the screen
Auto Color
Function
Only
usable on
Analog
Mode
Automatically adjust the
Horizontal position,
Vertical position,
Horizontal size, and
Phase Window's
background or
characters should be
displayed on your Full
screen prior to proceed
this function
Auto Adjust
Control the outlineSharpness
Adjusts the saturation of
Red,Green and Blue in
the display area
Saturation
Adjust the tone of colorHue
Adjust the brightness of
the screen
Brightness
Video
ADJ
Usable on
Video/
S-Video/
TV Mode
Adjust the contrast of the
screen
Contrast
Adjust volume levelVolume
Initialize the current
mode & setting value
Reset
Movie
(Usable on
Analog/Digital Mode)
Game
Select one of brightness.PCMode
TV modeTV
S-video modeS-VIDEO
Video modeVIDEO
DVI digital signalDigital
Misc.
Usable on
all Mode.
Analog signal(RGB)Analog
Signal
Source
Page 5
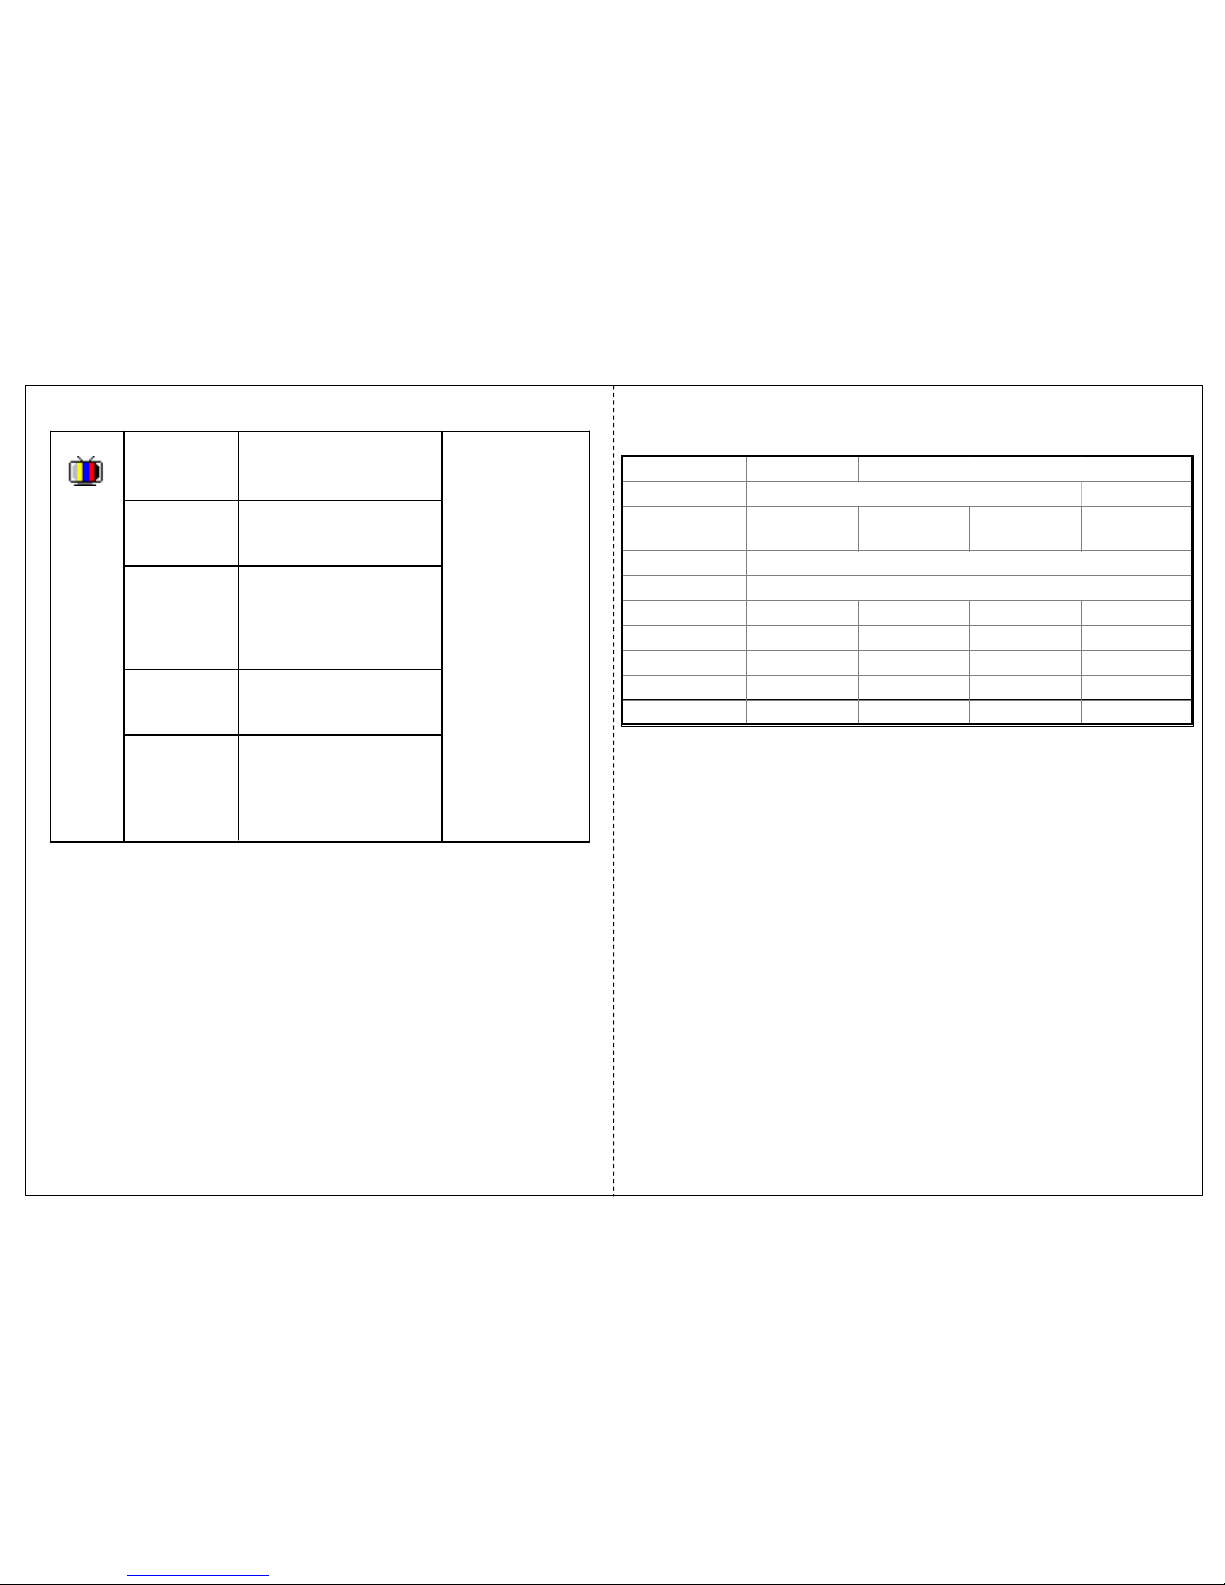
7. Specifications
Select TV System
NTSC : AIR / CATV
PALSECAM : PAL BG/I/DK,
SECAM L/LP
TV System
Automatically scan
Channel
Channel Scan
Adjust Channel Frequency
(Increased by 0.25Mhz
when adjust channel
frequency)
Channel Tune
Delete the channel of the
TV
Channel Del
TV
Control the outline
Add the channel
of the TV
Channel Add
Model AOD 150
Video
Frequency Horizontal: 31.5 ~ 80KHz
Vertical: 56 ~ 75KHz
Input signal Analog RGB, 15 Pin
Compatibility
Plug and Play VESA DDC 1/2B
Compatibility VESA / IBM / MAC
Power VESA Standard, DPMS
Operation Environment
Power Consumption Operation Mode: 35 watt max.
Stand-by: 4 watt max.
Temperature Operation Mode : 0 ºC ~ 40 ºC
Stand-by: -20 ºC ~ 60 ºC
Humidity Operation Mode: 10% ~ 85% R.H.
Stand-by: 90% R.H. Max.
User’s Mode
OSD Key Menu / Select / Down / Up / Power
Dimension & Weight
VESA Hole 75mm*75mm, 100mm*100mm(option)
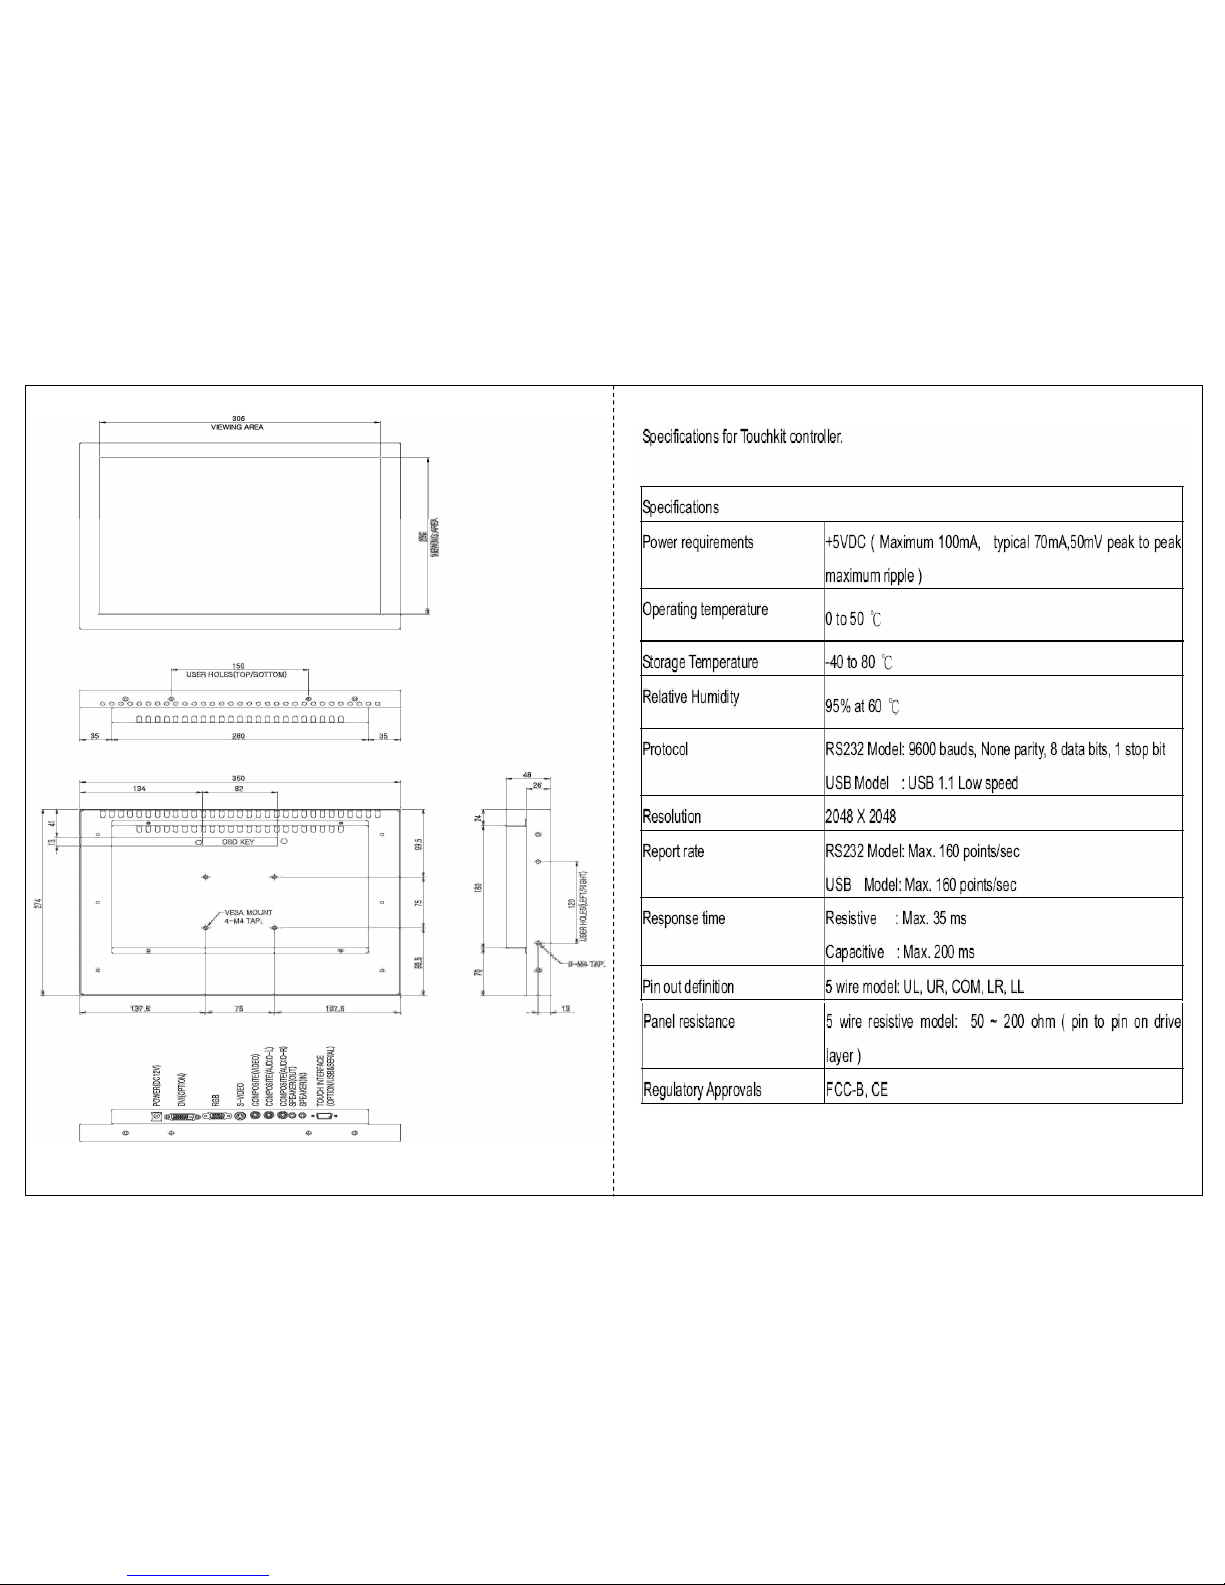
Dimension 350 (W) x 274 (H) x 48 (D) mm
Weight 3.5 kg
Main
Panel
LTM150X0
Suffix
TL01
(XGA)
TL02
(XGA)
A4
(XGA)
L01
(XGA)
Type
Color
Pixel 0.297x 0.297 0.297x 0.297 0.297x 0.297 0.297x 0.297
Resolution (Max) 1024 x 768 1024 x 768 1024 x 768 1024 x 768
Contrast Ratio
450:1 450:1 400:1 450:1
Response time
16 16
16 12
Brightness
250 cd/m2 250 cd/m2 250 cd/m2 250 cd/m2
Sub
15” Color Active Matrix TFT LCD
16.2M colors
LM150X08
Page 6
8. Contents Of the Retail Package
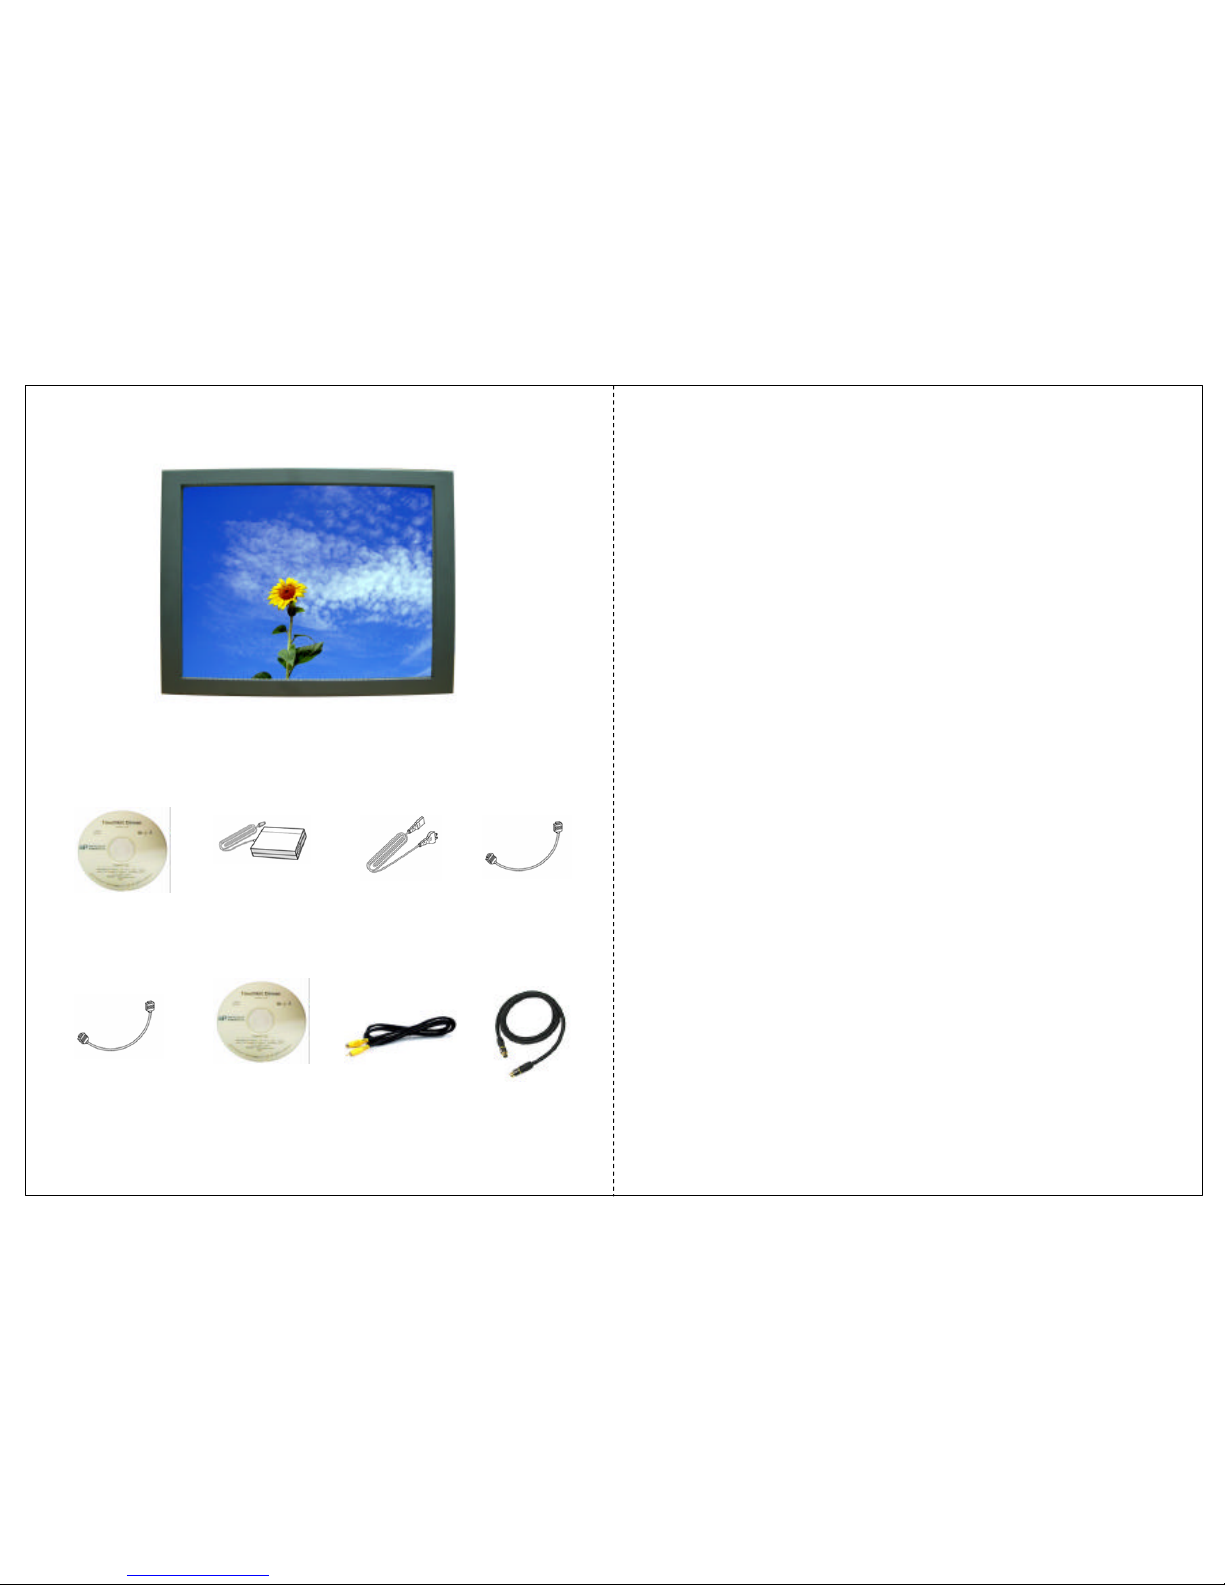
Monitor
User’s Manual
AC/DC Adaptor
Power Cord VGA Cable
Audio Cable
(Option)
Touch Driver (Option)
Composite
Cable (Option)
S-video Cable
(Option)
9. Troubleshooting
TO REDUCE THE RISK OF ELECTRIC SHOCK, DO NOT REMOVE
COVER.
NO USER-SERVICEABLE PARTS INSIDE.
REFER SERVICING TO QUALIFIED SERVICE PERSONNEL.
The monitor does not respond after you turn on the system.
Make sure that the monitor is turned on.
Turn off the power and check the monitor’s power cord, AC adapter,
and signal cable for proper connection.
Appear the “ No Input the Signal"
Check the connecting of the audio cable between the monitor and the computer.
Appear the “ Input Not the Supported"
Input signal are insuperable, reset the video mode.
The appearance is not at the screen center.
Use “AUTO ADJUST”, refer to the Controls section.
The characters on the screen are too dim or too bright
Choose fit color temperature, use “AUTO COLOUR ADJUST or manually adjust
“RGB ADJUSTMENT, refer to the Control section.
Page 7
10. Drawing
11. Resistive touch (Option)
Page 8
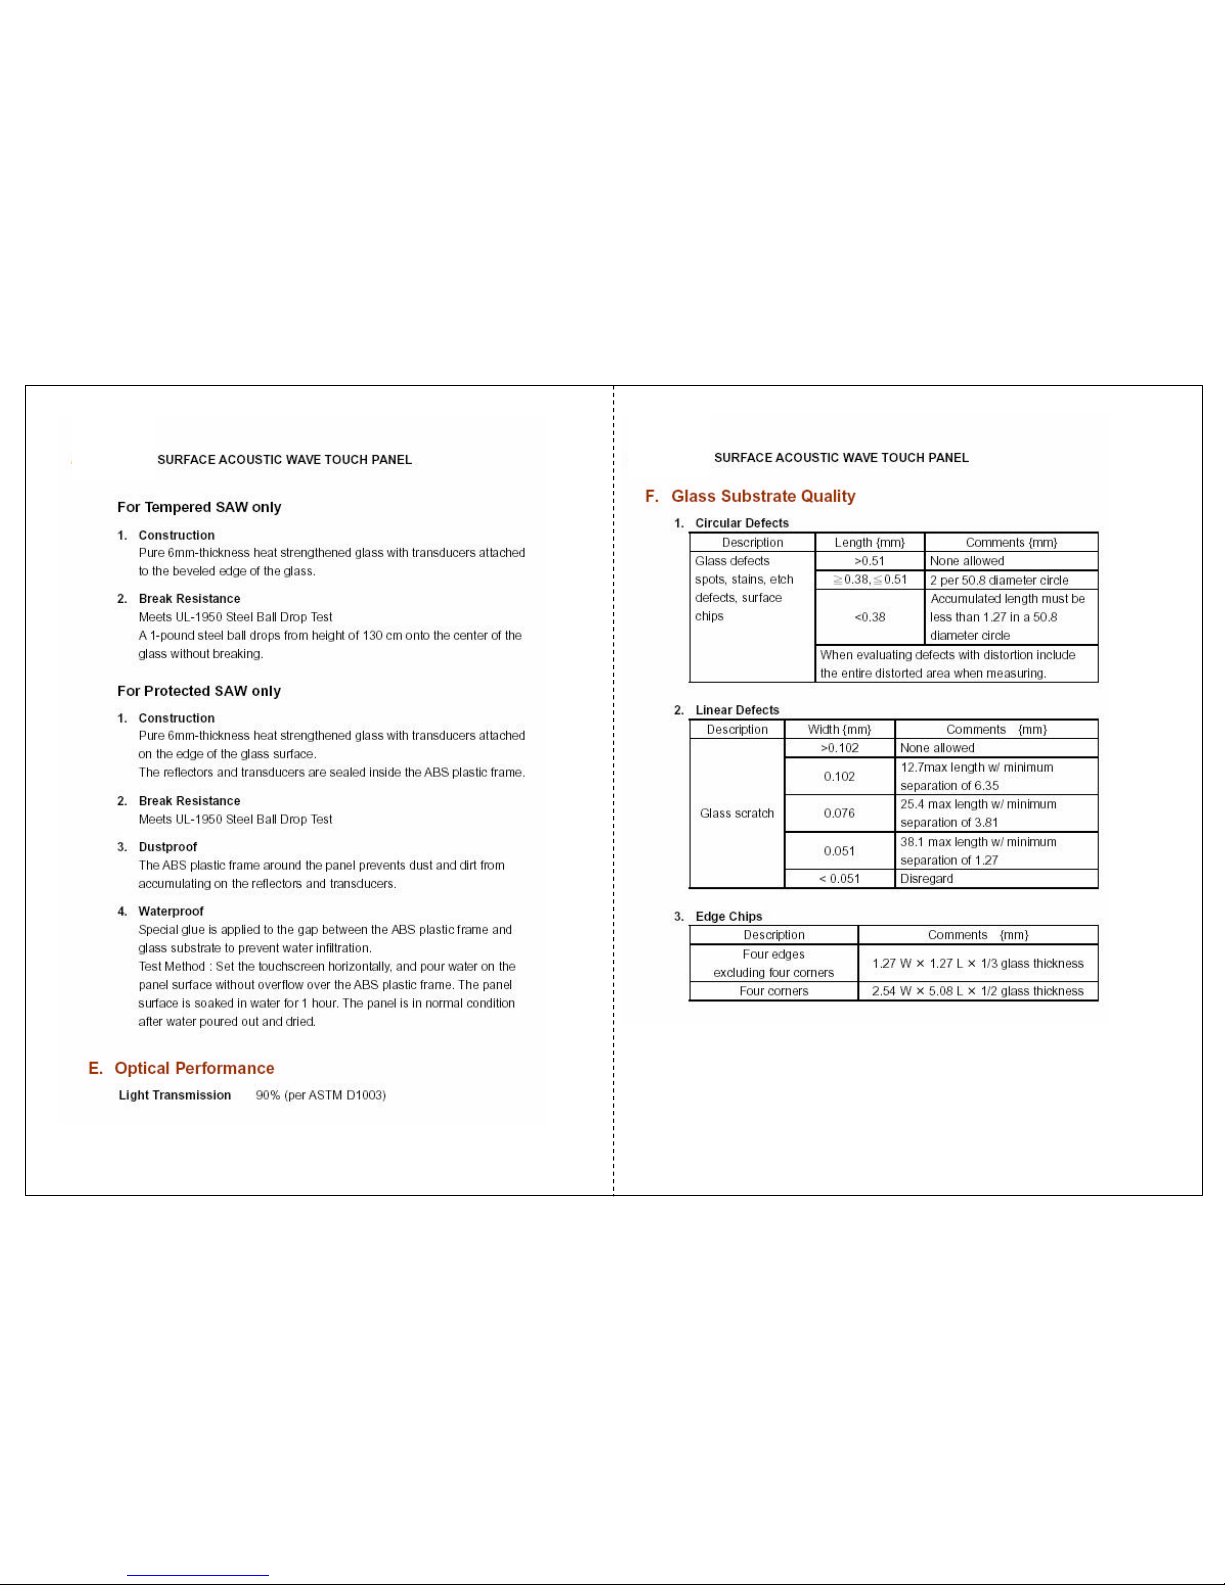
12. SAW touch (Option)
Page 9
Page 10
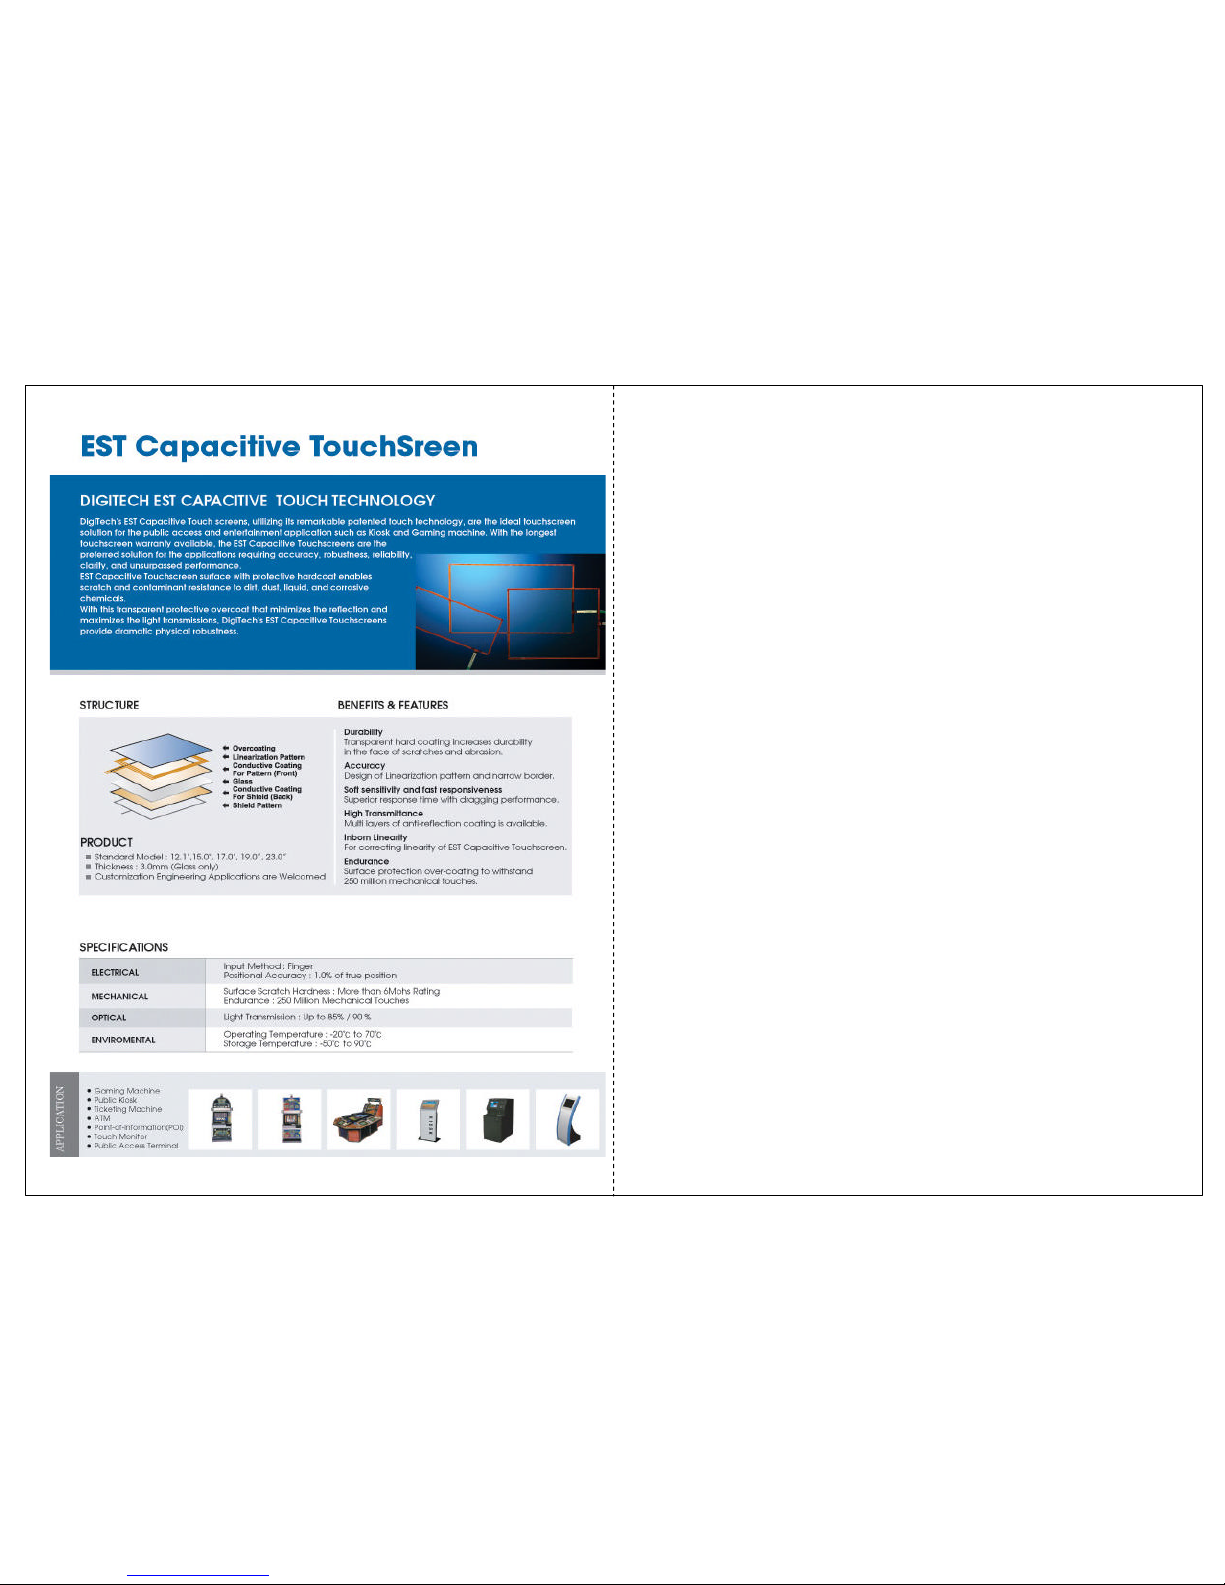
13. Capacitive Touch (Option)
9 Gunnery Terrace, Duke of Wellington Avenue
Royal Arsenal, Woolwich, London. SE18 6SW
United Kingdom
Tel : +44 208 325 1062 Fax: +44208 181 6751
www.gpegint.com [email protected]
 Loading...