

GPD Global 22101482-0001, 22101482-0003, 22293271, 22101482, 22293271-0001 User Manual
Lipstick Camera
Multiple Mount Process View
For Camera Models: 22101482, 22101482-0001, 22101482-0003, 22293271, 22293271-0001
Introduction
The Multiple Mount Process View Lipstick Camera enables the operator to view operations at
either two or three head stations on dedicated monitors. Each of the multiple color video
cameras is dedicated to a single head.
Adjustments can be made to adapt camera alignment, angle, focal point, and lighting to
current conditions. Camera lighting illuminates the viewing area for the lipstick video camera.
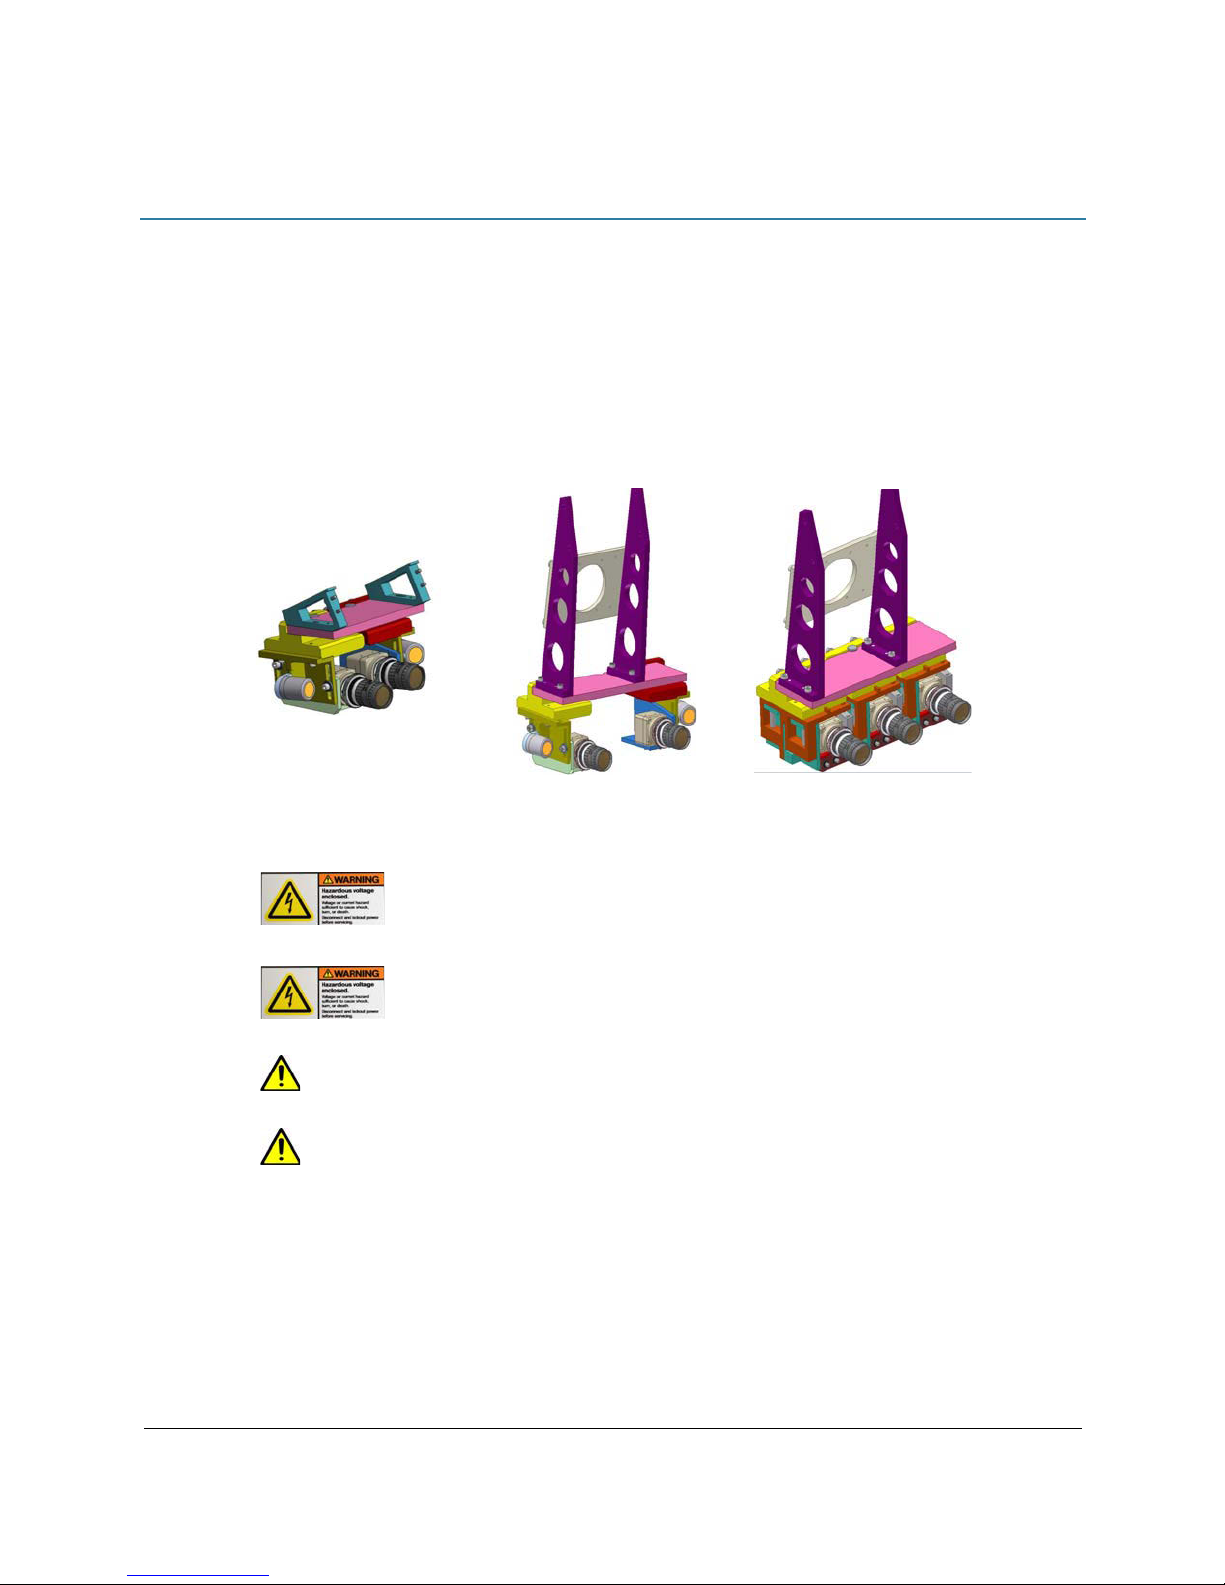
Figure 1: Multiple Mount Process View Cameras have a camera & light dedicated to each head station.
MAX Series dual camera (left). DS Series dual camera (center). DS Series triple camera (right).
Safety Notices
CAUTION: DO NOT bend, crush, or pinch the camera cable.
CAUTION: DO use caution when operating the camera in the vicinity of spot lights or other
lights and light-reflecting objects. Never face the camera, whether in use or not, toward the sun.
Adjustments
Each camera is factory set on the dispense system to view operations at a specific dispense
head. If changes become necessary, you can adjust the following aspects:
• Camera angle and focal point can be altered.
• Camera position may be swiveled into precise alignment with the needle.
• Camera Lamp angle is independently adjustable on dual camera model.
DANGER: Risk of Electrical Shock - Do Not Open. Do not attempt to disassemble
the camera. There are no user-serviceable parts inside. Refer servicing to qualified
service personnel.
DANGER: Risk of Electrical Shock - Do Not Expose Camera to Moisture. Moisture
can damage the camera and can create the danger of electric shock.
P/N 22200620 GPD Global
Copyright © 2018 GPD Global
®
611 Hollingsworth Street, Grand Junction, CO 81505 USA
tel +1.970.245.0408 • fax +1.970.245.9674 • www.gpd-global.com
®
Ver 2.3, 2/7/18
GPD Global
©
Camera-to-Needle Alignment
To adjust camera-to-needle alignment, swivel the camera assembly around the swivel screw
as follows.
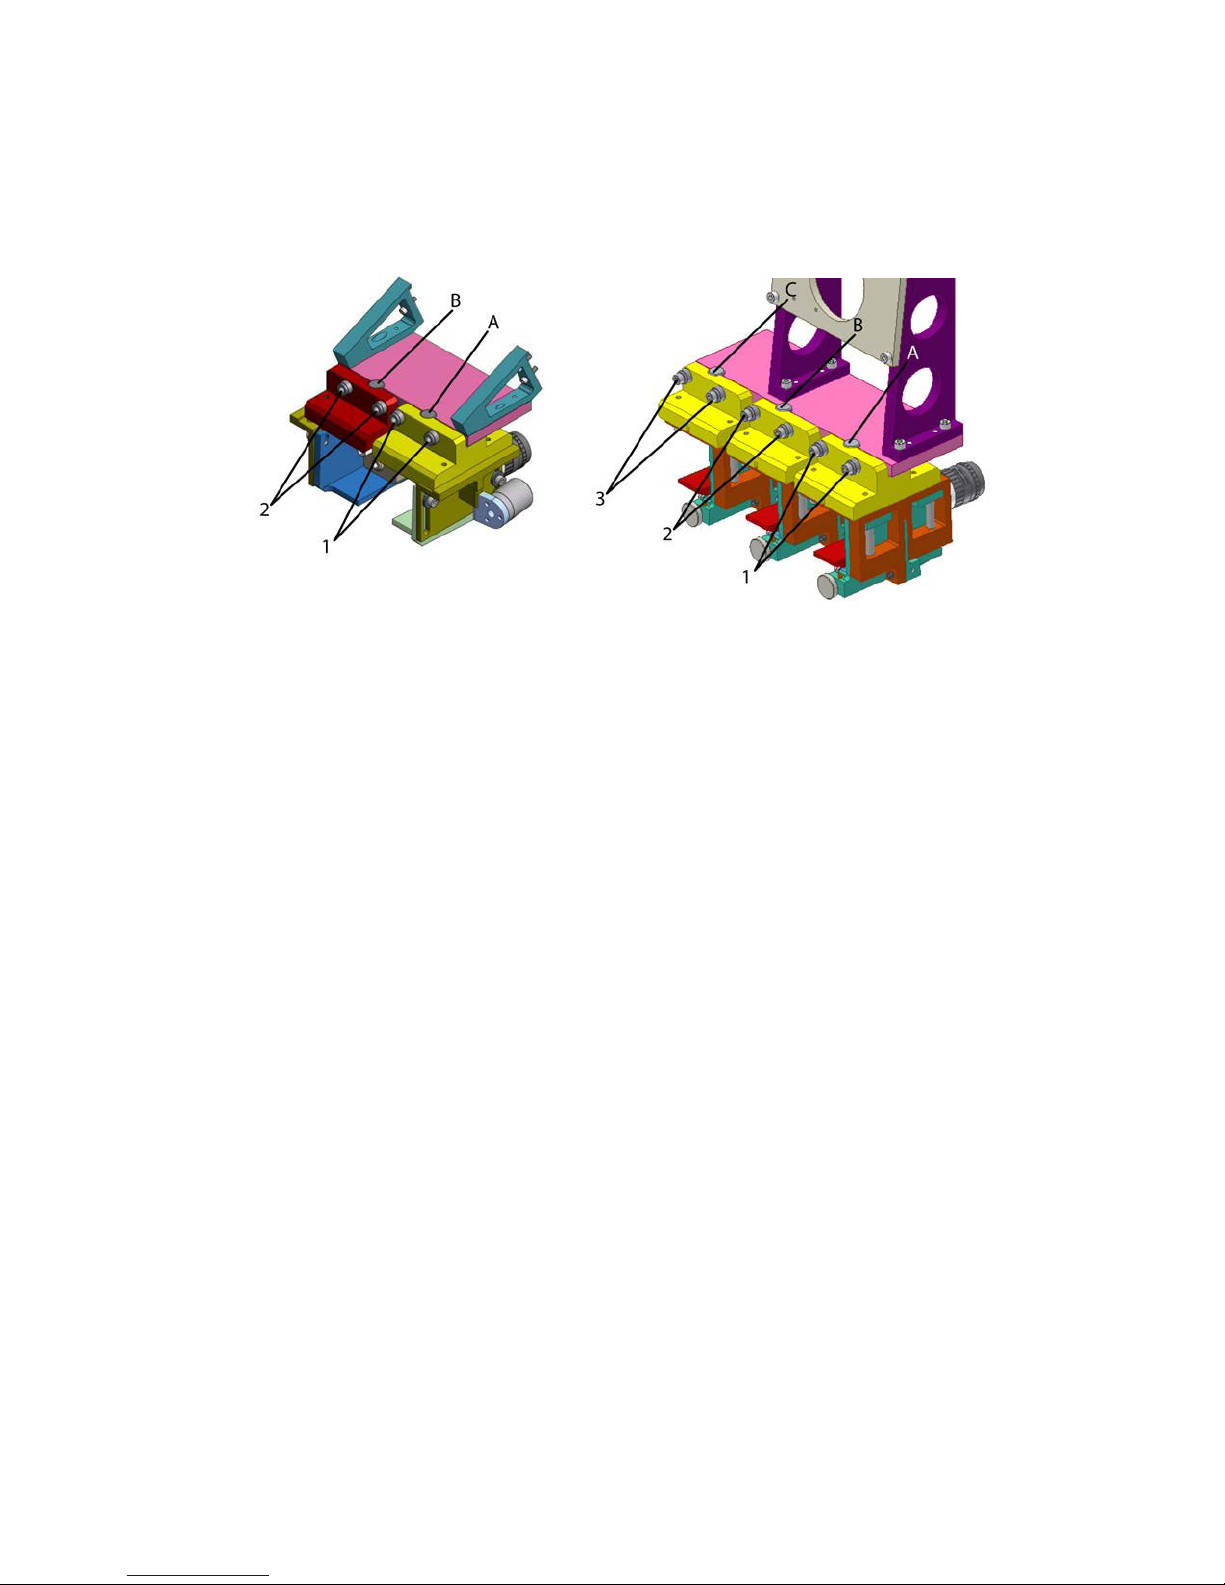
Figure 2: Location of Camera-to-Needle Alignment Screws. Dual camera (left). Triple camera (right).
Camera for Head Station 1
Loosen or tighten adjustment screws (Item 1) and swivel the camera around swivel
screw (Item A).
Camera for Head Station 2
Loosen or tighten adjustment screws (Item 2) and swivel the camera around swivel
screw (Item B).
Camera for Head Station 3
Loosen or tighten adjustment screws (Item 3) and swivel the camera around swivel
screw (Item C).
2/7/18 Multiple Mount Process View Camera User Guide 2
GPD Global
©
Camera Angle
Camera angle can be adjusted as follows.
Dual Camera Model
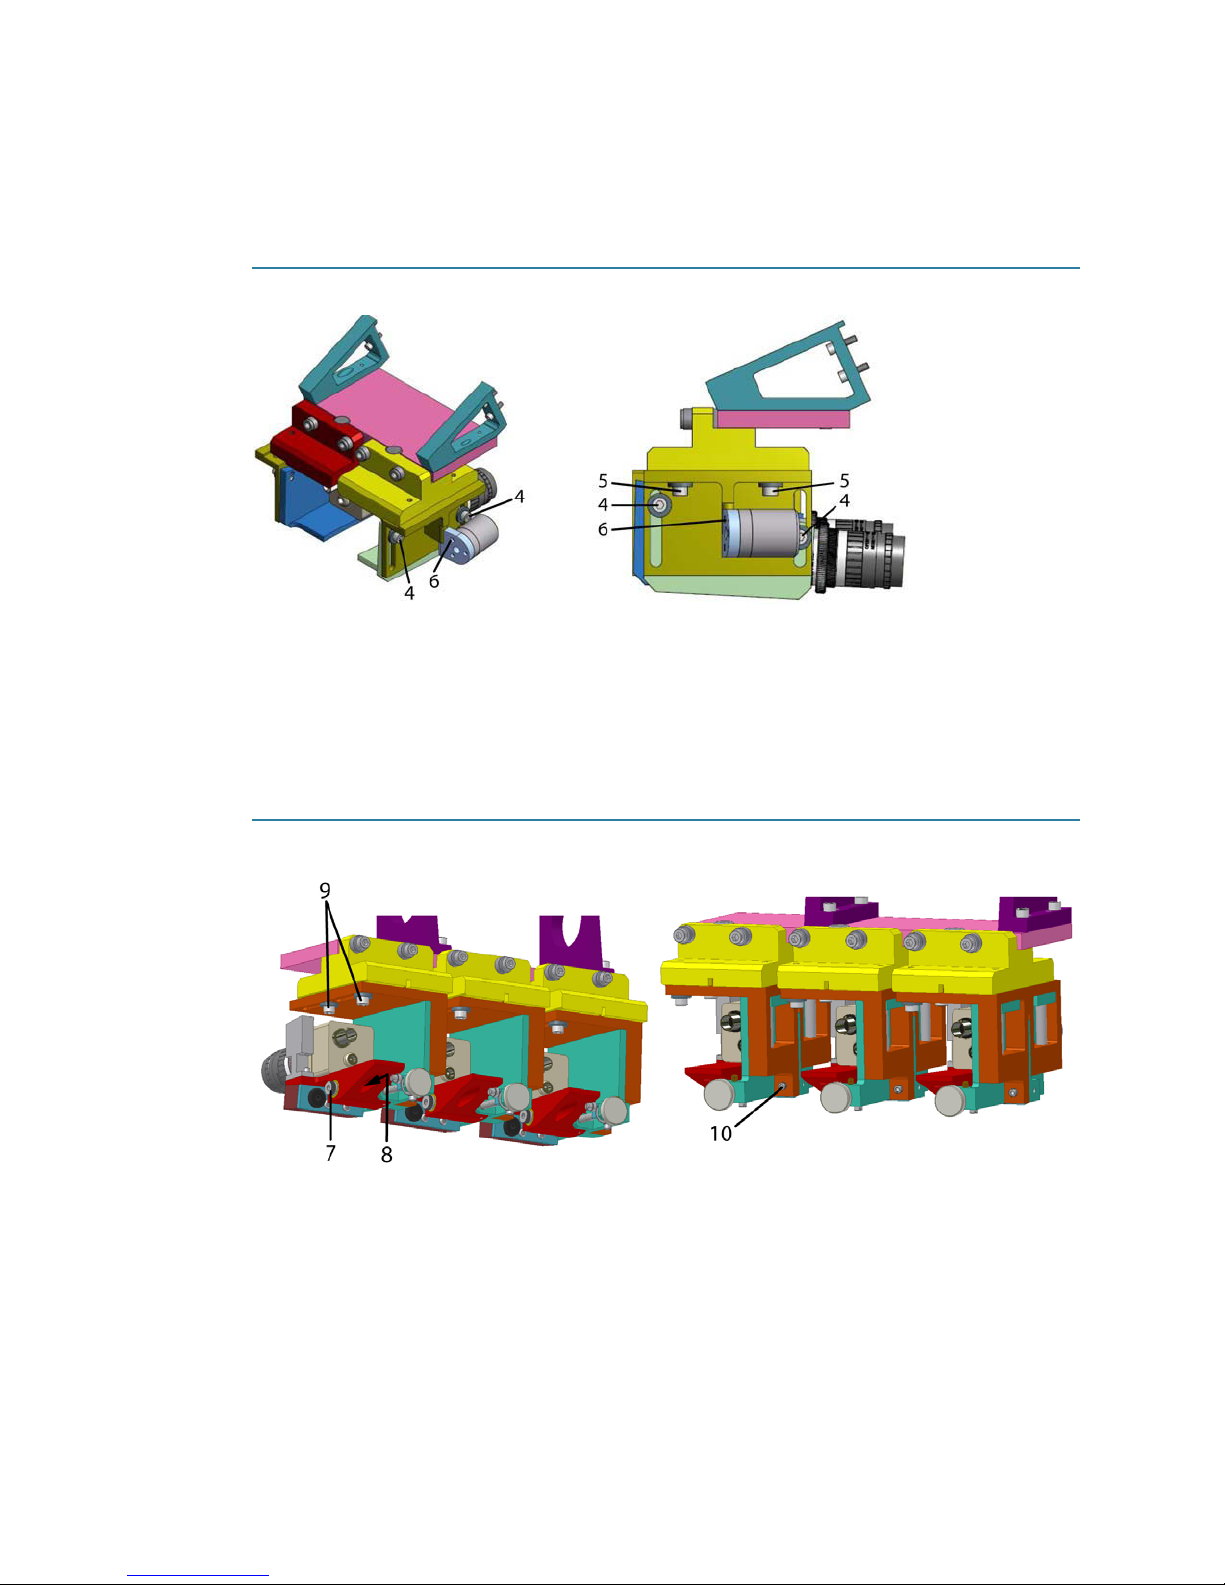
Figure 3: Location of Camera Angle Adjustments for Head Station 1
Rotation in X Axis
Translational in Z Axis
Translational in Y Axis
Loosen pair of cap screws (Item 4), adjust camera position, then tighten cap screws.
Loosen pair of cap screws (Item 5), adjust camera position, then tighten cap screws.
Triple Camera Model
Figure 4: Location of Camera Angle Adjustments for Head Station 3
Rotation in X Axis
Loosen cap screw (Item 7), adjust camera position with thumbscrew (Item 8), then
tighten cap screw.
Translational in Y Axis
Loosen pair of cap screws (Item 9), adjust camera position, then tighten cap screws.
Translational in Z Axis
Loosen set screw (Item 10), adjust camera position, then tighten set screw.
2/7/18 Multiple Mount Process View Camera User Guide 3
GPD Global
©
Focal Point
Dual Camera Model
To modify coarse focus, loosen the cap screws (Figure 5, Item 5) and reposition the camera
forward or backward relative to the pump. Re-tighten the screws.
To modify fine focus, adjust the camera lens setting.
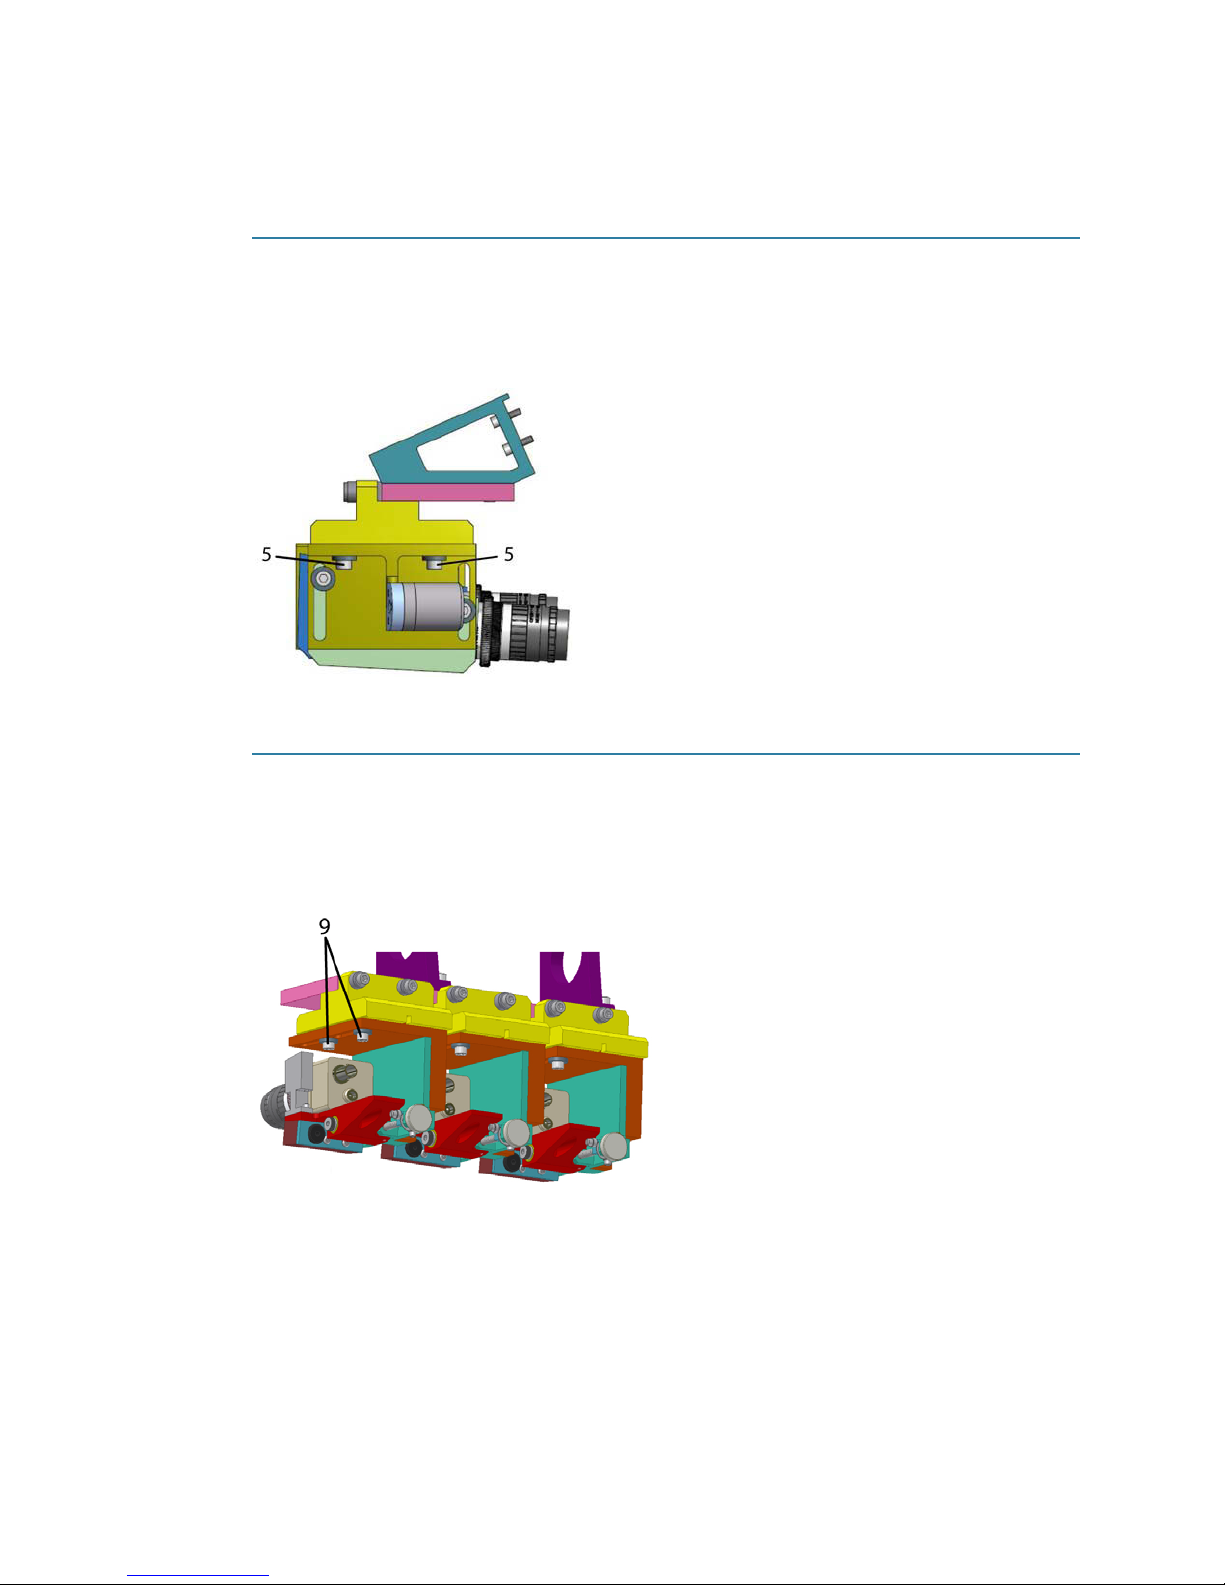
Figure 5: Location of Camera Focal Point Adjustment for Head Station 1
Triple Camera Model
To modify coarse focus, loosen the cap screw (Figure 6, Item 9) and reposition the camera
forward or backward relative to the pump. Re-tighten the screws.
To modify fine focus, adjust the camera lens setting.
Figure 6: Location of Camera Focal Point Adjustment for Head Station 3
2/7/18 Multiple Mount Process View Camera User Guide 4
 Loading...