

Page 1
PVP4040
Personal Video Player
User’s Guide
WWWGOVIDEOCOM
Page 2

Safety Instructions
Safety Instructions
Please read the following safety instructions before using the player.
• Do not overload electrical outlets, as this may result in excessive heat and/or fire.
• Do not bend the power cord or allow it to be crushed by heavy objects, as this may increase the
risk of fire.
Warning
• Do not handle the power plug with wet hands, as this may result in electric shock.
• Make sure the power plug is fully inserted, as a loose connection may increase the risk of fire.
• Never disassemble or modify the player in any way.
• Do not allow chemicals, such as benzene or thinner, to come in contact with the player.
• Do not use the player near a magnet or other strong magnetic field.
• Do not allow dirt or foreign objects to enter the player.
• Avoid using the player in environments with high temperatures (>104°F), low temperatures
(<41°F), or high humidity.
• Do not drop the player or expose it to excessive shock or vibration.
• Interference from electromagnetic waves may damage the player. Be sure to fully extend the
Caution
adapter cable before using it.
• Avoid using the player in direct sunlight or near any heat generating device.
• Avoid using the player in excessively dirty or dusty environments.
• Unplug the power cord when cleaning the adapter.
• Do not drop the adapter or expose it to excessive shock or vibration.
• Use only the adapter supplied with this player.
Notes when using earphones
Traffic safety
• Do not use the earphones while riding a bicycle or driving a car or motorcycle. It is not only dangerous,
but may also be illegal depending on the region. To avoid personal injury, do not use the earphones
while walking near roads, intersections, crosswalks, etc.
Avoid high volume
• Do not use the earphones continuously at high volumes, as it could be harmful to your hearing.
• If your ears ring, turn down the volume or stop using the earphones.
Environmental information
• Separate packing materials, batteries, and electronic products when not in use.
• Packing materials are classified into cardboard, polyethylene, etc. No unnecessary packing materials
have been used for this player.
2
2
Page 3
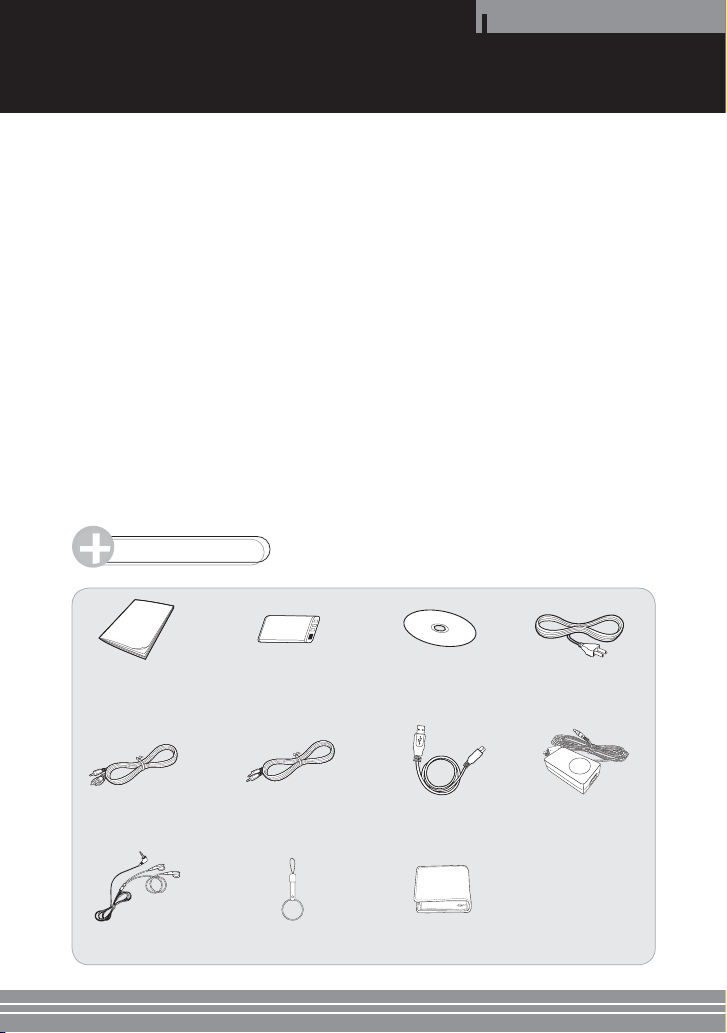
Table of Contents
Table of Contents
Player Overview ............................................................................................................................................................................ 4
Viewing/Recording from an External Source .................................................................................................................... 6
Watching Movies .......................................................................................................................................................................... 7
Viewing Images ............................................................................................................................................................................. 8
Listening to Music ........................................................................................................................................................................ 9
Using the Setup Menu ............................................................................................................................................................. 10
Connecting an External Source or PC ................................................................................................................................. 13
Using the Transcoding Software ........................................................................................................................................... 14
Charging the Battery ................................................................................................................................................................. 18
Troubleshooting ......................................................................................................................................................................... 19
Specifications .............................................................................................................................................................................. 20
Warranty ......................................................................................................................................................................................... 21
Accessories
User's Guide
Audio/Video Cable USB Cable AC Adapter
Earphones Ring Stand Carrying Case
Rechargeable
Lithium Ion Battery
Audio Cable
Installation CD
(Transcoder Software)
Power Cable
3
3
Page 4

Player Overview
Overview
0%23/.!,!62%#/2$%20,!9%2
'O6IDEO0ERSONAL!62ECORDER0LAYER
-ODEL060
WWWGOVIDEOCOM
-!$%).#().!
4
4
Page 5

Overview
1 LCD Screen
Displays the player’s status, menus, and media
files.
• Use the LCD ON/OFF switch to temporarily turn
off the LCD Screen to save battery life (see #16
below).
2 Charge indicator
Lights when the player’s battery is charging. Turns
off when the battery is fully charged. To charge
the battery:
• Connect the supplied AC Adapter to the player’s
DC In jack and plug it in.
OR
• Connect the player to a PC using the supplied
USB cable.
3 REC button
Starts recording from an external source
connected to the player’s AV In jack.
4 REPEAT button
Selects one of the player’s built-in repeat modes.
• You can also press and hold REPEAT to mark all
files for deletion. Then press STOP to delete all
marked files.
5 MENU button
Displays the player’s Main menu.
6 VOLUME/SLIDE TIME -/+ buttons
Adjust the player’s volume. Also use to set the
slide show interval from 2~30 seconds.
7 POWER/STOP button
Press to turn the player on. Press and hold to turn
the player off. Also use to stop playback.
8 SELECT control
The SELECT control has three positions (left, right,
and down) and a variety of uses:
• MENU NAVIGATION - Press left/right to browse
menu options. Press down to make selections.
• PLAY/PAUSE - Press down to play or pause the
selected file.
• SKIP PREV/NEXT - Press left/right during
playback to skip to the previous or next file.
• REWIND/FF - Press and hold left/right during
playback to scan backward or forward at
variable speeds.
• DELETE - Press and hold down to mark the
selected file for deletion. Then press STOP to
delete all marked files.
9 AV IN jack
Use to connect an external source (such as a DVD
player, VCR or camcorder), using the supplied
Audio/Video cable.
10 DC IN jack
Use to connect the supplied AC Adapter.
• The internal battery will charge whenever the
player is connected via the AC Adapter.
11 SD CARD slot
Use to insert an external SD memory card.
• SD (Secure Digital®) cards are high capacity
memory cards used to store video, audio, and
image files.
• To view the contents of your SD card, you must
switch the player from Internal to Extended
memory mode; see page 11.
12 Rechargeable Battery slot
Use to insert or remove the supplied lithium ion
battery.
• Pay attention to the correct polarities when
inserting the battery.
13 USB Connection jack
Use to connect the player to your PC to:
• Add media files to the player.
• Charge the battery.
14 NTSC/PAL switch
Selects your desired display system (NTSC or PAL).
• NTSC is the standard used in the United States.
15 HOLD switch
Temporarily locks all buttons on the player to
prevent accidental operation while walking,
jogging, etc.
16 LCD ON/OFF switch
Turns the LCD screen on and off. This is useful to
save battery life while listening to MP3 files.
17 Headphone jack
Use to connect the headphones/earphones.
18 60° TILT
Use to insert the loop on the supplied ring stand.
Allows the player to sit on a table at a comfortable
viewing angle.
19 30° TILT
Use to insert the loop on the supplied ring stand.
Provides an alternative viewing angle.
5
5
Page 6

Operation
Viewing an External Source
You can use the player to view and record* from an external source, such as a DVD player, VCR, camcorder, or
portable CD player. To connect your external source, see page 13.
INPUT MODE
1 Use the SELECT control to highlight and select the “INPUT MODE” icon.
• Playback from your external source connected to the AV IN jack will be displayed on
the LCD screen.
2 When finished, press the MENU button to exit.
• The Main menu will be displayed.
Recording from an External Source
1 Press the REC button.
2 Use the SELECT control to highlight and select the icon for the type of file you
want to record (Video, Image or MP3).
• The recording screen will appear and recording will start.
• If no video signal is detected, MP3 recording mode will be activated automatically.
3 To stop recording, press the STOP button.
• The new file will automatically be added to your player’s memory; see pages 7-9.
Note
* This player will not record Macrovision® copy-protected source material. If copy-
protection is detected, you will not be able to record from your external source.
6
6
Page 7

Operation
Watching Movies
You can use the player to watch video clips copied to the player in AVI format (MPEG-4 video with MP3 audio). If
you have video files in other formats, you can use transcoding software to convert the files to AVI format.
VIDEO LIST
VIDEO
VIDEO001.ASF
VIDEO002.ASF
VIDEO003.ASF
VIDEO004.ASF
VIDEO005.ASF
2.3 MB
00 : 30 : 30
FREE/TOTAL
IN: 71/124MB
EX: NO CARD
1 Use the SELECT control to highlight and select the “VIDEO LIST” icon.
• A list of video files in the built-in memory or currently loaded SD card will appear.
2 Use the SELECT control to highlight and select the desired video file.
• The selected video file will play.
• Press the SELECT control left or right to skip to the previous or next video file.
• Press and hold the SELECT control left or right to scan backward or forward during
playback.
• Press the STOP button to stop playback and return to the video list.
• During video playback, press the RECORD key to display an elapsed time counter on
the LCD screen.
3 When finished, press the MENU button to exit.
• The Main menu will be displayed.
REC MODE REPEAT VOLUME
HIGH OFF
Repeating Playback
Press the REPEAT button.
• The Repeat mode will change as follows:
ONE: Repeats the current video file.
ALL: Repeats all files in the video list.
OFF: Disables Repeat mode. All files in the video list will play through once.
Deleting Video Files
1 Use the SELECT control to highlight the video file you wish to delete.
2 Press and hold the SELECT control for two seconds to mark the file for deletion.
• An “X” will appear next to the file to indicate that it is marked for deletion.
• To mark all files for deletion, press and hold the REPEAT button for two seconds.
3 Press the STOP button to confirm deletion of the selected file(s).
• Note: You can use the procedures in step 2 to unmark previously marked file(s).
7
7
Page 8

Operation
Viewing Images
You can use the player to browse images copied to the player in JPEG format or on an SD card from a digital
camera.
IMAGE LIST
JPEG
Image1.JPG
Image2.JPG
Image3.JPG
Image4.JPG
Image5.JPG
41 KB
1024 x 768
FREE/TOTAL
IN: 71/124MB
EX: NO CARD
1 Use the SELECT control to highlight and select the “IMAGE LIST” icon.
• A list of JPEG files in the built-in memory or currently loaded SD card will appear.
2 Use the SELECT control to highlight and select the desired JPEG file.
• The selected JPEG file will be displayed on the LCD screen.
• Press the SELECT control left or right to skip to the previous or next image.
• Press the STOP button to return to the JPEG list.
3 When finished, press the MENU button to exit.
• The Main menu will be displayed.
REC MODE REPEAT VOLUME
NONE
HIGH
00 SEC
Setting Up a Slide Show
1 Press the REPEAT button to select "SLIDE" mode.
2 Use the SLIDE TIME +/– buttons to select the interval between each image.
• Choose from 2 to 30 seconds.
• The default slide time is 3 seconds.
Deleting Images
1 Use the SELECT control to highlight the JPEG file you wish to delete.
2 Press and hold the SELECT control for two seconds to mark the file for deletion.
• An “X” will appear next to the file to indicate that it is marked for deletion.
• To mark all files for deletion, press and hold the REPEAT button for two seconds.
3 Press the STOP button to confirm deletion of the selected file(s).
• Note: You can use the procedures in step 2 to unmark previously marked file(s).
8
8
Page 9

Operation
Listening to Music
You can use the player to listen to music files copied to the player in MP3 (MPEG-2 Layer 3) or WMA (Windows
Media Audio) format.
MP3 LIST
1 Use the SELECT control to highlight and select the “MP3 LIST” icon.
• A list of MP3 files in the built-in memory or currently loaded SD card will appear.
2 Use the SELECT control to highlight and select the desired MP3 file.
• The selected MP3 file will play.
• Press the SELECT control left or right to skip to the previous or next track.
• Press the STOP button to stop playback and return to the MP3 list.
3 When finished, press the MENU button to exit.
• The Main menu will be displayed.
Repeating Playback
Press the REPEAT button.
• The Repeat mode will change as follows:
ONE: Repeats the current MP3 file.
ALL: Repeats all files in the MP3 list.
OFF: Disables Repeat mode. All files in the MP3 list will play through once.
Deleting MP3 Files
1 Use the SELECT control to highlight the MP3 file you wish to delete.
2 Press and hold the SELECT control for two seconds to mark the file for deletion.
• An “X” will appear next to the file to indicate that it is marked for deletion.
• To mark all files for deletion, press and hold the REPEAT button for two seconds.
3 Press the STOP button to confirm deletion of the selected file(s).
• Note: You can use the procedures in step 2 to unmark previously marked file(s).
IN: 71/124MB
EX: NO CARD
MUSIC
32.0KHz
96Kbps
4.0MB
0 : 05 : 30
0 : 00 : 00
FREE/TOTAL
AUDIO001.MP3
AUDIO001.MP3
AUDIO002.MP3
AUDIO003.MP3
AUDIO004.MP3
AUDIO005.MP3
REC MODE REPEAT VOLUME
32KHz
96Kbps
STEREO
9
9
Page 10

Using the Setup Menu
The Setup menu allows you to control advanced features of your player.
Navigating the Setup Menu
Operation
GENERAL GENERAL
MEMORY
LANGUAGE
POWER SAVE
RESET
UP GRADE
MEMORY
LANGUAGE
POWER SAVE
RESET
UP GRADE
INTERNAL
EXTENDED
1 Use the SELECT control to highlight and select the “SETUP MENU” icon.
• The player’s Setup menu will appear.
2 Use the SELECT control to highlight and select from the following menu headers:
GENERAL: Memory, Language, Power Save, Reset, and Upgrade settings (page 11)
RECORD: MPEG4 and MP3 Record Quality settings (page 11)
MEMORY: Internal/Extended Memory Format settings (page 12)
PICTURE: Brightness and Contrast settings (page 12)
EXIT: Exit and return to the Main menu (page 12)
3 Use the SELECT control to highlight and select the desired submenus and spe-
cific menu options.
4 Press the STOP button to return to the Setup menu.
5 Press the MENU button to return to the Main menu.
10
10
Page 11

GENERAL SETUP
GENERAL SETUP
MEMORY
INTERNAL
LANGUAGE
EXTENDED
POWER SAVE
RESET
UP GRADE
Operation
MEMORY
Use to set the player to Internal or Extended (SD card) memory mode:
• INTERNAL: Use when playing, recording, deleting or formatting the
contents of the built-in memory. An SD card loaded in the player will
not be accessible.
• EXTENDED: Use when playing, recording, deleting or formatting
the contents of an SD card loaded in the player. The player’s built-in
memory will not be accessible.
LANGUAGE
• Selects a language for the player’s on-screen displays and menus.
POWER SAVE
• Conserves battery life by having the player turn off automatically if it
is left in Stop mode for five minutes.
RESET
• Restores all player settings to their factory defaults.
UPGRADE
Firmware upgrades may be available from time to time to add
functionality to the player. Check www.govideo.com for details.
1 Download the firmware upgrade file.
2 Connect the player to your PC with the supplied USB cable.
3 Copy the firmware upgrade file to the player.
4 Disconnect the player from the USB cable.
5 Select UPGRADE in the General Setup menu to upgrade the
firmware.
RECORD SETUP
RECORD
MPEG4
FINE
MP3
NORMAL
ECONOMY
MPEG4
Use to set the picture quality for video recording.
• FINE: Best quality (~30 minutes* using the built-in memory)
• NORMAL: Good quality (~50 minutes* using the built-in memory)
• ECONOMY: Average quality (~110 minutes* using the built-in
memory)
* Recording time may vary depending on the video signal.
MP3
Use to set the sound quality for audio recording.
• SAMPLE RATE/BIT RATE: Sets the desired sample rate and bit rate
for MP3 recording (the higher the rate, the higher the sound quality
and file size).
• CHANNEL: Sets the player to record MONO (1 channel) or STEREO (2
channel) audio during recording.
11
11
Page 12

Using the Setup Menu
MEMORY FORMAT
MEMORY FORMAT
INTERNAL
FORMAT
EXTENDED
DISPLAY SETUP
DISPLAY
BRIGHTNESS
CONTRAST
LCD BRIGHTNESS SETUP
FORMAT
Use to format (erase) the contents of the player’s Internal or Extended
(SD card) memory.
• INTERNAL: Deletes all files in the player’s built-in memory.
• EXTENDED: Deletes all files on the external SD card.
BRIGHTNESS
• Use to adjust the brightness of the LCD screen.
CONTRAST
• Use to adjust the contrast of the LCD screen.
Operation
SETUP EXIT
SETUP EXIT
12
12
Use to exit the Setup menu and return to the Main menu.
Page 13

Connections
Connecting an External Source or PC
Connect the player to an external source device (such as a DVD, VCR, camcorder or portable CD player) to watch or
record audio/video clips. Connect the player to a PC to transfer media files (AVI, JPEG, and MP3 files) to the player.
Connecting an External Audio/Video Source
External Audio/Video Source
Personal
Video
Player
Audio/Video Cable
• Connect the supplied Audio/Video or Audio cable from your external source to the AV In jack on the
right side of the player.
• Switch to “INPUT MODE” on the Main menu to view and record from your external source (see page 6).
External Source
External Audio Source
Audio/Video Cable
Audio Cable
Connecting a PC
Note
• The player’s controls will not function
while it is connected to your PC.
• Be sure to disconnect the USB
PC
USB cable
cable after you are finished moving,
copying, or deleting files between the
player and your PC to resume normal
player operation.
• Connect the supplied USB cable between the player and a PC running Windows ME®, Windows 2000®,
or Windows XP®.
• After the player is recognized by your PC, double-click My Computer and browse to the player (which
appears as a portable disc) using Windows Explorer® .
• Move, copy, and/or delete files from the player using the same methods you would use with any
external drive in Windows®.
13
13
Page 14

Transcoder Software
Installing the Transcoder Software
The supplied CD includes special Transcoder software and codecs that allow you to convert your movie files to a
format that is recognized by the player.
System Requirements
PC requirements
• PC with Pentium III 1GHz processor or higher
• 256MB RAM or higher
• VGA adapter with Microsoft DirectX® support
• Sound card (required)
• Microsoft® Windows® ME®, Windows 2000®,
Windows XP®
• Microsoft DirectX® 8.0 or later
• Microsoft Windows Media Player® 9.0
Software Installation
Follow the steps below to install the Transcoder
software and other required codecs. You must
have an Internet connection established on
your PC in order to complete the installation.
1 Inser t the supplied installation CD.
2 The main installation screen is displayed.
• If you do not see the screen at right, click
START> RUN, and then browse to
“autorun.exe” and click OK.
3 You MUST INSTALL each of the following
items by clicking its link and following the
on-screen instructions:
• DivX 5.11 Codec (Internet connection
required) - When the File Download box
appears, click Open to download and
launch the installer.
• Multi-Codec Pack (Internet connection
required) - When the File Download box
appears, click Open to download and
launch the installer.
• Windows Media Player 9.0 (Internet
connection required) - Connects you to
the Microsoft website where you can
download the latest version of Windows
Media Player for your operating system.
• Direct X 9.0 (Internet connection
required) - Follow the on-screen wizard to
install.
• Media Transcoder - This is the master
application that converts media file
formats to be compatible with the player.
Follow the Installation Wizard to install.
About Codecs
• Codec stands for “code/decode” and refers to the
conversion of files from one format to another.
• The player will only recognize AVI and ASF files
with MPEG-4 Video and MP3 Audio.
• The supplied Transcoder software will convert
the following files into a format compatible with
the player: WMV, ASF, AVI, MPEG, MPG, WMA.
4 When all applications and codecs have
been installed, select “Exit” to exit the
installer.
5 Launch the Transcoder software.
• Select START > Programs > Transcoder >
Transcoder.
or
• Double-click the Transcoder icon on the
Windows desktop.
Other CD Options
Try these links on the installer screen for advanced
help and other CD options:
• User’s Guide - Links to a PDF of the player’s
User’s Guide.
• Q & A - Links to common questions about
Transcoder operation.
• Install Guide - Links to detailed instructions on
software installation.
• Browse CD - Allows you to browse the contents
of the CD, including sample media files.
14
Page 15

Transcoder Overview
Transcoder Software
1 Menus
Click to view File, Build, Option, and
Help menu options.
2 Tool Bar
Click to select New, Open, Save, and
Build options.
3 File Search Window
Use to browse drives and directories
on your PC.
4 File List Window
Use to list files on your PC. Drag movie
files that you want to convert from
this window to the Transcoded Files
window (see #5).
5 Transcoded Files Window
Displays the movie files to be
transcoded.
6 S ave File Path
Indicates the directory where
transcoded movies are saved. To specify
this directory, select Option > SaveFile
Path.
7 Available Space Indicator
Indicates the amount of available space
and the total space in the selected
directory.
8 Transcoding Progress Indicator
Graphically displays the progress of the
transcoding.
15
Page 16

Menu & Tool Bar Options
Menu Options
File
• New schedule: Creates a new list of transcoded files.
• Open schedule: Opens a saved list of transcoded files (with the
extension *.dmt).
• Save: Saves the current list of transcoded files to a *.dmt file.
• Save As: Saves the current *.dmt file to a new file name.
• Exit: Exits the Transcoder software.
Build
• Tran s: Starts transcoding all files that have been dragged and
dropped to the Trancoded Files window.
Option
• Sami: Select to include closed caption files, if available for your
media files.
• Media File: Only displays media files in the File List window.
• Media Info: Only displays media files which do not require
transcoding in the File List window.
• Refresh: Refreshes the screen to display any changes.
• SaveFile Path: Allows you to specify the directory where transcoded
video files will be saved.
Help
• About: Displays the Transcoder software version information and
website.
Transcoder Software
Tool Bar Options
16
New Schedule
• Creates a new list of transcoded files.
Open Schedule
• Opens a saved list of transcoded files (with the extension *.dmt).
Save As
• Saves the current *.dmt file to a new file name.
Build
• Starts transcoding all files that have been dragged and dropped to
the Trancoded Files window.
Page 17

Transcoding Files
1 S earch for Files
Select the directory in the File Search window where the file(s) you wish
to trancode are located.
2 Drag and Drop Files
Drag and drop the file(s) to be transcoded from the File List window to
the Transcoded Files List window as shown.
3 Start Transcoding
Click the Build button on the tool bar (or select Build > Trans) to
begin transcoding the selected files.
4 Wait for Transcoding
The progress bar will indicate the percentage complete.
5 Check File
When transcoding is complete, check the icon to the left of the file
name:
• If a green icon appears, the file was successfully transcoded.
• If a red icon appears, the file was not successfully transcoded.
• If transcoding fails repeatedly, try reinstalling the transcoder and
codecs.
6 Download File
The transcoded file will be saved in the directory specified in the
Option > SaveFile Path menu.
• Double-click the file to play it in Windows Media Player.
• Connect the player to your PC with the supplied USB cable and copy
your transcoded video files to the player.
Transcoder Software
17
Page 18

Miscellaneous
Charging the Battery
Battery and Power
About the Rechargeable Battery
• The supplied lithium ion battery requires approximately two hours to fully charge from a completely
discharged state.
• Battery life ranges from two hours for video playback (with the LCD Screen on) to four hours for MP3
playback (with the LCD Screen off).
• For your convenience, you can charge the player using either the supplied USB cable or AC Adapter.
Charging with the USB cable
• Turn off the player.
• Connect the supplied USB cable between the player and your PC.
• The Charge indicator on the top of the player will remain lit during charging. After charging is complete,
the indicator turns off.
Charging with the AC adapter
• Connect the supplied AC Adapter to the DC In jack on the right side of the player.
• The battery will charge whether the player is on or off.
• The Charge indicator on the top of the player will remain lit during charging. After charging is complete,
the indicator turns off.
Cautions on use
• If you disconnect the USB cable while a file transfer is in progress, the file may be damaged. Be sure to
wait until the “USB CONNECTED TRANSFERRING FILES” message disappears from the LCD screen before
unplugging the USB cable.
• Be careful not to connect the AC adapter to the AV IN jack.
• Do not remove the SD card while a file is playing.
• This player is designed to work with USB 2.0, but USB 1.1 is also supported.
• Player operation is limited when the USB cable is connected.
• Do not remove the battery while a file is playing or recording.
• Turn off the player before charging it with the USB cable.
1818
Page 19

Troubleshooting
Helpful Tips
Miscellaneous
Symptom
Player will not power on.
Playback is distorted when viewing
an external source connected with
the A/V cable.
Sound from earphone jacks is low
or distorted.
Charging does not work or the
Charge indicator does not light.
External memory (SD card) is not
recognized.
A downloaded video file does
not play.
Device does not show up as a
removable drive in Windows
Explorer.
Solution
• Make sure the battery is installed or the AC adapter is connected.
• The battery may be discharged. If so, recharge it using the AC
adapter or USB cable.
• Make sure the HOLD switch is set to the OFF position.
• Make sure the LCD ON/OFF switch is set to the ON position.
• Press the POWER button.
• Make sure the A/V cable is properly connected.
• Check the NTSC/PAL switch.
• Check the volume level .
• Check the earphone connection. If there is dirt or foreign material
in the terminal, noise may occur.
• If the playback file is damaged, noise may occur or sound may be
interrupted. Try playing another file.
• Check the AC Adapter connections.
• Make sure the battery is installed correctly, paying attention to
the correct polarities (+ and -) as marked on the rear of the unit.
• Make sure the SD card is inserted properly.
• Check for the WRITE PROTECT tab on the SD card.
• This player supports only “FAT and FAT16” formats.
• Play the video file after correcting it using the Transcoder
software.
• Windows automatically assigns drive letters consecutively for
physical devices (such as hard drives, CD-ROM drives, Zip drives,
USB devices, etc.) starting with the letter C: .
• Check to make sure you do not have a resource conflict with
a mapped network drive. If you have a mapped network drive
assigned to the next available physical drive letter, the player will
not show up. To resolve the conflict, it is recommended that you
reassign the conflicting mapped drive to a higher letter in the
alphabet.
1919
Page 20

Specifications
Miscellaneous
Model
Size (Wx D x H)
Weight
Frequency characteristics
Audio Headphone output
S/N
Supported Files
MP3 Files
Image Files
Audio
ECONOMY
NORMAL
(Based on Built-in
FINE
Built-in
Extended
OS
CPU
Memory
Video/Audio
Encoding
Recording Time
Memory)
Memory Type
Recommended
system
specifications
Power specification
AV Files
Picture display
PC connection
Battery use time
PVP4040
3.8” (96mm) x 0.7” (18mm) x 3.1” (79mm)
With battery: 4.7 oz. (133g)/Without battery: 3.8 oz.(107g)
20Hz ~ 20KHz
20mW, Impedance: 16ohm
90dB or larger (based on MP3)
Video: MPEG-4 (320x240 resolution, 24fps max)
Audio: MP3 (32Kbps, 16Khz)
MP3 (ID3 Tag ver 1.1, 64-128kbps, 24-44.1Khz)
JPEG (Decoding: No limitation; Capture: 640x480))
MPEG-4/MP3, Extension = asf
MP3
110 minutes
50 minutes
30 minutes
3.5" Color TFT LCD, 480 x 240 Dot
NTSC/PAL (selectable)
USB 2.0
128MB FLASH MEMORY
SD card slot (8MB ~ 1GB)
Video playback: two hours
Audio playback: four hours (LCD OFF mode)
DC 5V 2.0A adaptor
DC 3.7V, 1100mA lithium ion battery
Windows ME/Windows 2000/Windows XP
Pentium III 1GHz or better
256MB
2020
Page 21

Miscellaneous
Warranty
Limited Warranty
Who Provides the Limited Warranty
During the warranty period, the GoVideo Warranty Administrator will honor service for 90 days labor, 1 year parts
from the original date of consumer purchase. See below for Commercial, Industrial or Educational use coverage.
Remote controls are warrantied for 90 days from the date of purchase.
Who is Protected
This warranty protects the original consumer owner of this GoVideo product.
What is Covered and How Long
This warranty covers internal operating parts and service/labor to repair or replace covered parts in this GoVideo
product for 90 days labor, 1 year parts, from the date of purchase, defined as follows: (1) Original Consumer Retail
Purchase; (2) First Rental Purchase Agreement; or (3) First Lease Purchase Agreement (the “Warranty Period”).
Labor and replacement parts supplied during the Warranty Period are covered only for the remaining portion
of the original Warranty Period. The GoVideo Warranty Administrator shall have no liability for service under
this warranty if non-OEM (Original Equipment Manufacturer) replacement parts are used in the repair of your
GoVideo product.
What the Owner Must Do If Service is Required
Please contact our customer service department at 1-800-736-7679 to repair or replace your product, at
GoVideo’s option, if it proves to be defective in material or workmanship under normal use during the
warranty period listed above, effective from the date of original consumer purchase of the product. Repaired
or replacement units are warrantied for the remaining period of the original warranty. Please retain dated sales
receipt. Within the warranty period, the customer pays inbound shipping charges and GoVideo pays return
shipping charges.
Other Warranty Coverage
Commercial, Industrial or Educational use has the same warranty coverage as stated in this warranty.
What are the Exceptions
This warranty does not cover: (1) Normal maintenance service, such as cleaning. (2) Damage from misuse,
abuse neglect or accident, natural disasters or Acts of God. (3) Cabinetry, decorative parts, A/C adapters, knobs
or buttons. (4) The foreign country use of this product. (5) GoVideo product which has been electronically
or mechanically modified in any way or incorporated into other products. (6) Installation and setup service
adjustments. (7) Owner instruction. Your Owner’s Guide provides information regarding operating instructions
and user controls. For additional information, contact your authorized GoVideo dealer. Go Video is not
responsible for any shipping, handling or insurance charges. This Exclusive Limited Warranty excludes all
incidental and consequential damages. Some states do not allow the exclusion of incidental and consequential
damages, so the above exclusion may not apply to you.
ALL IMPLIED WARRANTIES, INCLUDING IMPLIED WARRANTIES OF MERCHANTABILITY AND FITNESS FOR A
PARTICULAR PURPOSE ARE LIMITED IN DURATION TO THE DURATION OF THIS WARRANTY PERIOD. Some states
do not allow limitations on how long an implied warranty lasts, so the above limitation may not apply to you.
This Exclusive Limited Warranty gives you specific legal rights and you may also have other rights which vary
from state to state.
GOVIDEO WARRANTY ADMINISTRATOR
7835 East McClain Drive • Scottsdale, Arizona 85260-1732
customersupport@govideo.com
800.736.7679
21
Page 22

 Loading...