

Page 1

Page 2

2
.................
Views
AC Adapter
Headphones (Optional)
...........................................
.............................................
Video Connections
.................................
Connections
.................................
..................................
Viewing Disc Menus
...........................
..................................
4
Audio
.......................................................................
4
...................................................................
4
Angle
......................................................................
........................................................................
........................................................................
...............................................................
CDs with MP3 and JPEG fi les
Audio Language [DVD]
.........................
...................................................................
...........................................................
...............................................................
Video Output
............................................................
....................................................................
Audio Setup
...........................................
Output [DVD]
......................................
4
Angle Mark [DVD]
Setup
.......
About the DPT100
.................................................
..............................................
...........................................
Channels
.................................................
.............................................
A
................................
....................................
..............................
...................................
©2004 GoVideo. All rights reserved. Printed in China.
with the KODAK Picture CD format and will display KODAK Picture CDs. The “KODAK Picture CD Compatible” logo is a trademark of Eastman
without prior notifi cation. GoVideo disclaims any obligation to update the information contained herein.
Page 3
Canada, U.S., U.S. Territories
Japan, Europe, South Africa, Middle East
Southeast Asia, East Asia (including Hong Kong)
Australia, New Zealand, Pacifi c Islands, Central
America, Mexico, South America, Caribbean
Former Soviet Union, Indian Subcontinent, Africa
China
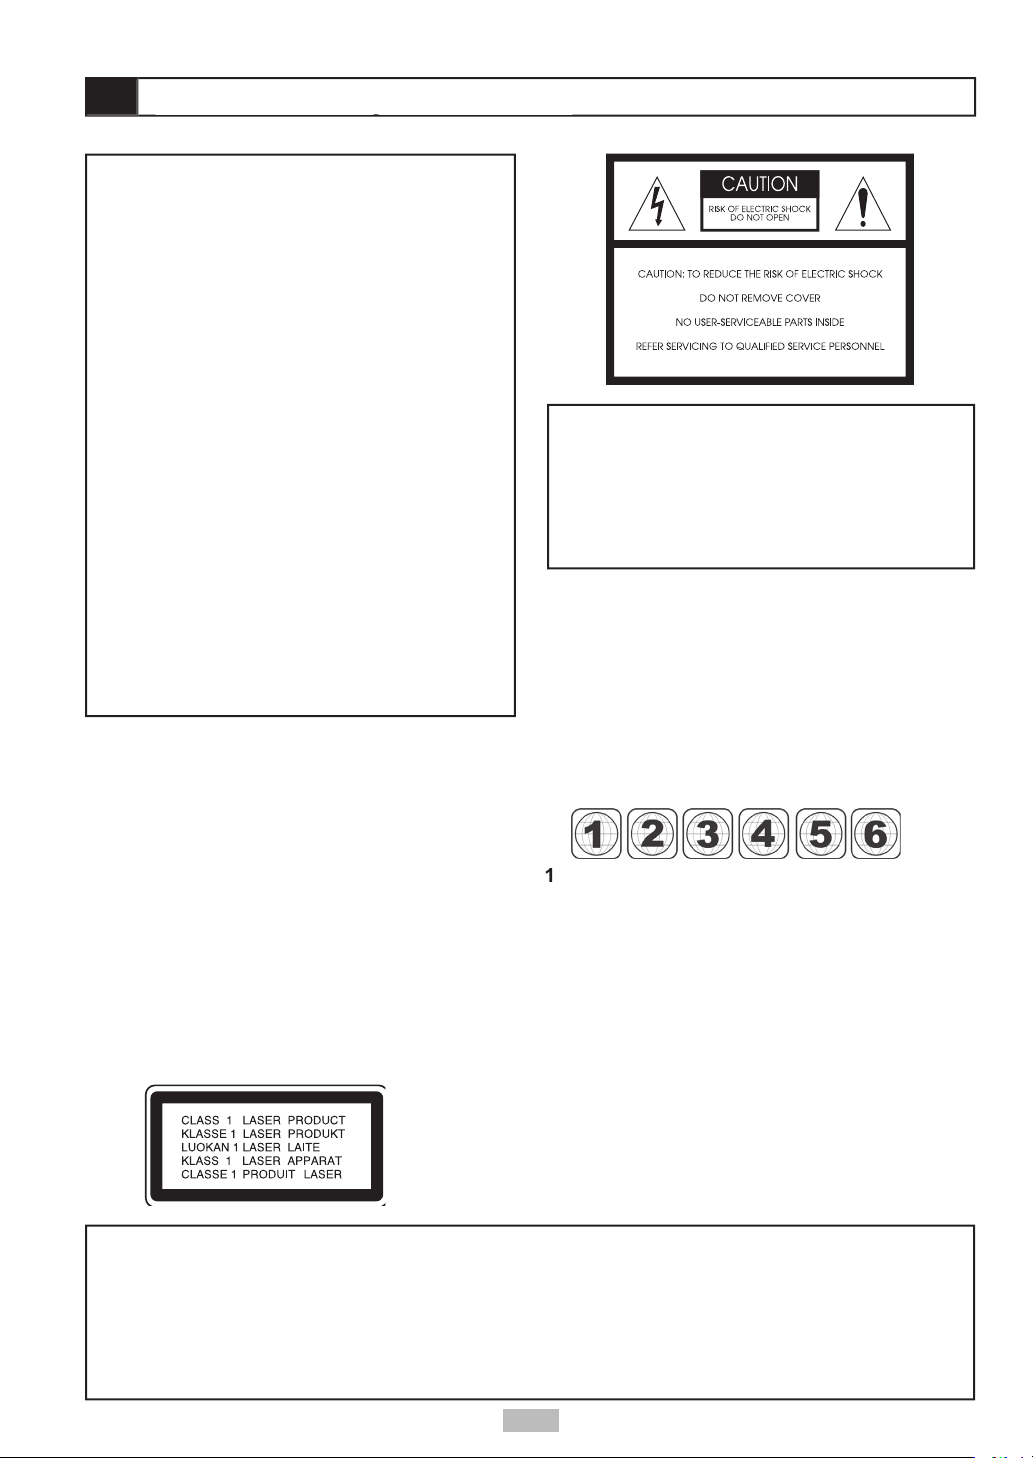
VISIBLE AND INVISIBLE LASER RADIATION WHEN
WARNING
vases, shall be placed on the apparatus.
3
Page 4
Read these instructions.
Keep these instructions.
Heed all warnings.
Follow all instructions.
Do not use this apparatus near water.
Clean only with a damp cloth.
Do not block any of the ventilation openings.
Do not install near any heat sources such
Do not defeat the safety purpose of the
wide blade is provided for your safety. When
Protect the power cord from being walked on
Only use attachments/accessories specifi ed by
Use only with a cart,
from tip-over.
Unplug this apparatus during lighting storms or
when unused for long periods of time.
Refer all servicing to qualifi ed service personnel.
Avoid placing the unit in areas of:
When the unit is not being used, turn it off. When left
watch a TV broadcast and the unit is left on. This is
4
Page 5
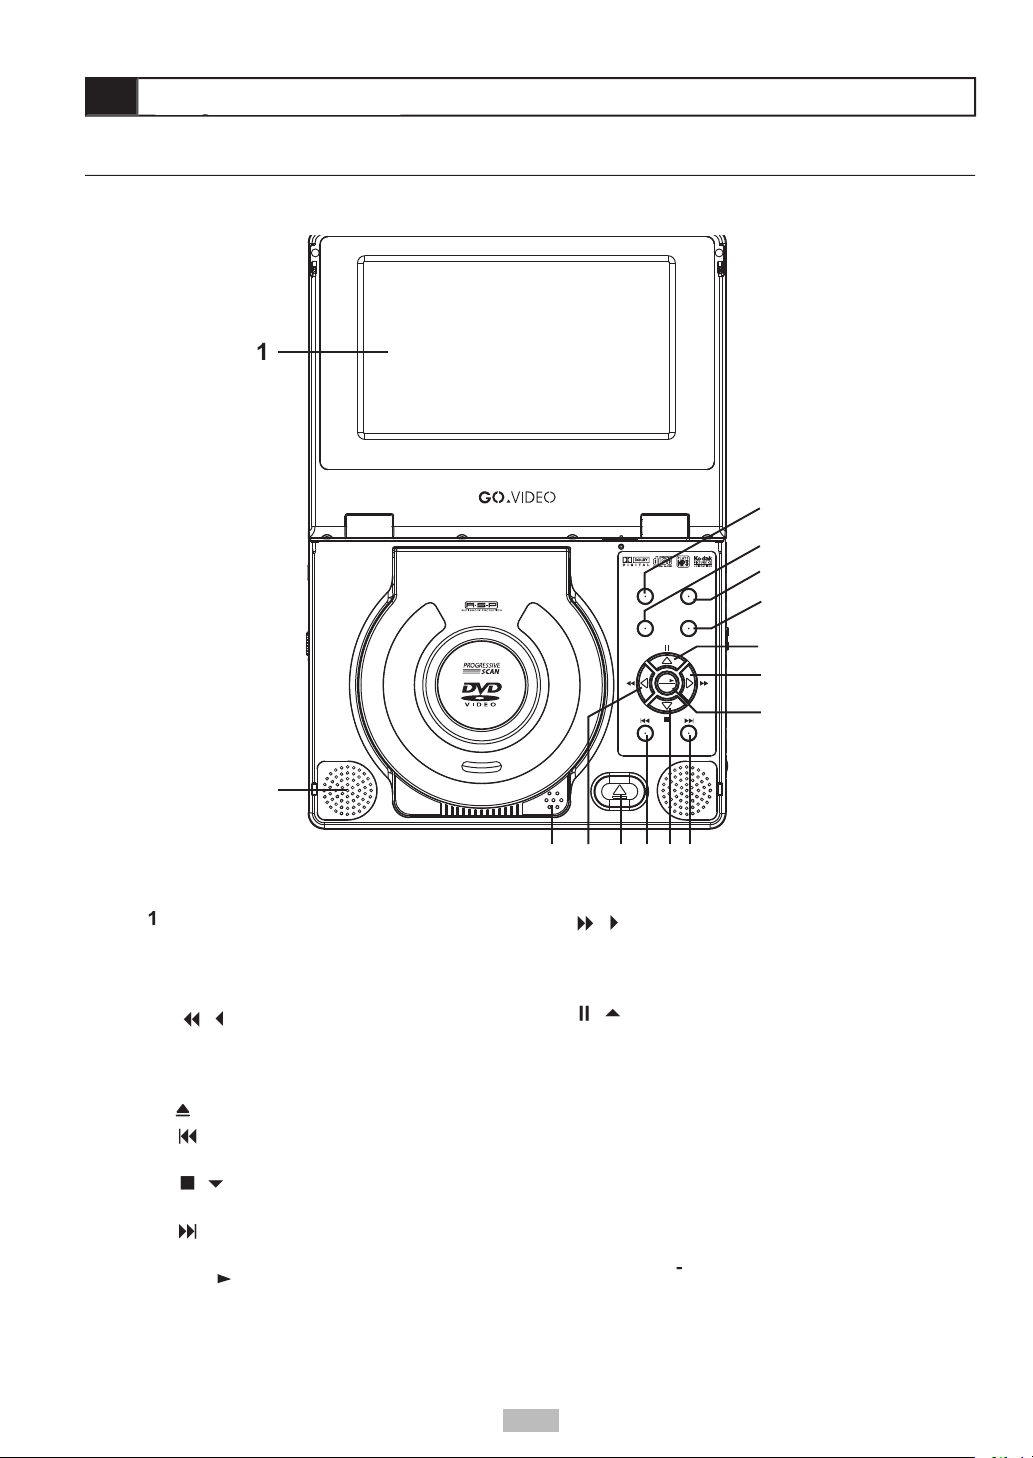
/
verse Scan
- Scans backward
when using optional TV tuner.
- Opens the disc tray.
- Skips to previous
/
- Stops playback. Moves
- Skips to next chapter/track
/
- Starts playback. Also
/
- Scans backward
/
- Pauses playback. Moves
- Displays the disc menu of a DVD.
- Displays the player’s Setup menu.
Also displays a special Tuner menu in
- Switches among S-Video,
Displays options relating to
LCD
Open
Setup
Mode Menu
Select
Play
DP7040
Portable DVD/CD Player
5
Page 6

sensor
- Receives input from remote
indicator
- Lights when player is
- Connects to the supplied AC
- Turns the player
- Connects to optional
- Holds the optional
Volume
- Adjusts the player’s
volume.
Jacks
- Connects to
7 8 9 10 11 12 13
3 4 5 6
Left Side
Right Side
1 2
Front
- Connects
AV Out/AV In Switch
- Changes the
Video and Audio jacks to be either Inputs
Audio Output/Input
- Connects out to
Video Output/Input
- Connects out to
from an external video device, such as a
6
Page 7
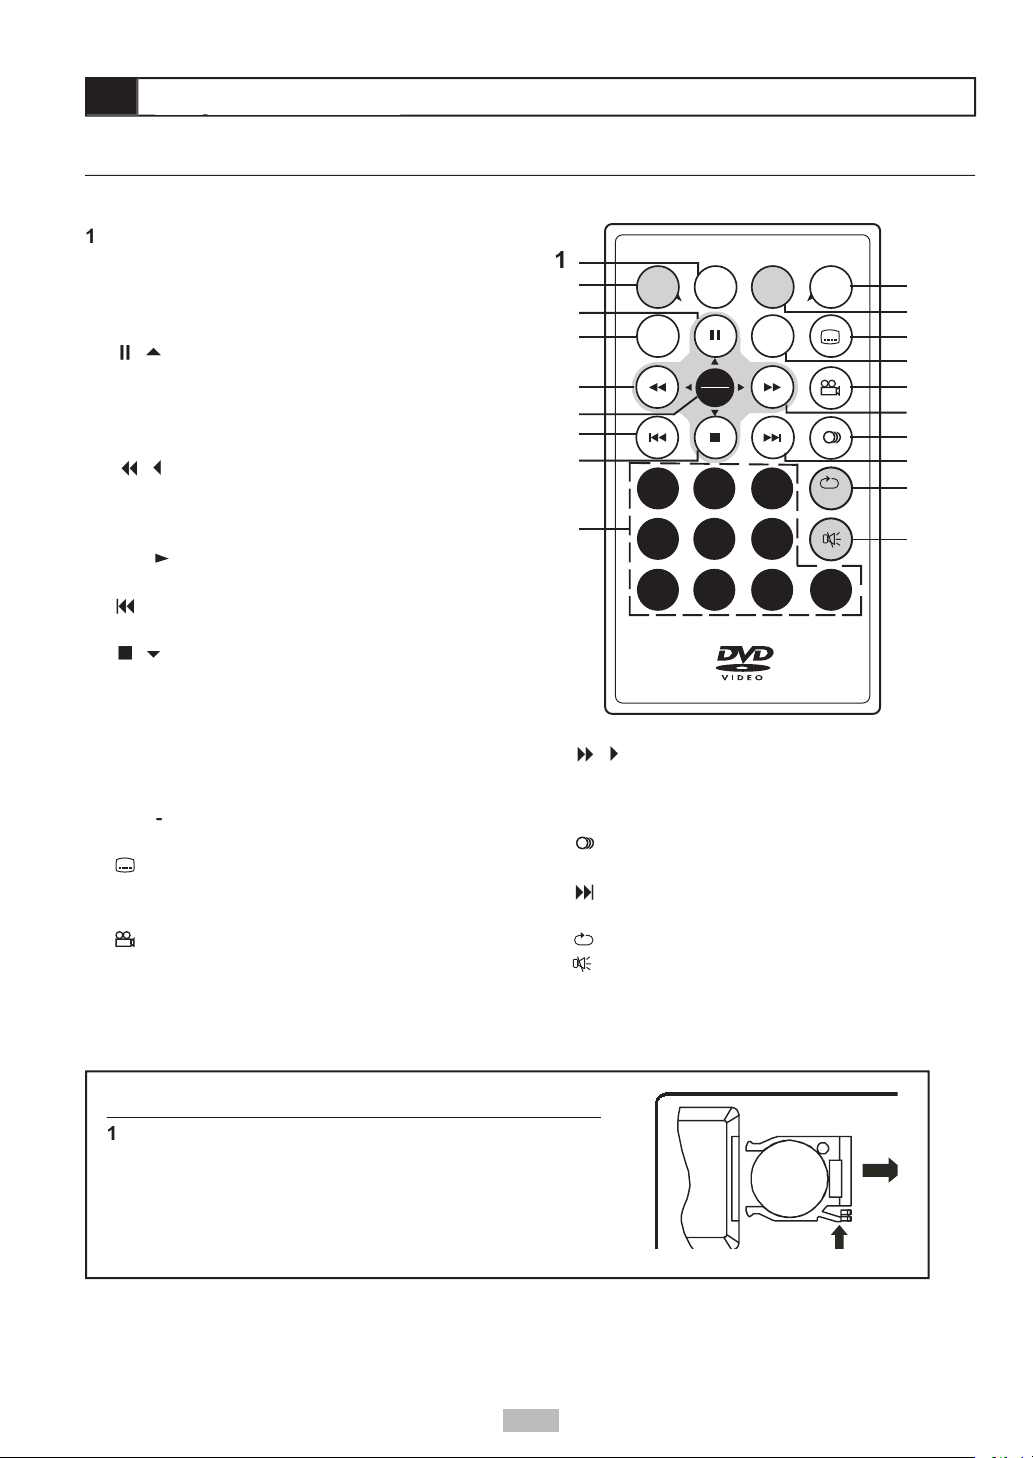
Squeeze the release lever and pull the battery tray out of
Insert the supplied CR2025 3V lithium battery with the
Slide the battery tray back into place.
Auto
Search
Setup
Info. LCD
Mode
Play
2 31
5 64
8 9 07
Sel.
Title
1/All
TV
Source
Menu
+
+
CR2025
OPEN
- Displays current chapter/track information.
- Displays the player’s Setup
/
- Pauses playback. Moves up in
- Switches among S-Video, Progressive
/
verse Scan
- Scans backward at
variable speed during playback. Moves left in
/
- Starts playback. Also makes
- Skips to previous chapter/
/
- Stops playback. Moves down in
- Makes direct selections in menus or
- Displays the disc menu of a
Displays options relating to the display,
- Selects among available DVD
- Displays DVD title menu, if available.
Angle
- Selects among available angles during
/
- Scans backward at
variable speed during playback. Moves right in
Audio
- Selects among available DVD audio
- Skips to next chapter/track during
- Selects among several Repeat modes.
- Turns the sound on and off.
7
Page 8
You can listen to the built-in speakers, or connect
button to the On position to turn on
button to open the disc cover.
facing up. Gently press the hole
/
button to start playback of the
///
keys to select the desired option
/
to confi rm.
Open
8
Page 9

4
21 3
4 Battery Connectors
while it is attached to the portable DVD player.
Plug the supplied AC adapter into a standard
Attached to the Player
Connect the battery pack to the back of the player
Plug the supplied AC adapter into a standard
Turn off the player. The battery pack will NOT
The battery charge indicator will turn red while the
The battery charge indicator will turn green when
The battery charge indicator will turn red while the
The battery charge indicator will turn green when
9
Page 10
You can connect the portable DVD player to a
Video jacks.
Connect the supplied audio cable (mini-plug to
Connect the supplied video cable (mini-plug to
Slide the
AV Out/AV In
switch to the AV Out
Set your TV to its appropriate Video input to view
Connect an S-Video cable with mini-plug adapter
Slide the
AV Out/AV In
switch to the AV Out
Set the Video Output to S-Video in the player’s
button as a
Set your TV to its S-Video input to view the player.
Connect a Component Video cable with mini-
jack on the side of the player to the Progressive
Slide the
AV Out/AV In
switch to the AV Out
Set the Video Output to P-Scan in the player’s
button as a shortcut
Set your TV to its Progressive Scan input to view the
AUDIO IN VIDEO IN
Y Pb Pr
S-VIDEO IN
10
Page 11

You can connect an external device, such as a VCR,
Connect your external device to the audio/video
Slide the
AV Out/AV In
switch to the AV In position
Analog Audio Connections
Connect the supplied audio cable (mini-plug to
Slide the
AV Out/AV In
switch to the AV Out
Set your stereo to its appropriate input to hear the
Connect a digital coaxial cable with mini-plug
Set the Digital Out to SPDIF/PCM (Stereo) or
Set your receiver to its appropriate input to hear
AUDIO OUT VIDEO OUT
11
Page 12

AV Out/AV In
switch to the AV OUT
Press
on.
Press
to open the disc cover.
Hold the edge of the disc and place it in the tray
with the label side up.
Close the disc cover.
Press
///
or use the number button(s)
Press
/
Viewing Disc Menus
When not in use...
When the portable DVD player is not in use, remove
button to clear the menu screen.
will appear.
once to stop and hold playback at
twice to stop and reset the disc to
12
Page 13

or
during playback.
/
x2,
x4, etc.) and
x2,
x4, and etc.) speed
/
buttons.
You can skip to a specifi c chapter or track during
during playback.
during playback.
button midway through
button.
frame by frame.
/
repeatedly during playback to select
from the following options:
To return to normal playback
until “REPEAT Off” appears.
13
Page 14

during playback.
repeatedly to display the title number,
repeatedly until the scene information
Audio
You can change the audio sound track to any
Press
Audio
during playback.
Press
Audio
repeatedly until the preferred
Press
during playback.
once, the fi rst
” will display
Press
repeatedly until the preferred
14
Page 15

Angle
Angle
button to view these
Press
Angle
during playback.
Press
Angle
repeatedly until the preferred
viewing angle is selected.
Press
during playback.
Press
in stop mode
Press
///
Press
/
Press
/
Press
Press
///
15
Page 16

AV Out/AV In
switch to the AV Out
Press
on.
Press
to open the disc cover.
Hold the edge of the disc and place it in the tray
with the label side up.
Close the disc cover.
once to stop and hold playback at
twice to stop and reset the disc to
or
during playback.
/
x2,
x4, etc.) and
x2,
x4, etc.) speed changes
/
buttons.
during playback.
button.
during playback.
button midway through
button.
once during playback.
/
during playback.
repeatedly to display the elapsed
repeatedly until the track information
16
Page 17

You can play Kodak Picture CDs in your portable DVD
Load a Kodak Picture CD.
• After a few seconds, the portable DVD player
Press
to view the current image number and
Use the number keys to jump to a specifi c image.
to pause the slide show.
to stop the slide show and enter
Modes
Press
to stop the slide show.
Press
///
to select “Return” then press
/
Press
and
to view the previous or next
Press
///
to choose the desired image.
Press
/
to see the full size image and
You can rotate your images clockwise in 90 degree
Press
to stop the slide show.
Press
///
to select “Rotate” then press
/
Press
and
to view the desired page of
Press
///
to choose the desired image.
Press
/
repeatedly to rotate the image
/
Press
/
to select the Play icon (
/
The slide show starts playing from the current
and
to view the previous or next
/
to rotate the current image in 90
to pause the slide show.
/
to resume the slide show.
to return to Thumbnail mode.
Press
to stop the slide show.
Press
///
to select “Program” then
/
Press
///
to highlight the desired
/
to mark them with a
Press
///
to choose “Program List”,
/
Press
///
to choose the Play icon (
/
to play the programmed
///
to choose the image, then
/
/
/
to choose “Return”, then
/
/
to choose “Return” again, then
/
17
Page 18

You can play JPEG picture CDs in your portable DVD
Load a JPEG Picture CD.
• After a few seconds, the portable DVD player
Press
to view the current image number and
Use the number keys to jump to a specifi c image.
to pause the slide show.
to stop the slide show and enter
Modes
Press
Press
/
to select the desired mode.
Press
/
to enter the selected mode.
///
to choose the desired image,
/
to display the image.
and
to view the previous or next 6
and
to view the previous or next
/
to rotate the image in 90 degree
to pause the slide show.
/
to resume the slide show.
to return to File Manager mode.
Press
///
to highlight the desired
/
to mark them with a
Press
/
to choose “Program List”, then press
/
Press
/
to choose the Play icon (
/
to play the programmed fi les.
/
to choose the fi le, then press
/
/
/
to choose “Return”, then
/
/
to choose “Return” again, then
/
///
to choose the desired image,
/
to see the full size image
and
to view the previous or next
/
/
18
Page 19

Press
on.
Press
Hold the edge of the MP3 disc and place it in the
Close the disc cover.
folders) which are subdivided into MP3 tracks. If your
Press
to stop playback.
Press
///
to choose the desired
/
to open it.
Press
///
to choose the desired track,
/
to start playback.
/
to
/
during playback.
/
Press
to stop playback.
Press
/
to select “Program”, then press
/
Press
///
to highlight the desired
/
to mark them with a
Press
/
to choose “Program List”, then press
/
Press
/
to choose the Play icon (
/
to play the programmed fi les.
/
to choose the track, then press
/
/
/
to choose “Return”, then press
/
/
to choose “Return” again, then
/
19
Page 20

You can select among various languages for the
Press
in Stop mode.
Press
/
to select “Language Setup”, then
/
Press
/
to select “OSD”, then press
/
Press
/
to select your preferred language.
Press
/
or select “Exit Setup” on the Setup
You can select your preferred language for DVD disc
Press
in Stop mode.
Press
/
to select “Language Setup”, then
/
Press
/
to select “Menu”, then press
/
Press
/
to select your preferred language.
Press
/
or select “Exit Setup” on the Setup
A
20
Page 21

You can select your preferred language for DVD
Press
Setup
in Stop mode.
Press
/
to select “Language Setup”, then
/
Press
/
to select “Subtitle”, then press
/
Press
/
to select your preferred language.
Press
/
Setup
or select “Exit Setup” on the Setup
Audio Language [DVD]
You can select your preferred language for DVD
Press
in Stop mode.
Press
/
to select “Language Setup”, then
/
Press
/
to select “Audio”, then press
/
Press
/
to select your preferred language.
Press
/
or select “Exit Setup” on the Setup
21
Page 22

following:
widescreen movies on a standard television with
Press
Press
/
/
Press
/
/
Press
/
Press
/
or select “Exit Setup” on the Setup
Press
Press
/
to select “Screen/TV Tuner”, then
/
Press
/
to select “Screen Saver”, then press
/
Press
/
to select “On” or “Off”.
Press
/
or select “Exit Setup” on the Setup
TV Tune r
TV
Ty
TV Syste
V
t
t
4:3
4:3
y
TV Syste
t
t
TV Tune r
When connecting the portable DVD player to a
Western Europe (except France, where SECAM
Press
Press
/
/
Press
/
/
Press
/
Press
/
or select “Exit Setup” on the Setup
y
TV Syste
t
t
AU
TV Tune r
22
Page 23

Video Output
Video or P-SCAN).
button to switch back to
Press
Press
/
to select “Screen/TV Tuner”, then
/
Press
/
to select “Video Output”, then press
/
Press
/
to select the appropriate Video
Press
/
/
to continue, or
or select “Exit Setup” on the Setup
TV Tune r
TV
Ty
Your T V Supports P-Scan
YES Press
TV
Ty
TV Syste
t
t
TV Tune r
Press
Press
/
/
Press
/
/
Press
/
Press
/
or select “Exit Setup” on the Setup
TV Tune r
y
TV Syste
t
t
Taiwan
23
Page 24

Audio
ta
t
A
W
f
f
WARNING:
A/V amplifi er/receiver with Dolby Digital (AC-3)
or select “Exit Setup” on the Setup
Press
in Stop mode.
Press
/
to select “Audio Setup”, then press
/
Press
/
to select “Digital Out”, then press
/
Press
/
to select your preferred Digital Out
Press
/
Audio Setup
24
Page 25

A
_ _ _ _
___
_
___
_
Angle
t
4:
Press
in Stop mode.
Press
/
to select “Custom Setup”, then press
/
Press
/
to select “Parental Ctrl”, then press
/
Enter a 4-digit password, then press
/
fi rst time when purchasing your DVD from the
Press
/
to select the desired rating and
/
or select “Exit Setup” on the Setup
Press
in Stop mode.
Press
/
to select “Custom Setup”, then press
/
Press
/
to select “Password”, then press
/
Enter your old password, then press
/
Enter your new password, then press
/
Re-enter your new password to verify it, then
/
or select “Exit Setup” on the Setup
25
Page 26

Angle
t
Angle
t
Press
in Stop mode.
Press
/
to select “Custom Setup”, then press
/
Press
/
to select “Default”, then press
/
Press
/
or select “Exit Setup” on the Setup
Angle Mark [DVD]
which you can select by pressing the
ANGLE
button.
You can have the player alert you when multiple
ANGLE
button will always allow selection of
Press
in Stop mode.
Press
/
to select “Custom Setup”, then
/
Press
/
to select “Angle Mark”, then press
/
Press
/
to select “On” or “Off”, then press
/
or select “Exit Setup” on the Setup
26
Page 27

button provides a shortcut to four common
Press the
button.
Use the
/
buttons to select “Panel” then
Use the
/
buttons to select from the
following, then press
/
widescreen aspect ratio.
viewing, press
again and choose one of
Press the
button.
Use the
/
buttons to select “Invert” then
Use the
/
buttons to select “On” or “Off” and
/
when “On” is selected. Use this feature when
Press the
button.
Use the
/
buttons to select “Color” then
Use the
/
buttons to decrease or increase
/
Press the
button.
Use the
/
buttons to select “Bright” then
Use the
/
buttons to decrease or increase
/
Zoom
27
Page 28

About the DPT100
for improved reception, use the RF adapter to connect
Align the tuner with the edge of the DVD player
Connect the TV tuner to the player as described
Connect the antenna to
jack with the sides of the
You are now ready to
1
2
3
Video Output connector:
Antenna
Antenna
Tuner
RF Adapter
Connect the TV tuner to the player as described
Connect the RF adapter to the EXT. ANT port on
Connect the RF cable from your cable TV wall
You are now ready to search for channels.
28
Page 29

You can fi ne tune individual channels to improve
Press
until “Tuner” appears in the upper left
While in Tuner mode, press
Press the
/
want to fi ne tune.
Use the
/
Use the
/
Adding or Removing Channels
After Auto Search has stored all available channels,
Press
until “Tuner” appears in the upper left
While in Tuner mode, press
Use the
/
want to add or remove from the list.
Use the
/
Press
to toggle the “Favorite” setting between
Connect the TV tuner to the DVD player.
Connect the antenna or RF adapter to the TV
Turn the DVD player on.
Press
until “Tuner” appears in the upper left
While in Tuner mode, press
to
While in Tuner mode, press
Use the
/
Auto Search
Press
Press
to exit the Tuner Setup
/
/
Auto search
Auto search
Auto search
Auto search
29
Page 30

button.
AV Out/AV In
switch is set to AV OUT.
forward or reverse scan.
function.
when Title is selected.
Audio sound track and/or
to display the subtitles.
Alternative audio sound
track (or subtitle) languages
30
Page 31

You can damage discs if you store them in the
following places:
Angle cannot change.
is selected as the signal source by pressing the
button.
/ Antenna
is set to match the source of the signal by pressing the
tuner
31
Page 32

32
43-111-00077
Audio Cable
Video Cable
Viewable carrying case
A number of replacement parts and optional accessories are available for this portable DVD player. To order
parts@govi
Page 33

33
Who Provides the Limited Warranty
for 90 days labor, 1 year parts from the original date of consumer purchase. See
Who is Protected
What is Covered and How Long
Agreement (the “Warranty Period”). Labor and replacement parts supplied during the Warranty Period
Administrator shall have no liability for service under this warranty if non-OEM (Original Equipment
What the Owner Must Do If Service is Required
What are the Exceptions
A/C adapters, knobs or buttons. (4) The foreign country use of this product. (5) GoVideo product
which has been electronically or mechanically modifi ed in any way or incorporated into other products.
ALL IMPLIED WARRANTIES, INCLUDING IMPLIED WARRANTIES OF MERCHANTABILITY AND
WARRANTY PERIOD. Some states do not allow limitations on how long an implied warranty lasts, so
which vary from state to state.
Page 34

 Loading...