

Page 1

Page 2
2
.................
View
Video Connections
Connections
........................................
..................................................
...............................................
.........................................................................
......................................................................
............................................
..................................................
.....................................................................
.....................................................................
Audio
.......................................................................
...................................................................
Angle
......................................................................
........................................................................
.........................................................................
...............................................................
A-B Repeat
..............................................................
CDs with MP3 and JPEG fi les
Audio Language
.........................................
...................................................................
...........................................................
...............................................................
Video Output
............................................................
...............................................................
...................................................................
Audio
Setup
Output
Setup
Angle Mark
....................................
...................................
©2004 GoVideo. All rights reserved. Printed in China.
without prior notifi cation. GoVideo disclaims any obligation to update the information contained herein.
Page 3
Canada, U.S., U.S. Territories
Japan, Europe, South Africa, Middle East
Southeast Asia, East Asia (including Hong Kong)
Australia, New Zealand, Pacifi c Islands, Central
America, Mexico, South America, Caribbean
Former Soviet Union, Indian Subcontinent, Africa
China
VISIBLE AND INVISIBLE LASER RADIATION WHEN
WARNING
vases, shall be placed on the apparatus.
3
Page 4
- All the safety and operating
- The safety and operating
- All warnings on the product and in the
- All operating and using
- Unplug this product from the wall outlet
Attachments
- Do not use attachments not
Water and Moisture
- Do not use this product near
water - for example near a bath tub, wash bowl, kitchen
Accessories
- Do not place this product on an unstable
the product. Use only with a cart,
follow the manufacturer’s
Ventilation
- Slots and openings in the cabinet are
the manufacturer’s instructions have been adhered to.
- This product should be operated only
from the type of power source indicated on the marking
to your home, consult your product dealer or local
will fi t into the power outlet only one way. This is a safety
feature. If you are unable to insert the plug fully into the
to fi t, contact your electrician to replace your obsolete
Alternate Warnings
- This product is equipped with a
three-wire grounding-type plug, a plug having a third
- Power-supply cords should
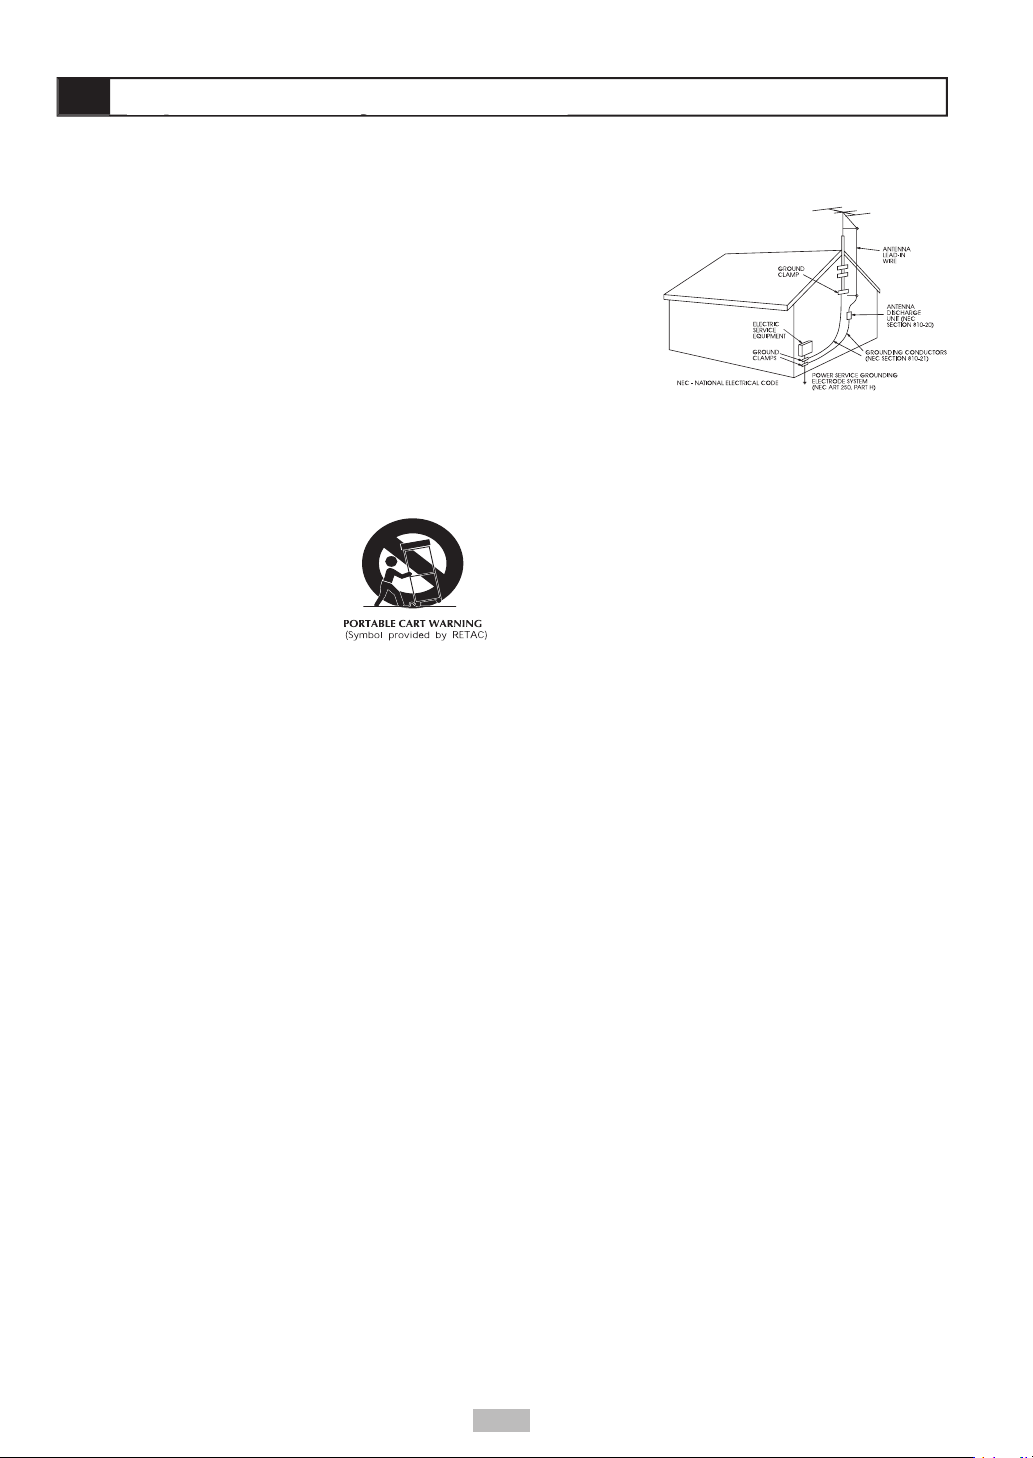
- If an outside antenna
wire to an antenna
to grounding
for the grounding electrode.
- For added protection for this product during
will prevent damage to the product due to lightning and
- An outside antenna system should not be
from touching such power lines or circuits as contact with
them might be fatal.
- Do not overload wall outlets, extension
- Never push objects of any
touch dangerous voltage points or short-out parts that
- Do not attempt to service this product
yourself as opening or removing covers may expose
you to dangerous voltage or other hazards. Refer all
- Unplug this product from
the wall outlet and refer servicing to qualifi ed service
the product.
the operating instructions. Adjust only those controls
that are covered by the operating instructions as an
way.
f When the product exhibits a distinct change in
- When replacement parts are
that have the same characteristics as the original part.
- Upon completion of any service or
- The product should be situated away from heat
Wall or Ceiling Mounting
- The product should be
4
Page 5
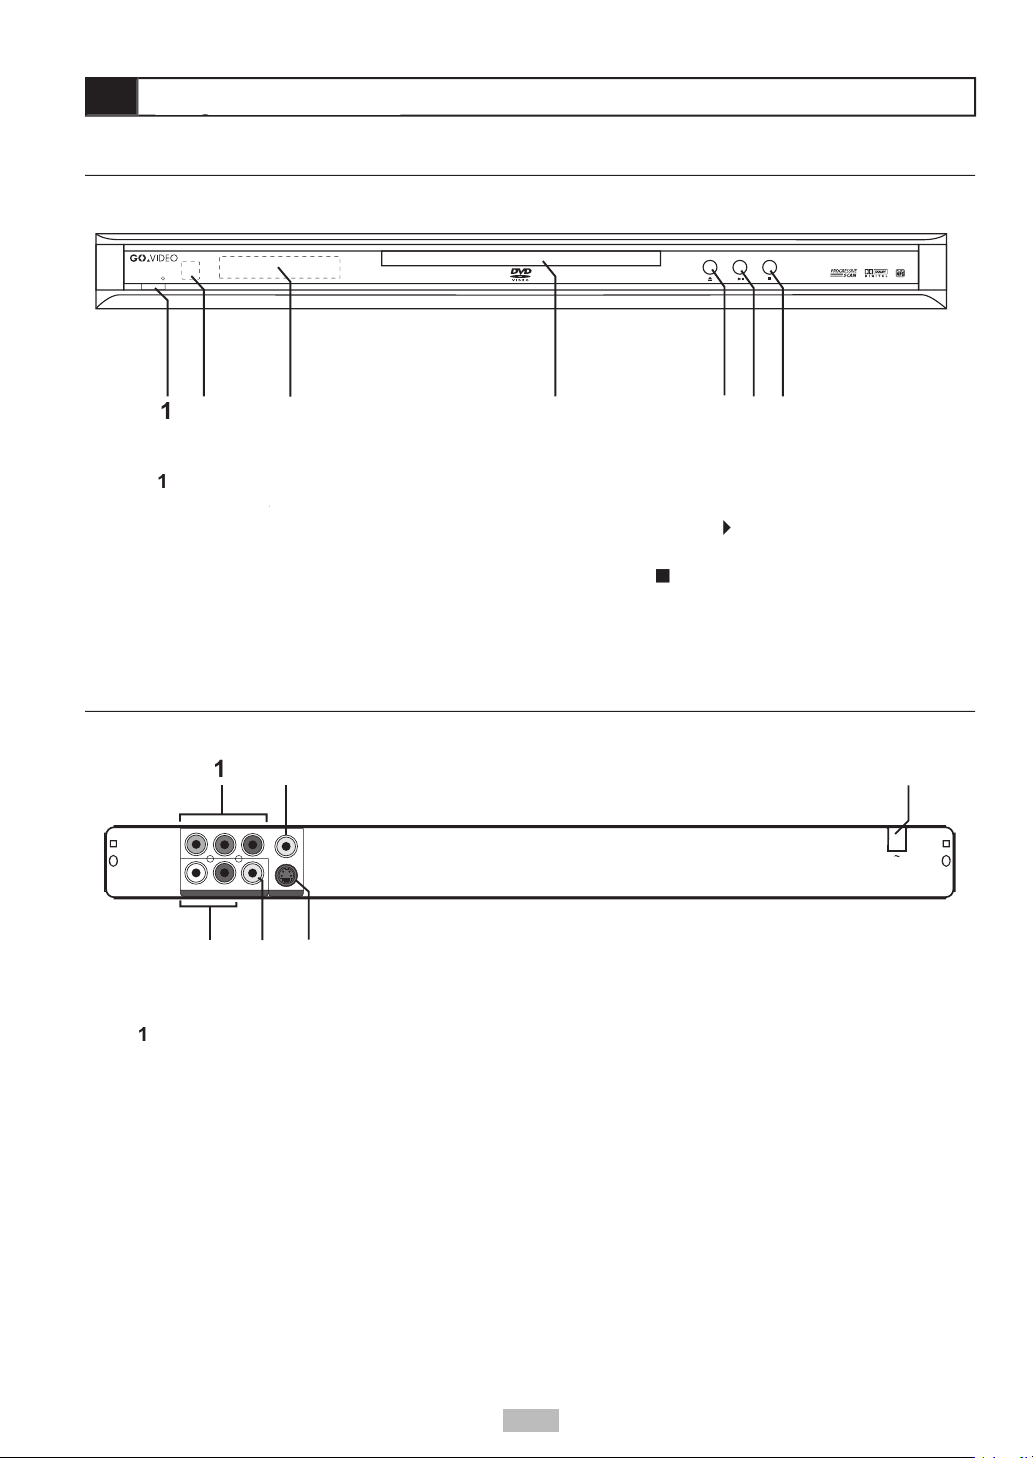
- Turns the player on and off.
- Receives input from the
- Displays the
- Insert disc here.
- Opens and closes the
- Starts/pauses
- Stops playback.
PLAY STOPOPEN/CLOSE
POWER
5
PROGRESSIVE SCAN DVD
• CD PLAYER
Y
Pb Pr
S-VIDE O
COAXIA L
RL
VIDEO
AUDIO OU T VIDEO OU T
- Connects to a
Video Output
- Connects to a standard
Audio Output
- Connects to the
- Connects to a TV
5
Page 6
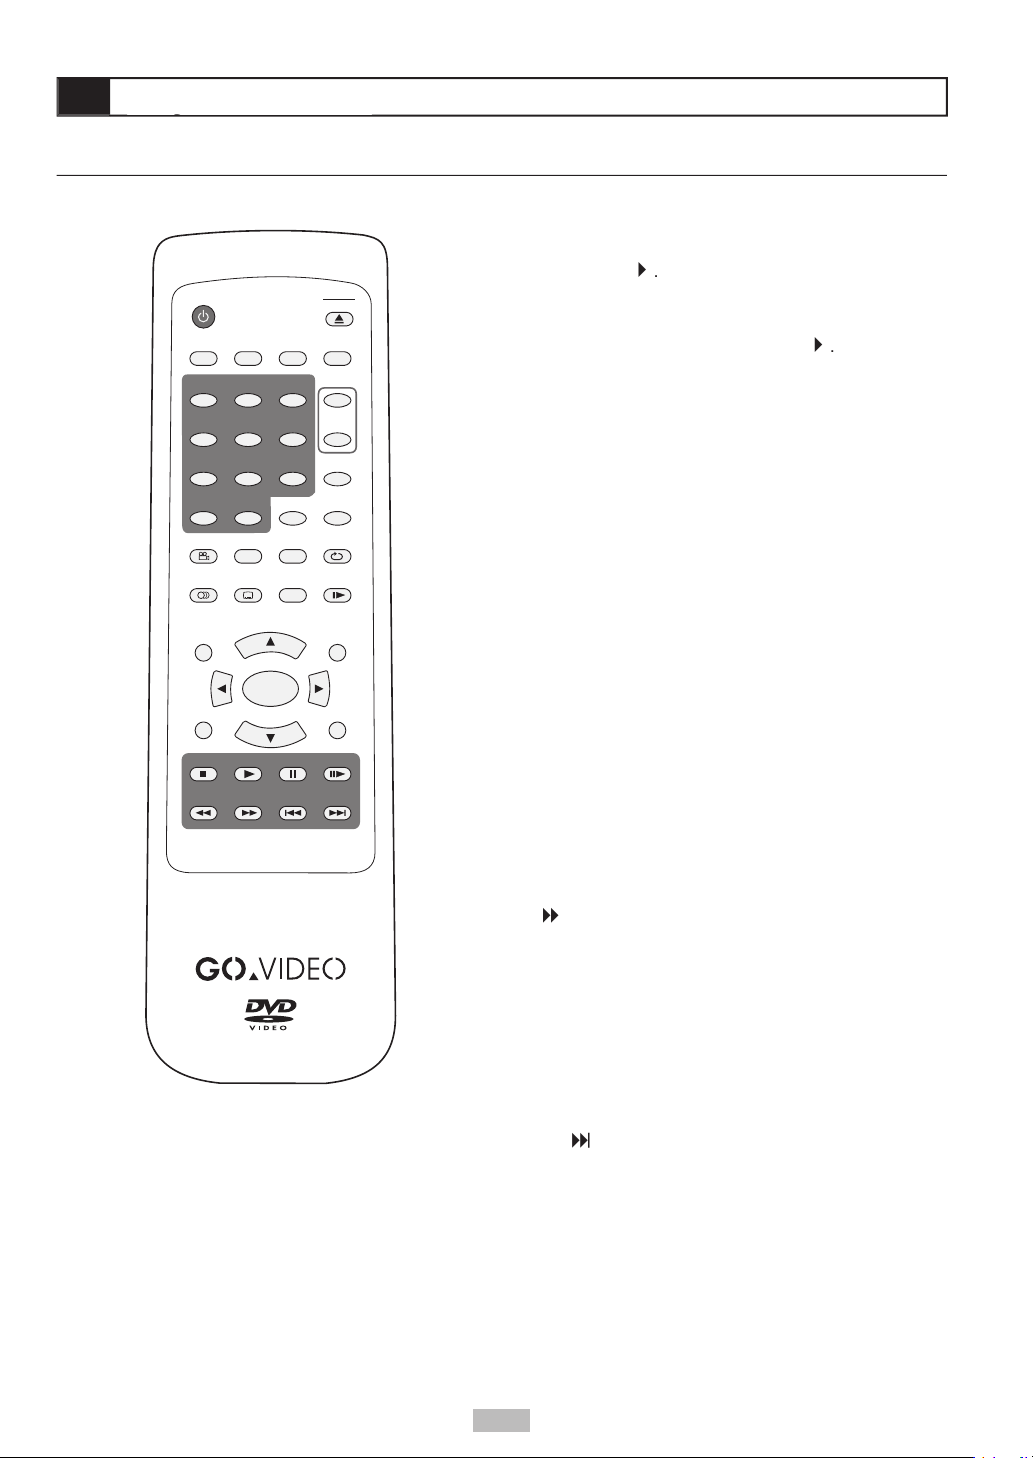
A-B
ANGLE
ARROW KEYS
AUDIO
will continue while this image is displayed. Press
Advances to the next chapter or track during
708
10+
9
4 5 6
POWER
MUTE
CLEAR
DISPLAY
PROGRAM
SUBTITLE
ANGLE
AUDIO
TITLE
DISC MENU
REW
SEARCH
REPEAT
SETUP
RETURN
A-B
PAUSE
PLAYSTOP
ZOOM
VOL
–
+
PBC
ENTER
STEP
SLOWFREEZE
FF PREV NEXT
1 2 3
P. SCAN
OPEN
CLOSE
6
Page 7
Video CDs only.
Video Out connection to your TV).
to resume).
twice to reset playback to the beginning
VOL +/-
Adjust the player’s volume. This will not change the
ZOOM
to move the zoomed
7
Page 8
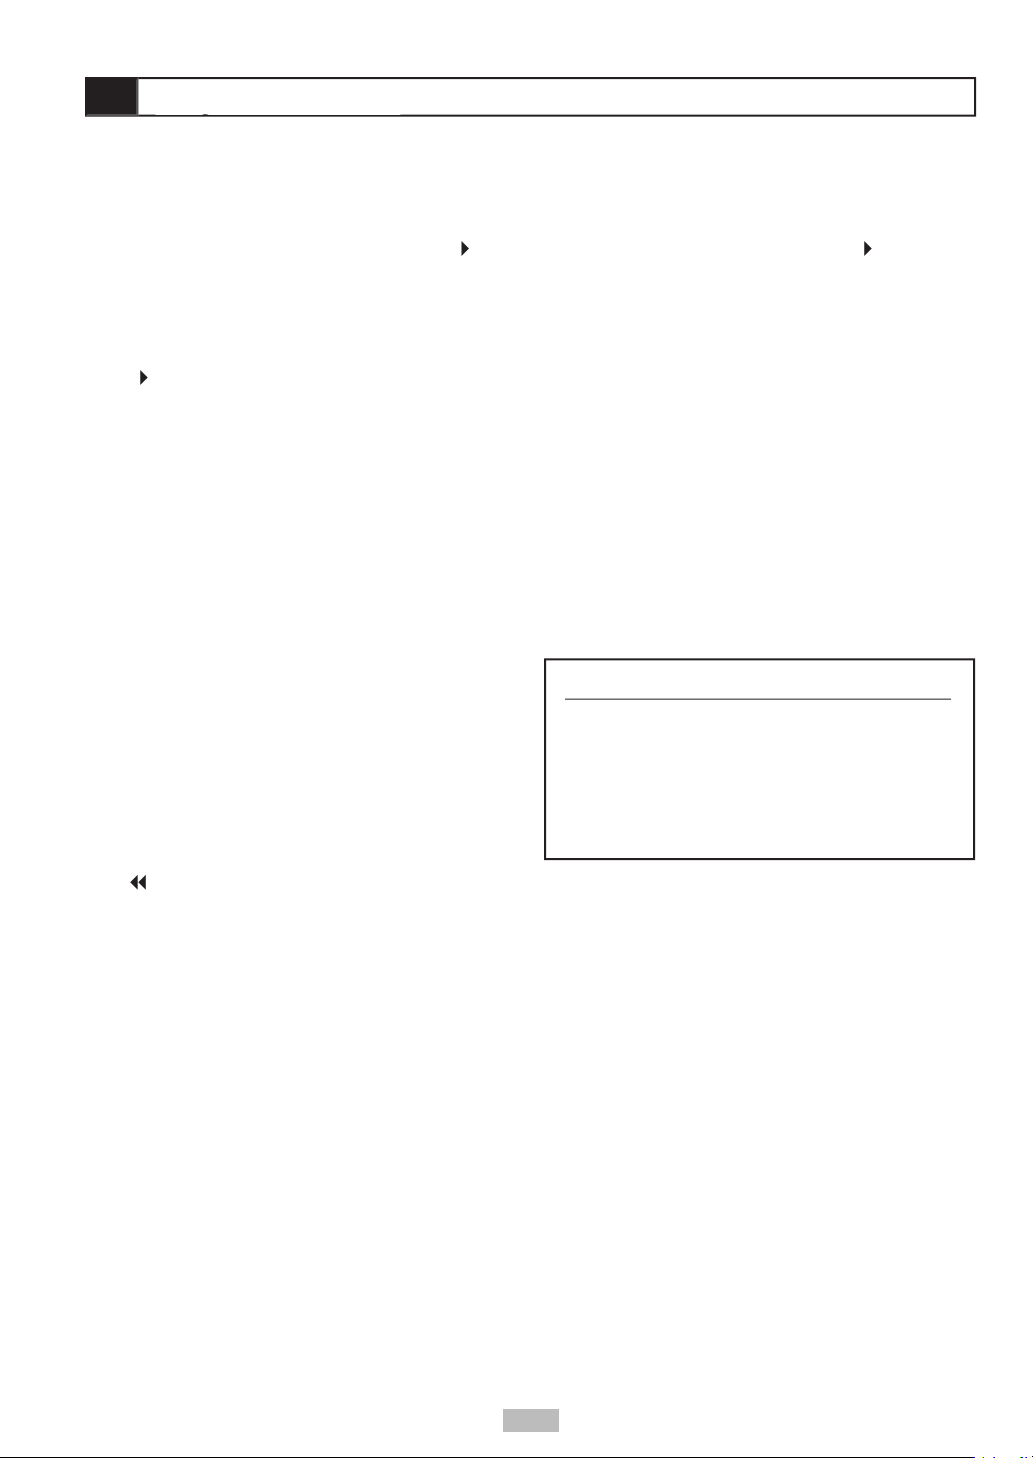
You can connect the DVD player to a standard
Connect the supplied audio cable (red and white)
from the Audio jacks on the rear of the player to
Connect the supplied video cable (yellow) from
Video Input on your television.
Set your TV to its appropriate Video input to view
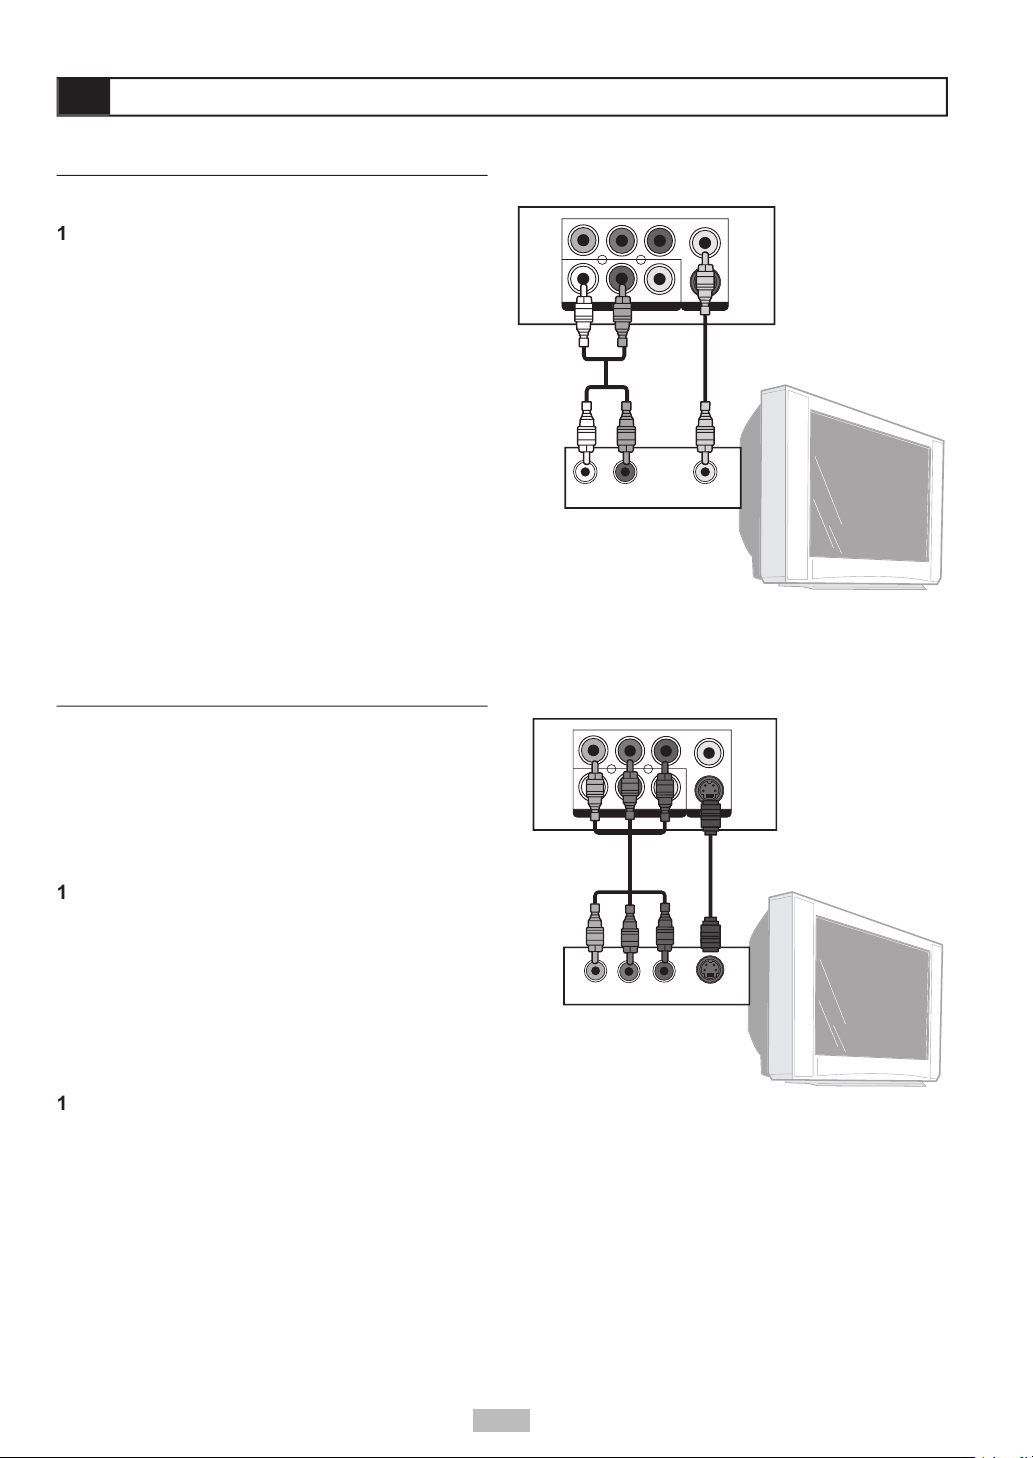
Video cables (not included). For audio, choose one of
Connect an S-Video cable (not included) from
Set the Video Output to S-Video in the player’s
Set your TV to its S-Video input to view the player.
Connect a Component Video cable (not included)
from the Component jacks (Y, Pb, Pr) on the
Set the Video Output to Progressive Scan (P-
button as a
Set your TV to its Progressive Scan or Component
Video input to view the player.
Y
Pb Pr
S-VID EO
COAXI AL
RL
VIDEO
AUDIO O UT VIDEO O UT
Y Pb Pr S-VIDEO IN
DVD Player
TV
OR
S-Video
Component
Video
Y
Pb Pr
S-VID EO
COAXI AL
RL
VIDE O
AUDIO O UT VIDE O OUT
Y
Pb Pr
S-VID EO
COAXI AL
RL
VIDE O
AUDIO O UT VIDE O OUT
AUDIO IN VIDEO IN
DVD Player
TV
Y Pb Pr S-VIDEO IN
DVD Player
OR
Yellow
S-Video
Component
Video
White Red
8
Page 9

Connect the supplied audio cable (red and white)
from the Audio R/L jacks on the rear of the player
Set your stereo to its appropriate input to hear the
Y
Pb Pr
S-VID EO
COAXI AL
RL
VIDE O
AUDIO O UT VIDE O OUT
Y
Pb Pr
S-VID EO
COAXI AL
RL
VIDE O
AUDIO O UT VIDE O OUT
Y
Pb Pr
S-VID EO
COAXI AL
RL
VIDE O
AUDIO O UT VIDE O OUT
Y
Pb Pr
S-VID EO
COAXI AL
RL
VIDE O
AUDIO O UT VIDE O OUT
AUDIO IN VIDEO IN
DVD Player
DVD Player
TV
COAXIAL IN
Digital Decoding Receiver
Y Pb Pr S-VIDEO IN
DVD Player
TV
OR
AUDIO IN
DVD Player
Stereo Receiver
Yellow
S-Video
Coaxial
Component
Video
White Red
White Red
Y
Pb Pr
S-VID EO
COAXI AL
RL
VIDE O
AUDIO O UT VIDE O OUT
Y
Pb Pr
S-VID EO
COAXI AL
RL
VIDE O
AUDIO O UT VIDE O OUT
Y Pb Pr S-VIDEO IN
DVD Player
TV
OR
AUDIO IN
DVD Player
Stereo Receiver
S-Video
Video
White Red
Connect a digital coaxial cable (not included) from
Set the Digital Out to SPDIF/PCM (Stereo) or
Set your receiver to its appropriate input to hear
9
Page 10

Press
on.
Press
to open the disc tray.
Hold the edge of the disc and place it in the tray
with the label side up.
Press
again to close the disc tray.
Press
Press
once to stop and hold playback at
twice to stop and reset the disc to
or
during playback.
x2,
x4, etc.) and
x2,
x4, and etc.) speed
/
You can skip to a specifi c chapter or track during
during playback.
during playback.
button midway through
button.
during playback to select from the
following options:
until “REPEAT Off” appears.
When not in use...
When the DVD player is not in use, remove the disc
to turn off the player.
button to clear the menu screen.
will appear.
10
Page 11

during playback.
repeatedly to display the
repeatedly until the information
Audio
You can change the audio soundtrack to any
Press
AUDIO
repeatedly until the preferred
Press
during playback.
once, the fi rst
” will display
Press
repeatedly until the preferred
Angle
ANGLE
Press
ANGLE
during playback.
Press
ANGLE
repeatedly until the preferred
viewing angle is selected.
Press
during playback.
Press
in stop mode
Press
Press
Press
Press
A-B Repeat
A-B Repeat allows you to repeat any segment of a
While playing a DVD or CD, at the place you want
button. “Repeat
A” will appear on screen.
Press
A-B
again at the end of the segment you
want to repeat. The segment will repeat in a
Press A-B again to resume normal playback.
11
Page 12

Press
on.
Press
to open the disc tray.
Hold the edge of the disc and place it in the tray
with the label side up.
Close the disc tray.
once to stop and hold playback at
twice to stop and reset the disc to
or
during playback.
x2,
x4, etc.) and
x2,
x4, etc.) speed changes
/FF
buttons.
during playback.
during playback.
button midway through
button.
once during playback.
during playback.
repeatedly to display the elapsed
repeatedly until the track
Press
Press
Press
to highlight the fi rst desired track,
to add it to your play list.
Press
to move to the next position on the play
Press
to play the programmed tracks.
to choose the track in the
12
Page 13

You can play Kodak Picture CDs in your DVD player.
Load a Kodak Picture CD.
• After a few seconds, the DVD player starts a
Press
to view the current image number
Use the number keys to jump to a specifi c image.
to pause the slide show.
to stop the slide show and
Press
to stop the slide show.
Press
and
to view the previous
Press
to choose the desired image.
Press
or
to see the full size
You can rotate images or fl ip them horizontally and
vertically before starting a slideshow.
Press
to access thumbnail mode.
Press
and
to view the desired
Press
to choose the desired image.
Press
to view the full size image, then
Repeat steps 1-5 for every picture you want to
to start the slideshow.
You can play JPEG picture CDs in your DVD player.
Load a JPEG Picture CD.
• After a few seconds, the DVD player starts a
Press
to view the current image number
Use the number keys to jump to a specifi c image.
to pause the slide show.
to stop the slide show and
to choose the desired image,
and
to view the previous
and
to view the previous
to rotate the images .
to pause the slide show.
to return to File Manager mode.
13
Page 14

Press
on.
Press
Hold the edge of the MP3 disc and place it in the
Press
folders) which are subdivided into MP3 tracks. If your
Press
to stop playback.
Press
to choose the desired directory,
to open it.
Press
to choose the desired track,
or
to start playback.
to start
/
during playback.
fi les. The operations are the same as with standard
14
Page 15

You can select among various languages for the
Press
in Stop mode.
Press
to select “Language Setup”, then
Press
to select “OSD”, then press
Press
to select your preferred language.
Press
or select “Exit Setup” on the Setup
You can select your preferred language for DVD disc
Press
in Stop mode.
Press
to select “Language Setup”, then
Press
to select “Menu”, then press
Press
to select your preferred language.
Press
or select “Exit Setup” on the Setup
Audio Language
You can select your preferred language for DVD
Press
in Stop mode.
Press
to select “Language Setup”, then
Press
to select “Audio”, then press
Press
to select your preferred language.
Press
You can select your preferred language for DVD
Press
SETUP
in Stop mode.
Press
to select “Language Setup”, then
Press
to select “Subtitle”, then
Press
to select your preferred language.
Press
SETUP
or select “Exit Setup” on the Setup
15
Page 16

following:
widescreen movies on a standard television with
Press
Press
Press
Press
Press
or select “Exit Setup” on the Setup
You can enable a screen saver that will protect your
Press
Press
Press
Press
to select “On” or “Off”, then press
or select “Exit Setup” on the Setup
y
TV Syste
t
t
4:3
4:3
When connecting the DVD player to a TV, you must
Western Europe (except France, where SECAM
Press
Press
Press
Press
Press
or select “Exit Setup” on the Setup
TV
Ty
TV Syste
t
t
AU
16
Page 17

Video Output
button on the remote
Press
Press
to select “Screen Setup”, then
Press
to select “Video Output”, then
Press
to select the appropriate Video
when this setting is selected.
Video connection to your TV.
Press
to continue, or
or select “Exit Setup” on the Setup
TV
Ty
TV Syste
t
t
You can change the light intensity of DVD playback to
Press
Press
to select “Screen Setup”, then
Press
to select “Brightness”, then press
Press
to select the desired Brightness
Press
or select “Exit Setup” on the Setup
You can increase or decrease the difference between
Press
Press
to select “Screen Setup”, then
Press
to select “Contrast”, then press
Press
to select the desired Contrast setting
from -4 (least contrast, may lose detail in dark
well-lit scenes).
Press
or select “Exit Setup” on the Setup
TV
Ty
TV Syste
t
t
TV
Ty
TV Syste
t
t
17
Page 18

Audio Setup
Press
in Stop mode.
Press
to select “Audio Setup”, then
Press
to select “Digital Out”, then press
Press
to select your preferred Digital Out
Press
Audio
ta
t
A
W
f
f
WARNING:
A/V amplifi er/receiver with Dolby Digital (AC-3)
or select “Exit Setup” on the Setup
18
Page 19

Angle
t
4:
A
_ _ _ _
w_ _ _
_
V_ _ _
_
Press
in Stop mode.
Press
to select “Custom Setup”, then press
Press
to select “Parental Ctrl”, then
Enter a 4-digit password, then press
fi rst time .
Press
to select the desired rating and press
or select “Exit Setup” on the Setup
Press
in Stop mode.
Press
to select “Custom Setup”, then
Press
to select “Password”, then press
Use the number keys to enter your old password.
Enter your new password.
Re-enter your new password to verify it.
or select “Exit Setup” on the Setup
19
Page 20

Angle
t
Angle
t
factory default settings.
Press
in Stop mode.
Press
to select “Custom Setup”, then
Press
to select “Default”, then press
Press
or select “Exit Setup” on the Setup
Angle Mark
which you can select by pressing the
ANGLE
button.
You can have the player alert you when multiple
ANGLE
button will always allow selection of
Press
in Stop mode.
Press
to select “Custom Setup”, then press
Press
to select “Angle Mark”, then press
Press
to select “On” or “Off”, then press
or select “Exit Setup” on the Setup
20
Page 21

setting on the player and the TV.
forward or reverse scan.
function.
when Title is selected.
Audio soundtrack and/or
to display the subtitles.
Alternative audio sound
track (or subtitle) languages
Angle cannot change.
21
Page 22

the surface will not be soiled with
fi ngerprints.
the disc tray.
the disc is not installed properly.
wipe the disc using a circular motion, circular scratches
You can damage discs if you store them in the following
thoroughly, and then wipe again with a dry cloth.
following:
the AC power cord.
Avoid placing the unit in areas of:
the moisture to evaporate.
watch a TV broadcast and the unit is left on. This is
22
Page 23

23
Who Provides the Limited Warranty
for 90 days parts and labor from the original date of consumer purchase. See
Who is Protected
What is Covered and How Long
Agreement (the “Warranty Period”). Labor and replacement parts supplied during the Warranty Period
Administrator shall have no liability for service under this warranty if non-OEM (Original Equipment
What the Owner Must Do If Service is Required
What are the Exceptions
A/C adapters, knobs or buttons. (4) The foreign country use of this product. (5) GoVideo product
which has been electronically or mechanically modifi ed in any way or incorporated into other products.
ALL IMPLIED WARRANTIES, INCLUDING IMPLIED WARRANTIES OF MERCHANTABILITY AND
WARRANTY PERIOD. Some states do not allow limitations on how long an implied warranty lasts, so
which vary from state to state.
Page 24

 Loading...