

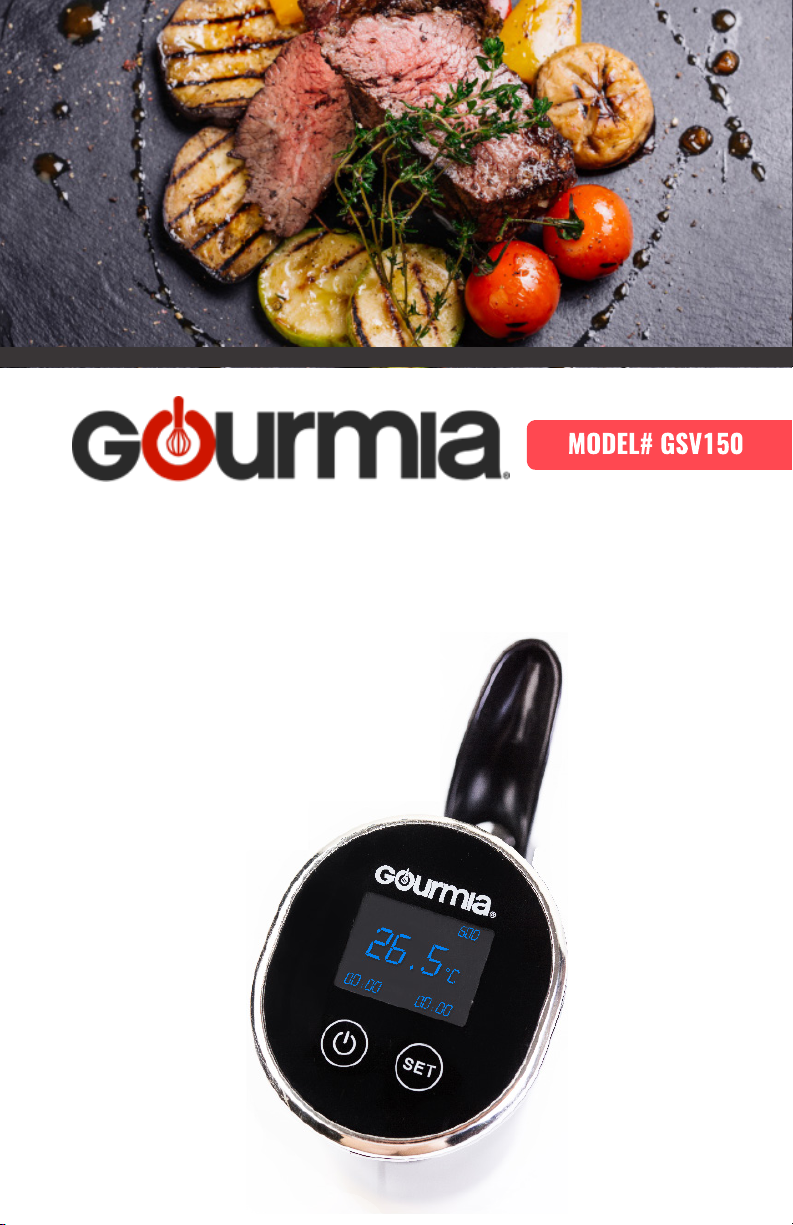
IMMERSION
SOUS VIDE POD
with WIFI

© 2016 Gourmia
www.Gourmia.com
The Steelstone Group
Brooklyn, NY
All rights reserved. No portion of this manual may be reproduced by any means whatsoever
without written permission from The Steelstone Group, except for the inclusion of quotations in a
media review.
Although every precaution has been taken in the preparation of this manual, The Steelstone
Group assumes no responsibility for errors or omissions. Nor is any liability assumed for damages
resulting from the use of the information contained herein. Although every eort has been made
to ensure that the information contained in this manual is complete and accurate, The Steelstone
Group is not engaged in rendering professional advice or services to the individual consumer;
further, The Steelstone Group shall not be held responsible for any loss or damage allegedly
arising from any information or suggestion in this manual.
10 9 8 7 6 5 4 3 2 1
Printed in China

Welcome to Inviting & Tender
Meals from Gourmia!
With your purchase of the Gourmia® Immersion Sous Vide Pod, you’ve opened the
door to a wonderfully tender, moist and delicious method of cooking. The ancient art
of sous vide is one of simplicity: a heated water bath cooks food to perfection using
leisurely cook times and low cooking temperatures. The results? Perfectly tender,
mouth-watering cuts of meat, crisp-tender vegetables that retain all their nutrients,
and the sweet ripeness of warm fruit.
The following pages of this manual give you full and complete instructions for
all the functions and features of your Immersion Sous Vide Pod. Inside, you’ll nd
helpful cooking hints and tips, steps for preparation, and an easy cooking chart for
your favorite foods. Also included are instructions for cleaning and maintaining your
Immersion Sous Vide Pod. Please read all safety instructions and complete directions
carefully for safe usage at all times.
Thank you for your purchase! We hope you will enjoy all the innovative products
brought to you by our family at Gourmia.
DOWNLOAD the APP and instructions at:
http://www.gourmia.com/apps
B EEF STEAK & TENDERLOINS
CHICKEN & EGGS
DUCK
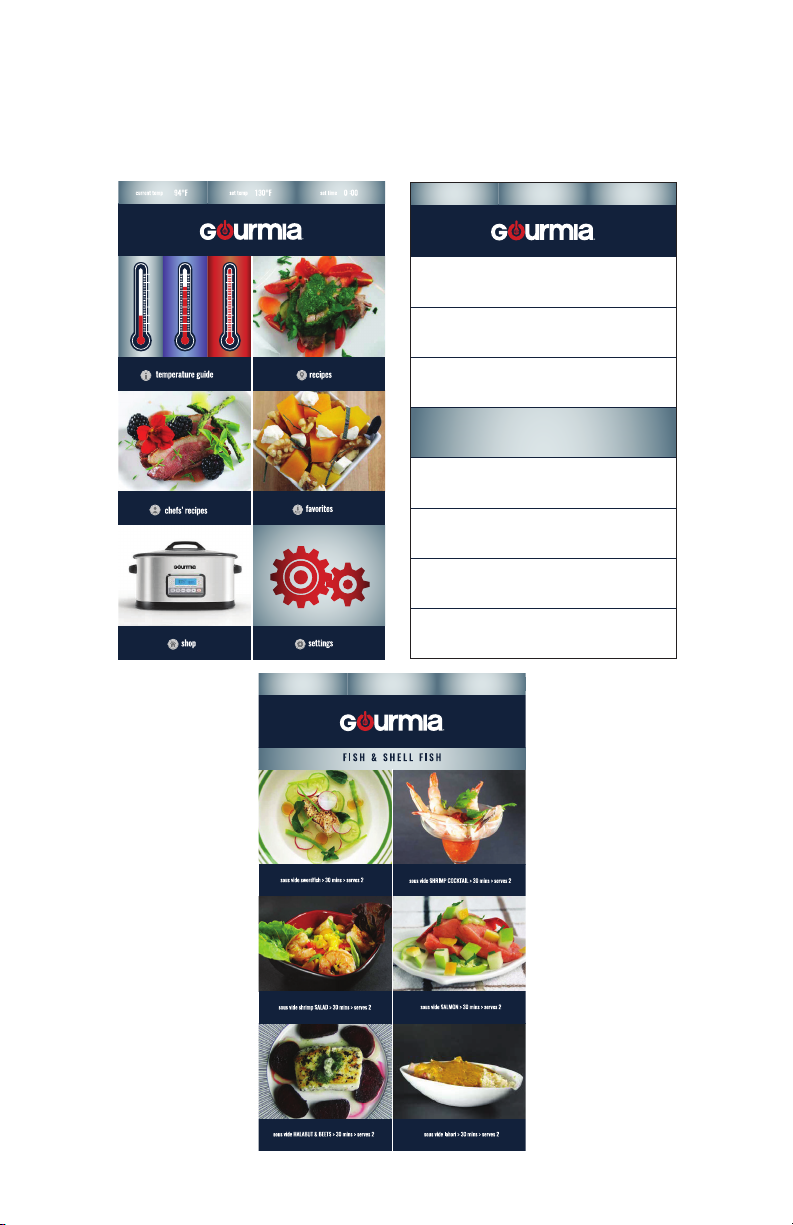
FISH & SHELL FISH
FRUIT & VEGETABLES
LAMB
PORK
TURKEY

SAFETY FIRST p. 6
FEATURES & FUNCTIONS p. 8
LCD CONTROL PANEL p. 10
STEP-BY-STEP OPERATING INSTRUCTIONS p. 12
FOOD PREP & COOKING GUIDE p. 16
Sous Vide Cooking Chart p. 17
Hints & Tips for Sous Vide Cooking p. 18
Water Displacement Method p. 19
TABLE OF CONTENTS
BEFORE FIRST USE & MAINTENANCE p. 20
Before First Use p. 20
Troubleshooting p. 20
Maintenance p. 21
WARRANTY & SERVICE p. 22

When operating this electric appliance, basic safety instructions should always
1. READ ALL SAFETY & USAGE INSTRUCTIONS BEFORE USING THE
2. EXERCISE EXTREME CAUTION: AVOID ELECTRICAL SHOCK. DO NOT
SAFETY FIRST
3. Use CAUTION to avoid burns: Refrain from touching the hot surfaces or the
4. Operate the Immersion Sous Vide Pod in water ONLY. Do not use in other
5. Do not use an extension cord with the Immersion Sous Vide Pod.
IMPORTANT SAFEGUARDS
be followed. Refer to the following for these instructions.
IMMERSION SOUS VIDE POD.
immerse cord, plugs or the entire Sous Vide Pod in water or other liquid. Only
the heater and circulator portion of the Pod should be in the water. DO NOT
immerse the Control Panel or upper portion of the Pod. If the Pod or any of
these areas is submerged, unplug the Pod immediately and contact customer
service for assistance.
heated water while using the Immersion Sous Vide Pod. Use extreme caution
when moving hot water and/or containers and use potholders and tongs to
avoid any risk of burns.
liquids or operate outside of water. Maintain the water levels between the
Minimum and Maximum indicators. IF THE WATER FALLS BELOW THE MINIMUM
LEVEL, AN ALARM WILL SOUND AND THE CIRCULATOR WILL SHUT OFF.
6. UNPLUG the Immersion Sous Vide Pod from outlet when not in use or before
cleaning. Allow the Pod to cool before cleaning. Do not let cord touch hot
surfaces.
7. Children should never use the Immersion Sous Vide Pod; close supervision is
required when appliance is used near children.
8. Do not place the Immersion Sous Vide Pod directly on any heating element,
gas or electric, or expose the Pod to any ammable or combustible elements.
9. Do not operate the Immersion Sous Vide Pod outdoors.
10. Never operate the Immersion Sous Vide Pod with a damaged cord or plug or
one that has malfunctioned or been damaged in any way. Immediately contact
Customer Service for analysis.
11. DO NOT add unauthorized accessory attachments. Such use may result in
electric shock, injury or re.
6
12. When done using, press Power o, then pull plug from outlet.
13. Do not use the Immersion Sous Vide Pod for any use other than intended.
SAVE THESE INSTRUCTIONS
FOR HOUSEHOLD USE ONLY
Electrical 3-conductor Cord Set: This Immersion Sous
Vide Pod is equipped with a 3-conductor cord set that
has a 3 prong grounding-type plug. It should be properly
connected to a grounding-type outlet. The plug is designed
to t ONLY a 3-grounding outlet unit, and as such, the
grounding prong should never be removed. If needed,
purchase a 2-prong adaptor and ground it to the outlet.
Consult a qualied electrician if in doubt. Do not use an
adaptor unless you are condent it is grounded. Do not
modify this plug. If the plug does not t the outlet securely,
call a qualied electrician for assistance.
SAFETY FIRST
7
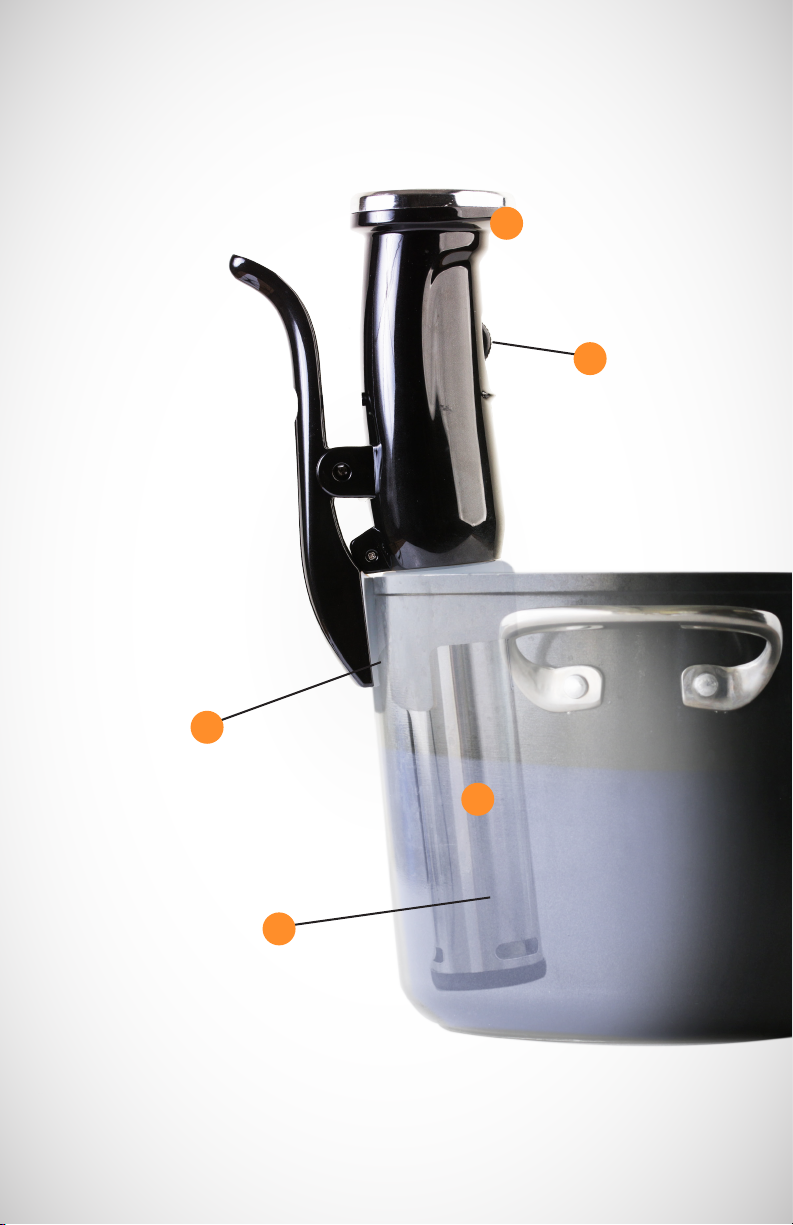
A
D
E
B
C
8

A. Immersion Sous Vide Pod: As the housing for the heating element,
circulator and LCD Control Panel, the Pod allows the user versatility
in choosing the size and shape of heat-safe container to be used as a
water bath.
B. Sous Vide Heating Element: Placed internally into the Pod, the
Heating Element is designed to reach temperatures up to 203°F.
C. Water Circulator: moves the water around the lled food bags to
maintain an even water temperature.
D. Variable Time & Temp Wheel: The wheel adjusts both the time and
temperature in increments on the Control Panel.
E. Sous Vide Pod Clip: Encased by a heat-safe plastic shield to protect
cookware, the clip holds the Sous Vide Pod upright and vertical within
the cooking container as the lled food bags cook in the water.
FEATURES & FUNCTIONS
maxium
ll line
minimum
ll line
9
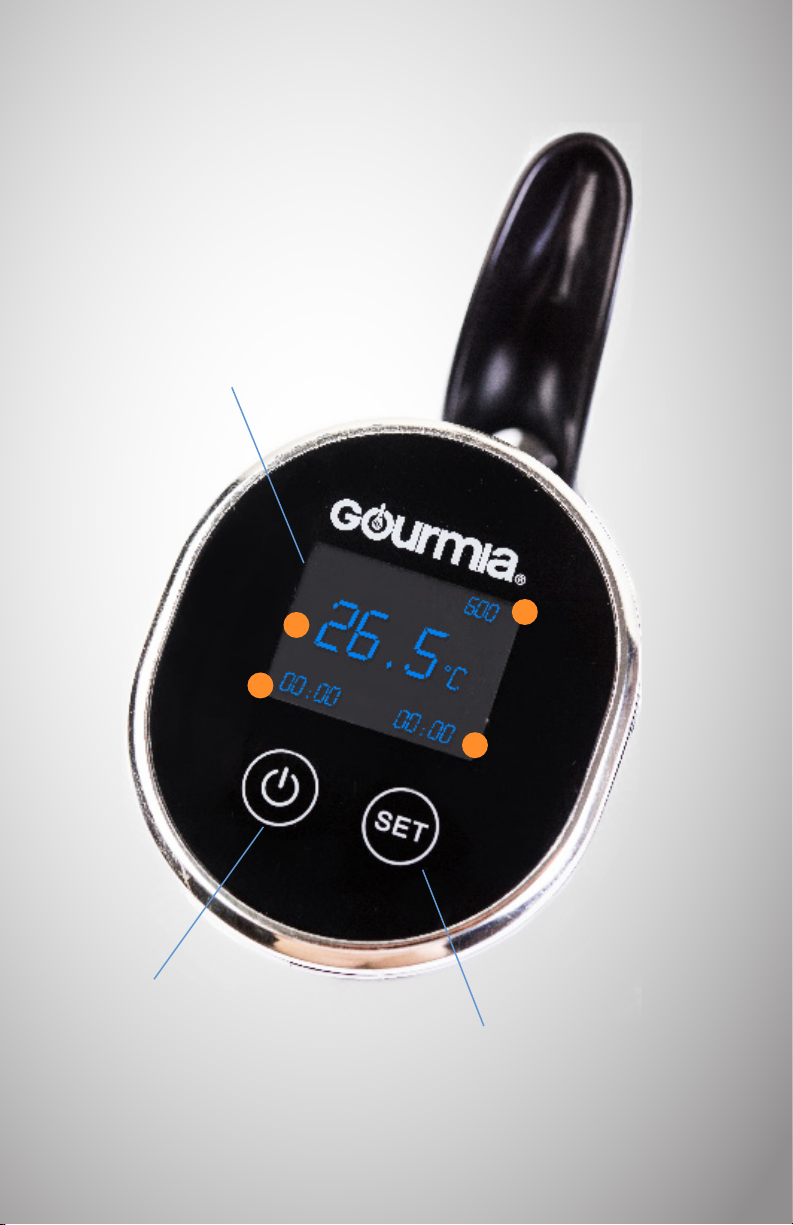
LCD DISPLAY
10
POWER
Button
B
C
A
D
SET
Button

THE LCD CONTROL PANEL Panel houses the electronic platform
for the operational functions of the Immersion Sous Vide Pod.
POWER BUTTON
Easy On/O button.
Press four (4) seconds ON
Press ve (5) seconds OFF
Press to display variable Times & Temps:
a. SET TEMP Cooking Temp
b. ACTUAL TEMP Flashes until Cooking Starts
c. SET TIME Cooking Time
d. WORK TIME Elapsed Time
SET BUTTON
PRE-PROGRAMMED CONTROL PANEL
11
11

STEP-BY-STEP INSTRUCTIONS
12
12

STEP-BY-STEP OPERATING INSTRUCTIONS
STEP-BY-STEP INSTRUCTIONS
1
Place the Sous Vide Pod in a heat-proof container deep enough so that
the Pod can clip to the side without touching the bottom of the con-
tainer. Secure the Pod Clip to the side of the container.
2
Fill with water to a level between the Minimum Water level and
Maximum Water level indicators on the Pod. NOTE: Adding lled food
bags will increase the water level; check after adding food to ensure the
water is not over the Maximum Water level line.
3
Plug the power cord into the outlet. Press the Power Button on the
Control Panel for four (4) seconds until the Display turns ON.
4
Set Temperature for Celsius (°C) or Fahrenheit (°F) by pressing Power
Button and SET Button at the same time to reach desired setting.
ACTUAL TEMP Flashes until Cooking Starts.
STEP-BY-STEP INSTRUCTIONS
5
Set the SET TEMP. Rotate the Variable Time & Temp Wheel to set the
desired cooking temperature. Cooking temperatures reach a maximum
of 95°C or 203°F.
13
13

STEP-BY-STEP INSTRUCTIONS
(cont’d on next page)
Press the SET Button once. The Hour display will ash.
Rotate the Variable Time & Temp Wheel to set the desired hour.
Press the SET Button twice. The Minute display will ash.
Rotate the Variable Time & Temp Wheel to set the desired minutes. Note
that the Sous Vide Pod will work indenitely if the Timer is not set.
Press the Power Button once to start the Sous Vide cooking process.
When the water temperature reaches the SET Temp, the alarm will
beep every three (3) seconds, indicating the food should be added to
the water. Add the lled food bags and press the SET Button for two (2)
seconds to cancel the alarm.
6
Set the SET TIME.
7
8
14
The Work Timer will display the elapsed time after one (1) minute.
9
When the Work Time reaches the SET Time, the alarm will beep every
three (3) seconds indicating the cooking time is elapsed. Press the SET
button for 2 seconds to stop the alarm.
10
Press the Power Button for 5 seconds to turn OFF.

11
Remove cooked food bags with tongs, as water will be hot.
Unplug and cool Sous Vide Pod before cleaning.
STEP-BY-STEP INSTRUCTIONS
15

FOOD PREP & COOKING GUIDE
16
16

FOOD PREP & COOKING GUIDE
The art of sous vide cooking is truly an art! It is simple in nature, yet this
cooking method is often used by gourmet chefs to prepare the most complex,
rich entrées and vegetables. Because the foods are cooked at low temperatures for
longer times, the texture and avors are authentically and naturally good-for-you
and avorful. Beef, poultry, sh and pork are fork-tender when done, with rich and
inviting textures. Vegetables retain all their nutrients when cooked sous vide, so
many of the natural sugars are retained, oering delightfully sweet and nutritious
side dishes. In fact, everything about sous vide says, “naturally good-for you!”
The following Cooking Chart, along with our favorite Hints & Tips, will help
determine how you’ll prep food and how long and at what temperature you’ll
want to cook your foods for safety and avor. Because temperatures are low and
the cooking times are extended, be sure to follow all safety precautions. Enjoy!
Immersion Sous Vide Pod Cooking Chart
FOOD PREP & COOKING GUIDE
FOOD PREP & COOKING GUIDE
BEEF
Filet or Steak
rare 120° - 135°F 1 hour Sear in hot skillet/top with butter
medium 140°F 1 hour Sear in hot skillet/top with butter
well-done 160°F 1 hour Sear in hot skillet/top with butter
Tri tip Roast 140°F 6-8 hours Sear all sides when done. Slice thinly.
Prime rib roast 140°F 6-14 hours Sear all sides when done. Slice thickly.
PORK
Boneless or Chop
medium 144°F 1-1.5 hours
well-done 160°F 1-1.5 hours
POULTRY
Chicken breast 150°F 1-1.5 hours Splash olive oil in skillet/sear all sides
Chicken dark
meat
Cook Temp Cook Time Chef’s Finish
Cook Temp Cook Time Chef’s Finish
Sear in hot skillet/top with
butter & herbs
Sear in hot skillet/top with
butter & herbs
Cook Temp Cook Time Chef’s Finish
167°F 1-3 hours Splash olive oil in skillet/sear all sides
17
17

FISH
Filet or steak 122°F 45 -1 hour Sear in hot butter for 30 seconds
Cook Temp Cook Time Chef’s Finish
EGGS
Poached 146°F 45 minutes Semi-soft cooked
VEGETABLES
Green Vegetables 180°F 5 - 20 min
Root Vegetables 180°F 1.5-3 hours
Cook Temp Cook Time Chef’s Finish
Cook Temp Cook Time Chef’s Finish
FOOD PREP & COOKING GUIDE
Hints & Tips for Sous Vide Cooking
* The thickness of meat, poultry and sh will determine the length of cooking
time. Use an instant-read thermometer after removing from the cooking bag to
guarantee that a safe-food temperature is indicated.
* Food safety in handling and cooking is always a priority. When unsure of
doneness, add 30 minutes to the cook time to pasteurize eggs and/or poultry.
* Searing after cooking gives foods a crispy texture and an appealing visual
picture. When meat is done, toss butter into a smoking-hot skillet and quickly
sear the cooked meat for 30 seconds on each side. This gives the meat a caramel
color and an appetizing outer appearance.
Toss w/ olive oil, kosher salt
& toasted nuts
Quarter/toss in mustard butter
& herbs
18
* Some tough cuts of beef and pork can be cooked sous vide to tender
perfection in 4 to 24 hours. Sear quickly when done and serve with root
vegetables.
* Vegetables will cook faster if they are thinly sliced or cut in small pieces; or if
left whole, they will take more time to become tender. Either way, the natural
sweetness and full nutrient value adds to the delight in sous vide vegetables.
* Fruit can be cooked sous vide to make toppings, purees, syrups and such. Cook
for 2-2½ hours at 160°F and let cool in the bag before using.

* To prep meat, poultry and sh before cooking, add seasonings or rubs before
bagging. Vacuum seal or use the Water Displacement Method to remove the
water from the bag before cooking (see following).
* To avoid the cooked protein that surfaces in sous vide chicken and sh, called
“albumin,” brine the chicken or sh for one hour in lightly salted water, drain and
pat dry.
* ALWAYS use a BPA-free vacuum-sealed bag when cooking foods more than 8
hours.
* Use a vacuum-sealed bag or use the “Water Displacement Method” for foods
cooked fewer than 8 hours.
Water Displacement Method
1. Fill a large plastic container with cool water.
2. Prep your food to be cooked and place food in a BPA-free
plastic freezer bag. Do not seal.
3. Slowly immerse the food-lled bag into the water. This
FOOD PREP & COOKING GUIDE
will force the air out as the bag is immersed.
4. Continue immersing the bag until just before the water
reaches the top of the bag.
5. While still in the water, close or zip to seal, forcing out all
remaining air as much as possible.
19

BEFORE FIRST USE
1. Remove all packaging and discard plastic bags.
2. Using a slightly damp cloth, wipe the Sous Vide Pod. Dry well.
TROUBLESHOOTING
If the LCD display reads EO2 at any time, the digital thermometer is
inoperable. Contact customer service.
If the LCD Display reads error code E05 while cooking, there is too little
water. Turn the Power Button OFF and add water. Re-start the Pod and
continue cooking. If the water level drops below the Minimum Water Level
line while cooking, the alarm will beep and the power will turn OFF. Fill the
water above the Minimum Water Level Line and restart the Pod.
20

MAINTENANCE
1. When cool, clean the Sous Vide Pod with a slightly damp soft cloth.
Dry well.
2. Store the Sous Vide Pod in a dry place. Do not wrap or secure in plastic.
3. After several uses, descaling may be required, particularly if hard water
is used in cooking.
a. To descale, place the Pod in a heat-safe container and
attach with clip
b. Fill the container with water to the Maximum Fill Level line on
the Pod
c. Set the Temperature to 158°F.
d. Add one (1) ounce citric acid descaling powder (food grade).
e. Allow the water to circulate for 20 minutes after Temperature
has been reached.
BEFORE USE & MAINTENANCE
f. Press the Power Button OFF and unplug.
g. When cool, rinse the bottom of the Pod in clear water and
wipe dry with a soft cloth.
21
21

22

WARRANTY & SERVICE
This Limited Warranty is for one full year from the date of purchase. It is
applicable to the original purchaser only and is not transferable to a third party
user. Repair or replacement of defective parts is solely at the seller’s discretion.
In the event that repair isn’t possible, the seller will replace the product/part. If
product repair/replacement won’t suce, the seller has the option of refunding
the cash value of the product or component returned.
Product defects not covered under the Warranty provisions include normal wear
and damage incurred from use or accidental negligence, misuse of instruction
specications or repair by unauthorized parties. The manufacturing company
is not liable for any incidental or consequential damages incurred by such
circumstances.
For Customer Service or Questions, Please call: 888-552-0033
www.gourmia.com
WARRANTY & SERVICE
WARRANTY & SERVICES
23
23

www.gourmia.com
 Loading...