


MODEL# GBM3100
GOURMIA® AUTOMATIC BREAD MAKER
© 2016 Gourmia
www.Gourmia.com
The Steelstone Group
Brooklyn, NY
All rights reserved. No portion of this manual may be reproduced by any means whatsoever
without written permission from The Steelstone Group, except for the inclusion of quotations in a
media review.
Although every precaution has been taken in the preparation of this manual, The Steelstone
Group assumes no responsibility for errors or omissions. Nor is any liability assumed for damages
resulting from the use of the information contained herein. Although every eort has been made
to ensure that the information contained in this manual is complete and accurate, The Steelstone
Group is not engaged in rendering professional advice or services to the individual consumer;
further, The Steelstone Group shall not be held responsible for any loss or damage allegedly
arising from any information or suggestion in this manual.
10 987654321
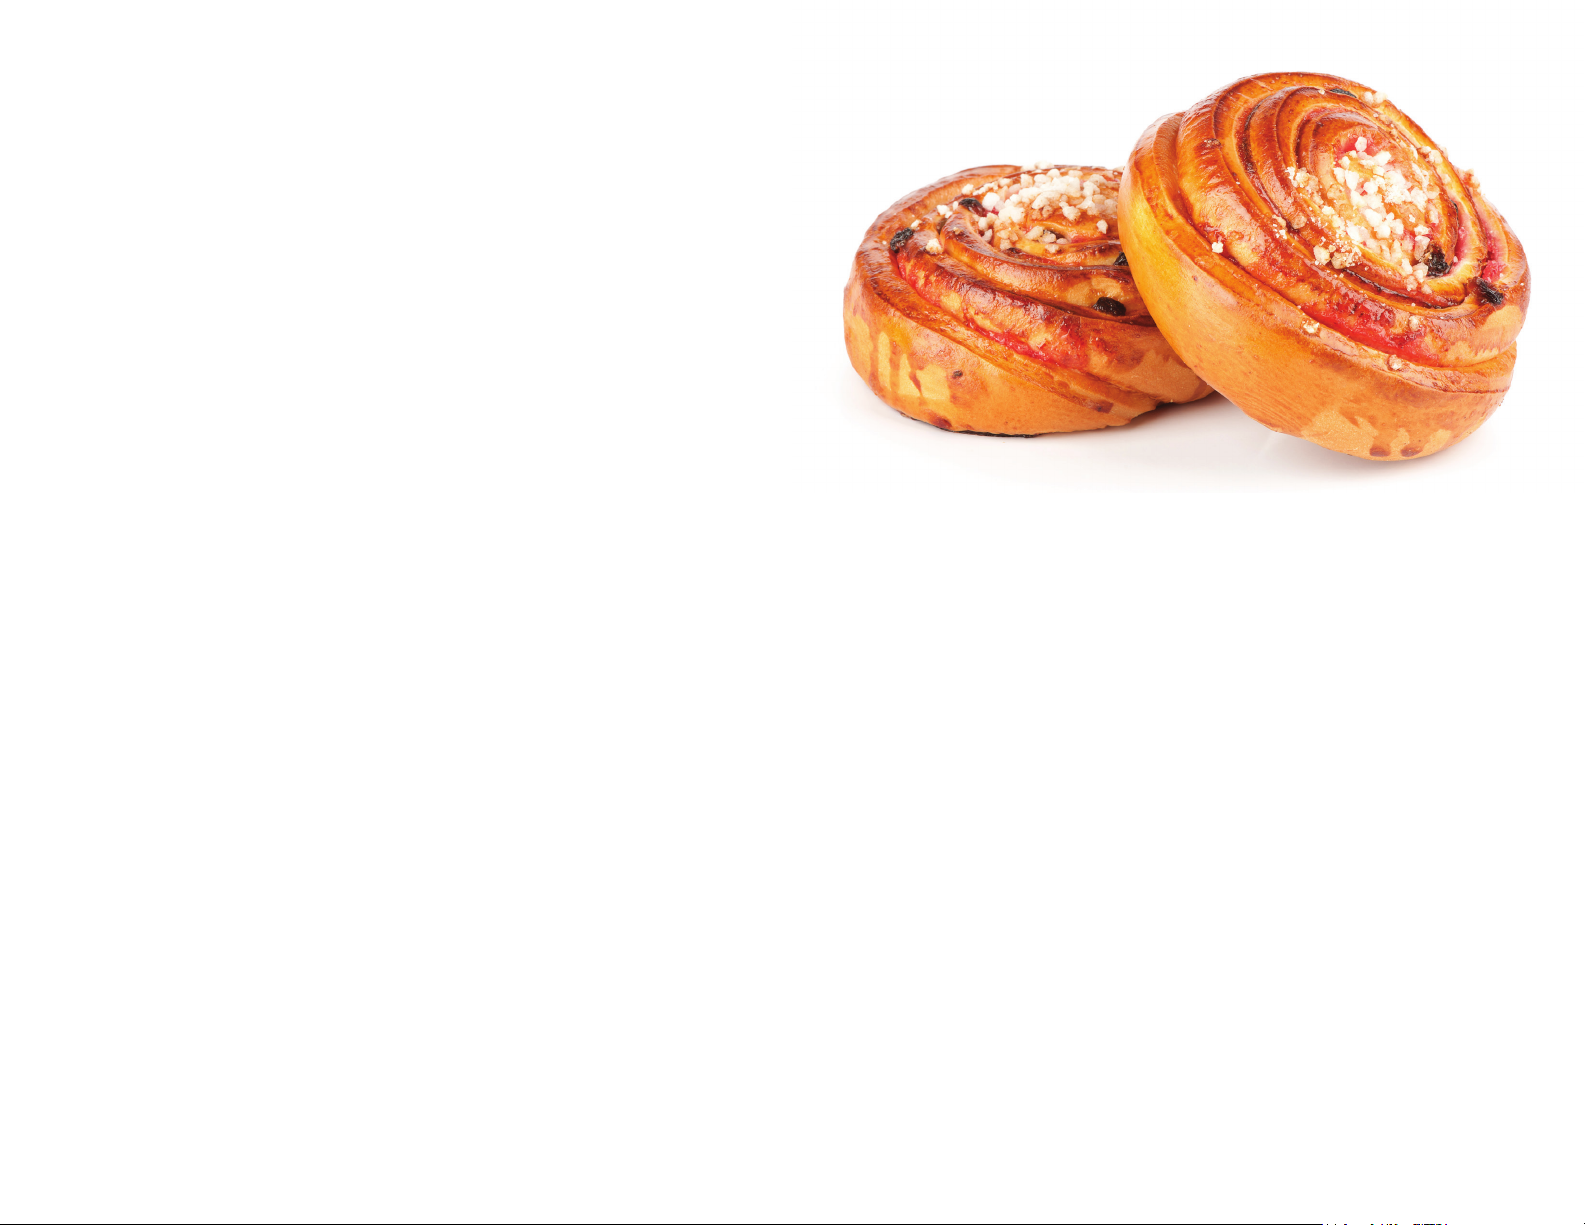
Welcome to delectable breads and bakery goods!
With your purchase of the Automatic Bread Maker, you are ready to enjoy the most
delectable, warm and satisfying slices of bread ever! Why? Your Automatic Bread
Maker truly makes so many kinds of bread, absolutely simple, from tender white
bread and crusty French bread, to specialty breads like gluten-free, buttermilk and
whole wheat breads. In addition, there are baking Modes for making jam, cake,
yogurt and homemade specialties included! Just add ingredients and set the menu
for the Baking Mode you need. That’s how easy it is!
One of the best features of your Automatic Bread Maker is the easy operating control
panel that oers clear selections. The pages of this manual give you full and complete
instructions for all the functions and features of your Automatic Bread Maker. Inside,
you’ll nd helpful cooking guides, information on baking modes and complete
step-by-step instructions for assembling, operating, cleaning and maintaining your
Automatic Bread Maker. Please read all safety instructions and complete directions
carefully for safe usage at all times.
Thank you for your purchase! We hope you will enjoy all the innovative products
brought to you by our family at Gourmia.
Printed in China
SAFETY FIRST P. 6
FEATURES & FUNCTIONS p. 8
PREPROGRAMMED CONTROL PANEL p. 11
BEFORE FIRST USE p. 15
BREAD BAKING MADE EASY! p. 17
BASIC BREAD
FRENCH BREAD
WHOLE WHEAT BREAD
SWEET BREAD
BUTTERMILK BREAD
GLUTENFREE BREAD
SUPERRAPID RISING BREAD
SPECIALTY BAKING MODES p. 19
CAKE MODE
KNEADONLY MODE
TABLE OF CONTENTS
DOUGH MODE
PASTA DOUGH MODE
YOGURT MODE
JAM MAKING MODE
BAKE MODE
HOME MADE SPECIALTIES MODE
MAINTENANCE p. 25
WARRANTY & SERVICE p. 27
5
IMPORTANT SAFEGUARDS
When operating this electric appliance, basic safety instructions should always be
1. READ ALL SAFETY & USAGE INSTRUCTIONS BEFORE USING THE
2. EXERCISE EXTREME CAUTION: AVOID ELECTRICAL SHOCK. DO NOT
3. Do not open the Automatic Bread Maker while the machine is working
SAFETY INFORMATION
4. Use pot holders if the Lid must be opened and stand well away from any
5. Do not place metal plates, trays or other objects in the Automatic Bread
6. UNPLUG the Automatic Bread Maker from outlet when not in use or before
7. Children should never use the Automatic Bread Maker; close supervision is
followed. Refer to the following for these instructions.
AUTOMATIC BREAD MAKER.
immerse cord, plugs or the Automatic Bread Maker in water or other liquid.
unless specied in your recipe. Use handles to open Lid when warm. Use
potholders or oven mitts to remove hot bread or other heated foods from
the Automatic Bread Maker.
escaping steam.
Maker, other than the accessories that are intended for use with the
Automatic Bread Maker, as they may cause re and/or short circuit damage.
cleaning. Allow the Automatic Bread Maker to cool before cleaning. Do not
let cord hang over edge of table or counter or touch hot surfaces.
required when appliance is used near children.
12. Use only factory cord supplied; NEVER add extension cords. When done
using, press Start/Stop to turn OFF, then remove plug from appliance
and outlet.
13. Do not use the Automatic Bread Maker for any use other than intended.
Do not use on a stovetop.
SAFETY INFORMATION
SAVE THESE INSTRUCTIONS
FOR HOUSEHOLD USE ONLY
Polarized Plug: This Automatic Bread Maker
has a polarized plug (one blade is wider than
the other). To reduce the risk of electrical
shock, the plug is intended to be used by
inserting it into the electrical outlet only one
way. If the plug does not t securely into the
outlet, turn the plug and re-insert. Do not
modify this plug. If the plug does not t the
outlet securely, call a qualied electrician
for assistance. DO NOT use this plug with
extension cords of
any kind.
8. Operate the Automatic Bread Maker on a level surface well away from
any hot gas or electrical burner, heat source, combustible spray cans or
pressurized items. The Automatic Bread Maker must be level for optimal
performance.
9. DO NOT operate the Automatic Bread Maker outdoors.
10. Never operate the Automatic Bread Maker with a damaged cord or plug
or one that has malfunctioned or been damaged in any way. Immediately
contact Customer Service for analysis.
11. DO NOT add unauthorized accessory attachments. Such use may result in
electric shock, injury or re.
76
B
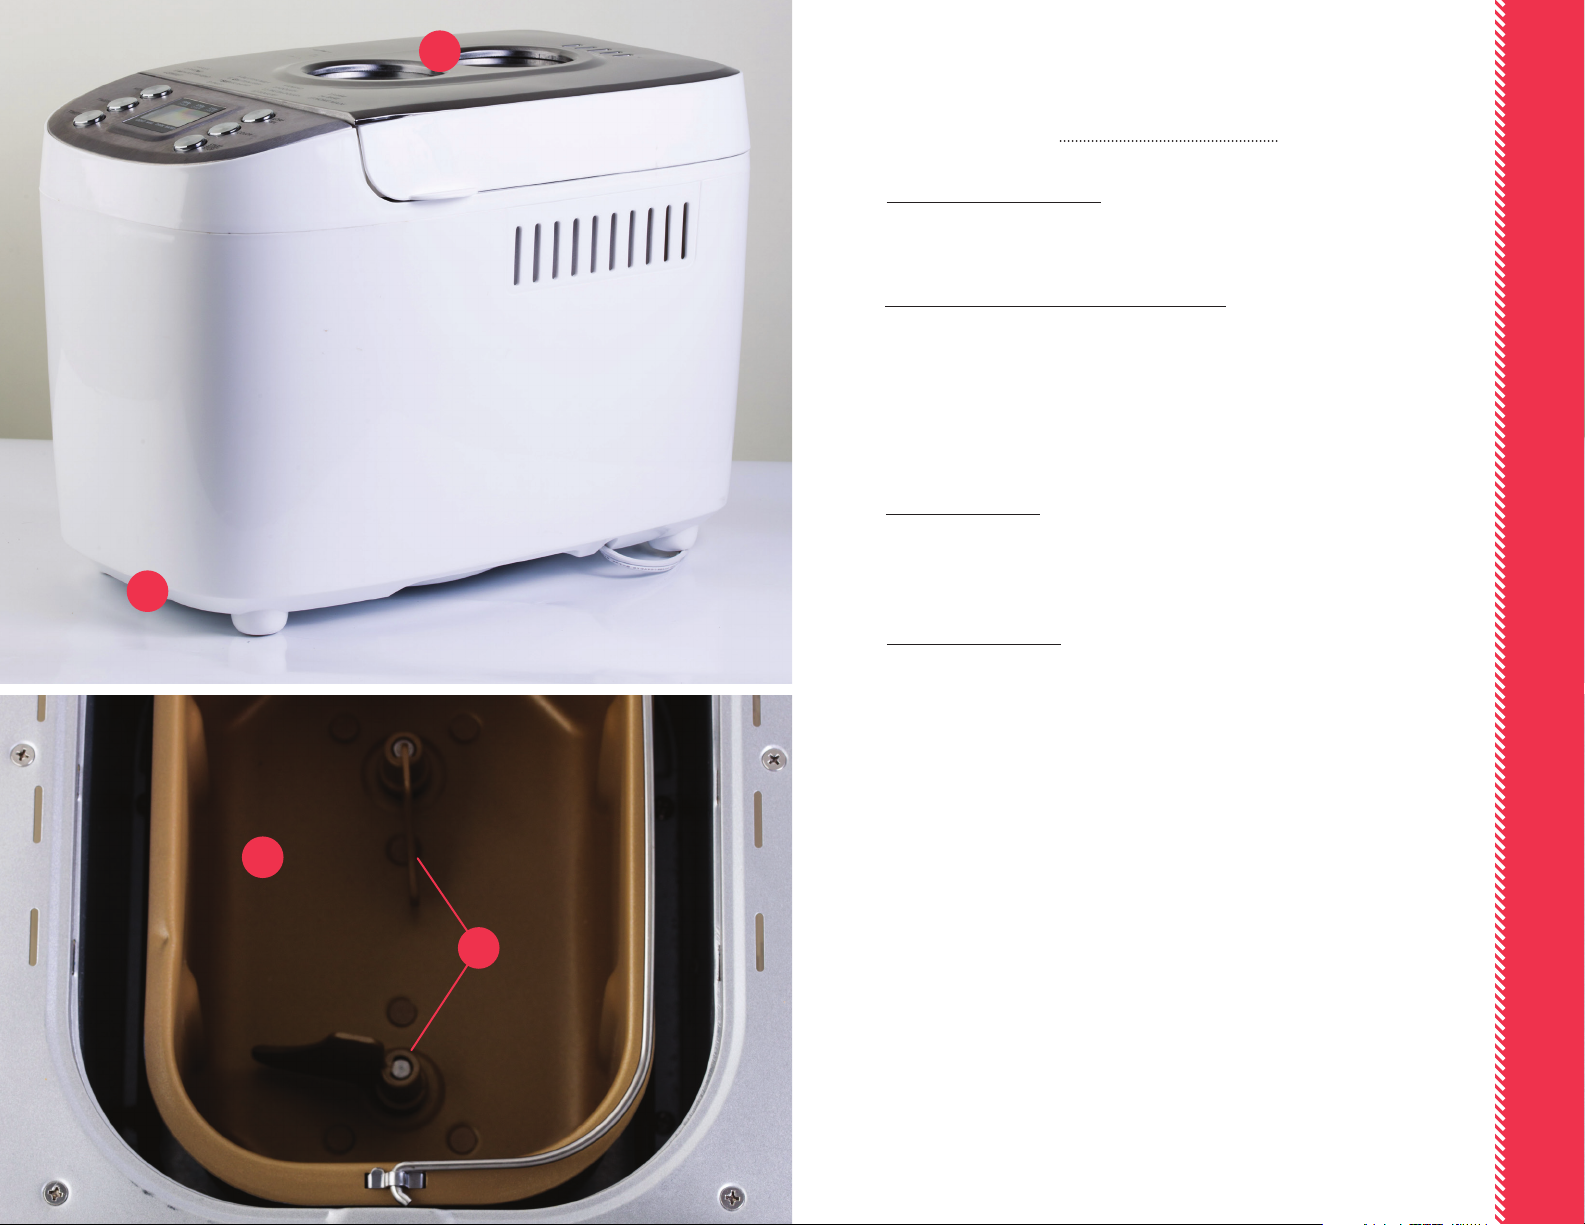
FEATURES & FUNCTIONS
A
A. Automatic Bread Maker Base: The Automatic Bread Maker Base is equipped with
FEATURES & FUNCTIONS
a built-in EasyLift Lid and houses the heating unit and Pre-programmed Control
Panel. The Base also holds the Nonstick Bread Pan and Dual Kneading Paddles.
B. EasyLift Lid with Dual Porthole Glass Windows: The Lid includes two viewing
windows for easy access while the bread machine is in operation. Check progress of
baking items through the windows rather than opening the Lid; this saves energy
and maintains countdown timing schedules.
To open the Lid after cooking, be aware of escaping steam and use pot holders as
needed. Use pot holders or heat-resistant gloves to remove the Nonstick Baking Pan.
C. Nonstick Baking Pan: The die cast aluminum Nonstick Baking Pan is used for
all foods baked in the Automatic Bread Maker. It holds the Dual Kneading Paddles,
which can be removed as needed to prepare foods such as jam, yogurt and other
cooked foods.
D. Dual Kneading Paddles: Two Paddles sit inside the Nonstick Baking Pan and
should be used any time the kneading process is used in bread preparation. When
not in use, remove the Paddles and set aside. To re-insert, align the square side of
each Paddle to the accompanying shaft and press down until fully seated.
C
D
8
9

A. Menu
B. Timer +
C. Timer –
D. Loaf Size
E. Color
F. Start/Stop
G. 2.0 lbs
H. 2.5 lbs
I. 3.0 lbs
J. Light
K. Medium
L. Dark
M. Rapid
PRE-PROGRAMMED CONTROL PANEL
PRE-PROGRAMMED CONTROL PANEL
GJH
A
B
C F
K LIM
D
The Control Panel houses the “brains” of the Automatic Bread Maker. The panel
features the LCD Display that shows temperature and time and it includes the Modes
that have been pre-programmed with optimal times and temperatures for each type
of bread or specialty Mode. Adjustments to the cooking times and temperatures are
oered for exibility in several Modes.
E
1111

g.1
g.2
I. Pre-programmed Bread Making & Modes
1. Plug the Bread Maker into the wall outlet. Lock the Nonstick Baking Pan into the
Base by centering the Pan in the Base and pressing down until it is rmly seated
(g 1). Secure the Dual Kneading Paddles in the Pan by aligning the Paddles with
the shafts and pushing down on the Paddles. (g 2)
2. The LCD Display will indicate “1” as the pre-set Menu choice for Basic Bread. The size
is set as 2.5 lbs, the time 3:00 hours, and the color is “Medium.” (g 3).
3. Press Start/Stop to begin the baking process or select “Menu” to choose a dierent
Bread Type or Mode. Press Start/Stop when the selection has been made.
4. The Timer will begin the countdown and will automatically turn the Bread Maker to
OFF when the time is complete.
5. Check each Bread Type and Mode for specic pre-programmed times and follow
instructions accordingly.
II. Optional Adjustments to Bread Making & Modes
1. To adjust the baking time, press the + or – Timer buttons to the desired times.
2. To adjust the loaf size, press “Loaf Size” Button to select desired loaf size.
PRE-PROGRAMMED CONTROL PANEL
g.3
3. To adjust the bread color, press the “Color” Button to select the depth of browning
on the top of the loaf.
4. If using rapid-rise yeast and bread our, you may select “Rapid” in some bread
choices. The rising time will be abbreviated and the total time will be shortened.
Press the “Color” Button to select “Rapid” and the default “Medium” color will
automatically be displayed.
NOTE: This Bread Maker has a 10-minute electric power cut-o memory. Once the
Start/Stop Button has been pressed, a change in the selected Bread Type or Mode
cannot be made until the plug has been removed from the wall outlet for at least 10
minutes. When plugged in again, the Bread Maker will return to Menu “1” to re-start.
1312

BEFORE FIRST USE
1. Wipe the exterior of the Base...and mild soap.
2. Dry all parts with a soft towel.
3. Remove water from the inside of the Dual Kneading Paddles using a
tightly twisted piece of a paper towel.
4. Do not clean the interior of the Base, cord or plug. Wipe any spills with
a barely damp cloth. Dry thoroughly.
BEFORE FIRST USE
15
BREAD BAKING MADE EASY
Inside your Automatic Bread Maker, there are 7 pre-programmed baking choices
for Bread Types and 8 pre-programmed choices for Specialty Baked Foods. With the
versatility of this Automatic Bread Maker, the 15 bread and baked specialty choices
are only the starting place to create delicious and amazing bakery goods. Various
times have been pre-programmed; you can either use the pre-programmed choices
in a simple 1-2-3 Step process, or you can manually change the times and options
as desired.
We encourage you to experiment, trying dierent breads and classic favorites, because
when the aroma of fresh bread wafts through your home, everyone will come running.
The sky is the limit with your Automatic Bread Maker!
Bread Types
BASIC BREAD – MENU “1”
Pre-set
Time
3:00 hrs 2.5 lbs MED 2.0 – 3.0 lb L M D Yes
Pre-set
Size
Pre-set
Color
Size
Range
Color
Range
Rapid
BREAD BAKING MADE EASY
Basic White Bread is one of life’s most simple, pure pleasures! Serve it any night of the
week with hot soup or a chilled salad and you are sure to please everyone. Use Basic
Bread for add-ins, such as fruit or chocolate chips to create new family favorites.
FRENCH BREAD – MENU “2”
Pre-set
Time
3:15 hrs 2.5 lbs MED 2.0 – 3.0 lb L M D Yes
French Bread has more resistance to the touch than Basic Bread and a yeasty, aromatic
aroma. It is especially good when served with pasta dishes and hearty soups. Tear or
cut thick slices and serve while warm. Serve with olive oil and balsamic vinegar or try
melted butter with herbs.
Pre-set
Size
Pre-set
Color
Size
Range
Color
Range
Rapid
17

WHOLE WHEAT BREAD – MENU “3” GLUTEN-FREE BREAD – MENU “6”
Pre-set
Time
3:30 hrs 2.5 lbs MED 2.0 – 3.0 lb L M D Yes
A great sandwich-making bread and one that is good for you as well, whole wheat
bread can be dense in texture and oers more avor. When cool, wrap tightly in plastic
wrap and wait for twelve hours before cutting into thin slices. Makes excellent toast for
a breakfast treat.
BREAD BAKING MADE EASY
Pre-set
Time
2:25 hrs 2.5 lbs MED 2.0 – 3.0 lb L M D Yes
Sweet bread, such as Cinnamon Swirl or Maple Pecan, can be especially welcome at
the breakfast table. Add raisins, pecans, walnuts or poppy seeds for avor and texture.
Pre-set
Size
Pre-set
Size
BUTTERMILK BREAD – MENU “5”
Pre-set
Color
Size
Range
SWEET BREAD – MENU “4”
Pre-set
Color
Size
Range
Color
Range
Color
Range
Rapid
Rapid
Pre-set
Time
3:25 hrs 2.5 lbs MED 2.0 – 3.0 lb L M D No
Making gluten-free bread is a technical process; carefully observe measurements and
amounts to get the best results. Use the correct recipe that ts one of the 2, 2½ or 3
pound loaf sizes. The texture of gluten-free bread is somewhat coarse and the bread
easily tears; handle slices carefully and toast for added strength and density.
Pre-set
Size
Pre-set
Color
Size
Range
Color
Range
Rapid
SUPER RAPID RISING BREAD – MENU “7”
Pre-set
Time
2:25 hrs 2.5 lbs MED 2.0 – 3.0 lb L M D Yes
When you are in a hurry, yet want a favorite homemade-bread touch to your meal, a
recipe for Super Rapid Rising Bread is sure to satisfy and please. Use rapid-rise yeast
and bread our to assist in speeding the process along. Bread is hot and ready within
just 90 minutes!
Pre-set
Size
Pre-set
Color
Size
Range
Color
Range
Rapid
BREAD BAKING MADE EASY
Pre-set
Time
3:00 hrs 2.5 lbs MED 2.0 – 3.0 lb L M D Yes
A cousin to basic or white bread, buttermilk bread reects the title – cold buttermilk
is added to the recipe to oer a tangy twist on traditional white bread. The crumb of
buttermilk bread is small, making it a great choice for sandwiches or toast. Wrap tightly
and keep for up to 4 days in a cool, dark place.
Pre-set
Size
Pre-set
Color
Size
Range
Color
Range
Rapid
Specialty Baking Modes
CAKE MODE – MENU “8”
Pre-set
Time
1:35 hrs 2.5 lbs MED 2.0 – 3.0 lb L M D No
The convenience of using the Automatic Bread Maker is clear when it comes to
baking. Prepare a loaf cake or a quick bread and spoon it into the Nonstick Baking Pan.
Turn on the Cake Mode and within a short time, warm cake or bread comes straight
from the oven. No need to heat the entire house with this easy and convenient method
of baking.
Pre-set
Size
Pre-set
Color
Size
Range
Color
Range
Rapid
1918

KNEAD-ONLY MODE – MENU “9”
YOGURT MODE – MENU “12”
Pre-set
Time
0:10 min N/A N/A N/A N/A No
When your specialty bakery goods require kneading only, use this quick and easy
mode to get the job done. This Mode is especially useful for kneading pizza dough
or focaccia.
Pre-set
BREAD BAKING MADE EASY
Time
1:50 hrs N/A N/A N/A N/A No
Use Dough Mode when preparing rolls or breads that are shaped or lled, such as
cinnamon rolls, pecan rolls, crescent rolls and other specialties. Dough will mix, knead
and rise. You can then shape and let rise once more before baking. So easy!
Pre-set
Size
Pre-set
Size
PASTA DOUGH MODE – MENU “11”
Pre-set
Color
Size
Range
Color
Range
DOUGH MODE – MENU “10”
Pre-set
Color
Size
Range
Color
Range
Rapid
Rapid
Pre-set
Time
8:00 hrs N/A N/A N/A N/A No
Mix together whole milk and active yogurt cultures in the Nonstick Baking Pan and
press the “Yogurt” Mode button. After eight hours, fresh and tangy yogurt is ready for
you! Chill and serve within three days.
Pre-set
Size
Pre-set
Color
Size
Range
Color
Range
Rapid
JAM MAKING MODE – MENU “13”
Pre-set
Time
1:20 hrs N/A N/A N/A N/A No
Spoon fresh fruit, sugar and pectin into the Nonstick Baking Pan and await delicious
results! Pour or spoon into small jars, chill and serve within 3 weeks.
Pre-set
Size
Pre-set
Color
Size
Range
Color
Range
Rapid
BREAD BAKING MADE EASY
Pre-set
Time
0:15 min N/A N/A N/A N/A No
Fresh Pasta dough requires serious kneading; the Automatic Bread Maker does it all so
easily by mixing the pasta dough, then kneading it vigorously.
Pre-set
Size
Pre-set
Color
Size
Range
Color
Range
Rapid

BAKE MODE – MENU “14”
Pre-set
Time
1:00 hr N/A MED N/A N/A No
Choose the Bake Mode anytime you’d like the ease and comfort of heating foods at a
moderate level without babysitting the baking process. Use this Specialty Mode for
corn bread and other bakery foods that require moderate oven heat.
Pre-set
Size
Pre-set
Color
Size
Range
Color
Range
Rapid
HOME MADE SPECIALTIES MODE – MENU “15”
Pre-set
Time
2:55 hrs N/A N/A N/A N/A No
Specialties in this Mode might include bread puddings, dense breads or other dessert
selections that require extra baking time. Try French Toast Casserole or a Vegetable
Frittata in this convenient baking Mode.
Pre-set
Size
Pre-set
Color
Size
Range
Color
Range
Rapid
BREAD BAKING MADE EASY
2322

MAINTENANCE
ALWAYS allow the Automatic Bread Maker to cool completely before cleaning.
Unplug the Automatic Bread Maker before cleaning.
After each use, clean and dry the exterior of the Automatic Bread Maker. Use a
damp, soapy cloth to clean the Base and Nonstick Baking Pan. Use only clear
water on a cloth to remove soap. DO NOT immerse the Base in water. Use non-
abrasive soap only.
After each use, remove the Dual Kneading Paddles and clean with mild soap
and clear water. Dry thoroughly and replace.
MAINTENANCE
25

WARRANTY & SERVICE
This Limited Warranty is for one full year from the date of purchase. It is
applicable to the original purchaser only and is not transferable to a third party
user. Repair or replacement of defective parts is solely at the seller’s discretion.
In the event that repair isn’t possible, the seller will replace the product/part. If
product repair/replacement won’t suce, the seller has the option of refunding
the cash value of the product or component returned.
Product defects not covered under the Warranty provisions include normal
wear and damage incurred from use or accidental negligence, misuse of
instruction specications or repair by unauthorized parties. The manufacturing
company is not liable for any incidental or consequential damages incurred by
such circumstances.
For Customer Service or Questions, Please call: 888-552-0033
WARRANTY & SERVICE
www.gourmia.com
27

www.gourmia.com
 Loading...