

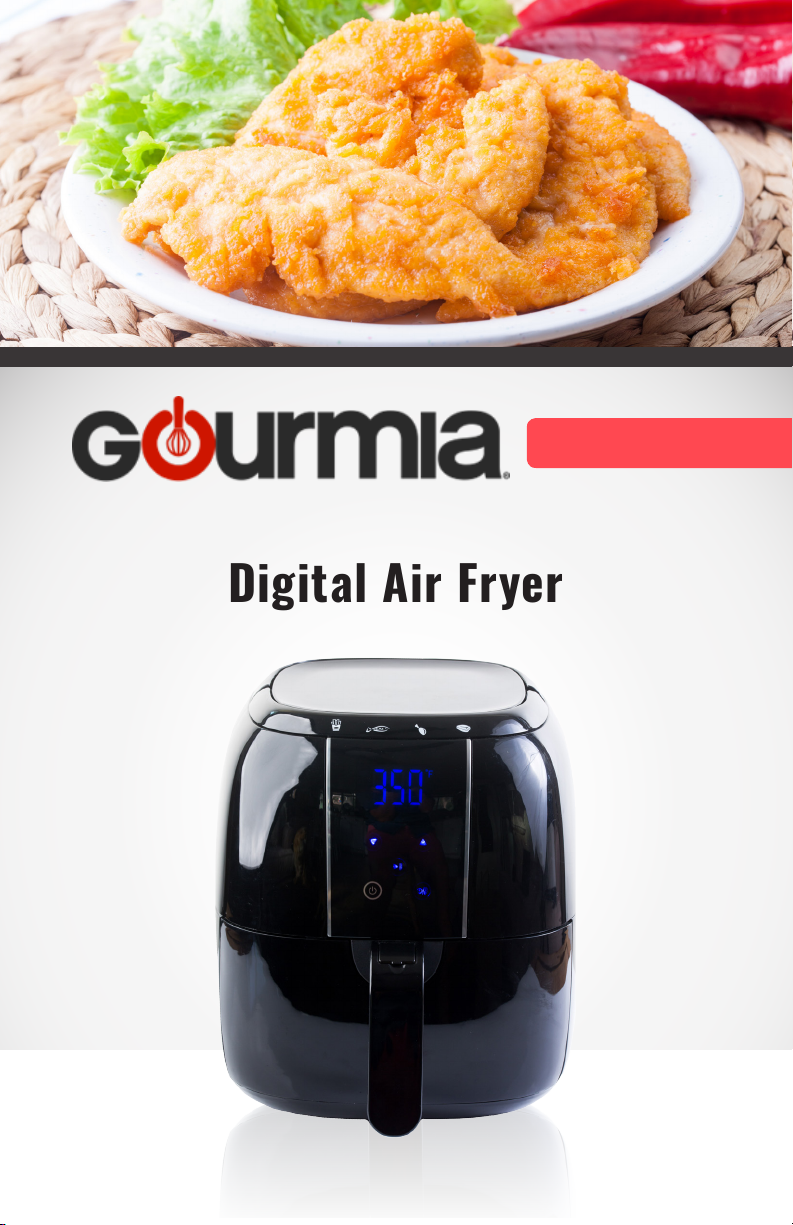
Digital Air Fryer
MODEL#GAF520

© 2016 Gourmia
www.Gourmia.com
The Steelstone Group
Brooklyn, NY
All rights reserved. No portion of this manual may be reproduced by any means whatsoever
without written permission from The Steelstone Group, except for the inclusion of quotations in a
media review.
Although every precaution has been taken in the preparation of this manual, The Steelstone
Group assumes no responsibility for errors or omissions. Nor is any liability assumed for damages
resulting from the use of the information contained herein. Although every eort has been made
to ensure that the information contained in this manual is complete and accurate, The Steelstone
Group is not engaged in rendering professional advice or services to the individual consumer;
further, The Steelstone Group shall not be held responsible for any loss or damage allegedly
arising from any information or suggestion in this manual.
10 9 8 7 6 5 4 3 2
1
Printed in China

Welcome to Naturally Delicious Air Fried
Foods from Gourmia!
With the purchase of the Digital Air Fryer, you are ready to enjoy the easy and naturally
delicious world of air frying! We all love the satisfying crunchiness of fried foods and
the sweet and savory avors inside that crunchy exterior, but we also know that heavy
fat comes with fried foods. Gourmia has created the perfect solution to the unwanted
fat that used to come with frying with the Digital Air Fryer!
From crispy shoestring potatoes sprinkled with sea salt to crisp eggrolls and fried
chicken, everything you love about frying is now yours without the added guilt
of heavy fat. With the large pan and basket included, you can air fry homemade
appetizers and roast vegetables to perfection, or you can choose frozen snacks to
quickly air fry as needed. With all the delicious foods you can air fry, the Digital Air
Fryer is sure to become your favorite kitchen appliance.
The following pages of this manual oer full and complete instructions for all
the functions and features of your Digital Air Fryer. Inside these pages, you’ll nd
information on and instructions for assembly, operating, cleaning and maintenance
of your Digital Air Fryer. Please read all safety instructions and complete directions
carefully for safe usage at all times.
Thank you for your purchase! We hope you will enjoy all the innovative products
brought to you by our family at Gourmia.

SAFETY FIRST p. 6
FEATURES & FUNCTIONS p.8
DIGITAL AIR FRYER CONTROL PANEL p. 10
BEFORE FIRST USE & STEP-BY-STEP INSTRUCTIONS p. 12
DIGITAL FRYING FOOD CHART p. 14
MAINTENANCE & SERVICE p. 16
TABLE OF CONTENTS
5

IMPORTANT SAFEGUARDS
When operating this Digital Air Fryer, basic safety instructions should always be
1. READ ALL SAFETY & USAGE INSTRUCTIONS BEFORE USING THE DIGITAL
2. EXERCISE EXTREME CAUTION: AVOID ELECTRICAL SHOCK. DO NOT
3. Do not operate the Digital Air Fryer close to walls or other obstructions. Allow
SAFETY FIRST
4. Do not operate the controls with wet hands.
5. During operation, hot steam or air escapes through the outlet vents. Keep face
6. The Fryer Base, Pan and Basket get hot during operation. Use potholders or
7. UNPLUG the Digital Air Fryer from outlet when not in use or before cleaning.
8. Children should never use the Digital Air Fryer; close supervision is required
followed. Refer to the following for these instructions.
AIR FRYER.
immerse cord, plug or the Digital Air Fryer Base in water or other liquid.
free space on all sides and above the Fryer to allow air circulation. Do not place
anything on top of the Fryer.
and hands away from the vents.
mitts to handle the Pan and Basket when removing foods and do not touch the
Base during frying.
Do not let cord hang over edge of table or counter or touch hot surfaces.
when appliance is used near children.
9. The Digital Air Fryer Pan or Base should NOT be lled with oil. This Fryer does
not use oil to operate.
10. Operate the Digital Air Fryer on a level surface well away from any hot gas or
electrical burner, heat source, combustible spray cans or pressurized items.
11. Immediately unplug the Fryer if dark smoke escapes from the outlets during
operation. Allow Fryer to cool and remove burned food particles from the Pan
or interior of the Base. Re-start when cooled and cleaned.
12. Never operate the Digital Air Fryer with a damaged cord or plug or one
that has malfunctioned or been damaged in any way. Immediately contact
Customer Service for analysis. Do not use extension cords.
6

SAVE THESE INSTRUCTIONS
FOR HOUSEHOLD USE ONLY
Electrical Polarized Plug: This Digital
Air Fryer has a polarized plug (one
blade is wider than the other). To reduce
the risk of electrical shock, the plug is
intended to be used by inserting it into
the electrical outlet only one way. If
the plug does not t securely into the
outlet, turn the plug and re-insert. Do
not modify this plug. If the plug does
not t the outlet securely, call a qualied
electrician for assistance. DO NOT use
this plug with extension cords of
any kind.
SAFETY FIRST
7

A
D
B
C
8

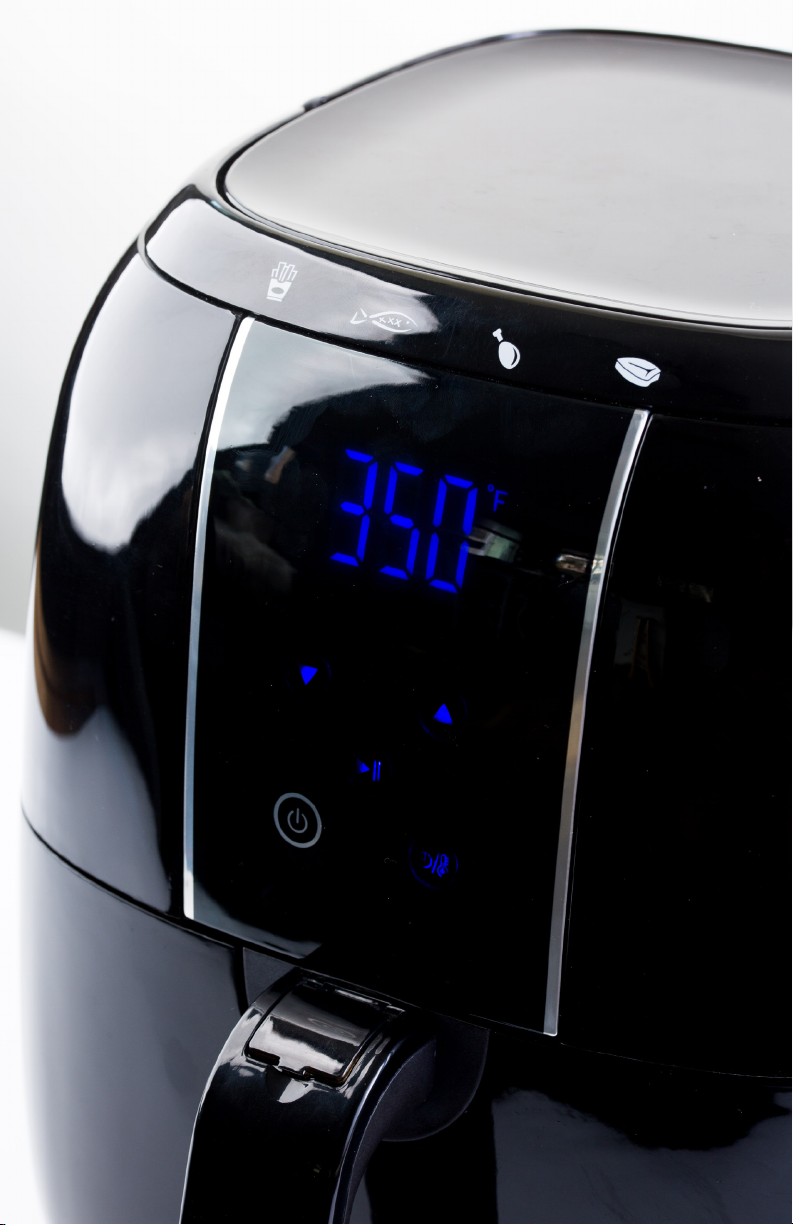
FEATURES & FUNCTIONS
A. Digital Air Fryer Base- The Digital Air Fryer Base houses the heating unit and
fan circulation system to powerfully heat and maintain frying temperatures and air
circulation during operation. The Fryer Base holds the Fryer Pan and Fryer Basket and
contains the vents for superior airow performance.
The Digital Air Fryer Base also holds the Digital Air Fryer Control Panel for easy
operation.
B. Air Fryer Pan- The Air Fryer Pan holds the Air Fryer Basket and, when assembled
together, are inserted into the Fryer Base. Unique safety controls in the Fryer Base stop
the Fryer operation if the Air Fryer Pan and Air Fryer Basket are removed during the
frying process.
C. Air Fryer Basket- The lightweight and easy-to-use Fryer Basket sits in the Fryer Pan
and is released when the Basket Release Button is pressed. Note that the Basket should
not be over-lled with ingredients for best air frying results.
D. Digital Air Fryer Control Panel- The Digital Air Fryer Control Panel holds the “brains”
of the Digital Air Fryer. Illuminated buttons oer manual choices for setting the time
and temperature and pre-set choices for various types of frying.
FEATURES & FUNCTIONS
9

I. Initial Pre-set Frying
II. Manual Air Frying
Adjusting Manual Settings
III. Pre-set Air Frying
Adjusting Pre-set Settings
I. Initial Pre-set Frying
a. Press Power On/O Button for 10 seconds until the control panel
turns on.
b. The LCD will alternately display the Temperature at 350°F and the
Digital Display Timer will indicate 10 minutes.
c. If using these settings, press Start/Pause Button. When
done, the Air Fryer will automatically turn O. The Fan will
continue to cool down for 1-5 minutes before turning O.
II. Manual Air Frying
DIGITAL AIR FRYER CONTROL PANEL
Temperature Range: 140°F to 390°F Time Range: 1 to 60 minutes
a. Press Power On/O Button for 10 seconds until the control panel
turns on.
b. The LCD will alternately display the Temperature at 350°F and the
Digital Display Timer will indicate 10 minutes.
c. If using these settings, press Start/Pause Button. When done, the
Air Fryer will automatically turn O. The Fan will continue to cool
down 1-5 minutes before turning O.
Adjusting Manual Settings:
a. After the Display indicates 350°F, press the UP or DOWN arrows to
increase or decrease the temperature.
b. Press the Time/Temp Button to display the time; use the UP or
DOWN arrows to increase or decrease the time.
10

c. Press the Start/Pause Button to begin frying. When done, the
Air Fryer will automatically turn O. The Fan will continue to
cool down 1-5 minutes before turning O.
III. Pre-set Air Frying
French Fries: 350°F/15 min.
Fish: 390°F/12 min
Chicken: 350°F/20 min
Meat: 390°F/15 min
a. Press Power On/O Button for 10 seconds until the control
panel turns on.
b. The LCD will alternately display the Temperature at 350°F and
the Digital Display Timer will indicate 10 minutes.
c. Press the Temp/Time Button until the desired cooking mode
icon illuminates.
d. Press the Start/Pause Button to turn On. The Display will
alternately indicate the temperature and time count down.
Adjusting Pre-set Settings:
a. After choosing the Pre-set Option, press the UP or DOWN
arrows to increase or decrease the temperature.
b. Press the Time/Temp Button to display the time; use the UP or
DOWN arrows to increase or decrease the time.
CONTROL PANEL
c. Press the Start/Pause Button to begin frying. When done, the
Air Fryer will automatically turn O. The Fan will continue to
cool down 1-5 minutes before turning O.
To Check Food while Frying:
Press the Start/Pause Button. Remove the Pan from the Digital Air Fryer. To resume
frying, slide the Pan back into the Air Fryer. Press the Start/Pause Button again. The
Digital Air Fryer will re-start. The Timer will continue the countdown.
To adjust Time or Temperature while Frying:
At any time while frying, change the temperature or time by pressing the Time/
Temp Button and the UP or DOWN arrows to make the desired changes.
1111

12

ASSEMBLY BEFORE USE
1. Place the Air Fryer on a at countertop.
2. Remove the Pan from the Air Fryer.
3. Remove the Basket from the Pan by lifting the Lock Cover on top of the
handle. Press the Release Button on top of the handle and lift the Basket
up and out of the Pan.
4. Wipe clean and dry the Pan and Basket.
STEP-BY-STEP INSTRUCTIONS
Follow the easy steps below for fast and easy air frying:
1. Place food into Basket and lock the Basket into place in the Pan.
2. Lower the Lock Cover on top of the handle.
3. Slide the Pan/Basket with the food into the Digital Air Fryer.
4. Choose a Frying Option: Manual or Pre-set Frying with/without
Adjustments
5. After selecting a manual or Pre-set option for frying, the Air Fryer will turn on
automatically.
BEFORE FIRST USE & STEP-BY-STEP INSTRUCTIONS
6. When done, the Air Fryer will turn O automatically. The Fan will continue to
cool down for 1-5 minutes and then turn O.
7. Remove the Pan from the Digital Air Fryer.
8. Place the Basket on a at surface and remove it from the Pan by pressing the
Basket Release Button. The Basket will disengage.
9. Do not turn the connected Pan and Basket upside down to remove foods.
Excess oil or food particles will fall from the Pan.
13

Food Min/ Max Time
Homemade
Potatoes
Shoestring Fries 10oz-16oz 18-20
Homestyle Fries 10oz-16oz 18-20
Wedges 10oz-16oz 20-22
Cubed 10oz-16oz 18-20
Shredded 8oz 15-18
Appetizers
Filled Pastries 8oz-12oz 10-12
Fresh Wonton 6oz-12oz 10-12
Vegetables
Peppers/ Onions 8oz-10oz 10-15
Crispy Zucchini 6oz-12oz 8-10
Kale Chips 4oz-8oz 6-8
Frozen Prepared
(un-thawed)
Chicken Nuggets 4oz-8oz 6-10
Fish Sticks 4oz-8oz 6-10
Jalapeño Poppers 6oz-8oz 8-10
Mini Corn Dogs 6oz 8
Spring Rolls 4oz-8oz 8-10
6oz-8oz 6-10
Taquitos- all varieties 6oz 8
French Fries 6oz-8oz 10-15
Meat, Poultry &
Seafood
Beef, Steak 4oz-16oz 8-12
Beef, Hamburgers 6oz-8oz 7-14
Chicken, Breast 4oz-8oz 10-13
14
Chicken, Leg 4oz-8oz 18-22
Fish, Fillet 4oz-8oz 10-12
Pork, Chop 4oz-8oz 10-14
Shrimp 4oz-8oz 8-12

Temp ˚F Toss/ Turn Chef Notes
390˚ Yes
360˚ Yes
390˚ Yes
390˚ Yes
390˚ No
350˚ No
350˚ Yes
350˚ Yes
390˚ Yes
390˚ Yes
380˚ Yes
380˚ Yes
350˚ Yes
350˚ No
380˚ Yes
370˚ Yes
370˚ No
350˚ Yes
add ½ T oil before frying
add ½ T oil before frying
add ½ T oil before frying
add ½ T oil before frying
add ½ T oil before frying
toss with oil and spices before frying
sliced/dip in egg/coat with cracker crumbs
torn into pieces, toss with oil before frying
arrange in basket without crowding
arrange in basket without crowding
arrange in basket without crowding
arrange in basket without crowding
add 1/2 T oil before frying,
arrange in basket without crowding
DIGITAL FRYING FOOD CHART
390˚ No
360˚ No
370˚
370˚
360˚
350˚
360˚
add spices before frying
shape into small sliders/arrange in basket
boneless, skinless/add oil & spices before
frying
cook until 160°F on thermometer
rub with oil and spices/crumbs before frying
rub with oil and spices/crumbs before frying
peel/dip in egg/coat with cracker crumbs
15

16

MAINTENANCE
1. Clean the Digital Air Fryer after every use. Do not use harsh chemicals or
scouring pads on any parts of the Fryer or accessories.
2. Wipe the interior of the Base with a slightly damp sponge or cloth. Dry
thoroughly.
3. Wipe the exterior of the Base with a slightly damp cloth. Dry thoroughly.
WARRANTY
This Limited Warranty is for one full year from the date of purchase. It is
applicable to the original purchaser only and is not transferable to a third party
user. Repair or replacement of defective parts is solely at the seller’s discretion.
In the event that repair isn’t possible, the seller will replace the product/part. If
product repair/replacement won’t suce, the seller has the option of refunding
the cash value of the product or component returned.
Product defects not covered under the Warranty provisions include normal wear
and damage incurred from use or accidental negligence, misuse of instruction
specications or repair by unauthorized parties. The manufacturing company
is not liable for any incidental or consequential damages incurred by such
circumstances.
For Customer Service or Questions, Please call: 888-552-0033
MAINTENANCE & SERVICE
www.gourmia.com
17

www.gourmia.com
 Loading...