

Page 1
Gotharman’s
Little deFormer
Quick Manual
Page 2

Contents Of This Manual
Introduction 3
Very Special Thanks To 4
Audio Path 5
Getting Started 6
Well, Now It’s Time For Some Action 10
Editing Parameters 11
List Of Parameters 13
Common 13
Sampler 13
Record A Sampling 18
Compressor 28
Distortion 29
Filter 30
Time & Pitch Effect 32
Sequencer 46
Modulation 48
Knob CC’s 50
Save Preset 51
FLASH 53
Updating The Little deFormer Firmware 55
List Of Included Samplings 60
Page 3

Introduction
Thank you very much for purchasing/consider to purchase a Little deFormer.
The Little deFormer are the result of a lot of ideas I have been writing down, since I made the first
deFormer in 2009, coming true. It has more effects (plus more to come), more filter types, an added
sampler, a much improved sequencer, it’s expanable and MIDI updatable, and has much more
power.
The idea behind
Being a budget musician, you usually don’t have the cash to bring out and set up all of your gear,
when you go out and play live.
The alternative is to sample phrases from your gear, and just trigger those samplings live, or to prerecord everything on a dat recorder or one of all those fancy new recorders.
Personally I have used both methods, but found both of them really boring. That was why I made
the first deFormer. After I made that, I brought a Roland MC-909 or a SP-606 and connected their
output to the deFormers audio input. Because of the deFormers great granular effects, it was now
possible to really tweak the samplings, and do something while standing on the stage, and it was no
longer boring.
In the Little deFormer, I have added a sampler with a stunning audio quality, ready to be boosted up
on a big PA. So now it is only nescessary to bring one piece of gear…
Because of the deFormers unique and high quality Gotharman made effects, it is also usable as an
add-on for the studio, who needs something that they can’t get anywhere else (at least not at this
moment).
I hope you will deForm some great tracks with it.
Page 4

Very special thanks to:
Kris Kunz
Georg Osswald
Kirk Marrison
Rafael Marfil
Gene Schwartz
Halvard Djupvik Smedsrud
David Kronemyer
Egan Budd
Steve Korn
Pedro Figueredo
Goeran Stangeland
James Neville
Robert Korizek
For supporting this project. I really appreciate your trust. Without you, the Little deFormer
might not have been…
Gotharman May 2012
Gotharman May 2012Gotharman May 2012
Gotharman May 2012
Page 5

Page 6
Getting Started
Well, now you got your Little deFormer, you probably can’t wait to get it up and going, so let’s
jump right to it.
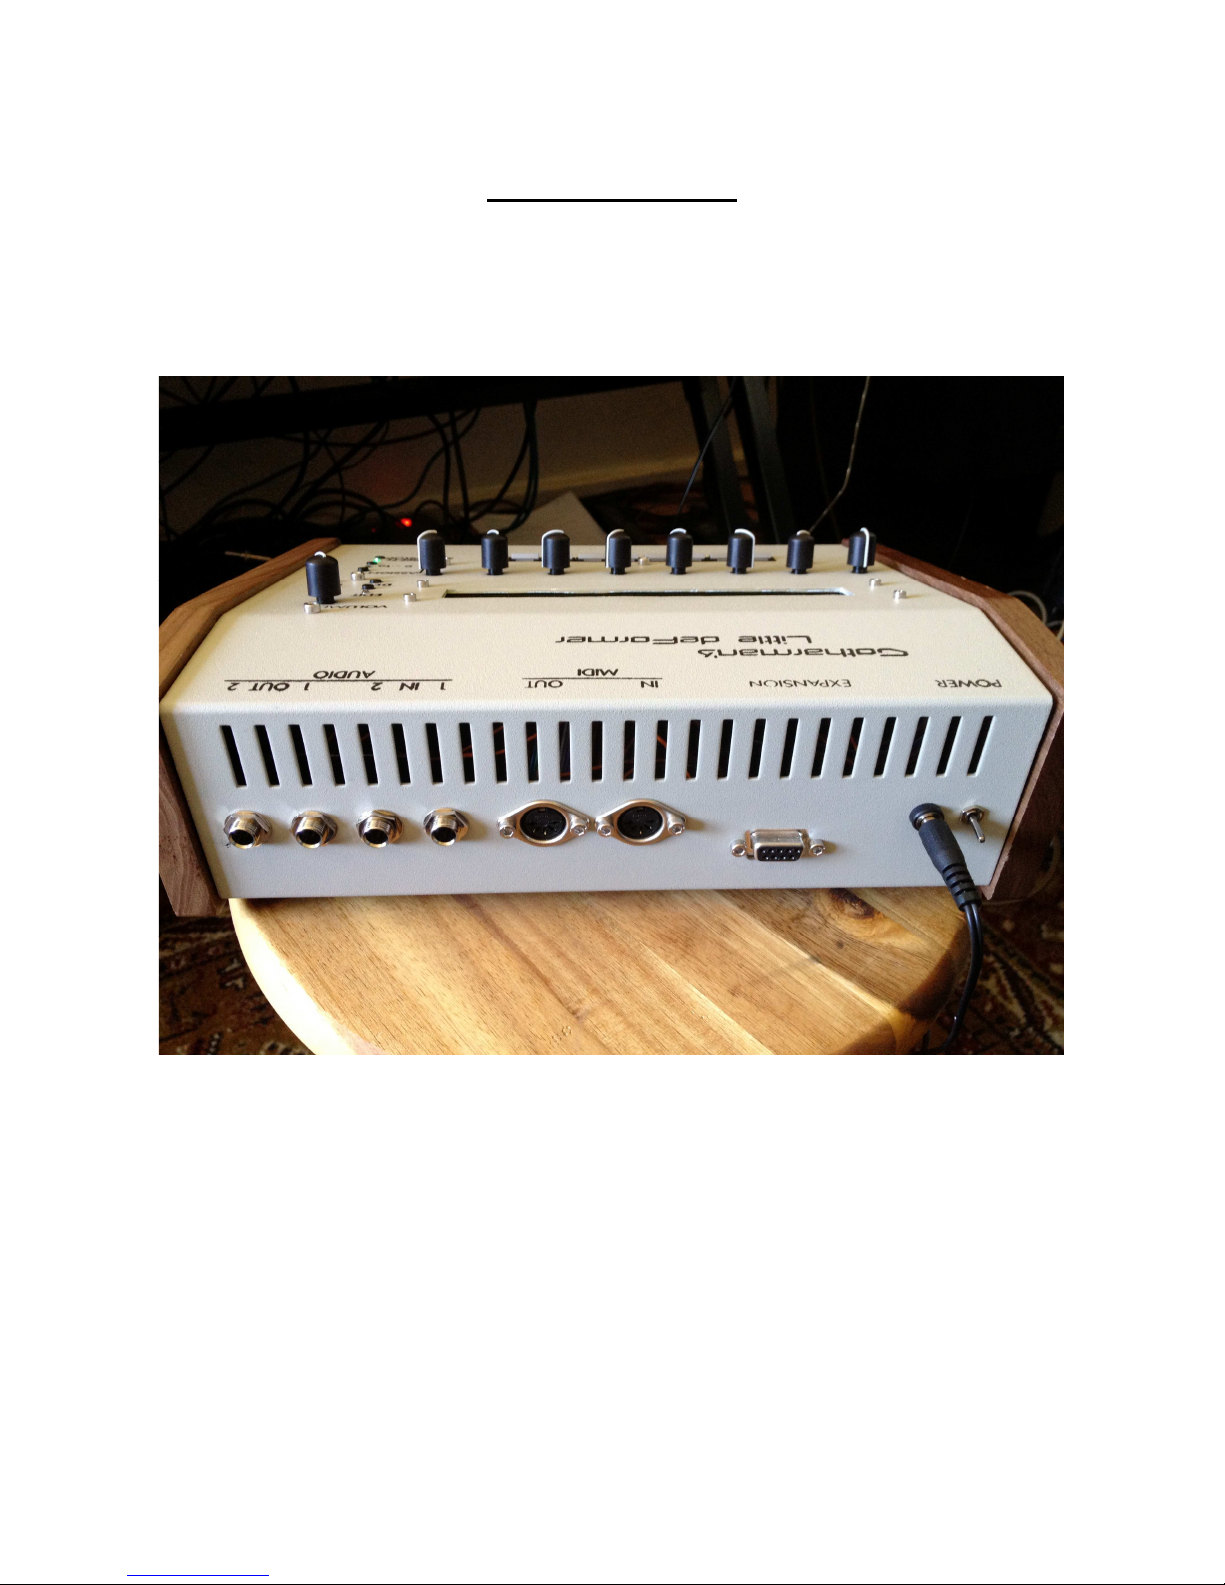
Connecting:
Connect the audio out 1 or 2 or both to a mixer or an amplifier, or anything else that ends out in a
set of speakers, a single speaker, or even a pair of headphones, if you are in a neighbour friendly
mood. Since it doesn’t have build in speakers, it just needs to be connected to something, that can
transfer its amazing sound to you.
If you plan to control it from a MIDI device, connect that to its MIDI input.
Page 7
If you would like to effect some other gear through the Little deFormers effects, connect this to
Audio Input 1 and/or 2. NOTE: When nothing is connected to Audio Input 2, Audio Output 2 are
internally connected to this. The audio in 2 level parameter then acts as a feedback control.
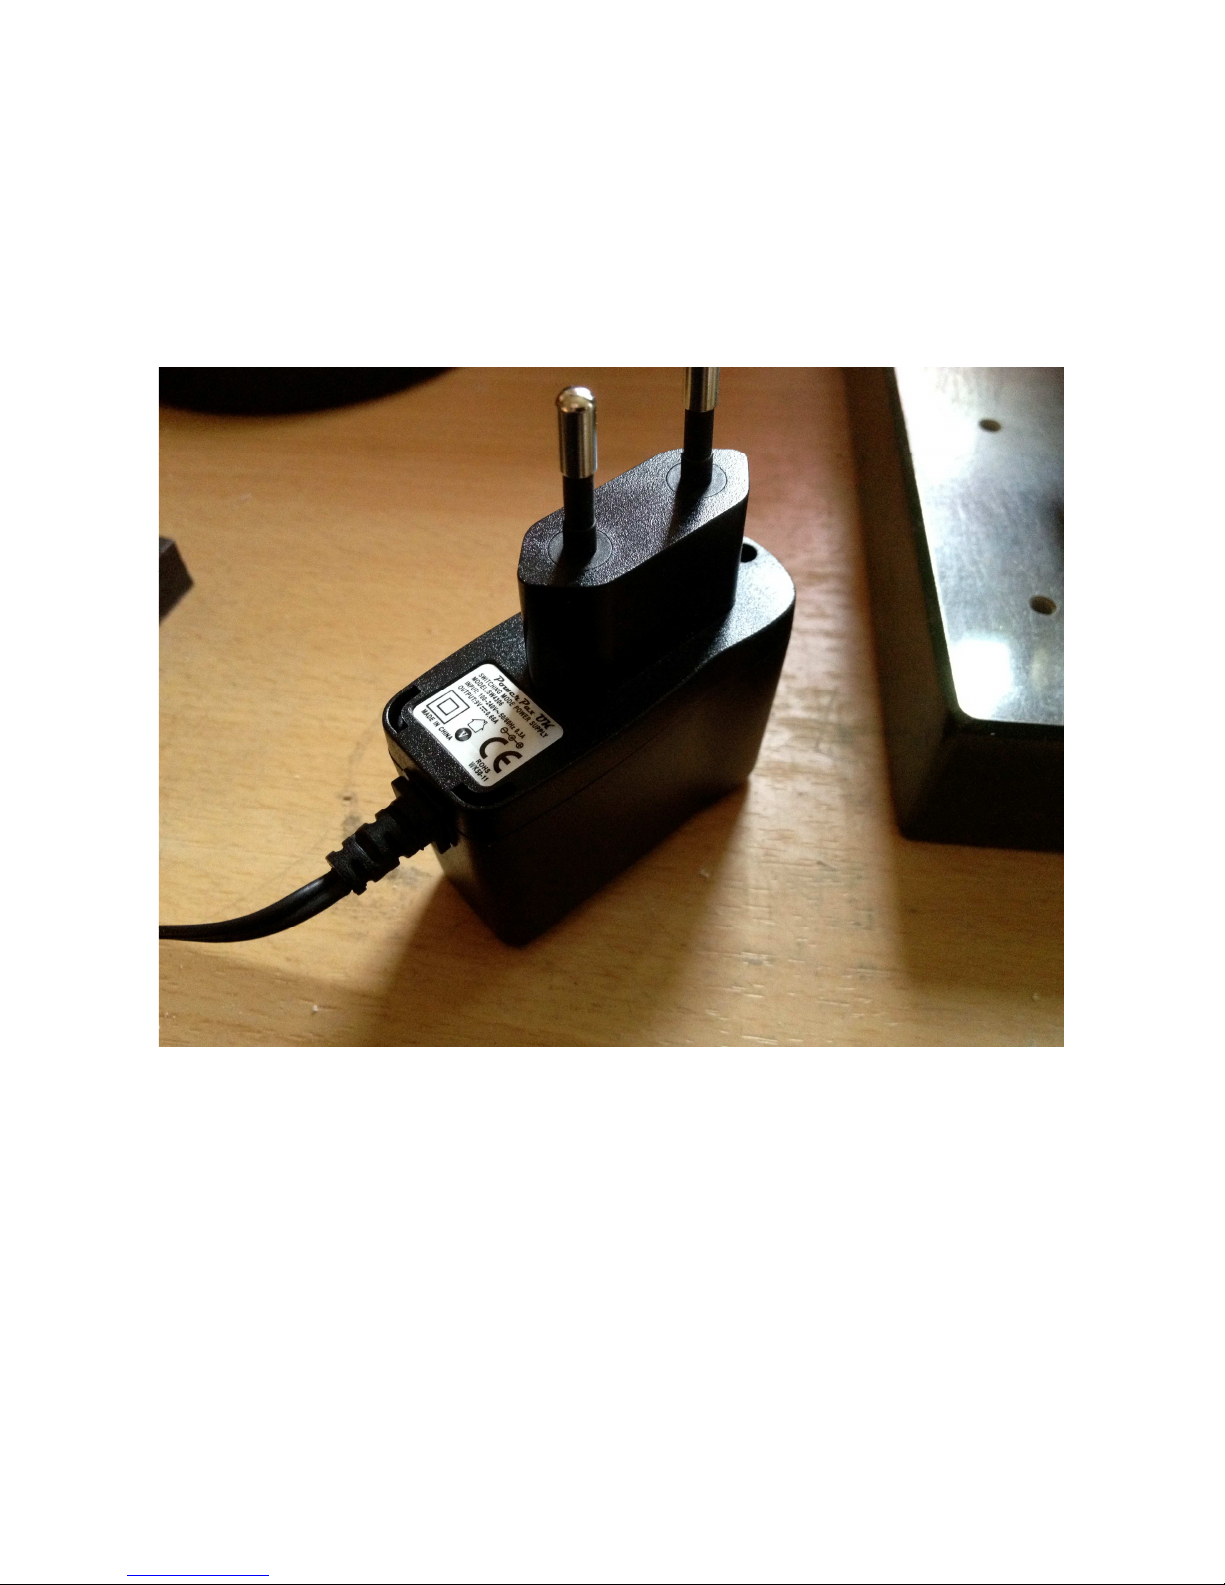
Connect the supplied power adaptor to the Power DC input, and to a 100V to 240V power source.
It’s a 9V, 660 mA type with a 2.1 mm DC plug, with positive middle.
Turn it on
Toggle the power switch on the back, so its pin is pointing down. Your Little deFormer should now
turn on.
Page 8
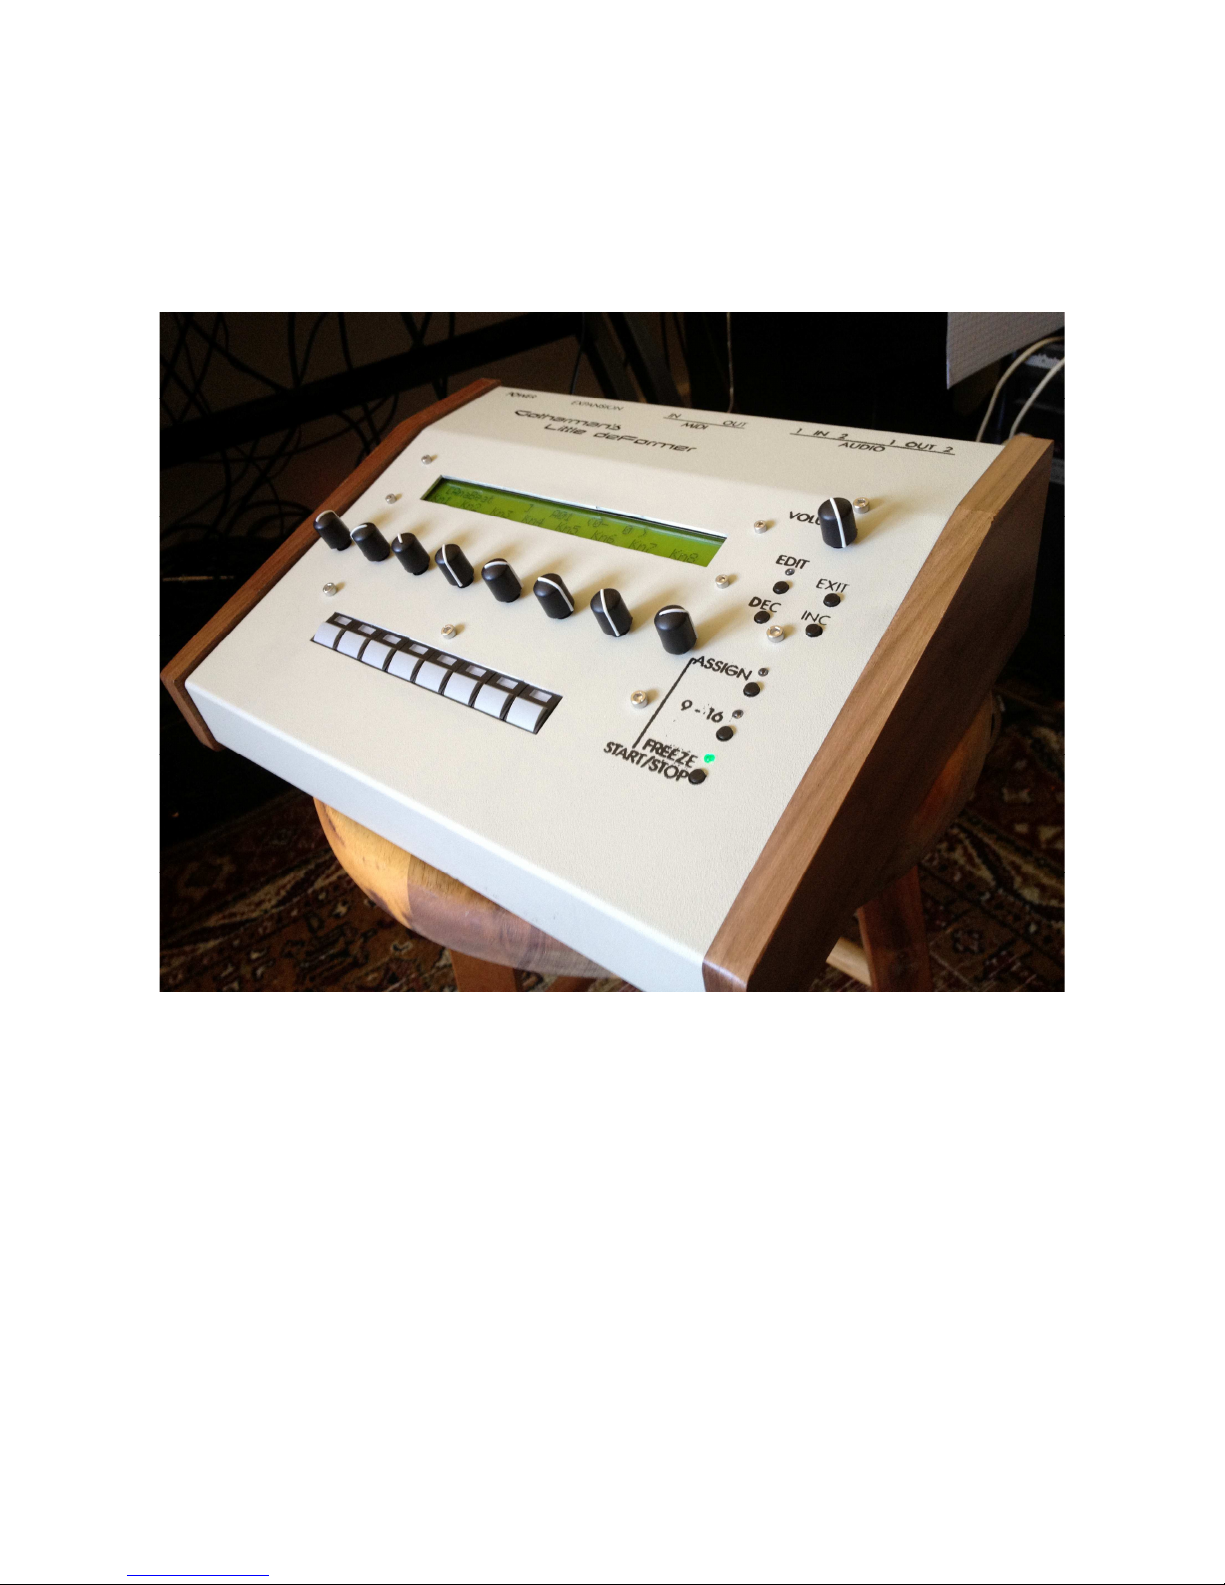
The User Interface
Volume knob
Turns the output level of the Litte deFormer up or down, depending on what direction you are
turning it. Clockwise movement will turn the volume up, counterclockwise movement will turn the
volume down.
Edit button
Pushing this will access the edit menu’s. It is also nescessary to push it, to confirm a preset change.
Exit button
This will exit from any menu to the preset select screen.
Dec and Inc buttons
These will select preset. In the edit menu’s they will select among the different edit pages. In the
Assign menu they will select samplings. Holding one of these buttons down, will cause it to scroll
through presets/samplings/pages.
Page 9

Assign button
Push this one time, so the Assign LED is lit, to select a sampling for the last pushed step button.
Push any step button, to view what sampling is assigned to it, and use the inc/dec buttons to select
another sampling
Push it one more time, so its LED is flashing, to mute/unmute any of the 32 sequencer tracks, by
pushing the step buttons.
9 – 16 button
When on the preset select screen, this button swithes between sample 1-8 and sample 9-16
triggering, via the step knobs.
On sequencer step programming screens, it toggles between step 1-8, 9-16, 17-24 and 25-32. When
reaching step 17-24 its LED flashes slow, when reaching step 25-32, it flashes fast.
On the sequencer track mute/unmute screen, it is also possible to access track 17-32 in a likewise
manner.
Freeze – Start/stop button
Pushing this button freezes the audio content of the time and pitch effect. If a preset is stored, with
this button active, the frozen audio content will be stored together with the preset as a sampling, and
re-loaded the next time you select that preset. The Freeze LED is Flashing to visualize the delay
time of the selected time & pitch effect.
When the Assign LED is lit or flashing, or when a sequencer edit page is selected, this button
functions as sequencer start/stop.
The 8 Edit Knobs
Edits up to 8 parameters at a time on the various edit pages. When on the Preset select page, or the
edit group select page (explained later), these knobs sends out a selected MIDI CC number, both to
the MIDI OUT and internally. Parameters assigned to be controlled by ”Kn1-8” will be affected,
when turning these.
The 8 Step Buttons
On most pages, these triggers the sampling assigned to them. On the sequencer track on/off page,
they toggles each sequencer track between on and off stage, and on the sequencer pages they step
grid program the sequencer tracks.
Page 10

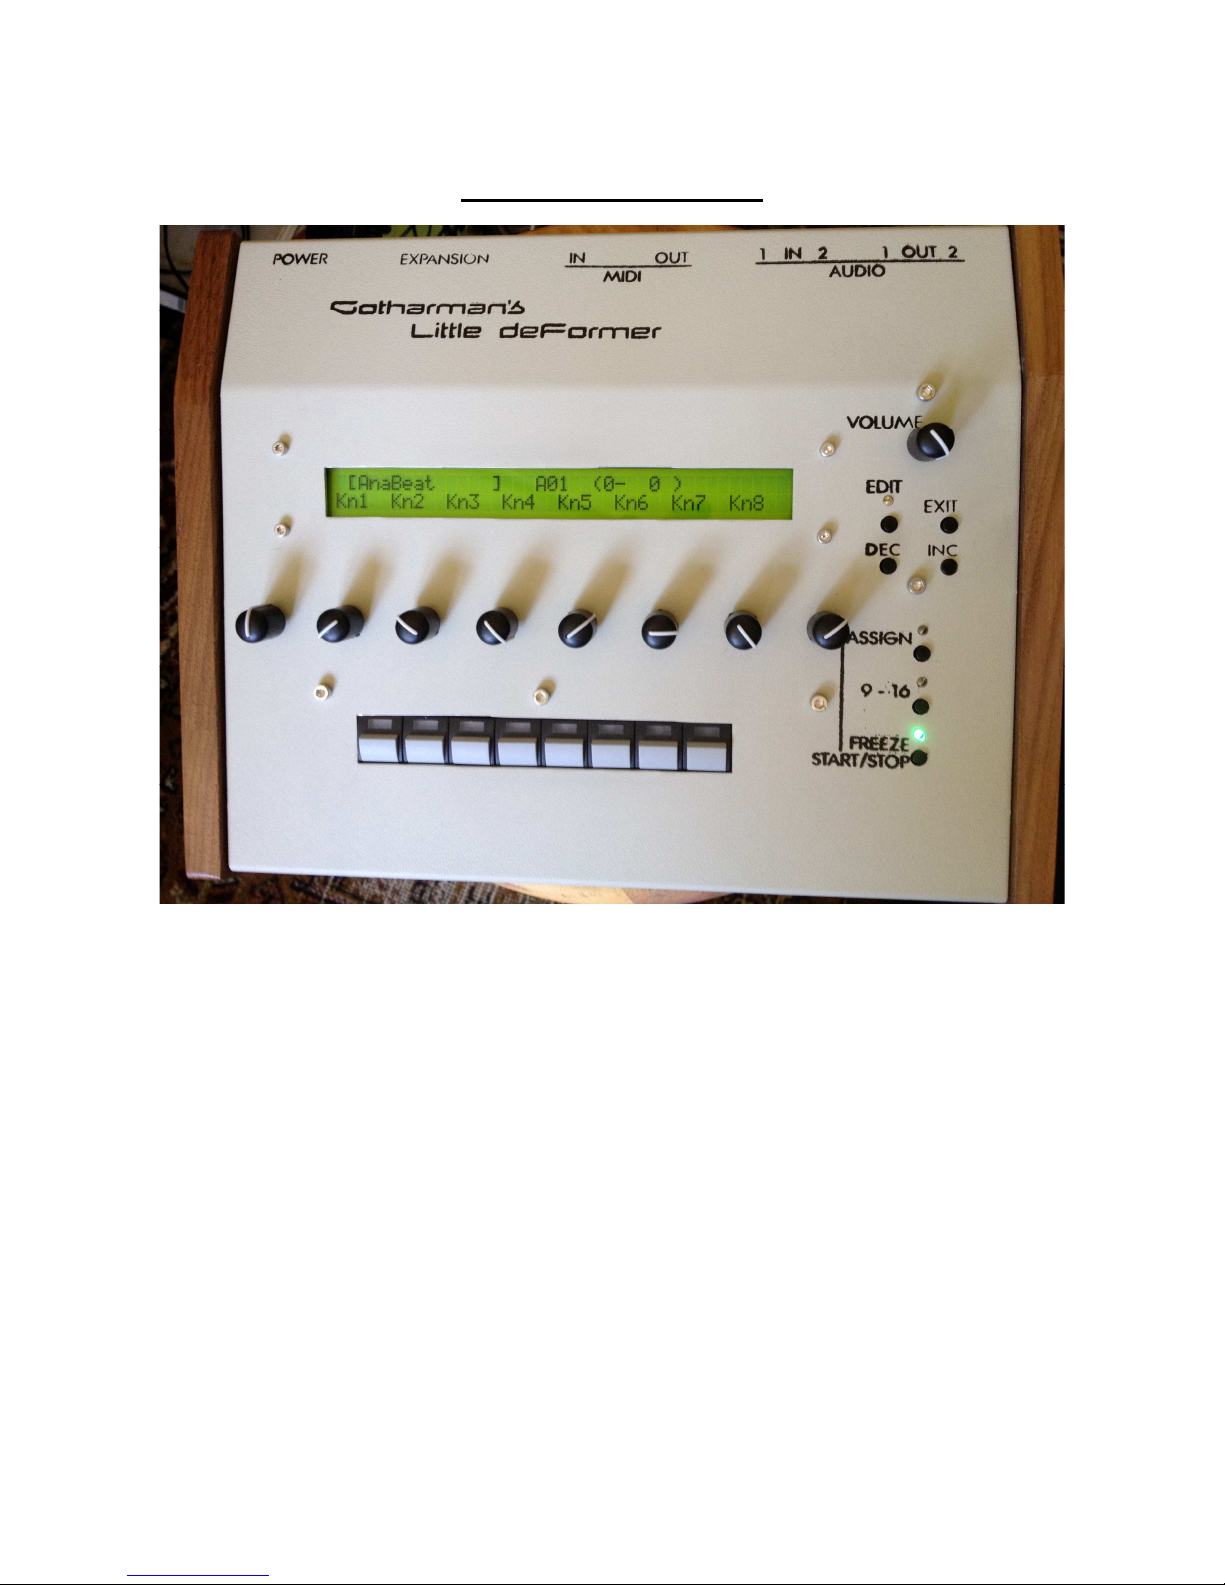
Well, now it’s time for some action
If you have followed the previous steps, your Little deFormer should now be turned on and
connected. When it is turned on, it starts up on the preset select screen:
Listening to the pre-programmed preset sequences
Push the ”Assign” button one time, so it is lit.
Push the ”Freeze Start/Stop” button one time.
The sequencer will now start.
To stop it, hit the ”Freeze Start/Stop” button again.
Listen to some other preset sequences
Push the ”Assign” button 2 times, so it is unlit, and you are back on the preset select screen.
Use the ”Inc” and ”Dec” buttons to select another preset.
The ”Edit” LED will start to flash.
Push the ”Edit” button to confirm the change to another preset.
If the sequencer is still running, the ”Edit” LED will now start to flash faster, until it reaches the
sequencer start step. Then the ”Edit” LED will go out, and playback of the newly selected preset
will start.
If the sequencer is stopped, it will change to the new preset, immediately when the ”Edit” button is
pushed.
Listen to some samplings
While still on the preset select screen, push some of the step buttons. You should now hear some
samplings play back. The step LED will light up, as long as the sample is playing.
Push the ”9-16” button to switch between sampling 1 to 8 and 9 to 16.
Selecting other samplings for the step buttons
Push the ”Assign” button one time, so its LED is lit.
Push a step button.
The assigned samplings name and number are now displayed.
Push the ”Inc” and ”Dec” buttons to assign another sampling to the step button.
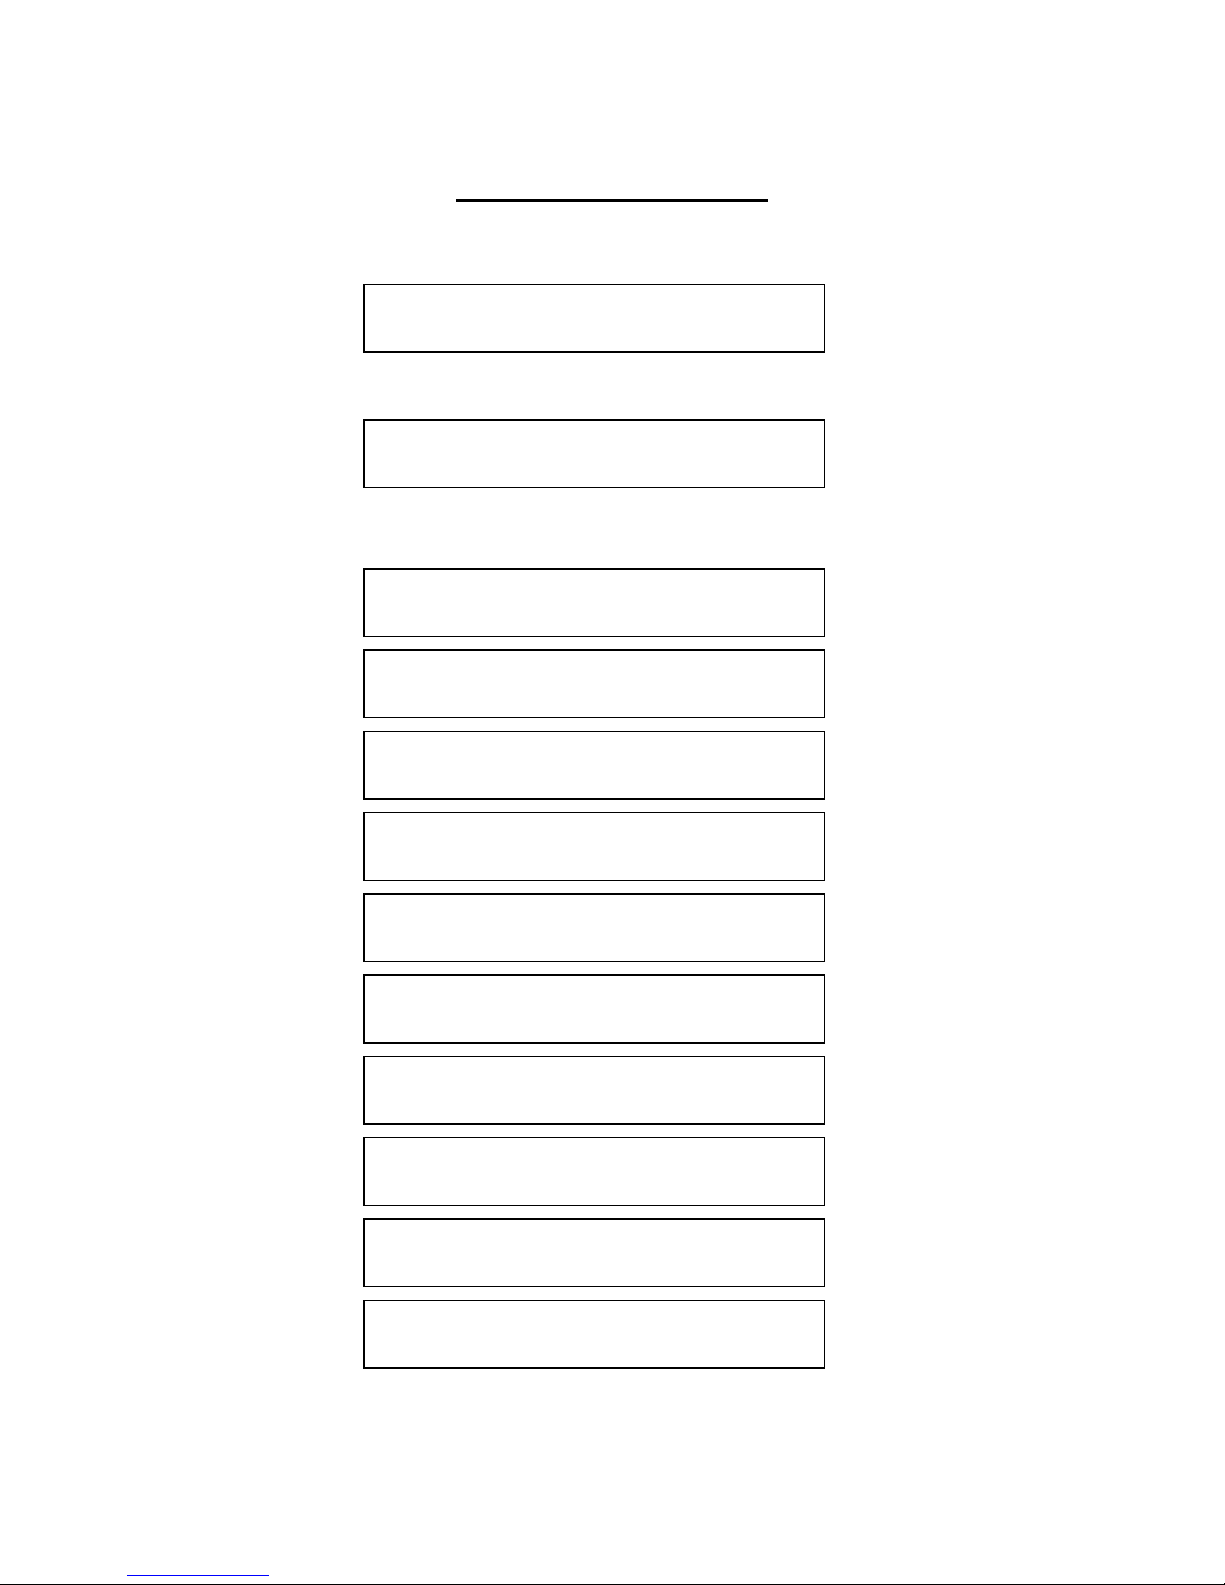
[AnaBeat ] A01 (0- 0)
Kn1 Kn2 Kn3 Kn4 Kn5 Kn6 Kn7 Kn8
[dmTom1 ]
203
Page 11
Editing parameters
From the preset select screen
Push the ”edit” button one time, to enter this screen:
This is referred to as an ”Edit Group screen”.
By pushing the ”Inc” and ”Dec” buttons, you can select between various edit group screens:
[AnaBeat ] A01 (0- 0)
Kn1 Kn2 Kn3 Kn4 Kn5 Kn6 Kn7 Kn8
COMMON
SAMPLER
COMPRESSOR
DISTORTION
FILTER
TIME & PITCH
SEQUENCER
MODULATION
KNOB CC’s
SAVE PRESET
FLASH
Page 12

To go back to the preset select screen, from the edit group screens, just hit the ”Exit” button.
To enter the parameters for the selected group, hit the ”Edit” button.
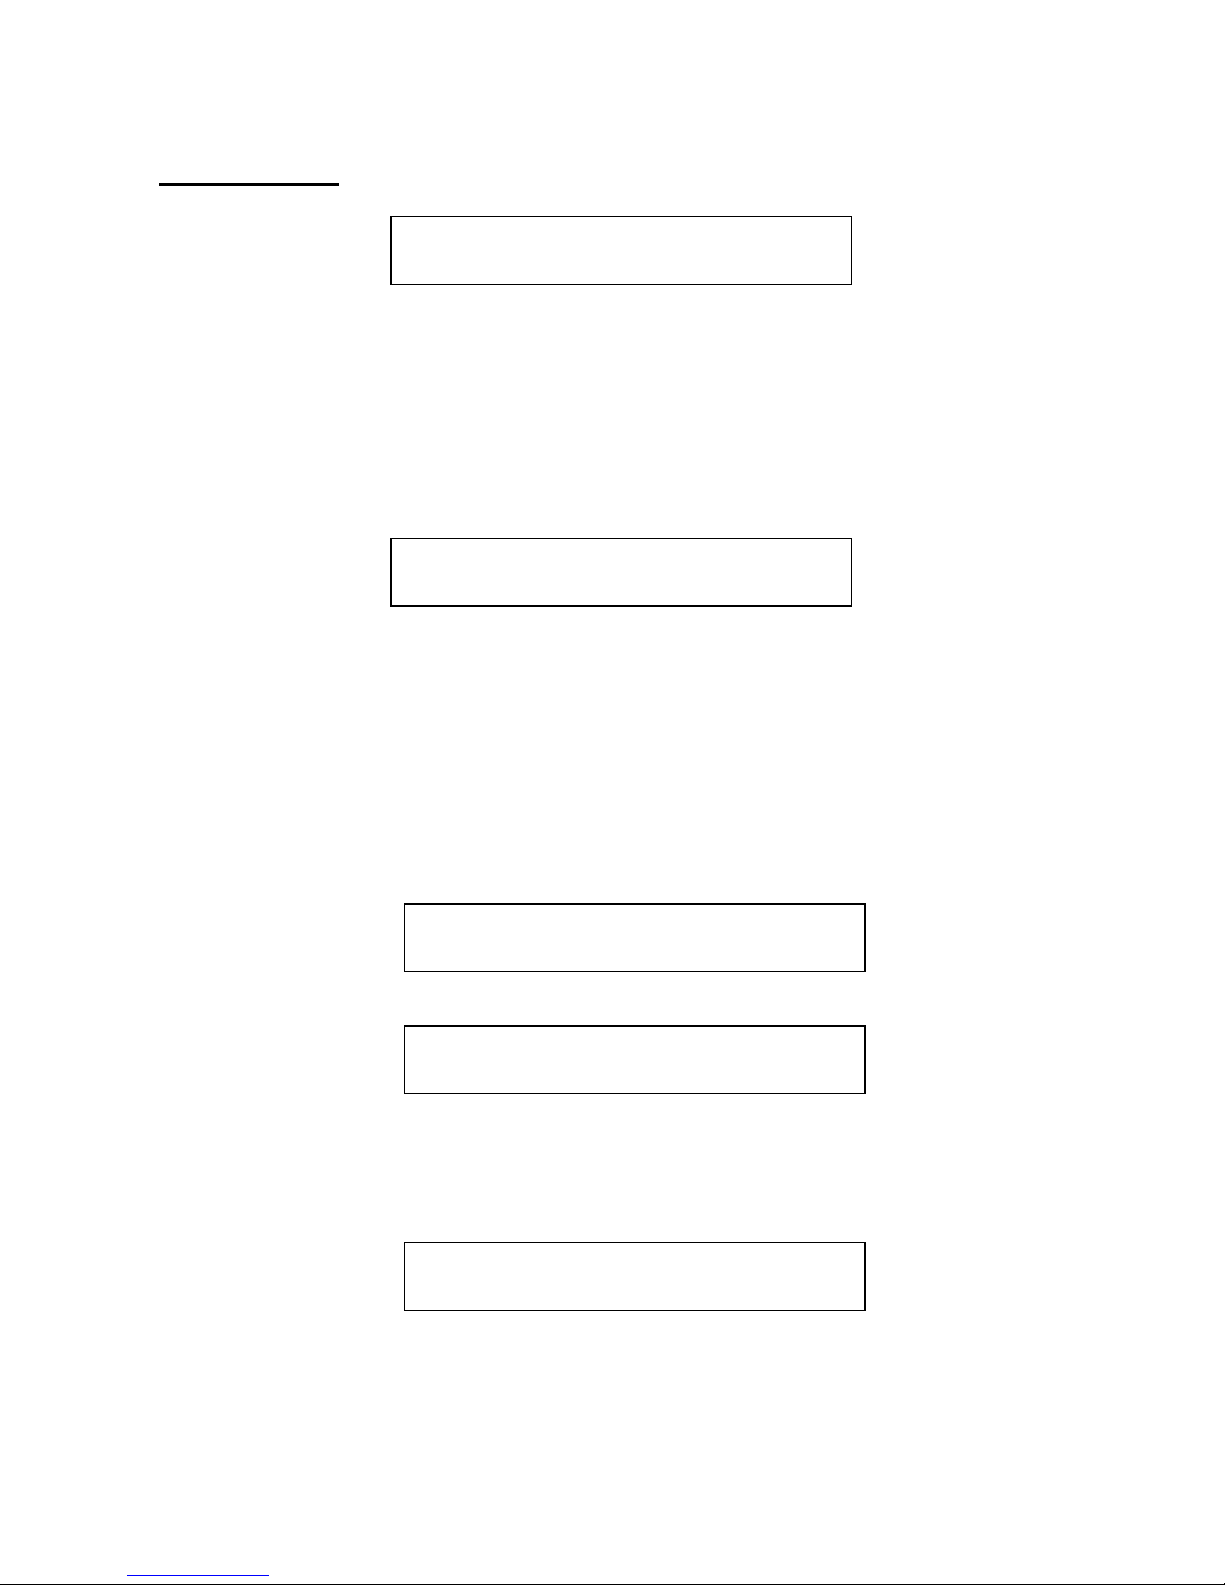
The first parameter screen of the ”SAMPLER” group of parameters looks like this on the Limited
edition model:
Push a step button to select the sampling you want to edit.
Use the 8 edit knobs to edit the parameter values.
Push the ”Inc” and ”Dec” buttons to select various parameters.
Push the ”Exit” button to go back to the edit group select screens.
In the ”SAMPLER” and ”FLASH” sections, there are some special parameter pages, that might
look like this:
On these parameter pages, you will have to push the ”Edit” button, either to enter a set of subparameters, or to make the little deFormer perform a certain function.
Tune . Fine . Gain . Env . Dec . Mode . Chop . #chp
+ 0 + 0 + 0 Off 128 poly Off 1
SAMPLE REC >
PUSH <edit>
Page 13

List Of Parameters
This list of parameters is only valid to the common firmware version, and there might be some
changes to this in future updates.
COMMON
Inp1 – -128 to +127. Adjusts the level of audio input 1. Negative values will damp the signal,
positive values will gain the signal. While monitoring the input signal, on this page, the 8 step
LED’s will act as a VU-meter. Adjust the input level, so stepLED 8 (the rightmost one) is not
lighting up.
Bus – 1 to 4. Selects which one of 4 busses Audio input 1 should be routed to.
Inp2 – -128 to +127. Adjusts the level of audio input 2. Negative values will damp the signal,
positive values will gain the signal. If nothing is connected to Audio input 2, Audio output 2 will be
internally connected to this, and the level parameter will act as ”FeedBack”. While monitoring the
input signal, on this page, the 8 step LED’s will act as a VU-meter. Adjust the input level, so
stepLED 8 (the rightmost one) is not lighting up.
Bus – 1 to 4. Selects which one of 4 busses Audio input 2 should be routed to.
Chan – 1 to 16. Common MIDI channel select. The Little deFormer will receive and transmit note
on’s and off’s, and controllers on the channel selected here.
Clck – Int, Ext. Clock select. Selects whether Little deFormer’s sequencer should sync to its own
internal clock source or to an external MIDI clock source. If ”ext” is selected here, a MIDI clock
transmitting device must be connected to Little deFormers MIDI IN.
Xmit – Off, On. Selects whether or not Little deFormer should transmit MIDI clock pulses on
MIDI OUT. Unlike most other MIDI gear, Little deFormer is able to re-transmit external MIDI
clocks, that is present on its MIDI IN.
SAMPLER
Tune - -128 to +127. Adjusts the pitch of the selected sampling. Negative values will pitch the
sampling down, positive values will pitch the sampling up.
Fine - -64 to +63. Fine tunes the pitch of the selected sampling. Negative values will pitch the
sampling down, positive values will pitch the sampling up.
Gain – -128 to +127. Adjusts the level of the selected sampling. Negative values will damp the
sampling, positive values will gain it.
Page 14

Env – Off, On. Selects if the selected samplings level should be controlled by a decay envelope, or
not.
Dec – 0 to 255. Sample envelope decay. The decay will be relative to the length of the sampling.
Mode – poly, mono. In poly mode, 4 samplings can play back at the same time, in mono mode only
one sampling can play back at a time, and samplings will cut each other off. The mono mode is very
useful in conjunction with the sample trigger system mentioned later, for creating a kind of
wavesequencing.
Chop – Off, 1-63. Selects what chop frame should play back. This can only be adjusted, if a
sampling is chopped, using the ”auto chop” or manual chop functions mentioned later. If the
sampling is not chopped, this parameter will have no function.
#chp – 1 to 64. Adjusts how many chop frames should be played back in a row. Like the Chop
parameter, this will have no function, if the selected sampling is not chopped.
Strt – 0 to 255. The selected samplings start point. When triggering the sampling, playback will
start from the adjusted point. This parameter is relative to the selected samplings length.
Fine – 0 to 255. Fine adjustment of the selected samplings start point. . This parameter is relative to
the selected samplings length.
Lngt – 0 to 255. The selected samplings playback length. When triggering the sampling, it will play
back for the adjusted amount of time. This parameter is relative to the selected samplings length.
Fine – 0 to 255. Fine adjustment of the selected samplings playback length. . This parameter is
relative to the selected samplings length.
Loop – Off, On, Togl.
Off – When the sampling is triggered, it will play back one time from the adjusted start point.
On – When the sampling has played back one time, after triggering, it will loop back to the start
point, and start playing back again, for as long as the step button is held.
Togl – When the step button is pushed, the sampling will play back like in loop mode, and keep
playing back, until the step button is pushed again.´
Trig – Off, 1 to 255. Selects a point in the selected samplings playback time, where it shall trigger
another sampling. At a setting of 1, it will trigger the other sampling immediately after it is
triggered, at a setting of 128 it will trigger the other sampling, when it has played back half of its
time and at a setting of 255, it will trigger the other sampling, when it has reached its end point.
This parameter is relative to the selected samplings length.
Smpl – 1 to 16. Selects which sampling it should trigger.
Bus – 1 to 4. Selects which one of 4 busses the selected samplings audio output should be routed to.
Page 15

Phaz – 0 to 255. Phaze effect. Each sampling on the Little deFormer has its own phaze effect. This
parameter adjusts the phaze angle. If the next parameter (Levl) is set to zero, this parameter will
have no effect at all.
Levl – 0 to 255. Phaze effect level.
Cut – 0 to 255. Each sampling on the Little deFormer has its own filter. This parameter adjusts the
cutoff frequency of the selected samplings filter.
Reso – 0 to 255. Adjusts the resonance of the selected samplings filter.
Type – The response (type) for the selected samplings filter. Choices are:
Lpf – Lowpass.
Bpf – 4 pole bandpass.
Bp8 – 8 pole bandpass.
Hpf – Highpass.
Add – This is actually not a filter, since it doesn’t filter out harmonics from the sample, but adds
some.
Bef – Band reject filter.
Bass – Enhances the low frequencies of the sampling, and passes the high frequencies through in a
very poor way.
Lofi – A destructive lowpass filter.
fEnv - -128 to +127. Adjusts how much the sample envelope will affect the filter cutoff frequency.
Negative values will reverse the envelope.
fMix - -128 to +127. Filter mix. Adjusts the mix between the clean sample output, and the filter
output. At position zero, you will only hear the output from the filter. At positions +127 and -128,
you will only hear the clean sampling. When turning this parameter from zero to +127, the pure
sample will be added more and more to the filter output. When turning it from zero to –128, the
pure sample will be subbed more and more from the filter output.
mEnv - -128 to +127. Adjusts how much the sample envelope will affect filter mix. Negative
values will reverse the envelope.
Filter adjust 1, 2 and 3 – 0 to 255. A little deFormer speciality. With these 3 parameters you can
adjust the filter response, and create completely new filter types. It’s a bit hard to explain what
exactly they do, and it is also a bit unpredictable. Tweak and listen.
Page 16

SAMPLER special parameter pages
Re-save sampling
When you have adjusted the startpoint and length of a sampling, you might want to save it that way
(Called ”Truncate” on many samplers). Or when you have auto-chopped a sampling, you might
want to save the chops as single samplings. Or maybe you just want to re-name a sampling. All
these functions are accomplished with the Re-Save function.
How to use it:
1. Adjust the sample start and length to your likings, or auto/manual chop it, and select the chop
you want to save.
2. Push the step button, and listen to the sampling. What you hear it play back, is what will be
saved as a new sampling.
3. Navigate to the re-save screen.
4. Push the ”Edit” button. That will take you to this page:
5. Use edit knob 1-8 to adjust the first eight characters in the new samplings name.
6. Push ”Inc”.
7. Use edit knob 1-4 to adjust the last 4 characters in the new samplings name.
8. Push ”Inc” again.
9. The display will read ”Saving…” for a short while, and then it will return to the Name 1-8 page.
10. Your new sampling has now been saved at the next available location on the internal FLASH
memory, and can be recalled, by assigning it to a step button.
RE-SAVE >
PUSH <edit>
Name 1 – 8 PUSH
dmTOM1 <inc>
Page 17

Erase sampling
Since there might be cases, where you would like to delete a sampling, that function is added too.
T.ex. when you have re-saved a sampling with correct start and end points, you might not need to
keep the original. Then you go to this page.
Push the ”Edit” button to go to this page:
The last selected sampling will show in the display. If this is not the sampling you want to erase,
push the ”Inc” and ”Dec” buttons to select the right one.
Push the ”Freeze” button. This display will show:
Push the ”Dec” button, if you are sure that you would like to erase this sampling. If you are not
sure, hit the ”Exit” button.
If you decide to push the ”Dec” button, this display will show:
Since little deFormer records samplings to the FLASH memory in a linear fashion, the hole that this
sampling leaves, will need to be filled out, so it starts moving the above samplings:
If there are many samplings after the one you erased, this takes very long time, so this system will
most probably be changed in a future firmware.
When the erasing and moving is done, it will return to the ”Select sample to be erased” page. If you
need to erase more samplings, repeat this procedure, if not, push ”Exit”.
ERASE SAMPLING >
PUSH <edit>
[dmTOM1 ]
460 <frz>
Sure?
<dec> = yes
Erasing…
Sample 460
Moving…
Sample 461
Page 18
Record a sampling
This lets you record your own samplings. If the device you want to sample does not have a volume
knob, you should go to the ”COMMON” edit group before you proceed with this, and adjust the
input level as decribed in that section.
HINT: When you enter the sample parameters, from the edit group menu, you will only need to
push ”Dec” one time, to enter this sample recording menu.
To proceed, push the ”Edit” button:
Use edit knob 1 to select what you want to record. Select ”Input” to record an audio source
connected to Little deFormers audio inputs, select ”Output” to re-sample anything that is going on
inside Little deFormer.
Activate the source. If the source is ”Output” play Little deFormers step buttons or start the
sequencer. The step LED’s now acts as a VU-meter. Take care, that step LED 8 (the rightmost one)
does not light up. If it does, adjust the level of the source, or push ”Exit” and go to the
”COMMON” section and adjust the input level.
Now push ”Dec” to activate recording. The display reads:
Activate the source to record it. When you are done recording, push ”Inc” to go to this screen:
If you would like to audition you sampling, push the ”Inc” button. If you would like to name it and
save it, push ”Dec”. If you would not like to keep this sampling, push ”Exit”.
If you choose to push ”Dec”, you will go to this screen:
Use edit knob 1-8 to select the first 8 characters of the new samplings name
Push ”Inc”.
SAMPLE REC >
PUSH <edit>
Source. PUSH
Input <dec>
Records….
Stop = <inc>
Audition = <inc>
Name = <dec>
Name 1 – 8 PUSH
dmTOM1 <inc>
Page 19

Use edit knob 1-4 to adjust the last 4 characters in the new samplings name.
Push ”Inc” again.
The display will read ”Saving…” for a short while, and then it will return to the record source select
screen.
Your new sampling has now been saved at the next available location on the internal FLASH
memory, and can be recalled, by assigning it to a step button.
Page 20

Auto-chop
If you have recorded a sampling, that contains more than one sound, t.ex. a beat or different
variations of the same sound, or just a lot of different sounds in one sampling, you might want to
trigger one sound at a time. You can, of course, adjust the start point and length of each sound
manually and re-save them, as described earlier in this manual, but that is rather time consuming.
Instead you might want to use this auto-chop function. It detects the start point of each single sound,
adds a chop mark, and lets you select each sound using the ”Chop” parameter.
It does not do anything to the sampling itself. It just creates a table of chop points, which the chop
parameter then uses to find the startpoints very fast.
To do this, make sure that the sampling you want to auto chop was the last sample that you
triggered using the step buttons. If you are not sure, please trigger it, using the step button.
Push the ”Edit” button.
The display will read:
After a short while, this screen will appear:
It is now possible to test the chop points. Push the step button, the chopped sampling is assigned to,
to audition. Push ”inc” and ”Dec” buttons to select the chop to audition.
If you are satisfied with the result, just push ”Exit”, and go to the ”Chop” parameter to play with the
newly created chops.
If you are not satisfied with the result, you might need to adjust the 2 parameters, and retry by
hitting ”Exit” and ”Edit” again.
The parameters:
Sens – 0 to 255. Adjust how loud the level of the sample audio should be, before it detects a start
point. If it creates too many chop points, turn this parameter up a bit. If it creates too little or no
chop points, lower this parameter.
AUTO CHOP >
PUSH <edit>
Analyzing…
Sens . Dec . Sample
39 2 1
Page 21

Dec – 0 to 255. Chop envelope decay. This adjusts the decay time of the chop detection envelope in
a reverse manner. The lower the value, the slower the decay. If the sounds is recorded with very
little or no silence between them, like in a beat, this needs to be set to a high value. If there’s a good
gap of silence between the sounds, set it to a low value.
In case you need to erase a chop point, this is also possible from this page.
Select the chop point you would like to erase.
Push ”Edit”.
This screen appears:
Push ”Inc” to erase the selected chop point or ”Exit” if you regret.
If you intend to keep the chop points you have created, remember to save them, as described a
few pages later in this manual.
Delete? PUSH
<inc>
Page 22

Add chop point
This function allows you to manually place a chop point to be used with the chop parameter.
Adjust the start point of the sampling, to where you want a chop point to appear.
Go to this page.
Push ”Edit”.
The display reads:
For a short while.
You have now manually added a chop point. Go back to the start point parameter, and set it to zero.
Play with the ”Chop” parameter.
If you intend to keep the chop points you have created, remember to save them, as described a
few pages later in this manual.
ADD CHOP POINT >
PUSH <edit>
DONE!
Page 23

Add live chop point
This function allows you to manually place a chop point to be used with the chop parameter, while
the sampling is playing back
Trigger the sampling. When it plays back the point where you want to add a chop point, hit ”Edit”.
The chop point is now added.
If you intend to keep the chop points you have created, remember to save them, as described a
few pages later in this manual.
ADD CHOP LIVE >
PUSH <edit>
Page 24

Delete a chop point
This function allows you to manually delete a chop point.
Select the chop point you wish to erase, using the ”Chop” parameter.
Go to this page.
Push ”Edit”.
The display reads:
For a short while.
DEL CHOP POINT >
PUSH <edit>
DONE!
Page 25

Move a chop point
If a chop point is not added exactly where you want it, it is possible to move it a bit, using this
function, instead of erasing it and making a new one.
Select the chop point you would like to move, using the ”Chop” parameter.
Go to this page.
Push ”Edit”
This screen will appear:
Chop - -128 to +127. Moves the chop point. Positive values moves it forwards, negative values
moves it backwards.
Offs - -128 to +127. Move chop point fine adjust. Positive values moves it forwards, negative
values moves it backwards.
When you are done, push ”Exit”
MOVE CHOP POINT >
PUSH <edit>
Chop . Offs.
+0 +0
Page 26

Save the chop points
This function allows you to save the choppoints you have created for the sampling. The chop points
are saved together with the sampling, so the next time you recall it, they will immediately be
available.
When saving a preset, Little deFormer checks if there are any unsaved chop points, and if there are,
it saves them, just in case you should have forgotten to do it.
Push ”Edit”.
The display reads:
For a short while.
The chop points has now been saved.
SAVE CHOPs >
PUSH <edit>
DONE!
Page 27

Clear the chop points
In case that you doesn’t need the created chop points anyway, this function allows you to clear them
all for the selected sampling.
Push ”Edit”.
The display reads:
For a short while.
The chop points has now been cleared.
If you want these to dissapear permanently, go back to the previous page, and save the cleared chop
points.
CLEAR CHOPs >
PUSH <edit>
DONE!
Page 28

Compressor parameters
Powr – Off, On. Compressor power switch.
Bus – 1 to 4. Selects which of the 4 audio busses, the compressor should be added to.
Gain – 0 to 255. Compressor gain. If this is zero, no sound will go through the compressor.
Flor – 0 to 255. Compressor floor. Sets a minimum level for the sound that goes through the
compressor. If this is set to zero, you will only hear the compressed sound itself. If this is set to 255,
you will hear no compression at all.
Thrs – 0 to 255. Adjust the audio level point, where the compression will start in a reverse manner.
If this is set to zero, compression will never start, if it is set to 255, the compressor will constantly
be active.
Gate – 0 to 255. Compressor gate time. Sets a ”relax space” for the compressor, right after it has
been trigged. In that space of time, it will not re-trigger.
Atak – 0 to 255. Compressor curve attack time.
Rel – 0 to 255. Compressor curve release time.
Trig – Compressor trigger select.
Aud – The compressor is trigged by the audio signal going through it.
sm1 to sm16 – The compressor is trigged by sampling 1 to 16 trigger.
Page 29

Distortion parameters
Effect – Distortion effect select. Choices are:
BitManipu – Bit manipulator including bit and rate reduction and the special obscembler
distortion.
Gain – Gains the signal. It is possible to gain it so much, that it distorts.
Valve – A digital simulation of a classic valve distortion.
Sine – A noisy and warm sine shaping distortion.
Fuzz – Simulates a classic fuzz distortion.
Xdis – Complete destruction of the sound.
Bus – 1 to 4. Selects which of the 4 audio busses, the distortion effect should be added to.
Bit Reduction parameters
BitR – 16 to 1. Bit reduction.
Rate – 0 to 255. Sample rate reduction. The higher the value, the more the sample rate will be
reduced.
Obsc – 0 to 255. Obscemble. This parameter will manipulate the audio bits to extremes, and make it
sound weird.
Dly – 0 to 255. Obscembler feedback delay. Creates a delay in the Obscembler feedback path.
Feed – 0 to 255. Obscembler feedback. When Obscemble and delay is both set to zero, this creates
a warm overdrive sound. If any of the other parameters is not set to zero, this creates some
unpredictable sounds.
Distortions parameters
Driv – 0 to 255. Drive. The higher the value, the more the sound will distort. If this is set to zero, no
sound will pass through the distortion.
Offs – 0 to 255. Distortion offset. The more this is turned up, the more unsymmetric the distortion
will be.
Damp – 0 to 255. Damps the output from the distortion.
Page 30

Filter parameters
This filter is always placed on audio bus 1.
Cut – 0 to 255. This parameter adjusts the cutoff frequency of the filter.
Reso – 0 to 255. Adjusts the resonance of the filter.
Type – The response (type) for the filter. Choices are:
Lpf – Lowpass.
Bpf – 4 pole bandpass.
Bp8 – 8 pole bandpass.
Hpf – Highpass.
Add – This is actually not a filter, since it doesn’t filter out harmonics from the sound, but adds
some.
Bef – Band reject filter.
Bass – Enhances the low frequencies of the sound, and passes the high frequencies through in a
very poor way.
Lofi – A destructive lowpass filter.
fMix - -128 to +127. Filter mix. Adjusts the mix between the clean sound and the filter output. At
position zero, you will only hear the output from the filter. At positions +127 and -128, you will
only hear the clean sound. When turning this parameter from zero to +127, the pure sound will be
added more and more to the filter output. When turning it from zero to –128, the pure sound will be
subbed more and more from the filter output.
Conn – Selects where to place the filter. Choices are:
Off – The filter is shut off.
On – The filter is placed on the input of the Time and Pitch effect. Both the clean and the effected
sound will be filtered.
Dly – The filter is placed on the input of the Time and Pitch effect. Only the effected sound will be
filtered.
Feed – The filter is placed in the feedback path of the Time and Pitch effect.
Post – The filter is placed right after the feedback path of the Time and Pitch effect.
Outp – The filter is placed on the output of the Time and Pitch effect.
folr – 0 to 255. An envelope follower is added to this filter. This parameter adjusts the speed of the
envelope follower.
fEnv - -128 to +127. Adjusts how much the envelope follower will affect the filter cutoff
frequency. Negative values will reverse the envelope.
mEnv - -128 to +127. Adjusts how much the envelope follower will affect filter mix. Negative
values will reverse the envelope.
Page 31

Filter adjust 1, 2 and 3 – 0 to 255. A little deFormer speciality. With these 3 parameters you can
adjust the filter response, and create completely new filter types. It’s a bit hard to explain what
exactly they do, and it is also a bit unpredictable. Tweak and listen.
Page 32

Time and Pitch effect parameters
Here you will find time and pitch based effects, like reverb, delay, granulators and pitch
manipulators. The main effect will always be present on audio bus 1. A secondary effect will be
present at audio bus 2 to 4. The ”freeze” button freezes the audio signal, and makes whatever audio
that is held in the effect buffer repeat continiously.
Effect – Selects the Time and Pitch effect. Choices are, at this moment:
Delay 1 – A delay effect with special granular parameters like ”Beam” and ”Size”, and with a
feedback that can go higher than infinite. Can also be used as a one track loop recorder, with an
included metronome.
Secondary eff: The same as primary.
Delay 2 – A bright sounding 2-tap delay.
Secondary eff: The same as primary.
Reverb 1 – A FAT synthesized reverb with a very high resolution. High end!
Secondary eff: The same as primary.
Reverb 2 – Like reverb 1 with a bit lower resolution, but more parameters.
Secondary eff: The same as primary.
PitchShp1 – PitchShaper 1. A one input pitchshaper, the re-pitches the input signal to a new
adjustable pitch. All pitch variations in the sound will be removed. Has a very wide pitch range.
Secondary eff: Reverb or delay 2.
GlitchShf – GlitchShifter 1. This is not really a pitchshifter, but then again…. It does some weird
stuff!
Secondary eff: Reverb or delay 2.
GlitchSh2 – GlitchShifter 2. Almost the same as glitchshifter 1, but it sounds different.
Secondary eff: Reverb or delay 2.
SamplePtc – Sampling Pitch Shifter. Changes the pitch of a sampling, without changing the length.
It will also work on external signals, but it needs to be triggered by a sampling.
Secondary eff: Reverb or delay 2.
DoublGran – Double Step Granulator. A 16 step granulator effect with 2 tracks and audio frame
detection, so it only splices grains together at zero points. This takes up a lot of DSP power, so
Compressor, Distortion and Filter will be disabled, when selecting this effect. The sampling filters
are still active though.
Secondary eff: Reverb.
Variator – A granular effect that creates new variations of the input sound, in both pitch and time.
Secondary eff: Reverb or delay 2.
Page 33

TimeStrtc – TimeStretch. Able to change the length og the input signal, without changing the pitch.
It is also possible to change the pitch if desired. It is also possible to trigger it with a sampling, for
bigger precision.
Secondary eff: Reverb or delay 2.
PitchShp2 – PitchShaper 2. This pitchshaper needs 2 inputs. The sound present on bus 1 will get
re-pitched, while the sound present on bus 2 will determine the pitch.
Secondary eff: Reverb or delay 2.
Mix1 – 0 to 255. The mix between the audio signal present on bus 1 and the primary effect.
Mix2 – 0 to 255. The mix between the audio signal present on bus 2 and the secondary effect.
Mix3 – 0 to 255. The mix between the audio signal present on bus 3 and the secondary effect.
Mix4 – 0 to 255. The mix between the audio signal present on bus 4 and the secondary effect.
Page 34

Delay 1
Grp – 0 to 15. Delay time group. This is a very coarse adjustment of the delay time.
Time – 0 to 255. Delay time.
Fine – 0 to 255. Delay time fine adjust.
Feed – 0 to 255. Delay feedback. At settings below 128, the feedback is decreasing. At setting 128
(middle position) the feedback is 1:1. Use this setting, if you want to use delay 1 as a loop recorder.
At settings above 128, the feedback is increasing, and might cause distortion.
Size – 0 to 255. A granular parameter. The more this is turned up, the less space of the delay box is
used, causing some echo’s to repeat, and others not to sound at all.
Xfad – 0 to 255. Crossfade. Makes the delay effect sound smoother, by crossfading the feedback
repeats into each other.
Mode – Crossfade mode.
nrm – Normal crossfade mode. The repeats crossfades into ech other.
duck – Ducked croosfade mode. One repeat fades out, before the next fades in.
Dir – Delay playback direction.
Fwd – Forwards.
Bwd – Backwards
Beam – 0 to 255. A granular parameter, that ”beams” some of the delay sound grains to another
place.
Deep – 0 to 63. Simulates a delay box, with adjustable depth.
Metr – Off, On. Delay metronome on/off. Use this when you are using the delay as looprecorder.
Tics – 0 to 32. Number of metronome ticks per delay time run.
Level – 0 to 255. Metronome volume.
Delay TAP page – Use the ”Freeze” button to tap the delay time, when you are on this page. The
delay time parameters are automaticly adjusted to fit the tap time, so you can always go to the time
page, and fine adjust.
TAP! PUSH
<freeze>
Page 35

Delay 2
Grp1 – 0 to 15. Delay time group tap 1. This is a very coarse adjustment of the delay time.
Tim1 – 0 to 255. Delay time tap 1.
Fin1 – 0 to 255. Delay time fine adjust tap 1.
Fed1 – 0 to 255. Delay feedback tap 1.
Size – 0 to 255. A granular parameter. The more this is turned up, the less space of the delay box is
used, causing some echo’s to repeat, and others not to sound at all.
Grp2 – 0 to 15. Delay time group tap 2. This is a very coarse adjustment of the delay time.
Tim2 – 0 to 255. Delay time tap 2.
Fin2 – 0 to 255. Delay time fine adjust tap 2.
Fed2 – 0 to 255. Delay feedback tap 2.
Deep – 0 to 63. Simulates a delay box, with adjustable depth.
Dir – Delay playback direction.
Fwd – Forwards.
Bwd – Backwards
Page 36

Reverb 1
Time – 0 to 255. Reverb time. The total reverb time is a combination of time, timeX, feed and
feedX.
Fine – 0 to 255. Reverb time fine adjust.
TimX – 0 to 255. Adjusts how much the following reverb taps will decrease in time. Lower settings
is good for a short reverb, and higher settings for a long reverb.
Feed – 0 to 255. Reverb feedback.
FedX – 0 to 255. Adjusts how much the following reverb taps will decrease in feedback. Lower
settings gives a delay effect. As this is turned up, it goes over in a metallic reverb type, and at
higher settings it gives a more full reverb.
Size – 0 to 255. A granular parameter. The more this is turned up, the less space of the reverb box is
used, causing some echo’s to repeat, and others not to sound at all.
Levl – 0 to 255. Reverb level.
Dir – Reverb playback direction.
Fwd – Forwards.
Bwd – Backwards
Page 37

Reverb 2
Time – 0 to 255. Reverb time. The total reverb time is a combination of time, timeX, feed and
feedX.
Fine – 0 to 255. Reverb time fine adjust.
TimX – 0 to 255. Adjusts how much the following reverb taps will decrease in time. Lower settings
is good for a short reverb, and higher settings for a long reverb.
Feed – 0 to 255. Reverb feedback.
FedX – 0 to 255. Adjusts how much the following reverb taps will decrease in feedback. Lower
settings gives a delay effect. As this is turned up, it goes over in a metallic reverb type, and at
higher settings it gives a more full reverb.
Xfad – 0 to 255. Crossfade. Makes the reverb effect sound smoother, by crossfading the feedback
repeats into each other.
Deep – 0 to 63. Simulates a reverb box, with adjustable depth.
Levl – 0 to 255. Reverb level.
Dir – Reverb playback direction.
Fwd – Forwards.
Bwd – Backwards
Page 38

PitchShaper 1
Sens – 0 to 255. Pitch tracking sense. At lower settings it will find more pitch tracking points,
which will make the pitch higher on complex sounds, while at higher settings it will find less
pitchtracking points.
Pitc – 0 to 255. Pitch Coarse.
Fine – 0 to 255. Pitch Fine.
Feed – 0 to 255. Feedback.
Smot – 0 to 255. Output smoothing. The more this is turned up, the more it smoothen out the pitch
changes in the signal
CompX – 0 to 255. Complexity. The more this is turned up, the less complex the sound output will
be.
Effect2 – Reverb or Delay 2. See the parameters for these under ”Reverb 1” and ”Delay 2”.
Page 39

GlitchShifter 1 and 2
Sens – 0 to 255. Pitch tracking sense. At lower settings it will find more pitch tracking points,
which will make the pitch higher on complex sounds, while at higher settings it will find less
pitchtracking points.
Folr – 0 to 255. Envelope follower speed.
Pitc – -128 to +127. Pitch Coarse.
Feed – 0 to 255. Feedback.
CompX – 0 to 255. Complexity. The more this is turned up, the less complex the sound output will
be.
Effect2 – Reverb or Delay 2. See the parameters for these under ”Reverb 1” and ”Delay 2”.
Page 40

Sample Pitch
Sens – 0 to 255. Pitch tracking sense. At lower settings it will find more pitch tracking points,
which will make the pitch higher on complex sounds, while at higher settings it will find less
pitchtracking points.
Size – 0 to 255. The size of the RAM buffer used for the pitchshifting
Pitc – -128 to +127. Pitch Coarse.
Folr – 0 to 255. Envelope follower speed.
Feed – 0 to 255. Feedback.
Effect2 – Reverb or Delay 2. See the parameters for these under ”Reverb 1” and ”Delay 2”.
Page 41

Double Granulator
Sens – 0 to 255. Pitch tracking sense. At lower settings it will find more pitch tracking points,
which will make the pitch higher on complex sounds, while at higher settings it will find less
pitchtracking points.
Time – 0 to 255. The time the granulator will sample the input, until it starts over again.
Size – 0 to 255. The size of one grain.
Stp1 – 1 to 16. Adjusts how many steps the granular sequence should consist of.
Spr1 – 0 to 255. Adjusts how big an area of the RAM buffer, track 1 should use for grain playback.
Fsz1 – 1 to 128. Adjusts how many grains track 1 should play back in a row.
Ofs1 – 0 to 127. Selects the location of the lowest possible grain track 1 will play back.
Lvl1 – 0 to 255. Granulator track 1 volume.
Feed – 0 to 255. Granulator Feedback.
Play – Granulator play mode:
Seq – The granulator sequencer is controlling the grain playback order.
Key – The grain playback order is controlled by the step buttons. The ”9-16” must be pushed so it is
flashing to activate this. In this mode, a grain plays to its end, before it shifts to the selected grain.
KeyI – Key Immediate.The grain playback order is controlled by the step buttons. The ”9-16” must
be pushed so it is flashing to activate this. In this mode, it immediately shifts to the selected grain.
KeyO – Key One-Shot.The grain playback order is controlled by the step buttons. The ”9-16” must
be pushed so it is flashing to activate this. In this mode, it also immediately shifts to the selected
grain, but only plays it back one time.
Frm1-16 – Granulator track 1 grain select for sequencer step 1-16. Only 8 steps can be adjusted at a
time. Push the ”9-16” button, to toggle between steps 1-8 and steps 9-16.
Pit1-16 – Granulator track 1 pitch for sequencer step 1-16. Only 8 steps can be adjusted at a time.
Push the ”9-16” button, to toggle between steps 1-8 and steps 9-16.
Lvl1-16 – Granulator track 1 level for sequencer step 1-16. Only 8 steps can be adjusted at a time.
Push the ”9-16” button, to toggle between steps 1-8 and steps 9-16.
Page 42

Dir1-16 – Granulator track 1 playback direction for sequencer step 1-16. Only 8 steps can be
adjusted at a time. Push the ”9-16” button, to toggle between steps 1-8 and steps 9-16.
Move – 0 to 15. If this is zero, track 1 and 2 syncs to each other. If this has any other value, track 2
plays back a different step than track 1.
Spr2 – 0 to 255. Adjusts how big an area of the RAM buffer, track 2 should use for grain playback.
Fsz2 – 1 to 128. Adjusts how many grains track 2 should play back in a row.
Ofs2 – 0 to 127. Selects the location of the lowest possible grain track 2 will play back.
Lvl2 – 0 to 255. Granulator track 2 volume.
Frm1-16 – Granulator track 2 grain select for sequencer step 1-16. Only 8 steps can be adjusted at a
time. Push the ”9-16” button, to toggle between steps 1-8 and steps 9-16.
Pit1-16 – Granulator track 2 pitch for sequencer step 1-16. Only 8 steps can be adjusted at a time.
Push the ”9-16” button, to toggle between steps 1-8 and steps 9-16.
Lvl1-16 – Granulator track 2 level for sequencer step 1-16. Only 8 steps can be adjusted at a time.
Push the ”9-16” button, to toggle between steps 1-8 and steps 9-16.
Dir1-16 – Granulator track 2 playback direction for sequencer step 1-16. Only 8 steps can be
adjusted at a time. Push the ”9-16” button, to toggle between steps 1-8 and steps 9-16.
Effect2 – Reverb. See the parameters for this under ”Reverb 1”.
Page 43

Variator
Time – 0 to 255. The size of the RAM buffer used for the variator
Size – 0 to 255. The size of one grain.
Gran – 0 to 255. Determines the variation pattern.
Pitc – -128 to +127. Pitch Coarse.
Feed – 0 to 255. Feedback.
Effect2 – Reverb or Delay 2. See the parameters for these under ”Reverb 1” and ”Delay 2”.
Page 44

Time Stretcher
Tune – -128 to +127. Pitch Coarse.
Size – 0 to 255. The size of the RAM buffer used for the TimeStretcher
Strc – -128 to +127. Time stretch. A negative value will stretch the sound longer, a positive value
will compress the sound to apper shorter.
Trig – Off, On. Determines if the time stretch effect should be trigged by the samplings or not.
Effect2 – Reverb or Delay 2. See the parameters for these under ”Reverb 1” and ”Delay 2”.
Page 45

PitchShaper 2
Sns1 – 0 to 255. Pitch tracking sense for bus 1, the sound that will be pitched. At lower settings it
will find more pitch tracking points, which will make the pitch higher on complex sounds, while at
higher settings it will find less pitchtracking points.
Sns2 – 0 to 255. Pitch tracking sense for bus 2, the sound that will determine the pitch. At lower
settings it will find more pitch tracking points, which will make the pitch higher on complex
sounds, while at higher settings it will find less pitchtracking points.
Feed – 0 to 255. Feedback.
Smot – 0 to 255. Output smoothing. The more this is turned up, the more it smoothen out the pitch
changes in the signal
CompX – 0 to 255. Complexity. The more this is turned up, the less complex the sound output will
be.
Effect2 – Reverb or Delay 2. See the parameters for these under ”Reverb 1” and ”Delay 2”.
Page 46

Sequencer parameters
The Little deFormer’s sequencer has 32 step tracks and 4 modulation tracks, that each can be up to
32 steps long. It also has 4 note randomizers, to create random variations or feel to the sequences.
To start and stop sequencer playback, push the ”Assign” button, so it is lit, and push the ”Freeze
Start/Stop” button.
To switch individual tracks on and off, push the ”Assign” button 2 times, so it is flashing. The step
buttons now toggles the sequencer tracks on/off. When a track is on, the LED representing it will be
lit, and give a short ”flash”, when the sequencer track triggers. Only 8 tracks are showed on the step
button LED’s at a time, because there are only 8 step buttons!
To access track 9 to 32 on/off, push the ”9-16” button. The ”9-16” LED indicates what tracks your
are monitoring in the following way:
Off – track 1-8
On – track 9-16
Slow flashing – track 17-24
Fast flashing – track 25-32
On all sequencer pages, it is possible to turn the trigger for each step of the selected track on and
off. Again, since there are only 8 step buttons, you can only edit 8 steps at a time. The step are
selected and monitored in the same fashion as the tracks on/off page, using the ”9-16” button and
LED:
Off – step 1-8
On – step 9-16
Slow flashing – step 17-24
Fast flashing – step 25-32
All 32 tracks can individually be set up to control either internal sample/grain triggering or external
MIDI gear. When set to internal, track 1 to 16 controls triggering of sampling 1 to 16, and track 17
to 32 controls triggering of grains, if ”Double Granulator” is selected as the Time & Pitch effect,
and if it is in key mode.
When a tracks is set to external, MIDI channel and note number can be selected separately for each
track.
It is also possible to directly link one of the four controller tracks to a step track, to make pitched
sequencing. This setting applies both to internal and external tracks.
The controller tracks can modulate almost any parameter. Routing of this is done on the
”Modulation” section, which is described later in this manual.
Each track can be routed to one of four Note Randomizers, that can give the sequence a slight
random feel, og create complete random chaos. This setting also applies both to internal and
external tracks.
Page 47

Trak – 1 to 32. Selects the step track you wish to edit.
Last – 1 to 32. Selects the lengt of the sequence, in number of steps.
Scal – 1/32, 1/24, 1/16, 1/12, 1/8, 1/4, 1/2 , 1/1. Selects the step note scaling.
Rndm – 1 to 4. Selects which one of the four Note Randomizers, the selected track will run
through.
Prob – 0 to 255. Probability of the selected Note Randomizer. When set to 255, all note-on’s will
be played back, when set to zero, no note-on’s will be played back.
Velo – 0 to 255. Adjusts how much the selected Note Randomizer will affect velocity. Currently
this function only works on external tracks, but it will be added to internal tracks too, in a future
update.
Time – 0 to 255. Determines how much the selected Note Randomizer will affect the timing of the
tracks running through it. At settings 1 to 3, it will give a slight natural unstability or feel to the
rhythmic timing. At higher setting the rhythmic timing will be unrecognizable.
Tempo – 50 to 305. The tempo of the sequence in BPM (Beats Per Minute). This parameter has no
function, if ”sync” in the ”Common” section is set to ”ext”.
Outp – Int, Ext. Selects whether the selected track will trigger the internal samplings/grains, or
external MIDI gear,
Chan – 1 to 16. The MIDI channel the selected track will output note-on’s to, if Outp = Ext.
Note – C-2 to B7, Ctt1 to Ctt4. The note number the selected track will output, if Outp = Ext. If
Ctt1 to 4 is selected, controller track 1 to 4 will determine the note number to output. This setting
will also affect internal tracks.
Controller track 1, step 1 to 32 – 0 to 255. The value for each step in controller track 1. Step
groups of 8, is selected using the ”9-16” button, as described earlier in this section.
Controller track 2, step 1 to 32 – 0 to 255. The value for each step in controller track 2. Step
groups of 8, is selected using the ”9-16” button, as described earlier in this section.
Controller track 3, step 1 to 32 – 0 to 255. The value for each step in controller track 3. Step
groups of 8, is selected using the ”9-16” button, as described earlier in this section.
Controller track 4, step 1 to 32 – 0 to 255. The value for each step in controller track 4. Step
groups of 8, is selected using the ”9-16” button, as described earlier in this section.
Page 48

Modulation
The Little deFormer has 32 modulation routings per preset. For each modulation routing, you will
have to select the source, the destination, and the modulation amount.
MOD – 1 to 32. The modulation routing number. Push the ”Inc” and ”Dec” buttons to select.
Sorc – Modulation source select. Choices are right now (more will soon come):
Kn1+ - Edit knob 1, on the preset select screen and the edit group select screens. The MIDI CC
number assigned to this knob, in the ”Knob CC’s” section, will be a source at the same time.
Kn1- - Edit knob 1 inversed, on the preset select screen and the edit group select screens. The MIDI
CC number assigned to this knob, in the ”Knob CC’s” section, will be a source at the same time.
Kn2+ - Edit knob 1, on the preset select screen and the edit group select screens. The MIDI CC
number assigned to this knob, in the ”Knob CC’s” section, will be a source at the same time.
Kn2- - Edit knob 1 inversed, on the preset select screen and the edit group select screens. The MIDI
CC number assigned to this knob, in the ”Knob CC’s” section, will be a source at the same time.
Kn3+ - Edit knob 1, on the preset select screen and the edit group select screens. The MIDI CC
number assigned to this knob, in the ”Knob CC’s” section, will be a source at the same time.
Kn3- - Edit knob 1 inversed, on the preset select screen and the edit group select screens. The MIDI
CC number assigned to this knob, in the ”Knob CC’s” section, will be a source at the same time.
Kn4+ - Edit knob 1, on the preset select screen and the edit group select screens. The MIDI CC
number assigned to this knob, in the ”Knob CC’s” section, will be a source at the same time.
Kn4- - Edit knob 1 inversed, on the preset select screen and the edit group select screens. The MIDI
CC number assigned to this knob, in the ”Knob CC’s” section, will be a source at the same time.
Kn5+ - Edit knob 1, on the preset select screen and the edit group select screens. The MIDI CC
number assigned to this knob, in the ”Knob CC’s” section, will be a source at the same time.
Kn5- - Edit knob 1 inversed, on the preset select screen and the edit group select screens. The MIDI
CC number assigned to this knob, in the ”Knob CC’s” section, will be a source at the same time.
Kn6+ - Edit knob 1, on the preset select screen and the edit group select screens. The MIDI CC
number assigned to this knob, in the ”Knob CC’s” section, will be a source at the same time.
Kn6- - Edit knob 1 inversed, on the preset select screen and the edit group select screens. The MIDI
CC number assigned to this knob, in the ”Knob CC’s” section, will be a source at the same time.
Kn7+ - Edit knob 1, on the preset select screen and the edit group select screens. The MIDI CC
number assigned to this knob, in the ”Knob CC’s” section, will be a source at the same time.
Kn7- - Edit knob 1 inversed, on the preset select screen and the edit group select screens. The MIDI
CC number assigned to this knob, in the ”Knob CC’s” section, will be a source at the same time.
Kn8+ - Edit knob 1, on the preset select screen and the edit group select screens. The MIDI CC
number assigned to this knob, in the ”Knob CC’s” section, will be a source at the same time.
Kn9- - Edit knob 1 inversed, on the preset select screen and the edit group select screens. The MIDI
CC number assigned to this knob, in the ”Knob CC’s” section, will be a source at the same time.
Sq1+ - Sequencer controller track 1.
Sq1- - Sequencer controller track 1 inversed.
Sq2+ - Sequencer controller track 2.
Sq2- - Sequencer controller track 2 inversed.
Sq3+ - Sequencer controller track 3.
Sq3- - Sequencer controller track 3 inversed.
Page 49

Sq4+ - Sequencer controller track 4.
Sq4- - Sequencer controller track 4 inversed.
Grp – Destination parameter group. Choices are:
Comm –Common section.
Smp1-16 – Sampling 1 to 16.
Comp – Compressor.
Dist – Distortion.
Fltr – Filter.
Time – Time & Pitch effect.
Sequ –Sequencer
Dest – Destination parameter. Almost any parameters in the above mentioned groups.
Value – 0 to 255. Modulation amount.
Page 50

Knob CC’s
Edit knob 1 to 8 MIDI CC assign. The edit knobs will output the MIDI controller numbers you
select here, to MIDI OUT, on the global MIDI channel as selected in the ”Common” section, on the
preset select page and on the parameter group select pages.
Incoming MIDI conrollers (from MIDI IN) will also be directed to the parameters that are assigned
to be controlled by the edit knobs, in the ”Modulation” section.
cc1 – cc8 - #0 to #64. The MIDI CC number assigned to the edit knob.
Page 51

Save Preset
This section will decribe how to save a preset on the Little deFormer.
All parameters and sequences will be saved as a preset. Only MIDI channel and sync options are
automaticly saved as common data, and are not part of the preset.
NOTE: If the freeze function is active, the content of the Time & Pitch audio buffer, will be saved
together with the preset as a sampling, and loaded into this buffer, every time you select the preset.
This is cool for ”capturing the moment”. If you don’t want this to happen, make sure that the freeze
function is off. If you play back a sampling, or any audio from the inputs, and you can hear the
sound gets effected by the selected Time & Pitch effect, then you can be sure, that freeze is off.
NOTE: All unsaved sample chop tables, will also be saved, when you save the preset. So if you
have, either automaticly or manually, added some chop points, you do not wish to keep, make sure
to go to the ”SAMPLE” edit group > ”Clear Chops” and activate this, before you save your preset.
From this edit group page:
Push the ”Edit” button, to go to this page:
Here it is possible to select the memory location, in which you would like to save your preset. Push
the ”Inc” and ”Dec” buttons to select. The ”Edit” LED will flash. There are 512 locations to choose
from.
If a location reads this out:
No preset has previously been saved on this location. If you choose a preset, that already has a
name, this will be overwritten by the new preset.
[HipHop 1 ]
SAVE TO: A02
SAVE PRESET
[ <empty> ]
SAVE TO: A02
Page 52

Push the ”Edit” button to proceed. This screen will appear:
Use edit knob 1-8, to select the first 8 letters of the name in your preset.
Push the ”Inc” button to proceed.
Use edit knob 1-4, to select the last 4 letters of the name in your preset.
Push the ”Inc” button.
Your preset is now stored in the selected location, and it is automaticly selected.
Name 1-8 PUSH
HipHop 1 <inc>
Page 53

FLASH pages
In this parameter group, there are no real parameters. It is mostly for service purposes, for updating
Little deFormers firmware, and for checking out on available sampling memory.
# Of Samples – 0 to 999. Shows the number of samplings present in the FLASH memory.
% Avail – 0 to 100. Shows the amount of available FLASH memory in percent, for new sample
recordings. Since Little deFormer has 100 minutes of total sampling time, 1% equals 1 minute.
FLASH ID – This should show the hex number: ADDC109554. If it doesn’t, the Little deFormers
internal FLASH memory might be damaged, and it needs service.
# Of Bad Blocks – If this number is higher than 20, the FLASH memory might need to be replaced.
If it reads 255, it is really not good.
FORMAT FLASH – Push <edit>. If the power goes off, while you are doing a recording, it will
create a mess in the internal FLASH memory. Use this function to ”clean up”. It will only clean up
unused spaces of the FLASH memory, so no samplings or presets will be erased.
Test Display:
If you have more than 4 samplings stored, this display MUST show 4 numbers. The numbers might
not be the same as shown, but they MUST increase as shown. If not, there might be a loose
connection between the DSP processor and the FLASH.
XMIT OS1? / XMIT OS2?
If you want to keep a backup of the Little deFormer firmware, before you update it, you can use
these functions. Connect a MIDI device that is capable of recording .syx files (Like a pc with MIDIOX installed), and push ”Edit” to activate.
UPDATE OS?
For updating Little deFormers firmware. Complete procedure is described later in this manual.
0000 0006
0020 0030
Page 54

SRAM TEST?
For testing the SRAM used for the Time & Pitch effect.
Push ”Edit” to activate.
The display will read ”Testing…” for some while, and thereafter return a result of the test. If the
result is anything else than ”SRAM OK!”, something is damaged around the SRAM, either the
SRAM itself or a connection.
Page 55

Updating the Little deFormer firmware
IMPORTANT: Before you update your Little deFormer firmware, please
perform a SRAM test, as described on page 54. If your Little deFormer fails the
SRAM test, you should not perform the firmware update, but ship it in for
service first.
Occasionally there will be firmware updates available at:
http://www.gotharman.dk/deformer.htm
These will be bug fixes or adding of additional functions or effects, so it might be a good idea
getting familiar with, how to update the firmware of your Little deFormer.
You will need:
-Your Little deFormer
-A computer with internet connection
-A MIDI interface connected to your computer
-A MIDI cable
1. Go to the abovementioned deFormer website, and download the latest firmware to your
computer. The firmware will usually consist of 2 files, named t.ex:
ldefd1_268.syx
and
ldefd2_135.syx
2. If you haven’t done it already, go to:
http://www.midiox.com/
and download the free MIDI utility program MIDI-OX. And please donate, if you feel like.
It is probably also possible to use other programs that supports .syx files, but the Little deFormer
firmware updates has been created using MIDI-OX, so this program is for sure the one that will
work best.
3. Install MIDI-OX on your computer. You shall be very welcome to skip this step, if you have
already done this.
Page 56

4. After installing MIDI-OX, open the program, and click on ”Options” > ”Configure Buffers”:
5. Enter the number ”20000” in the ”Bytes” box under ”Low Level Output Buffers”
6. Click ”OK”.
Page 57

7. Go to ”Options” > ”MIDI devices”, and select the MIDI interface you intend to use for the
updating, as your output device.
8. Connect MIDI out on the selected MIDI interface to MIDI in on your Little deFormer.
9. Click on ”View” > ”Sysex”
12. It now should look like this:
Page 58

13. On your Little deFormer:
-From the preset select screen, push the ”Edit” button one time.
-Push the ”Inc” button until the display reads:
-Push the ”Edit” button one time.
-Push the ”Inc” button until the display reads:
-Push the ”Edit” button one time, and the display will read:
14. On MIDI-OX, in the Sysex view: Click ”File” > ”Send sysex file”.
[AnaBeat ] A01 (0- 0)
Kn1 Kn2 Kn3 Kn4 Kn5 Kn6 Kn7 Kn8
FLASH
UPDATE OS?
Push <edit>
Waiting for
MIDI data…
Page 59

15. A file browser will open. Locate the .syx files you downloaded from the deFormer site, select
one of them, and click ”Open”.
MIDI-OX will now transfer the file to your computers MIDI out, where you have, hopefully,
connected your Little deFormer.
If you have, its display will now read:
The hex number in the buttom of the display will be constantly incrementing. This indicates, that it
is receiving the MIDI data. If this number stops incrementing, there might be something wrong with
your MIDI connection, and you should turn off your Little deFormer, and check it out. If you are
sure your connections are ok, try to go back to step 5, and put a higher number in the ”Low level
output buffers” box, for instance ”40000”.
When all data is received successfully, the display will change to:
It will stay there for some seconds, and then it will change to:
16. Turn off your Little deFormer, and turn it on again. Go back to step 13, and repeat the process,
for transmitting the other .syx file. When you have done that, your Little deFormer is updated.
If your Little deFormer any where in the process reads:
Something has went wrong somewhere. If it does this repeatedly, your MIDI cable might be bad, or
your MIDI interface might not be stable enough to perform an update.
Receiving…
0A
Programming…
UPDATE SUCCESSFUL
Pls turn me off
CHECKSUM ERROR!
Page 60

List Of Included Samplings
All samplings starting with ”dm” is from Gotharman’s deMOON.
All samplings starting with ”an” is from Gotharman’s anAmono.
All samplings starting with ”mg” is from Gotharman’s microGOTHAR.
All samplings starting with ”mt” is from Gotharman’s microGOTHAR 2.
All samplings starting with ”mv” is from Gotharman’s microVOTHAR.
All samplings starting with ”v8” is from Gotharman’s Vothar 8.
All samplings starting with ”cs” is from Gotharman’s rebuild Yamaha CS-20M.
All samplings starting with ”gc” is from some special Gotharman circuits, build for a special
sound purpose.
01 dmBass3
02 dmBpAdd
03 dmValve
04 dmValve 2
05 dmValve 3
06 dmValve 4
07 dmTalkinValv
08 dmDenver
09 dmChorus
10 dmFroggy
11 dmGran
12 dmBass0
13 dmUnisonBass
14 dmLeadSound
15 dmChorus2
16 dm1000bass
17 dmWhoi
18 dmWishstring
19 dmSteps
20 anSweep
21 anBass4
22 anFeedSound
23 anFeedSeq
24 anOyba
25 anFass
26 anDessSolo
27 anBass1
28 anSweep2
29 anBass3
30 anBass5
31 anGlitch
32 anGlitch2
33 anGlitchBass
Page 61

34 anGlitchBas2
35 anMouthHarp
36 anUglyCan
37 anDriveBass
38 anDriveLead
39 anSoloSofia
40 anVintageDis
41 anVintageDs2
42 anDarkFeeD
43 anNoiseTalk
44 mgHpf Rezo
45 mgContraNoiz
46 mgHard
47 mgFunaral
48 mgExpBass
49 mgChorus
50 mgChorus 2
51 mgSineBazz
52 mgSineBazz 2
53 mgPolice
54 mgSomeTzhing
55 mgHumanLead
56 mgVoxman
57 mgLpf Rezo
58 mgConspiracy
59 mgHumanSynth
60 mgMetalClavi
61 mgVoiceCkav2
62 mgFMclav
63 mgOverVoxBas
64 mgNoiseBox
65 mgSizzBass
66 mgLayerBass
67 mgPveerBass
68 mgVibraTone
69 mgBlackNight
70 mgBirdMare
71 mgTolkar
72 mgGothBabe
73 mgGothBabe 2
74 mgRobot
75 mgWhipBass
76 mgAcid
77 mgHpf Reso 2
78 mgRingNoise
79 mgCrowded
80 mgUndrRezo
Page 62

81 mvRingBass
82 mvSlapVox
83 mv70’sBass
84 mvMetalmanBs
85 mvAhhh
86 mvAhhh 2
87 mvOrchestral
88 mvSubmarine
89 mvChoirT
90 mvFeedBconga
91 mvWhoi
92 mvRingSweep
93 mvSweepBass
94 mvFat Choir
95 mvMessChoir
96 mvTalkNoise
97 mvTalkMetal
98 mvBass
99 mtBeaj
100 mtWalkBass
101 mtThim
102 mtMaiden
103 mtUnison
104 mtUnivox
105 mtWind
106 mtMetalLine
107 mtClickLine
108 mtFeedAtmo
109 mtMad Alien
110 mtMad Alien2
111 mtNoise
112 mtRainBow
113 mtScaryMan
114 mtScaryMan2
115 mtHellKids
116 mtFormahhnt
117 mtTalkBox
118 mtWideBass
119 mtWideBanc
120 mtBlowOrch
121 mtFormahhnt0
122 mtWastePeak
123 mtDistortion
124 mtFlt Choir
125 mtDistort 2
126 mtKeepChoir
Page 63

127 mtPeak
128 mtPeak 2
129 mtWintherChor
130 mtBass
131 mtMetalBass
132 mtGunBass
133 mtSpring
134 mtSpringBass
135 mtVocoder
136 mtAngel
137 mtNoisyBass
138 mtDirty
139 mtScratchy
140 mtChurch
141 mtCrasch
142 mtScary Man4
143 csSpazeChoir
144 csTied
145 csAllpLp
146 csAllpLp2
147 csAllpLp3
148 csMedievChor
149 csMedievChr2
150 csTrueChoir
151 csSplatBass
152 csStrings
153 csSweep
154 csSyncChoir
155 csSyncChoir2
156 csSyncFMlead
157 csRumbling
158 csMonoLead
159 csItoldYOU
160 csVintageVox
161 csMaskChoir
162 csUgne
163 csHorror
164 csMental
165 csDrillinh
166 csTbass
167 csVoltage
168 csOnAcid
169 csCryaziD
Page 64

170 v8Morphsweep
171 v8Peaker
172 v8YowHarp
173 v8Rangle
174 v8Noise1
175 v8FeedNoise
176 v8Basu
177 v8Basu 2
178 v8Tomy
179 v8Metaltomy
Drums
180 dmKick1
181 dmKick2
182 anKick1
183 anKick2
184 anKick3
185 mgCrowdKick
186 mgKick
187 mtKick
188 gcCemKick 1
189 gcCemKick 2
190 gcCemKick 3
191 gcCemKick 4
192 gcKick
193 gcKick2
194 gcKick3
195 gcKick4
196 gcKick5
197 gcKick6
198 gcKick7
199 gcKick8
200 gcKick9
201 dmSnare1
202 dmSnare2
203 anFeedSnare
204 anFeedSnare2
205 anFeedSnare3
206 anFeedSnare4
207 anRipApart
208 anSnare1
209 anSnare2
210 anSnare3
211 mgSnare
212 mgSnare 2
Page 65

213 gcCemSnare 1
214 gcCemSnare 2
215 gcCemSnare 3
216 gcCemSnare 4
217 anLofiClap
218 gcClap
219 gcNoise
220 mgNoiseDrum
221 mgNoiseDrum2
222 dmBlok
223 dmTom1
224 dmTom2
225 gcCemTom
226 gcClosed Hat
227 gcOpen Hat
228 gcCymbal
229 dmHihat
230 anCymbal
231 anCymbal 2
232 anCymbal 3
233 anCymbal 4
234 anFeedDrum1
235 anFeedDrum2
236 anFeedDrum3
237 anFeedDrum4
238 anFeedDrum5
Page 66

Written by
Flemming Christensen
”Gotharman”
2012
www.gotharman.dk
 Loading...