

Page 1

Operating Instructions
METRAFUSE FD PRO
Fuse and Circuit Breaker Detector
3-447-081-03
2/10.20
More information on the product can be
found at www.gossenmetrawatt.com.
Download Center
Page 2

METRAFUSE FD PRO Gossen Metrawatt GmbH
Page 3

METRAFUSE FD PRO Gossen Metrawatt GmbH
Table of Contents
1 Safety Instructions.............................................................................................................1
2 Applications .......................................................................................................................2
2.1 Intended Use / Use for Intended Purpose................................................................ 2
2.2 Use for Other than Intended Purpose...................................................................... 2
2.3 Liability and Guarantee............................................................................................ 2
2.4 Opening the Instrument / Repairs............................................................................ 2
3 The Instrument................................................................................................................... 3
3.1 Scope of Delivery .................................................................................................... 3
3.2 Instrument Overview ............................................................................................... 4
3.3 Relevant Standards................................................................................................. 5
3.4 Technical Data ........................................................................................................ 6
4 Preparation ........................................................................................................................7
4.1 Electrical Power Supply........................................................................................... 7
4.2 Switching On (and Off) and Resetting the Receiver.................................................. 8
4.3 Pre-Use-Check ....................................................................................................... 8
5 Operation ...........................................................................................................................9
5.1 Principle of Use and Advice for Best Performance................................................... 9
5.2 Finding Fuses or Circuit Breakers............................................................................ 9
5.3 Finding Fuses or Circuit Breakers of Bare Wires.................................................... 11
6 Maintenance ....................................................................................................................13
7 Product Support ...............................................................................................................14
8 Repair and Replacement Parts Service / Calibration Center
and Rental Instrument Service......................................................................................... 14
9 CE Declaration .................................................................................................................15
10 Return and Disposal......................................................................................................... 15
Page 4

METRAFUSE FD PRO Gossen Metrawatt GmbH
1 Safety Instructions
Observe this documentation, in particular all included safety information, in order to protect
yourself and others from injury, and to prevent damage to the instrument.
• Read and observe the operating instructions carefully and thoroughly.
You can find the document at http://www.gossenmetrawatt.com.
Keep the document for future reference.
• Tests may only be performed by a qualified electrician, or under the supervision and
direction of a qualified electrician. The user must be instructed by a qualified electrician
concerning performance and evaluation of the test.
• Adhere to the five safety rules as defined in DIN VDE 0105-100:2015-10; VDE 0105100:2015-10 Betrieb von elektrischen Anlagen - Teil 100: Allgemeine Festlegungen
Operation of electrical installations - Part 100: General requirements.
(1. Disconnect completely. 2 Secure against reconnection. 3. Verify that the installation is
dead. 4 Carry out earthing and short-circuiting. 5. Provide protection against adjacent
live parts.)
• Wear suitable and appropriate personal protective equipment (PPE) whenever working
with the instrument.
• If the instrument doesn’t function flawlessly, remove it from operation and secure it
against inadvertent use.
• The instrument may only be used as long as it’s in good working order.
Inspect the housing before use. Pay particular attention to any possible cracks and the
insulation.
• Use only the specified accessories with the instrument.
• Accessories and cables may only be used as long as they’re fully intact.
Inspect all cables and accessories before use. Pay particular attention to damaged housings, broken insulation or kinked cables.
• Only use the instrument and the specified accessories in compliance with the specified
technical data and under the specified conditions.
• The instrument and the included accessories may only be used for the tests described in
this manual.
• Do not use the instrument after long periods of storage under unfavorable conditions
(e.g. humidity, dust or extreme temperature).
• Do not use the instrument after extraordinary stressing due to transport.
• Do not use the instrument in potentially explosive atmospheres.
• Use the instrument only in accordance with the specified protection class (IP code).
• The instrument must not be exposed to direct sunlight.
• Observe and comply with all safety regulations which are applicable for your work environment.
1
Page 5

Gossen Metrawatt GmbH METRAFUSE FD PRO
2 Applications
2.1 Intended Use / Use for Intended Purpose
The METRAFUSE FD PRO is a test instrument used for the speedy identification of which
fuse or circuit breaker is protecting a circuit.
The METRAFUSE FD PRO consists of two parts: a receiver and a transmitter. The transmitter is connected to the circuit under test and uses the AC circuit‘s power to generate and
inject a modified high frequency signal into the live conductor. The receiver is used to detect
the signal from the transmitter and when put in contact with the fuse or circuit breaker that is
connected to the circuit under test will indicate the presence of the transmitter signal both by
LED and beeping.
Safety of the operator, as well as that of the instrument, is only assured when it’s used for its
intended purpose.
2.2 Use for Other than Intended Purpose
Using the instrument for any purposes other than those described in these operating instructions is contrary to use for intended purpose.
2.3 Liability and Guarantee
Gossen Metrawatt GmbH assumes no liability for property damage, personal injury or consequential damage resulting from improper or incorrect use of the product, in particular due
to failure to observe the product documentation. Furthermore, all guarantee claims are rendered null and void in such cases.
Nor does Gossen Metrawatt GmbH assume any liability for data loss.
2.4 Opening the Instrument / Repairs
The instrument may only be opened by authorized, trained personnel in order to ensure flawless, safe operation and to assure that the guarantee isn’t rendered null and void. Even original replacement parts may only be installed by authorized, trained personnel.
Unauthorized modifications to the instrument are prohibited.
If it can be ascertained that the instrument has been opened by unauthorized personnel, no
guarantee claims can be honored by the manufacturer with regard to personal safety, measuring accuracy, compliance with applicable safety measures or any consequential damages.
2
Page 6

METRAFUSE FD PRO Gossen Metrawatt GmbH
3 The Instrument
3.1 Scope of Delivery
Please check for completeness.
1 METRAFUSE FD PRO receiver
1 ALKALINE BATTERY, 9 V
1 METRAFUSE FD PRO transmitter
1 Mains lead cable for transmitter
1 Fused test probe set incl. alligator clips
1Bag
1Operating instructions (this document)
You will need a Philips screwdriver to open and close the battery compartment.
3
Page 7

Gossen Metrawatt GmbH METRAFUSE FD PRO
Receiver on LEDs
on/reset button
Scanning tip
Mains cable and/
or test probe
connector
Tra n s mit t er on
LED
Receiver Transmitter
Signal strength
LEDs
ReceiverTran sm it te r
Scanning tip
Battery
compartment
Mains cable and/
or test probe
connector
3.2 Instrument Overview
Front
Back
4
Page 8

METRAFUSE FD PRO Gossen Metrawatt GmbH
!
Symbols on the instrument and the included accessories:
Warning concerning a point of danger
(attention, observe documentation!)
Double insulation (protection category II)
European conformity marking
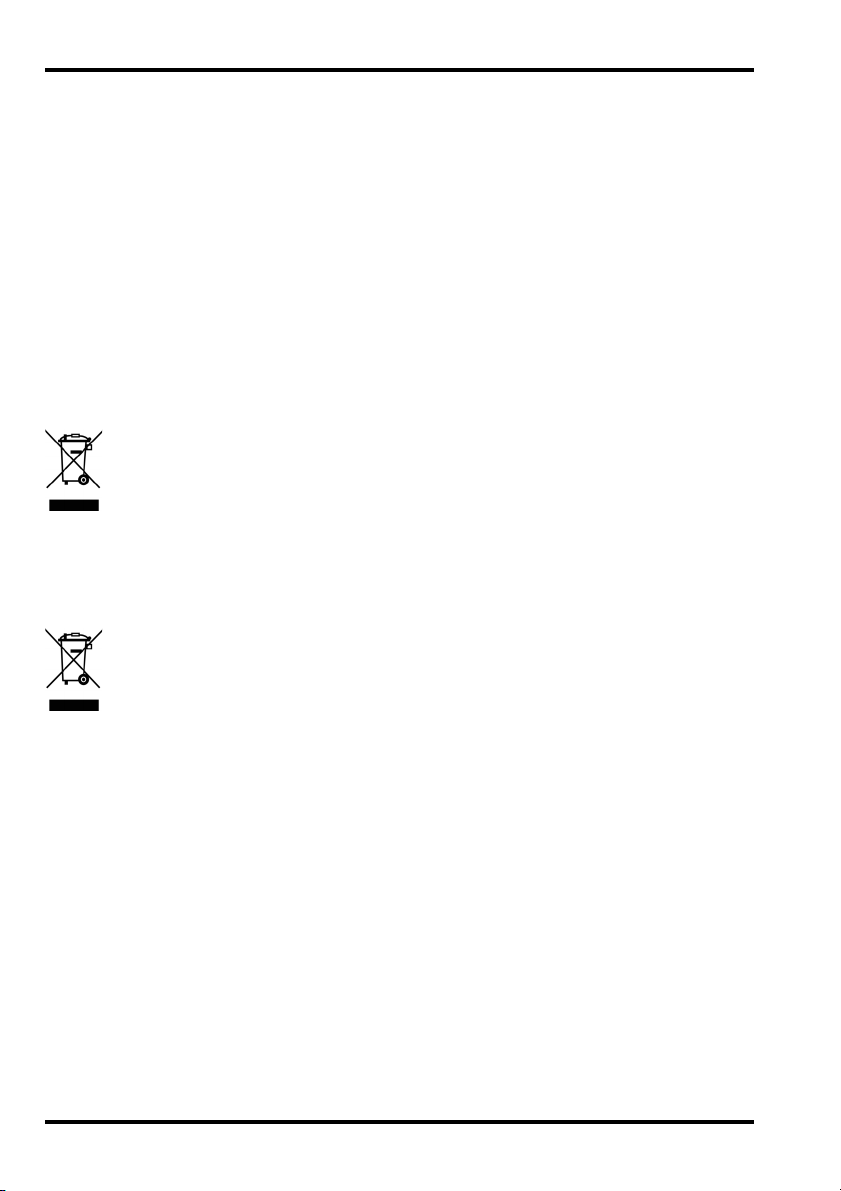
The device may not be disposed of with household trash.
Return and Disposal
15.
3.3 Relevant Standards
The instrument has been manufactured and tested in accordance with the following safety
regulations:
DIN EN 60529
VDE 0470-1
IEC 61010-1: 2010
DIN EN 61010-1: 2010
VDE 0411-1: 2010
IEC 61010-2-030: 2010
DIN EN 61010-2-030: 2010
VDE 0411-2-030: 2010
IEC 61326-2-2: 2013
DIN EN 61326-2-2: 2013
VDE 0843-20-2-2: 2013
Test instruments and test procedures
Degrees of protection provided by enclosures (IP code)
Safety requirements for electrical equipment for
measurement, control and laboratory use.
Part 1: General requirements
Safety requirements for electrical equipment for
measurement, control and laboratory use.
Part 2-030: Particular requirements for testing and
measuring circuits
Electrical equipment for measurement, control and
laboratory use - EMC requirements.
Part 2-2: Particular requirements for portable test equipment
used in low-voltage distribution systems.
5
Page 9

Gossen Metrawatt GmbH METRAFUSE FD PRO
3.4 Technical Data
Power
Ambient Conditions
Electrical Safety
Electromagnetic
Compatibility (EMC)
Mechanical Design
Receiver supply: alkaline battery 9 V
type PP3/MN 1604/6F22
or equivalent
Receiver auto power off: after 6 minutes
Transmitter supply: circuit under test
(100 V …250 V AC; 50 Hz … 60 Hz)
Transmitter current: < 20 mA
Operating temperature: 0 ... +40 °C
Storage temperature: –20 ... +60 °C
Relative humidity: max. 75%, no condensation allowed
Elevation:
max. 2000 m
Measuring category: CAT III, 250 V
Pollution degree: 2
Protection category: II
Interference emission /
immunity:
EN 61326-1: 2013 resp.
EN 61326-2-2: 2013
Protection: IP20
Dimensions (W × H × D): Transmitter 160 × 85 × 35 cm
Receiver 210 × 50 × 35 cm
Weight: Transmitter 166 g
Receiver 78 g (without battery)
Test probe set
Fuse Super-Fast (FF) Safety Fuses,
10 A, 600 V, 6,3 × 32 mm
Measuring category: CAT III 1000 V, CAT IV 600 V
6
Page 10

METRAFUSE FD PRO Gossen Metrawatt GmbH
4 Preparation
Before using the METRAFUSE FD PRO, prepare as follows:
1. Establish the power supply 7.
2. Turn the device on 8.
3. Conduct a pre-use-check
After you have performed these steps, you can find fuses and circuit breakers
4.1 Electrical Power Supply
The receiver and transmitter are powered differently.
Receiver (M660B)
The METRAFUSE FD PRO receiver is powered by a 9 V Alkaline battery type PP3/MN 1604/
6F22 or equivalent. One battery is included in delivery; replacements must be provided.
You have to install the battery before first use and replace it later if depleted. Required tools:
Philips screwdriver.
The receiver is switched off.
1. Place the receiver face down on a stable surface.
2. Loosen and remove the screw from the battery compartment cover.
3. Unlock and remove the battery compartment cover.
4. Connect the 9 V battery to the battery snap.
5. Only the battery specified in the technical data (
6. Insert the 9 V battery into the battery compartment, making sure that the wires are not
damaged (e.g. squished).
7. Place the battery compartment cover onto the battery compartment and press it until it
audibly clicks into place.
8. Secure the battery compartment cover with the screw.
The receiver is provided with power.
8.
9.
6) may be connected and used.
The receiver LEDs provide status information on the battery power:
Receiver on LEDs are solid green: battery full
Receiver on LEDs are flashing: battery power low (approx. 20 %);
replacing required soon
Receiver on LEDs and signal strength LEDs flashing: battery almost discharged;
To maximize battery life, the receiver will automatically switch off after six minutes of inactivity. To resume testing after this period, it can be turned on again
Transmitter (M660A)
The transmitter is powered by the circuit under test (100 V …250 V AC; 50 Hz … 60 Hz) it is
connected to. The transmitter is connected to it either by the mains cable or the fused test
probe set. Both are described in chapter Operation
The transmitter current is < 20 mA.
7
replacing required
8.
9.
Page 11

Gossen Metrawatt GmbH METRAFUSE FD PRO
Attention!
!
4.2 Switching On (and Off) and Resetting the Receiver
The receiver has a button, the transmitter does not.
Receiver
The receiver has a button “on/reset“ which has 3 functions:
1. On:
Push and immediately release the button. The receiver emits a steady bleeping and
green receiver on LEDs indicate its battery status.
2. Off:
Push and hold button down for over 1 second. The receiver turns off.
3. Reset:
Push and immediately release the button when the receiver is already turned on. All scanning function memories are reset to zero. The fuse and circuit breaker finding process can
be (re)started
Reset the receiver out of reach from distribution boards.
The distribution board signal interferes with the reset.
Transmitter
There is no switch for the transmitter. It automatically turns on when it is connected to the
circuit under test and also injects the test signal into the live conductor automatically.
9.
4.3 Pre-Use-Check
Before each use of your METRAFUSE FD PRO, check that the receiver and transmitter are
functioning correctly.
The electrical power supply has been established
1. Switch the receiver on 8.
2. Check that the receiver on LEDs are GREEN and that a steady beeping tone is emitted.
If either of these functions is not present, replace the battery in the receiver before proceeding (7).
3. Connect the transmitter to an electrical outlet
4. Move the receiver scanning head over the label of the transmitter.
There will be "hotspots" on the transmitter label where the frequency of the beeping will
become very rapid or change to a continuous tone and all of the signal strength LEDs will
light up.
The instrument is ready for use.
(If the indication from step 4.cannot be obtained, remove it from operation and secure it
against inadvertent use. Then return it to Repair and Replacement Parts Service for examination
14.)
7.
7.
8
Page 12

METRAFUSE FD PRO Gossen Metrawatt GmbH
Note!
5 Operation
The METRAFUSE FD PRO is used for the speedy identification of which fuse or circuit
breaker is protecting a circuit.
5.1 Principle of Use and Advice for Best Performance
The METRAFUSE FD PRO consists of two parts: a receiver and a transmitter.
The transmitter is connected to the circuit under test and uses the circuit‘s power supply to
generate and inject a modified high frequency signal into the live conductor that can be
detected by the receiver.
The signal will not adversely affect other equipment but is powerful enough to work
over cable runs of several hundred meters.
The receiver uses a ferrite transducer to detect the signal from the transmitter at the distribution board. When its scanning tip is put in contact with the fuse or circuit breaker that is connected to the circuit under test, it will indicate the presence of the transmitter signal both by
LED and beeping. Varying the angle at which the scanning tip is held in relation to the
breaker will affect the strength of the signal received. Therefore, for the duration of the test
you must keep the scanning tip at the same angle relative to the fuses or circuit breakers and
at a similar distance to them.
The signal strength indicator is comparative rather than absolute: Each press of the on/reset
button resets the sensitivity to maximum and the receiver will respond when placed in close
proximity to any fuse, circuit breaker or cable carrying the signal. During a test, the receiver
will auto tune its sensitivity to the strongest signal encountered since the reset button was
last pushed. It is therefore necessary to ensure that all of the breakers that could be protecting a circuit are scanned at least twice and that you do not stop as soon as a maximum
strength signal is indicated.
Due to the differing designs of circuit breakers, it may sometimes be unclear which of two
circuit breakers the strongest signal comes from. Particularly if the maximum strength signal
appears to come from a boundary area between two adjacent circuit breakers. In this case,
rotate the receiver (without resetting) through 360º to identify the orientation in which the
strongest signal is found. Reset and re-scan the row of breakers. Alternatively, you can reset
the receiver (
breaker. The strongest signal should come from the correct circuit breaker.
8) and test at the opposite (to the common boundary) edge of each circuit
5.2 Finding Fuses or Circuit Breakers
The receiver‘s battery is full 7.
The pre-use-check was positive
1. Connect the provided transmitter mains lead cable to the transmitter‘s mains cable and
test probe connector.
2. Plug the transmitter mains lead cable into an outlet of the circuit under test.
The transmitter is provided with power (the transmitter on LED is lit red). It automatically
injects the test signal into the live conductor.
9
8.
Page 13

Gossen Metrawatt GmbH METRAFUSE FD PRO
Attention!
!
Attention!
!
3. Press the receiver‘s on/reset button and immediately release it.
The receiver is turned on. A steady beeping tone is emitted and the receiver on LED is lit
green to indicate automatic scanning mode.
4. Reset the receiver by pressing and immediately releasing the on/reset button again.
The receiver is reset.
The distribution board signal interferes with the reset.
Reset the receiver out of reach from the distribution board.
5. With the receiver, go to the distribution board that contains the fuses or circuit breakers
that may protect the circuit under test.
6. Place the receiver‘s scanning tip in contact with the face of the fuses or circuit breakers
at a right angle to the direction of the body and run the scanning head steadily along the
row(s) of fuses or circuit breakers. Ensure that you place the scanning tip on the circuit
side rather than the supply side of the fuse or circuit breaker.
When the receiver detects a stronger transmitter signal, the frequency of the beeping will
increase to a very rapid or continuous tone, the pitch of the beeper will increase and the
signal strength LEDs will light up, climbing the bar graph.
7. Continue scanning back and forth across all rows of fuses or circuit breakers until the
signal strength LED is lit only when the scanning tip is over one single fuse or circuit
breaker. (With each sweep the receiver will automatically adjust its sensitivity and disregard weaker signals.)
Scan all of the fuses and circuit breakers that may protect the circuit under test several times.
The signal strength indicator used is comparative. Therefore, on the first scan of the
fuses or circuit breakers, the signal strength LED will often light for several different
fuses or circuit breakers. This indicates that the signal detected is the strongest found
so far. Do not stop scanning at this point as it may not be the strongest signal there is!
You have found the fuse or circuit breaker protecting the circuit under test.
Switch off the test instruments and unplug the transmitter from the outlet.
10
Page 14

METRAFUSE FD PRO Gossen Metrawatt GmbH
Attention!
!
Attention!
!
5.3 Finding Fuses or Circuit Breakers of Bare Wires
Use the fused test probe set (included in delivery 3) for finding fuses or circuit breakers of
bare wires, e.g. light fittings.
Risk of electric shock!
Do not touch bare wires or bare components.
Wear suitable and appropriate personal protective equipment (PPE). Adhere to the
five safety rules as defined in DIN VDE 0105-100:2015-10; VDE 0105-100:2015-10.
The receiver‘s battery is full
The pre-use-check was positive
1. Switch off the power to all components under test. As you do not know which fuse or
circuit breaker is applicable, switch off the entire distribution board.
2. Remove the test probe heads.
The removable part begins directly below the 3 probe-colored rings.
3. Clip the alligator clips onto the test probes (blue to blue and black to black).
4. Connect the fused test probe set to the transmitter mains cable and test probe connector.
5. Connect the blue test probe to the neutral wire.
6. Connect the black test probe to the live wire.
7. Switch the power back on.
The transmitter is provided with power (the transmitter on LED is lit red). It automatically
injects the test signal into the live conductor.
8. Press the receiver‘s on/reset button and immediately release it.
The receiver is turned on. A steady beeping tone is emitted and the receiver on LED is lit
green to indicate automatic scanning mode.
9. Reset the receiver by pressing and immediately releasing the on/reset button again.
The receiver is reset.
The distribution board signal interferes with the reset.
Reset the receiver out of reach from the distribution board.
10. With the receiver, go to the distribution board with the fuses or circuit breakers that may
protect the circuit under test.
11. Place the receiver‘s scanning tip in contact with the face of the fuses or circuit breakers
at a right angle to the direction of the body and run the scanning head steadily along the
row(s) of fuses or circuit breakers. Ensure that you place the scanning tip on the circuit
side rather than the supply side of the circuit breaker or switch.
When the receiver detects a stronger transmitter signal the frequency of the beeping will
increase to a very rapid or continuous tone, the pitch of the beeper will increase and the
signal strength LEDs will light up, climbing the bar graph.
7.
8.
11
Page 15

Gossen Metrawatt GmbH METRAFUSE FD PRO
Attention!
!
12. Continue scanning back and forth across all the rows of fuses or circuit breakers until the
signal strength LED is lit only when the scanning head is over one single fuse or circuit
breaker. (With each sweep the receiver will automatically adjust its sensitivity and disregard weaker signals.)
Scan all of the fuses and circuit breakers that may protect the circuit under test several times.
The signal strength indicator used is comparative. Therefore, on the first scan of the
fuses or circuit breakers, the signal strength LED will often light for several different
fuses or circuit breakers. This is indicating that the signal detected is the strongest
found so far. Do not stop scanning at this point as it may not be the strongest signal
there is!
You have found the fuse or circuit breaker protecting the circuit under test.
Switch off the test instruments. Switch off the power and disconnect the test probes
from the wires. Switch the fuse or circuit breaker and then the power back on.
12
Page 16

METRAFUSE FD PRO Gossen Metrawatt GmbH
Attention!
!
Attention!
!
Attention!
!
6 Maintenance
Housing
No special maintenance is required for the housing. Keep outside surfaces clean. Use a
cloth for cleaning, which has been slightly dampened with water.
Do not use cleansers, abrasives or solvents!
Never touch or clean the conductive ends of the test probes or any other electrical
contact!
Test Probes: Fuse Replacement
The test probes feature fuses for extra security. If the fuses are blown, you must replace
them. Always check the fuses in both test probe heads and replace if blown. You will need
Super-Fast (FF) Safety Fuses, 10 A, 600 V, 6,3 × 32 mm.
The test probes are disconnected from the device.
The replacement fuses are on hand.
Do no touch the conductive ends of the test probes!
1. Pull off the test probe head to remove it.
The removable part begins directly below the 3 probe-colored rings.
2. Unscrew the part above the black ring and remove it.
The fuse is located in the bottom of the removed part.
3. Remove the fuse.
4. The fuse may be tucked in stiff. Be careful when using force to remove it!
5. Replace the fuse.
6. You may encounter resistance when inserting the replacement fuse. Be careful when
using force to insert it!
7. Screw the part with the fuse back into the test probe.
8. Clip the test probe head back on.
9. Repeat the previous steps with the other test probe.
The fuses in the test probes have been replaced.
13
Page 17

Gossen Metrawatt GmbH METRAFUSE FD PRO
7 Product Support
If required please contact:
Gossen Metrawatt GmbH
Product Support Hotline
Phone: +49 911 8602-0
Fax: +49 911 8602-709
E-Mail: support@gossenmetrawatt.com
8 Repair and Replacement Parts Service / Calibration Center* and
Rental Instrument Service
If required please contact:
GMC-I Service GmbH
Service Center
Beuthener Straße 41
90471 Nürnberg • Germany
Phone: +49 911 817718-0
Fax: +49 911 817718-253
E-mail: service@gossenmetrawatt.com
Web: www.gmci-service.com
This address is only valid in Germany. Please contact our representatives or subsidiaries for
service in other countries.
14
Page 18
METRAFUSE FD PRO Gossen Metrawatt GmbH
9 CE Declaration
This instrument fulfills the requirements of the applicable EU guidelines and national regulations. We confirm this with the CE marking. The CE Declaration of Conformity is available
upon request.
10 Return and Disposal
This instrument is subject to directive 2012/19/EC on Waste Electrical and Electronic Equipment (WEEE) and its German national equivalent implemented as the Waste Electrical and
Electronic Equipment Act (ElektroG) on the marketing, return and environmentally sound disposal of electrical and electronic equipment. The instrument is a category 9 product (monitoring and control instrument) in accordance with ElektroG (German Waste Electrical and
Electronic Equipment Act).
The symbol at the left indicates that this device and its electronic accessories must
be disposed of in accordance with applicable legal regulations, and not together
with household waste. In order to dispose of the device, bring it to a designated collection point or contact our product support department (
This instrument is also subject to directive 2006/66/EC on batteries and accumulators and
waste batteries and accumulators and its German national equivalent implemented as the
Battery Act (BattG) on the marketing, return and environmentally sound disposal of batteries
and accumulators.
14).
The symbol at the left indicates that batteries and rechargeable batteries must be
disposed of in accordance with applicable legal regulations. Batteries and rechargeable batteries may not be disposed of with household waste. In order to dispose of
the batteries or rechargeable batteries, remove them from the instrument and bring
them to a designated collection point.
Separate disposal and recycling conserves resources and protects our health and the environment.
Current and further information is available on our website at
http://www.gossenmetrawatt.com under the search terms “WEEE” and “environmental
protection”.
15
Page 19

Gossen Metrawatt GmbH METRAFUSE FD PRO
16
Page 20

Gossen Metrawatt GmbH METRAFUSE FD PRO
© Gossen Metrawatt GmbH
Edited in Germany Subject to change without notice / Errors excepted A PDF version is available on the Internet
All trademarks, registered trademarks, logos, product names, and company names are the property of their respective
owners.
Phone +49 911 8602-111
Gossen Metrawatt GmbH
Südwestpark 15
90449 Nürnberg • Germany
Fax +49 911 8602-777
e-Mail info@gossenmetrawatt.com
www.gossenmetrawatt.com
 Loading...